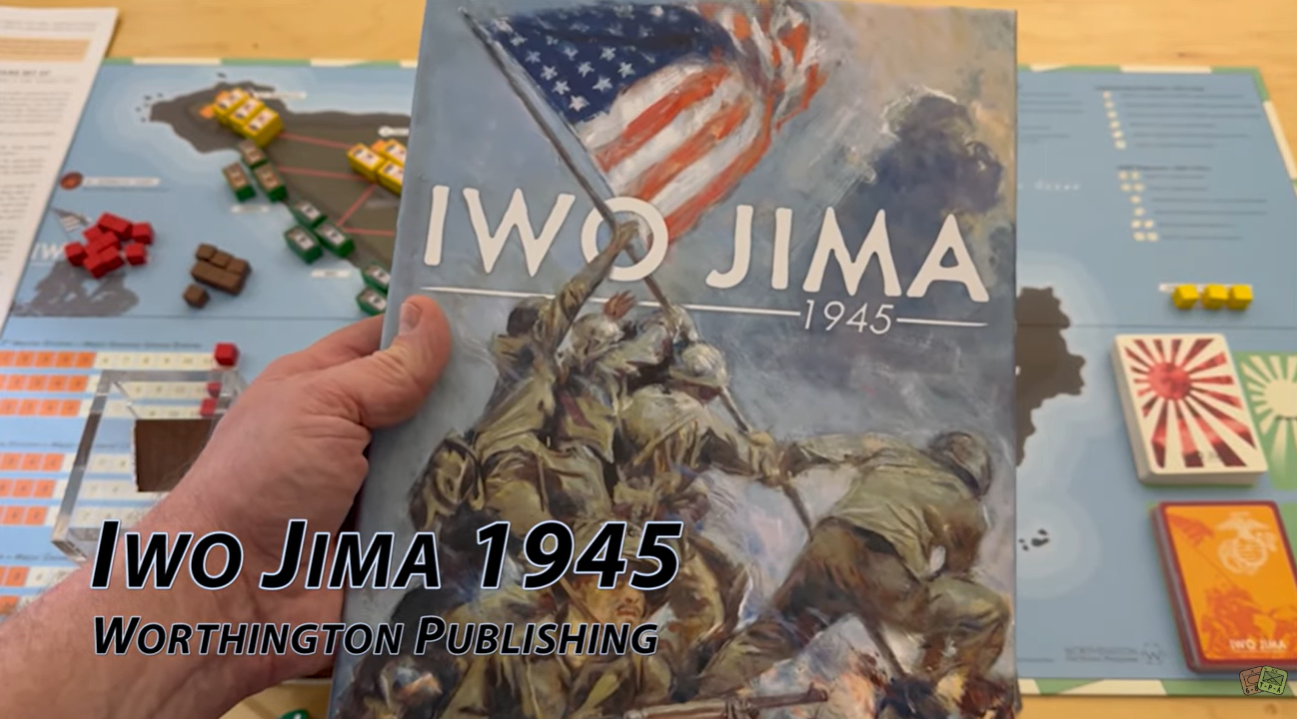
A few years ago, Worthington Publishing published their first game in the Island Fight Series called Tarawa 1943. That game was awesome and was truly difficult to win, as it should be. Now, they have published the 2nd volume in the series called Iwo Jima 1945 that covers the only island assault during the Pacific war that the attacking US forces would suffer worse casualties than the Japanese defenders. On February 19, 1945 the USMC would land 30,000 marines on the island against a Japanese defensive force that numbered roughly 21,000 Japanese soldiers. Facing a Japanese commander who had learned valuable lessons from the losses on other Japanese islands, the USMC would eventually land over 70,000 marines and suffer over 25,000 casualties during the 36 day campaign.
In this solitaire game, the player takes on the role of the USMC commander leading the invasion of Iwo Jima. The game system, driven by cards, will simulate the strategies of the Japanese defenders, often referred to as the Japanese AI, adding a layer of historical authenticity to your gaming experience. If you have played Tarawa 1943, you will be familiar with the system.
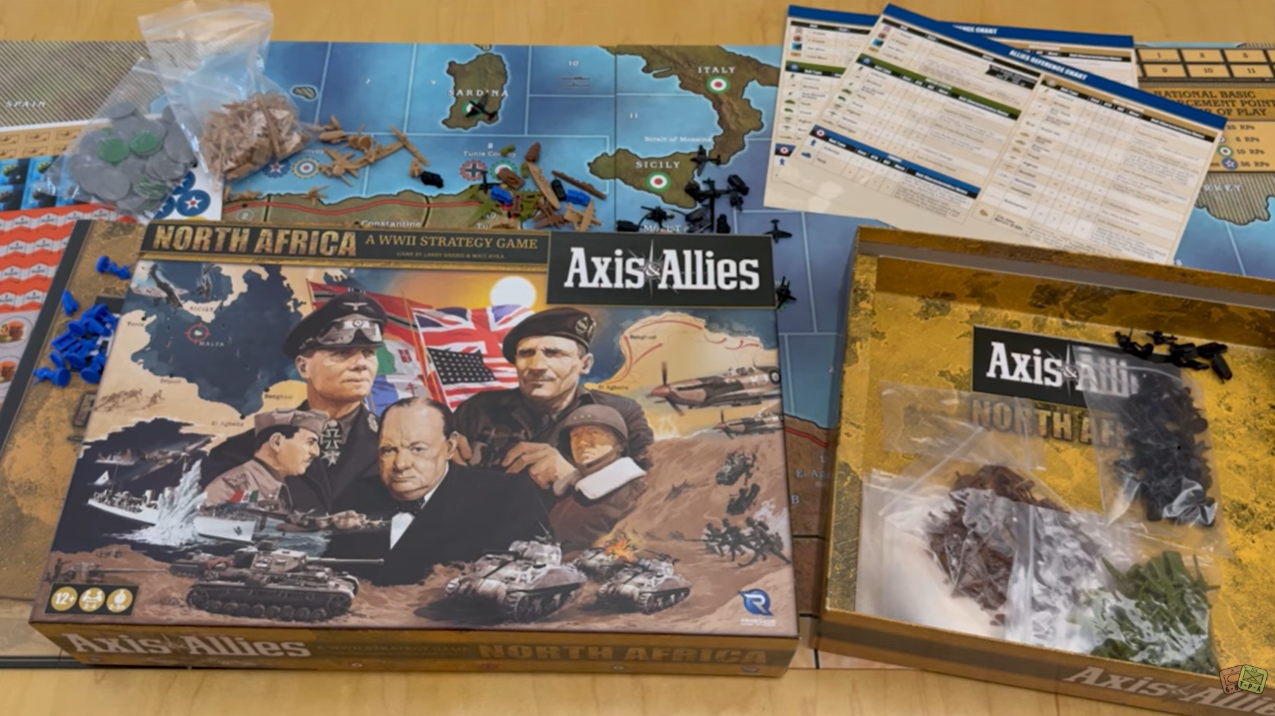
The fighting in North Africa was unlike any other in World War II. In Axis & Allies: North Africa, you will command the forces of either the Axis (Germany and Italy) or the Allies (the United Kingdom and, eventually, the United States) in a campaign that may again capture the imagination of the entire world. Intercept enemy convoys headed to the ports of North Africa…while protecting your own. Prove your logistical prowess by keeping your forces supplied. Most of all, show your ingenuity as a general, and you may change the course of history and ultimately gain the respect of your opponents.
Axis & Allies: North Africa contains 2 scenarios: Rommel’s Last Push and Operation Torch, over 250+ plastic miniatures, including 6 new units: SdKfz 231, Panzer IV Tank, 6-pounder AT Gun, CMP Truck, SOMUA S35 Tank, and LRDG Jeep.
The year is quickly fading as we are nearing the start of the 4th quarter of 2026. Man the year has just gone by so quickly and I still have so many great games awaiting us to give them the attention they deserve. But there are always new games and they are also equally deserving. This month, I was able to find 19 games to share (including 6 games from our sponsor). I was also able to find 3 games being offered on Crowdfunding through Kickstarter and Gamefound.
Again this month, we have a sponsor for the Wargame Watch post in Neva Game Press. This is Neva’s 3rd time sponsoring this post and they are very busy as they have a ton of new games upcoming. Neva Game Press is a new publisher who appeared on the scene 2 years ago. When I started seeing their posts on Twitter and Facebook, I was immediately impressed with their interesting topic choices for their upcoming games as well as the fact that they are trying to make small footprint wargames that pack a punch. And the art is also very appealing and brings an aesthetically pleasing and attractive look to their games!
Big Experiences, Small Footprint: New from Neva Game Press
At Neva Game Press, we believe great games don’t require massive boxes. Our ‘Hardcover Book’ box policy delivers premium components and deep, innovative mechanics in a shelf-friendly format—without compromising playability. We recently rebranded from Neva Wargames to Neva Game Press to reflect our expansion into thematic titles, though our commitment to wargaming remains stronger than ever.
End-of-Year Releases
We are closing 2026 on a high note with two major releases. After the rapid sell-out of Iwo Jima: Hell on Earth—the first volume of our Blind Valor Series—we are thrilled to bring it back as a Revised Edition, and we are grateful for the community’s support. We are also releasing an Iwo Jima: Hell on Earth Update Kit for owners of the original 1st Edition. Finally, we are launching our new tactical wargame, Peking: 55 Days of Fury—the first volume in our Breach Point Series.
Peking immerses 1–2 players in the 1900 Boxer Rebellion for a tense, 90-minute experience. Whether defending the International Legations or leading the attack, you’ll need to master our unique fog-of-war mechanic and hybrid system (featuring event cards and operation points split into two phases) to secure victory.
Our commitment to the community continues with an ambitious slate for 2027, featuring: Valls: Battle of the Goi Bridge, Spartacus: Rome under Threat, 1806: The Elbe Campaign and Reformation: Fire and Faith.
They recently announced their next Kickstarter project that would take their system to the Anglo-Boer War called The Great Anglo-Boer War: The Battle for South Africa 1899-1902. The game is currently on Kickstarter and appears to be a very important addition to the many games on the period.
From the game page, we read the following:
The Great Anglo-Boer War is a grand-strategic level game of the war between the British Empire and the Boer Republics in South Africa from 1899 to 1902. The Boers were armed like no other adversary the Empire had ever faced. By October 1899, war had become inevitable—and both sides were equipped for the first ‘modern’ conflict. Both sides had rifled breech-loading artillery, machine guns, bolt-action magazine rifles, trenches, barbed wire, and more.
The war started as a conventional contest but morphed into the first modern guerrilla war of the 20th century. In the end, the Empire overwhelmed the Boers, but by 1910 all of South Africa (including the contested republics of 1899) was granted self-government as a Crown Dominion, with Louis Botha as the Prime Minister. The Boers can be said to have lost the war but won the peace. A fascinating bit of history but an even more interesting study in military history.
The game places you in the position of the military commanders of both armies. Political events are largely beyond your control, but may influence what you are allowed to do. There are three scenarios – the Conventional War, the Guerrilla War, and the Grand Campaign Game. The full campaign is THE ULTIMATE BOER WAR EXPERIENCE – from the first desperate siege defenses of 1899 to the treaty of Vereeniging (or maybe not?) – and everything tactical and otherwise in between. Battles, blockhouses, farm-burnings, evasions, escapes, raids, concentration camps, sieges, drives, armoured trains, 1-pdr automatic “pom-poms”, surrenders, entrenchments, typhoid, barbed-wire, native spies, night marches, supply wagons and more. If it was part of the real Boer war – it is in the game. If you know about the war – this is the one you’ve been hoping someone would make, and if you are learning about it – this IS THE GAME for that. With a 44×34 map at 9 miles/hex scale, monthly game turns and an accurate order of battle, this is a game that truly does justice to the topic.
As of September 1st, the Kickstarter campaign has raised $7,389 toward its $12,900 funding goal with 86 backers. The campaign will conclude on Tuesday, October 20th at 1:38pm EDT.
2. Combat! Vietnam from Compass Games
This month we had another pretty big downloading of new pre-order games from Compass Games that I have affectionately referred to in the past as “Pre-Order Palooza”. This one was not their normal 6-10 new titles but there were 4 new games offered and they all looked very good. The first game that I am highlighting here is the next volume in the highly thought of Combat! Series of solitaire wargames. These games represent man to man combat where typically each of the counters on the board represent a single soldier. They have focused exclusively on World War II previously but now they have announced this new game set during the Vietnam War called Combat! Vietnam. I have yet to play any of the previous volumes in the series, even though I own 4 of them, but they are high on my want to play list and I am very much interested in this system because I love Tactical level games, very much enjoy man to man combat in games and also enjoy games that are set in during the Vietnam War.
From the game page, we read the following:
Combat! Vietnam is a stand-alone solitaire game of man-to-man combat in the Vietnam War, covering the years from 1965 to 1972. This game depicts the countless small actions that were fought during those years, with the player commanding a squad of American, Communist, or South Vietnamese soldiers. In the 11 scenarios, the fighting rages across the widely varied terrain of Vietnam, from dense jungles to city streets.
The comprehensive Random Scenario Generator (and Campaign Game) further expands your gaming possibilities. With this tool, players can generate a limitless supply of unique scenarios for Combat! Vietnam.
Combat! Vietnam also includes Armor rules, allowing the player to relive iconic scenes such as T-54 tanks charging south during the Easter Offensive or Marine Patton tanks battling through Hué.
3. Viking Dawn: A Game of Viking Exploration & Expansion 800-1040 A.D. from Compass Games
The 2nd game from Compass Games today is a good one. And I know that because I have played it. But, our friend Gregory M. Smith is a solitaire game designing genius and has done many of these solo, narrative driven style wargames that we have all enjoyed for hours on end while we have been unable to find an opponent or just because we want to play a game on our timeline. We have interviewed him many times for his games such as Zeppelin Raider, Interceptor Ace, The Hunted, Western Front Ace, Amerika Bomber, Defending America, American Tank Ace, British Tank Ace, Rebel Tide, Sinking Yamato and most recently for a magazine wargame called B-52D Linebacker II. But Greg is a versatile designer and also has done many great 2-player games as well. He always has something cooking in his game design kitchen and recently we spoke with him about his new design with Kevin McPartland called Viking Dawn: A Game of Viking Exploration & Expansion 800-1040 A.D. from Compass Games. I was able to play this 1-4 player game while at the World Boardgaming Championships last month and you can read about my experience at the following link: https://theplayersaid.com/2026/07/27/world-boardgaming-championships-2026-daily-debrief-series-day-3/
From the game page, we read the following:
Viking Dawn is a low-complexity strategic game, with rules for two, three, or four players, each controlling a faction of Vikings (Norse, Swede, Dane, and optionally Geat). Inspired by SPI’s game Conquistador! from the 1970’s, Viking Dawn has exploration, trade (both internal and external), and minor leaders. The game also contains rules for solitaire play with the Danes or Norse.
Faction descriptions:
Norse – closest to the New World, they have the additional advantage of two Explorers, Erik the Red and Leif Eriksson.
Danes – closest to the lucrative raiding and settlement targets of England, they also have the advantage of having several early leaders.
Swedes – although further from England, they are closest to several Russian settlement areas, and river portage routes to the east and Constantinople.
Geats – ostensibly the weakest faction, as they must pay tribute to the Swedes for protection, they have the best trading advantage in the game.
Players compete to raid lucrative settlements and explore the world with longships and warbands. Each faction has named historical leaders, who have an impact on combat and exploration. Players may trade with each other or nonplayer-controlled areas and establish settlements. Includes rules for settlements gaining independence, leader burials, and establishment of the Varangian Guard.
If you are interested in Viking Dawn: A Game of Viking Exploration & Expansion 800-1040 A.D., you can pre-order a copy for $54.00 from the Compass Games website at the following link: https://www.compassgames.com/product/viking-dawn-pay-later/
4. Tunnel Rats: The Vietnam War Underground from Compass Games
Game 3 in this month’s mini-Pre-Order Palooza from Compass Games is another very interesting looking game set during the Vietnam War called Tunnel Rats: The Vietnam War Underground. This game is a solitaire game, which I think makes a lot of sense historically and thematically and actually gets me very excited for the possibilities, and I very much look forward to seeing how this one works. I have great hope for this one. The designer is Lisa Smedman who has done several recent popular solo games including Trench Raid.
From the game page, we read the following:
Tunnel Rats is a single-player game set during the Vietnam War. You will control two American “tunnel rats” who have been tasked with exploring an underground tunnel complex created by the Viet Cong. This complex is made up of tiles representing tunnels and underground rooms in which the enemy may be lurking. In this claustrophobic environment, the tunnel rats need to be as quiet as possible to avoid alerting the enemy. Tense firefights and hand-to-hand combat feature a unique initiative system, and encounters are fast and furious.
With a procedurally generated map, nine tunnel rat characters to choose from, and a variety of weapon and equipment load-outs, each “run” will provide a new and dynamic challenge. Your team’s objective will vary, shifting the focus of play depending upon which lieutenant is in command of the team. Tunnel Rats also includes rules for campaign play, allowing surviving tunnel rats to gradually hone their skills over time – if they survive.
Be on your guard, as the tunnel rats never know what they will encounter down in “the black”. It might be a hidden punji stake pit, a Viet Cong command center filled with valuable documents, a venomous snake slithering along a tunnel, or a water trap they must swim through without drowning!
5. Against the Reich Deluxe Edition from Compass Games
Game 4 from the Compass Games mini Pre-Order Palooza is a classic hex and counter operational level wargame set in World War II called Against the Reich Deluxe Edition designed originally by Joseph Balkoski.
From the game page, we read the following:
In June of 1944, the world held its breath as land and naval forces of six Allied nations launched the largest amphibious assault ever attempted. The long-awaited second front, the Western Front, was finally open. The Allies had to force the unconditional surrender of Nazi Germany by crossing the great Rhine River into the Reich itself. Adolf Hitler was confident that the battered but undefeated Wehrmacht could hold two enormous fortified zones (the Atlantic and Westwalls) and repulse any attempt to cross into the German homeland. Against the Reich is the first game in years to cover the entire Western Front campaign. The players are in the positions of Eisenhower and Hitler, making the grand decisions that control the course of the campaign.
A Quick-Playing Simulation: Designer Joseph M. Balkoski, whose specialty is the Western Front, has provided an accurate, realistic simulation that plays like a game. With short and long campaign games, you can choose the length of the simulation.
Headquarters and Supplies are Realistically Linked: Players must decide where to concentrate their resources. Limited supplies make the placement of headquarters and depots a critical factor in the campaign.
Choice of Invasion Sites: The Allied player must decide where to invade – do you strike a lightly defended area and accept a long, grinding ground campaign, or strike close to the Rhine and risk quick destruction?
Historical Overview: Russel F. Weigley, author of Eisenhower’s Lieutenants, the definitive history of the Western Front, has analyzed the strategic options facing Eisenhower and Hitler – and the players.
Loaded with other Features: A short “Battle of the Bulge” scenario, Second Invasion, Flooding Holland, Port Repair, The Roer Dams, Rail Movement, Mediterranean Front Reinforcements, Amphibious and Airborne Assaults, and much more.
6. Enlightenment Empires: Power and Politics in Eastern Europe, 1725-1795 from GMT Games
One of my favorite parts about historical wargaming is that I get exposed to and am able to learn about some of the more obscure parts of our world’s history. Now you might be saying to me that the subject of power politics in Eastern Europe form 1725-1795 is not obscure and I think that you would be correct if I was from Eastern Europe. But as I am from the United States, this is not a period or locale that we learned much about in grade school. That being said, I am very much interested in this concept and history and am glad to see Brian Asklev taking another crack at a topic that focuses on some of the history from his neck of the woods. When Enlightenment Empires: Power and Politics in Eastern Europe, 1725-1795 was first announced a few weeks ago, I was immediately interested because I do love games where several nations have to compete economically, politically, diplomatically and through force of arms. I also recently played Brian’s Baltic Empires at WBC and very much enjoyed that game and this one appears to be in a similar style and uses the very interesting Dramatis Personae cards to inject historical characters with their abilities into the game play.
From the game page, we read the following:
Enlightenment Empires is an approachable 2-5 player strategy game about conflicts between the states of Central and Eastern Europe region during the Enlightenment era, a transformative period of political upheaval, large-scale warfare, and constant struggles for power. Players will have to develop their economy, decide their internal policies on the ideas of individual liberty and effective governance, secure trade deals and financial assistance within the context of the global rivalry between Britain and France, and finally build armies to become the dominant power of Central and Eastern Europe. Russia, Poland-Lithuania, Prussia, Austria, and the Ottoman Empire will fight for hegemony, using variable victory conditions that reflect their respective historical objectives.
Building on the solid foundation provided by Baltic Empires, highlights of Enlightenment Empires include:
Five new asymmetric factions with unique abilities and objectives, including a new “Constitution” objective reflecting the pinnacle of Enlightenment political ideals.
Another highly thematic deck of historical Dramatis Personae to constitute your royal court, now also including random events that can disrupt players’ plans…or present them with new opportunities.
A simplified, yet still deep and political, economic system that forces players to make tough decisions regarding their state’s internal policies (serfdom, noble privileges, and military spending) and its diplomatic relations to the superpowers of the period, England and France.
The same streamlined battle system based on custom dice per unit type, now modified by military reforms.
More detailed minor powers that players may form alliances with.
Variable player counts (from 2 to 5 players), with scenarios ranging from a tight duel to a tense multiplayer conflict replete with alliances and betrayals.
If there is a word that could define the whole of 18th century, it would be the Enlightenment. The philosophical thought that applied reason to all spheres of life guided the social and political developments of the 1700s, and intellectuals, scientists, politicians, and rulers alike acted either in support of it or against it. And while in Western Europe the republican ideals of enlightenment brought about the French Revolution, in Central and Eastern Europe enlightenment became a tool for state-building for the absolutist monarchs, including the Holy Roman Emperor and Archduke of Austria Joseph II, King Frederick II of Prussia, or Empress Catherine the Great of Russia. The mid-18th century period was formative for these powers, with Prussia and Russia continuing to struggle to establish their dominance in the region, while Austria and the Ottoman Empire fought to preserve their status, and the weakened state of Poland-Lithuania struggled to reform its constitution before meeting an unlucky demise. Three of the traditional “pentarchy“ of Great European Powers (namely, Russia, Prussia, and Austria) were Eastern powers that achieved this status during the 18th century. Their dominance in the region was forged by the work of bureaucrats and reformers, as much as by the soldiers and generals on the fields of the Seven Years‘ War.
Keep in mind that these type of games can sometimes be very complex and have lots of moving parts. And I am not saying that this doesn’t have them but Brian has said that the game is very approachable.
Enlightenment Empires presents these political and military conflicts in a fun and accessible format, while also doing justice to the fascinating history of the region during this period. The game features five asymmetric factions with different strengths, internal political conditions, military forces, and historical objectives, along with the capacity to develop their states by conducting reforms along (or against) Enlightenment ideals, investing in economic infrastructure, and recruiting key historical characters that offer unique game effects. The game also includes several scenarios for variable player counts and durations, offering additional flexibility and replayability.
7. The Last Hundred Yards Volume 6: The Forgotten Hell from GMT Games
If you didn’t know we really enjoyed The Last Hundred Yards as well as Volume 2: Airborne Over Europe. The system is extremely interesting for a tactical game and uses some novel elements in regards to how victory points are scored including a focus on time to complete missions as well as the casualties incurred. Really an excellent system with lots of crunch and potential! Now, even though there are a total of 5 other volumes that have been released, Mike Denson has forged ahead with the next entry in the series which gives us a look at the operations in New Guinea and the Northern Solomon Islands during WWII with The Last Hundred Yards Volume 6: The Forgotten Hell.
From the game page, we read the following:
The Last Hundred Yards: The Forgotten Hell is Volume 6 in The Last Hundred Yards Series. This game examines the Allied campaigns against Japan in 1942, focusing on U.S. operations on Guadalcanal and Australian fighting in Papua New Guinea.
In New Guinea, Australian militia and the Australian Imperial Force troops fought a brutal and desperate delaying campaign along the Kokoda Track from Port Moresby to Buna, Battling through jungle, mountains, rain, mud, hunger, disease, and exhaustion, they resisted repeated Japanese advances and flanking attacks. Their stubborn defense slowed the enemy, shielded Port Moresby, and eventually helped reverse the campaign. At Milne Bay, Australian forces pushed the Japanese back and shattered the belief that the Imperial Japanese Army was invincible.
On Guadalcanal, U.S. Marines and Army troops fought equally savage battles, destroying Ichiki’s force at Alligator Creek and later assaulting entrenched Japanese positions around Mount Austen. There, the enemy used caves, rocky ridges, and concealed strongpoints to prolong the struggle.
Together, these engagements reveal the intensity of jungle warfare in the Southwest Pacific, where endurance, small-unit leadership, and relentless attacks under terrible conditions shaped the early Allied offensive against Japan. These actions also showed how terrain, logistics, and morale could decide campaigns as surely as firepower across the battlefields of the Solomons and New Guinea alike.
8. Shenandoah: Jackson and Sheridan in the Valley, 1862 – 1864 (Stonewall in the Valley and Sheridan in the Shenandoah) from Multi-Man Publishing
A BIG and well respected American Civil War operational system is what Great Campaigns of the American Civil War (GCACW) is and the newest volume in the series is called Shenandoah: Jackson and Sheridan in the Valley, 1862 – 1864. One of the things that I very much appreciate about this system is the fact that they use some of the best art out there for their covers.
From the game page, we read the following:
Shenandoah: Jackson and Sheridan in the Valley, 1862 – 1864 is the latest design in the award-winning Great Campaigns of the American Civil War(GCACW) Series. It contains both a complete redesign of the Stonewall in the Valley (SIV) game covering Stonewall Jackson’s 1862 valley campaign and a completely new game module Sheridan in the Shenandoah that depicts Sheridan’s 1864 valley campaign. The game is designed by Joe Balkoski (the original GCACW Series creator) and Chris Withers. The original SIV game maps have been upgraded to contain the latest GCACW map features, with map design executed by artist Charlie Kibler—whose work on the series dates to its creation in 1992.
Shenandoah: Jackson and Sheridan in the Valley, 1862 – 1864 uses the latest version of the GCACW Standard Basic Game Rules, which also apply to all other games in the series, and these rules are now printed at an increased 11-point font size instead of 9-point. After more than a quarter-century of refinement, these rules are extremely well organized and relatively easy to learn, even for series newcomers. The Advanced Game rules cover situations specifically applicable to these unique campaigns such as “The Burning” that depicts the desolation of the valley by Union cavalry in 1864.
Stonewall in the Valley includes one new Basic Game scenario, the four original Basic Scenarios rebalanced, and the original Advanced Game campaign scenario extensively revised:
The Battle of Kernstown (March 23, 1862; 1 turn): Introductory scenario on the battle of Kernstown – ideal for beginners.
My Last Council of War (March 10 to March 23, 1862; 14 turns): Heavily outnumbered, Jackson moves south from Winchester thru Strasburg to Mt. Jackson. A Union force of three divisions follows to Strasburg while sending two divisions out of the Valley to reinforce McClellan. Jackson races back north and attacks the remaining Union division at Kernstown but loses the battle.
God Blessed Our Arms at McDowell (April 30 to May 11, 1862; 12 turns): Historically, Jackson moves west from Staunton and causes the Union force at McDowell to retreat north to Franklin. He briefly pursues them but then returns to the Valley. This scenario postulates what might have happened had Ewell’s division and Banks’ two divisions become involved in the McDowell campaign instead of holding fast in their camps in the south of the Valley.
Rebel Blitzkrieg (May 21 to June 2, 1862; 13 turns): Jackson and Ewell advance north on the Luray Pike and surprise the small Union force at Front Royal. A Union division entrenched at Strasburg to the west belatedly discovers it is in danger of being cut off and just beats Jackson north to Winchester. Jackson defeats the Union at the first battle of Winchester and pursues to Harpers Ferry. Meanwhile strong Union forces are moving in behind Jackson from both the east and the west. Jackson turns south, marching to Strasburg and then Mt. Jackson and barely avoids the trap.
Our Beautiful Valley Will be Cleansed (June 6 to June 11, 1862; 6 turns); Two Union columns, separated by the Shenandoah River, pursue Jackson south from Strasburg. Fremont’s force engages the Confederates at Harrisonburg and then two days later battles them at Cross Keys. Meanwhile Shields’ division advances into Jackson’s rear and almost captures his wagon train. Jackson turns his army from Fremont to Shields and defeats Shields in the battle of Port Republic causing both Union forces to pull back north.
Jackson’s Shenandoah Valley Campaign (March 7 to June 19, 1862; 105 turns): The entire Valley campaign is covered in this scenario. Both sides typically have forces moving all over all three maps in exciting maneuvers and with forces coming and going due to external events. The scenario plays quite fast due to lulls where sets of 5 turns are skipped. The original advanced rules have been simplified, and the scenario has been extensively playtested and re-balanced.
Sheridan in the Shenandoah includes twelve Basic Game scenarios and two Advanced Game campaign scenarios, all extensively playtested:
Second Winchester (June 13 to June 15, 1863; 3 turns): Ewell’s corps leads the Confederate army thru the Valley to invade Pennsylvania and routed the Union division at Winchester. The Rebels cut off the Union retreat and captured most of the Union division. The route was now clear for Lee’s invasion of the north.
The Battle of New Market (May 15, 1864; 1 turn): Introductory scenario on the battle of New Market – ideal for beginners.
Piedmont (June 4 to June 6, 1864; 3 turns): Picking up the after Sigel’s debacle at New Market, Union General David Hunter marches south from Winchester. With Breckinridge, Confederate hero of New Market, aiding Lee at Cold Harbor, defense of the Valley falls to a ragtag collection of troops that are rushed to the area under General W. E. “Grumble” Jones. The forces battle at Piedmont, Jones is killed, the Rebels are routed, and the Union captures Staunton.
In the Valley Again (July 23 to August 5, 1864; 14 turns): Early’s army moved back into the Valley in mid-July after retreating from the outskirts of Washington, D.C. On July 23, Confederate scouting revealed that Early was only opposed by Crook’s forces and not the VI and XIX corps, which had returned to D.C. Early attacked Crook at Kernstown and routed the Union forces which retreated across the Potomac. Confederate infantry destroyed the B&O RR at Martinsburg and threatened to invade north. Two Confederate cavalry brigades advanced north towards Chambersburg, burned it, and were chased by 2 Union cavalry divisions. Meanwhile, the VI and XIX corps had been recalled to the Valley, but then along with Crook’s force, moved east to protect against an assumed invasion again by the Confederates. The Union force soon countermarched back to Harpers Ferry and the Confederates retreated south.
Second Kernstown (July 24, 1864; 1 turn): A simple scenario covering the second battle of Kernstown – ideal for beginners.
Sheridan Takes Command (August 10 to August 14, 1864; 5 turns): Sheridan took command of all forces in the region on August 7th. His orders were “wherever the enemy goes let our troops go also”. The plan was to trap the Confederate infantry in the northern valley, but Early knew the danger and moved south just ahead of the Union. Both sides marched rapidly south until the Confederates setup a strong line at the Fisher’s Hill. Sheridan prepared to attack but halted his plans when a strong force under Anderson entered the Valley at Front Royal.
You Must Be Cautious (August 17 to August 21, 1864; 5 turns): With the Union infantry camped along Cedar Creek and the Confederates entrenched in a strong line at Fisher’s Hill just to the south, Sheridan learned of the approach of Kershaw’s division. This elicited a new directive from Grant warning Sheridan he “must be cautious and act on the defensive until movements … force them to detach” troops. Therefore, Sheridan conducted a night march to Winchester. From there the Union briefly defended at Berryville and then at Charlestown. The Confederates pursued and eventually tried to bring on a battle at Charlestown. However, Sheridan was cautious and followed the new defensive strategy and disengaged to retreat into a strong, compact line at Halltown, just in front of Harpers Ferry.
Third Winchester (September 19, 1864; 1 turn): This scenario depicting the third battle of Winchester is only one turn but still features lots of maneuver and combat.
From Winchester to Fisher’s Hill (September 19 to September 22, 1864; 4 turns): This scenario encompasses two significant battles in the valley campaign. The Union army attacked the Confederate defensive line just east of Winchester and eventually drove the Rebels back to Winchester. This final Confederate line collapsed, and they retreated south all the way to a formidable defensive position at Fisher’s Hill, just south of Strasburg. The Union pursued and then rolled the west flank of this line and routed the Confederates.
Early’s About Played Out (September 23 to September 26, 1864; 4 turns): After the battle of Fisher’s Hill the Confederates retreated south. The Union pursued with their entire army, but the action for the next few days was limited to cavalry and rear-guard skirmishes. The Confederates safely made it to Brown’s Gap, while the Union infantry stopped at Harrisonburg and Union cavalry started burning the countryside.
Tom’s Brook (October 9, 1864; 1 turn): This solitaire scenario is filled with cavalry action and is an excellent learning scenario for beginners.
The Battle of Cedar Creek (October 19, 1864; 1 turn): While this is only a 1-turn scenario it is filled with the action that took place in the battle of Cedar Creek. The Confederate player starts with a Night March and a Surprise Attack. The Union responds with a special “Sheridan’s Ride” action to enable counterattacks.
Sheridan Moves South (September 19 to October 20, 1864; 32 turns): This scenario spans the battles in the campaign from when Sheridan attacked the Confederates at Winchester, to when the Confederates were defeated at the battle of Cedar Creek. This campaign can be easily played in a weekend.
The Last Valley Campaign (July 21 to October 20, 1864; 92 turns): This scenario encompasses the entire campaign from when Early’s army returned to the Valley after his raid on Washington, to when he was defeated at the battle of Cedar Creek. There is maneuver and combat all over all three maps in this scenario. The action often starts with a Confederate offensive and advance to the Potomac. The Union then gets significant reinforcements to launch counteroffensives.
9. Okinawa: The Last Battle of WWII Reprint from Best with 1
I love a new and interesting way to tell the story of a key battle and I found a very interesting one called Okinawa: The Last Battle of WWII from Best with 1 earlier this year. This is a solitaire only game and for each game the player will draw four objectives from a possible 12 that you must survive and capture before time runs out. On your turn, the player will roll special dice and then spend those to take actions such as movement, attack and take special actions from different unit action cards that will be set up in a square from from 1 to 10. The numbers coincide with the dice of the attacking Japanese and as the player moves through the rondel they will be able to activate and use their different soldiers to attack the Japanese defenders or use their special abilities to gain tokens that can be used for rerolls or healing of wounds
I think that the best part of the game is the concept of resource management as you have to use the dice appropriately to move and fight and also to manage your troops as you can upgrade certain cards as you pass the midway point of the round as well as when special actions are granted via the special resource chits. Upgrading units is very important as this will unlock things like heavy weapons in the form of bazookas, a Sherman tank and planes to be able to take out the Japanese armor units defending the island. The game is about efficiency of movement and doing the most with what you have. The dice determine what you can and can’t do and movement is optional as you don’t have to move unless you feel it is advantageous. But remember, that you have to defeat the defenders and the various objectives to be able to advance to your final objective and sitting in one space too long is not advisable.
The different units have various functions including attack, such as the Rifleman, Machine Gun Team and Sniper but also have secondary functions to remove the fog of war, heal your damaged units or gain additional resources. The Japanese defenders are well hidden and also have various defenses such as pill boxes and caves that will require the player to defeat these before moving to attack the units located inside.
In the end the game is about defeating the Japanese defenders while doing so in a set amount of revolutions around the rondel setup. This can be as few as 2 times around or as many as 4 and knowing when to use your resources to reroll your dice, as you either didn’t get the run of consecutive numbers you were looking for or just need a specific number, you will run out of resources quickly and you must plan them out as best you can to win the game. This one is really fun and I have played it about a dozen times winning about 70% of the time. The game plays in about an hour and the action is fast and furious and you are immediately beset by the staunch Japanese defenders and must act quickly.
You do not have to buy the Hero Bound game but can order the game as an Add On.
10. Tank Clash: Eastern Front from Ameba Games
I love to highlight these little campaigns that I find on Kickstarter and this month there is a new company, or at least that I am not familiar with, called Ameba Games that is offering a small game called Tank Clash: Eastern Front. This games appears to be the 2nd game in the series with the 1st being called Tank Clash: Western Front.
From the game page, we read the following:
Tank Clash is back with new iconic World War 2 tanks!
The Red Army is spearheaded by the powerful Soviet armoured units like the T34, SU100 and IS2. Germany pins its hopes on the last of the panzer divisions to halt the Soviet advance. The Wehrmacht fields its fearsome tanks like the Stug III, Nashorn and Tiger II for the coming battle.
The stage is set for the largest clash of late-war heavy armour.
Tank Clash: Eastern Front is a standalone tactical tank warfare game for 2 players, designed for both newcomers and seasoned strategists. Easy to learn yet rich in tactical choices, it combines its signature checkers-style armour tracking system with dice rolling and hand management for intense skirmish battles.
Already own Tank Clash: Western Front?
Built with modularity in mind, Eastern Front is fully compatible with its predecessor. Combine both games to command 12 unique tank types across expansive battlefields with up to 4 players. Eastern Front’s new features – including new missions, battlefield tokens, event cards and enhanced gameplay elements can also be incorporated into Western Front for an even richer combat experience.
I know what you might be thinking, as the art is a bit cartoony, but I am going to give this one a chance. I think that any wargamer likes to use tanks and this one appears to be focused on these metal monsters and I am going to give it a go. Plus the components are really nice, including some very well made poker chips that are used on the board, and frankly the price of $40 is probably worth what you re getting.
As of September 1st, the Kickstarter campaign has funded and raised $9,054 toward its $3,928 funding goal with 108 backers. The campaign will conclude on Wednesday, September 16th at 9:00pm EDT.
New Release
1. A Hellish Fight: The Battle of Fort Sumter – 1863 from High Flying Dice Games
I love lesser gamed subjects. Or even sometimes games that have never seen the light of day and never touched certain subjects. It is always nice to play something unique and interesting while learning new parts of history. High Flying Dice Games does this exceptionally well as they have made their living on doing lesser (or even totally) unknow battles in their small format games. This month they have released a game that focuses on the 2nd siege of Fort Sumter in Charleston, South Carolina in 1863 called A Hellish Fight: The Battle of Fort Sumter – 1863. This one looks pretty interesting and appears to focus on the iron clad battles and bombardment of the ruins of the fort that were still held by the Confederates.
From the game page, we read the following:
Following the capture of Fort Wagner on September 7th, and the protracted bombardment of Fort Sumter by the Union navy’s ironclads as well as army land batteries, an assault to take the fort’s ruins was planned. Admiral Dahlgren and General Gilmore both felt that securing Fort Sumter’s capture would not only lead to Charleston’s surrender, but send a clear signal that the Confederacy’s days were numbered.
If you are interested in A Hellish Fight: The Battle of Fort Sumter – 1863, you can order a copy for $18.95 from the High Flying Dice Games website at the following link: https://www.hfdgames.com/sumter.html
2. Guadalcanal: The Battle for Henderson Field, Oct 23-26, 1942 from Dan Verssen Games
The Valiant Defense Series designed by David Thompson has been one of my favorite solitaire wargame series of the past nearly 10 years. Each of the volumes in the game address very specific situations and always have a very interesting take with fun mechanics, great art and fantastic production. The torch for the series though has been passed to a new designer in Vincent Cooper. He has designed Volume 5 Guadalcanal: The Battle for Henderson Field, Oct 23-26, 1942 and it has finally fulfilled off of Kickstarter.
From the game page, we read the following:
Take command of the valiant Marines of the 1st Marine Division, supported by Soldiers of the 164th Infantry Regiment, desperately defending Henderson Field against waves of Japanese troops. Guadalcanal: The Battle for Henderson Field is a solitaire and cooperative tactical wargame published by Dan Verssen Games (DVG) as Volume V in the Valiant Defense Series.
Here is a bit of a designer diary/commentary from the designer Vincent Cooper:
This all started about 3 1/2 years ago when I first played Pavlov’s House. I say played. I ‘played’ the game for about 10 minutes…and then I sat there in stunned disbelief at how a game could be sooooo good!!!!
By the time I finished there were two very clear ideas for games fully formed. I contacted DVG to see if there was any interest and they put me in touch with David Thompson. I didn’t hold much hope. There was no reason for him to trust his IP to me, a person he didn’t know.
But I gave it a try and David, it turns out, is one of the nicest people you can ever come into contact with. After some back and forth, the idea for Guadalcanal – The Battle for Henderson Field was born (not, in fact, one of the original ideas, but we’ll see what the future holds for them…).
The game has been through various stages of development and now stands ready to KS!! I will be giving more details in the future about the various variant play options, but have no fear: This will keep you scratching your head looking for the right decision for MONTHS!!
Art by the supremely talented Nils Johansson
Thank you to all the play testers, and in particular Glenn Saunders, Shane Freshwater and Martin Fenwick Charlesworth Much more to come from out design team in the near future!!!
A few years ago, Road to the Rhine designed by Frank Chadwick was announced and it is now ready to ship.
From the game page, we read the following:
In the cataclysmic battle of the Falaise Pocket, the Allied forces defeated the German army and drove them back across France in disorder. In the south of France, American and French troops of the 6th Army Group have stormed ashore and driven the remnants of the German 19th Army north toward the border.
Road to the Rhine covers the Allied pursuit of the German Army following the Normandy breakout through fierce fighting at the West Wall and bridging the Rhine River. The campaign game covers the period from September 1944 through April 1945, while separate shorter scenarios include Operation Market-Garden and the Battle of the Bulge. The game includes two battle games (one-turn scenarios), two longer scenarios, and one full campaign game. The game also includes extensive designer notes from original game designer Frank Chadwick and a historical play-through of the Bulge battle game.
Road to the Rhine is another classic by Game Designers’ Workshop, re-mastered by Compass Games. Originally designed by Frank Chadwick, this edition pays tribute to the classic by honoring the original game system while introducing many enhancements for gameplay purposes. In terms of presentation, we upgraded all components, including completely new full-color maps, new reinforcement and new unit displays, expanded turn and supply tracks, enhanced charts, a rulebook with incorporated errata, and larger counters.
This one does have two 22″x34″ maps but with only 2 countershafts so it is large in scope but not necessarily in scale as it appears to be fairly low counter density. One to keep an eye on though as it is designed by Frank Chadwick and is a remastering of the classis GDW release in 1979.
As usual, thanks so much for reading along and sticking with me this month as I navigated through the many websites and game pages looking for new and interesting games to share.
Finally, thanks once again to this month’s sponsor Neva Game Press!
Bravery in the Sand is a 2-player game that covers the major part of the battle known as Operation Crusader in North Africa during World War II. Covering the period from November 20 to December 3, 1941, players assume the roles of the Axis and Commonwealth generals to determine who will be victorious in this battle. One player controls the Commonwealth force (British, South African, New Zealand, and Indian), and the other player the Axis force (German and Italian). Players activate formations via chit draw, and combat is of the roll-to-hit variety. Includes rules for battlefield recovery, replacements, fortifications, Rommel and more.
About a month ago, I started a new feature on the blog called Discussion Thread where I pose a question or a situation and seek your input and comments on the issue to gain greater understanding and to encourage thoughtful feedback. The response to the first post about In-Game Retribution was positive and there were a lot comments and opinions shared. I now wanted to do another post in the series but focus on the subject of Zones of Control and their importance in wargames.
A Zone of Control, typically referred to as ZOC, is the area immediately surrounding a military unit that exerts tactical influence over adjacent spaces, which in turn restricts enemy movement, closes up gaps in a line preventing enemy units from moving through, forces combat or triggers some sort of reactive action such as opportunity fire or engagement without the passive player needing to occupy those hexes or take any actions. They are designed to create some sort of resistance to enemy units as they approach. Mimicking real world combat and adding in this concept of awareness of enemy movement.
I think that everyone has an opinion on the subject of ZOC’s and these opinions are mixed regarding complexity, the type, being rigid or sticky, and their in-game effects, but there is a consensus that they simulate well the concept of military friction and holding frontline positions. Let’s take a quick look at the different types of ZOC’s and I will share my thoughts on each.
First up, is the rigid/locking ZOC where units must halt their movement the moment they enter a space where an enemy unit is exerting a Zone of Control. The ZOC in this case forces the moving unit to terminate its movement for that turn. I very much prefer these type of ZOC’s as I think that they really simulate the concept of prepared and even sometimes dug-in troops have the advantage and can force advancing units to stop trough interlocking fields of fire or heavy gun projection on the area such as off-board artillery.
Next, we have the soft ZOC where advancing enemy units can move through enemy ZOC influenced spaces, but suffer some sort of movement point penalties, attrition, or extra costs. I also really like this concept as it typically functions similarly to more rigid ZOC’s by costing a +2 or +3 movement cost which typically ends a units movement but not always. I have seen moving units have to take a step loss to take an extra move or more simply extra movement costs such as the placing of a disrupted marker or the like. This type really focuses on the pressures and cost of moving into and through these Zones of Control but are simpler than the more rigid variety.
Finally, I have seen more fluid ZOC’s such as when units can pass adjacent to enemies, but doing so might trigger attacks of opportunity or reactive fire at a disadvantage such as providing the units projecting the ZOC a positive DRM in their attacks or attacking with a column shift on the Combat Results Table. This concept is that moving or advancing units have less cover, less caution and open themselves up to attack more so than those that are forced to stop.
I think that all 3 of these types have their merits and downsides but their use typically depends on the situation represented in the design, the mindset or experience of the designer and the varying historical troop quality and fire power of the units. A line of tanks dug in is much more fearsome and demands a different level of respect in their ZOC projection than say a small arms squad of soldiers who do not have heavy weapons such as LMG’s. And I think that all are viable in design.
Then there is the lack of Zones of Control. I am not a fan of this concept at all but have found that it is typically used in more introductory wargames that are less complex and focuses on being less of a simulation than a traditional hex and counter affair. Many years ago, and at a time when we were still early in our wargame learning journey, I played a game called Paul Koenig’s Market-Garden: Arnhem Bridge from Victory Point Games. I think that I was attracted to it because of the subject of Market-Garden and the inclusion of Allied airborne units. In looking at the game, the main focus and goal is to move toward the bridge and capture it. The path to move to the bridge is through fairly dense urban hexes with a road leading right to the on-ramps.
Strategically, a German commander would have lined the streets with their best units to prevent the enemy from simply riding right down the middle of the street to the bridge. This commander would have given orders to fire on anything approaching and would have had reserve units located in the buildings to the left and right of the streets to prevent small unit interdiction through the back alleys. These units would have taken up positions to bring heavy fire upon any approach hex and this is typically simulated in other games through the use of a Zone of Control. This ZOC would typically cause advancing units to stop while taking fire from an adjacent unit but in this design, the units just kind of ride on by, waving to the nasty MG-42 nests on the 2nd floor of the buildings and blowing kisses to the Panzers hidden in or behind the piles of rubble!
In reviewing the history of the campaign, one of the major problems the British had in advancing on the bridge was that relatively small German forces had taken up positions in the woods and on the outskirts of the city and effectively pinned down most of the advance of British forces toward Arnhem. This, in my opinion, is a major design flaw and should be house-ruled or cause a redesign of an otherwise fun and good playing game. I have illustrated this point with the pictures below where the British 4-6 Infantry unit simply moves right down the street between 4 better groups of units (an 8-9 Tank, three 6-8 Mobile Infantry and a crack 6-6 SS unit) without taking fire or being stopped! Seems silly doesn’t it?!?
I really tend to prefer the sticky/rigid/locking Zones of Control that seem to be found in most of the hex and counter wargames we play. I am more ok with the less restrictive soft or fluid ZOC’s in a tactical wargame where I can hold actions to then inflict opportunity fire on advancing units. But, as I said before, once you introduce the big guns in the form or tanks or heavy artillery, I really like the sticky/rigid/locking Zones of Control. Is this a taste thing or am I in the minority?
So what are your thoughts on the importance of Zones of Control? Can you enjoy and play a game that doesn’t have them? What is your preference in their stickiness/level of exerted influence in a game? What games do them best? Thanks for reading and for sharing your thoughts. I will come up with a few more of these posts over the next few months to share and I hope to see lots of comments and reaction.
Battles in the East (BITE) is a series simulating World War II Eastern Front battles. The system rules are an evolution of the SPI classics Panzergruppe Guderian, Army Group South and Cobra. Unit integrity bonuses include Soviet Corps and vary to show the increasing Soviet cohesion and decreasing German cohesion as the war progresses. HQ units provide higher level combat support and supply advantages to corresponding units in range. BITE also incorporates standardized scales (unit size, distance, time) for easy comparisons. While the series rules allow players to play many games with the same core rules, the scenario rules add unique situational elements of each battle. Each volume includes two battles from one year with two copies of the charts and tables as well as scenario rules and set-up cards for easy reference. Battles in the East Volume 2 offers a strategic simulation of pivotal 1941 Eastern Front conflicts, including the fierce battles at Uman and Tula.
Rinse and repeat with the after gaming sleeping and eating of breakfast. I was very tired this morning when the alarm went off at 7:30am. I knew I had a big day and hoped that I’d have the energy to do all that I had planned.
First up was a learning game of the brand new The Weimar Republic from GMT Games. The Weimar Republic is a Card Driven Game of political struggle in interwar Germanywhere 4 unique factions compete for dominance including the democratic Coalition, the Soviet-backed Communist Party, Hitler’s National Socialists and the far-right Radical Conservatives. The game covers the Interwar Years between 1919-1933 and represents all of the different fighting factions trying to gain control in Germany’s regions and major cities, to maneuver the political landscape of the Republic, and to dominate through a combination of propaganda, parliamentary elections, street violence, economic influence and ideological zeal. This situation sets itself up perfectly for a game to explore the various parties involved. I was able to get into a game with the Hoosier Herd gaming group from Bloomington, Indiana.
The game appears to be a COIN Series like game as each faction has their own unique abilities and powers but also win in their own way. The game also visually looks like a COIN game as it uses multi-colored wooden cubes to represent influence in the various districts of pre-WWII Germany.
A major focus of the game is the concept of Elections. Each Era has a number of Election Cards (based on the historical number of Elections) that are shuffled into the Event Card decks. When an Election Card is played, both a Regional and a General Election is held at the end of that round. Election scoring is based on players’ Dominance over spaces and Regions, with modifiers such as Middle Class Sympathies, Cadres, military Supremacy, etc. Regional Elections gives Parliamentary Control over the game’s Regions while a General Election can potentially end the game – if anyone but the Coalition wins a General Election, that player also immediately wins the game.
Players draw a hand of cards for each Era and use their AP to conduct Actions. You don’t chose between AP and Event as when you play an Event Card the Event always takes place, unless there are some requirements that aren’t met. You don’t need to play a card every turn – in fact you can’t, as there are fewer cards in a hand than turns in an Era and you may only play one Event Card per turn. However, you always have a basic 1 AP that may be used by itself or in combination with any Event Card played, so during some turns you will be using only that basic point. You can also pass which allows you to discard a card and draw a new one.
I very much like what I was doing but need to grok the rules so I know what I should be doing. We had a good time and I look forward to another play in the near future.
Next up I sat down with Greg Smith to play the upcoming Korean Tide from Compass Games. I took Greg to the woodshed with the Chinese and had a great time with the game. This one is a very good addition to the Tide Series and adds in some new tricks.
One of the things that I liked was the addition of new Divisional Displays which hold the strength points and assets of each division. The player will track the strength points as they are lost and gained but also will keep track of their reserves which is a new concept. Reserves can be used to force a reroll of your opponents dice during combat or to reroll your dice. The reserves are created by reducing the division’s strength points by 1. There are also tank counters that are attached to units, particularly the North Korean units at the start of the game which add a single strength point but also cause the defender to retreat after being attacked regardless of outcome. Both of these additions are very nice changes.
Greg and I played for the first 2 years of the war including 1950 and 1951 and I was able to break his units and destroy several American divisions. But the real thorn in Greg’s side was my 6th KPA unit who was dug in and just wouldn’t die. I was able to continually feed them reinforcements and their combat rolls were amazing inflicting 2-3 losses on the UN forces while taking no more than 1 loss. Such an interesting system and I very glad that I was able to play it.
Next up was a game of Baltic Empires from GMT Games. Baltic Empires covers the tumultuous period in the Baltic region from the collapse of the Teutonic Order in 1558 to the end of the Great Northern War in 1721. The game really focuses on representing both the mercantilist economic thinking of the time, the very limited resources at hand on the state/ruler level and the destructive nature of warfare and its effects on the local economy. When war occurs in spaces infrastructure can be destroyed and it is very expensive to keep replacing units that just die on the battlefield.
The game has 5 factions including Denmark-Norway, Sweden, Poland-Lithuania, Prussia-Brandenburg and Russia. Each power has 2 common victory conditions and 1 or 2 that are specific to that power. The shared victory conditions are either control of 2 custom houses or being the hegemon on all 3 tracks at the same time.
One of my favorite parts was that each turn, 5 Dramatis Personae Cards are randomly drawn from the deck and become available for purchase by the players in the Production phase. These cards have a wide variety of effects, but can be broadly divided into 4 types: those that have permanent effects, those that have one-time effects, those that affect victory conditions and those that provide a special leader unit.
These cards are excellent fun and really create somewhat of a race to purchase the best cards before others can acquire them.
I loved the game and was doing quite well with Sweden as I had captured Riga and Kurland in the Baltics and had built up quite the nice economic engine.
The economic system is simple, but manages to capture a lot of key elements of this period. Each province has between 0 and 3 resource icons and between 0 and 2 city icons. If a workshop marker is present on a resource icon the province produces 1 of that type of resource and if a city marker is present on a city icon the province produces 1 thaler (the currency of the game). There is one twist though, as provinces under noble control will contribute a maximum of 1 of the resources and 1 of the thalers produced in it to the central administration while the rest is discarded as it goes into the coffers of the local nobility. Only provinces where royal control has been imposed will contribute their full income to the player. In addition to this there are 3 trade center provinces on the map, and these generate extra income for their controlling player as they are able to tax the trade there. Just a great little game that I hope to explore further later.
My final game of the evening was a look at The Emperor’s Voice and The Emperor’s Choice coming to Kickstarter soon from Worthington Publishing. I was able to sit down with Wes Crawford to play his game The Emperor’s Voice which covers midnight until noon on August 15, 1945 when an attempted Army coup occurred against the Emperor of Japan in order to stop the surrender. The Emperor’s Choice is about the week leading up to the attempted coup, where the Imperial Cabinet debated over the issues concerning the ultimate decision by the Emperor to surrender. The two games may be joined together to create one longer legacy game that may be played in about two hours, although each may be played separately as a complete game, too.
I played The Emperor’s Voice as the Honor player who is trying to convince the Emperor to call off the surrender. The game is played with each player having a set type of action cards with things like move, plot, force commit, attack and persuade. Each of these actions is used to move into position to influence key figures and generals to sway them to your side with the draw of random chits and event cards to overcome your opponents total influence of the figures.
It’s all very tense and planning is key as you only have a few turns of 4-5 card plays to sway the generals, find the recording to destroy it, pressure the emperor and take out resistance against you. It all works well to create a very interesting and thematic game. I was able to win the game by convincing several of the key generals to my side and then successfully moved the emperor. I ended with 11 total cubes or VP’s to 5 for Wes.
I also played 1 round of The Emperors Choice where players are moving 1 of 6 issues up a track to their side to score VP’s and to gain special abilities from the won issues to assist in their next turn.
Both are great fun and will be coming to Kickstarter in the 4th quarter.
I had a great time today and got in a total of 5 games. I’m a bit beat and my mind is mush but I’m really looking forward to tomorrow as we have a full 6-player game of Imperial Elegy from VUCA Simulations planned and a look at an upcoming WWI aerial dogfight game called Above the Trenches from Flying Pig Games.
The morning dawned early and I was up and ready to go by 8:30am. I had a muffin in my room and a trusty diet Mountain Dew for breakfast and we were on our way to the Winterberry Room to get going on our continued game of GTS.
We jumped right back into GTS Where Eagles Dare and The Devil’s Cauldron from MMP. I was assigned to command the area around Eindhoven/Best/Son and to eliminate the few pockets of German resistance remaining there and then move our armor north to cut off possible German reinforcements from the east. We jumped back in at the 1100 turn and played into the 1700 turn although I had to leave shortly after lunch to meet up with Gregory M. Smith. This system is just so solid and is really great fun.
And I also very much enjoy the deep historical immersion into the event and its incorporation of things like heroes and artillery parks as well as the gorgeous production values with amazing counters, a very detailed and beautiful board and the way it portrays company-level combat. I will say that there is a fairly steep learning curve and rules overhead and while I feel the combat system works it is very involved and bits can be forgotten. But it really is a solid operational level portrayal of WWII combat. I very much can’t wait to play it again in the future and we actually have the reprint of The Devil’s Cauldron on pre-order and I have heard it might be out by the end of the year. I need to find me a copy of Where Eagles Dare as well although I most likely will never get the full combined games together on the table at the same time.
After 14 hours of pushing counters, I am now a follower of this system and want to thank Joe and Matt, as well as my friend Mike Heckman, for teaching me.
After lunch I found my friend John Sy from the Philippines and said hello but he had a gift he had brought for me. It was Japanese occupation currency in the form of Philippine pesos from WWII. What a very cool and thoughtful gift and upon my return home I will be placing it in a frame and hanging it in my game room. Thanks John!
I then was able to meet up with my friend and fantastic designer Gregory M. Smith as well as Kevin McPartland to get a look at a few games that they are designing together, including Viking Dawn from Compass Games and Star Spangled Tide: The War of 1812 from Compass Games.
Me, Greg Smith and Kevin McPartland.
We first got a play in of Viking Dawn and had a great time with the game. It is a light, beer and pretzels style game based on the SPI Conquistadors designed by Richard Berg where players control 1 of 4 Viking clans and are trying to build longboats, train war bands, develop explorers and lead them to explore, settle, raid and conquer Europe from Russia in the east, to Iceland and Newfoundland in the west, the Mediterranean and parts of North Africa. When leaders die you must bury them with silver gaining VP’s or if you can’t afford it bury them with nothing and lose VP’s. The main mechanic is a press your luck exploration mechanic where you must roll for the destruction of your fleets based upon how far they have traveled that year. You might lose all of your ships or may get lucky and lose none, you can mitigate this be investing in the journeys with additional supplies and tech to ensure better offs but the dice are cruel and you might just lose not only your fleets but also the booty they have collected from raiding.
It’s a very fun and lite take on this chaotic time in history and I very much enjoyed it. The game is nearly complete and should be printing and ready for shipping in early 2027. I think that this one is a perfect convention game and is sure to see more plays on my table.
We then shot a video with both designers together and then broke off with just Greg to talk about 6 of his other in-design projects. These included the following Korean Tide (next entry in the Tide Series covering the Korean War 1940-1953),Rifle Platoon (tactical level squad based solitaire game using the American Tank Ace Series), Project Z (what if bombing game where Japan won at Midway and began to run bombing operations against the United States mainland and Australia similar to Amerika Bomber), Western Desert Ace (solitaire Ace Series game focused in North Africa), B-52D Linebacker II (solitaire Vietnam War bombing game in 1972) and then finally a scoop on a joint design from Kevin McPartland and Greg Smith called Star Spangled Tide. It was a great discussion and I’m very much looking forward to all of these games.
To end the video, Greg spoiled his upcoming Lone Banner game which is a 1-4 player dungeon crawler set in the fantasy world of Kalar from Burning Banners from Compass Games. This one is going to be fun and I got a look at the characters, spells and weapons and also saw the dungeon tiles that will be laid out as players move through the dungeon encountering traps, monsters and bosses to fight. This looks great but it is a ways off as Greg said he has only been designing it for a month or so.
I then got to play the new The Great Hunger from Compass Games with designer Kevin McPartland. InThe Great Hunger players represent families of tenant farmers and field hands. At first, when the potatoes are plentiful your clan will grow, using the events on the top half of cards to help your family expand across the map moving into counties, working on estates and in factories. When the potatoes blight arrives, you’ll use the events on the bottom half to save as many as you can, finding them aid or employment in Ireland, or scrambling to ports to secure passage to America.
The game is a very light Euro style game of survival and is well done as it’s rooted in history and teaches about the struggles of the Irish. I am glad to have played the final production copy as I got to play a prototype copy a few years ago at WBC. This one will catch some heat from people for it’s dark topic and will just not be for everyone but it has something to teach about history and I have Irish ancestry and am interested as to what happened to cause my ancestors to leave their home to come to America.
One final thing I want to show you is the lineup of games that GMT has staged in the main gaming area. These are all of their newest arrivals and they are just gorgeous. I’m most interested in Coast Watchers designed by Volko Ruhnke and The Weimar Republic designed by Gunnar Holmbäck.
Day 2 dawned early with me getting up at 6:20am due to the sunlight beaming into our window as we had not carefully drawn the blinds together tightly. We got ready and left the room fur breakfast and arrived in the Winterberry Room at 8:30 ready to dive into the Grand Tactical Series.
As we approached the table, I was absolutely blown away by the size and scale of it and the multiple boards laid out on it with plexiglass and secured with binder clips and tape. The boards combined measure 17’ of wargaming good and include The Devil’s Cauldron: The Battles for Arnhem and Nijmegen and Where Eagles Dare: The Battle for Hell’s Highway from Multi-Man Publishing.
The game state is actually a continuation of a game that started at WBC last year. Joe and Matt took pictures of the game board and also of each of the formations and their position from last year’s game and had set it up in that state to play over the next week.
Here is a look at those carefully taken pictures. Such detail and care given to the game. How am I not going to love this experience?
There were a total of 6 of us playing the game and we were loosely assigned a few formations to be in charge of. Actually we were told we were in command and were to make plans and then discuss those with the CIC’s to get approval and then execute that plan. A lot of autonomy and ability to go about it individually.
Over the span of 10 hours we played and finished the 0700 and 0800 turns for September 19th. This system is very fun and crunchy but also involved. When attacks are made there is very structured procedure but that isn’t overly complex. Company bonus checks initiate the action and the player will have to roll less than or equal to their troop quality number to gain a +2 to their combat value. Typically this troop quality ranges from a high of 7 to as low as 2 for artillery. Once completed, this bonus is added to their combat factor and then is reduced for the terrain defensive bonus and any defense shown in the enemy counter. Typically you are targeting following under a 7 for good units and a 2 for lesser units. Sometimes these modifiers make it so only a roll of a 0 on a d10 will hit. A 0 is not a 10 in this game. But there is always a chance. Hits are then referred to the CRT which uses the rolled value to refer to the type of Fire to determine results. Types of Fire include indirect, HE or small arms and results include a Cohesion Hit, with multiple Cohesion Hits leading to step losses, step losses of 1, elimination or suppression. There is also limited opportunity fire and assaults that require a bravery/morale checks. At first it seemed over the top but once I picked it up was really fairly simple.
Activation is chit pull and works very well. A formation activating gets to do something with each unit but then can spend Command Points to take additional moves or attacks. Just a very solid system that reminds me a lot of the Company Scale System also designed by Adam Starkweather. The system focuses heavily on how well division and regimental HQ’s can coordinate their sub-units and handle combat stress. I liked it very much and look forward to playing a few more hours tomorrow before moving into some other games.
I also wanted to show off the ingenuity and commitment of these Grognards and their setup for GTS.
First off the lighting. They have light poles that provide above the board light which makes a huge difference in visibility of the game and its counters.
They also have magnetized the chits and when they are drawn are posted on a board for all to see who has activated and who is up. There are chits drawn early but that are hidden on the board to allow for the next player to begins planning to speed game play.
The table they use is also custom made and is modular to fit the various games in the series. The bases are sturdy and they appear to be solid but are assembled quickly.
They use 1/4” thick plexi that is quite thick and has somewhat of a magnifying effect. It is very well done and made playing the game more enjoyable.
While playing, there was another nearby big in-design East Front wargame being played by Antony Birkett, Chip Saltsman and Curtis Baer. If you didn’t know, all 3 have been involved with, designing and developing several volumes in the Operational Combat Series from MMP. Tony has designed several volumes including The Third Winter, The Forgotten Battles and Crimea.
The system is called the Operational Warfare System and its first game is called After Stalingrad designed by Antony Birkett. Think modern mechanics being brought to the Operational Combat System in Tony’s words.
The system is focused on maneuver and command and control and uses HQ’s with different amounts of Action Points used to activate units. The game play is back and forth and interactive and it was said there is little downtime. They hope to use this system to tell the study of other WWII battles in North Africa, the Mediterranean and Western Fronts, as well as the tried and true East Front.
The fame has been in designer and development over the past 6 months and is being made ready due extensive play testing. They are currently shopping the design to publishers and hope that it is published in 2027.
I was able to shoot a 15 minute interview with these guys and had some really good discussions about their goals with the game and the system highlights.
I also met at different times of the day several fans of the channel. I met 2 first time attendees this year who both watch our videos named Jason and Bill who were both class acts.
Jason.
Bill.
This is probably a bit personal but Bill told me that our videos helped during a time when his now deceased wife was sick and he was in a dark place. That was very touching to me and I appreciated that we somehow assisted him through that difficult time.
The June 2026 Monthly Debrief Video, which is the 6th episode in Season 6 of this series, saw us discussing Nostalgia and its effects on the wargaming hobby. I think that nostalgia is generally a good thing but it definitely can be something that holds the hobby back. Too much nostalgia tends to keep us away from new and emerging games and systems and in general can be a suppressor of innovation and progression.
Also, as usual, we covered the games we played in June as well as the games we plan to play in July.
We will remind you here that we are fortunate to be continuing our relationship with Noble Knight Games as the sponsor for our Monthly Debrief Video series. In case you don’t know, Noble Knight Games specializes in hard to find games but also carry all the new releases. But what makes them truly unique is that you can find some of the rarest games, long out of print games, hand made games, imported games from overseas, etc. Thanks to them for their sponsorship and we hope that you will consider them first when looking for the games we cover.
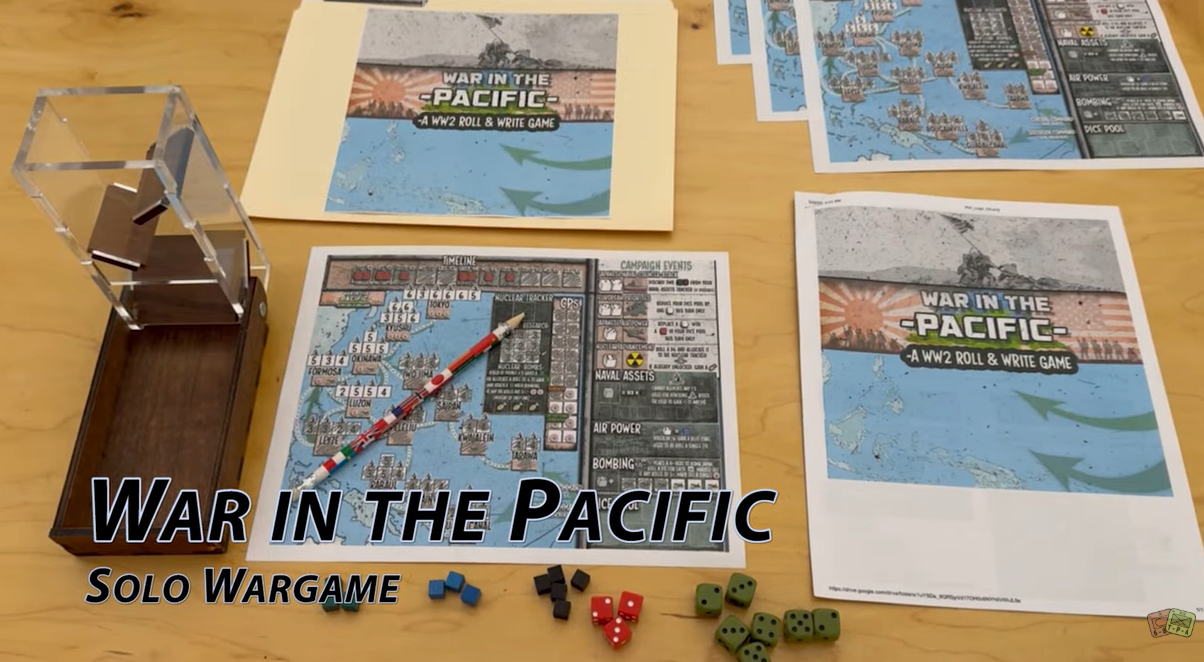
In War in the Pacific– A WW2 Roll & Write Game from Solo Wargame, players will allocate limited resources to launch attacks, conduct strategic bombing, maintain supply lines and seize key islands. Your strategy must be swift and decisive, targeting objectives like Guadalcanal, Iwo Jima, and Okinawa. As the war intensifies, you can divert critical resources to the Manhattan Project, researching and developing nuclear weapons. The race to build atomic bombs could be the key to ending the war. Can you balance the demands of the Manhattan Project with the immediate needs of your campaign?
Once you’ve gained a foothold, you’ll face a crucial choice: invade mainland Japan in a costly land assault, or use strategic bombing and nuclear weapons to force Japan’s surrender. Each option is risky as an invasion could end the war quickly, but at great cost, while bombing and nukes may hasten Japan’s surrender, but could come too late.
With fast-paced dice allocation, resource management, and mounting pressure, every decision could mean the difference between victory or failure in your quest to force Japan’s capitulation.
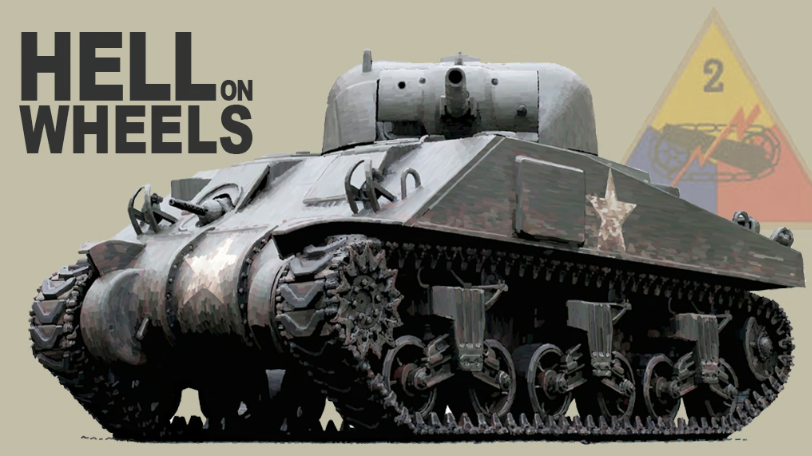
Over the past several years, we have done interviews with Matt White, publicized his games and played a few of them as well and he always has something cooking. Recently, I came across his newest offering on Kickstarter called Spearhead: Hell on Wheels – Tank Battles in Normandy. This game is a solitaire or 2-player print and play tactical game that allows players to take command of US tanks in German occupied France. I reached out to Matt and as always he was more than willing to share on the design.
Grant: What is your new project on Kickstarter called Spearhead: Hell on Wheels?
Matt: This is a brand new solitaire and co-op World War II print and play tactical wargame. In this game you are in command of a group of 3 US tanks in brutal and intense tank combat in enemy-occupied territory.
The players must lead their tanks, through unforgiving terrain, finding and then engaging the enemy in fierce fire fights. They must defeat any encountered enemy tanks and forces, whilst meeting the objectives as they move across the map.
Grant: What was your inspiration for the name? What do you want it to convey about the design?
Matt: My biggest inspiration was reading accounts from various US armored units. Keeping your tank crews alive and positioning your tanks whilst dealing with unexpected enemy positions is key to survival and success and truly seemed to be “Hell on Wheels”.
Grant: What about the battles during Normandy inspired you to make this game?
Matt: Basically I wanted to focus on and show the difficulties with the survivability of the armored crews and their vehicles during the D-Day invasion and the days after as the Allies broke out into France. That was the biggest point I wanted to make.
An American M10 Tank Destroyer.
Grant: What research did you do on the subject?
Matt: As with all my games, in trying to get the historical aspects correct both in the mechanics of the game as well as the look and feel of the art, I basically try to do lots and lots of reading! I read as much as I can on the subject, from various authors and viewpoints, and when I am not spending time playing games or making them, I basically read! This knowledge is part of the inspiration for my games as I draw upon things that I have rad and then translate them to the page.
Grant: As a tactical level wargame, what are the most important areas of focus for the design?
Matt: The positioning of your tanks in relation to where the enemy could be, and not only the tank hull but also the turret. Keeping your tank crews alive and positioning your tanks whilst dealing with unexpected enemy positions is key to survival and success. This game is point-to-point based where you must place your tank orientation and can aim the turret separately. Being able to keep the front of the hull forward towards the enemy tanks whilst hopefully being able to fire on their flank is critical.
Grant: How does the game differ in its 2 modes including solitaire and cooperative?
Matt: In the game you are in command of a number of US tanks – these can be split between players if you wish. Its quite unlike a number of solitaire WW2 tank games where you are in command of one tank. In this game you have a number which makes it really suitable for co-op play.
Grant: I know the design is a Print and Play offering. Why do you feel this model is best suited for your designs?
Matt: I like making print and play games as it forces you, as the designer, to make every component count and making the most of the physical space on a sheet of paper. I find that challenge one of the most interesting parts of the creative process. I also like the print and play model because it is very affordable for all parties, both me and the players, and allows the game to be available to anyone at anytime and on their terms.
Grant: I see that the board has a point-to-point movement layout. Why was this your chosen method of conveying information about the battlefield?
Matt: As much as I love traditional hex based games (and continue to play a lot of them), I also like point-to-point too. I like the way you can combine not only line of sight but also information about the environment in the game.
Grant: What is the meaning of the different symbols that appear on the board?
Matt: Movement is from point-to-point and where you move from a Position Point (the rectangle points) to an Observation Point (the circle points) where you will test for observation and perform the majority of combat. If combat is successful then you will be able to move to the next position point.
As you can see from the map there are multiple paths from Position Points to Observation Points and then onto other Position Points. Plus there are a variety of pros and cons to various paths to allow for a variety of terrain types and observation challenges. These paths are illustrated on the map in the shape of lines which are known as Movement & Observation Lines.
For each Movement & Observation Line there is a symbol at one end. The most common symbol is a black arrow, which denotes normal terrain and normal observation. There are other symbols which mean more difficult terrain or harder observation. These are:
Black Arrow – Normal Movement – Normal Observation
White Arrow – Normal Movement – Hard Observation
White Square – No Movement – Normal Observation
Black Circle – Difficult Movement – Normal Observation
White Circle – Difficult Movement – Hard Observation
Grant: What difficult decisions do players have to make in the game?
Matt: You will have to deal with enemies and you discover them but you don’t know where they are and so you must make some decisions based on information you do and don’t have. The player will also have several simultaneous objectives that must be obtained and will have to contend with both the German forces defending them that you know about and those that you do not.
“Lady luck” plays a part, as with any military operation, but your decisions and tactics are crucial, especially in how you position your tanks on the map when facing enemies as you cautiously roll through the environment.
A German Panther.
Grant: What dangers and threats meet the players on the battlefield?
Matt: There are a variety of dangers but not only the enemy forces as tank obstacles and mines can be a serious threat, combined with the environment itself.
Grant: What objectives does the player have to accomplish?
Matt: For each game session the objectives are randomly generated with Objective markers provided. All you have to do is safely get your tanks to those Objective markers, all the whilst dealing with the enemy!
Grant: How are hidden German units handled?
Matt: Every time you move your tanks you will need to check what they can observe and into which other points then can see. At this time you will roll on a couple of charts to see if you can see enemy units. However, just because you can’t see any doesn’t mean that they are not there.
Grant: What is the makeup of the Tank Cards? What information do they contain?
Matt: Using the Tank Cards you record the status of the major components of your tank such as the engine and tracks plus any gun jams. You also record the status of the various tank crew, all of which can have an impact in the game. Counters are provided to record all the status of both the tank and the crew.
Grant: What different types of tanks are included on both sides?
Matt: There are variety of tanks in the game with each tank having its own unique gameplay – for example the M10 tank destroyer has no hull machine gun (but does have a better anti-tank weapon). There are also Stuart M5A1 Tanks, StuG’s, Panzer IV’s, and many more.
Grant: How does combat work?
Matt: In the combat phase, you determine the order in which both your tanks and the enemy tanks fire. This is crucial to how the combat plays out as in real life WW2 tank combat, the results will favor the tank crew who can fire first on their target.
You will roll a few dice, depending on your tank positioning and other factors, and retain the highest number. You can increase your number of rolled dice by certain criteria – the more dice you roll the better! For example, if your tank turret is facing the enemy, the terrain type, the health of both the tank and the crew and if the enemy have been observed all are major factors. The enemy tanks will be doing the same, so factors such as successful enemy observation in the previous phase are crucial!
Grant: What is the goal of the game? How is victory obtained?
Matt: Your goal is to reach your various objectives on the map, whilst trying to keep your tanks and crew alive.
For each game session the objectives are randomly generated with Objective markers provided. All you have to do is safely get your tanks to those Objective markers, all whilst dealing with the enemy!
Grant: What are you most pleased about with the design?
Matt: I am most pleased to be coming to the end of the design and getting it ready for people to play! Finishing or coming close to it, is the hardest part of the development. In terms of the actual game, I really enjoy being able to get a game that has depth and is engaging that can be printed on just a few sheets of paper.
Grant: What kind of an experience does the game create?
Matt: I hope that the game creates a thoughtful representation of actual tank combat and how decisive it can be!
But that is not all. The game is modular and has several options included. As well as the map shown above, the game will also come complete with another map, additional counters and a rulebook which allows for you to create your own unique scenarios.
This map has the same points but where you will roll on tables to determine the various Movement & Observation Lines from each Position Point and Observation Point. There will be counters that you can place between the Position and Observation Points as an aid. You will be using various charts and tables to procedurally generate your map as you play, determining those gameplay elements as you progress. This type of game session will present you with a new challenge as you really have to deal with more unknown elements as you progress your tanks across the map.
Grant: What other designs are you currently working on?
Matt: I have a few games I am working on – currently working on something involving WW2 Mosquito aircraft!
For a YouTube video overview of the game, please check out Matt’s overview video here:
Thanks to Matt for his time in answering our questions and for his great little print and play games. I love it when one of these new games is brought to light as I get to oodle over the art and see what new things he has created!
Clash D-Day Special edition is a turn-based board game that is set during the longest day in history: D-Day. Take control over the Allies and Axis forces and get ready to conquer the necessary beaches and areas. Outwit your enemy, make tactical decisions and think ahead. Prepare and take action in the greatest seaborne invasion that changed history on June the 6th, 1944! Clash D-Day is very easy to learn and there is no need for historical knowledge. Clash D-Day is based on the popular board game Clash of the Ardennes and is a stand alone version of the game. Use all of your (special) units wisely, because you will run out of units very quickly. Place them strategically and tactically on 1 of the 7 streets, always think ahead and try to reach your objective a little bit sooner than your opponent.
Inflection Point is a Battalion Combat Series (BCS) game depicting two important but relatively unknown battles before and after Stalingrad. The Battle for Kalach was fought in July 1942 following Case Blue, the successful drive into southern Russia. Paulus’ Sixth Army intended to encircle and destroy the Soviet Armies and walk into Stalingrad. The Soviets were still recovering from Operation Barbarossa the year before. The result of the battle set up the epic urban fight that was the turning point of the Eastern Front. By December 1942, the Sixth Army was trapped at Stalingrad by a more capable Red Army. In the Battle of Chir River, the Soviets looked to exploit their gains and prevent German relief operations over a portion of the Kalach battlefield. Initial success along the Chir River changed when the energetic 11th Panzer Division was thrust onto the scene. These two battles show the progression of the Red Army into an offensive army that could start fighting toe-to-toe against the invaders. For the Germans, the days of blitzkrieg successes were waning and were being put on the defensive. There was a marked inflection point around Stalingrad.
The game showcases this change in quality and capability between the armies. Units famed for fighting at Stalingrad are here – 24th Panzer and 100th Jäger Divisions as well as the 62nd Army. With rules on crucial air supply that was needed to sustain the German offensive, to stubborn Soviet command in the form of Colonel Konstantin Zhuravlev, players will be able to recreate these pivotal battles. The steppes of Southern Russia are accurately depicted, with rivers, balkas, and small hills being crucial in the otherwise flat terrain. With offensive and defensive possibilities for both sides in both battles, there’s tense decision making in order to win and change the fate on the Eastern Front.
With this My Favorite Wargame Cards Series, I hope to take a look at a specific card from the various wargames that I have played and share how it is used in the game. I am not a strategist and frankly I am not that good at games but I do understand how things should work and be used in games. With that being said, here is the next entry in this series.
#84: Marconi Transmitter from The Hunt from Salt & Pepper Games
I have played several hidden movement games over the years and enjoyed them all. Some of these titles have included wargames such as They Come Unseen from Osprey Games, Sniper Elite: The Board Game from Rebellion Unplugged and Bomber Command from GMT Games as well as a few board games including Hunt for the Ring from Ares Games. The concept of moving cautiously, attempting to evade pursuers, all while trying to locate and acquire or destroy objectives makes for a very interesting gaming experience. These situations can make for some really tense games that cause your head to ache and your wits to be tested. But they rely on some bluffing as well. Trying to force your opponent to anticipate where they think you should be and then trying not to be there. A really great mechanic in board games but not always easy to pull off and make for a very playable and interesting game. In 2022, we played a new design from Matthias Cramer and Engin Kunter that took this hidden movement concept and put it into a historically based game about the struggle over control of the South Atlantic between the British Royal Navy and the German Kriegsmarine during the early years of World War II called The Hunt from Salt & Pepper Games.
The Hunt is a Card Driven Game where the German player has to attempt to stay hidden while trying to sink merchant shipping as the Royal Navy hunts for them throughout the South Atlantic. The players each have asymmetric actions to use to accomplish their missions and each has a tough time doing what they have to do. But, if they manage their cards wisely, using them as effectively as possible, they can successfully either evade their pursuer or catch their prey.
In today’s post, we will take a look at the very useful German card Marconi Transmitter. Marconi Transmitter is a 5 Ops card, which makes it a very important card in the German deck as it allows for the taking of 2-3 actions in a single turn, but for which there is an even more important use as a means of setting yourself up for that easy score to sink a merchant vessel. In the game, the British have multiple Task Forces that will search the South Atlantic for the Graf Spee attempting to find her, engage her and sink her to the bottom. As a Hidden Movement game, the German player has surprise on their side and must use tactics that manipulate and change things for the British player making their searches much more difficult and time consuming. The Marconi Transmitter allows the German player to move a British Task Force up to 3 hexes away and then to choose a Freight Ship and then place that ship back onto its starting location on the board. This card has the ability to clear the way of enemy ships searching for the Graf Spee but then follows that up with the relocation of an unsuspecting Freight Ship to place it within striking distance of the pocket battleship for an easy kill. I just love these kind of cards that manipulate things and provide means to change up the current situation.
Marconi transmitters were pioneering early radio devices developed by Guglielmo Marconi in the late 1890’s. Primarily consisting of spark-gap transmitters, they generated radio waves that allowed ships and continents to communicate via Morse code without wires, paving the way for modern broadcasting and other telecommunications. This advancement was used by the Allies to hunt for the Graf Spee in the South Atlantic and caused the German pocket battleship to change some of its operating procedures. The Admiral Graf Spee did not elude the Marconi radio transmitters through electronic jamming. Instead, her commanding captain, Hans Langsdorff, successfully evaded Allied interception by using strict radio silence and executing aggressive threats to ensure merchant vessels never broadcasted their distress calls.
When the Graf Spee intercepted a merchant ship, she used her speed and imposing silhouette to intercept before a signal could be sent. The standard British raider defense was to use their Marconi-equipped transmitters to call for help. However, as soon as a merchant ship began transmitting a warning, the Graf Spee would flash a signal demanding they cease transmission immediately, threatening to open fire with her devastating main armament. Outgunned and at the mercy of the German ship, the merchant crews complied, shutting off their wireless.
Because the Graf Spee traveled thousands of miles across the remote South Atlantic and Indian oceans, she remained unseen by simply avoiding the heavy shipping lanes. Captain Langsdorff further deceived Allied forces by utilizing visual camouflage. By attaching fake turrets and a dummy funnel, and flying false colors, he bypassed merchant shipping unmolested while maintaining strict radio silence to keep his location hidden.
Here is a link to our full video review of the game:
We have interviewed the venerable designer Ty Bomba on numerous occasions over the 10-year life of the blog. In fact, I counted up the interviews and to date we have done 18 total! Wow but the last one we did was in January 2023 and we have just not had him on since. No reason for that other than I have been busy with other games. But recently I saw from War Diary Publications that they were printing one of his What If? style alternative history games called Rommel in Italy, 1943-1944: A Counter-Factual Simulation, which supposes Field Marshal Erwin Rommel had taken command of German forces in Northern Italy rather than being sent to help with the defense of France against the expected Allied invasion. I reached out to Ty and he was more than glad to give me some more information.
Grant: What is your upcoming game Rommel in Italy about?
Ty:Rommel in Italy, 1943-1944: A Counter-Factual Simulation allows 2 players (or one playing 2-hand solitaire) to investigate the strategic and operational potentials that would have been in place across northern Italy from September 1943 through May 1944 if Hitler had left Field Marshal Erwin Rommel in charge there rather than Kesselring. Rommel advocated for immediately pulling back to a shorter, easier to defend, position at the south edge of the Po Valley rather than trying to fight it out farther south, with both the German’s flanks exposed to possible encirclement via Allied amphibious end runs. In effect, it put the Allies into a strategic position that historically they did not achieve until a year later. The question then becomes can they keep up that kind of advance into and across the Alps.
Grant: Why was this a subject that you wanted to design a game around? What assumptions about history did you take into account?
Ty: Historically, we had 2 of Germany’s best field commanders, Rommel and Kesselring at complete odds with each other over theater-level strategy. Kesselring felt confident the Allies would not achieve a level of operational efficiency that would allow them to effectively exploit the supremacy in the seas along both of Italy’s coasts. History showed that he was correct in that assessment, but Rommel’s transfer to France was not a sure thing. Hitler actually tried to send him back to Italy, to take full charge there, shortly after Rommel had gotten on a plane to fly to France. Radio communications temporarily failed, and by the time Hitler’s communications people got that all sorted out, the dictator had again changed his mind and kept Kesselring in place.
Further, the fact Kesselring was shown to have been correct does not mean Rommel was necessarily wrong – and there’s a fun-to-play wargame inherent in that iron.
Grant: What is important from the overall period and setting to model in the game?
Ty: The opening of the campaign, in September 1943, is filled with opportunity – but also fraught with peril – for both sides. At the start of play, there are only a few German garrison units in the far north of Italy, while the 10 (mostly elite) divisions of their Tenth Army start off-map to the south, where they just received Rommel’s order to run north. There are no Allied units setup on the map at all. They enter on the south edge during the first turn, and both players operate using the sequence below.
5.3 Allied Reinforcement & Replacement Phases
During these phases, the Allied player may bring onto the map newly arriving units and reclaim into play units that had been previously eliminated in combat. This phase is skipped on Turn 1.
5.4 German Reinforcement Phases
During these phases, the German player may bring onto the map newly arriving units and reclaim into play units that had been previously eliminated in combat. This phase is skipped on Turn 1.
5.5 Movement & Combat Sequence Determination Phases
In each of these phases, excluding that of Turn 1, the Allied player openly declares whether that turn’s movement phase or combat phase will be taken first. On Turn 1 the sequence is always the movement phase followed by the combat phase.
5.6 Alternating Actions Movement or Combat Phases
Always starting with the Allied player, the two players alternate either launching one attack or moving one unit, depending on whether the present phase is movement or combat. Individual attacks may have more than one attacking unit in them, but moves are always made one unit at a time. The unit(s) committed to those “actions” are, upon their completion, flipped over to show their disrupted sides. If a player does not actually want to make an attack or a move when it is his time to do so, he must flip one unit to its disrupted side, just as if it had moved or launched an attack: no “passing” is allowed.
5.7 Movement or Combat Recovery Phases
A movement or combat phase continues as described above until both players are out of undisrupted units or both agree they want to end the phase. If one player runs out of undisrupted units before the other, the player with remaining undisrupted units may go ahead and complete whatever actions he wants to perform with them within normal strictures, but now uninterrupted by having to pause to allow the opposing player to take an action. When a combat or movement phase is ended, both players should cooperatively turn over all disrupted units on the map so their undisrupted sides are and showing.
5.8 German Supply Check Phases
In each of these phases, both players should cooperatively look over the map to find if there are any German units out of supply. Each such unit is immediately removed to the dead pile.
5.9 Allied Supply Check Phases
In each of these phases, both players should cooperatively look over the map to find if there are any Allied units out of supply. Each such unit is immediately removed to the dead pile.
5.10 Ending & Starting Turns
Each time a Allied Supply Check Phase has been completed, advance the Turn marker one box on the Turn Track printed on the mapsheet and start a new turn with Phase I.
On the first turn, the Allied player has a relatively open front before him. If he can exploit that to get into the Po Valley quickly, he will move the strategic timetable significantly forward of the historic one. However, as he’s moving onto the map, so too it German Tenth Army. Depending on how bold both players are, it is not unusual to see pockets form inside other pockets.
Grant: How has this design changed since its original publication in 2021 in Banzai Magazine under the title Rommel’s Last Stand: Italy 1943-44, What If?
Ty: The new publisher has fixed the (scant) errata from the first (bilingual) Japanese edition from Banzai Magazine. They have also taken all the Japanese off the map and out of the rules, presenting everything fully in English. Other than the removal of those irritants, it is the same game.
Grant: What is the scale and force structure of units used for this design?
Ty: Each hex on the map equals 5 miles (8 km) from side to opposite side. Each full turn represents 2 weeks to 2 months, depending on the time of year. Every ground unit represents a regiment, brigade or division of about 2,500 to 12,000 men and/or 50 to 350 armored fighting vehicles.
Grant: How many maps are used in the game?
Ty: There is 1 large-hex based 34×22” map showing Italy north of the line of the Arno River to Ancona.
Grant: What is the anatomy of the counters?
Ty: The units are standard-classical in their data presentations, except their movement factors are not printed on them. All Allied units have (supplied) MF’s of 16 throughout the game, while the German MF’s are as follows.
German Mechanized Units Turns 1-6 – 16 MF’s
German Non-Mechanized Units Turns 1-6 – 8 MF’s
German Mechanized Units On Turns 7-10 – 12 MF’s
German Non-Mechanized Units On Turns 7-10 – 6 MF’s
Grant: What sources did you consult for the Order of Battle?
Ty: The Armies of Rommel by George Forty was an excellent source for the subtleties in the initial German Order of Battle. Beyond that, I pulled the roughly half-dozen historical Italian campaign games off my shelves and pulled information out of them. This is one of the most thoroughly simulated campaigns in the hobby, going all the way back to Avalon Hill’s Anzio, so I was not looking to find any heretofore undiscovered anomalies in either sides’ OB. The uniqueness in this game’s treatment of it comes from the changed strategic context combined with the tension inherent in the turn sequence, which requires both players to remain alert for sudden danger or fortuitous opportunities all throughout its play
Grant: How does combat work?
Ty: Combat is always voluntary and, when viewed on a battle-by-battle basis, is standard/classical odds ratio using a six-sided die.
Grant: What are the victory conditions?
Ty: Operating in conjunction with the alternating-actions turn sequence, the victory conditions are a further element I used to keep both players on the edges of their seats at all times. See below.
4.1 In General. The Allied player is on the offensive, trying to win by advancing fast enough to cause a major disruption to the historic timeline.
4.2 Allied Victory During 1943 Turns. If Phase 9 of Turn 1 or 2 or 3 or 4 ends with Venice or Milan or Trieste, or any one or more of the four German supply source hexes, occupied by an Allied unit or stack, that game ends at that time in an Allied victory.
4.3 Allied Victory During 1944 Turns. If Phase 9 of Turn 5 or 6 or 7 or 8 or 9 or 10 ends with any one or more of the four German supply source hexes occupied by an Allied unit or stack, that game ends at that time in an Allied victory.
4.4 German 1943 Sudden Death Victory. If any movement or combat phase of a 1943 turn ends with the German player having gained control of the containing the Allied Amphibious Invasion Beachhead marker, the games ends in a German victory at that time.
4.5 German 1944 Sudden Death Victory. If any movement or combat phase of a 1944 turn ends with one or more German units in any hex(es) on the south map edge, that game ends in a German victory at that time.
4.6 German End-Game Victory. If Phase 9 of Turn 10 ends without the Allied player having achieved a victory, the game ends at that time in a German victory.
The “White Dragon Game Designer” dressed as a samurai.
Grant: What are you most pleased with about the design?
Ty: As I mentioned above, the Italian campaign has been one of our hobby’s most thoroughly plowed fields for decades. Despite that, I believe I have offered a new experience with it here. Players will get a new slant on it, one that operates within the broad parameters of the war’s historic decision-making, but that is also tense and entertaining for both commanders.
I also hope its appearance in an easily available all-English edition may lead this and other publishers to look into acquiring the rights to other of my designs that have so far appeared only in East Asia (where I am affectionately known as the “White Dragon Game Designer”). I have done several games that have been well-received there, but are barely known here in the West.
Grant: I know you are a busy man with game design projects as well as editing for various wargame magazines but what other games are you currently working on?
Ty: I am presently working on this alternative history design, which is scheduled to appear in World at War No. 130, called Stalin’s Missed Opportunity: What If He Invaded Romania in May 1940?.
PHALANX does some really great games and they have 2 new games that have recently been placed on pre-order in a 2-pack called Pacific War Games (you can order them separately). This package includes 1943: Race to Rabaul designed by Volko Ruhnke and Tora Tora Tora! designed by Wataru Horiba. I have reached out to Volko Ruhnke to discuss his 1943: Race to Rabaul, which is part of the Keep ‘Em Rolling Series of logistics focused wargames that includes titles such as 1944: Race to the Rhine and 1941: Race to Moscow, and he was more than willing to share.
If you are interested in 1943: Race to Rabaul, or its sister game in the Pacific Wargames package called Tora Tora Tora!, you can pre-order copies on the Gamefound pre-order page at the following link: https://gamefound.com/en/projects/phalanx/pacificwar-games
Grant: Volko welcome back to the blog. What is your new upcoming game 1943: Race to Rabaul?
Volko:1943: Race to Rabaul will be the next volume in Phalanx Games’ “Keep ‘Em Rolling” Series, following up on 1944: Race to the Rhine and 1941: Race to Moscow. Also set in World War II, this time you are supplying forces moving and fighting across the South Pacific–with the twists that players are fighting each other and have to manage sea, air, and land operations.
Grant: You have designed logistics focused games in the past such as the Levy & Campaign Series. How has that experience lead you to the Keep ‘EM Rolling Series?
Volko: I’ve always enjoyed wargames that include placing, moving, consuming, destroying actual supply bits on the map–going back at least to The Gamers’ Standard Combat Series AFRIKA. In Levy & Campaign, I wanted to show that for medieval campaigns, in a simple enough way to be fun rather than tedious. When I later played 1944: Race to the Rhine, I saw that that design accomplished that very well indeed, even made it the focus of play. So I was hooked.
Grant: How did this opportunity come to you?
Volko: Two Septembers ago, I was in Prague for Czech Con hosted by Levy & Campaign Žižka designer Petr Mojžíš, where I got to meet Phalanx co-owner Jaro Andruszkiewicz. He invited me to do a design with his company. I at once knew that it had to be something in their “Race” series. Via my research for Coast Watchers from GMT Games, I already had become fascinated by Japanese logistical challenges and Allied counter-logistics strategy in the South Pacific. So the fit seemed a natural.
Grant: What sources did you consult to get the historical details correct? What one must-read source would you recommend?
Volko: I had already done a lot of reading for Coast Watchers. The source that really laid out the Japanese perspective on their difficulties in reinforcing the front line was Kengoro Tanaka’s Operations of the Imperial Japanese Armed Forces in the Papua New Guinea Theater. I also picked up Breaking the Bismarcks Barrier, an official US Navy history of the campaign. My favorite general Pacific War history source is Ronald Spector’s Eagle Against the Sun (as I briefly had the opportunity to study history under Professor Spector at George Washington University.)
Grant: What is your overall design goal and thesis for Race to Rabaul?
Volko: In the South Pacific of 1943, the Allies were far more savvy than just piling their firepower and men directly against the well-fortified Japanese positions. Instead, they wore them down with air strikes over time, while blockading them by air and sea. The key challenge to the Japanese defense was the inability to get enough supplies and men through the growing Allied air and then sea superiority to reinforce–and even just feed the Japanese forces holding the line. In1943: Race to Rabaul, you manage that logistical and counter-logistical struggle on each side.
Grant: How tough was working within the constraints of an existing system?
Volko: I find it easier overall to start with an existing system that I know works and build from there (as I did with classic-CDG Wilderness War and the scenarios and C3iMagazine campaign that I’ve done within Combat Commander). The key challenges for me in bringing the Phalanx “Race” system to the South Pacific were expanding it to opposed play necessary to capture the critical counter-logistical aspect – and to a maritime environment – sea, air, amphibious and land warfare – all with the eye to adding just a dose of added complexity.
Grant: How does the vastness and remoteness of the pacific affect logistics? How did you model this?
Volko: The environmental problem that the Japanese faced and the Allies exploited in the South Pacific was that nearly all logistics came by sea, so air interdiction ruled. There were land campaigns in New Guinea’s interior. But the jungle and ridge terrain there required air lift or coastal transport to build up. And by 1943, the Allies increasingly dominated the air war. Race to Rabaul requires you to move your troops, ammunition, and food across sea–you can’t just march your corps forward. For the more constrained Japanese, that means launching Convoys that the Allies might detect and strike.
Grant: What was most important to model in the game? What about inter-service rivalry?
Volko: That Japanese challenge moving anything and the Allied effort to stop it is most characteristic of the design. But perhaps its most impactful addition to the “Race” system is opposed combat. Rabaul taps the same principle of counting supply bits to determine combat outcomes. But with 2 opposed players, playing cards to hope to out wit each other, as well as land and amphibious attacks, the combat subsystem in this volume is necessarily more involved. For non-wargamers, that is probably a hindrance. But for wargamers, it may make Rabaul even more up their alley than the earlier games. Inter-service rivalry comes to the fore in Rabaul when you have 3 or 4 players. Each side has two Commander roles, “racing” along either the east or west half of the map. Each represents the Japanese or Allied army or naval dominance of the New Guinea and Solomons campaigns, respectively. Whichever player (not side) reaches its goal first wins the game–so you can choose to cooperate with the other Commander on your side or not!
Grant: How does the logistics support differ between the Allies and the Japanese?
Volko: I’ve mentioned the Japanese use of Convoys and Allied Convoy Strikes above. The Allies have that easier–their abundance of transports is assumed wherever they have Air Cover. The problem is that they must take ground and build Air Bases to extend that Air Cover and Convoy Strike range forward. The Allies also get more abundant Men &Material–generally more bits per action at their Supply Bases than the Japanese get at theirs. But, as in the earlier “Race” games, here the Allies must work their Logistics Level up to add to that capacity. The Japanese also have an advantage stalwart austerity in feeding their troops: the Japanese, unlike the Allies, never lose their last Troops piece in a space due to lack of Food, they garden!
Grant: What was the process of taking a series designed for land based campaigns into one involving amphibious supply and operations?
Volko: I had to add some complication to show the maritime environment. Instead of one type of connection between spaces, Race to Rabaul has Land, Sea, and Straight. Instead of just Trucks (and in Moscow Trains), Rabaul has Japanese Freighters, Destroyers and Barges and Allied Landing Craft. Because you have to transport soldiers not just supplies across water, Rabaul has Troops bits instead of Fuel, and Troops become key to feeding requirements, building Air Bases, fortifying, and, naturally, combat. Allied amphibious landings can be disastrous if defeated with the sea at their backs. And air power looms far larger int he naval environment, with Commanders controlling up to 6 Air tokens instead of Rhine’s 1 each.
Grant: What other challenges does each side face in obtaining their goal?
Volko: The Japanese defenders are essentially playing for time, as each Logistics step that the Allies need to trigger will award Japanese medals for holding the Bismarcks Barrier. But just those Japanese medals probably won’t be enough: the Japanese Commanders need to find openings to strike and cause Allied Troop losses as well. That takes timing and will cost Japanese Men & Material or Air tokens–possibly accelerating the Allied drive that will break the Bismarcks Barrier and stop those medal awards for good. The Allied attackers need to manage the troops, supplies, and cards to take Japanese positions efficiently to reduce the number of enemy medals for those Logistics steps. But rushing too much will result in risky attacks–even a potentially disastrous failed invasion–not to mention exposure to Japanese Banzai counterattacks. Pushing Allied Men & Material forward needs to occur even while the Allies keep up the pressure on Japanese convoys and bomb Japanese positions to counter their defensive buildup and digging in.
Grant: What is the layout of the game board and the purpose of the different boxes?
Volko: The board shows 2 tracks, in effect: MacArthur (green player) is racing up the New Guinea coast on the west half, while Halsey (blue) is racing up the Solomon Island chain on the east. These work like the colored areas in the earlier “Race” games, except that each track has a human opponent trying to stop you: Imamura (gold) against MacArthur, and Kusaka (white) against Halsey. The various boxes serve as pools for each side’s Men & Materiel bits and Fleets of Convoys or Landing Craft. Boxes also track what is just temporarily removed or spent rather than out of play (off the board). An Allied Logistics track works very much like those in the earlier games, showing how much each Allied Commander has developed the logistical infrastructure, affecting how many M&M they get per action, how many Air tokens they have, and how many cards they hold.
1943: Race to Rabaul game board art by Donal Hegarty.
Grant: What is the general Sequence of Play?
Volko: The Sequence of Play is quite basic–first the Japanese take actions, then the Allies do. As in the other games, Commanders each get 2 core actions from a menu, plus Bonus actions from cards, in this case at most 1 of the latter.
But before each Japanese turn, there is a free Delivery step in which Convoys drop off cargo. That wrinkle in the sequence means that (mostly) there will be an Allied turn in between Japanese Convoy Launch (an action) and Delivery, so a chance for the Allied players to strike the Japanese ships. The exception is certain Japanese Bonus action cards representing particularly successful “Tokyo Express” runs and the like. Logistics steps, when (mostly) the Allies trigger them, always occur after Allied actions. There are a couple Japanese cards that can force a Logistics step, representing intervention by Japanese fleet commander Yamamoto. Victory is instantaneous, whenever any Commander takes their 12th medal or–far less likely–a Japanese Supply Base such as Rabaul falls.
Grant: How many players is the game designed for?
Volko: The game handles 2, 3, or 4 players. We always have Japanese and Allied players opposing each other, as both logistics and counter-logistics feature. With 4 players, each takes a Commander: the 2 Commanders on a side can help each other with longer-range strikes and intelligence, or they can withhold help or even sabotage each other if their ally is pulling ahead and getting too close to winning. With3 players, one takes both Commanders on a side and must win with both, facing 2 players each as a single Commander. The single player can be either on the Japanese or Allied side, either works. With 2 players, you can either each command a side–the 2 Japanese Commanders versus the 2 Allied–or you can pick either half of the map–New Guinea alone or the Solomons–and play a shorter game with just 1 Commander each side.
Grant: What different commanders do players have a choice to play as? How do they differ?
Volko: The paired Commanders personify not only the conditions in New Guinea and the Solomons, respectively, but also the bureaucratic friction between Army and Navy on each side.
-MacArthur in New Guinea is also the theater commander so gets say in any internal Allied dispute such as order of actions. As an Army General, he has more land assets such as Artillery cards and a related Special Ability to redraw them, more suitable anyway to the New Guinea “track” that involves some interior fighting. Also, MacArthur alone can use Airdrops to seize jungle airstrips.
-Halsey in the Solomons has more Naval Shelling, Cruisers against Japanese Convoys–also his Special Ability–plus Guerrillas but correspondingly less Artillery and attack Divisions. Halsey late in the campaign needs to be the most careful not to get the last of his Divisions beaten up and withdrawn.
-Facing MacArthur, General Imamura represents the overall Japanese Army’s focus on New Guinea and the overall Japanese priority on that axis over the Solomons chain–so that player is the senior partner on the Japanese side. Imamura has more Troop and Ammo unit cards at his disposal and a Special Ability that can redraw them. He has his own Bonus action cards like Supply Road and Barge Assault.
-Admiral Kusaka facing Halsey has an edge in Carrier Pilots–his Special Ability–naval advantages like Long Lance torpedoes, but also the defensively crafty Army General Sasaki, who held up the Allies bloodily on New Georgia.
Grant: How is victory achieved?
Volko: As in the other “Race” games, capture of a Supply Base–here an Allied Commander advancing to either Rabaul, Madang in New Guinea, or Kavieng in the islands–ends the game immediately in an Allied Commander win. But, as in those games, that rarely will occur: the main way to win is to be the first of the 4 Commanders to gather 12 medals along the way.
Grant: What different scenarios are included?
Volko: The game includes 4 scenarios, each of different length. They all end with capture of a Japanese Supply Base or with a 12th medal. They run different play lengths by starting at later and later points in the South Pacific campaign:
-TheFull Campaignbegins with the Japanese still to make their final push on the Kokoda track and Guadalcanal in late 1942. The Allies must battle their way to Buna in Papau before heading up the New Guinea coast, while throwing the Japanese off Guadalcanal before driving up the Solomons chain.
-CARTWHEEL begins with the Allies preparing their historical 1943 drive to conquer or encircle Rabaul. Buna and Guadalcanal are cleared and serving as Allied bases, but the great Allied offensive has not yet launched.
-POSTERN begins with MacArthur primed for the historical September invasion to capture the Japanese New Guinea base of Lae and Halsey’s forces having just fought across New Georgia in the central Solomons.
-Finally, CHERRY BLOSSOM is a small learning scenario for just 2 players on the Solomons half of the board, representing the moment that Halsey is about to invade the Japanese bastion island of Bougainville.
Grant: What do you feel the game models well?
Volko: Phalanx’s “Race” system does so well highlighting the need to gather and push supplies forward in a mobile mechanized campaign–especially one in which the defender is largely on the run. Race to Rabaul I hope similarly succeeds in showing that the overwhelming Allied logistical edge over the Japanese in the South Pacific by 1943 was alone not enough against tenacious, dug-in defenders. The Allies succeeded as they did by smartly targeting Japanese logistics first, and only then throwing ground forces at the enemy bastions. To me, this design makes that counter-logistics approach vivid. I hope players will agree!
Grant: What are you most pleased about with the design?
Volko: I’m pleased with how the one-sided “Race” concept ported here to a full wargame, force on force, and that some added map features, pieces types, and combat rules brought the Phalanx system to “tri-phibious” warfare. The game is more complicated than either 1944: Race to the Rhine or 1941: Race to Moscow, to be sure, but remains more accessible than my usual design space such as Levy & Campaign or Recon Series. (I think so, anyway.)
Grant: What other designs are you contemplating or already working on?
Volko: Jaro of Phalanx, who commissioned this design from me, and I have chatted back and forth about a wide range of settings for a possible next “Race” volume from me. I have a good idea what that would be, if players end up digging Rabaul. But it would be premature to raise particular expectations as yet.
Thank you for the intriguing questions!
If you are interested in 1943: Race to Rabaul, or its sister game in the Pacific Wargames package called Tora Tora Tora!, you can pre-order copies on the Gamefound pre-order page at the following link: https://gamefound.com/en/projects/phalanx/pacificwar-games
I know it is now June….I am usually done with this post by mid-March but this year we had a bunch of great games that came out in November and December and we just had to get several of them to the table before we shut 2025 down. Our opportunity to do so with full tables as there were several multi-player games in that bunch, was during Buckeye Game Fest in mid-March where we played lots of great games including Werwolf: Insurgency in Occupied Germany, 1945-1948 from Legion Wargames, Cross Bronx Expressway from GMT Games and Imperial Elegy: The Road to the Great War 1850-1920 from VUCA Simulations to name just a few. And now, with those final games getting played, comes the impossible task of distilling an entire year’s worth of gaming down to a list of the 10 games that we most enjoyed. I hate doing this. I love writing about, thinking about and sharing my experiences about the games we have played but hate having to make somewhat objective choices about which is better and which games should even be considered for the list. The first comment I would have is that not all games are the same. Not the same scale, the same play time, the same mechanically or even historically. Each game is unique and in my opinion, all games have something objectively good about them. Secondly, we didn’t get around to playing some of the new releases in 2025. I say some but we actually didn’t play a lot of the new releases and did the best that we could to play as many as possible. So we might leave off a game that you thought was very good and deserving and it probably is but we either didn’t get around to playing it or it just didn’t hit with us. But, in the end, I have to make this list and this is my best effort at doing just that!
In 2025, we played 33 unique titles from 22 different publishers. Some were operational, strategic or tactical scale and in the list this year I didn’t include any solitaire games. Some used counters. Some used cards. Some used wooden bits and some used miniatures. Some were only card games with no other components and some were cooperative. At the end of the day, in 2025 we played a lot of games! And here I present to you my list of the Top 10 Wargames of 2025!
10. China’s War: 1937-1941 from GMT Games
This is a game that I have been awaiting for a long, long time. Really since it was announced nearly 7 years ago in 2019. Yes you read that right…2019! And I am happy to report that the wait was definitely worth it as the game feels fresh and is a very worthy addition to the COIN Series. China’s War: 1937-1941 from GMT Games, which is volume 13 in the well respected and venerable COIN Series, examines the first five years of the 2nd Sino-Japanese conflict, when China stood alone against the whole of the Japanese Empire. Each player takes on the role of 1 of 4 Factions seeking to attack or defend the Republic of China including the aggressive and powerful Japanese, the harried Government represented by the Guomindang party, the rebellious Chinese Communist Party, or the unruly and fractious Warlords who are obedient when convenient but have their eye on gaining state power. Using military, political, and economic actions and exploiting various events, players will build and maneuver forces to influence or control the population, extract resources, or otherwise achieve their Faction’s goals and victory conditions. As with all COIN Series games that are Card Assisted rather than Card Driven Games, the deck of cards will regulate turn order, inject historical events into the game with major benefits or consequences, cause victory checks and other in game processes.
China’s War feels like a classic COIN Series game but in my opinion has 3 insurgent style factions against the powerful Japanese who don’t really act like the large Government factions in previous entries in the series. The focus really centers on the control of the Lines of Communication or LoC’s on the game board, which was a very refreshing approach that created some really interesting interplay and caused me to think differently about how I would go about achieving my Victory Conditions.
We find that Brian Train’s designs are just fantastic. I think that sometimes they can be a bit opaque, meaning that their true genius cannot be seen with just a few plays but will be unlocked over 4 or 5 plays as we have found with A Distant Plain, which has continually moved up on my list of favorite COIN Series games with each play that now numbers around 5. But China’s War was just special. It is totally unique as to its take on insurgency within the COIN Series, is really frenetic and active and gives the feeling of classic COIN while really turning things a bit upside down with the way the powerful faction works in the Japanese as they really only care about maintaining and cleaning off their Lines of Communication. In fact, they are so unique that they are the faction that will place Terror on the board, which is typically reserved for the insurgent factions to sway Support and Opposition.
We very much enjoyed the game and had a good time with it. We had a newer COIN Series player and they seemed to take to the game quickly and understood what it was that they were supposed to be doing. With that being said, with only the 1 play, I am sure that there are lots of things that we didn’t experience and will be able to discover those in future gaming opportunities. Suffice it to say that we can’t wait to play the game again and I am planning to bring this one along with me to the World Boardgaming Championships at the end of July.
We recently shot a First Impression/review video and you can watch that at the following link:
9. Imperial Elegy: The Road to the Great War 1850-1920 from VUCA Simulations
This spring, while attending Buckeye Game Fest in Columbus, Ohio, we were able to coordinate a 6-player game of Imperial Elegy: The Road to the Great War 1850-1920 from VUCA Simulations. Imperial Elegy is a card driven game that blends diplomacy, warfare, and statecraft and feels a bit akin to games like Here I Stand and Virgin Queen from GMT Games. Grand scale sweeping epics that play multiplayers and take a day to play. Players play as 1 of 6 unique major powers in the game including Germany/Prussia, the United Kingdom, France, Austria-Hungary, Russia and the Ottoman Empire.
Imperial Elegy is a fantastically themed game that takes place over 7 turns, with each of the turns representing approximately a decade. If the Great War breaks out due to the World Tension Track reaching a certain level, the game can be extended by an additional 6 shorter turns. A turn in the game consists of player impulses that is driven by the play of action cards for their Command Points or for the printed events. Players will use CP and events to take actions like colonize, conduct diplomacy with minor nations, fight wars, as well as hinder their opponents by playing events that take away their actions or resources. A turn will end once all players have consecutively passed or when all players run out of cards.
The game is somewhat of a sandbox style game as you have so many options and choices about what to do during the course of the game. Obviously, your faction has some direction about what you should be doing but really it is up the player to spend their resources how they will to accomplish their ultimate goals and score Victory Points. I truly love that aspect about this game and as we played we saw that sandbox and the asymmetry between the various factions. Particularly at the start, each country has some specific goals that they have drawn from the National Goals Deck that are a source of Victory Points, in fact a major source of Victory Points, and players will need to prioritize these cards and decide which ones to attempt to go after from the start. With only 7 turns, they will have to make progress on these National Goals if they have any hope of actually achieving them.
Each of the represented nations in the game have their own special player board that contains various tracks that keep various information readily available to the players. Here is a look at the German player board. I very much enjoyed that they have gone to a great deal of effort to make these player boards and also that they gave each of the nation’s Stability, which decides whether various actions like war can be taken or if there are various positive or negative modifiers, the available Manpower that will determine how many armies can be built, Industry that tells how many action pointed you will have to spend during war to maneuver units, attack and replace losses. The focus of the game is about the control of territories both in Europe as well as colonies abroad and there is an automatic victory if a certain target number is met, in the case of Germany 15.
As we played, I started to realize that the key focus of the overall world stability and things like the Domestic Stability Tracks, which are focused of both the internal and external pressures faced by the powers. I really very much liked this thematic inclusion as no one wants to start a major global conflagration and there are steps that players have to take to skirt the inevitable troubles that result in their own actions and how they are seen by the other players in the game. But in our limited play, I never really felt threatened by this concept. Either our group was super skilled at avoiding the inevitable increase in tension or due to our short play we didn’t really experience some of the events that would have tipped this over the edge. I think that we say small increases in our full turn play but nothing that seemed unmanageable and we actually had an event that lowered it so it never became an issue. The game is about spending your resources wisely, in the form of your cards and your aspects like Stability, and to use your cards to do the events that could increase tension didn’t seem to be in our best interest, at least not in the 1st decade of the game. But maybe that will come later.
8. An Impossible War: The First Carlist War in the North, 1834-1838 from Bellica Third Generation
Earlier this year, I was able to host Francisco Ronco at my home to play a few games together. One of the games we played was published by his company Bellica Third Generation and was called An Impossible War. An Impossible War: The First Carlist War in the North, 1834-1838 is a block wargame that recreates the First Carlist War in the North of Spain which was a civil war between the Carlists who supported the succession of the late king’s brother Carlos de Borbón and the progressive and centralist supporters of the regent Maria Christina acting for Isabella II of Spain who were referred to as the Liberals. The game uses blocks representing units but also includes counters and uses cards.
An Impossible War is a fantastic design that attempts to capture the historical aspects of this titanic struggle for the throne of Spain in the mid 19th century. Historically, the Carlist forces who were defenders of traditional monarchy, regional privileges, and the Catholic Church, were a minority faction fighting an overwhelmingly larger, richer liberal government. The uprising phase reflects how the Carlists compensated for this disparity by forcing the Liberal government to fight on multiple fronts and suffer from logistical nightmares across hostile terrain. The Carlist Uprising Phase, and the use of its auxiliary Rest of Spain regional map, forces some really tough dilemmas on the Liberal player. They must attempt to divide their forces between the main Game Map and the Rest of Spain Map to prevent the opposition Carlist forces from overwhelming the home territory in the north. It serves as a vital strategic balancing act for the Liberal player that cannot be ignored and must be dealt with systematically and somewhat evenly. Too much focus on the Rest of Spain Map and the situation on the Game Map will quickly snowball and they will lose control. Focus on the situation on the Game Map and the protection of Cities and Towns and the Carlist Expeditions will gain momentum and turn the countryside red. While the primary war centers on the rugged terrain of northern Spain (Navarre and the Basque Provinces), the uprising mechanic abstractly models scattered insurgencies across the rest of the country. And as you know, insurgencies can be very unpredictable and difficult to contain. You stamp out one area only to see a fire start in another. The Liberal player must divert troops and supply resources to the secondary map to quell these localized rebellions and hunt down Carlist expeditions originating from the north. And, the important thing for the Carlist player and the expansion of the uprisings and the success of their expeditions is the possible generation of generation of Prestige and Victory Points, which is really crucial to their path to victory.
I very much enjoyed the asymmetry between the Carlist and Liberal forces in the game. It made for a very interesting tactical challenge for both sides as they have to play to their strengths and not get too overly concerned with the numbers. The Carlists will be much more mobile in their defense and look to exploit every gap in a supply line to move around and stay away from the numerically superior Liberal forces, whereas the Liberal player will have to move more methodically to take outlying towns and settlements to be able to shore up their lines and create less opportunities for end arounds by the Carlists. The disparity in the forces was a very interesting choice by the designer David Gómez Relloso and I am sure is reflective of the historical reality of the First Carlist War.
I very much enjoyed An Impossible War, even though I played just a few turns of a smaller scenario with Francisco Ronco. He was a master at the game, as obviously as the publisher and a playtester he is intimately familiar with the rules and strategies, and I learned a lot from him about how the game should be played. I am looking forward to future plays as the game is just very good and has some interesting aspects that create a very tense and interesting game of maneuver and strategy. The Game Map is very well done, from an aesthetic perspective as well as functionally, and the board makes playing the game easier.
I also was able to shoot a fairly short video summary of my game play with Francisco Ronco who is the owner of Bellica Third Generation and you can watch that at the following link:
Also I have embarked on a series of written Action Point post highlighting the various aspects of the game. Those published to date are as follows:
If you are interested in An Impossible War: The First Carlist War in the North, 1834-1838, you can purchase a copy for 120,00 € ($139.08 in US Dollars) from the Bellica Third Generation website at the following link: https://bellica3g.com/en/product/una-guerra-imposible/
7. Blue & Gray Deluxe Edition from Decision Games
If you like classic wargames, and by that I mean simple I Go You Go Hex and Counter games from the 70’s and 80’s, then you are going to love Blue & Gray Deluxe Edition, which is a new updated version of 2 classic quadrigames from SPI covering several key battles from the American Civil War. Blue & Gray Deluxe Edition consists of the original eight games from the SPI Blue & Gray I & II Quadrigames but with massively upgraded components and counters and some better written rules. The key battles depicted are among the most important of the American Civil War and include Shiloh, Antietam, Fredericksburg, Chancellorsville, Gettysburg, Chickamauga, Chattanooga and The Battle of the Wilderness.
The Deluxe Edition part of the title is really just a few changes including a mounted board that is really gorgeous and pretty sturdy. The counters have been slightly enlarged and there are a few additional optional rules including things like night turns, fatigue, leader casualties. There also were some optional unit counters that could be used but overall this was an artist and layout reissue of the game with some other nice additions such as period fonts and a very solid choice of colors for the maps and the counters as they really compliment each other well. But the game is really extremely playable meaning that is doesn’t take long to pick up the rules and the system is very standard fair. The game mechanics used are based on the Borodino/Napoleon at Waterloo system and frankly are very easy to grock and to get into. I did very much like the back and forth of the scenarios as the players will tend to clash over control of certain key areas that have defensible terrain and that are only approachable from a few areas. But the game does have a few concerns for me such as generally no fog of war and no difficulty in activating any and all of your stacks. But that is what the system is and it will truly appeal to those that are looking for that nostalgic feeling from their childhoods.
But it plays well, fast and is solid and any good solid wargame is good with me.
6. Fighting Formations: US 29th Infantry Division from GMT Games
One of my favorite tactical systems of all time is Combat Commander designed by the late Chad Jensen. I had yet to play his other tactical combined-arms series called Fighting Formations until the newest release came out in 2025 called Fighting Formations: US 29th Infantry Division. Fighting Formations is intended to be an ongoing series of wargames covering WWII tactical combined-arms combat at the platoon and squad levels. Each game in the series will feature a distinct combat unit, highlighting battles in which that unit participated as well as its particular order of battle and fighting characteristics. In this second volume of Fighting Formations, GMT features the US 29th Infantry Division—“Blue and Gray”—as it fought from just after D-Day in June of 1944 to the end of the year.
The core mechanics from the original Fighting Formations remain unchanged in this volume. The difference from the original game is in the way the units will fight. The different costs on the matrix place an emphasis on certain actions and assets for the 29th ID that were different than the others games way of approaching a battle. This game is far from Combat Commander though as it uses cards but they are not the engine of the game. The game also has a very interesting and unique activation system where each of the orders cost a different amount of Initiative and tuns into and impulse-type back and forth where the various Orders carry with them a certain cost in Initiative. The game has a pool of 40 Initiative that is spent to give these orders and then to activate units for those orders. At the end of every order, the player with the most Initiative is able to give the next order. In response, the opponent can also spend Initiative to conduct both Opportunity Fire or Reactive Fire which keeps the game very dynamic and fluid. Just a really great way to approach this and if you have played Downfall from GMT Games you will notice similarities with the system.
The game also tells a great narrative of the differences between the US and German troops as the 29th had access to more battlefield support than their German counterparts and the card deck is tailored to that experience as well. The US player in the new game has access to more cards and at lower initiative costs, bringing artillery and air support to the forefront in a way that we have not seen before.
We did a RAW video after our 1st play and you can watch that at the following link:
The Rock of Chickamauga is the 2nd entry in the Black Swan Series from Flying Pig Games designed by Hermann Luttmann and follows closely on the heels of A Most Fearful Sacrifice. Using the same game system, which is based on the well received Blind Sword Series, The Rock of Chickamauga covers the entire Battle of Chickamauga, fought from September 18th through the 20th, 1863 in northern Georgia. The Union Army of the Cumberland, under William Rosecrans, is driving south from Chattanooga, hoping to envelop and trap Braxton Bragg’s Confederate Army of Tennessee. But Bragg anticipates the maneuver, pulls back and then counterattacks the overextended Union forces. They meet along Chickamauga Creek, nicknamed the “River of Death”, in an epic struggle.
The Black Swan Series uses a card-draw activation system that functions similarly to a traditional chit-pull system. This system is a core mechanic for introducing uncertainty, friction, and the fog of war into the gameplay. The cards themselves contain specific game information and orders, which streamlines play and reduces the need to look up rules or charts, saving time compared to traditional chit-pull systems.
I also very much liked how the confusion and true fog of war that existed at the battlefield was included in the game play. Not only do to the commanders’ lack precise information about their opponent but also the physical nature of the battlefield. Both sides basically went into battle stumbling and bumbling through the woods, searching out what they thought was the enemy’s flank and actually being way off in their assumptions. The woods themselves were so uniquely characteristic in that they were mostly thickly grouped with little undergrowth (being cleared by the local farmers and millers), but still displaying significant canopies. This canopy functioned like a tropical jungle “roof” and trapped smoke and dust within it. To add to that, there had been little rain in the area and the trails, lanes, and roads were exceedingly dry and produced clouds of dust. My main concern therefore was replicating all that confusion and ignorance of the location of opposing forces and thankfully, that’s what the entire Blind Swords/Black Swan System is modeled to reflect. Therefore, I just doubled-down on the inherent “chaos” elements of the core system and made those factors even more prevalent.
I also love how the system models the units and their fighting prowess referred to as Cohesion. The Cohesion Rating of a unit is essentially a catch-all for its morale, training and experience and includes what the unit’s intangible fighting qualities are, other than just sheer number of men. It is probably the most important aspect of the game engine as it is the key element that will determine how well a unit will fight – and survive – during the battle. It is used throughout the game to measure a unit’s ability to fight and endure on the battlefield. The CR will fluctuate during the entire game, and it will do so often. Units that are Shaken or Battleworn will have their CR suffer. Units can also raise their CR temporarily through the use of various events or by providing them with Unit Support. A low CR makes units more vulnerable and increases their risk during a Break Test, which will cause them to leave the game if they fail. You have to focus on this aspect or you will be unable to consistently move your attacks forward.
Just such a great system and I love Hermann’s attention to the historical details and the way he tells these ACW stories. I love this Black Swan Series and look forward to future volumes.
4. BCS Inflection Point: The Battle for Kalach and the Battle of Chir from Multi-Man Publishing
Over the past couple years, we have played a few venerated and respected series games from Multi-Man Publishing for the first time that frankly I had initially turned my nose up at for various reasons. These reasons were not really anything important or truly about the design or mechanics but included things like price, graphic design, style and somewhat because of the complexity and reputation of complexity of those systems. These series included first the Standard Combat Series (SCS) with our first game being Rostov ’41 and now the Battalion Combat Series (BCS) with our first game being Arracourt and since we have played several other volumes including Brazen Chariots and Baptism by Fire. I must admit here that I am actually embarrassed that I hadn’t played those series and readily admit that I just discounted and dismissed them out of hand. I am so very glad that we repented of our stubbornness and found this system because it really is very, very good at what it is trying to teach and demonstrate about warfare at this scale.
One of the best parts about this new volume in the series is that it is actually 2 games in the same box. One game which is smaller, with fewer counters and formations and that uses a smaller version of the board included in the game and one that is the full campaign with more counters and formations, a larger board and is much more involved. Overall, I would say that the BCS is a fairly straightforward series even for someone who is a beginner and has less experience with the BCS system like me. I think that I thought they were designing Arracourt as the entry to the series, and I still think that is the case, but this volume has some of the same flexibility and approachability that some of the larger titles don’t necessarily have. I feel that players can cut their teeth on this one using the smaller scenario while getting comfortable with the rules and system before you attempt the larger scenarior or even other larger games in the series. I also feel that the game requires somewhat of a paradigm shift before playing. What I mean by that is really two fold.
First, I really feel that usually these big hex and counter wargames are set in their combat methods, namely focused on odds based Combat Results Tables and counting up combat factors to get the perfect odds, and require a bit of calculation. But BCS doesn’t use a traditional CRT but breaks the combat down into more of a collection of DRM’s based on many factors.
Second, the game also has very low counter density, with the scenario we played having about 40 counters per side on the map at any given time, and stacking limits are just 2 combat units with other counters also allowed such as support units or HQ’s. There are not enough counters here to create the long contiguous line or wall of units that are typical in some of the larger systems, which lends this one to a bit more maneuvering of units to get into good position while using terrain to attempt to isolate and cut off units from supply or to prevent the enemy from doing the same to your units. This created somewhat of a back and forth dance for us that kept my focus and attention and was really quite entertaining. Supply is important to the system but not as focused on it as say the Operational Combat Series (OCS). The players must manage their HQ’s and their combat trains to keep their units in full supply and this becomes somewhat of a different type of dance that sees players cautiously keeping their units in a loose perimeter to prevent a freak breakthrough or run around to get to the back of the formations to take out supply sources and cut off units. I really liked the scale and feeling of this BCS system and had a very good time in trying to learn and understand it and also trying to figure out the best strategies to engage.
The counters included in BCS Inflection Point are dual sided but the back side is not to show a reduced unit as is normal with these wargames. The front side is the unit’s move side while the back side is its deployed side. Each of these stances is very important and must be used by each player to get the most out of their units and to take it to their opponent.
We also did a review video and you can watch that at the following link:
If you are interested in BCS Inflection Point: The Battle for Kalach and the Battle of Chir, you can order a copy for $112.00 from the Multi-Man Publishing website at the following link: https://mmpgamers.com/inflection-point-p-418
3. Close Quarter Battles: Waterloo from Lock ‘n Load Publishing
Close Quarter Battles: Waterloo was such a surprise of the year for us. It is a tactical level wargame that is truly intense and chaotic that attempts to, and does a fantastic job of accomplishing, the brutal, up-close engagements of Napoleonic warfare. The game puts players in command of elite British, French, or Prussian forces as they fight for control of key battlefield positions. The designer has chosen to center on the two strongpoints of the battle of Waterloo including the La Haye Sainte farm and the Hougoumont Farm. First off, the game is just gorgeous and the maps are stunning. In fact, they are so good that I am going to highlight them in an upcoming entry on the blog in the Beautiful Boards of Wargaming Series. But, the Waterloo battles here are skirmishes around and for the taking of these two farms. The game uses a grand tactical system that works to attempt to to simulate the interactions between infantry skirmishers of small groups, artillery sections and cavalry in a fortified area. This leads to the game being uber violent and bloody as assaults are common but difficult particularly for the attackers who will have to scale formidable walls and then take on the awaiting crack troops inside. Officers and generals are very important to the battle as they will influence the battlefield with their command range and other attributes to add DRM’s to the troops by issuing orders, rallying troops, and trying their best to maintain discipline.
I really like this one as it is really a game. Meaning that the rules are simple yet impactful and the game provides each of the players with a deck of cards that act as events to provide bonuses, allow for greater movement distance or to perform heroic acts. They also provide the chance to attack and eliminate leaders with sniper fire to cause even further chaos and blood.
We did a review video and you can watch that at the following link:
2. All Are Brothers: Solferino, 1859 from Legion Wargames
We very much enjoy the Blind Swords Series originally designed by Hermann Luttmann. We love it for its chaos, unpredictability and for is crunchy combat system. This past year, a new designer Bryan Armor took up the call and took this Blind Swords System and put it into action in the Second Italian War of Independence. All Are Brothers: Solferino, 1859 simulates the decisive battle of the Second Italian War of Independence at the Brigade-level, with some additional Regimental-size and smaller detachments included.
And the other part that is so good about this system and the game itself is the activation chit pull system. The chit pull mechanic also very much aids in solitaire play, as does variable activation rules and reinforcement tables but it really makes for a lot of uncertainty about how and what units will activate. No battle is in your full control and this system really reinforces that truth about the battlefield.
One of the best parts is the morale system. Each corps has an associated Corps Morale marker on the Morale Track. Each Corps Morale marker will be reduced by one when they activate including movement and fire attacks but also when Leaders take casualties or break tests are failed. This can all lead to the corps becoming demoralized which means they will be unable to offensively move and attack and will be relegated to a defensive posture. So you really have to make good choices about what units and when they will activate. You cannot just wholesale activate each formation every turn but must look at their status to decide how best to manage this aspect that was a very interesting and nice addition to an all ready proven and very good system. This means that units are also prone to attrition and need to be covered or supported by artillery fire. They can be used most effectively if massed at certain points. The chits also effected the corps’ stance switching between aggressive or defensive and this is a choice that must be made with a full understanding of a plan of attack.
Just a very solid and playable game that felt like a big wargame that played fairly quickly and easily and didn’t get bogged down too much.
We did a review video and you can watch that at the following link:
If you are interested in All Are Brothers: Solferino, 1859, you can order a copy for $58.00 from the Legion Wargames website at the following link: https://www.legionwargames.com/legion_AAB.html
1. Congress of Vienna from GMT Games
I am a big fan of the Great Statesman Series from GMT Games and several of its volumes including Churchill and Pericles are among my favorite wargames. But Congress of Vienna is a really great game, probably the best of the bunch, and has matured the system laid out by its found Mark Herman. Congress of Vienna has two different but related phases including the conference table where players first debate over the control of issues germane to the factions and the period of the war and second these issues are then used on the battlefield to recruit units, attack and take overall command of battles. The players will be playing cards from their hands to “debate” over the various issues that were placed on the table, which include all types of things such as Military Operations, Recruitment, who will lead the combined Coalition forces (Generalissimo), Future of French Government, British Financial Aid, Liberalism vs. Absolutism, Austrian Neutrality and several other issues, and then later the players will use their accumulated Resources gained from the issues to enact action on the Military Map and do things like mobilize troops, place Military Support Markers and the ultimately to conduct warfare.
The interesting thing about this mechanic is that sometimes the other players will win your issues by having them rest on their side of the conference table at the conclusion of the phase. In this case, the winning player will gain control of that issue and then will get the opportunity to choose where the issues will be placed on the Military Map, but the owner of the issue will still pay for it and must do where the placement is telling them to do, such as attack on a certain front. There also is a small area on the board where the Russian player must turn their effort to fight in Asia. This action has no real in game effect or benefit other than causing Russia to lose the choice of what they wanted to do in favor of doing something else. This can be a great tactic for the French player, or even for other Coalition players to spoil the plans of the Russian player and possibly box them out of gaining VP for military victories on various tracks.
The game relies on cards and cards can be used to negotiate, i.e. move an issue to your National Track. Cards can provide a particular issue with positive and negative DRM’s depending on which nation plays them and can also be traded with another player during the Diplomacy Phase. Certain cards are better than others for debating an issue moved by another player; and finally, if they are saved for the War Phase, staff cards can be used to modify dice rolling in battles. These are very versatile cards and the players will have to learn them and their benefits in order to be effective at the game.
But even though the game relies on cards and has an important Diplomacy Phase, without a doubt CoV is a wargame with DRM’s for units and military leaders, terrain, military support, a Casualties Table, retreat and advancing after battle, etc. However, both Phases are inversely related and if players use their Character Cards in the form of generals and military leaders for the Diplomacy Phase you will not have them available for the Military Phase. If you do not win enough issues during the Diplomacy Phase, you will not have recruiting or military operations where they are most important to your power.
I would say that the game is very involved and will take a few plays to really get comfortable with. I don’t want anyone to take this to mean that the game is overly complex and difficult to play. That is not the case. It is a very approachable system and game once you get the basics down through the play of a few turns. I would also say that there is a ton of differences and asymmetry with the nations and learning all of them well and understanding their tactics will take some time. But that is a good thing in my opinion and means that there is depth to the game and replayabilty is huge. And in my opinion, this was the best game that I played from 2025. Just fantastic!
Each year I feel compelled to tack on some games to this list just because they were so very interesting or dealt with unique settings that I feel they are worthy of mentioning. While they didn’t make the Top 10 list, they are each good games in their own right.
Alliance: Multi-Player Napoleonic Wargame from Columbia Games
All in all, we had a great time with Alliance. I think that we felt that the game was solid, with some great mechanics such as the card play and the block combat system, but was just missing some things. I would like to see what the community comes up with as far as variants and other changes over the next year. But the game delivers on its promise of a sandbox strategic level Napoleonic wargame with a focus on alliance building and maintenance. There is a lot to like and we plan to play this one again.
We also did a full video review and you can watch that at the following link:
If you are interested in Alliance: Multi-Player Napoleonic Wargame, you can order a copy for $99.98 from the Columbia Games website at the following link: https://secure.columbiagames.com/products/3221
Werwolf: Insurgency in Occupied Germany, 1945-1948 from Legion Wargames
Werwolf: Insurgency in Occupied Germany, 1945-1948 is a COIN Series adjacent game designed by Clint Warren-Davey and Benjamin Feine and is an alternate history game, but the story that is presented is entirely plausible. Werwolf was a real underground guerrilla group, comprised of SS and Hitler Youth members. It was intended to lead an insurgency against the invading Allies and Soviets when it became clear that Germany was losing the war in a conventional sense in the mid-1940’s. They did in fact have a few successes and American intelligence officer Frank Manuel said that the Werwolves were prepared “to strike down the isolated soldier in his jeep, the MP on patrol, the fool who goes a-courting after dark, the Yankee braggart who takes a back road.” The game allows players to take on the role of the occupying Soviets and Western Allies along with this Werwolf insurgency and the Edelweiss insurgency.
This game was very good and frankly was a breath of fresh air in the COIN Series or COIN Series adjacent arena. This game was very kinetic and each faction had a ton of combat and had to engage each other to accomplish their goals. The cards were fantastic and the additions to the system such as Research Tokens, Heavy Weapons in the form of leftover tanks, Wunder-waffen and the Cold War Tension Track, were really fresh and well integrated into the game play. I loved the game and would play it again in a heart beat!
If you are interested in Werwolf: Insurgency in Occupied Germany, 1945-1948, you can order a copy for $106.00 from the Legion Wargames website at the following link: https://www.legionwargames.com/legion_WER.html
Verdun from Dragon Dawn Productions
Verdun is a card game that is focused on the famous siege of Verdun during World War I. As player’s hands dwindle down as they play 2 cards per round but only draw 1, players will also have to play cards that help the other side, timing it strategically to minimize their own casualties. The teams alternate being the Attacker, and each card played leads to more and more deaths. You are fighting over positive victory points from trying to win several positions through over the top attacks that are worth a set amount of VP but that are hidden from view until they are taken so you never know if you are going for the high VP area or the low ones until you blow the whistle to initiate the attack.
A game of Verdun lasts about 16 rounds as players start with 12 cards, which they then play in a series of 12 tricks. When you win the trick, you gain the VP for the position but the winner will lose their lowest valued cards while the loser will lose their highest value cards to the dead pile representing mounting casualties. Low cards have fewer skulls on them representing deaths while higher cards have more. So even in victory you will be accumulating negative VP’s and this is one of the key aspects of the game…managing those deaths! Just like the high command.
In the end, the player with the highest score will win and this number will be very low or can even be negative. In our play of the game, my French defeated Alexander’s Germans by a final score of 3 VP to -14 VP. What a great little trick taking game! The really interesting part about the late game is that your hand has dwindled to being full of your worst cards as you have most likely used the good cards earlier to win tricks or cause losses to your opponent. The last few card plays just seem brutal and you are just hoping to not have to take a lot of skulls. This felt very fruitless and mimics the despair of commanders as they had to issue orders that they knew were not going to result in any positive gains but only the loss of life.
We did a full video review and you can watch that at the following link:
Drop Zone: Southern France from Worthington Publishing
Drop Zone: Southern France is a company-level wargame covering the Allied airborne assault that spearheaded Operation Dragoon, which was the invasion of Southern France or the Second D-Day on August 15, 1944. The history behind this operation is really very interesting as early on the morning of D-Day, the allied First Airborne Task Force (1st ABTF) parachuted a dozen miles behind the Riviera landing beaches to seize key towns and road junctions, to prevent the German occupation forces from counter-attacking the amphibious landing, and to facilitate the advance of Allied forces. The 4:00 AM parachute drop was badly scattered due to an unexpected dense fog bank that blanketed the battlefield. Drop Zone: Southern France covers the first two days of this airborne operation in six game turns, when the American and British paratroopers and glider-men fought surrounded and alone, supported only by French resistance bands. This game is very good and is just a solid wargame.
This game is surprisingly good and we had a great time playing it! There are just so many interesting elements to consider including the various operations, objectives and paths to take for the Allies to attempt to capture their objectives as planned. We found the game to be imminently playable and were very pleased with the strategy and planning required to do well. This one is a winner and I would recommend it highly as an introductory wargame that plays in 90-120 minutes but gives some real meat to chew on.
We did a full video review and you can watch that at the following link:
Chicago ’68 pits revolutionary spectacle against civil order at the Democratic National Convention riots of 1968. Players take the role of either the Establishment, consisting of the Chicago PD and Mayor Daley, or the Demonstrators, including the Yippies and MOBE, and is a fast-paced game of street battles and political maneuvers.
Each side plays from two asymmetric decks of action cards. The Establishment positions tactical forces and police platoons to co-ordinate mass arrests while working the convention floor. The Demonstrators, on the other hand, can pivot from direct clashes to radical street theater; their tactics can be reactive and unpredictable, allowing for wild cat-and-mouse chases and mischief-making across the tear-gassed avenues of downtown Chicago.
This game is an area control/area influence game that uses cards to take a predetermined set of actions that can be upgraded and replayed with better actions as the game progresses. Each player will fight for control of the delegates to the convention as well as exposure to the nation through the media. Just a very well designed game that was a ton of fun to play.
There I am finally done. My list of the Top 10 Wargames published in 2025. I had fun playing them and putting this list together as I got to revisit each of the games and think about why they were included on this list.
Please let me know what your top games of the year were and what you think of my choices and what games you would have placed on such a list.
This is a board game blog. Board games are a medium which can help us understand – for example, they can provide a uniquely active perspective on history. Yet which other medium can provide a fresh perspective on board games? – This is where novels come in handy. Today, we’re going to look at The Third Reich (Roberto Bolaño), a study in obsession as well as gaming and history.
Spain in the 1980s. Udo Berger, a young German, has just arrived in a small seaside town for a vacation with his girlfriend Ingeborg. Yet Udo’s mind is not on the beach. He has just won the national championship at the wargame The Third Reich (clearly based on Rise and Decline of the Third Reich (Don Greenwood/John Prados, Avalon Hill)) and plans to use his vacation to write an article on his new strategy for the Axis. Ingeborg, however, has more traditional vacation activities in mind, and so they spend some of their swimming, tanning, and partying, through which they befriend another German couple, some locals, and the enigmatic paddleboat renter who is only known as El Quemado (The Burned One) for the burn marks which cover his body. When the vacation comes to an end, Udo remains in Spain, supposedly to help in the case of an acquaintance lost at sea windsurfing… yet the real reason is the game of Third Reich which he plays against El Quemado.
Chilean novelist Roberto Bolaño wrote the novel in 1989. Since he turned his hand-written first draft into a typoscript (and later typed the first 20% into his first computer), it is assumed that he wanted to eventually publish it, but he didn’t do so before his death in 2003. When the novel was found among his papers, it was posthumously published in 2010. In addition to the original Spanish (El Tercer Reich), the book has been widely translated. I read the German translation.
Warning: Spoilers for the plot of The Third Reich ahead – but frankly, this is not a book you read for plot, you read it for the vibes.
Obsession: Conquest, Validation, Control
Udo Berger is wargame-obsessed, but the book is not a study of how an outsider has outsider fixations. On the one hand, Berger’s obsession with conquest and domination sets him by no means apart from his peers – just that they usually direct their respective urges to amorous exploits. On the other, our protagonist does not only want to conquer in the game either. In addition to his girlfriend, he also pursues the hotel manager Frau Else (who has been his crush when he was vacationing in Spain as a teen), and the underage chambermaid Clarita. And maybe most of all, Berger is fixated on being respected by his wargame peers, which he can only imagine obtaining by finding strategies (and publishing articles about them) which will obliterate all conventional wisdoms about the game.
As Berger is acutely aware of his lack of linguistic sophistication, he decides to practice by writing a diary during his vacation (which is what we read in the novel). The development of this diary reflects the changes in the writer: Originally, his daily entries are very structured (one per day, headlined by the date), and mostly concerned with banal reports on what he did, what he ate, and what he has in mind for the game/article). As Berger is drawn more and more into his duel with El Quemado, the diary gets more confused: He jumps from one level of narration to another within the same paragraph, extensive passages are solely dedicated to what’s happening in the game (down to which counters are placed on which individual hex numbers on the board), and the chapters are not only named after the dates, but also entitled “With El Lobo and El Cordero [his Spanish acquaintances]”, “Spring 1942” or “My Favorite Generals”.
Berger’s inability to focus also dooms his conquests (ludic and erotic): He sets out to prove that opening a second front early is not a liability, but an asset, and enthusiastically reports early in the game to a friend at home that it’s “Blitzkrieg on all fronts”. Yet as he conducts an amphibious assault of Britain at the same time as he invades the Soviet Union, his forces are overstretched and his Axis collapses before the historical date. And broadcasting his erotic attention over Ingeborg, Frau Else, and Clarita, does not further his relationship with either of them.
As things slide out of his grip, his attitude to control changes: Initially, Berger is fixated on the superior strategy. He notes down the exact moves – which corps need to occupy which hex in which turn to win. This chess-like approach collapses after the turning point of the game: Once El Quemado begins his counter-attack, Berger mentions for the first times that there are die rolls in the game (and how they favor his opponent) – not unlike many board gamers I have seen.
Gaming and History
Besides the main theme of obsession, the novel also offers many glimpses on gaming, history, and the relation between the two.
Berger arrives in Spain with his life compartmentalized between the gaming and the “normal” part – his girlfriend and the office job. This compartmentalization is already eroding with his plan to write the strategy article (which immediately chafes against the confines of a conventional vacation – the hotel employees are bewildered by his request for a large table to be set up in his room, and Ingeborg demands he come to the beach) and fully collapses over the course of the book, when he even unilaterally extends his vacation to play the game (and gets fired for it).
The shadow of history hangs over Berger. Our protagonist does not only play games about World War II, he also reads “patriotic” literature of the era, knows about the lives and deeds of the German generals (especially those of the SS), and the only of his wargamer friends for whom he has a certain reverence is a veteran of World War II. Despite this clear fascination for the history of Nazi Germany, Berger twice disavows being a Nazi himself (having been asked by El Quemado and Clarita). Once he even calls himself an “opponent of the Nazis”, but does not expound on it. His personal politics do not factor into the novel – Berger, having been born around 1960 in democratic, liberal, prosperous post-war Germany enjoys the luxury of only engaging with history at his leisure. He thus remains at the surface of it…
…unlike his gaming opponent. El Quemado comes from South America, and it is rumored among his Spanish acquaintances that the scars he bears are the result of torture (by one of the many right-wing regimes which took power in the 1970s). History has thus seeped into his body and gives him the strength to withstand the ludic assault of the experienced player Berger.
Bolaño himself was arrested after the 1973 coup in Chile and, to his own wonder, was released after eight days without having been tortured (he ascribed it to two of the detectives having attended school with him). He then emigrated to Spain where he worked odd jobs in the tourism industry like El Quemado.
Another allusion to Chile is made in a much-misunderstood scene: On September 11, everyone is out at the beach to celebrate the Catalan national holiday. Yet when a plane flies overhead, an eerie sense of dread overcomes the spectators. Many reviewers see this as a revision which Bolaño must have made after the September 11, 2001 terrorist attacks (or, as an odd coincidence) – but I think the likeliest reason for the scene is that the coup in Chile began on September 11, 1973 with the rebelling air force bombarding the presidential palace in Santiago.
Verdict
Roberto Bolaño’s The Third Reich starts with the innocent concept of a beach vacation. As it grows darker, the novel develops a hypnotic pull. The author’s own deep knowledge of wargames allows him to paint a vivid picture of the game itself – and of the hold it can have over its players.
Last year, I have inaugurated a new irregular series on my blog assessing the merits of UK prime ministers (illustrated through the lens of a single board game each). The rating system seemed robust enough to apply it to other countries/leaders (at least if they are more or less democratic). Thus, we branched out to an American president and a German chancellor. Today’s subject is another US president – Harry S. Truman, the first Cold Warrior in the White House. And which game could be more appropriate for him than Twilight Struggle (Ananda Gupta/Jason Matthews, GMT Games)?
The Rating System
Some caveats ahead: The presidents will be rated by the knowledge of their time. If they or their contemporaries could not have known about the effects of something, I will not use my hindsight to mark it as a mistake of theirs. The assessment is focused on their conduct as president, but includes their life after holding the office (in which they will still be regarded in the public eye as (ex-)presidents).
Now, to the system itself: There are three policy field categories (foreign, domestic, and economic policy) and three more general ones (vision, pragmatism, integrity). A president can earn from one to five stars in each category (for a total sum of up to 30). In detail, the president is assessed as follows:
Foreign policy: Did the president increase US influence in the world and the security of Americans at home? Did the president wield US power responsibly and with positive results for the regions affected (the latter counting for a greater deal in times of US power being great)?
Domestic policy: Did the president increase the liberty of Americans to express themselves and to participate in the political process? Did the president promote domestic security and shape the framework for fair justice dealing with offenses?
Economic policy: Did the president facilitate the prosperity and economic security of Americans (including in the mid- and long-term)? Was the president’s economic policy based on mutual benefit of those involved or did it unduly burden one side?
Vision: Did the president have an idea of what the United States and the world (the latter counting for more in times of US influence being great) should look like beyond the immediate future? Did the president’s policies steer the United States (and, if applicable, the world) in this direction?
Pragmatism: Did the president succeed in seeing his policy through from inception to completion? How well did the president manage the support from Congress, society, the administration, the media (the latter counting for more in more recent years)?
Integrity: Did the president understand the office as a means to benefit himself, special interest groups, the entire country, or another community? Did the president respect the boundaries of the office?
Truman’s Life
Harry S. Truman was born on May 8, 1884 as the son of Missouri farmers. He took a few classes at a local business school, but remains the only US president of the 20th and 21st century to not have attended college. After a few years of odd jobs, he returned to help on his parents’ farm. As he had political ambitions, he joined the National Guard in 1905 and volunteered for service during World War I.
Back from the war, Truman opened a haberdashery (which went bankrupt in 1921) and was elected county judge (in 1922). His political career was tied to Tom Pendergast’s political machine. Over the course of the following years, he struggled both economically and politically. His fortunes only improved when he was named Missouri’s director for the Federal Re-Employment program (which got him in touch with important people from Franklin D. Roosevelt’s New Deal programs) in 1933 and was elected senator in 1934.
Truman’s first term in the Senate was unremarkable and he only barely won re-election in 1940. The following year, his career took off when he headed a special committee to investigate inefficiencies in US war production – a crucial task with war ravaging both Europe and the Pacific, which the United States would enter later that year. Truman’s reputation for honesty and efficiency recommended him to president Roosevelt who was looking for a running mate in the 1944 presidential elections. As the favorites of the two wings of the Democratic party – Henry Wallace for the liberals, James F. Byrnes for the conservatives – were anathema to the respective other wing, Roosevelt chose Truman as a non-offending alternative – the “second Missouri compromise”. Roosevelt barely met with Truman either on the campaign trail or after their successful election and kept him in the dark about his political initiatives, particularly regarding foreign policy. When Roosevelt died barely three months after the start of his term, Truman entered the presidency woefully unprepared.
His first task was the victorious conclusion of World War II. Germany surrendered only weeks after Truman’s inauguration. When soon after the first nuclear bombs were successfully tested, the United States dropped them on Japan in order to “shock” the country into surrender – a policy which Truman endorsed, but did not specifically authorize (the bomb was treated like any other weapon at the disposal of the commanders in the theater).
In the meantime, Truman grew more distant to America’s erstwhile Soviet allies. He had wanted the Soviets to join the United Nations and the war against Japan, but once they had done both, Truman took a hard line against what he perceived as Soviet expansionism. The first test of strength was Soviet refusal to leave Iran – in violation of the agreement among the Allies after their invasion of Iran in 1941, which specified that they would leave the country six months after the cessation of hostilities. Truman’s tough stance won the day by spring 1946 – but in a pattern typical for his presidency, he did not receive the credit for it among the American public.
A common sight in the first turn of Twilight Struggle: Iran is a focal point for both players if they want to contest the Middle East and have access to western Asia. …in this case, the US player used their +2 influence boost (according to competitive play standards) in Iran – a luxury which the historical Truman did not have! From the Playdek digital adaptation of Twilight Struggle.
At home, Truman was faced with the transformation of the economy back to peace time. Increased unemployment and inflation dashed the hopes for a beautiful, carefree post-war life for many Americans. Truman’s heavy-handed handling of a railroad strike – he proposed a law that would draft strikers into the army – intimidated the strikers into submission. Yet while it antagonized labor (and questioned Truman’s commitment to constitutional practices), it did not win him support among business or the middle class. Truman’s Democrats were shellacked the 1946 midterm elections.
The electoral defeat freed Truman from his obsession to walk a middle course and please everybody. Instead, he proposed the policies that he thought were right. Domestically, that encompassed a series of ambitious bills to preserve and expand civil and economic rights which he called the “Fair Deal.” Most of them were squarely defeated by a cross-aisle conservative majority in Congress, but Truman’s activity put Congress on the defensive and no further New Deal legislation was rolled back.
Truman’s greatest achievements belong to the realm of foreign policy. Faced with the challenge of possible Soviet inroads into the Eastern Mediterranean (from where the United Kingdom was about to withdraw), Truman countered with the promise of aid to any free nation which resisted subjugation – the Truman Doctrine. He backed this unprecedented American commitment to internationalism up with the European Recovery Program – or, as it was more popularly called, the Marshall Plan. (Truman was wise enough not to attach his own name to it, as his unpopularity in Congress would likely have resulted in a defeat of the proposal.) The ERP did not only help Europe in its recovery from the destruction of World War II, but also provided a welcome stimulus for the American economy on whose goods the money was spent, and it was a major PR success for the United States in the nascent Cold War with the Soviet Union. When the Soviets played hardball in 1948 and blockaded West Berlin, a western-controlled island within the Soviet occupation zone of Germany, Truman found a measured response in supplying West Berlin from the air – steering clear of both abandoning West Berlin and risking war.
Truman’s relationship with both wings of the Democratic Party had been uneasy through his tenure – the liberals disliked him for his handling of labor disputes and his tough stance on real and perceived Communists. As the Cold War developed, a second “Red Scare” swept the country. Truman, who personally did not believe that a large number of Communist spies had infiltrated federal institutions, nonetheless lent this conspiracy theory credence with the vain attempt to ward off more radical legislation on the matter by examining the loyalty of all federal employees – with “reasonable doubts” sufficient to be fired. Even though the past of five million federal employees was scrutinized, not a single Communist spy was found.
On the other hand, the conservatives, particularly those from the Democrats’ southern bastions, warily regarded his Civil Rights stance. Truman created a committee to make proposals for Civil Rights whose recommendations he endorsed. Yet only when the Southern Democrats abandoned him in the election year 1948 (and supported the segregationist Strom Thurmond instead) did he stick out his head and decreed the desegregation of the armed forces and the federal civil service.
Truman took to the campaign trail and vigorously attacked the Republicans for not supporting his domestic reform agenda. Against the predictions of the pollsters, Truman defeated his Republican opponent Thomas E. Dewey soundly, with Thurmond coming in a distant third (and defeated in most southern states as well). Truman’s inauguration in 1949 was the first to which Black Americans were invited as guests.
Truman’s second term was less eventful than his first – and less successful.
When North Korean forces crossed the 38th parallel to unite Korea by force (with Stalin’s approval), Truman faced another Cold War crisis. Truman attached an importance to it that went far beyond Korea – if such a blatant breach of the peace was not checked, it would spell doom for the rules-based peace order embodied in the United Nations. Thus, he sent in US forces to stop the Northern invasion and attained UN approval for the operation. US troops under General Douglas MacArthur blunted the offensive of the North Koreans and landed in their rear – thus throwing the entire invasion force back in disarray. As the coalition forces approached the 38th parallel, Truman disregarded Chinese warnings and authorized a crossing into North Korea. The ensuing Chinese entry into the war now caught the coalition forces off guard and forced them into an ignominious retreat. MacArthur then pressured Truman to extend the war to China – and the use of nuclear bombs. Truman refused, and as MacArthur kept defying presidential authority, relieved him of his command. For the remainder of Truman’s tenure, the Korean War would be a bloody stalemate.
Domestically, Truman did not fare better. His attempt to prevent a full-on Red Scare by the loyalty check program turned out to have failed entirely – instead Representative Joseph McCarthy levelled (unfounded) charges of Communist sympathies and activities at government officials, academics, left-leaning politicians, labor activists, and entertainers (especially in the film industry). The climate of fear which infringed on free speech also damaged the United States’ standing abroad.
Finally, another strike – this time in the steel industry – aroused the president’s anger. He seized the steel mills from their private owners to deal with the strike. This was deemed unconstitutional by the Supreme Court in April 1952. By the time of the Court’s decision, the deeply unpopular Truman had already announced that he would not seek re-election. The Democratic Party instead chose the governor of Illinois, Adlai Stevenson, as their nominee. Stevenson lost in a landslide against the Republican candidate Dwight D. Eisenhower, the general credited with winning World War II in Europe.
Harry S. Truman lived a relatively modest post-presidential life, devoting much of his time to writing his memoirs. He died on December 26, 1972.
The Rating
Foreign policy: Truman shifted from cooperation to confrontation with the Soviet Union with remarkable skill. He found adequate responses to most foreign policy crises – from the first test of strength in Iran over the Greek/Turkish crisis which prompted the Truman Doctrine to the Berlin Blockade and the North Korean invasion of the South. His rare misstep was the foolhardy decision to push further in Korea which drew the Chinese into the war.
Structurally, Truman’s influence is even more profound: Almost the entire modern US security architecture was founded by him – the US Air Force, the Department of Defense, the National Security Council, the Central Intelligence Agency and NATO.
Rating: 5 out of 5.
Domestic policy: Truman’s domestic record is mixed. While he was the first 20th century president to stick his head out for the equal treatment of Black Americans, he only turned to action after the Southern Democrats had abandoned him already. His anti-Communist loyalty checks infringed on the individual liberties of federal employees and did not achieve their goal of pre-empting more radical measures by the anti-Communist conspiracy theorists like Joseph McCarthy (and rather emboldened them). Finally, Truman’s invasive meddling in the economy – both his law to draft strikers and his seizing of the steel mills – show an instinctive preference for a security-based war presidency over individual economic freedoms.
Rating: 2 out of 5.
Economic policy: Truman faced the challenge to transform the US economy back to peace time – for which conservatives/business and liberals/labor had starkly different ideas. Truman initially attempted a middle course, but turned more liberal after his electoral victory in 1948. His Fair Deal legislation (most notably the near-doubling of the minimum wage, the expansion of Social Security to another 10 million Americans, the rural electrification programs, and the building of homes for low-income Americans) contributed to the broad prosperity of the post-war decades.
In the end, it was Truman’s foreign policy that was most influential for the economic development of the US: The Marshall Plan had shown how a further internationalization of American businesses could be profitable for them. Truman’s turn toward the security state after the outset of the Korean War led to a quadrupling of defense spending which would never again fall to the level of the inter-war years. This perpetual state of war-readiness and the resulting military-industrial complex of the United States play a crucial role for the structure of the US economy until today.
Rating: 4 out of 5.
Vision: Nobody regarded Truman as a visionary when he entered the presidency. Yet his policies captured not only the present but also the future: The Truman Doctrine, a sharp break with the American isolationist tradition, was employed for the remainder of the Cold War. Every other Cold War presidential doctrine rested on it (and usually interpreted it for a particular region). Its basic tenet – to aid free nations against attempts to subjugate them – informs US policy until today (say, in Ukraine). In practice, the Truman Doctrine resulted in the “containment” of the Soviet Union and global Communism – another basic principle of US foreign policy for the next 40 years.
Truman’s predecessor Franklin D. Roosevelt, much more a visionary in the public perception, had relied on his own personality to see through all the great breaks with political tradition. Truman, on the other hand, built the institutionalized security state which is until today the foundation of the US presidency. Despite the pivot to “security” as the new main goal of American government activity, Truman maintained the primacy of politics over the military and defeated the specter of Bonapartism when he fired MacArthur over his insubordination.
Rating: 5 out of 5.
Pragmatism: Truman’s early attempts to chart a middle path often antagonized both sides – and sometimes led to contradictions (as when he publicly endorsed both Henry Wallace’s and James F. Byrnes’s foreign policy statements which differed markedly on the matter if the Soviet Union was an ally or an opponent of the United States).
Truman was at best middling at winning public support for his initiatives. While he won the 1948 election, his Congressional allies fared badly both in 1946 and 1950, and Truman had low approval ratings through most of his tenure (excepting the honeymoon period in 1945 and his time of foreign policy glory in 1947), sometimes as low as 23%.
Despite these troubles with both Congress and the wider public, Truman could see some of his key policy initiatives through Congress despite their impulses towards isolationism and a limited role of government.
Rating: 2 out of 5.
Integrity: Truman honestly strove for the interests of the whole nation. Yet he tested the limits of the Constitution with his reaction to strikes and when he did not seek Congressional approval for the war in Korea. His appointments were often based on loyalty rather than merit (and turned out lackluster in these cases more often than not). While Truman never used the presidency to enrich himself personally, his reputation for being extraordinarily honest is rather an artifact of being compared favorably to his morally flexible successors Lyndon B. Johnson and Richard Nixon in the 1960s and 1970s.
Rating: 3 out of 5.
Overall: Despite Truman’s unassuming personality and his low popularity during his tenure, he laid the foundations for American foreign policy for decades. His many moments of foreign policy brilliance are interspersed with a mixed record at home and many individual mistakes in running the office. He was an above-average, but not great president.
How would you rate Truman? Let me know in the comments!
Further Reading
For a short and accessible biography, see Dallek, Robert: Harry S. Truman, St. Martin’s Press, New York City, NY 2008.
As always when it comes to American presidents of the 20th century, see the respective chapter in Leuchtenburg, William E.: The American President. From Teddy Roosevelt to Bill Clinton, Oxford University Press, Oxford 2015, pp. 243—326.

 Anmelden