Continuing along in this series devoted to the best looking boards found in the wargaming world where I will highlight the art and layout of a different board in a wargame that we have played to show you the various talents of the artists and graphic designers involved. In my humble opinion, a well designed and attractive board can make all the difference in the world to me enjoying a wargame. Don’t get me wrong, the game has to be good, but if it’s also good looking it always is a better experience. A board can draw me in. Can make me feel that I’m there. Can set the stage for the thematic immersion that we all crave. And I have found many of these type of boards and I want to make sure that I share them with you.
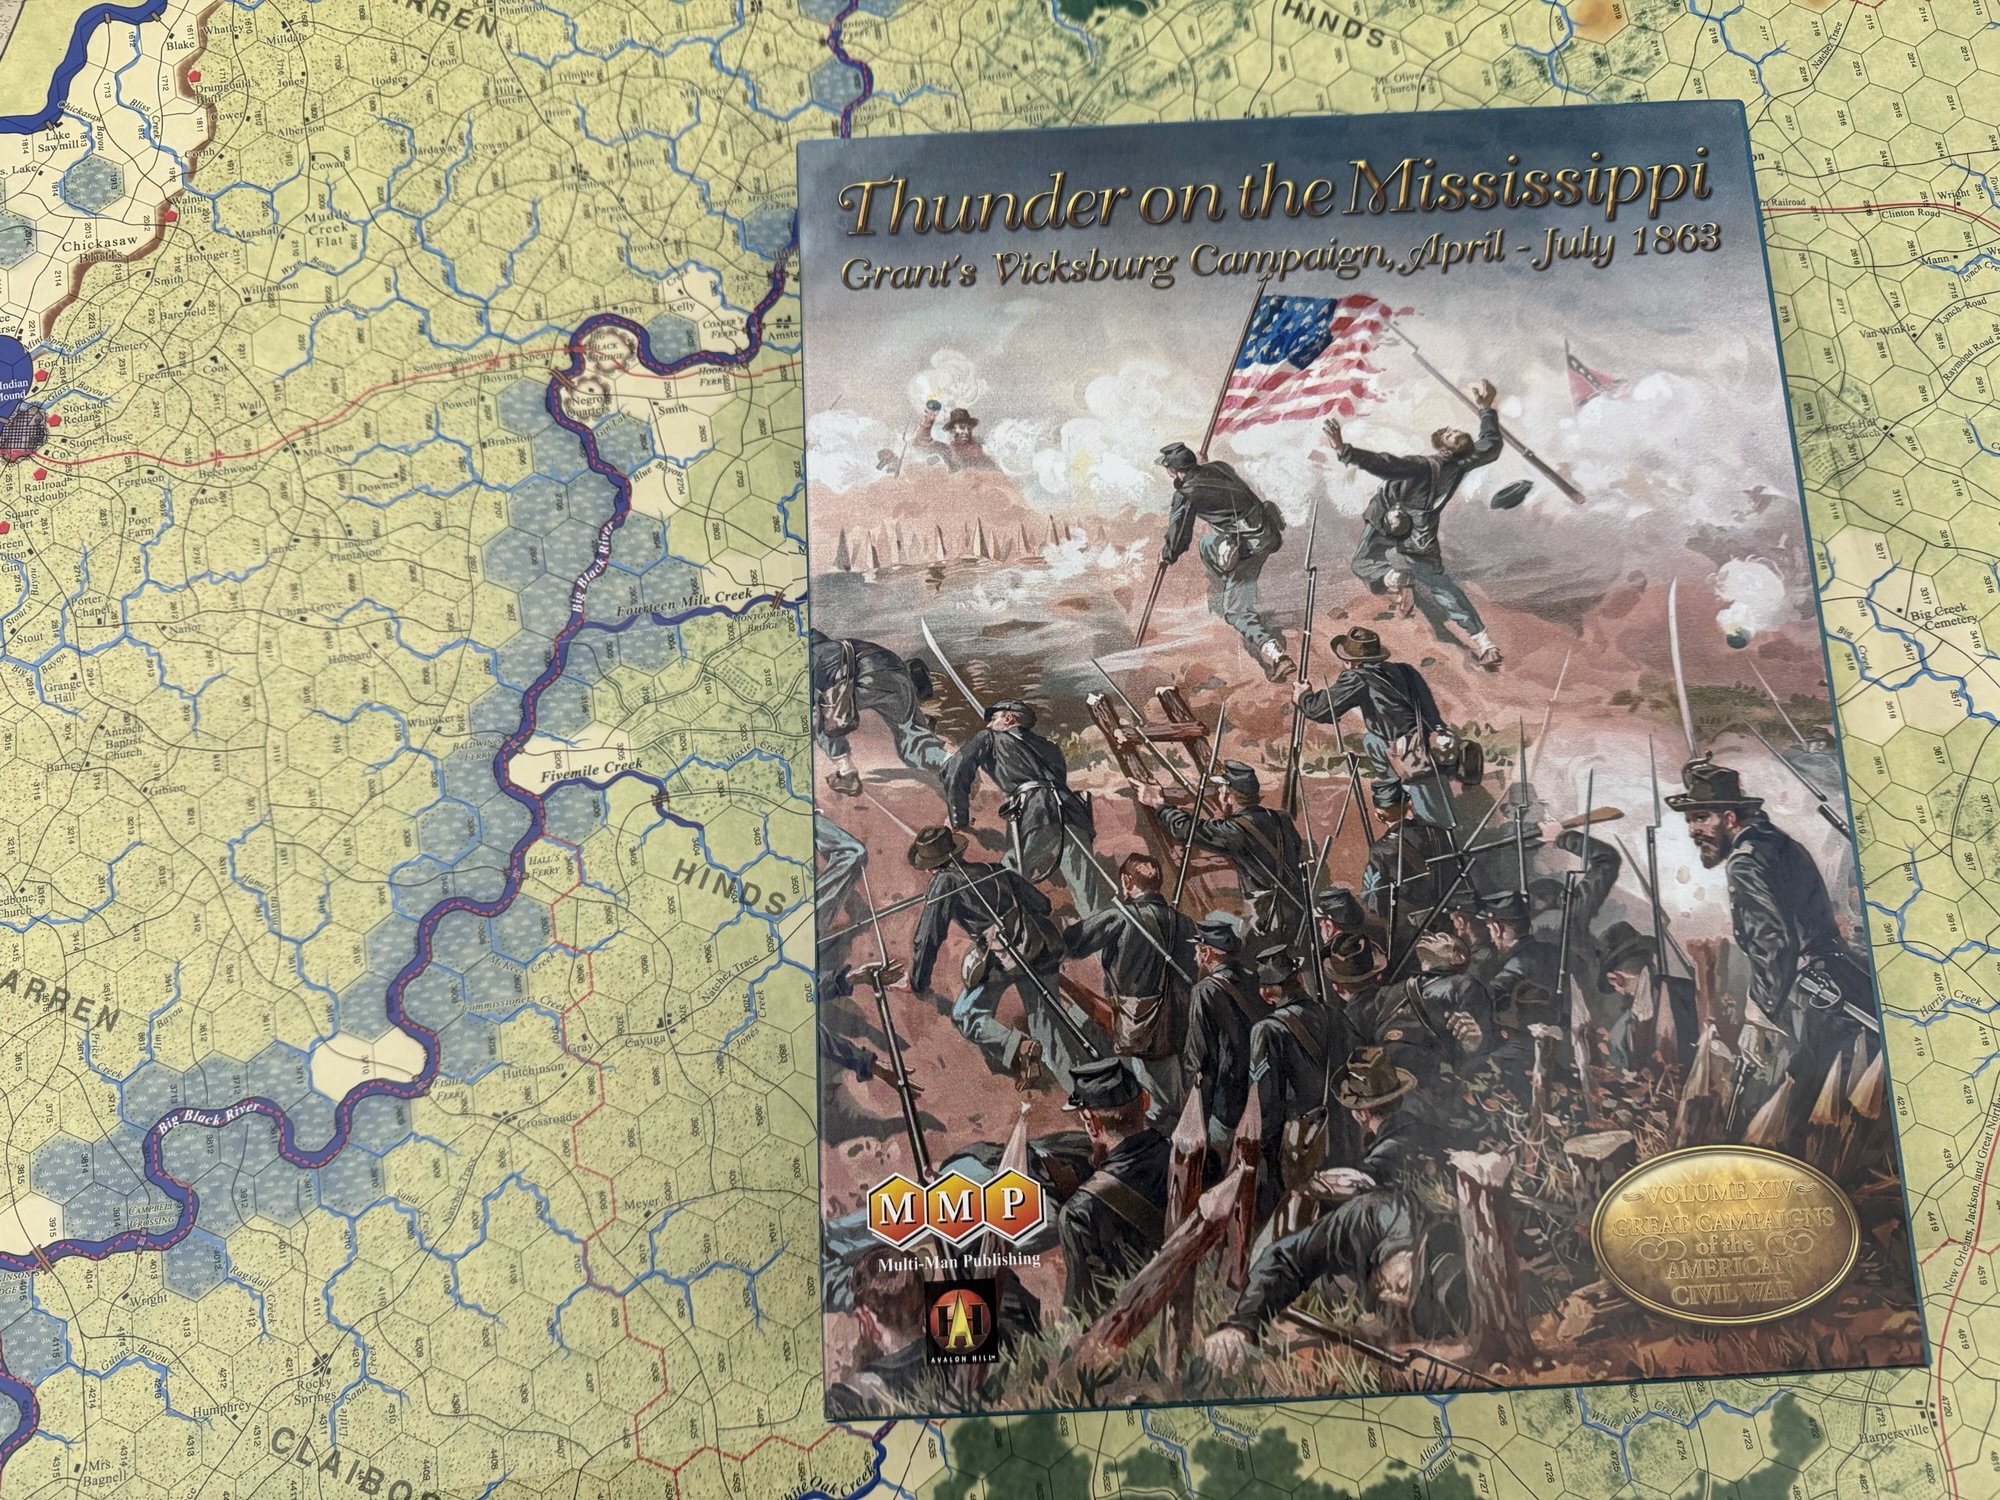
In this entry in the series, we will be taking a look at the fantastic looking board for Great Campaigns of the American Civil War: Thunder On the Mississippi: Grant’s Vicksburg Campaign, April-July, 1863 from Multi-Man Publishing. The board is illustrated by the very talented Charlie Kibler whose work on the Great Campaigns of the American Civil War Series dates back to its creation in 1992. He has done a ton of great looking boards including The Battle for Normandy (2009) from GMT Games, The Day Was Ours: First Bull Run (2021) from Revolution Games, Border Reivers (2023) from GMT Games recently as well as a slew of Advanced Squad Leader boards stretching back through the years and a lot of series games for GMT Games such as Great Battles of the American Civil War and Great Battles of the American Revolution. We have already highlighted a few of his boards in the past like Storm Over Jerusalem from MMP and Battles of the American Revolution Volume II: Brandywine from GMT Games. He is very effective at creating great looking terrain and weaving in very nice details to highlight the main functions of the board and I very much like the simplicity and accurateness of his boards.
The board consists of 2 separate 22″x 32″ full-color map sheets that when combined create a large playing surface. The borders of the board include off-board information that is related to the geography and locations in and around Vicksburg. When I first saw this, I wasn’t really quite sure how to take it but after playing and also thinking about this decision, I really like how it was used to frame up or provide a significant visual contrast to the main game board. The brown coloring really contrasts well with the colorful terrain features and create a clear distinction for the players. I initially thought this was a poor decision and felt that it was a missed opportunity but it works really well.
Here is a closeup of this part of the board so you can get a good feel for what I am talking about.
I always like to look at the game title box/area of the board and find these to be really great insights into the mindset and approach of the artist. On the board for Thunder on the Mississippi, we see Charlie used a washed out period look map for the background of this area. The really interesting part is how it transitions from the non-colored portion of the board title box to the game board itself. There is no connection between the 2 and the elements found on the board are not carried over or connected to the period map. I would maybe have liked to see there be a connection for an immersive approach but I understand that this was not the purpose of the use of the period map.
In Thunder on the Mississippi, there are 2 new terrain features unique to the Vicksburg region introduced including loess hills and coastal bluffs. Loess has not been featured before in GCACW Series games. Each loess hex is depicted with many small tan dots superimposed on an olive base color. This stippling gives it a sandy feel and I think really works well as loess is a fine-grained, powdery soil, a wide belt of which runs on the east side of the Mississippi on a southwest – northeast axis. Because loess is highly susceptible to erosion, it is marked by sharp, irregular ravines, many of which were so overgrown with vegetation as to be nearly impassable to military units.
In the game, loess hexes are identical to woods hexes in terms of Movement Point costs and MP penalties to enter a friendly-occupied hex. Also, loess hexsides untraversed by roads or railroads exert a restricted ZOC the same as woods hexsides similarly untraversed. I think that the type of terrain, and what it does to the units that enter, really mimics the soft soil type as it is always hard to run in sand. I very much like the color used as well and it serves to set this specific terrain type apart from the rest of the board. Here is a look at the western portion of the West Map that is up against the Mississippi River.
The other new terrain feature is that of coastal bluffs, which has also not been featured before in the series. Each coastal bluff hexside has a downhill side in which the light brown bluff line-pattern is uneven and an uphill side in which the bluff line-pattern is smooth. I know that it might be a bit hard to see in the below picture but the downhill side is found on the left side while the uphill side is on the right. Think of it this way…the uphill is simply a straight line border while the downhill side reflects the ravines from erosion and is made up of multi-length lines pointing out. I very much like this new terrain and also think that Charlie did a great job with the distinction even though it is a bit hard to distinguish from afar.
And that brings me to the portion of the board that I think is my favorite. Not because it is some revolutionary technique but because of the power and permanence that is offers the board, acting as an anchor and a framing of the action to be played out on it, and that is the Mississippi River itself. There is no real use of stylized marks or special features shown on the board but it is just a thick and dark blue line that meanders through the countryside. But the dark blue really gives a sense of size and scope and I very much feel that it is important to the board and what is to transpire on it.
I also very much like how Charlie decided to keep in the exact layout of the river and shows its many twists and turns and oxbows that are found along its length.
The board for Thunder on the Mississippi is really a visual masterpiece. It provides great transition from terrain type to terrain type, frames up the board itself very well and uses very smart and poignant color choices, including the loess terrain color and the dark blue of the Old Man, all to create a fantastic canvas upon which to play out this titanic struggle and key turning point of the American Civil War.
If you are interested, here is a link to our video review:
The next board that we will take a look at in the series is The Marianas Campaign: Volume One: Saipan – The Bloody Rock from Compass Games.
Here are links to the previous entries in the series:
With this My Favorite Wargame Cards Series, I hope to take a look at a specific card from the various wargames that I have played and share how it is used in the game. I am not a strategist and frankly I am not that good at games but I do understand how things should work and be used in games. With that being said, here is the next entry in this series.
#95: Flying Ace from The Republic’s Struggle: Battle for the Republic, Spain 1931-1939 from NAC Wargames
The Republic’s Struggle is a thematic Card Driven Game that tells the story of the historical events that took place in Spain after the resignation to the throne of King Alfonso XIII, and the proclamation of the II Spanish Republic in 1931. With the creation of the new regime, the struggle for power between the different social, political and ideological sectors increased, which gave rise to continuous changes of political power, alterations of public order, armed uprisings and violent acts, carried out by the numerous ideological factions of the moment; which culminated in 1936, in a failed military uprising. The failure of this coup d’état was the origin for the Spanish Civil War.
The Republic’s Struggle is based on Twilight Struggle from GMT Games and uses the same concepts of area control while adding in some actual combat with units represented on the board. During the game, the Republican player and the National player, will be able to recreate events of the period to increase their popularity in the localities by carrying out political propaganda, recruiting troops or militias, generating revolts or assaults, establishing diplomatic relations or carrying out bombardments. All this will be done by playing their hand of cards in an alternative way, either by using the events or by playing the action points or icons to perform any of the other actions available to the players.
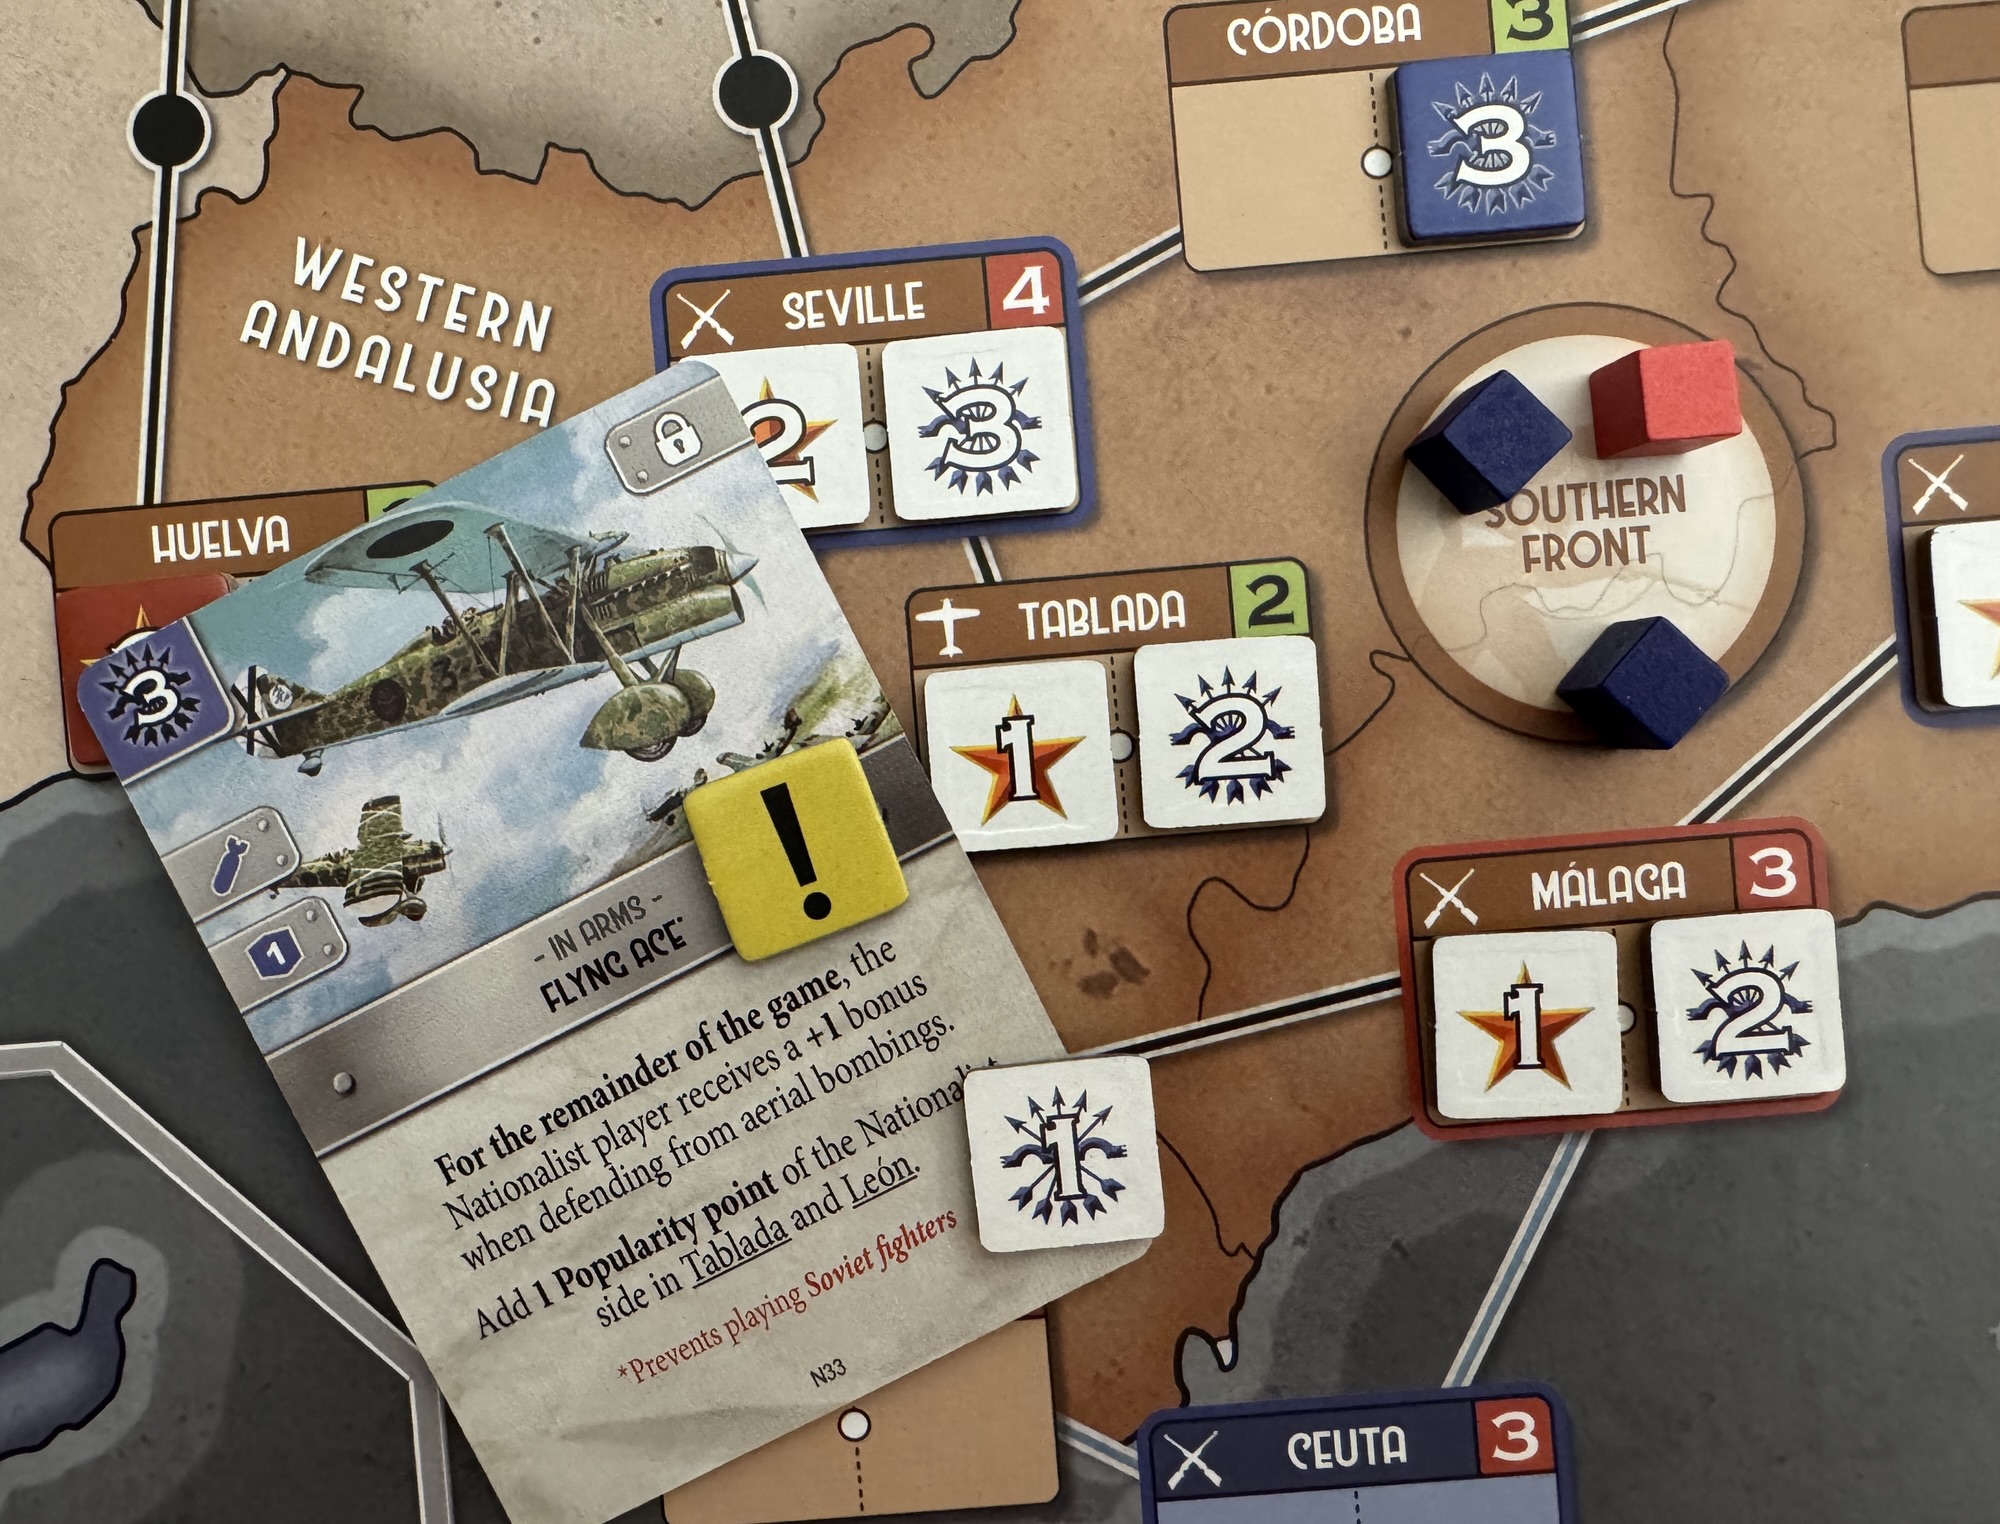
As you probably know, the Spanish Civil War was a bloody and vicious affair. With the advent of air planes and advancement of other weapons technology there was no army that couldn’t be touched. In The Republic’s Struggle players can use their cards and Operation Points to perform an aerial bombing on enemy units that are found on the various fronts. The Bombardment Process is executed by spending the Operation Points (OP’s) of a card, provided the card features a special bomb icon in the upper left hand corner near the Op Points. If a card displays both a bomb icon and a combatant cube icon, you may only choose to execute one of the options and not both. These Bombings target combatants located in specific Fronts, which are represented by circular spaces where army cubes may be placed through card play. In order to perform an aerial bombing, the player must have control of n Air Base Location on the Front that they wish to attack. The attacking player will add the Operation Points of the card played and adds a D6 while the defender will also roll a D6 but will add in the Defense Value that was determined at the outset of the turn by the play of a card and +1 for each of their cubes in the Front. If they have played a card such as Flying Ace, they will get to add a +1 to this total and then results are compared and a winner is determined and losses are the difference between the Attack and Defense Value.
That is the real power in the Flying Ace card as this +1 can be a huge boon in these aerial bombings and allow them to put up a stiffer defense and hold onto more of their units on these Fronts. The game instructs players to utilize the Exclamation Point markers to remind themselves of these type of benefits as the player should place the played card in front of them with the marker to be able to remember the benefit later in that turn.
But the Flying Ace Card provides another smaller but important benefit as it allows the Nationalist player to place 1 Popularity Point in Tablada and León to continue to build their influence and control of these key regions for scoring purposes. And finally, another benefit is that the play of the Flying Ace Card will prevent the Republican player from being able to play their Soviet Fighters Card which has a similar benefit. The thinking here is that the first player to get this card out controls the skies and has air superiority.
Aerial bombing during the Spanish Civil War marked a dark turning point in military history, serving as a lethal testing ground for the aerial terror tactics later unleashed in World War II. An estimated 15,000 people died from air raids during the conflict, with the vast majority of victims being civilians targeted by Nationalist forces backed by Nazi Germany and Fascist Italy. One of these horrific events was that of the Bombing of Guernica on April 26, 1937. Carried out by Nazi Germany’s Condor Legion and Fascist Italy’s Aviazione Legionaria, this raid destroyed a massive portion of the Basque town and killed hundreds of civilians. It became the ultimate global symbol of the brutality of war, immortalized by Pablo Picasso’s famous painting Guernica.
In the next entry in this series, we will take a look at Henry Knox Continental Artillery Commander from Washington’s War from GMT Games.
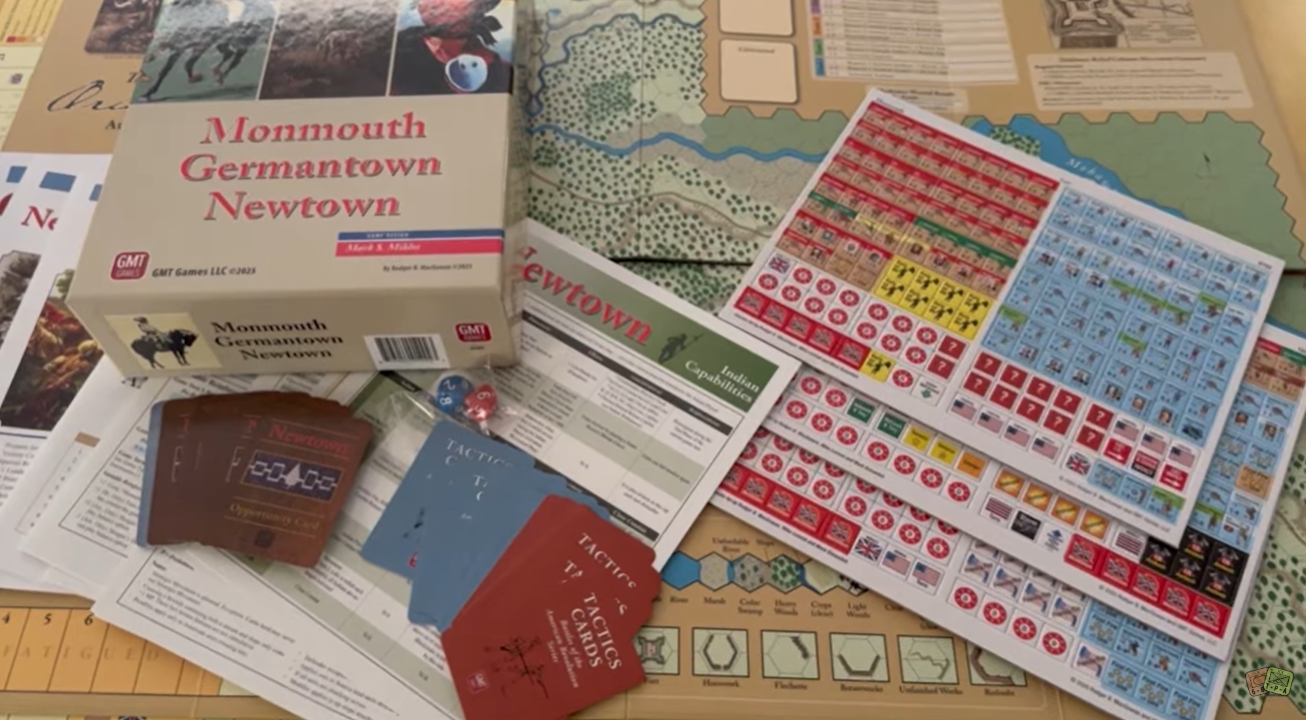
Battles of the American Revolution Tri-Pack II: Monmouth, Germantown and Newtown is the second compilation of earlier releases from GMT Games’ Battles of the American Revolution Series. These are tactical level battles at the regimental level with a map scale of approximately 200 yd/hex.
Additions to the original releases include:
maps are hard-mounted
packaged in a GMT “deep box”, which is a 3″ box
rules and player aids printed in color
all replacement counters that have been issued since the games’ original releases
a new one page matrix-style play aid to assist the First Nations player in Newtown
Joel Toppen’s Solitaire Tactics Card play aid
a significantly upgraded Germantown rulebook addressing errata and ambiguities
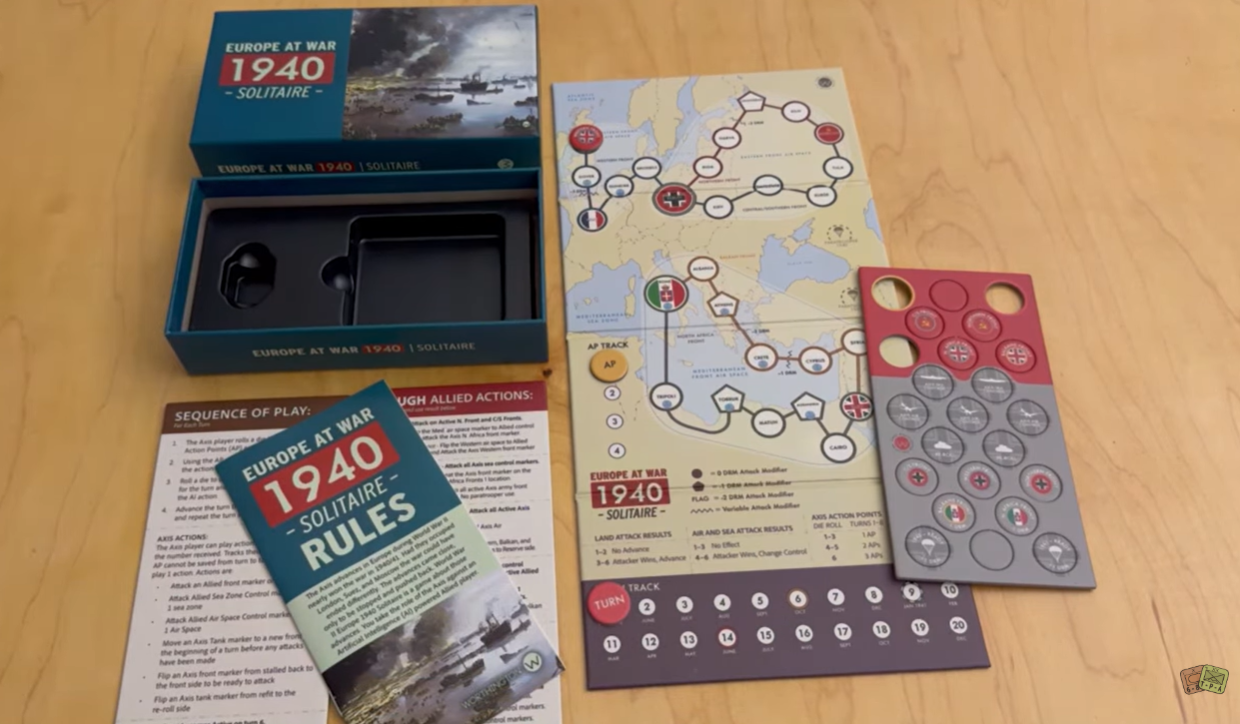
Europe at War 1940: Solitaire, the sister wargame to Pacific War 1942, places the player in the role of the Axis high command during the first 18 months of World War II and focuses on the European Theater of World War II.
The game introduces some new concepts important to the war in Europe. Each side has a limited number of tank units to add strength to some front armies. The axis has a paratrooper unit that can help with hazardous operations. Choosing when and where to place them can be a major decision. Also control of air spaces on fronts becomes an important factor. And, ports on sea zones are affected by sea zone control. Crossing bodies of waters on a front is a major effort.
As the axis do you try to take London before turning east against the Russians? Should you help out the Italians in the Balkans? Or do you turn your tanks loose in the deserts of North Africa?
The American Civil War was the bloodiest conflict and a defining event in the history of the United States. The tragedy of the conflict was amplified by the fact the battles were brutally fought with Napoleonic tactics while using new and more lethal weaponry. As a result, over the course of nearly four full years of war, roughly 700,000 Americans were wounded or killed in battle along with another 400,000 soldiers dying from disease.
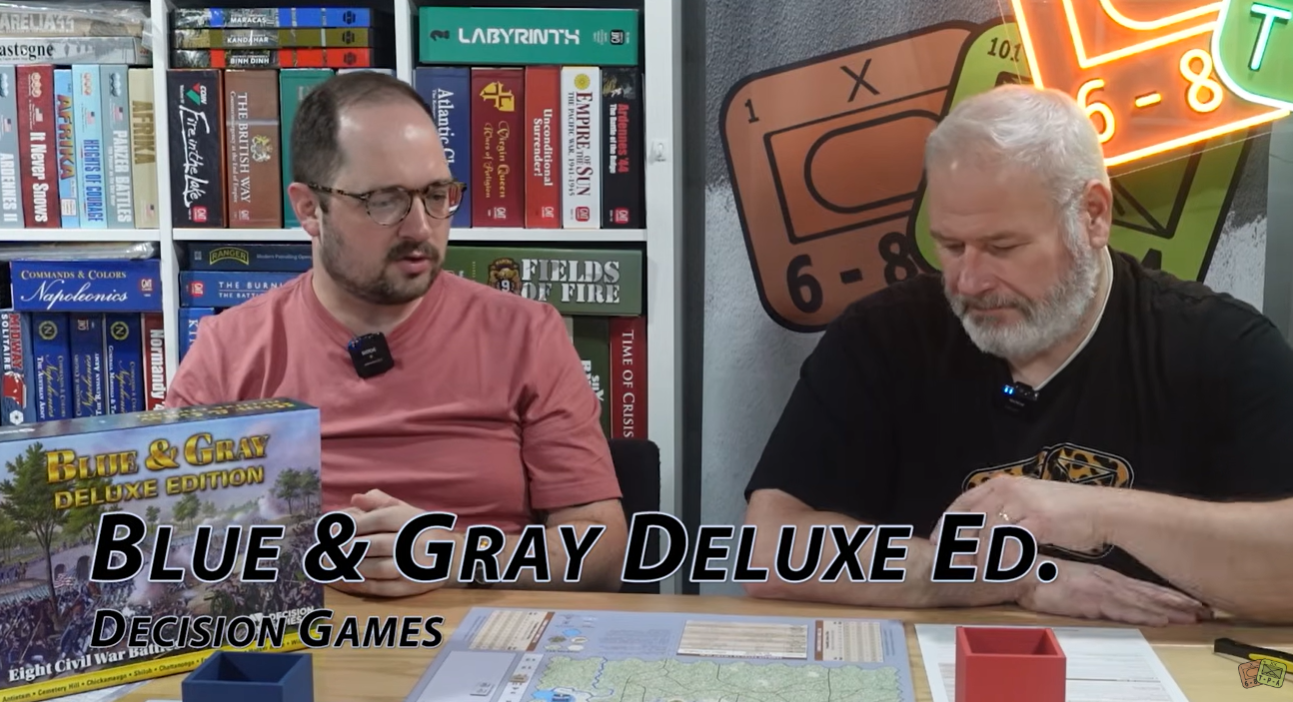
Blue & Gray Deluxe Edition consists of the original eight games from the SPI Blue & Gray I & II Quadrigames. The battles depicted are among the most important of the American Civil War: Shiloh, Antietam, Fredericksburg, Chancellorsville (Hooker & Lee), Gettysburg (Cemetery Hill), Chickamauga, Chattanooga, and The Battle of the Wilderness.
The game mechanics used in this series are based on the well-received Borodino/Napoleon at Waterloo system. Terrain is a significant factor, with everything from rolling farmland to untracked wilderness represented. Battles will often see a back-and-forth struggle for control of critical terrain. Rules for night turns are also provided. A standard set of rules are used, common to all eight games, while each game also has its own set of exclusive rules, historical set-ups, and player and design notes—all from the original SPI games.
Blue & Gray Deluxe Edition features new artwork, double-sided mounted game boards, enlarged counters, player aid cards, numerous optional rules gleaned from other game editions, and new variant counters and markers for use with several variants from Moves and Strategy & Tactics magazines. Reintroduce yourself to these classic games from SPI’s golden era and refight some of the best-known battles of the American Civil War which decided the fate of a nation at war with itself.
I love a different style and focus of wargame. A game that takes a look at an important but somewhat obscure or rarely addressed historical topic, such as espionage or intelligence, and creates a gaming experience tailored around the events to highlight and evoke the difficulties and tension that would have been present. In January 2026, GMT Games announced such a game in Checkpoint Charlie, which is a solo or cooperative game focused on SIS espionage missions in Berlin in the 1960’s designed by Russell Brown. We have posted an interview with Russel and it was very well received and he has now agreed to create a series of History Behind the Cards to highlight the events of the 1960’s Cold War struggle in West Germany but also to share aspects about the game play and how it models the history.
*Note: The cards highlighted in this series and their event text, as well as any pictures used showing any of the various components, are still in the design and development process and as such event effects and text might still change prior to final development and publication.Also the art and layout of the cards are only for playtest purposes at this point and the game will enter the art department as it nears publication.
History Behind the Cards – Checkpoint Charlie from GMT Games – Card #7: Ich Bin Ein Berliner
In the summer of 1963, the Berlin Wall had been in place for almost two years, the reality of a city split between east and west, between Soviet and Western influence, was impossible to deny. Politicians, military leaders, and the people living day-to-day in Berlin continued to argue about the lack of forceful response from the west, particularly the Americans, when the wall went up. Other than a modest buildup of US forces within and around the city, there had been precious little action to re-assure the people of Berlin that the west hadn’t abandoned them.
In June of that year, President Kennedy hoped to change that perception by personally visiting this western city in the center of Soviet-controlled East Germany. He received the reception and the reaction he was hoping for, driving through the city to crowds of cheering West Berliners, and giving his famous speech on the steps of the Rathhaus Shöneberg to a gathered crowd of over one hundred thousand. In a calculated risk, he referred to the city as West Berlin, officially acknowledging the split created by the wall. He introduced his “Fellow Americans” and at the mention of General Clay (Card #6), the crowd interrupted the speech for some heartfelt cheering for the man that saved their city during the Berlin Airlift. Kennedy’s famous line of solidarity, “Ich bin ein Berliner,” — I am a Berliner — came at the end of the speech and may have been a bit off-script.
So how would Kennedy’s speech affect a mission in Checkpoint Charlie? I’m going to answer that with a story.
I spend a lot of time at a wonderful coffee shop near my home, so much time that my iPhone has labeled the location as my “work.” The baristas there know me, and one day one of them asked me what I was working on. “Right now,” I said, I’m working on a board game about spies in Berlin in the 60’s.”
He laughed. “Have you met John?” He pointed to an older customer at one of the tables. “He was a spy in Berlin in the 60’s.” It was true.
Since then, I’ve had many conversations with John about his time in Berlin. He was Army Intelligence, keeping track of what was going on in the city. He was there when the wall went up. He interviewed the refugees that, for a time, still managed to find a way into West Berlin. And he was there during Kennedy’s speech.
I asked him about the speech and said that in the game it resulted in crowds (a Demonstrations marker) near Tempelhof. He shook his head. “Everywhere. Crowds everywhere. All over the city.”
I’m sorry to report that I’ve restrained the effects of this card and the speech for gameplay reasons, but I haven’t ignored John in every case. The Daily Military Train event (Card #9) exists solely because of his stories, and after removing the Refugees event (Card #13) from the game because I assumed the flow of refugees disappeared after the wall went up, I put it back in because John assured me that they were still coming – he had met and interviewed hundreds of them.
In the next article in this series, we will take a look at the ongoing propaganda efforts from both sides of the Berlin Wall with Loudspeaker Wars.
In my opinion, this game looks extremely interesting and I am very much excited to learn more about it. I am appreciative to Russell and his efforts to bring us these cards and to write these entries to share with our readers. I am also very glad that this topic is being covered in a game and look forward to playing this one day soon.
With this My Favorite Wargame Cards Series, I hope to take a look at a specific card from the various wargames that I have played and share how it is used in the game. I am not a strategist and frankly I am not that good at games but I do understand how things should work and be used in games. With that being said, here is the next entry in this series.
#94: Hamet’s Army Created from The Shores of Tripoli from Fort Circle Games
I have never played a historical wargame on the First Barbary War, which if you didn’t know was one of the first major wars the young United States of America participated in that was situated far outside their sphere of influence in North and South America. Shortly after the end of the American Revolutionary War, commercial vessels of the United States were being attacked and raided by the pirates of the Barbary coast in the Mediterranean Sea. In 1801, newly inaugurated President Thomas Jefferson was eager to put an end to this threat and sent a “squadron of observation” to the Mediterranean to deal with the threat. The Shores of Tripoli covers this conflict and does so using a card driven game mechanic that works really well in this instance. The game is a little deceiving, as at first it appears to be pretty introductory with simple rules and mechanics, but the depth for the game lies in the strategy for each side and the fact that their victory conditions are asymmetric.
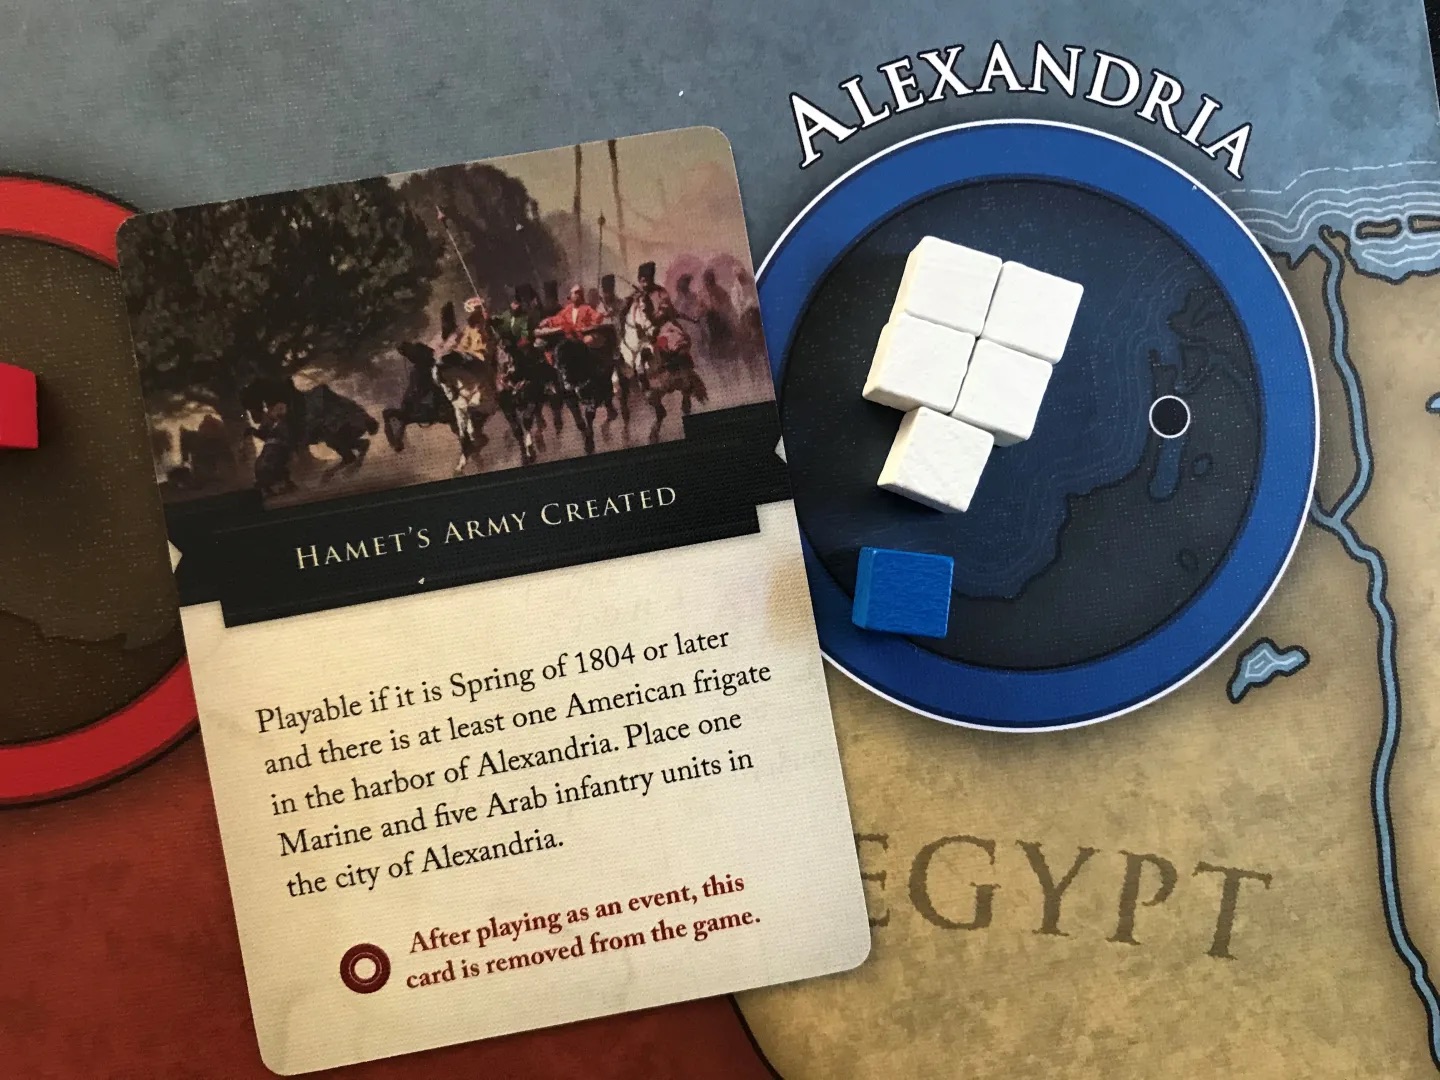
While the main combatants in the game are naval units, there are ground units as well that must be used to try and take Tripoli to win the game. The American ground units consist of Hamet’s Army, which is a combined force of Arab and American infantry units that are dedicated to the mission of installing the pro-American Hamet Qaramanli on the Tripolitan throne. These ground units consist of white cubes that represent the Arab Infantry and blue cubes that represent American Marines. In Ground Combat, each Infantry unit rolls one die and it takes one hit for them to be eliminated.
Hamet’s Army will be created if the United States player plays the card Hamet’s Army Created for the Event. There are several conditions to the card being played though as it must be the Spring of 1804 or later and there has to be at least one American Frigate located in the Alexandria harbor. Once played to bring on Hamet’s Army the card is removed from the game and placed in the box. The newly created army will have to fight their way through 2 locations, Derna and Benghazi, for a final confrontation at Tripoli. I think that I very much enjoy this card because it is a necessary step in the game that the player has to plan for and be prepared to play when it does reveal itself. The player must be ready by using a portion of their limited actions to move at least 1 American Frigate to the harbor of Alexandria and then play this card for the printed event. Keep in mind that this is just the start though as there is a long way to go from here and many more things that must be completed to setup the final showdown.
Hamet Qaramanli’s army was a mixed mercenary force of several hundred Arab and Berber fighters, European cannoneers, and Greek infantry led by U.S. Army Captain William Eaton and U.S. Marine Lieutenant Presley O’Bannon during the First Barbary War. The goal of the expedition was to successfully march across the North African desert, capture the city of Derna, and depose the ruling Pasha of Tripoli, Yusuf Qaramanli in favor of his exiled older brother Hamet Qaramanli. In early 1805, the force marched roughly 500 to 600 miles across the Libyan Desert from Egypt to the Tripolitan border. The force consisted of 8 U.S. Marines, a small group of U.S. sailors, 26 Greek volunteers, a company of cannoneers and roughly 1,000 Arab and Berber mercenaries loyal or allied to Hamet. On April 27, 1805, aided by U.S. Navy warship bombardments, the force successfully stormed and captured the strategic port city of Derna in the Battle of Derna. But before Hamet’s army could advance further toward Tripoli, the United States signed a peace treaty with Yusuf Qaramanli, abandoning Hamet’s claim to the throne in exchange for freed American prisoners and an end to tributes.
Lieutenant O’Bannon and Marines advancing toward Tripoli. (Image from Merrill L. Bartlett and Jack Sweetman, The U.S. Marine Corps: An Illustrated History, (Naval Institute Press, Annapolis, MD: 2001), 30–31.)
We have played several games designed by Adam Starkweather in his Company Scale System (CSS). These games are really good solid chit draw systems that really puts some unknown in what groups of units can activate and even when they will activate. There are also events and if the chit cup runs dry before all of the units can activate due to the end round chit then you are just sore out of luck. You have to prepare for this inevitability and I love the concept of prioritizing your activations and making sure you activate what you absolutely have to before doing those units that would be beneficial to activate. Now Adam has created his own publishing company called Bring it on Games and they have announced their first pre-order game in a new system called Advanced Company Scale System Game One:Anzio: A Lost Opportunity. This is a huge wargame and includes 10 large maps, 20 counter sheets and tons and tons of charts, tables and player aids. This is a MONSTER wargame…no doubt about it but it looks really good. I reached out to Adam to see if he could provide us some additional insight into the game and he was more than willing to discuss with us.
If you are interested in Advanced Company Scale System Game One:Anzio: A Lost Opportunity, you can pre-order a copy for $350.00 from the Bring it on Games website at the following link: Shop — Bring it on Games
Grant: Adam welcome to our blog. First off please tell us a little about yourself. What are your hobbies? What’s your day job?
Adam: First off, my hearty thanks to The Players’ Aid crew for giving me the opportunity to introduce myself and tell you about my new adventure.
As my waistline will attest, my hobbies and interests are decidedly sedentary. I love watching basketball and baseball (go Knicks – had a great year). And several years ago, I decided to rekindle – ha! – my love of reading. For many years, for work, I read non-fiction. But now, every night before I crash, I read for fun for a half hour. Currently, I’m reading both for work and for fun as I am journeying through Stephen King’s multiverse with a goal of making a game on it. I have an inside to get to King, and I’m hoping I can get him to glance at it and spark some interest. It will be decidedly war gamey in its presentation.
Believe it or not, for over 20 years, I have been blessed that wargame design has been my main gig and what I do for work. With over 50 titles that I’ve designed, developed, or project managed, it has been a productive period for me in the hobby.
Grant:What motivated you to break into game design? What have you enjoyed most about the experience thus far?What have you learned about design over the years?
Adam: A day I remember well. 3 friends and I were playing SPI’s Highway to the Reich, and it just fell apart while we were playing it. Things were happening that just didn’t make sense, and it wasn’t balanced. Once that suspension of disbelief is done, we wargamers just bail on a game. We thought we could do better. All four of us started making a Market-Garden game, but only I kept with it, and my first design The Devil’s Cauldron, was the result 7 years later. As for enjoying what I do, there are occasional hiccups, of course, but I have a dream job. I’m like a professional NBA player – doing something that is tons of fun, and I get paid to do it. I’m the luckiest man in the world.
As for what I’ve learned, of course, I’ve learned how to design – often under tremendous time pressure, but if I had to name one thing, it is knowing what I’m good at and when I need help. I’m great at coming up with new concepts and innovative mechanics, but I can’t research worth a damn nor do I have the patience to rewrite rules again and again. With my new company Bring it on Games, I have both the time and assets to attack my weaknesses and focus on what I do well – and love doing. I have dedicated researchers, dedicated rules editors, and dedicated playtesters. I finally have the time to do a game the right way.
Grant: What is your upcoming game ACSS Anzio about?
Adam: My first game for my new company is on the Battle of Anzio. It is at company level and at 500 meters a hex. It has two campaign games in the box – one for Operation Shingle (the landing and advance inward to the furious German counterattack) and Operation Buffalo – the final breakout and advance to Rome. The middle months in which a World War One type situation happened is not in the game. Two massive campaign games and some 20 smaller scenarios are included.
Grant: What does the subtitle “A Lost Opportunity” represent from the history?
Adam: It is likely for such a famous operation that most people reading this know that Anzio presented an opportunity to end the Italian Front with an aggressive approach to the battle. Instead, the General in charge (Lucas) was tentative and did not advance with the aggression needed. In all my research, I have found that it wasn’t entirely his fault, but it wasn’t a time to be tentative. In the Campaign game, you can try and defeat the Germans with the hand you were historically dealt, or there is an alternative scenario (aptly called “Killer Whale”) where the restrictions on your aggressiveness are removed, and perhaps you can end the Italian battle in two weeks.
There were also missed opportunities in the second campaign in the box. The Allies went for the glory to capture Rome but allowed the Germans to retreat from the Gothic Line mostly intact. The war in Italy was allowed to continue, but again, it didn’t have to be that way. As with Operation Shingle, there is an alternative campaign game in which glory is set aside for a few weeks, and you as the Allies attempt to cut off the German forces and end the war in Italy.
“We were hurling a wild cat on the shore, but all we got was a beached whale.” -Winston Churchill
Grant: Why was this a subject that drew your interest?
Adam: Why Anzio? As is often the case, the subject matter of a game is about work that has already been done. Why start from scratch if months of work have already been done? My historian worked on a game for another designer several years ago and had a great Order of Battle for the game. There was plenty of game in the battle, so Anzio it became. Utah Beach is likely next up for my company as I’ve already made the Grand Tactical Series game on the battle. So I have a complete order of battle and map already made. After that, or before that, might be Salerno. A gamer has already made the game using another system, but the conversion would be easy enough. And of course, a game for ACSS will be on Market-Garden. I have already made a game at this scale. Years of work have already been done. This also gives me time to start fresh on new topics like Omaha Beach or Gela – they become the game with work already done and join the conga line.
Grant: What is your design goal with the game?
Adam: Oh that’s easy. I want to finally be able to make the best company level game I can make. GTS was made when I was a novice and CSS was made when I was under tremendous time pressure. I have both the expertise and the time to do it right this time.
Grant: How have you modified the Company Scale System to become “Advanced”?
Adam: I started work on this a few years back and called it ACSS. The name stuck with me, and I kept it. It keeps Eric Smith’s brilliant combat system and is a chit pull, but much has also been improved and changed. I think I answer much of the realism issues of both systems with ACSS.
I have the rules available online for anyone to read – simply go to rules and you can read it and see where we are at. 3-4 more edits still to go, but it is more complete than anything I’ve made before, even as it sits now.
As for new stuff and mechanics that my playtesters have said they’ve never seen in a game before – I have two standouts. Situational Awareness matters in this game as does an orders system that influences what and how you do things. They are in the above rules so I won’t go deeply into it – but it has a novel way of presenting Fog of War but still allows for solitaire play. There is much, much more that is new – but those two are mentioned by my playtesters the most.
Grant: What elements do you feel are most important to model from World War II and the Allied invasion of Italy?
Adam: I make wargames, so to me, the most important aspect is to get the history correct and honor those that fought and risked their lives to make a better world for me and my children to live. So the history has to be right and fully immersive. In addition, playing a game on a battle is a different, albeit as involved as reading a book on the battle – but it is also a game. It should have decisions and fun aspects in it to make it fun to play.
Grant: What sources did you consult for the historical details?
Adam: If you go to my website at https://bringitongames.com/, you’ll find everything you need to play an introductory scenario using my system – but if you have a look at the end of the scenario book you can download, you’ll see the extensive bibliography for the game. As an aside, over the last 25 or so years of game design, it is really interesting to see how the web has become indispensable in researching military topics.
Grant: What one must-read source would you recommend?
Adam: I asked this very question of my historian a few months ago. He suggested:
Anzio 1944, The beleaguered beachhead, Osprey Publishing Campaign #155, Steven J. Zaloga, 2008, ISBN 978-1-84176-913-4
Although I’m partial to:
Fatal Decision, Anzio and the Battle for Rome, Carlo D’Este, 2008, ISBN 978-0-06-057649-3
A more involved read and perhaps not as great for wargamers as the Osprey volume, but I think the added effort is worth the trouble.
Grant: What is the scale of the game? Force structure of units?
Adam: As with my other company level systems, ACSS is 500 meters a hex, mostly company level units, and each turn is 2 hours. It is a scale I’ve used for two decades and I’m comfortable at this level. In addition, I fell in love with this scale because it offers both tactical mechanics but you can play an entire battle (although you’ll need space and time of course).
The system uses a chit-draw method to activate units and this is at division level. You draw a chit and do things with an entire division and then move to the next chit.
Grant: What are the differences between the playable factions of the Allies and Axis powers?
Adam: At this level of company actions, the difference between the two armies is quite evident. The Germans have fantastic equipment but are brittle, while the Allies have so much firepower at their disposal. To show one example of what you can show at this scale: the Germans based their tactical dogma on their excellent MG 42 machine gun, while the Americans based their tactics on the excellent Garand rifle. They each operated differently – and I can show this at this scale. Many other aspects from more effective counter-battery fire to specialized tactics are also there. Check out the rulebook above and you’ll see.
Grant: What is the layout of the board?
Adam: Almost all monster games focus on the campaign game, and the scenarios are snippets of the larger campaign game. That is certainly true of my large games. For me at least, it was always a matter of speed. I could test scenarios while I tested the campaign game. My scenarios often started when the campaign game started. There are a few exceptions to this where the scenarios are the primary game, and the campaign game is the added bonus. Games like Pacific War by Victory Games are like this.
I, however, want to have both scenarios and the campaign games have equal importance. Each scenario has its own counter set and its own map. The map size goes from 8 1/2 inches for the introductory scenarios, to one map for the majority of intermediate and advanced scenarios, to two maps for a larger game experience. Finally, there are the two full campaign games, which each have 4 full-sized maps and two half maps – a total of 5 maps. But there are some ten double-sided maps in the game (a total of 20 maps) – this is a map for each scenario and a campaign game map.
“The Rock” Scenario map.
Grant: How are units activated? Why do you feel chit-pull is such an effective method?
Adam: I love chit-pull as a mechanic and have used it for decades. It has the advantage of being great for solo play. There is the drawback that if you have a lot of players, you might have to wait for your turn to come up – although there are ways around this that I talk about in the rulebook, I find the great advantage of board games over computer games is the social aspect of playing them.
Grant: What is the general Sequence of Play?
Adam: A great question. When I first open a game, there are two things I look at first. The Sequence of Play and the victory conditions. They tell me more about the general concepts behind the game than anything else. Of course, a far more complete Sequence of Play is in the rulebook that you can download, but the basic SoP that is used in the VASSAL module is:
But check out the rules for a much more exhaustive Sequence of Play.
As for victory conditions, I blatantly steal from great designers that have great victory conditions – in concept. Some designers just know how to make victory conditions that drive a game and allow for incredible excitement in play. There are some 21 scenarios in the game, and I use different types of victory conditions in each and every one. I did the same thing to a lesser degree in my Greatest Day game. But whatever type of game you like, I’ll have you covered in one or more of the scenarios and the campaign game.
As for how the basic mechanics work, I have a ton of examples in the game for you to have a read and see how things work. Check them out.
Grant: Tell me about Bring it on Games. How are you different from other game companies?
Adam: I changed The Players’ Aid’s last question to talk about this a bit. I take the slogan “A Game Company run by Gamers” seriously. As we have aged, what we expect from games has changed. The games are expensive, but while we all, hopefully, have more money now, we have less time and less patience. I used to love reading rules, but now it is like pulling teeth – it is painful to get into a game. This game and all that follow are about making the games convenient and easy to approach. It is expensive for sure for all of this added stuff that you haven’t seen before – but again, we have more money but less time. You’ll see things here that will make you wonder why all the companies don’t do this.
Also, I don’t want to be GMT or MMP. I want to make games. I won’t have a warehouse, so only orders will be printed. Once I go to press, the game will be out of print. I’ll also limit the total number of orders I will accept. I like making the games. I don’t want to spend my time with all the company stuff. Trust me when I tell you that the owners of all the game companies aren’t having as much fun in the hobby as you are – they are busy running a company, tracking inventory, and all that stuff. I don’t enjoy that very much. So I’ll give up selling games after they print and keep having fun.
I hope you’ll go to my website at www.bringitongames.com and download the sample rules and Vassal set – and see if it’s your thing. I’d love your support. You can also subscribe to my newsletter. And I apologize in advance if you, as more than a few gamers have said to me, “you’ve ruined GTS and CSS for me”.
If you have any questions or comments, you can reach me at:
Thanks so much for your time in answering our questions Adam. I am very much looking forward to this system and wish you the best of luck in bringing it across the finish line. I have very much enjoyed my experience with the Company Scale System (Saipan: The Bloody Rock and The Enemy is at the Gates: Battle for Berlin, 1985 both from Compass Games) as well as the Grand Tactical Series (Devil’s Cauldron and Where Eagle’s Dare both from Multi-Man Publishing) and very much enjoy the feel of the game and the combat system.
If you are interested in Advanced Company Scale System Game One:Anzio: A Lost Opportunity, you can pre-order a copy for $350.00 from the Bring it on Games website at the following link: Shop — Bring it on Games
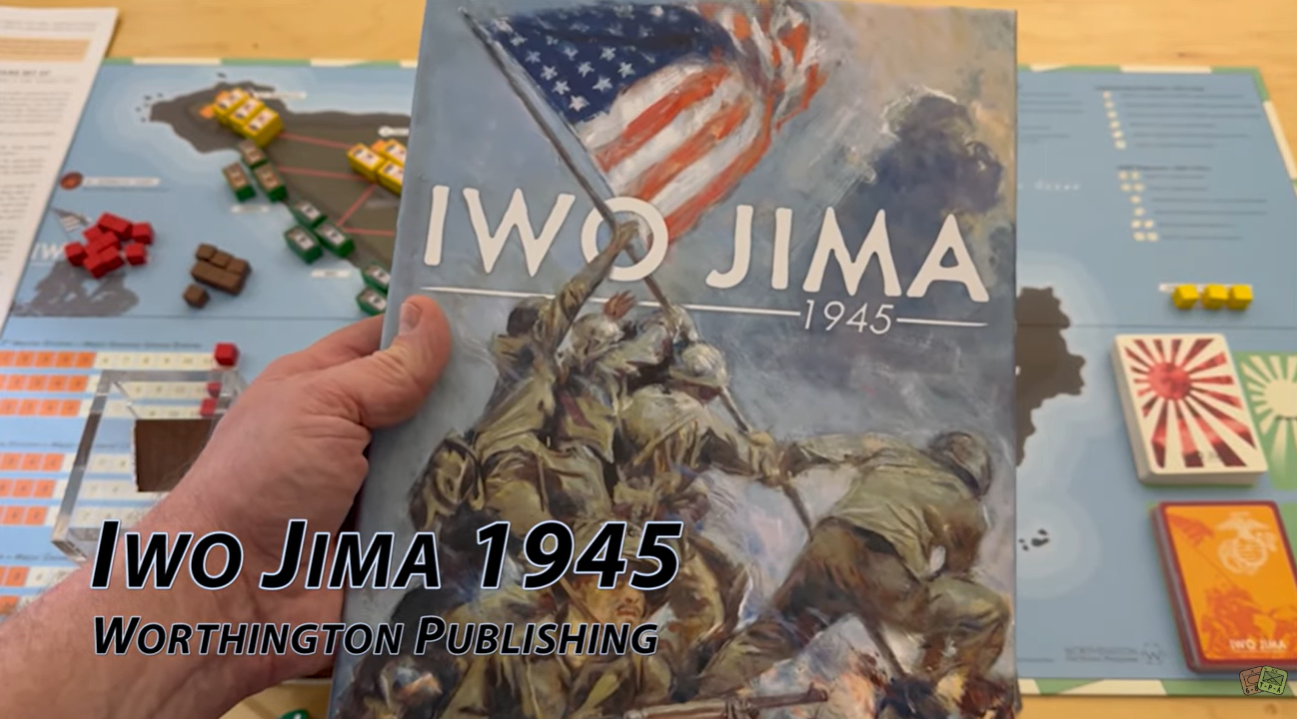
A few years ago, Worthington Publishing published their first game in the Island Fight Series called Tarawa 1943. That game was awesome and was truly difficult to win, as it should be. Now, they have published the 2nd volume in the series called Iwo Jima 1945 that covers the only island assault during the Pacific war that the attacking US forces would suffer worse casualties than the Japanese defenders. On February 19, 1945 the USMC would land 30,000 marines on the island against a Japanese defensive force that numbered roughly 21,000 Japanese soldiers. Facing a Japanese commander who had learned valuable lessons from the losses on other Japanese islands, the USMC would eventually land over 70,000 marines and suffer over 25,000 casualties during the 36 day campaign.
In this solitaire game, the player takes on the role of the USMC commander leading the invasion of Iwo Jima. The game system, driven by cards, will simulate the strategies of the Japanese defenders, often referred to as the Japanese AI, adding a layer of historical authenticity to your gaming experience. If you have played Tarawa 1943, you will be familiar with the system.
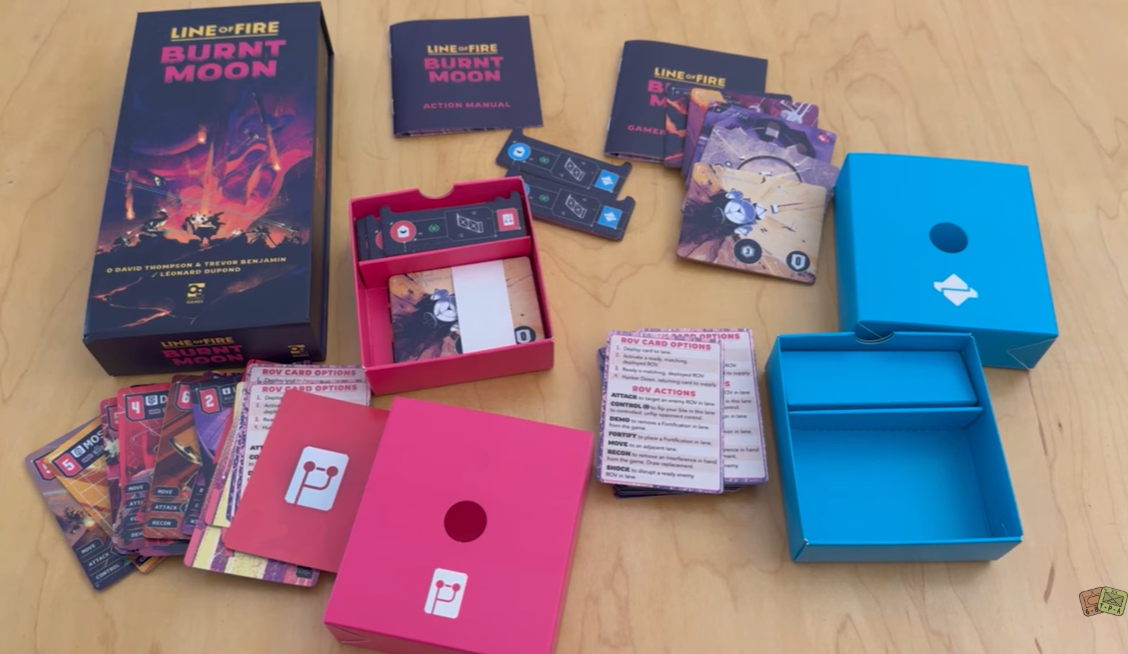
A group of black-hat hackers known as POSIWID plots to hijack the moon Io and hold the entire Jovian power grid to ransom. Standing in their way are the ultra-corporate LFA, the constructors of the lunar energy facilities. Both sides have engaged a fleet of ROV – advanced remotely-operated robots — to battle across the treacherous landscape. The machines are activated. Initiate combat sequence. The battle for Io has begun.
Line of Fire: Burnt Moon is a standalone 2-player card game that fuses the lean deck-building of the award-winning UndauntedSeries with fast-paced lane battling. Sharp decision-making and clever positioning combine in a nail-bitingly tense, endlessly replayable, and lightning-fast experience.
With this My Favorite Wargame Cards Series, I hope to take a look at a specific card from the various wargames that I have played and share how it is used in the game. I am not a strategist and frankly I am not that good at games but I do understand how things should work and be used in games. With that being said, here is the next entry in this series.
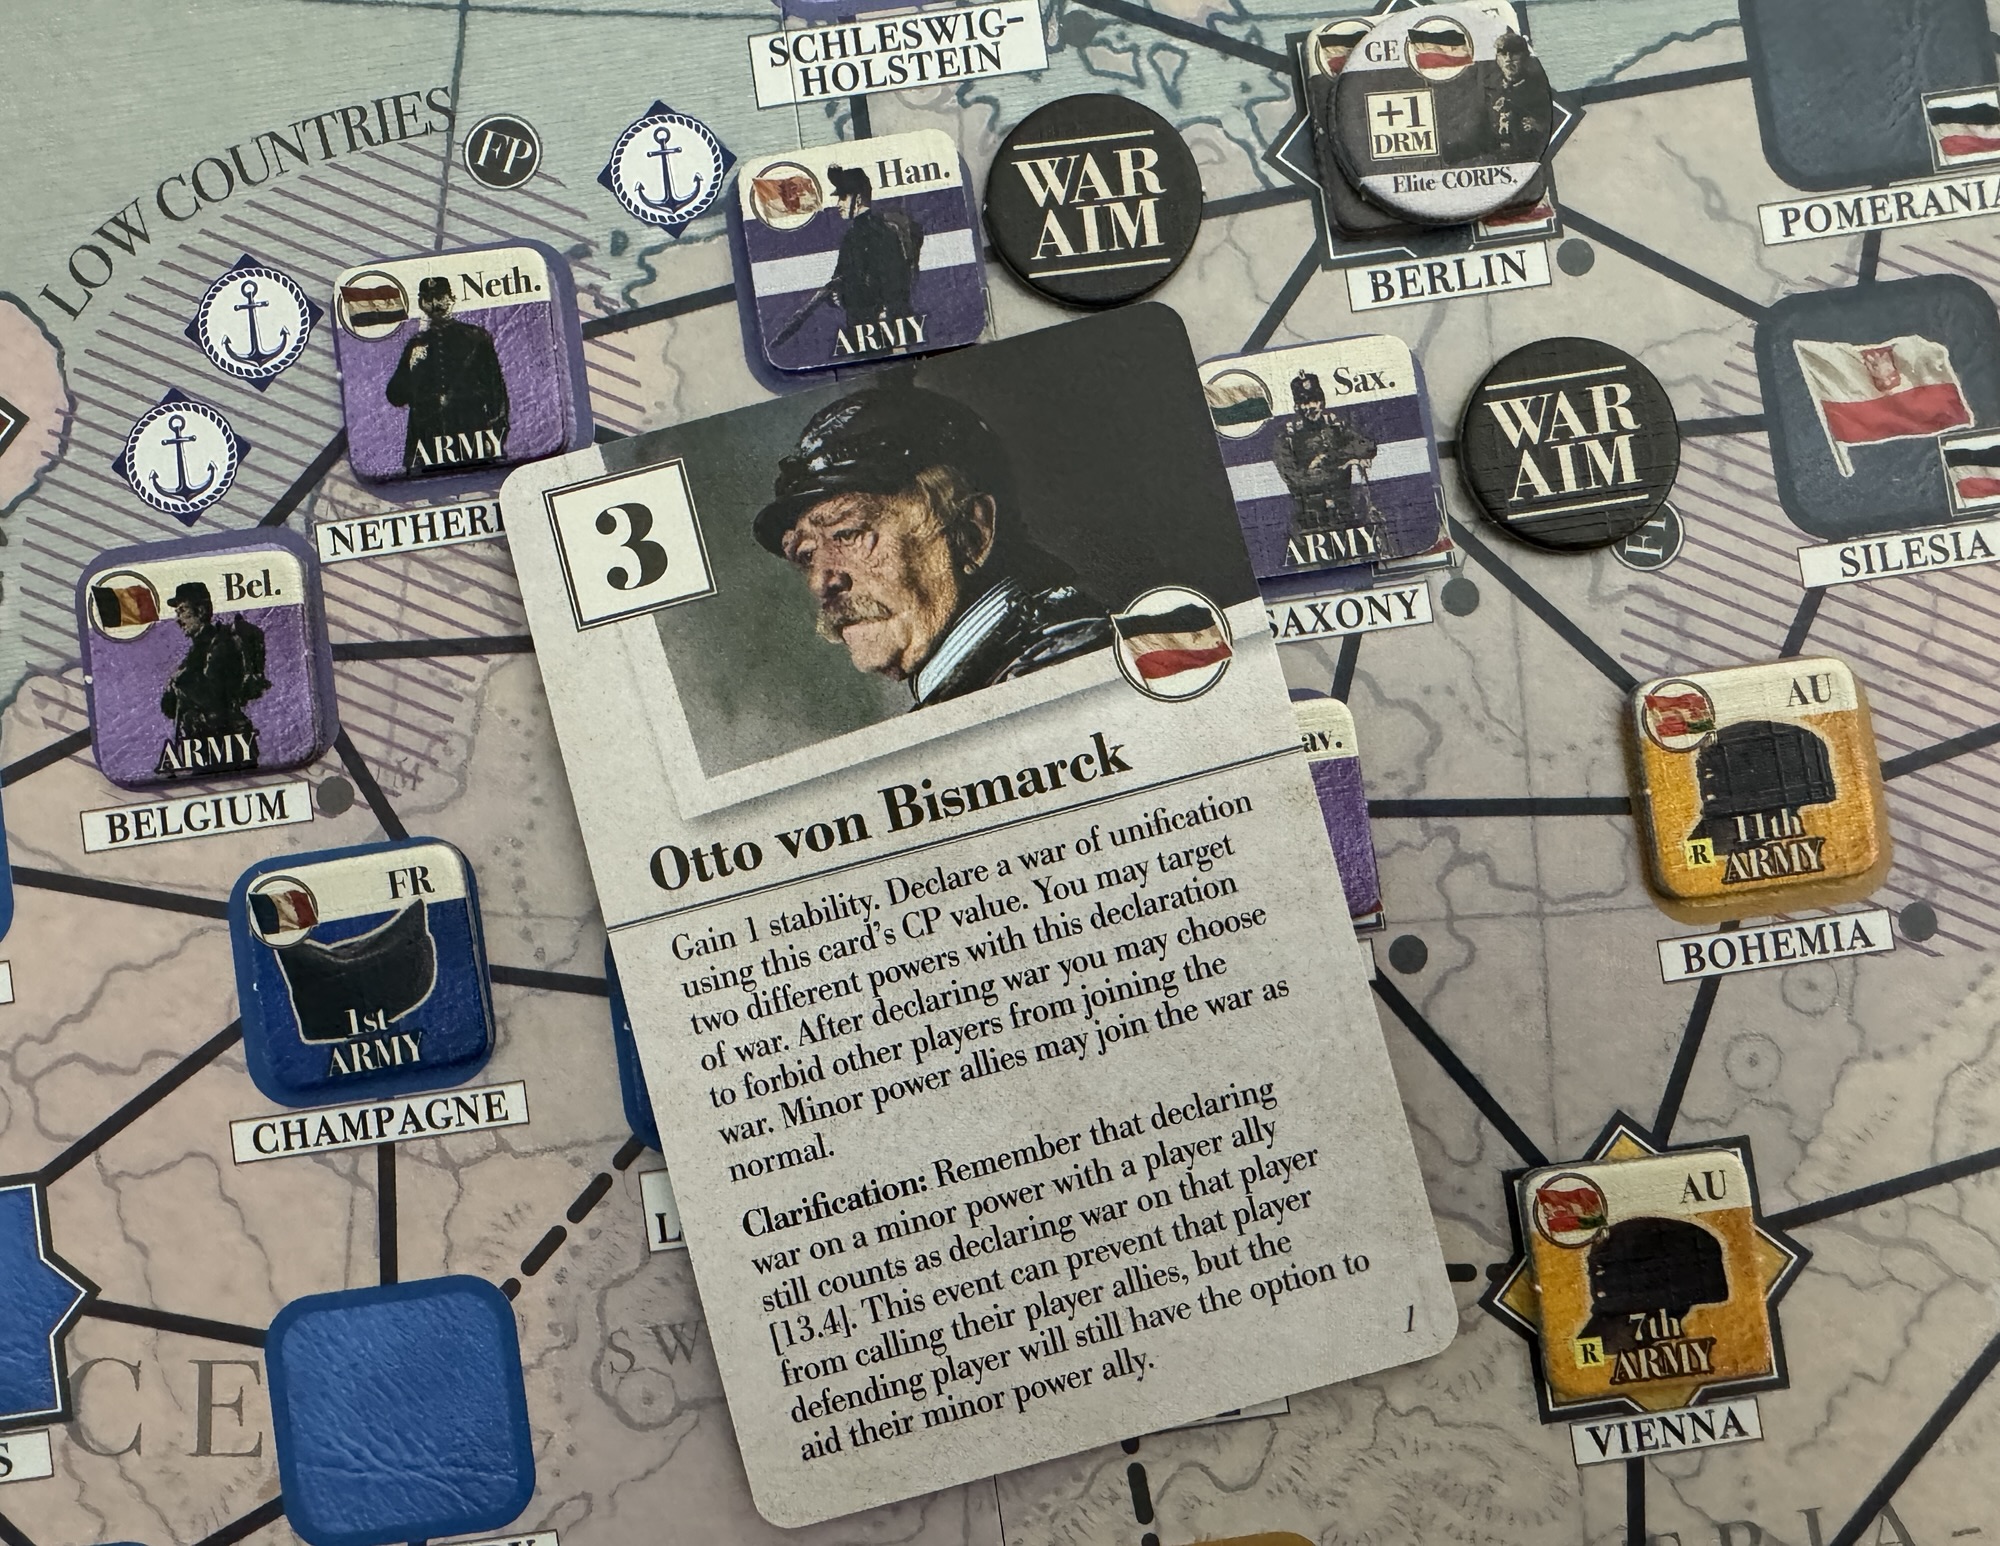
#93: German Home Card Otto von Bismarck from Imperial Elegy: The Road to the Great War 1850-1920 from VUCA Simulations
Imperial Elegy: The Road to the Great War 1850-1920 is a massive card driven game that blends diplomacy, warfare, and statecraft and feels a bit akin to games like Here I Stand and Virgin Queen from GMT Games, which are both grand scale sweeping epics that play multiplayers and take a day to play. Players play as 1 of 6 major powers in the game including Germany/Prussia, the United Kingdom, France, Austria-Hungary, Russia and the Ottoman Empire. The game is quite grand and ambitious as it covers 70 years near the end of the Victorian Era and the Progressive Ear and sees quite a lot of global change and competition between the great powers of the time. The game is a Card Driven Game and uses Action Cards as a type of currency to spend for their Command Points or the printed event to take actions such as recruiting armies and navies, industrialize, moving fleets and armies around the globe, influencing minor powers and establish colonies in Africa, India and the Pacific Ocean. The cards are all tied to the history of the period but the game can be played very much as a sandbox allowing players to explore strategies by trailblazing new horizons or following history.
In Imperial Elegy: The Road to the Great War 1850-1920, the Otto von Bismarck Card is a powerful and extremely important German Home Card. Rather than being shuffled into the common Action Card Deck, it belongs exclusively to the Prussian/German player’s unique toolkit to represent the historical trajectory of German state-building. The card is mechanically tied to the first few turns of the grand 7-decade timeline and acts as a get started quickly card for the German player as they begin the long and somewhat difficult task of attempting to unify the Germanic peoples under one banner. The German player can choose to execute it on Turn 1 to abstractly simulate Bismarck’s rapid real-world rise to power and kickstart early diplomatic maneuvers or wars. Playing as Germany, the player should be focused on attempting the Unification of Germany and will most likely choose the Unification National Goal card as a standard at the beginning of games. The Bismarck Home Card is the primary historical vehicle used to achieve this unification and simulates driving the annexations or alliances needed to claim crucial minor regions including Saxony, Schleswig-Holstein, Denmark and Alsace Lorraine. And like standard Action Cards in Imperial Elegy, the card presents a choice. The German player can either choose between using its high Command Point (CP) Value of 3 for a massive push focusing on industrial development or military actions, or using the card for its printed Event text. One of the really nice parts of the card is the way that it effects Stability in the game. Stability is a core national resource and rating that measures a major power’s internal political health, structural integrity and capacity to wage war or absorb setbacks such as economic downtown and social upheaval. Typically, when you declare war, your Stability will degrade but not in the case of a War of Unification. And with Bismarck, Germany will gain 1 Stability when they declare a War of Unification. This is such a powerful effect for the early game as it will allow the German state to build up their capacity and increase Stability to be able to perform later in the game.
1871 portrait of Otto von Bismarck, the first Chancellor of the German Empire. He is depicted wearing his signature Prussian military uniform, including the distinct Pickelhaube (spiked helmet).
Otto Eduard Leopold, Prince of Bismarck, Duke of Lauenburg, known as Otto von Bismarck, was a conservative German statesman who masterminded the unification of Germany in 1871 and served as its first chancellor until 1890, in which capacity he dominated European affairs for two decades. He had previously been Minister President of Prussia from 1862–1890 and Chancellor of the North German Confederation from 1867–1871. He provoked three short, decisive wars, against Denmark, Austria, and France.
Following the victory against Austria, he abolished the supranational German Confederation and instead formed the North German Confederation as the first German national state, aligning the smaller North German states behind Prussia, and excluding Austria. Receiving the support of the independent South German states in the Confederation’s defeat of France, he formed the German Empire – which also excluded Austria – and united Germany.
With Prussian dominance accomplished by 1871, Bismarck skillfully used balance of power diplomacy to maintain Germany’s position in a peaceful Europe. To historian Eric Hobsbawm, Bismarck “remained undisputed world champion at the game of multilateral diplomatic chess for almost twenty years after 1871, and devoted himself exclusively, and successfully, to maintaining peace between the powers”. However, his annexation of Alsace-Lorraine (Elsaß-Lothringen) gave new fuel to French nationalism and Germanophobia. Bismarck’s diplomacy of Realpolitik and powerful rule at home gained him the nickname the “Iron Chancellor”. German unification and its rapid economic growth was the foundation to his foreign policy. He disliked colonialism but reluctantly built an overseas empire when it was demanded by both elite and mass opinion. Juggling a very complex interlocking series of conferences, negotiations and alliances, he used his diplomatic skills to maintain Germany’s position.
A master of complex politics at home, Bismarck created the first welfare state in the modern world, with the goal of gaining working-class support that might otherwise go to his Socialist opponents. In the 1870s, he allied himself with the low-tariff, anti-Catholic Liberals and fought the Catholic Church in what was called the Kulturkampf (“culture struggle”). He lost that battle as the Catholics responded by forming the powerful German Centre Party and using universal male suffrage to gain a bloc of seats. Bismarck then reversed himself, ended the Kulturkampf, broke with the Liberals, imposed protective tariffs, and formed a political alliance with the Centre Party to fight the Socialists. A devout Lutheran, he was loyal to his king, Wilhelm I, who argued with Bismarck but in the end supported him against the advice of his wife Queen Augusta and his heir Crown Prince Frederick William. While Germany’s parliament was elected by universal male suffrage, it did not have much control of government policy. Bismarck distrusted democracy and ruled through a strong, well-trained bureaucracy with power in the hands of a traditional Junker elite that consisted of the landed nobility in eastern Prussia. He largely controlled domestic and foreign affairs, until he was removed by the young new headstrong Kaiser Wilhelm II. He retired to write his memoirs.
This historic image shows Chancellor Prince Otto von Bismarck (center) with diplomatic envoys and plenipotentiaries of the Federal Council (Bundesrat) inside the Berliner Reichstag in 1889.
We have put out several pieces of content covering Imperial Elegy and find it to be a fantastic game. These include written posts and videos. You can visit those by following the links below:
Unboxing Video:
Video Review:
Summary of Solitaire Bots presented by our friend James:
Games tackling subjects ranging from the 1968 Democratic National Convention protests to the 30-year holdout of Japanese WW2 soldier Hiroo Onoda have been named as finalists in this year’s Summit Award, which aims to recognise historical game designs which have attracted new players or introduced new subjects or perspectives to the hobby.
The game puts players in the roles of the gender-defying mollies of early 18th century London, attempting to build community and joy while facing persecution by the Society for the Reformation of Manners.
Chicago ‘68, designed by Yoni Goldstein and published by the Dietz Foundation, was the most-selected title during the Summit Award’s public nomination process this summer.
Chicago ’68, designed by Yoni Goldstein || Photo Credit: Yoni Goldstein
The game explores the protests and police response surrounding the 1968 Democratic National Convention, dividing players between Establishment and Demonstrator factions including the mayor’s office, Chicago Police Department, Yippies and National Mobilization Committee To End The War In Vietnam.
Battlefields of the Napoleonic Wars, designed by Paolo Mori and Alessandro Zucchini and published by Ingenioso Hidalgo, uses four different battlefield maps to recreate engagements from the Napoleonic Wars in sessions lasting between 60 and 120 minutes.
The fourth finalist is Francisco “Pako” Gradaille’s Onoda, a 25-minute solo game published by Salt & Pepper Games which explores the experiences of Japanese soldier Hiroo Onoda, who continued guerrilla warfare on the Philippine island of Lubang until 1974. Judges praised the unusual subject and the way the game asks players to engage with Onoda’s story and decisions.
Onoda, designed by Francisco Gradaille || Photo Credit: Salt & Pepper Games
Winter Rabbit, which draws on traditional Cherokee animal stories and was created as a counterpoint to common colonial themes in games, was runner-up in the 2021 Zenobia Award and won the Light Strategy category at this year’s Origins Awards.
The Summit Award considers games across five criteria – ease of teaching, ease of play, uniqueness of topic, novelty of approach and effectiveness as a historical game.
SDHist, which was launched mainly as a local wargaming group in 2015, is led by wargaming experts including Liberty or Death: The American Insurrection designer Harold Buchanan.
The organisation’s board and board of advisors selected three of this year’s finalists following the public nomination process, which put Chicago ‘68 on the shortlist.
The same groups will select the winner, which is set to be announced at the SDHist Summit convention in San Diego in November.
If you want to read more posts like this strategy post – for example my upcoming deep dives on the God cards in Julius Caesar, I strongly recommend you subscribe to the blog: All new posts in your inbox right when they go live!
The victory conditions in Julius Caesar are straightforward: Have 10 victory points (VP) at the end of any year or more VP than your opponent at the end of the full five years of war. Absent the rare VP from a leader kill, these come from the control of victory cities on the board (up to 13). At the beginning, Pompeius controls cities worth 7 VP, Caesar only Massilia for 1 VP. That leaves five VPs in vacant cities: As it is much easier to take empty cities than those defended by your opponent, these should be your focus for the first year.
VP cities: Pompeius’s holdings are green, Caesar’s red. Rome and the three cities in the Greek East in blue are up for grabs.
2 VP come from Rome, which Caesar must take and hold early (which shouldn’t be a problem for the plethora of Caesarian legions nearby). That leaves the 3 VP from three cities in the Greek-speaking East (Athens, Byzantium, and Ephesus) as the first spaces of contention between the players. Either should send an army there early, and make it strong enough not to be swatted away by the other. Especially when you use the Free Deployment, you can try to position yourself for the rush to the east. Try out a few different deployments, maybe with navis (ships) in different ports to reach cities by sea – or block your opponents from doing so. Which brings us to…
Win Naval Superiority
Once the front lines are drawn, ships become even more important. As defenders have the combat advantage of dealing hits first when battle priorities (ranging from A to D) are tied, defending is a lot easier than attacking in Julius Caesar. Successful attacks thus hinge on local superiority, and ships are the way to achieve it:
You can transport your land forces amphibically much further than they could march on land. Instead of bashing your head against a well-prepared defensive position, your amphibious force can go ashore where the enemy is weakest.
Instead of being limited to however many troops you can march into battle by road (four on a main road, two on the regular roads), the ships can join attacks on port cities and give you the boost needed to overcome the defenders.
Whoever has naval superiority thus usually decides where the action happens. You should gain it, or at least deny it to your opponent.
Caesar has gotten a massive fleet of four blocks into the Mare Internum, which gives him a plethora of offensive options: He can transport land forces to Sicily (1a) or North Africa (1b). He can strike east into the Mare Aegypticum and, in the following turn, directly attack Alexandria (2a) – defended by the lone blue Cleopatra block – or Antioch (2b) – defended by the lone green Pompeian block. He could also sail up the Aegean and into Propontis and help force the straits in a combined land-sea attack in the following turn (3).
Don’t Overdo It With the Gods
Yes, I know. The God cards look great. Surprise attack with Mars! Bonus movement with Mercury! Volcanic eruption with, well, Vulcan! They are, however, not always better than the regular move/levy cards, and the more you have of them, the less flexible you are. So: One God card is fine (although I have sometimes discarded the only God card I was dealt). Two are a lot, and you should strongly consider discarding one of them. If you are ever dealt three, curse your luck and discard one for sure.
Over the next weeks, I’ll add a few more specific thoughts on the God cards. Watch this space.
Which of these cards would you discard on turn 1? Does it make a difference if you’re playing as Caesar or Pompeius?
Which tricks do you use to win at Julius Caesar? Let me know in the comments!
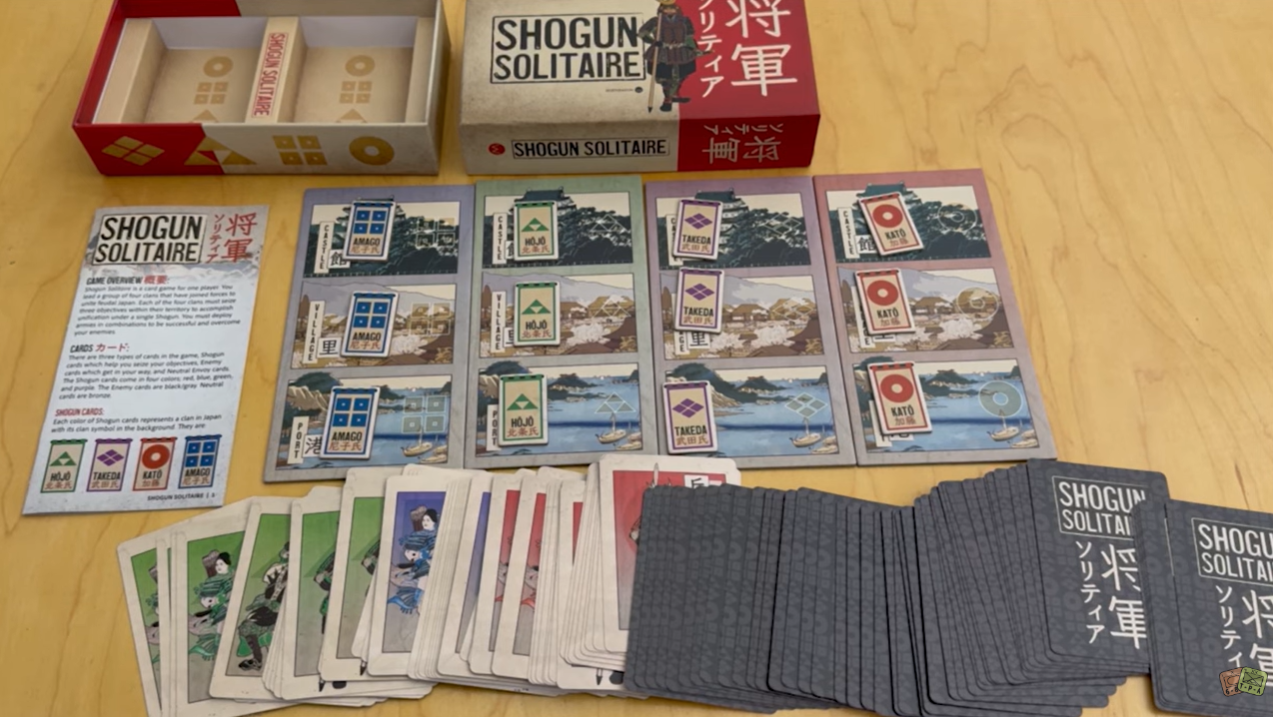
Shogun Solitaire is a card game for one player. Your mission in Shogun Solitaire is to lead a coalition of four clans to unite feudal Japan. Each clan must secure three objectives within their territory to achieve unification under a single Shogun. To accomplish this, you’ll need to deploy armies in strategic combinations, outsmarting your enemies. The game’s object is to become the Shogun by unifying all the clans of feudal Japan.
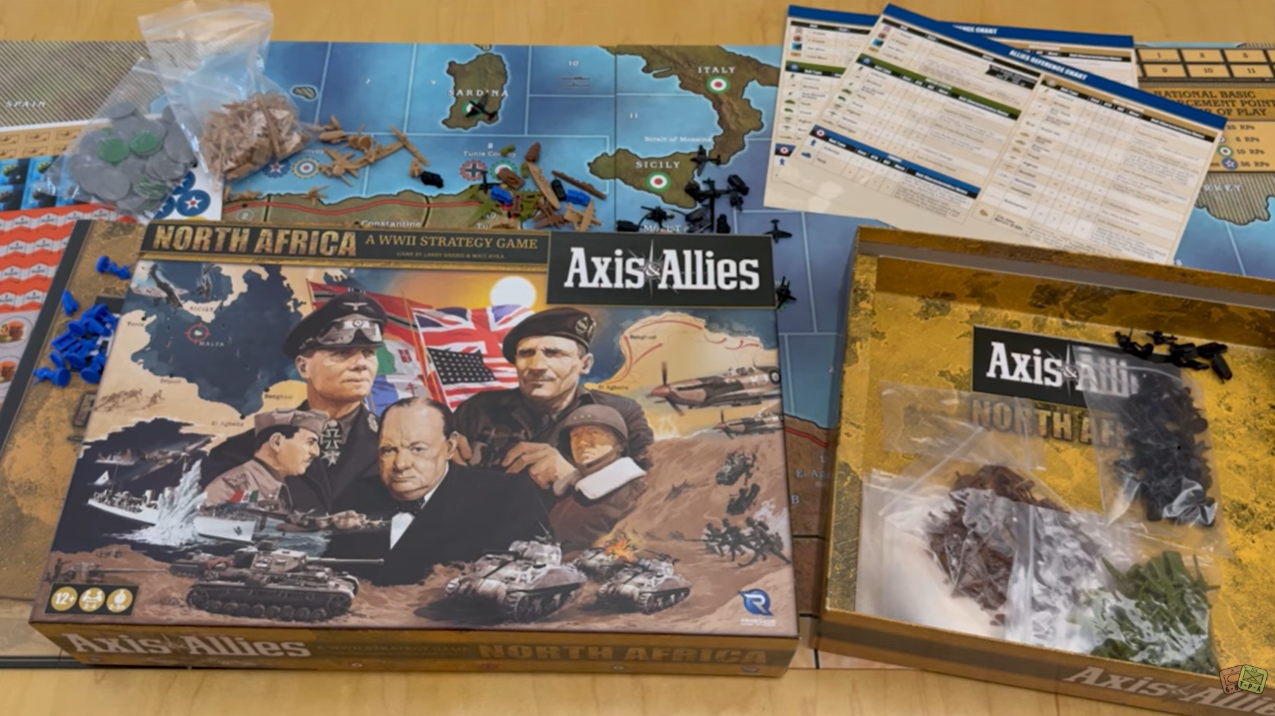
The fighting in North Africa was unlike any other in World War II. In Axis & Allies: North Africa, you will command the forces of either the Axis (Germany and Italy) or the Allies (the United Kingdom and, eventually, the United States) in a campaign that may again capture the imagination of the entire world. Intercept enemy convoys headed to the ports of North Africa…while protecting your own. Prove your logistical prowess by keeping your forces supplied. Most of all, show your ingenuity as a general, and you may change the course of history and ultimately gain the respect of your opponents.
Axis & Allies: North Africa contains 2 scenarios: Rommel’s Last Push and Operation Torch, over 250+ plastic miniatures, including 6 new units: SdKfz 231, Panzer IV Tank, 6-pounder AT Gun, CMP Truck, SOMUA S35 Tank, and LRDG Jeep.
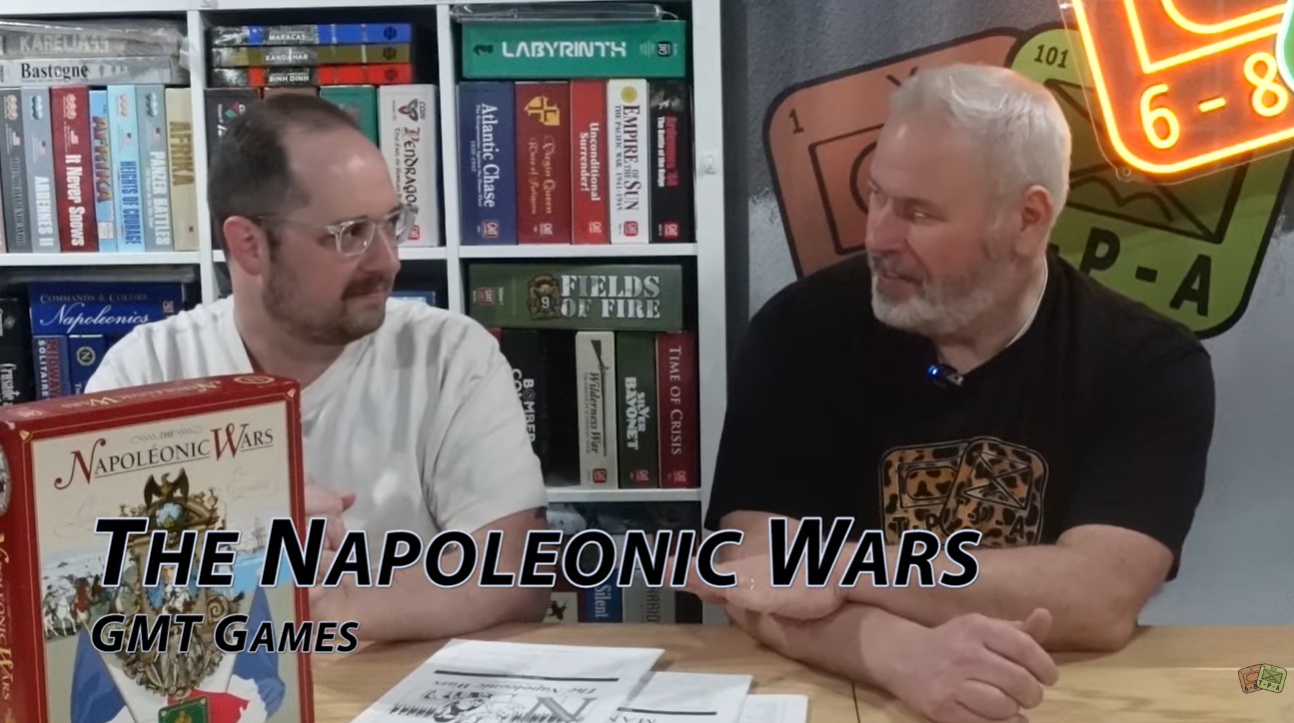
The Napoleonic Wars, 1805 – 1815, brings you a fast-paced, tension-filled, card-driven wargame using a point-to-point movement system that pushes the envelope in a new direction for this pivotal period of history. Having a simple-to-learn strategic system and short rulebook, The Napoleonic Wars, can be played in an evening as the cards and Diplomatic Track make for tough decision-making in the face of everchanging enemy threats.
Set in 1805 Europe, you must weigh the strategic dilemmas facing the two alliances in mortal conflict. Napoleon’s France enjoys a superb army, central position, superior leadership, and a useful, if not powerful, ally in Spain. However, she faces three foes.
I love a different style and focus of wargame. A game that takes a look at an important but somewhat obscure or rarely addressed historical topic, such as espionage or intelligence, and creates a gaming experience tailored around the events to highlight and evoke the difficulties and tension that would have been present. In January 2026, GMT Games announced such a game in Checkpoint Charlie, which is a solo or cooperative game focused on SIS espionage missions in Berlin in the 1960’s designed by Russell Brown. We have posted an interview with Russel and it was very well received and he has now agreed to create a series of History Behind the Cards to highlight the events of the 1960’s Cold War struggle in West Germany but also to share aspects about the game play and how it models the history.
*Note: The cards highlighted in this series and their event text, as well as any pictures used showing any of the various components, are still in the design and development process and as such event effects and text might still change prior to final development and publication.Also the art and layout of the cards are only for playtest purposes at this point and the game will enter the art department as it nears publication.
History Behind the Cards – Checkpoint Charlie from GMT Games – Card #6: General Clay Steps In
US General Lucious D. Clay was appointed as military governor of the United States zone of Berlin from 1945 until 1949. He was best known, especially to the people of Berlin, as the person responsible for the Berlin Airlift, which fed and supplied the people of Berlin from the air when the Soviets cut off all access to the city for eleven months, from June 1948 to May 1949. Without the airlift, the west would have been left with two terrible options – allow West Berlin to be starved into submission and annexation, or invade East Germany to open a supply corridor, almost certainly starting an all-out war with the Soviets.
In the early 1960’s, US President Kennedy turned to the now retired General Clay and called on him to deal with serious issues that arose in Berlin, like the faceoff between tanks at Checkpoint Charlie (card #4). Clay understood Berlin and had the respect of its people, so Kennedy brought him along on his famous visit to the city, during which the president gave his “Ich bin ein Berliner” speech (card #7).
The General Clay Steps In card in Checkpoint Charlie represents the retired general being sent by Kennedy to resolve issues in West Berlin. Playing the card removes an event marker from the city and is the only way many of the event markers can be removed during a mission. It is especially useful for removing the Faceoff marker or a troublesome Stasi Stakeout.
In the next article in this series, we will take a look at Ich bin ein Berliner Speech by President John F. Kennedy.
In my opinion, this game looks extremely interesting and I am very much excited to learn more about it. I am appreciative to Russell and his efforts to bring us these cards and to write these entries to share with our readers. I am also very glad that this topic is being covered in a game and look forward to playing this one day soon.
With this My Favorite Wargame Cards Series, I hope to take a look at a specific card from the various wargames that I have played and share how it is used in the game. I am not a strategist and frankly I am not that good at games but I do understand how things should work and be used in games. With that being said, here is the next entry in this series.
#92: Castelnau and Voie Sacrée from Verdun 1916: Steel Inferno from Fellowship of Simulations
Over the past several years, we have played quite a few World War I games with our focus on the Guns of August events every summer. We have really played some fantastic games including some of the true classics on the genre such as Paths of Glory from GMT Games and The Lamps are Going Out from Compass Games but also some real hidden gems like At All Costs from Hollandspiele, Devil Dogs from Worthington Publishing and Decisive Victory 1918: Soissons from Legion Wargames. A game that we very much liked was Verdun 1916: Steel Infernofrom Fellowship of Simulations. The game is a Card Driven Game that uses cards with events and operation points to tell the grim story of the year long fighting around the French city of Verdun. The game uses a bucket of dice approach to the initial bombardments in a battle and then players choose whether to follow that with an infantry assault that doesn’t use any dice to determine hits. The game is very much a wargame but I think the cover highlights a key fact about the game by calling it a “Strategy Game” namely that it is a game as there are wildly powerful events based in history, with lots of dependence on dice not just for bombardments but also for playing certain offensives Event Cards where Victory Points are earned based on the higher numbers rolled. The game is very well done, is truly interesting and surprisingly deep with its tactical choices and decisions.
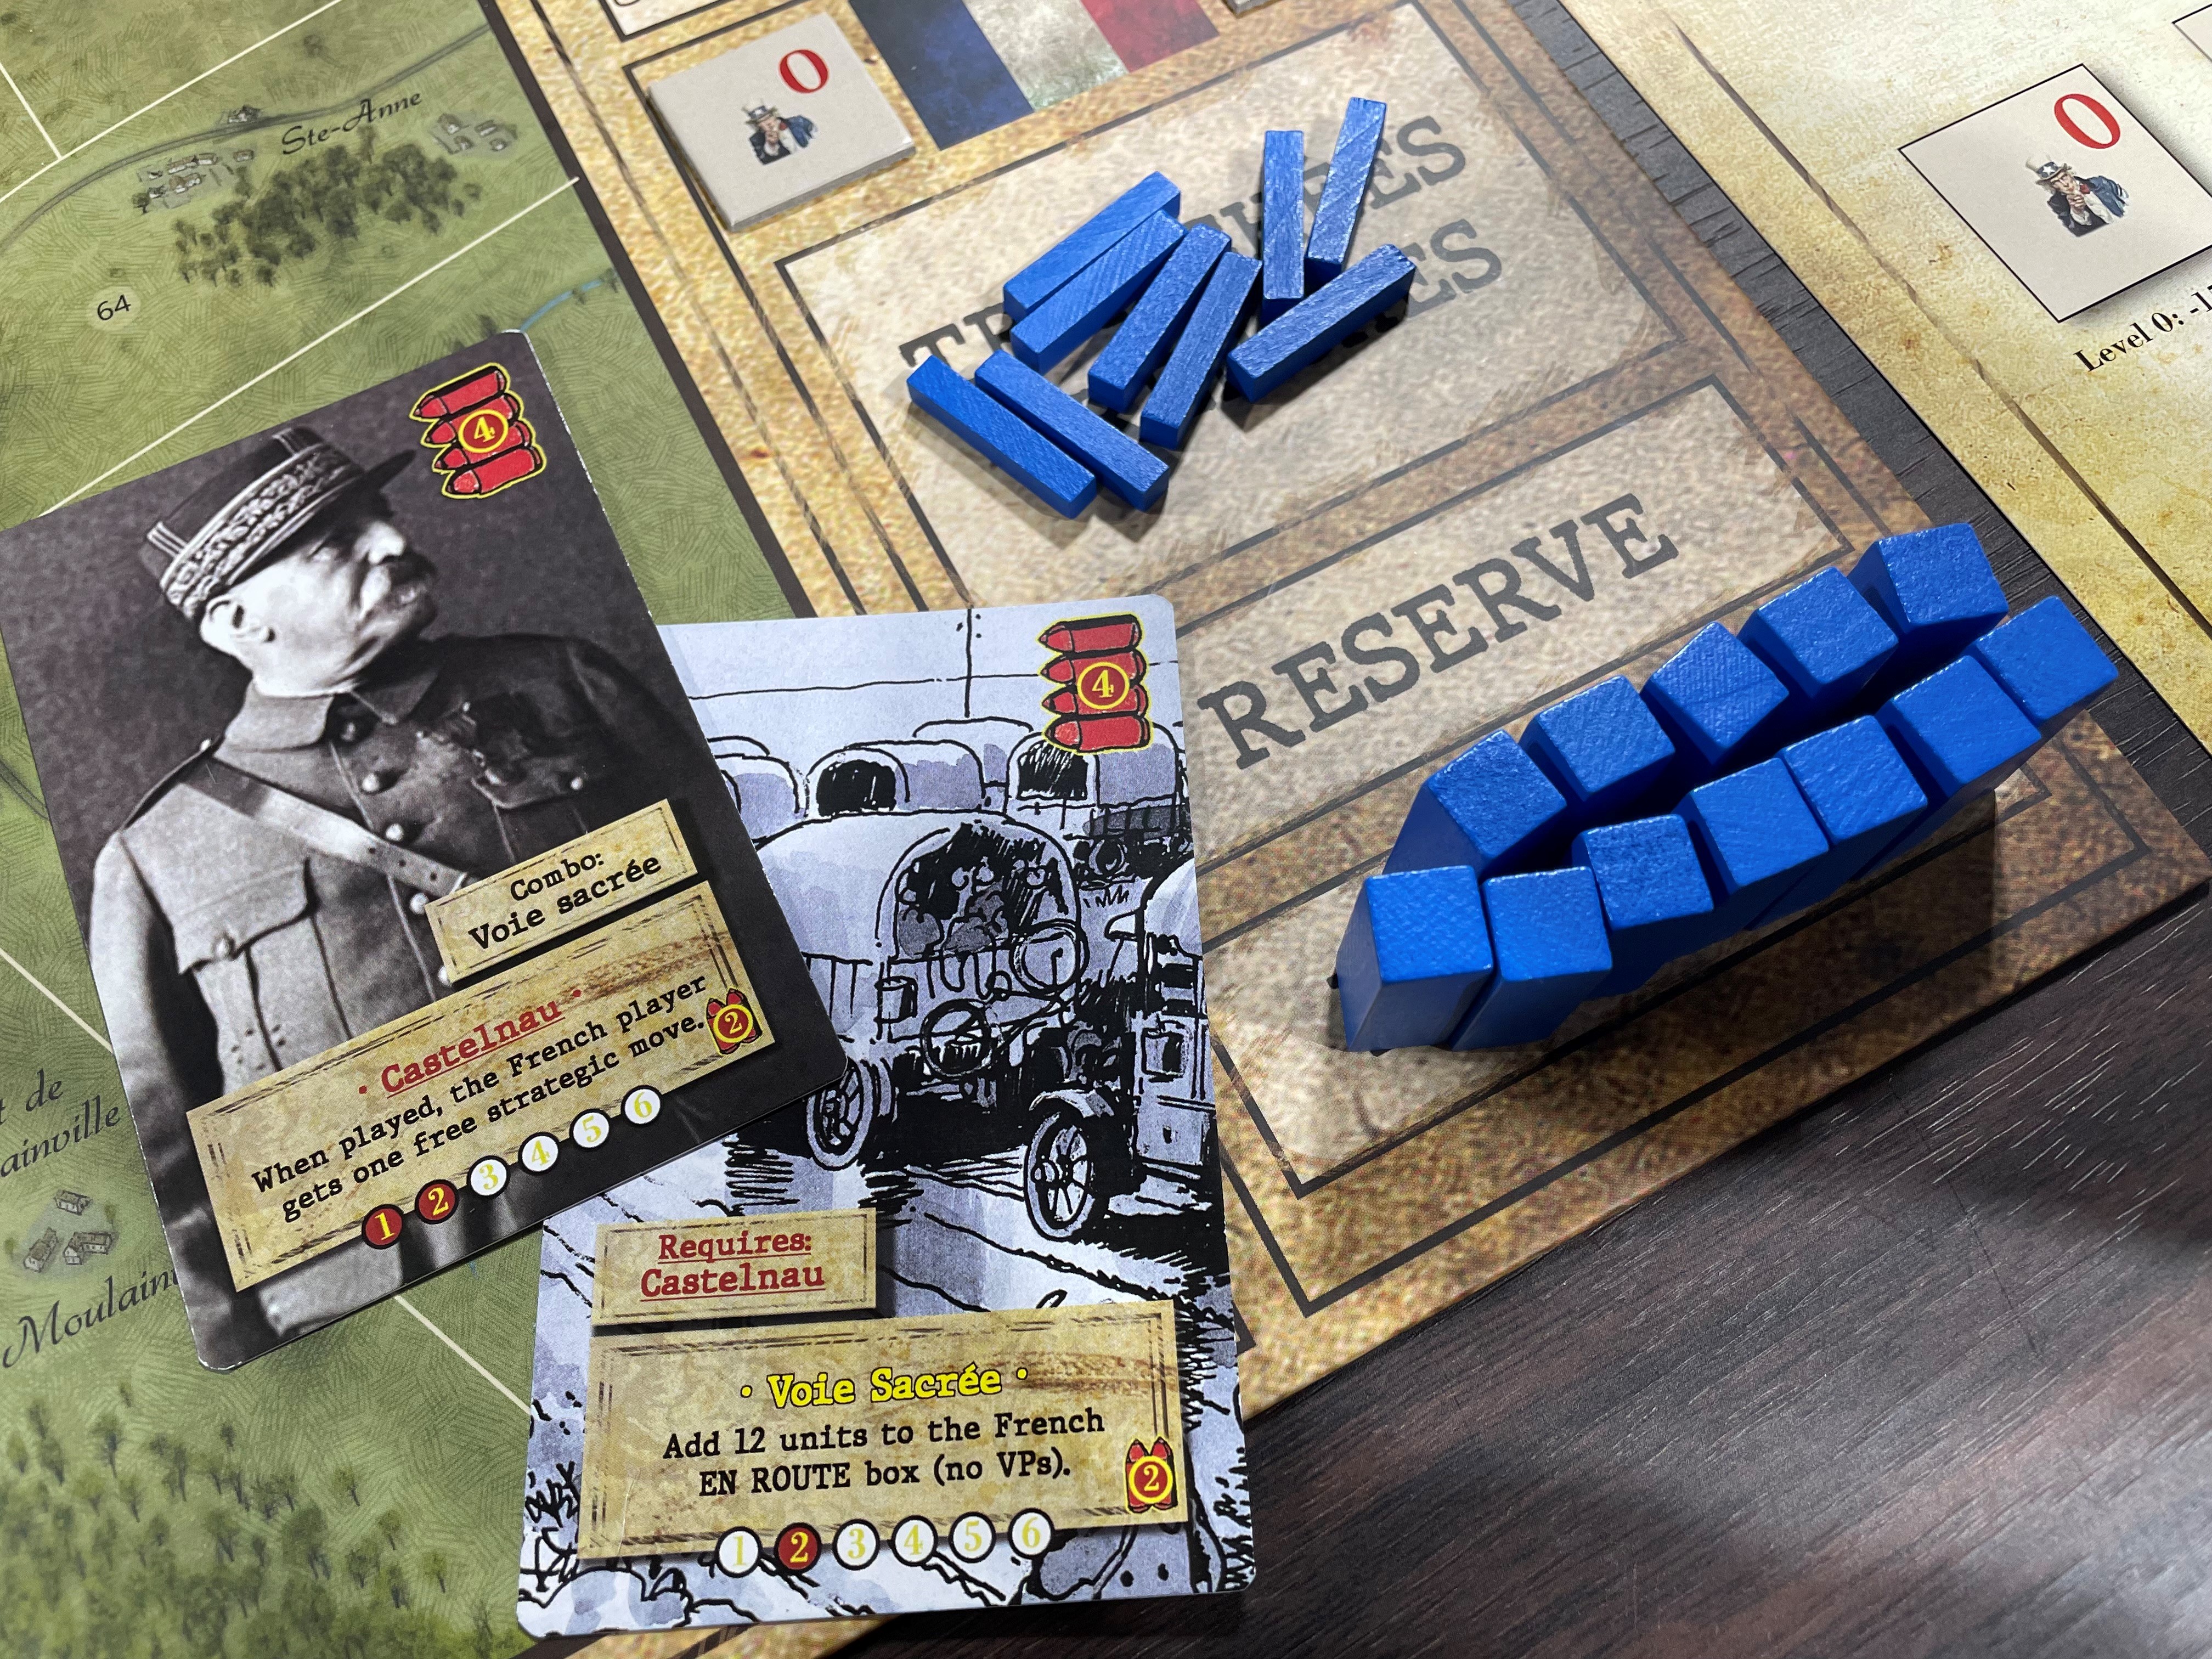
Some cards cannot be played as an Event until a specific named card has been played by the player. This is indicated on the card with a small “requires” box above the title of the card which shows the card that must already be in play as a Permanent Event to allow the new event to be triggered. Also, these Required Cards also have a small “combo” box above the title of the card to remind players which card they will allow to be played as a Permanent Event. Sometimes this concept of Combos must be planned for and may take a few rounds to get lined up to be able to play.
A perfect example of this is the Castelnau/Voie Sacrée Combo. Castelnau is an Event Card that must be played down on the table as a Permanent Event and is available during Turns 1 and 2. Once it is played, then that unlocks the play of Voie Sacrée and allows a very powerful Combo to go into effect by allowing the French player to place 12 units into the En Route Box on the board meaning they will be available for placement during the next Turn. This is so very powerful as in order to get that many units to use, the French player has to sacrifice a total of 12 VP (1 VP per unit added as Reinforcements). With this Combo, you sacrifice no VP’s and get 12 units to place on the board to plug the inevitable holes that will be created by the powerful German Barrages and assaults. There are other Combos as well including several specified Offensives (Russian Offensives and the Somme Offensive) that take several Turns to accomplish with multiple cards to get an opportunity to roll dice to gain VP’s. This was a very novel idea for the CDG mechanic and really worked well to create some portion of the game that required planning and an investment.
The Voie Sacrée, which is French for Sacred Way or Sacred Road, is a road that connects Bar-le-Duc to Verdun, France. It was given its name because of the vital role it played during the Battle of Verdun in World War I. After March 1916, along the 45 miles of the Voie Sacrée, transport vehicles were on the move day and night, ferrying troops, armaments, and supplies to the Verdun battlefield. During the initial crisis of February 21st through March 22nd, 600 trucks per day had already delivered 48,000 tons of ammunition, 6,400 tons of other materiel and 263,000 men to the battlefield. Beginning on February 21st, all horse-drawn traffic and troop movements on foot had been ordered off the road, leaving it open for truck and motorcar traffic only. After March 1916, one truck passed every 14 seconds, submitting the road to considerable wear and tear. Quarries had to be opened nearby to supply the road with crushed stone. Over the course of ten months, 16 labour battalions worked to keep the road in good shape and order. The road had been recognised since 1915 as the only reliable vehicular road that remained in existence to supply Verdun safely. All the standard-gauge railway lines that could reach Verdun had already been interrupted by German forces in late 1914. To compensate for this precarious situation, the road had been widened to 23 ft during 1915, so it could accommodate the continuous up and down flow of two lines of truck traffic. This preemptive roadway improvement in 1915, plus success in organizing the transport system on the road (a mission supervised by Colonel Maurice de Barescut, the Chief of Staff of the French Second Army), is what ultimately saved Verdun in 1916.
The Voie Sacrée still exists, but it has been paved over and is now an active secondary road. In 2006, the route was renumbered RD1916, a reference to the road’s most critical year. From 1923, the Voie Sacrée was marked by a borne every kilometer along the route. Each borne is topped with a sculpture of an Adrian helmet, the helmet worn by French soldiers during the Battle of Verdun.
The town hall in the village of Souilly, on the Voie Sacrée, served as headquarters to Generals Philippe Pétain and Robert Nivelle during the Battle of Verdun. A large, well-preserved, two-story stone building fronting on the Voie Sacrée, the Souilly town hall is still in official use today. Several plaques on its facade remind the visitor of the historic role it played in 1916 during the Battle of Verdun and, later in 1918, during the Meuse–Argonne offensive.
The year is quickly fading as we are nearing the start of the 4th quarter of 2026. Man the year has just gone by so quickly and I still have so many great games awaiting us to give them the attention they deserve. But there are always new games and they are also equally deserving. This month, I was able to find 19 games to share (including 6 games from our sponsor). I was also able to find 3 games being offered on Crowdfunding through Kickstarter and Gamefound.
Again this month, we have a sponsor for the Wargame Watch post in Neva Game Press. This is Neva’s 3rd time sponsoring this post and they are very busy as they have a ton of new games upcoming. Neva Game Press is a new publisher who appeared on the scene 2 years ago. When I started seeing their posts on Twitter and Facebook, I was immediately impressed with their interesting topic choices for their upcoming games as well as the fact that they are trying to make small footprint wargames that pack a punch. And the art is also very appealing and brings an aesthetically pleasing and attractive look to their games!
Big Experiences, Small Footprint: New from Neva Game Press
At Neva Game Press, we believe great games don’t require massive boxes. Our ‘Hardcover Book’ box policy delivers premium components and deep, innovative mechanics in a shelf-friendly format—without compromising playability. We recently rebranded from Neva Wargames to Neva Game Press to reflect our expansion into thematic titles, though our commitment to wargaming remains stronger than ever.
End-of-Year Releases
We are closing 2026 on a high note with two major releases. After the rapid sell-out of Iwo Jima: Hell on Earth—the first volume of our Blind Valor Series—we are thrilled to bring it back as a Revised Edition, and we are grateful for the community’s support. We are also releasing an Iwo Jima: Hell on Earth Update Kit for owners of the original 1st Edition. Finally, we are launching our new tactical wargame, Peking: 55 Days of Fury—the first volume in our Breach Point Series.
Peking immerses 1–2 players in the 1900 Boxer Rebellion for a tense, 90-minute experience. Whether defending the International Legations or leading the attack, you’ll need to master our unique fog-of-war mechanic and hybrid system (featuring event cards and operation points split into two phases) to secure victory.
Our commitment to the community continues with an ambitious slate for 2027, featuring: Valls: Battle of the Goi Bridge, Spartacus: Rome under Threat, 1806: The Elbe Campaign and Reformation: Fire and Faith.
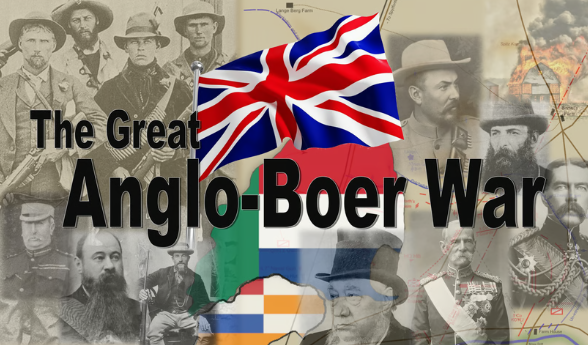
They recently announced their next Kickstarter project that would take their system to the Anglo-Boer War called The Great Anglo-Boer War: The Battle for South Africa 1899-1902. The game is currently on Kickstarter and appears to be a very important addition to the many games on the period.
From the game page, we read the following:
The Great Anglo-Boer War is a grand-strategic level game of the war between the British Empire and the Boer Republics in South Africa from 1899 to 1902. The Boers were armed like no other adversary the Empire had ever faced. By October 1899, war had become inevitable—and both sides were equipped for the first ‘modern’ conflict. Both sides had rifled breech-loading artillery, machine guns, bolt-action magazine rifles, trenches, barbed wire, and more.
The war started as a conventional contest but morphed into the first modern guerrilla war of the 20th century. In the end, the Empire overwhelmed the Boers, but by 1910 all of South Africa (including the contested republics of 1899) was granted self-government as a Crown Dominion, with Louis Botha as the Prime Minister. The Boers can be said to have lost the war but won the peace. A fascinating bit of history but an even more interesting study in military history.
The game places you in the position of the military commanders of both armies. Political events are largely beyond your control, but may influence what you are allowed to do. There are three scenarios – the Conventional War, the Guerrilla War, and the Grand Campaign Game. The full campaign is THE ULTIMATE BOER WAR EXPERIENCE – from the first desperate siege defenses of 1899 to the treaty of Vereeniging (or maybe not?) – and everything tactical and otherwise in between. Battles, blockhouses, farm-burnings, evasions, escapes, raids, concentration camps, sieges, drives, armoured trains, 1-pdr automatic “pom-poms”, surrenders, entrenchments, typhoid, barbed-wire, native spies, night marches, supply wagons and more. If it was part of the real Boer war – it is in the game. If you know about the war – this is the one you’ve been hoping someone would make, and if you are learning about it – this IS THE GAME for that. With a 44×34 map at 9 miles/hex scale, monthly game turns and an accurate order of battle, this is a game that truly does justice to the topic.
As of September 1st, the Kickstarter campaign has raised $7,389 toward its $12,900 funding goal with 86 backers. The campaign will conclude on Tuesday, October 20th at 1:38pm EDT.
2. Combat! Vietnam from Compass Games
This month we had another pretty big downloading of new pre-order games from Compass Games that I have affectionately referred to in the past as “Pre-Order Palooza”. This one was not their normal 6-10 new titles but there were 4 new games offered and they all looked very good. The first game that I am highlighting here is the next volume in the highly thought of Combat! Series of solitaire wargames. These games represent man to man combat where typically each of the counters on the board represent a single soldier. They have focused exclusively on World War II previously but now they have announced this new game set during the Vietnam War called Combat! Vietnam. I have yet to play any of the previous volumes in the series, even though I own 4 of them, but they are high on my want to play list and I am very much interested in this system because I love Tactical level games, very much enjoy man to man combat in games and also enjoy games that are set in during the Vietnam War.
From the game page, we read the following:
Combat! Vietnam is a stand-alone solitaire game of man-to-man combat in the Vietnam War, covering the years from 1965 to 1972. This game depicts the countless small actions that were fought during those years, with the player commanding a squad of American, Communist, or South Vietnamese soldiers. In the 11 scenarios, the fighting rages across the widely varied terrain of Vietnam, from dense jungles to city streets.
The comprehensive Random Scenario Generator (and Campaign Game) further expands your gaming possibilities. With this tool, players can generate a limitless supply of unique scenarios for Combat! Vietnam.
Combat! Vietnam also includes Armor rules, allowing the player to relive iconic scenes such as T-54 tanks charging south during the Easter Offensive or Marine Patton tanks battling through Hué.
3. Viking Dawn: A Game of Viking Exploration & Expansion 800-1040 A.D. from Compass Games
The 2nd game from Compass Games today is a good one. And I know that because I have played it. But, our friend Gregory M. Smith is a solitaire game designing genius and has done many of these solo, narrative driven style wargames that we have all enjoyed for hours on end while we have been unable to find an opponent or just because we want to play a game on our timeline. We have interviewed him many times for his games such as Zeppelin Raider, Interceptor Ace, The Hunted, Western Front Ace, Amerika Bomber, Defending America, American Tank Ace, British Tank Ace, Rebel Tide, Sinking Yamato and most recently for a magazine wargame called B-52D Linebacker II. But Greg is a versatile designer and also has done many great 2-player games as well. He always has something cooking in his game design kitchen and recently we spoke with him about his new design with Kevin McPartland called Viking Dawn: A Game of Viking Exploration & Expansion 800-1040 A.D. from Compass Games. I was able to play this 1-4 player game while at the World Boardgaming Championships last month and you can read about my experience at the following link: https://theplayersaid.com/2026/07/27/world-boardgaming-championships-2026-daily-debrief-series-day-3/
From the game page, we read the following:
Viking Dawn is a low-complexity strategic game, with rules for two, three, or four players, each controlling a faction of Vikings (Norse, Swede, Dane, and optionally Geat). Inspired by SPI’s game Conquistador! from the 1970’s, Viking Dawn has exploration, trade (both internal and external), and minor leaders. The game also contains rules for solitaire play with the Danes or Norse.
Faction descriptions:
Norse – closest to the New World, they have the additional advantage of two Explorers, Erik the Red and Leif Eriksson.
Danes – closest to the lucrative raiding and settlement targets of England, they also have the advantage of having several early leaders.
Swedes – although further from England, they are closest to several Russian settlement areas, and river portage routes to the east and Constantinople.
Geats – ostensibly the weakest faction, as they must pay tribute to the Swedes for protection, they have the best trading advantage in the game.
Players compete to raid lucrative settlements and explore the world with longships and warbands. Each faction has named historical leaders, who have an impact on combat and exploration. Players may trade with each other or nonplayer-controlled areas and establish settlements. Includes rules for settlements gaining independence, leader burials, and establishment of the Varangian Guard.
If you are interested in Viking Dawn: A Game of Viking Exploration & Expansion 800-1040 A.D., you can pre-order a copy for $54.00 from the Compass Games website at the following link: https://www.compassgames.com/product/viking-dawn-pay-later/
4. Tunnel Rats: The Vietnam War Underground from Compass Games
Game 3 in this month’s mini-Pre-Order Palooza from Compass Games is another very interesting looking game set during the Vietnam War called Tunnel Rats: The Vietnam War Underground. This game is a solitaire game, which I think makes a lot of sense historically and thematically and actually gets me very excited for the possibilities, and I very much look forward to seeing how this one works. I have great hope for this one. The designer is Lisa Smedman who has done several recent popular solo games including Trench Raid.
From the game page, we read the following:
Tunnel Rats is a single-player game set during the Vietnam War. You will control two American “tunnel rats” who have been tasked with exploring an underground tunnel complex created by the Viet Cong. This complex is made up of tiles representing tunnels and underground rooms in which the enemy may be lurking. In this claustrophobic environment, the tunnel rats need to be as quiet as possible to avoid alerting the enemy. Tense firefights and hand-to-hand combat feature a unique initiative system, and encounters are fast and furious.
With a procedurally generated map, nine tunnel rat characters to choose from, and a variety of weapon and equipment load-outs, each “run” will provide a new and dynamic challenge. Your team’s objective will vary, shifting the focus of play depending upon which lieutenant is in command of the team. Tunnel Rats also includes rules for campaign play, allowing surviving tunnel rats to gradually hone their skills over time – if they survive.
Be on your guard, as the tunnel rats never know what they will encounter down in “the black”. It might be a hidden punji stake pit, a Viet Cong command center filled with valuable documents, a venomous snake slithering along a tunnel, or a water trap they must swim through without drowning!
5. Against the Reich Deluxe Edition from Compass Games
Game 4 from the Compass Games mini Pre-Order Palooza is a classic hex and counter operational level wargame set in World War II called Against the Reich Deluxe Edition designed originally by Joseph Balkoski.
From the game page, we read the following:
In June of 1944, the world held its breath as land and naval forces of six Allied nations launched the largest amphibious assault ever attempted. The long-awaited second front, the Western Front, was finally open. The Allies had to force the unconditional surrender of Nazi Germany by crossing the great Rhine River into the Reich itself. Adolf Hitler was confident that the battered but undefeated Wehrmacht could hold two enormous fortified zones (the Atlantic and Westwalls) and repulse any attempt to cross into the German homeland. Against the Reich is the first game in years to cover the entire Western Front campaign. The players are in the positions of Eisenhower and Hitler, making the grand decisions that control the course of the campaign.
A Quick-Playing Simulation: Designer Joseph M. Balkoski, whose specialty is the Western Front, has provided an accurate, realistic simulation that plays like a game. With short and long campaign games, you can choose the length of the simulation.
Headquarters and Supplies are Realistically Linked: Players must decide where to concentrate their resources. Limited supplies make the placement of headquarters and depots a critical factor in the campaign.
Choice of Invasion Sites: The Allied player must decide where to invade – do you strike a lightly defended area and accept a long, grinding ground campaign, or strike close to the Rhine and risk quick destruction?
Historical Overview: Russel F. Weigley, author of Eisenhower’s Lieutenants, the definitive history of the Western Front, has analyzed the strategic options facing Eisenhower and Hitler – and the players.
Loaded with other Features: A short “Battle of the Bulge” scenario, Second Invasion, Flooding Holland, Port Repair, The Roer Dams, Rail Movement, Mediterranean Front Reinforcements, Amphibious and Airborne Assaults, and much more.
6. Enlightenment Empires: Power and Politics in Eastern Europe, 1725-1795 from GMT Games
One of my favorite parts about historical wargaming is that I get exposed to and am able to learn about some of the more obscure parts of our world’s history. Now you might be saying to me that the subject of power politics in Eastern Europe form 1725-1795 is not obscure and I think that you would be correct if I was from Eastern Europe. But as I am from the United States, this is not a period or locale that we learned much about in grade school. That being said, I am very much interested in this concept and history and am glad to see Brian Asklev taking another crack at a topic that focuses on some of the history from his neck of the woods. When Enlightenment Empires: Power and Politics in Eastern Europe, 1725-1795 was first announced a few weeks ago, I was immediately interested because I do love games where several nations have to compete economically, politically, diplomatically and through force of arms. I also recently played Brian’s Baltic Empires at WBC and very much enjoyed that game and this one appears to be in a similar style and uses the very interesting Dramatis Personae cards to inject historical characters with their abilities into the game play.
From the game page, we read the following:
Enlightenment Empires is an approachable 2-5 player strategy game about conflicts between the states of Central and Eastern Europe region during the Enlightenment era, a transformative period of political upheaval, large-scale warfare, and constant struggles for power. Players will have to develop their economy, decide their internal policies on the ideas of individual liberty and effective governance, secure trade deals and financial assistance within the context of the global rivalry between Britain and France, and finally build armies to become the dominant power of Central and Eastern Europe. Russia, Poland-Lithuania, Prussia, Austria, and the Ottoman Empire will fight for hegemony, using variable victory conditions that reflect their respective historical objectives.
Building on the solid foundation provided by Baltic Empires, highlights of Enlightenment Empires include:
Five new asymmetric factions with unique abilities and objectives, including a new “Constitution” objective reflecting the pinnacle of Enlightenment political ideals.
Another highly thematic deck of historical Dramatis Personae to constitute your royal court, now also including random events that can disrupt players’ plans…or present them with new opportunities.
A simplified, yet still deep and political, economic system that forces players to make tough decisions regarding their state’s internal policies (serfdom, noble privileges, and military spending) and its diplomatic relations to the superpowers of the period, England and France.
The same streamlined battle system based on custom dice per unit type, now modified by military reforms.
More detailed minor powers that players may form alliances with.
Variable player counts (from 2 to 5 players), with scenarios ranging from a tight duel to a tense multiplayer conflict replete with alliances and betrayals.
If there is a word that could define the whole of 18th century, it would be the Enlightenment. The philosophical thought that applied reason to all spheres of life guided the social and political developments of the 1700s, and intellectuals, scientists, politicians, and rulers alike acted either in support of it or against it. And while in Western Europe the republican ideals of enlightenment brought about the French Revolution, in Central and Eastern Europe enlightenment became a tool for state-building for the absolutist monarchs, including the Holy Roman Emperor and Archduke of Austria Joseph II, King Frederick II of Prussia, or Empress Catherine the Great of Russia. The mid-18th century period was formative for these powers, with Prussia and Russia continuing to struggle to establish their dominance in the region, while Austria and the Ottoman Empire fought to preserve their status, and the weakened state of Poland-Lithuania struggled to reform its constitution before meeting an unlucky demise. Three of the traditional “pentarchy“ of Great European Powers (namely, Russia, Prussia, and Austria) were Eastern powers that achieved this status during the 18th century. Their dominance in the region was forged by the work of bureaucrats and reformers, as much as by the soldiers and generals on the fields of the Seven Years‘ War.
Keep in mind that these type of games can sometimes be very complex and have lots of moving parts. And I am not saying that this doesn’t have them but Brian has said that the game is very approachable.
Enlightenment Empires presents these political and military conflicts in a fun and accessible format, while also doing justice to the fascinating history of the region during this period. The game features five asymmetric factions with different strengths, internal political conditions, military forces, and historical objectives, along with the capacity to develop their states by conducting reforms along (or against) Enlightenment ideals, investing in economic infrastructure, and recruiting key historical characters that offer unique game effects. The game also includes several scenarios for variable player counts and durations, offering additional flexibility and replayability.
7. The Last Hundred Yards Volume 6: The Forgotten Hell from GMT Games
If you didn’t know we really enjoyed The Last Hundred Yards as well as Volume 2: Airborne Over Europe. The system is extremely interesting for a tactical game and uses some novel elements in regards to how victory points are scored including a focus on time to complete missions as well as the casualties incurred. Really an excellent system with lots of crunch and potential! Now, even though there are a total of 5 other volumes that have been released, Mike Denson has forged ahead with the next entry in the series which gives us a look at the operations in New Guinea and the Northern Solomon Islands during WWII with The Last Hundred Yards Volume 6: The Forgotten Hell.
From the game page, we read the following:
The Last Hundred Yards: The Forgotten Hell is Volume 6 in The Last Hundred Yards Series. This game examines the Allied campaigns against Japan in 1942, focusing on U.S. operations on Guadalcanal and Australian fighting in Papua New Guinea.
In New Guinea, Australian militia and the Australian Imperial Force troops fought a brutal and desperate delaying campaign along the Kokoda Track from Port Moresby to Buna, Battling through jungle, mountains, rain, mud, hunger, disease, and exhaustion, they resisted repeated Japanese advances and flanking attacks. Their stubborn defense slowed the enemy, shielded Port Moresby, and eventually helped reverse the campaign. At Milne Bay, Australian forces pushed the Japanese back and shattered the belief that the Imperial Japanese Army was invincible.
On Guadalcanal, U.S. Marines and Army troops fought equally savage battles, destroying Ichiki’s force at Alligator Creek and later assaulting entrenched Japanese positions around Mount Austen. There, the enemy used caves, rocky ridges, and concealed strongpoints to prolong the struggle.
Together, these engagements reveal the intensity of jungle warfare in the Southwest Pacific, where endurance, small-unit leadership, and relentless attacks under terrible conditions shaped the early Allied offensive against Japan. These actions also showed how terrain, logistics, and morale could decide campaigns as surely as firepower across the battlefields of the Solomons and New Guinea alike.
8. Shenandoah: Jackson and Sheridan in the Valley, 1862 – 1864 (Stonewall in the Valley and Sheridan in the Shenandoah) from Multi-Man Publishing
A BIG and well respected American Civil War operational system is what Great Campaigns of the American Civil War (GCACW) is and the newest volume in the series is called Shenandoah: Jackson and Sheridan in the Valley, 1862 – 1864. One of the things that I very much appreciate about this system is the fact that they use some of the best art out there for their covers.
From the game page, we read the following:
Shenandoah: Jackson and Sheridan in the Valley, 1862 – 1864 is the latest design in the award-winning Great Campaigns of the American Civil War(GCACW) Series. It contains both a complete redesign of the Stonewall in the Valley (SIV) game covering Stonewall Jackson’s 1862 valley campaign and a completely new game module Sheridan in the Shenandoah that depicts Sheridan’s 1864 valley campaign. The game is designed by Joe Balkoski (the original GCACW Series creator) and Chris Withers. The original SIV game maps have been upgraded to contain the latest GCACW map features, with map design executed by artist Charlie Kibler—whose work on the series dates to its creation in 1992.
Shenandoah: Jackson and Sheridan in the Valley, 1862 – 1864 uses the latest version of the GCACW Standard Basic Game Rules, which also apply to all other games in the series, and these rules are now printed at an increased 11-point font size instead of 9-point. After more than a quarter-century of refinement, these rules are extremely well organized and relatively easy to learn, even for series newcomers. The Advanced Game rules cover situations specifically applicable to these unique campaigns such as “The Burning” that depicts the desolation of the valley by Union cavalry in 1864.
Stonewall in the Valley includes one new Basic Game scenario, the four original Basic Scenarios rebalanced, and the original Advanced Game campaign scenario extensively revised:
The Battle of Kernstown (March 23, 1862; 1 turn): Introductory scenario on the battle of Kernstown – ideal for beginners.
My Last Council of War (March 10 to March 23, 1862; 14 turns): Heavily outnumbered, Jackson moves south from Winchester thru Strasburg to Mt. Jackson. A Union force of three divisions follows to Strasburg while sending two divisions out of the Valley to reinforce McClellan. Jackson races back north and attacks the remaining Union division at Kernstown but loses the battle.
God Blessed Our Arms at McDowell (April 30 to May 11, 1862; 12 turns): Historically, Jackson moves west from Staunton and causes the Union force at McDowell to retreat north to Franklin. He briefly pursues them but then returns to the Valley. This scenario postulates what might have happened had Ewell’s division and Banks’ two divisions become involved in the McDowell campaign instead of holding fast in their camps in the south of the Valley.
Rebel Blitzkrieg (May 21 to June 2, 1862; 13 turns): Jackson and Ewell advance north on the Luray Pike and surprise the small Union force at Front Royal. A Union division entrenched at Strasburg to the west belatedly discovers it is in danger of being cut off and just beats Jackson north to Winchester. Jackson defeats the Union at the first battle of Winchester and pursues to Harpers Ferry. Meanwhile strong Union forces are moving in behind Jackson from both the east and the west. Jackson turns south, marching to Strasburg and then Mt. Jackson and barely avoids the trap.
Our Beautiful Valley Will be Cleansed (June 6 to June 11, 1862; 6 turns); Two Union columns, separated by the Shenandoah River, pursue Jackson south from Strasburg. Fremont’s force engages the Confederates at Harrisonburg and then two days later battles them at Cross Keys. Meanwhile Shields’ division advances into Jackson’s rear and almost captures his wagon train. Jackson turns his army from Fremont to Shields and defeats Shields in the battle of Port Republic causing both Union forces to pull back north.
Jackson’s Shenandoah Valley Campaign (March 7 to June 19, 1862; 105 turns): The entire Valley campaign is covered in this scenario. Both sides typically have forces moving all over all three maps in exciting maneuvers and with forces coming and going due to external events. The scenario plays quite fast due to lulls where sets of 5 turns are skipped. The original advanced rules have been simplified, and the scenario has been extensively playtested and re-balanced.
Sheridan in the Shenandoah includes twelve Basic Game scenarios and two Advanced Game campaign scenarios, all extensively playtested:
Second Winchester (June 13 to June 15, 1863; 3 turns): Ewell’s corps leads the Confederate army thru the Valley to invade Pennsylvania and routed the Union division at Winchester. The Rebels cut off the Union retreat and captured most of the Union division. The route was now clear for Lee’s invasion of the north.
The Battle of New Market (May 15, 1864; 1 turn): Introductory scenario on the battle of New Market – ideal for beginners.
Piedmont (June 4 to June 6, 1864; 3 turns): Picking up the after Sigel’s debacle at New Market, Union General David Hunter marches south from Winchester. With Breckinridge, Confederate hero of New Market, aiding Lee at Cold Harbor, defense of the Valley falls to a ragtag collection of troops that are rushed to the area under General W. E. “Grumble” Jones. The forces battle at Piedmont, Jones is killed, the Rebels are routed, and the Union captures Staunton.
In the Valley Again (July 23 to August 5, 1864; 14 turns): Early’s army moved back into the Valley in mid-July after retreating from the outskirts of Washington, D.C. On July 23, Confederate scouting revealed that Early was only opposed by Crook’s forces and not the VI and XIX corps, which had returned to D.C. Early attacked Crook at Kernstown and routed the Union forces which retreated across the Potomac. Confederate infantry destroyed the B&O RR at Martinsburg and threatened to invade north. Two Confederate cavalry brigades advanced north towards Chambersburg, burned it, and were chased by 2 Union cavalry divisions. Meanwhile, the VI and XIX corps had been recalled to the Valley, but then along with Crook’s force, moved east to protect against an assumed invasion again by the Confederates. The Union force soon countermarched back to Harpers Ferry and the Confederates retreated south.
Second Kernstown (July 24, 1864; 1 turn): A simple scenario covering the second battle of Kernstown – ideal for beginners.
Sheridan Takes Command (August 10 to August 14, 1864; 5 turns): Sheridan took command of all forces in the region on August 7th. His orders were “wherever the enemy goes let our troops go also”. The plan was to trap the Confederate infantry in the northern valley, but Early knew the danger and moved south just ahead of the Union. Both sides marched rapidly south until the Confederates setup a strong line at the Fisher’s Hill. Sheridan prepared to attack but halted his plans when a strong force under Anderson entered the Valley at Front Royal.
You Must Be Cautious (August 17 to August 21, 1864; 5 turns): With the Union infantry camped along Cedar Creek and the Confederates entrenched in a strong line at Fisher’s Hill just to the south, Sheridan learned of the approach of Kershaw’s division. This elicited a new directive from Grant warning Sheridan he “must be cautious and act on the defensive until movements … force them to detach” troops. Therefore, Sheridan conducted a night march to Winchester. From there the Union briefly defended at Berryville and then at Charlestown. The Confederates pursued and eventually tried to bring on a battle at Charlestown. However, Sheridan was cautious and followed the new defensive strategy and disengaged to retreat into a strong, compact line at Halltown, just in front of Harpers Ferry.
Third Winchester (September 19, 1864; 1 turn): This scenario depicting the third battle of Winchester is only one turn but still features lots of maneuver and combat.
From Winchester to Fisher’s Hill (September 19 to September 22, 1864; 4 turns): This scenario encompasses two significant battles in the valley campaign. The Union army attacked the Confederate defensive line just east of Winchester and eventually drove the Rebels back to Winchester. This final Confederate line collapsed, and they retreated south all the way to a formidable defensive position at Fisher’s Hill, just south of Strasburg. The Union pursued and then rolled the west flank of this line and routed the Confederates.
Early’s About Played Out (September 23 to September 26, 1864; 4 turns): After the battle of Fisher’s Hill the Confederates retreated south. The Union pursued with their entire army, but the action for the next few days was limited to cavalry and rear-guard skirmishes. The Confederates safely made it to Brown’s Gap, while the Union infantry stopped at Harrisonburg and Union cavalry started burning the countryside.
Tom’s Brook (October 9, 1864; 1 turn): This solitaire scenario is filled with cavalry action and is an excellent learning scenario for beginners.
The Battle of Cedar Creek (October 19, 1864; 1 turn): While this is only a 1-turn scenario it is filled with the action that took place in the battle of Cedar Creek. The Confederate player starts with a Night March and a Surprise Attack. The Union responds with a special “Sheridan’s Ride” action to enable counterattacks.
Sheridan Moves South (September 19 to October 20, 1864; 32 turns): This scenario spans the battles in the campaign from when Sheridan attacked the Confederates at Winchester, to when the Confederates were defeated at the battle of Cedar Creek. This campaign can be easily played in a weekend.
The Last Valley Campaign (July 21 to October 20, 1864; 92 turns): This scenario encompasses the entire campaign from when Early’s army returned to the Valley after his raid on Washington, to when he was defeated at the battle of Cedar Creek. There is maneuver and combat all over all three maps in this scenario. The action often starts with a Confederate offensive and advance to the Potomac. The Union then gets significant reinforcements to launch counteroffensives.
9. Okinawa: The Last Battle of WWII Reprint from Best with 1
I love a new and interesting way to tell the story of a key battle and I found a very interesting one called Okinawa: The Last Battle of WWII from Best with 1 earlier this year. This is a solitaire only game and for each game the player will draw four objectives from a possible 12 that you must survive and capture before time runs out. On your turn, the player will roll special dice and then spend those to take actions such as movement, attack and take special actions from different unit action cards that will be set up in a square from from 1 to 10. The numbers coincide with the dice of the attacking Japanese and as the player moves through the rondel they will be able to activate and use their different soldiers to attack the Japanese defenders or use their special abilities to gain tokens that can be used for rerolls or healing of wounds
I think that the best part of the game is the concept of resource management as you have to use the dice appropriately to move and fight and also to manage your troops as you can upgrade certain cards as you pass the midway point of the round as well as when special actions are granted via the special resource chits. Upgrading units is very important as this will unlock things like heavy weapons in the form of bazookas, a Sherman tank and planes to be able to take out the Japanese armor units defending the island. The game is about efficiency of movement and doing the most with what you have. The dice determine what you can and can’t do and movement is optional as you don’t have to move unless you feel it is advantageous. But remember, that you have to defeat the defenders and the various objectives to be able to advance to your final objective and sitting in one space too long is not advisable.
The different units have various functions including attack, such as the Rifleman, Machine Gun Team and Sniper but also have secondary functions to remove the fog of war, heal your damaged units or gain additional resources. The Japanese defenders are well hidden and also have various defenses such as pill boxes and caves that will require the player to defeat these before moving to attack the units located inside.
In the end the game is about defeating the Japanese defenders while doing so in a set amount of revolutions around the rondel setup. This can be as few as 2 times around or as many as 4 and knowing when to use your resources to reroll your dice, as you either didn’t get the run of consecutive numbers you were looking for or just need a specific number, you will run out of resources quickly and you must plan them out as best you can to win the game. This one is really fun and I have played it about a dozen times winning about 70% of the time. The game plays in about an hour and the action is fast and furious and you are immediately beset by the staunch Japanese defenders and must act quickly.
You do not have to buy the Hero Bound game but can order the game as an Add On.
10. Tank Clash: Eastern Front from Ameba Games
I love to highlight these little campaigns that I find on Kickstarter and this month there is a new company, or at least that I am not familiar with, called Ameba Games that is offering a small game called Tank Clash: Eastern Front. This games appears to be the 2nd game in the series with the 1st being called Tank Clash: Western Front.
From the game page, we read the following:
Tank Clash is back with new iconic World War 2 tanks!
The Red Army is spearheaded by the powerful Soviet armoured units like the T34, SU100 and IS2. Germany pins its hopes on the last of the panzer divisions to halt the Soviet advance. The Wehrmacht fields its fearsome tanks like the Stug III, Nashorn and Tiger II for the coming battle.
The stage is set for the largest clash of late-war heavy armour.
Tank Clash: Eastern Front is a standalone tactical tank warfare game for 2 players, designed for both newcomers and seasoned strategists. Easy to learn yet rich in tactical choices, it combines its signature checkers-style armour tracking system with dice rolling and hand management for intense skirmish battles.
Already own Tank Clash: Western Front?
Built with modularity in mind, Eastern Front is fully compatible with its predecessor. Combine both games to command 12 unique tank types across expansive battlefields with up to 4 players. Eastern Front’s new features – including new missions, battlefield tokens, event cards and enhanced gameplay elements can also be incorporated into Western Front for an even richer combat experience.
I know what you might be thinking, as the art is a bit cartoony, but I am going to give this one a chance. I think that any wargamer likes to use tanks and this one appears to be focused on these metal monsters and I am going to give it a go. Plus the components are really nice, including some very well made poker chips that are used on the board, and frankly the price of $40 is probably worth what you re getting.
As of September 1st, the Kickstarter campaign has funded and raised $9,054 toward its $3,928 funding goal with 108 backers. The campaign will conclude on Wednesday, September 16th at 9:00pm EDT.
New Release
1. A Hellish Fight: The Battle of Fort Sumter – 1863 from High Flying Dice Games
I love lesser gamed subjects. Or even sometimes games that have never seen the light of day and never touched certain subjects. It is always nice to play something unique and interesting while learning new parts of history. High Flying Dice Games does this exceptionally well as they have made their living on doing lesser (or even totally) unknow battles in their small format games. This month they have released a game that focuses on the 2nd siege of Fort Sumter in Charleston, South Carolina in 1863 called A Hellish Fight: The Battle of Fort Sumter – 1863. This one looks pretty interesting and appears to focus on the iron clad battles and bombardment of the ruins of the fort that were still held by the Confederates.
From the game page, we read the following:
Following the capture of Fort Wagner on September 7th, and the protracted bombardment of Fort Sumter by the Union navy’s ironclads as well as army land batteries, an assault to take the fort’s ruins was planned. Admiral Dahlgren and General Gilmore both felt that securing Fort Sumter’s capture would not only lead to Charleston’s surrender, but send a clear signal that the Confederacy’s days were numbered.
If you are interested in A Hellish Fight: The Battle of Fort Sumter – 1863, you can order a copy for $18.95 from the High Flying Dice Games website at the following link: https://www.hfdgames.com/sumter.html
2. Guadalcanal: The Battle for Henderson Field, Oct 23-26, 1942 from Dan Verssen Games
The Valiant Defense Series designed by David Thompson has been one of my favorite solitaire wargame series of the past nearly 10 years. Each of the volumes in the game address very specific situations and always have a very interesting take with fun mechanics, great art and fantastic production. The torch for the series though has been passed to a new designer in Vincent Cooper. He has designed Volume 5 Guadalcanal: The Battle for Henderson Field, Oct 23-26, 1942 and it has finally fulfilled off of Kickstarter.
From the game page, we read the following:
Take command of the valiant Marines of the 1st Marine Division, supported by Soldiers of the 164th Infantry Regiment, desperately defending Henderson Field against waves of Japanese troops. Guadalcanal: The Battle for Henderson Field is a solitaire and cooperative tactical wargame published by Dan Verssen Games (DVG) as Volume V in the Valiant Defense Series.
Here is a bit of a designer diary/commentary from the designer Vincent Cooper:
This all started about 3 1/2 years ago when I first played Pavlov’s House. I say played. I ‘played’ the game for about 10 minutes…and then I sat there in stunned disbelief at how a game could be sooooo good!!!!
By the time I finished there were two very clear ideas for games fully formed. I contacted DVG to see if there was any interest and they put me in touch with David Thompson. I didn’t hold much hope. There was no reason for him to trust his IP to me, a person he didn’t know.
But I gave it a try and David, it turns out, is one of the nicest people you can ever come into contact with. After some back and forth, the idea for Guadalcanal – The Battle for Henderson Field was born (not, in fact, one of the original ideas, but we’ll see what the future holds for them…).
The game has been through various stages of development and now stands ready to KS!! I will be giving more details in the future about the various variant play options, but have no fear: This will keep you scratching your head looking for the right decision for MONTHS!!
Art by the supremely talented Nils Johansson
Thank you to all the play testers, and in particular Glenn Saunders, Shane Freshwater and Martin Fenwick Charlesworth Much more to come from out design team in the near future!!!
A few years ago, Road to the Rhine designed by Frank Chadwick was announced and it is now ready to ship.
From the game page, we read the following:
In the cataclysmic battle of the Falaise Pocket, the Allied forces defeated the German army and drove them back across France in disorder. In the south of France, American and French troops of the 6th Army Group have stormed ashore and driven the remnants of the German 19th Army north toward the border.
Road to the Rhine covers the Allied pursuit of the German Army following the Normandy breakout through fierce fighting at the West Wall and bridging the Rhine River. The campaign game covers the period from September 1944 through April 1945, while separate shorter scenarios include Operation Market-Garden and the Battle of the Bulge. The game includes two battle games (one-turn scenarios), two longer scenarios, and one full campaign game. The game also includes extensive designer notes from original game designer Frank Chadwick and a historical play-through of the Bulge battle game.
Road to the Rhine is another classic by Game Designers’ Workshop, re-mastered by Compass Games. Originally designed by Frank Chadwick, this edition pays tribute to the classic by honoring the original game system while introducing many enhancements for gameplay purposes. In terms of presentation, we upgraded all components, including completely new full-color maps, new reinforcement and new unit displays, expanded turn and supply tracks, enhanced charts, a rulebook with incorporated errata, and larger counters.
This one does have two 22″x34″ maps but with only 2 countershafts so it is large in scope but not necessarily in scale as it appears to be fairly low counter density. One to keep an eye on though as it is designed by Frank Chadwick and is a remastering of the classis GDW release in 1979.
As usual, thanks so much for reading along and sticking with me this month as I navigated through the many websites and game pages looking for new and interesting games to share.
Finally, thanks once again to this month’s sponsor Neva Game Press!
They recently announced their next Kickstarter project that would take their system to the Anglo-Boer War called The Great Anglo-Boer War: The Battle for South Africa 1899-1902. The game is currently on Kickstarter and I reached out to my contact there Kevin Talley who acts as one of the Developers on the team for his input into the design to give us a better picture of how this new game plays.
Grant: What is the focus of your new upcoming game called The Great Anglo-Boer War?
Kevin:The Great Anglo-Boer War is a grand-strategic level game of the war between the British Empire and the Boer Republics in South Africa from 1899 to 1902.
Grant: Who is the designer and what is their goal with the game?
Kevin: As with all of our designs, R.J. Mills is the designer. He has always been fascinated with the Boer War and the goal was to make a really good hex-and-counter wargame to cover the whole conflict.
Grant: What is important to model from the history of the Anglo-Boer War?
Kevin: Well, the Boer War was very unique. It began as an asymmetric conventional contest in 1899 between the relatively small citizen militia forces of the two Boer Republics (they had no standing professional armies) and nearly the entire army of the British Empire! Then, once the Empire had captured both Boer capitals in 1900, the Boers refused to surrender and instead decided to fight a guerrilla war (and that went on for 2 more years). So, given the dynamics of this truly unique conflict, making a realistic game presented some serious design challenges. The design had to accurately simulate the conventional period, where the fractional Boer forces soundly defeated the British in several key battles during the early months, and it also had to credibly represent the guerrilla phase of the war, where very small numbers of Boers roamed (often unseen) and raided (always with surprise) throughout a vast area nearly twice the size of Texas. For this phase, the Empire forces had 250,000 troops deployed unsuccessfully trying to defeat 20,000 guerrillas! It all ended (finally) 31 May, 1902, with the Treaty of Vereeniging.
Grant: What other games inspired this design?
Kevin: We had not intended to make a Boer War game here at Cadet until after we started seeking a good grand-strategic/operational game about the Boer War to play. We got the “Boer War bug” playing Geoff Noble’s Redver’s Reverse: The Battle of Colenso, 1899 from Legion Games and decided we wanted to play a game of the whole war. We had pledged the KS Campaign for Joseph Miranda’s The Boer War from Canvas Temple Publishing and were hopeful, but it wasn’t what we’d hoped for in the end. Then we tried all the other Boer War games out there, or at least those we knew about, but there just wasn’t a good, realistic, strategic level/operational game of the whole war – especially not with the kind of depth we were looking for. We wanted something more like Nick Karp’s Vietnam: 1965-1975 from Victory Games – but for the Boer War – something with that kind of simulative value, historical chrome and especially guerrilla war operational mechanics. The closest thing we found was the old 3W game from 1991 (Eric Faust and Lew Fisher) called The Boer War. It had a lot of what we were looking for, but it was under-developed, errata-riddled and had too many issues to list. Still, that game had some brilliant design ideas, so we decided to start with that framework and make our own game. We were surprised that this topic didn’t have more published games already.
Grant: How did warfare change during the Victorian Age? How did you capture these changes?
Kevin: The British Army was fighting in drill book formations all the way through the 19th century. Consider that, just a year before in 1898 at Omdurman, the infantry stood in close order (just like in the movie Zulu), easily repelling the 50,000-strong army of the Khalifa with Lee-Metford volleys, Maxims and quick-firing breech loading artillery. This all worked very well when the enemy had swords, spears or primitive firearms. But the Boers had Mausers. And Krupps. And Maxims! Tactics had to evolve to meet this new level of lethality and the British Army was not initially prepared to face an enemy that was equipped with the same weapons as they. And an enemy that chose trenches and concealment – inflicting severe losses on British troops in drill formations. The combat system in the game realistically models the advantages of entrenchments, terrain, unit formation posture, night marches and even artillery effects. The Boers on defense can be very tough. A typical attack will be costly. Best to use open order and artillery to great effect – even better to use maneuver and avoid the prepared defense altogether. It took the British some time to learn their lessons.
Grant: What sources were consulted for the historical details?
Kevin: The bibliography for the game is included in section 26 of the rulebook. We used 20+ books on the topic to get the information for the design, and of course those include all the most important works published about the war: Rayne Kruger, Pakenham, Farwell, Arthur Conan Doyle (who was there), Barthorp, Reitz (a famous Boer Journal of the war), Maurice’s official history, Amery (Times history) and more. Someone who has researched the war and knows the historiography will truly appreciate this game.
Grant: What is the scale of the game? Force structure of units?
Kevin: The map scale is 9 miles to a hex. The map is huge. 34″ x 44″ on the table. The unit scale can be as little as a half battalion on the Empire side (500 men) and a single commando element of as few as 333 for the Boers. But the system is so flexible that a single leader’s counter in a hex on the map could represent as many as 30,000 Empire soldiers (with supporting artillery) and up to 13,320 Boers with several batteries of their guns as well. The game scale works for both large conventional battles (early war) and small guerrilla actions (later war).
Grant: What is the layout and anatomy of the counters?
Kevin: The counters are the typical ½” variety, printed on both sides. There are Entrenchment markers that, when flipped, double as “Scorched Earth” markers; Rail markers (early war) that also double as Blockhouse Line markers (guerrilla phase); Boer Control markers that can also be used as Strength Point counters; Number markers that flip to various increments; dozens of Empire Detachment markers which flip to show either Infantry or Cavalry or Artillery Strength Points (and the rotated position of these markers indicates the detachment strength in the hex); Armoured Train unit counters; Supply Wagon unit counters; Unit Status markers for multiple conditions like Retreated, Disordered, Demoralized, Invasion VP’s and more; and of course the Empire and Boer Leader counters, which are the basic units of maneuver in the game.
Grant: What different types of units are available to both sides?
Kevin: A Leader counter on the map typically indicates a ‘Force’ (which is a leader and the Strength Points of soldiers and artillery in their command) for both sides. These Forces are the maneuver units that move around on the map. There are also Detachments, which are Strength Points of soldiers and artillery without a leader (these secure and patrol an area, with a ZOC but without the counter moving). The Empire Strength Points can be Infantry, Cavalry or Artillery, with each point equating to 500 soldiers or a battery of field guns. The Boers are basically all mounted infantry militia, with each Strength Point representing 333 Boers or one battery of their artillery. The Empire also has Armoured Train units (we kept the English spelling), which function as ‘line of communication’ forces that police Empire-controlled rail lines. The Boers also have their Republic Presidents (Steyn and Kruger) and their small government staffs, which serve to score Victory Points by avoiding capture and maintaining their presence as head of state, either in their capitals or out on the veldt.
Grant: What is the off-map Arrow/Wheel used for?
Kevin: There are “Unit Displays” for both sides. These typically show a small picture of the Leader next to a pair of Strength Point numbered ‘wheels’. The players use counters with little arrows on them to indicate on the ‘wheels’ how many SP’s of soldiers are in a Leader’s Force, with any artillery batteries indicated by using a number marker. This keeps the counter-density on the map low, since the battalions, regiments, batteries or commandos are indicated using these off-map strength displays, and only the Leader’s counter moves on the map.
Grant: What was the inspiration for this mechanism?
Kevin: This came from the 3W game. Some players dislike this method for managing unit strength, and it took some getting used to, but we eventually decided it was the best mechanic we had seen in any design for this aspect of the game. Now we love it. Especially because of the flexibility it allows once the war changes from conventional to guerrilla. Historically the forces changed from divisions and brigades fighting large Boer commandos to much smaller columns of Empire troops chasing small Boer units of a few hundred all over the map.
Grant: How does it show the importance of Leaders in the game?
Kevin: I think this whole method of organizing the armies of both sides by each “Leader’s Force” really works perfectly to simulate the Boer War. It matches the real history. Everything a Force does boils down to the influence and command capabilities of the Leader. And forces of widely varying strength and unit composition were assigned to different leaders on both sides at different times throughout the conflict.
Grant: What is the Leader specific initiative rating system? How does it aid in your telling of the Anglo-Boer War?
Kevin: A Leader has to ‘roll for initiative’ to do most actions. Each Leader has an initiative rating which either helps or hurts their odds of a successful die roll, and the ratings are based on the historical performance of that Leader. This represents more than simply a Leader’s tendency to act decisively or not, but also his relative command influence for scarcity of resources, typical Victorian-era officer rivalries, orders and communications variables, bad intelligence and other typical “frictions” of war. The history of the war is full of instances where orders didn’t get communicated, sometimes weren’t given at all, or were ignored. Battles were lost many times because this leader or that failed to act on their own initiative or had some other priority override their commander’s intent. There are some Leaders whose rating is so good, they can nearly always do anything the player wants (and those are almost exclusively Boers). Other Leaders are reliably ineffective, and special care must be taken by the players to choose the right missions for these people. The realism of the design is greatly enhanced by this aspect – a player might have a great plan, but there is no guarantee that their Leaders will enact it. As Lord Roberts said after the battle at Poplar Grove, “In war you can’t expect everything to come out right.”
Grant: What is the layout of the game board?
Kevin: The Game Map contains almost all of the area of the war, from the eastern Transvaal and much of Swaziland and Zululand all the way to the Kalahari desert in the west; from 150 miles west of Port Elizabeth on the coast all the way up past Durban in Natal – and all of the mountains, ridges, rough and veldt of South Africa contained therein. It is a very large area and the map scale is 9 miles per hex. Using .625 hexes (for standard ½” counters), the map is 34″ x 44″ on the table.
Grant: What key terrain features are included and how do they affect maneuver and tactics?
Kevin: The terrain types for hexes include mountain, rough and veldt. Special hexside types can be ridge or river, bridge or rail. The mountain ranges are all there, as are the ridgelines and heights, rivers and rail, towns, ports and capitals. Even the passes and “neks” are indicated. The actual escarpment of the Drakensberg are all mountain hexes, but the Biggarsberg north of Ladysmith, as an example, is treated as ridge-type hexsides with rough terrain hexes. There is a real distinction between mountains and typical rough country/hills. The geography of South Africa was a serious factor in the conduct of the war and the terrain effects for both movement and combat are significant in the game.
A Force attacking across a river hexside is reduced by 50%; a Force attacking across a ridge or into mountains is reduced by 25%; a Force defending in mountain terrain is doubled; a Cavalry Force crossing a river pays 2 extra movement points to do so, while an Infantry Force pays 3; a veldt hex costs 1 point to enter, a rough hex 2, a mountain hex 4, and crossing a ridge hexside adds 2 points. Geography is key. Often, the only way to effectively dislodge an enemy Force from a position is to maneuver them out of it, because the odds for a successful attack are slim based on the terrain. The Tugela River line in Natal is a famous example of a natural fortress, and so it is with the game. To get past a competent Boer defense there, it will take an Empire player who understands the map and the combat system (plus some good dice and a card or two).
Grant: What type of cards are included? Can you share a few examples.
Kevin: The cards are great. Mostly they modify the combat odds or DR’s by providing for an odds-column shift or a DR mod for one of the many on the Battle Board (the Empire Attack Scouting Effect, the Artillery Effect or the actual combat DR). But there are also many cards that influence very specific game actions – like evasions or recruiting, siege surrender extensions or supply situations, armoured trains or movement or initiative effects. Some cards influence the unit formation or entrenchment posture during a battle, while some may determine the outcome of night marches. Some are related to intelligence and reveal hidden enemy units or prevent unknown strength in a combat event. Others influence scouting and observation, signals and orders, escapes and ambushes…I could go on.
All the cards were created based on actual events that happened during the war. Here is an excerpt from the Campaign language and the “design notes” section of the rulebook: “The game cards are designed to build historic realism into the game, especially for the combat system. As in all wars, small instances of chance – moments of decisive leadership (or not) – a thunderstorm – an oil-less signals lamp – a wire fence – a flooded drift – a poorly drawn map – a mistaken guide – an enemy surprise…all these historic events and elements of chance are represented in our design by game cards for both sides. We think this adds to the design immensely, since these can account for odds column shifts and DR mods that the players cannot anticipate. Like their historical counterparts, the players cannot know exactly what their odds are until the battle is joined and the card(s) are revealed!”
Grant: How does combat work?
Kevin: The combat system uses an odds-based CRT and a combat die roll to determine battle results, so it is fairly typical of a hex-and-counter wargame. What gives the system the right depth is that combat can happen during the movement as well as the combat phases. Combat can also be initiated by the non-phasing player using a reaction mechanism – so it isn’t nearly as simple or predictable as “I go / You go”. Based on the history, we felt the combat system (even at this scale) needed to incorporate strength ratios, unit tactical formations, weather, visibility, unknown Boer strength, artillery strength and effects for both sides, leadership, scouting and intelligence, terrain, night march outcomes, unit morale, “dummy” defensive positions, entrenchments and more.
Grant: How does the Battle Board work?
Kevin: There are so many effects and modifiers that contribute to the combat system that we decided the only way to keep everything straight was to have a Battle Board. For example, an Empire attack vs. a defending Boer Force would look like this: First, the Force attacking commits their desired number of Strength Points to the battle using the Attacker’s SP display, then the defending Boer unit’s SPs are indicated on their display. Any unit status particulars (Disordered, Demoralized, Retreated) are also indicated. The next step is to see how many unknown Boer SPs there are, so a die is rolled and that number goes on the Board (usually the Empire player cannot know their exact combat odds until after they commit their SPs to the attack because of this “unknown SP” die roll). Then any terrain or supply state modifiers are applied (there are markers for these) for both sides to establish the initial combat odds, and a counter for that ratio is placed in the appropriate box on the odds track (always rounded in favor of the defender). Next, any factors that modify the combat odds are noted and applied (entrenchments, the Empire Attack Scouting Effect DR, any other enemy units in the attacker’s ZOC, a Demoralized defender, any cards – attacker first). Now a marker is placed for the final combat odds on the final odds track. The last bit is to calculate what modifier (if any) is going to apply to the combat DR. The Artillery Effect is determined with a DR, if the Empire is using a night march there is another DR, the Empire Force’s Leader combat rating is applied, if the attack is made from a rail-move ZOC it matters, and finally any cards that modify the DR – attacker first. Once the Battle Board has been completely and correctly configured, the combat die is rolled and the CRT consulted to determine the result. The Battle Board is really essential to keep track of all of it.
Grant: What role does scouting and intelligence play in the game?
Kevin: The British generals were famously ignorant of the Boer dispositions in the early battles, for they had almost no intelligence organization in their army corps and they were especially short on mounted troops for effective scouting. The Empire Attack Scouting Effect is built into the combat system to reflect this. If the “E.A.S.E.” DR is greater than the number of Cavalry SP’s in the attacking Force, there is an odds-column shift to the left for the combat on the CRT. Later in the guerrilla phase, there is a “mystery movement” dynamic which keeps the Empire player guessing about which Boer commando markers are real units and which are only decoys. Some of the game cards confer valuable intelligence by allowing the Empire player to reveal a “mystery” commando of their choice (and native spies can help both sides).
Grant: How is artillery used?
Kevin: There is an Artillery Effect Track on the Battle Board which compares the arty strength of the two sides in a battle – whomever wins this comparison gets a modifier that applies to the combat DR. The Boers get a DR to add to their battery count, so even an Empire Force with 8 batteries of guns might not win the Arty Effect Bonus if there are 3 Boer batteries (if they roll a 6, they have 9). This “Boer Arty Effect” DR does not necessarily represent additional unknown batteries/guns, but more simulates the Boer tendency to use superior artillery tactics, multiple prepared positions, gun re-positioning during a battle, indirect fires and hidden gun positions with range and target fire preparation. In addition, the British firepower was often wasted against cunningly prepared “dummy” trenches and positions such that seemingly impressive preparatory fires were completely ineffective. The Boer Arty DR serves to simulate both aspects. The Empire has far greater potential weight of fire, but qualitatively the Boer Arty is superior (as with the historical truth). There are cards for both sides that impact the Artillery Effect for a battle.
Grant; What is the role of Scorched Earth?
Kevin: As the Boers turned more towards guerrilla tactics, the Empire forces began burning farms and killing or confiscating livestock (and especially horses) as reprisals for Boer attacks and to destroy potential shelter and supply sources for the guerrillas. This often resulted in the re-settlement of the Boer women and children in concentration camps, where thousands perished from disease and hunger. There are several game mechanics during the guerrilla phase that simulate this aspect of the war, and one is the “Scorched Earth” program. If the Empire player chooses, they may assign Forces during a game turn to “Scorch” one or more district areas in the Boer Republics. A marker is placed, and Boer movement point costs in that district are doubled, while guerrilla recruiting is halved. Once “Scorched”, a district can no longer provide Boer VP’s during the District Control segment of the VP interphase. But there is a potential cost to this kind of “scorched earth” policy: every turn this is done the Boer rolls a die – if the result is equal to or less than the number of newly “scorched” districts for the turn, the Boers get 5 VP for each. These VP’s reflect negative public opinion, parliamentary outrage and press coverage back in England, as well as increased Boer resentment and dedication to fight to the bitter end to avenge the destruction of their homes and families. The Empire player must balance the military benefits against the possible consequences of the policy (and be careful).
Grant: How does the Attrition Phase work?
Kevin: There is a lot going on during the Attrition and VP interphase. Hundreds of the Boers in just about every Force will simply leave to go home (they are all volunteer militia, not regulars); The Empire may have thousands of losses to typhoid (it was a big deal during the war); Boer family deaths in the concentration camps may cause desertions in the commandos (and uproar back in Britain); Besieged Empire garrisons may suffer losses or surrender; Railheads may advance or be pushed back: Forces might entrench; Unit statuses (like Demoralized units) get updated; VP’s for the game turn are tallied and losses counted, and the totals for the war (or scenario) are arrived at. It gets even busier if a Boer capital has been captured during the turn, as this can drastically increase the number of Boers who choose to “take leave” and go home (low morale). At the end of the phase, the players advance the game turn marker and start the next month of the war.
Grant: How is victory determined?
Kevin: Victory Points are awarded to both sides for all kinds of events. Mostly major or minor battle victories, but also for siege outcomes (relief or surrender), Boer invasions of Empire territory, capture of Leaders and capitals, control of districts, consequences from the scorched earth policy and concentration camps, and even penalties for over-stacking. There is a VP table on the back of the rulebook so the players can double-check during the VP interphase, and there are handy player-turn and interphase record sheets to use as well. Whoever has the most VP’s at the end of the scenario wins, unless an automatic victory for either side ends the contest early.
Grant: What different scenarios are included in the design?
Kevin: There are three scenarios – the Conventional War, the Guerrilla War, and the Grand Campaign Game. Here’s an excerpt from the Campaign language: “The full campaign is the ultimate Boer War experience – from the first desperate siege defenses of 1899 to the treaty of Vereeniging (or maybe not?) – and everything tactical and otherwise in between: Battles, blockhouses, farm-burnings, evasions, escapes, raids, concentration camps, sieges, drives, armoured trains, 1-pdr automatic “pom-poms”, surrenders, entrenchments, typhoid, barbed-wire, native spies, night marches, supply wagons and more. If it was part of the real Boer war – it is in the game.”
Grant: What does the game do well in modeling the Anglo-Boer War?
Kevin: We feel the game succeeds in modeling just about every aspect of the war, but there are a few particulars. Again, from the Campaign language: “For our design, we wanted a more granular scale of both movement and combat than any other strategic-level Boer War game yet published. Rayne Kruger, in chapter 23 of his “Good-Bye Dolly Gray” pointed out that, perhaps more than any other Boer advantage, the Empire was fighting “a war against space.” We ended up having two 22″ x 34″ map sections at 9 miles/hex to pull this off. A very large game on the table – but very typically “Cadet.” As it goes here, bigger is better. More hexes = more realism.”
Also, the Empire forces during the war were especially dependent on the rail lines for supply, while the Boer forces were far less dependent on any supply system to keep their forces in the field. The supply rules in the game really do justice to history, as everything the Empire player wants to do will be substantially constrained by their proximity to a rail line. In fact, some remote districts simply cannot be effectively garrisoned by Empire forces or detachments, because those units will be out of supply. Moreover, the scarcity of draft animals (oxen and mules) during the war meant only a handful of supply wagon units were available to extend an Empire LOS away from any rail line, and so it is with the game. These few substantial wagon convoys are also prime targets for the marauding Boers (as with countless examples from the war).
Grant: What has been the experience of playtesters?
Kevin: The game plays very well, indeed, but there were a few unexpected outcomes from the initial design, especially the combat system. In our first run of the conventional war scenario, we discovered that the “Boer unknown SP DR” mechanic needed a change. The Boers simply fought too well. Every time the Empire committed SP’s to an attack, the Boers would essentially be ‘reinforced’, owing to their unknown SP die roll. It always added SP’s to the Boer Force, since it wasn’t designed to subtract them. True, this kept the Empire player uncertain as to the combat odds until the forces were joined, but it had the effect of representing the Boers as ahistorically disciplined regular troops – prepared to fight to the death and hold their ground even when attacked by 15, 20, or even 30,000 British with 50+ field guns. The Boers just didn’t do that. There are far more examples of the Boer volunteers fleeing in droves from large Empire forces (in spite of exhortations and even threats by their leaders and even presidents) than examples where they stood their ground. In many ways this tendency served to preserve their forces and denied the Empire the showdown battles they hoped for during the second phase of the conventional war. A small rearguard of hardcore Burghers (farmers) would usually hold off the exponentially larger Empire forces, allowing their thousands of fleeing comrades to make their escape. They traded ground for time and blood, almost always avoiding any decisive loss.
So, we amended the rule so the DR can go either way, depending on the size of the attacking Empire force and on another DR modified by the Boer Leader rating of the defending force. This solution made a huge difference and resulted in the historical outcomes we wanted. If you attack Botha with a large Empire Force, he will likely motivate several hundred more Burghers to join the defense. Attack Prinsloo, though, and he’s likely to have several hundred of them (or more) run away before the battle is joined. There is a card in the Empire deck that prevents the unknown SP DR altogether, and now freshly retreated or Demoralized defenders don’t roll either.
Grant: When can we expect the game to be fulfilled?
Kevin: We are optimistic that the community will support our Campaign for this one (gotta get successfully funded first), and we will start the production sample and the rest of the process immediately afterward. Our anticipated timeline is to have the games shipping to the backers by August of next year.
Grant: What projects are in the near future for Cadet Games?
Kevin: We would really like to get our Hamburger Hill game produced. The design is 100% done and it is a really detailed sim of that famous battle. We ran it on Gamefound back in 2025 but it didn’t hit the goal. So, we will likely run that one again to see if we can’t get that produced here sometime soon. We have a ton of other projects in the works, one of which is a solo design covering the Mayaguez incident and the battle for Koh Tang Island from May, 1975. We have been really immersed in the Boer War since the middle of last year, so this one has had almost all of our attention (and still does for now, since we are playing through multiple rounds of the guerrilla phase and all of its intricacies)! We also have Barbarossa ’41 on deck for our Armies & Alliances Series of WWII ‘miniatures and monster map’ designs. Thanks again for helping us get the word out about our passion for military history and wargames!
Thank you for your time in answering our questions Kevin and for the great care you guys are taking with these games to tell a fun and interesting part of history.

 Anmelden