Grant’s Top 10 Solitaire Wargames of 2025!
As I have done with my Top 10 Wargames of each year list I am going to do the same with the Top 10 Solitaire Wargames/Games that I played that were published in 2025. I played a total of 17 new published solo games in 2025 so take this list with a grain of salt as I didn’t play all the titles released in 2025 nor even all of the games that I purchased this past year. The games that I played include the following:
- Okinawa: The Last Battle of WWII from Solo Game of the Month
- Iwo Jima 1945 from Worthington Publishing
- The Pursuit of John Wilkes Booth from Blue Panther
- Operation Dragoon Travel Game from Worthington Publishing
- Crusaders: The Siege of Acre 1291 from Art of Wargames and Blue Panther
- SPQR: The Battle of Alesia 52 BC from Art of Wargames and Blue Panther
- Siege Works: A Napoleonic Siege Roll & Write from Solo Wargame
- War In The Pacific: A WW2 Roll & Write from Solo Wargame
- Fields of Fire Deluxe 2nd Edition from GMT Games
- Europe at War 1940 Solitaire from Worthington Publishing
- Shogun Solitaire from Worthington Publishing
- Black Skin Black Shirt: Ethiopia vs Fascist Italy 1935-1937 from White Dog Games
- Empire of Grass from White Dog Games
- Onoda from Salt & Pepper Games
- Iwo Jima: Hell on Earth from Neva Game Press
- La Der de Ders – The War to End War from Hexasim
- Thermopylae: Last Stand from Solo Wargame
I have really grown to love my solo wargaming and it is partly because there are plenty of well designed and engaging games out there that continue to feed my curiosity and hunger for a tough challenge. Here I present to you my list of the Top 10 Solitaire Wargames of 2025!
10. Crusaders: The Siege of Acre 1291 from Art of Wargames and Blue Panther
A new solitaire game is always welcome on my table…and if that game is about the Crusades, even better! Earlier this year, Blue Panther released a new game designed by Joe Fernandez called Crusaders: The Siege of Acre 1291. The game is what I would call a lite dice-chucker with some very interesting aspects of a siege baked into the game. There are tracks on the board that track the condition of the outer wall, inner wall and accursed tower and the Crusader Knights, including Templars, Hospitallers and Teutonic Knights, inside the city of Acre have to defend against the Mamluk siege for 13 turns.
The game has a random event that kicks off each turn that will do damage to the city walls, kill knights and advance the Mamluk miners who are attempting to tunnel under the walls. There is just one event that if rolled can do a loss to the attackers but this occurs only on a roll of 3 on a 10-sided die.
The rules are very simple clocking in at 5 pages and are easy to understand and once read the game can be played only from the excellent player aid. I very much enjoyed the Deus Vult actions that are special actions that can be used to do things like repair a wall, reverse a Mamluk mining action or sally out of the city to offensively attack the besieging units. But, these actions can be nullified if certain conditions occur so you should use them while you have them and not wait too long or they might disappear.
I feel like this game really scratches that quick playing, easy to get into but intense and difficult game itch. The Crusaders have an uphill battle for sure as they really don’t have as many options or choices as I would like to see but what is there makes sense, is full of historical flavor and plays well. I have not been that successful with the game, meaning that I haven’t won very often, but despite that I still want to come back play after play and that should tell you something about the game and what it is. If your dice luck is really bad, this one can snowball quickly ending in a catastrophic defeat. I think that the other real attractive part of the game is that it is quick to set up, has good rules and plays quickly. This one will not blow your socks off but it is good for what it is and it comes in a small box that is very portable. In fact, I played it first while attending a work conference.
Here is a link to my playthrough video:
Here also is a link to my video review:
If you are interested in Crusaders: The Siege of Acre 1291, you can order a copy for $35.00 from the Blue Panther website at the following link: https://www.bluepantherllc.com/products/crusaders-the-siege-of-acre-1291
9. Shogun Solitaire from Worthington Publishing
Staying in the small, travel sized wargame department is Shogun Solitaire from Worthington Publishing. I say wargame, but it is probably more of a strategy card game with a war theme being set in the period of the Sengoku Jidai. Shogun Solitaire is a card based dedicated solitaire game where the player is leading a coalition of four clans to unite feudal Japan. These clans are one of 4 different colors in the game including green (Hōjō), purple (Takeda), red (Katō) and blue (Amago). Each of the clans must secure 3 objectives within their territory to achieve unification under a single Shogun including the port, village and castle of that region. To accomplish this, you’ll need to deploy armies in the form of cards in strategic combinations to gain control of those objectives. These cards are built up in the players tableau and you must get a run of 3 same colored cards (not the same type of soldiers although you cannot play 2 of the same soldiers consecutively) played in order to win the next objective. But, there are Enemy cards colored black or gray that represent assassins, Ronin and raids. There are also neutral Envoy cards that are bronze colored that act as dead space in your tableau and represent the court responsibilities and diplomacy of the Shogun with allied clans and if you ever build up too many of them in the area you will have to take a breath and wipe the slate clean by sending them home.
The really great part of this game is that each of the different types of cards have different special abilities and you must deploy them properly in order to gain the greatest advantage before the 102 card deck runs out. There are six types of Shogun cards that represent the available forces that can be deployed to seize objectives. Samurai can protect and will cancel enemy cards before they can do damage. The Ninjas allow the player to search the top 4 cards of the deck and then reorder them in order to finish a run of the same color cards before bad things can happen. And one of the most important cards is that of the Leaders which act as a wild card that can be played like any Shogun card of its color. I found that trying to utilize these cards to their highest effect was very fun and tense and I found myself really trying to utilize each ability at the right time.
This game is fast playing, playing in 20-30 minutes, and is very fun. But it can be very luck dependent as when you draw bad cards a few hands in a row, there is not much that you can do and the game begins to pound you down and it can come to an end very quickly. But, this game is very good and well designed for what it is; a lite, card based, quick playing travel sized game that is also very beautifully produced with gorgeous period art, thick cards and a fantastic board that flips over to show a
Here is a link to my playthrough video:
Here also is a link to my video review:
If you are interested in Shogun Solitaire, you can order a copy for $35.00 from the Worthington Publishing website at the following link: https://www.worthingtonpublishing.com/collection/shogun-solitaire
8. Iwo Jima 1945 from Worthington Publishing
A few years ago, Worthington Publishing published their first game in the Island Fight Series called Tarawa 1943. That game was awesome and was truly difficult to win, as it should be. Now, they have published the 2nd volume in the series called Iwo Jima 1945 that covers the only island assault during the Pacific war that the attacking US forces would suffer worse casualties than the Japanese defenders. On February 19, 1945 the USMC would land 30,000 marines on the island against a Japanese defensive force that numbered roughly 21,000 Japanese soldiers. Facing a Japanese commander who had learned valuable lessons from the losses on other Japanese islands, the USMC would eventually land over 70,000 marines and suffer over 25,000 casualties during the 36 day campaign.
In this solitaire game, the player takes on the role of the USMC commander leading the invasion of Iwo Jima. The game system, driven by cards, will simulate the strategies of the Japanese defenders, often referred to as the Japanese AI, adding a layer of historical authenticity to your gaming experience. If you have played Tarawa 1943, you will be familiar with the system.
Iwo Jima’s play deck is larger than that of Tarawa’s, which provides a bit of breathing room in the game but doesn’t necessarily change the difficulty appreciably. There are also added mountain positions on the island where the attacking USMC will roll 1 less attack dice making it very challenging to overtake several of the key positions and that will need the player to use special cards to assist. The USMC player is allowed to play any number of the cards from their hand during their turn as opposed to just 3 from the previous entry in the series. The other rules are almost all the same, and you can begin playing with just a brief read of them.
I have played this one about 10 times and have not even come close to winning. It is tough and the way the dice system for combat works it is truly difficult for the Marines to score hits quickly enough to make significant progress, which is how it should be. But, the game is fun, tactically challenging as you have to manage your Cohesion as well as decide when to deploy and replace front line troops with fresh troops and plays pretty quickly. I have never had a bad play of this system and very much look forward to other entries in the series.
Here is a link to my playthrough video:
Here also is a link to my video review:
If you are interested in Iwo Jima 1945, you can order a copy for $75.00 from the Worthington Publishing website at the following link: https://www.worthingtonpublishing.com/collection/iwo-jima-1945
7. Onoda from Salt & Pepper Games
I am always on the lookout for an interesting and different type of historical game. And when that game is solitaire and allows the player to experience and gain insight into the life of a tragic figure then I am very interested. A few years ago, I came across this very interesting looking solitaire game designed by Francisco Gradaille called Onoda from Salt & Pepper Games. Onoda follows the tragic life of Hiroo Onoda who was a Japanese soldier who wouldn’t believe that Japan had lost World War II and stayed at his post on the island of Lubang in the Philippines from 1945-1974 when he finally surrendered after a visit from his commanding officer. I have played this one several times and can say the game is very interesting, educational and also gives the player an opportunity to learn and gain insight into the life of this person who is remembered as an insane criminal and a story of tragedy.
During 6 rounds of variable duration, the player has to obtain a number of resources represented by rice that will
allow them to finish the round without suffering penalties, such as reduced health and morale. In each round, the player will have to undertake a series of missions, earning honor points for accomplishing them. During the game, the player will get to experience some of the events that the real-life Onoda had during his stay in Lubang as well as some of the tragedies. The missions includes things like sabotaging key infrastructure, gathering equipment and other useful items all the while trying to evade detection and capture. But the game goes deeper than that as the crux of the game is the management of morale and the level of insanity in the mind of the soldier due to paranoia, death of comrades or illness.
During these missions, the player will have to draw tokens from a draw bag that represent the level of alarm that is present on the island due to his shenanigans. Each time that a player has to perform a check to accomplish a mission or to avoid danger from the random events, the player must take a Resource/Resolution token from the bag and check its number side against the relevant level of alarm or paranoia in the are where the operation is being undertaken. These Checks are successfully passed when the token’s number is higher than the Alarm or Paranoia level so keeping these low and also moving around the island stealthily will spread out the alarm level and keep Onoda safer and more able to accomplish these missions. Failure will lead to negative effects and lost opportunities as the game has only 6 turns.
I very much enjoyed this game and also loved it because it made me think about this tragic “hero” and his motivations and life those 30 years on the island. What commitment he must have had as well as derangement and you have to respect that or at least give it some thought. Just a great little narrative generator with some very gamey mechanics that create an interesting experience.
Here is a link to my playthrough video:
Here also is a link to my video review:
Also, in case you missed it, we published an interview with the designer Francisco Gradaille on the blog and you can read that at the following link: https://theplayersaid.com/2024/11/06/interview-with-francisco-gradaille-designer-of-onoda-from-salt-pepper-games-coming-to-gamefound-november-7th/
If you are interested in Onoda, you can order a copy for $39.00 from the All Play website at the following link: https://www.allplay.com/board-games/onoda
6. Black Skin Black Shirt: Ethiopia vs Fascist Italy 1935-1937 from White Dog Games
I have really enjoyed my plays of several games designed by R. Ben Madison. He has a knack for including elements of the history into the gameplay while placing the events into the framework of his chosen system, which is usually the States of Siege Series…but not always. His newest offering called Black Skin Black Shirt: Ethiopia vs. Fascist Italy 1935-1937 from White Dog Games uses the States of Siege Series System and delves into pre-WWII conflict in Africa.
First off, this game is very challenging, as is to be expected as the Ethiopians are desperately outmanned and outgunned by the Fascists as they invaded to take over the oil rich area for their own purposes and I have not done well at it at all in my few plays. I normally would have played it a few more times before adding to the list but I just had such a good experience with it and the history that I felt that I needed to add it to the list. It uses the States of Siege Series but in a bit of a different layout as there are not tracks per se but there are paths that lead through various regions of the country of Ethiopia as they converge on the capital of Addis Ababa.
The game is chit pull and the chits that are pulled give instructions about the actions of the AI Italians as they move on each path. The player will also gain a number of action points that can be used to take actions such as attacking to drive back the invaders. I very much like the concept of support of the Fascist invasion as they have the ability to place their support focused bases on the map as they advance and this leads to the player no longer being able to drive them back to beyond that point so the pressure really ratchets up as the game goes along.
As is the case generally with these games, Black Skin Black Shirt is an easy-to-play, straightforward solitaire game that creates a very interesting historical narrative about how the conflict plays out. There are really lots of tough choices and the game is about the management of your resources and assets, such as your Ras warlords who can go out and make devastating ambush attacks but can also be killed in action and removed from the game, The game forces the player to take charge of the defenses, by calling up troops and marshalling resources as well as attempting to call on the League of Nations for aid and support.
Here is a link to my unboxing video:
If you are interested in Black Skin Black Shirt: Ethiopia vs Fascist Italy 1935-1937, you can order a copy for $56.00 from the White Dog Games website at the following link: https://www.whitedoggames.com/ethiopia
5. The Pursuit of John Wilkes Booth from Blue Panther
A few years ago, while attending the WBC, I had the chance to meet Wes Crawford who was demoing his upcoming game Engine Thieves. He was a very nice guy and his game was pretty interesting as well. Since that time, he has another game that has been released designed in partnership with Ryan Heilman in The Pursuit of John Wilkes Booth published by Blue Panther. I had a chance to play the game solitaire (with Wes overseeing the game and giving me guidance and pointers) at WBC in 2024 and have since played the game on my own several times and had a really great time with it. Great little solo game with several other modes where the player uses resources like police and detectives to search for clues in the hunt for Lincoln’s assassin after the events at Ford’s Theater on the evening of April 14, 1865. Definitely not a subject that has been gamed before and it is really refreshing to be able to experience this history in an interesting and engaging game. There really is a lot to like with the way that clues are found and chits are blindly drawn to verify clues from a bag. There is also a great little movement mechanic with police and detectives to try to acquire more clues.
I know that this is not a traditional wargame but the topic is just so very interesting and the variety of modes you can play in is also very cool. I think that this one is a game that will stay in my collection for years to come and I think that you will enjoy the chit pull, use of your special Stanton Cards that give special events or actions and the way that the movement, searching and raiding works when you find Booth.
We were able to post an interview with Wes Crawford on the blog and you can read that at the following link: https://theplayersaid.com/2024/12/03/interview-with-wes-crawford-designer-of-the-pursuit-of-john-wilkes-booth-from-blue-panther/
Here also is a link to our video interview after playing the game with Wes at WBC:
Here is a link to my playthrough video:
Here also is a link to my video review:
If you are interested in The Pursuit of John Wilkes Booth, you can order a copy for $70.00 from the Blue Panther website at the following link: https://www.bluepantherllc.com/products/pursuitofjwb
4. Siege Works: A Napoleonic Siege Roll & Write from Solo Wargame
Until a year or so ago, I had literally never heard of the concept of a Roll & Write game. But, I started seeing these things pop up on Kickstarter from a new company called Solo Wargame and I was immediately intrigued as the topics for the games were so interesting and varied that I thought that there just might be something worth looking into. Since that time, I have played 2 of these Roll & Write games from Solo Wargame and really found that Siege Works: A Napoleonic Siege Roll & Write was my favorite. I say my favorite because who doesn’t like a siege game and a game set during the Napoleonic Wars is always fun!
Roll & Write Games are typically small and portable games, some are even Print ‘n Play games like Siege Works, that involve the player rolling dice and then marking the results on sheets of paper or sometimes erasable boards. These markings can mean several different things including goals being met, pre-requisites being completed or enemies defeated. The genesis or archetype for these Roll & Write Games is Yahtzee, where players roll a handful of dice looking for various combinations of results to mark off on their sheet that then score points in the end. But recently that game genre has started to include a bit more player agency and choice about how they go about reaching goals including dice selection from those that are rolled, choosing results that are needed at the time but may be less than optimal in the long run and in completing certain goals that will open the door for additional future beneficial options for the player. Don’t get me wrong. A Roll & Write Game is very simple and is not a traditional style of wargame with hexes, counters and Combat Results Tables. But the game tells a story of a siege and how it works. So I was initially skeptical about this form of game and just had to give it a try to see what it was about. I have actually played 2 of them and found them to be lite, fun and interesting. And Siege Works is a solitaire Roll & Write Game so I have played it by myself on my gaming table and had a good time with them.
The biggest plus to the game is the simple rules, easy setup and fast onboarding with learning and being able to get the game played. You can play this easily with a simple read of the rules and a bit of review of the Game Sheet before playing. The sequence of play is very good and easy to follow as well and I found that the game is pretty intuitive. My only issue with the rules was that I found that they sometimes needed just a few more words or an additional sentence for clarity. But this is combated somewhat by the fact that the rules contain a lot of good play examples for the different actions in the game.
Here is a link to my First Impressions post that appeared on the blog and you can read that at the following link: https://theplayersaid.com/2025/09/16/first-impressions-siege-works-a-napoleonic-siege-roll-write-from-solo-wargame/
Here is a link to my playthrough video:
Here also is a link to my video review:
If you are interested in Siege Works: A Napoleonic Siege Roll & Write, you can order a print and play copy for $8.00 from the Wargame Vault website at the following link: https://www.wargamevault.com/en/product/530416/siege-works-a-napoleonic-siege-roll-write
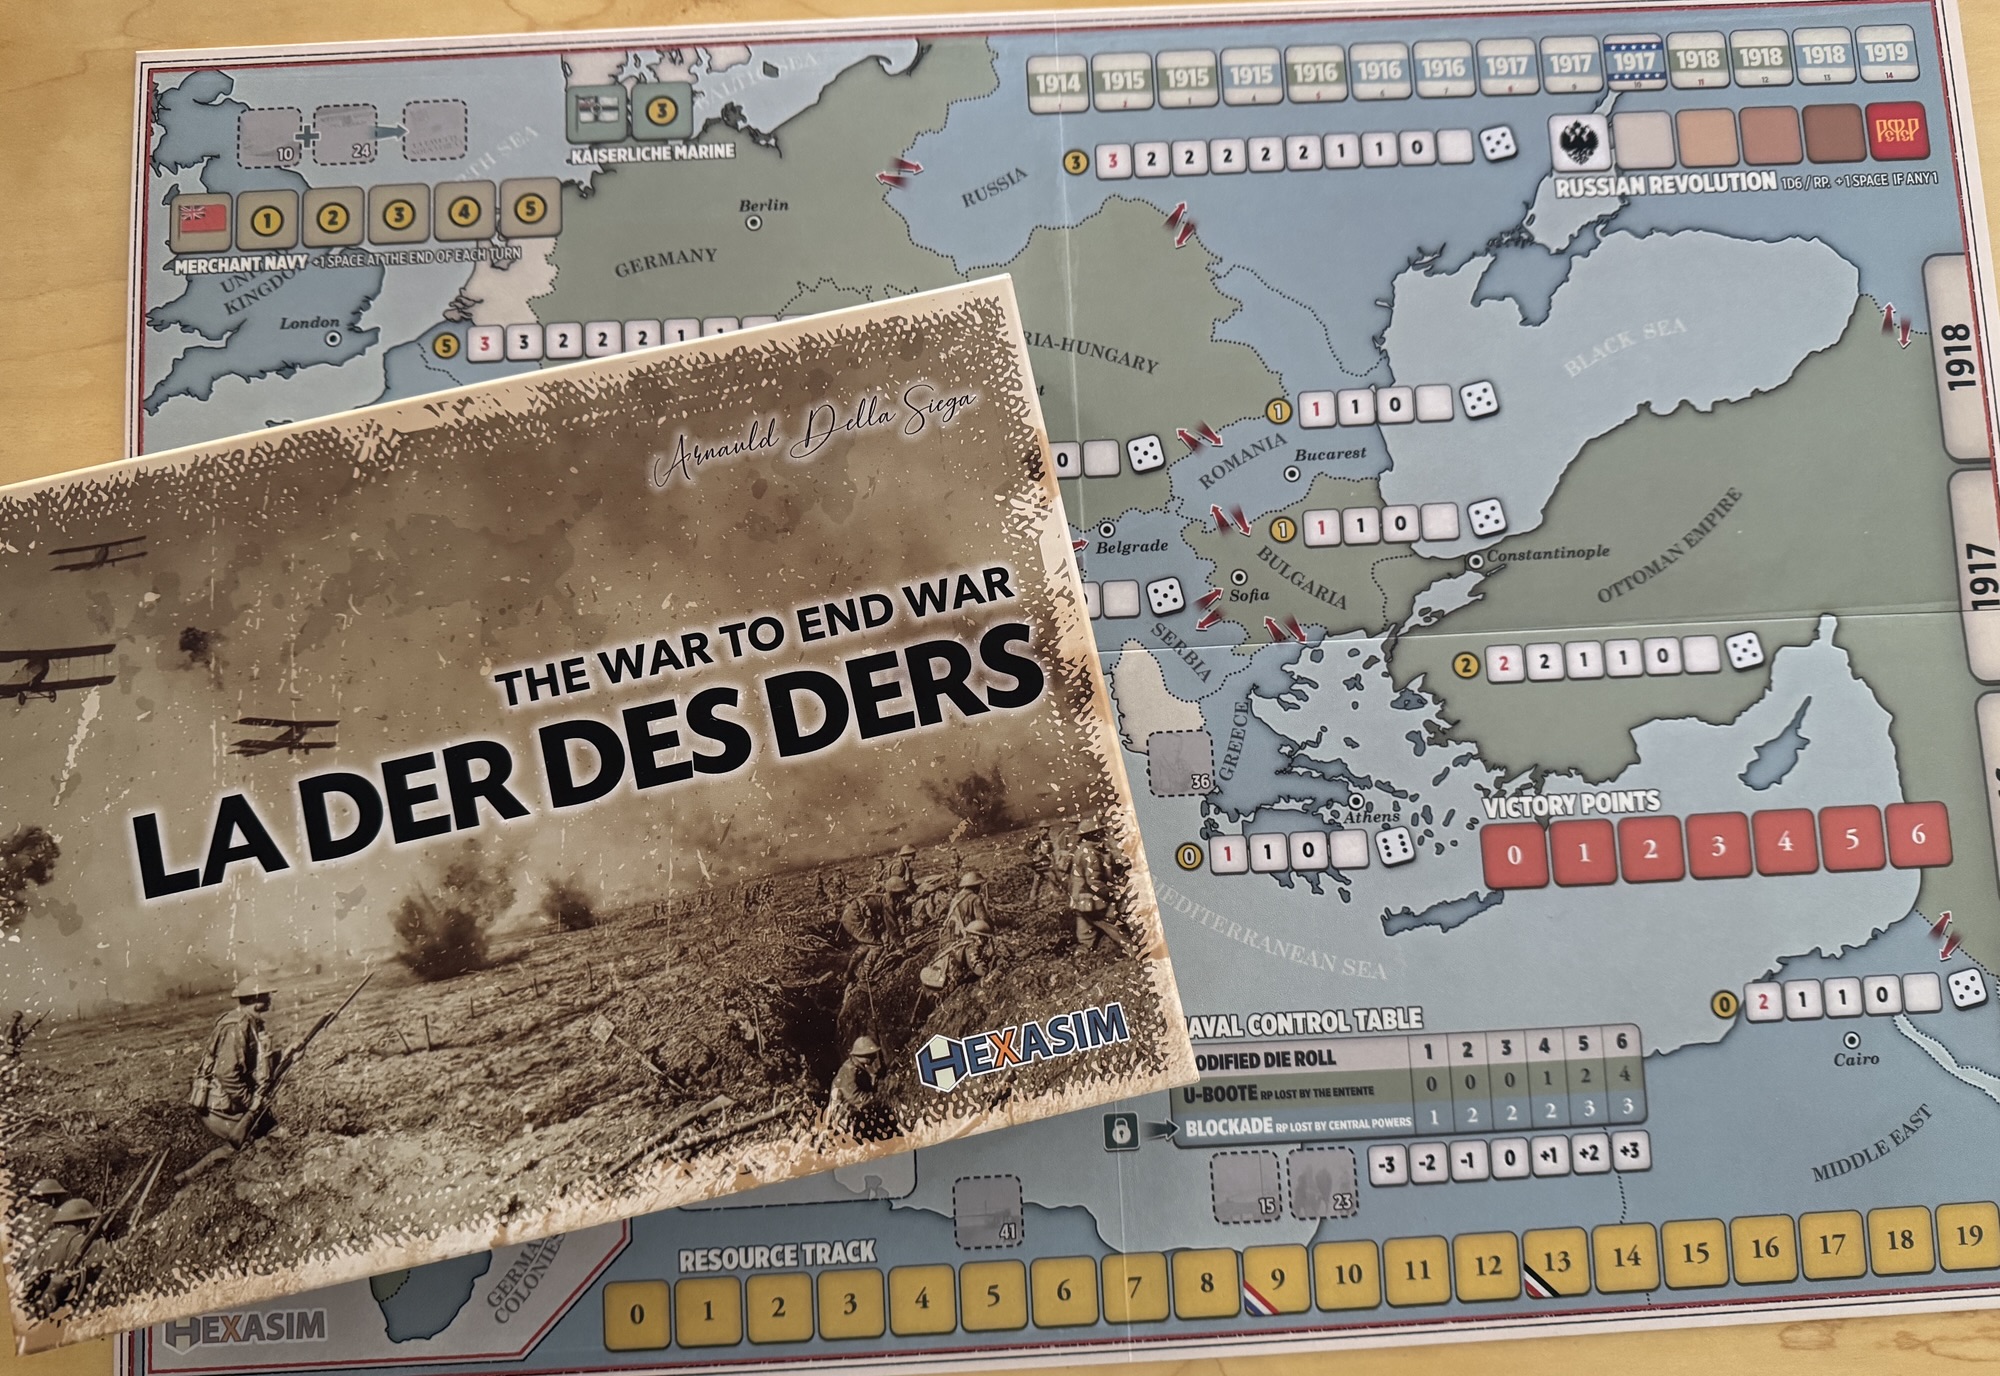
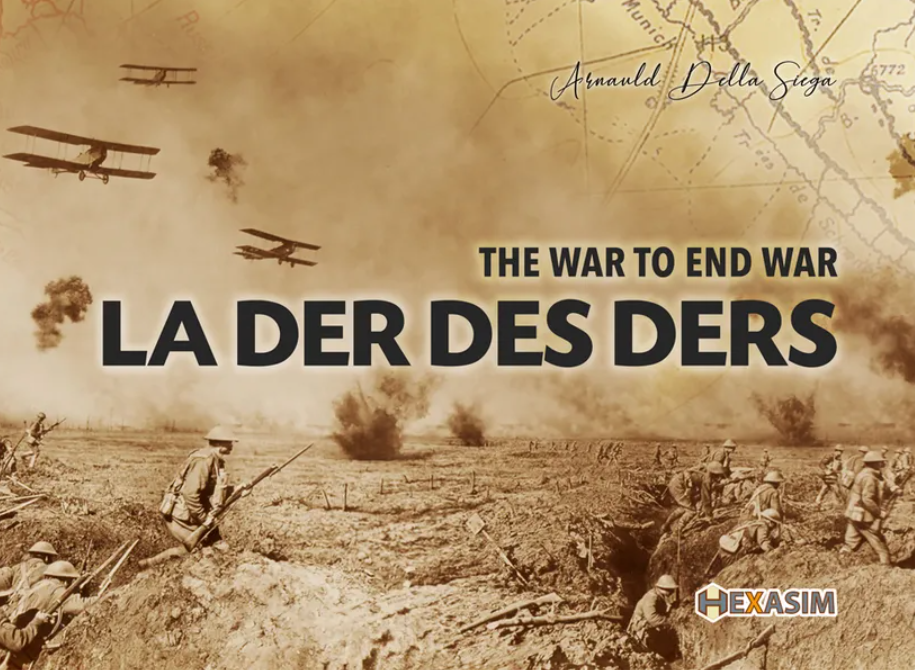
3. La Der de Ders – The War to End War from Hexasim
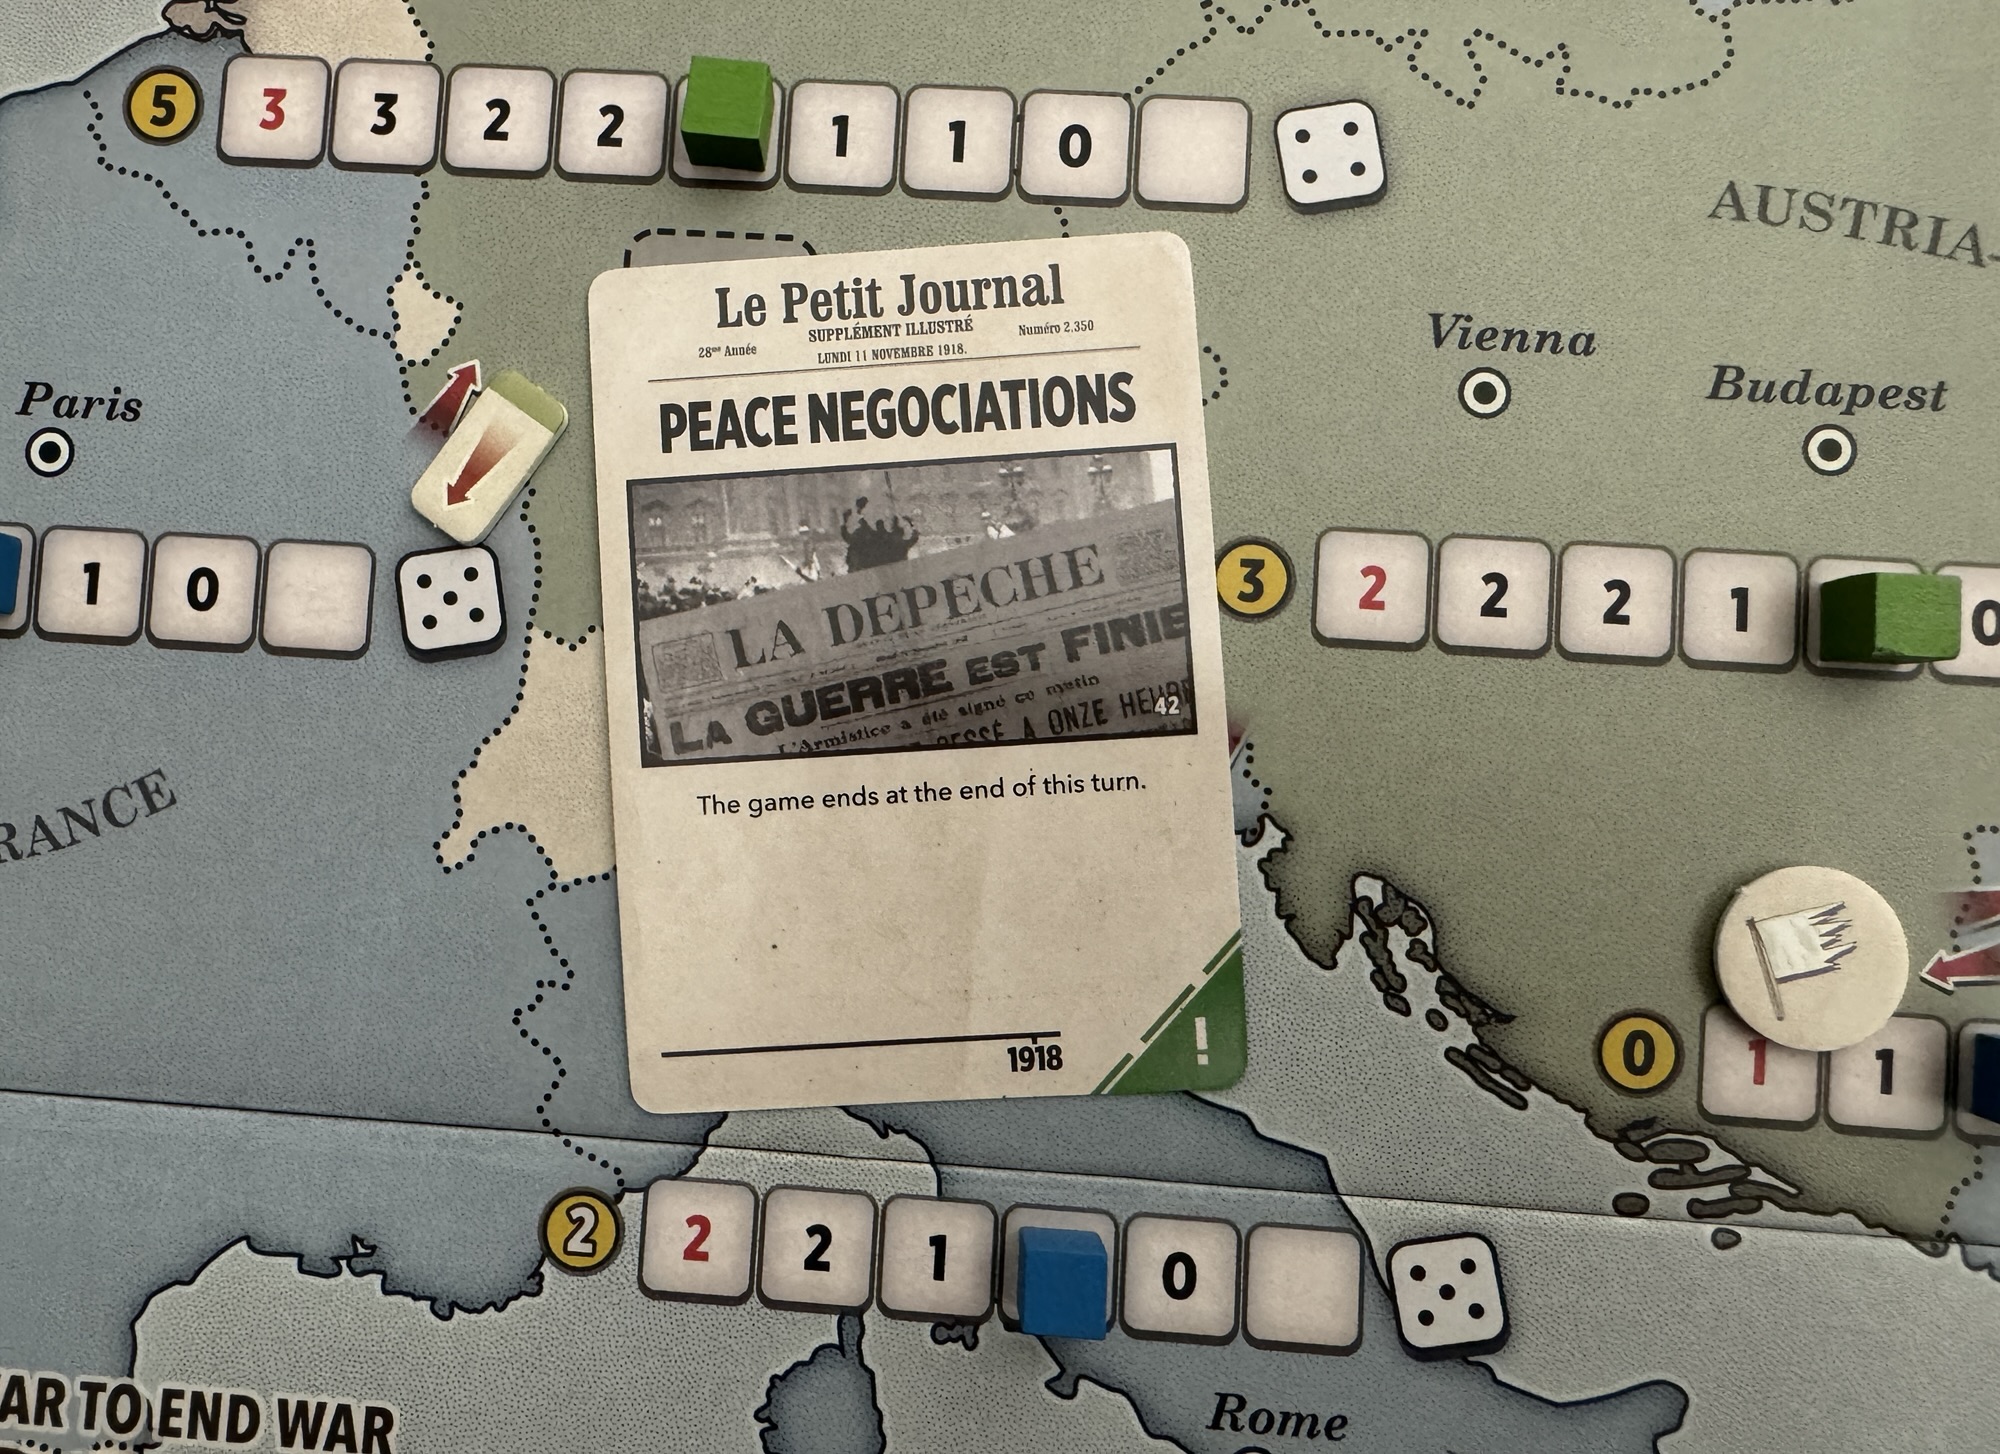
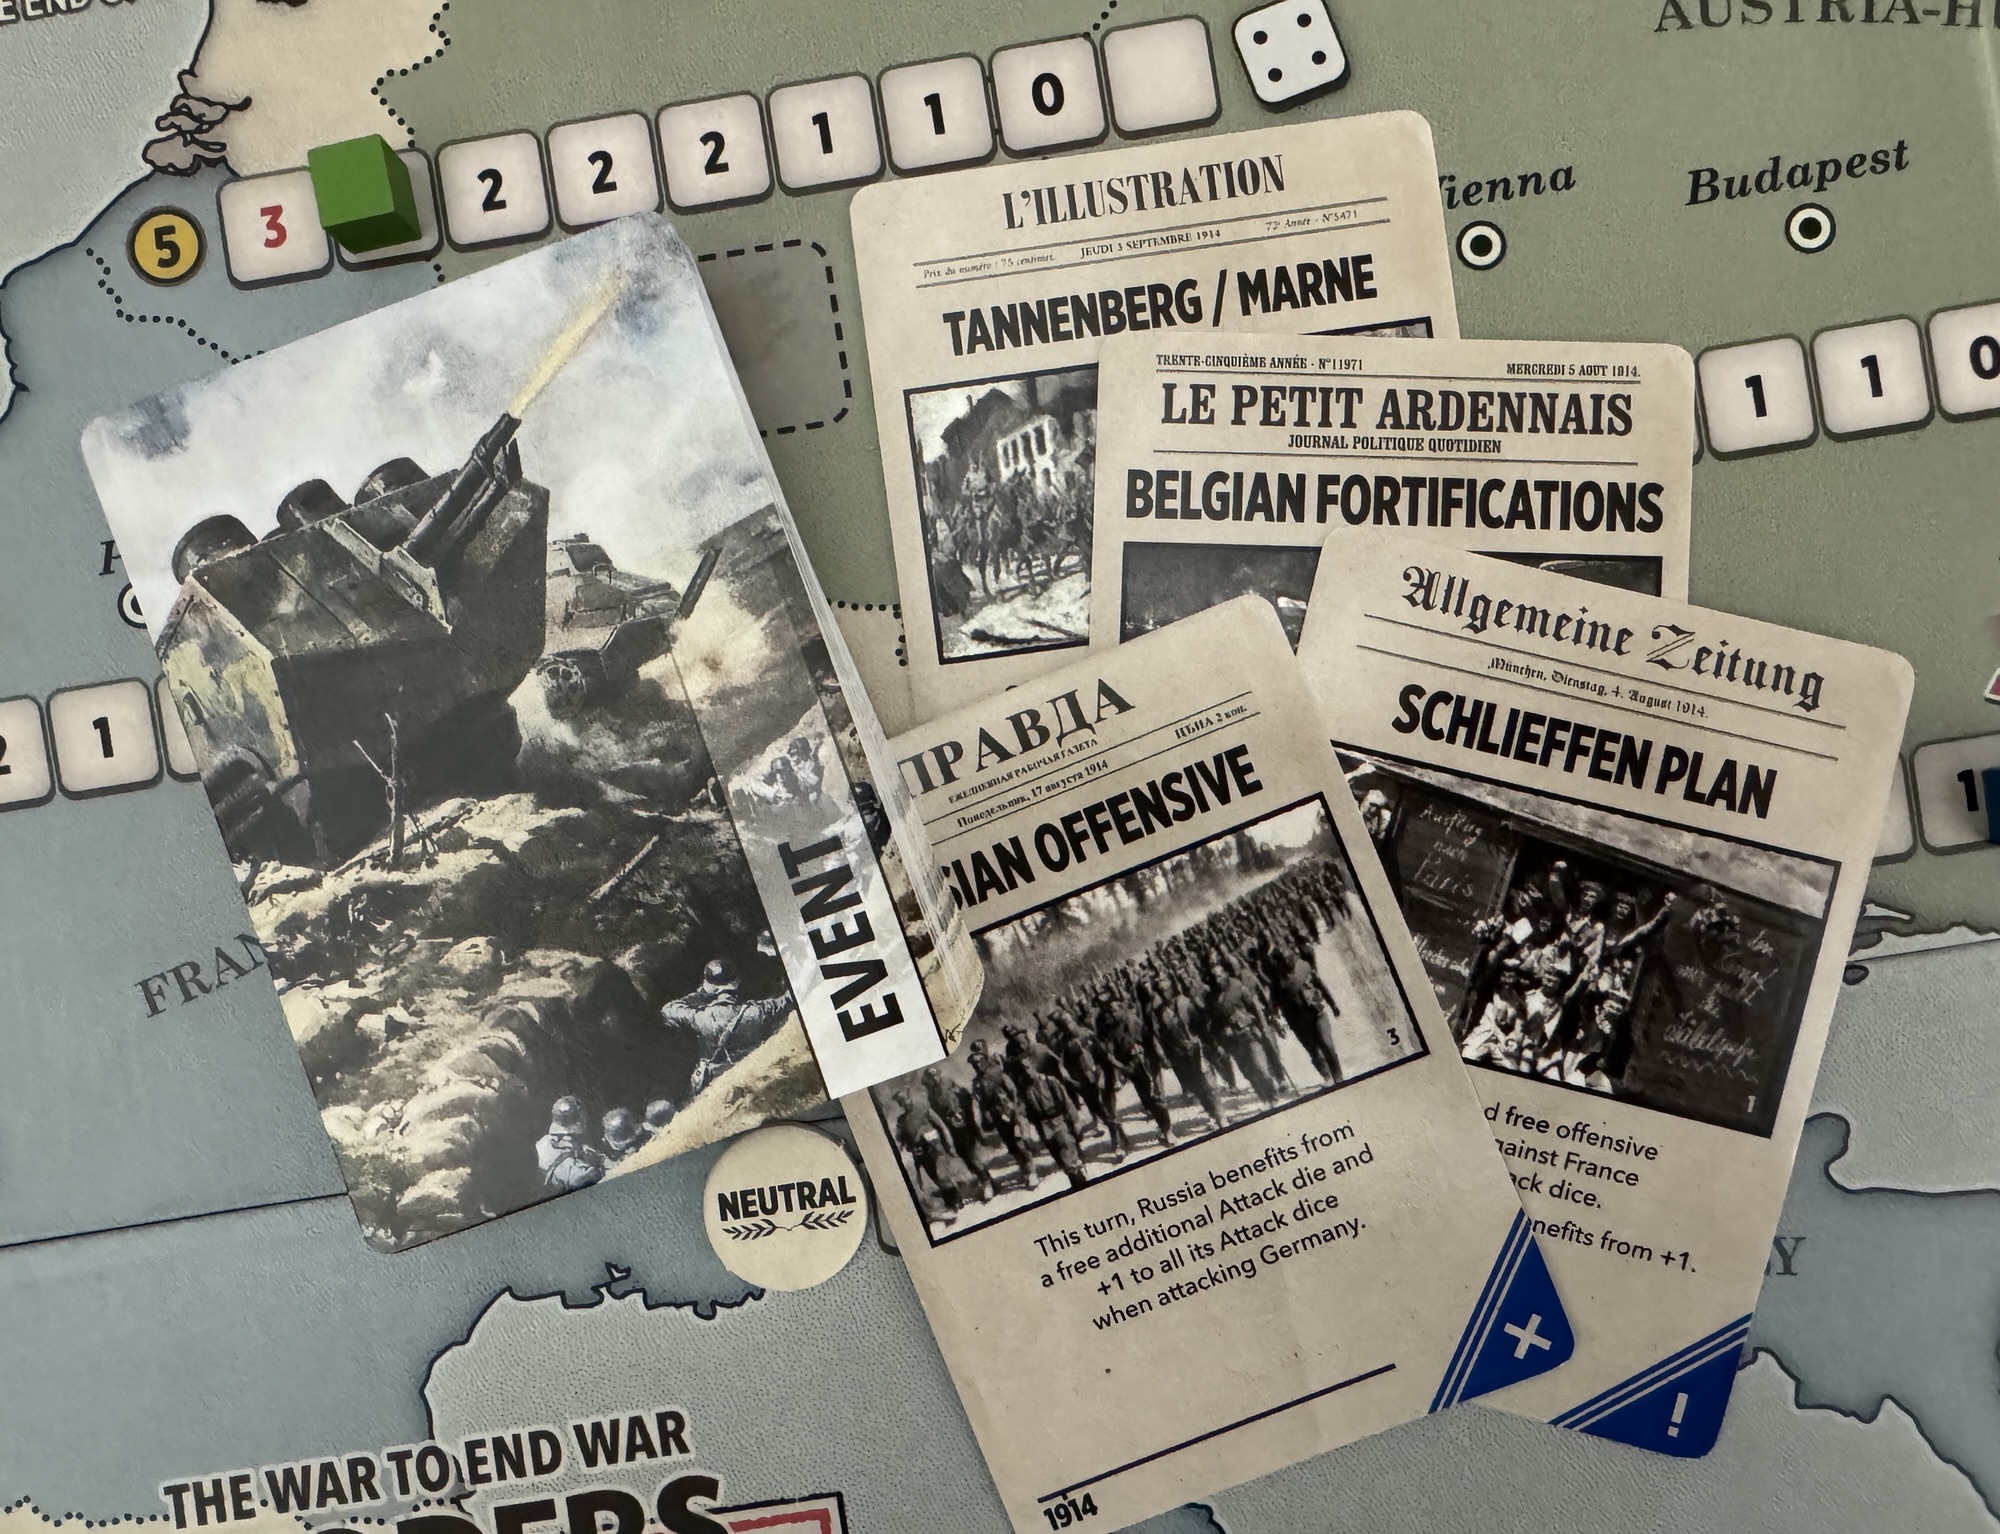
La Der des Ders – The War to End War from Hexasim is a 1-2 player slightly abstracted strategic level look at World War I. The game allows the players to relive the First World War at a strategic level, with each player controlling one of the 2 sides either the Entente, consisting of France, England, Russia, Serbia and other minor nations or the Central Powers including Germany, Austria-Hungary, the Ottoman Empire and a few minors. La Der des Ders can also be played solo, with a dedicated solitaire bot called “Athena” who utilizes special Cornflower Cards to make decisions about what technologies to invest in, where to undertake offensives and how to utilize limited resources and reinforcements. Each turn, players gain an amount of Resource Points dependent on what nations are in the war, which they can allocate to different areas to guide their overall strategy. Victory is achieved by launching offensives that drain the morale of enemy nations, forcing them out of the conflict through collapse.
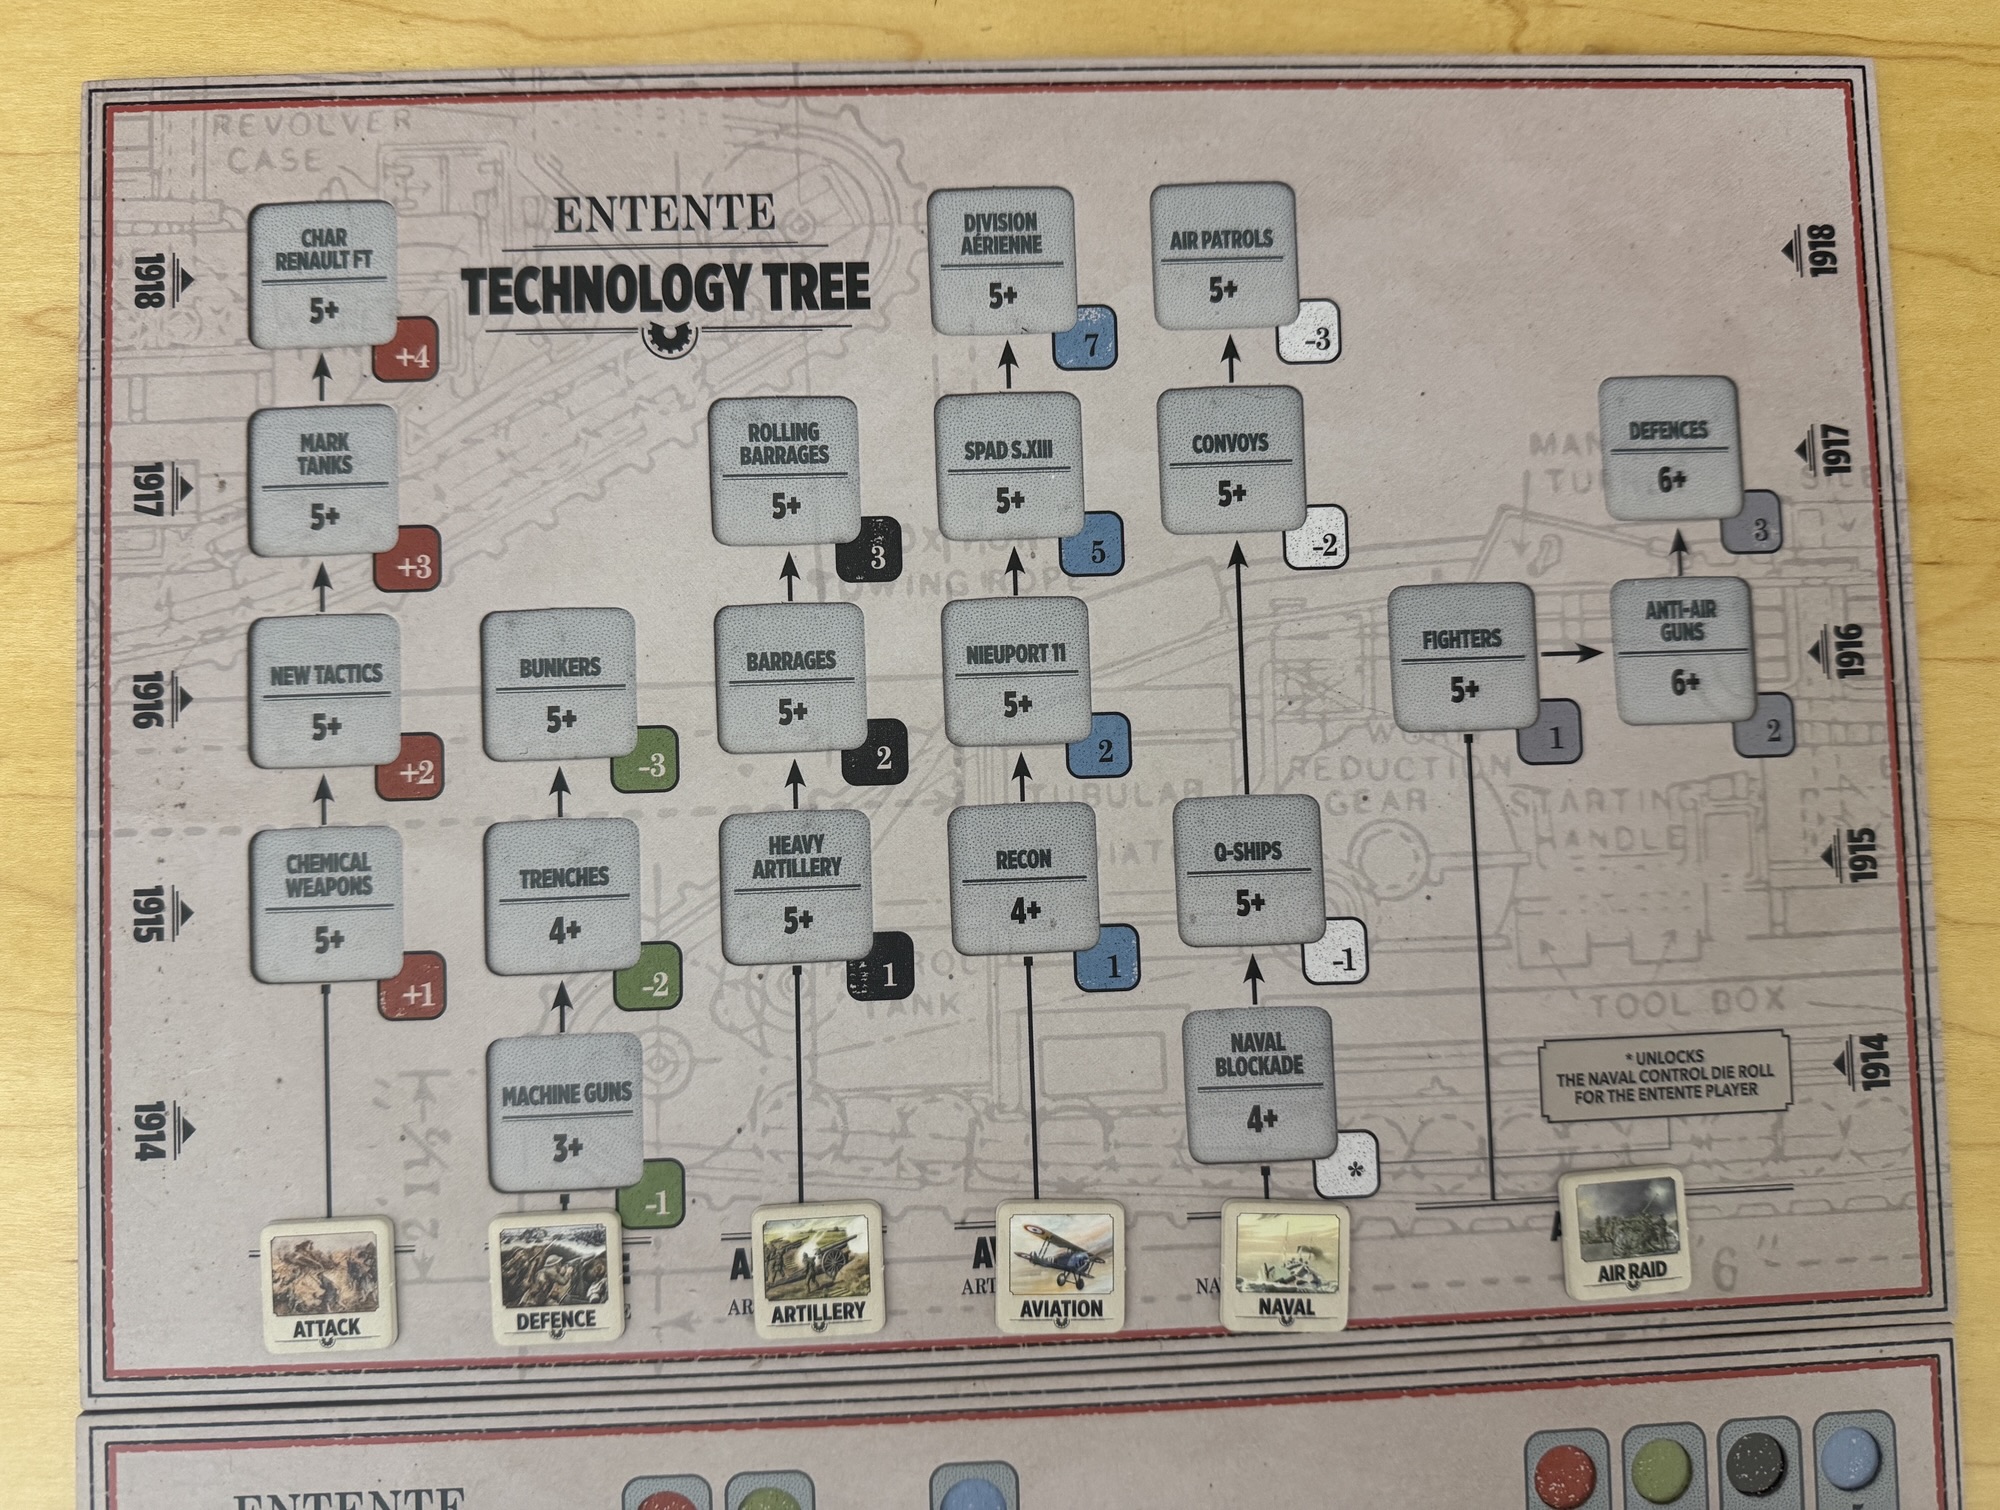
One of the best parts of La Der de Ders, and typically the best part of any strategic level wargame, is the Technology Phase and the player’s ability to spend their limited resources on various types of technologies to improve their performance on the battlefield and in the economic war. But, keep in mind that there is a risk here as resources are limited and you have to pay to develop these technologies and there is no guarantee of success as it is up to a dice roll, albeit a modified one at that. Each of the players has their own Technology Tree board that is used to track their technological progress over the course of the game. There are a total of 6 different Technologies that can be researched including Attack, Defence, Artillery, Aviation, Naval, and Air Raid.
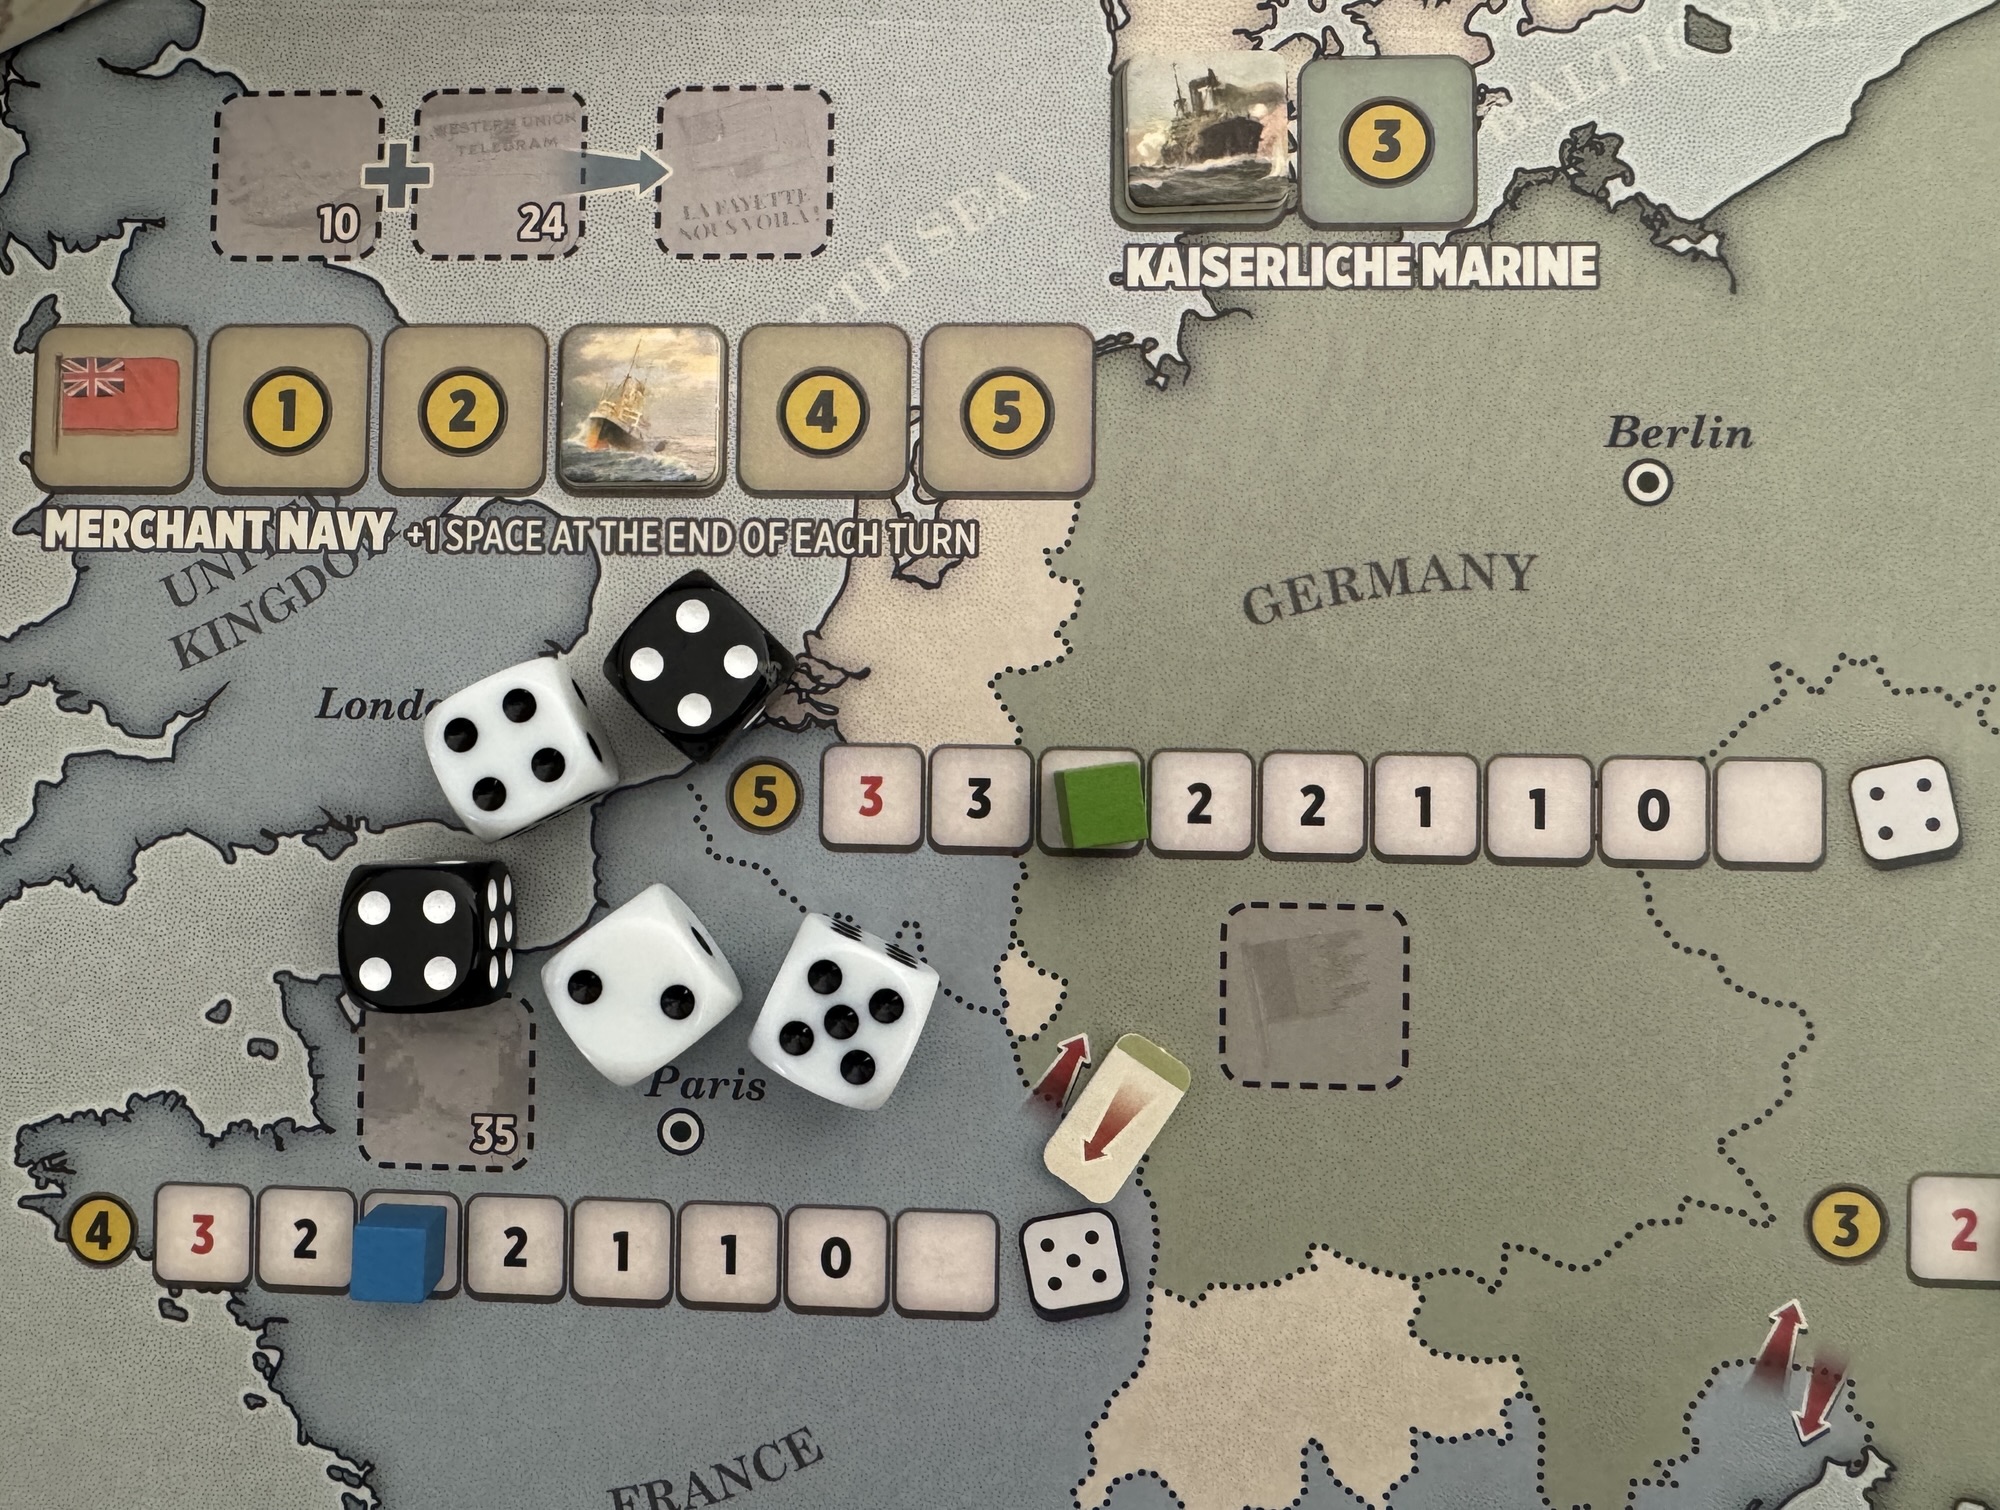
The process of taking Offensives is really pretty simple as players take turns to activate one of their sectors that has not yet been activated this turn. The sector chosen will then be activated and must launch an Offensive against an adjacent enemy sector. There is a cost to the launching of Offensives though as the player will have to pay the appropriate cost by first choosing the size of their Offensive, which in game turns means the number of dice they will pay to roll in the Offensive. The size of the Offensive must be at least 1 and can be up to the current Operational Value of the attacking sector. The player launching the offensive then spends as many Resource Points as the size of the Offensive. Dice rolling is fun and the real key here is how to plan for an prioritize your chosen Offensives as you cannot just do one each turn or you will risk collapse and will be unable to do other things such as invest in technology development.
Victory in the game is well done and I very much like the concept of only calculating the value for those countries who have not Collapsed and who are still in the war when the end game is triggered. We all know that it is easier to negotiate a peace that is favorable to your side when you are still a threat and if too many nations of either side have collapsed then their Prestige Points will reflect this as those countries won’t contribute to the final value. And I also like the simplicity of the scoring system. If certain key countries like France and Germany surrender, then that equates to a victory for the side causing the surrender and if the game continues to grind on through the final turn, then there is this calculation that is really pretty simple and gives importance to each goal with a different value that can be earned. Just a solid method for determining victory that makes sense and fits with the historical aspect of the outcome of the Great War.
The Athena bot is the solitaire mode of the game and it is not just tacked on but is very well done and creates an interesting and challenging game. It is a really well designed system that removes most of the work by the player when playing solitaire. There will be times when you have to make a decision, such as the priority of how Offensives occur from the non-player side, but these decisions are easy and the hard work is done by the simple flipping of a card. I do want to point out one final thing. The sequence of play differs slightly from the 2-player game as it rearranges when the Athena bot does a few of the steps during the Spend Resource Points Phase as shown below. The human player will start by doing their Reinforcements first followed by their Technology investment. Athena will then go and do their Technology investment first followed by Reinforcements. Both players will then move into the Offensive Phase and the player with initiative as shown on the turn track will take the first Offensive of the turn.
I wrote a series of Action Point posts on the game and you can read those at the following links:
Action Point 1 – Game Board
Action Point 2 – Technology Phase and Technology Tree
Action Point 3 – Event Cards
Action Point 4 – Example of an Offensive
Action Point 5 – Victory Conditions
Action Point 6 – Overview of the “Athena” Solitaire Bot
Here is a link to my playthrough video:
Here also is a link to my video review:
If you are interested in La Der de Ders – The War to End War, you can order a copy for $50.00 from the GMT Games website (they have a contract with Hexasim to sell their games in the United States) at the following link: https://www.gmtgames.com/p-1222-la-der-des-ders-the-war-to-end-war-english-version.aspx
2. Iwo Jima: Hell on Earth from Neva Game Press
Neva Game Press (formerly Neva Wargames) is a new publisher who appeared on the scene 2 years ago. When I started seeing their posts on Twitter and Facebook, I was immediately impressed with their interesting topic choices for their upcoming games as well as the fact that they are trying to make small footprint wargames that pack a punch. And the art is also very appealing and brings an aesthetically pleasing and attractive look to their games! Recently, they released their first game called Iwo Jima: Hell on Earth which is a solitaire look at the amphibious invasion of the island of Iwo Jima in 1945 during the end of WWII.
Iwo Jima: Hell on Earth is the first game in their Neva Skirmish Line and it is a hex and counter wargame with some interesting mechanics for combat and a combination of secondary mechanics to keep the game fresh and replayable. This solitaire game lets you play as the U.S. Marines during Operation Detachment. It offers a challenge for both intermediate and experienced wargamers and is really very, very good. I have only played the game 1 time all the way through but as the year is getting away from me already I had to finish up and decided that this was a very good experience deserving of the position on this list. I hope to play again very soon and put together some video content to share more about the game.
One of the things that I really liked was the focus on the hidden Japanese units that play a significant role in the game. Collecting intelligence for the U.S. as they move up the beaches and onto the mainland ensures more strategic planning and greater success of attacks. Additionally, hidden units, combined with a randomized initial Japanese unit setup, enhance the game’s fog of war and replayability. No play will be the same and I think that is a good way to design a solitaire game. U.S. intelligence has some information about potential Japanese defenses, but it is important to verify on the map that there are actual units at those locations. Additionally, more information about those units should be gathered by revealing them to see their actual composition and plan a better attack. Units can be revealed through successful bombardment, combat or reconnaissance. Making a better attack means that the player has access to different type of weapons and attacking a tank unit with a heavy weapon will give modifiers that will not be gained if the asset is not present.
If you attack a hidden unit or if a hidden unit is supporting the attacked Japanese unit, you will draw Intelligence Chits that provide information about the unit and their combat support value. While attacking hidden units can be risky in certain situations, it is essential to continue advancing to achieve timely victory. Understanding when to attack hidden units or gather intelligence through reconnaissance actions is crucial for success and one of the better parts of the game.
Combat is varied and there is a lot of choice about how to go about attacking the defenders. A unit can engage in combat through Direct Attack, Indirect Attack, or a combination of both. In a Direct Attack (with a maximum of 2 U.S. units adjacent to the target), the combat factor value of these units is utilized. For an Indirect Attack (with a maximum of 3 U.S. units if conditions are met), the units’ combat support type and value are used to participate in the combat. Units involved in a Direct Attack may also be used for Indirect Attacks as needed. The next step of combat involves comparing the combat ratio to determine the appropriate table column for checking the die result. Die Roll Modifiers must then be determined, based on factors such as the type of Japanese defense units, which could include Trenches, Pillboxes, or Caves, the comparison between the combat support from the U.S. player and the Japanese side, and terrain effects. The combat is very crunchy and fairly involved and I will definitely classify this one as a good hex and counter wargame experience.
I need to get this one back to the table soon but this is a keeper and I cannot wait to play again.
If you are interested in Iwo Jima: Hell on Earth, you can order a copy for $53.00 from the Neva Game Press website at the following link: https://nevagamepress.com/product/iwo-jima-hell-on-earth/
1. Okinawa: The Last Battle of WWII from Best with 1
I love a new and interesting way to tell the story of a key battle and I found a very interesting one called Okinawa: The Last Battle of WWII from Best with 1 earlier this year. This is a solitaire only game and for each game the player will draw four objectives from a possible 12 that you must survive and capture before time runs out. On your turn, the player will roll special dice and then spend those to take actions such as movement, attack and take special actions from different unit action cards that will be set up in a square from from 1 to 10. The numbers coincide with the dice of the attacking Japanese and as the player moves through the rondel they will be able to activate and use their different soldiers to attack the Japanese defenders or use their special abilities to gain tokens that can be used for rerolls or healing of wounds
I think that the best part of the game is the concept of resource management as you have to use the dice appropriately to move and fight and also to manage your troops as you can upgrade certain cards as you pass the midway point of the round as well as when special actions are granted via the special resource chits. Upgrading units is very important as this will unlock things like heavy weapons in the form of bazookas, a Sherman tank and planes to be able to take out the Japanese armor units defending the island. The game is about efficiency of movement and doing the most with what you have. The dice determine what you can and can’t do and movement is optional as you don’t have to move unless you feel it is advantageous. But remember, that you have to defeat the defenders and the various objectives to be able to advance to your final objective and sitting in one space too long is not advisable.
The different units have various functions including attack, such as the Rifleman, Machine Gun Team and Sniper but also have secondary functions to remove the fog of war, heal your damaged units or gain additional resources. The Japanese defenders are well hidden and also have various defenses such as pill boxes and caves that will require the player to defeat these before moving to attack the units located inside.
In the end the game is about defeating the Japanese defenders while doing so in a set amount of revolutions around the rondel setup. This can be as few as 2 times around or as many as 4 and knowing when to use your resources to reroll your dice, as you either didn’t get the run of consecutive numbers you were looking for or just need a specific number, you will run out of resources quickly and you must plan them out as best you can to win the game. This one is really fun and I have played it about a dozen times winning about 70% of the time. The game plays in about an hour and the action is fast and furious and you are immediately beset by the staunch Japanese defenders and must act quickly.
Here is a link to our unboxing video:
Here is a link to my playthrough video:
Here also is a link to my video review:
If you are interested in Okinawa: The Last Battle of WWII, you can order a Print and Play copy from the Best with 1 website at the following link: https://bestwith1.com/product/okinawa-pnp/
There you have it. My list of the best solitaire wargames/games that I played in 2025! What a year. There were just so many great games but unfortunately only so much time. There were other games that I was unable to get played that I had acquired and I regret not getting to but there is only so much time.
What were your favorite solitaire wargames from 2025?
-Grant
![]()