
Normale Ansicht

Interview with Ty Bomba Designer of Rommel in Italy, 1943-1944: A Counter-Factual Simulation from War Diary Publications

Von: Grant
22. Juni 2026 um 14:00

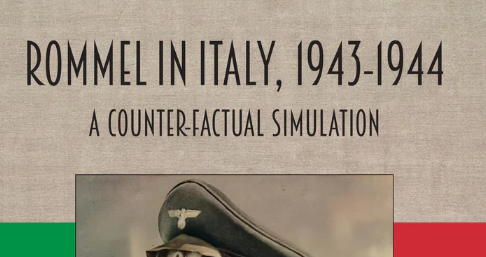
We have interviewed the venerable designer Ty Bomba on numerous occasions over the 10-year life of the blog. In fact, I counted up the interviews and to date we have done 18 total! Wow but the last one we did was in January 2023 and we have just not had him on since. No reason for that other than I have been busy with other games. But recently I saw from War Diary Publications that they were printing one of his What If? style alternative history games called Rommel in Italy, 1943-1944: A Counter-Factual Simulation, which supposes Field Marshal Erwin Rommel had taken command of German forces in Northern Italy rather than being sent to help with the defense of France against the expected Allied invasion. I reached out to Ty and he was more than glad to give me some more information.

If you are interested in Rommel in Italy, 1943-1944: A Counter Factual Simulation, you can pre-order a copy for $30.00 from the War Diary Publications website at the following link: https://wardiarymagazine.com/products/rommel-in-italy-1943-1944-a-counterfactual-simulation

Grant: What is your upcoming game Rommel in Italy about?

Ty: Rommel in Italy, 1943-1944: A Counter-Factual Simulation allows 2 players (or one playing 2-hand solitaire) to investigate the strategic and operational potentials that would have been in place across northern Italy from September 1943 through May 1944 if Hitler had left Field Marshal Erwin Rommel in charge there rather than Kesselring. Rommel advocated for immediately pulling back to a shorter, easier to defend, position at the south edge of the Po Valley rather than trying to fight it out farther south, with both the German’s flanks exposed to possible encirclement via Allied amphibious end runs. In effect, it put the Allies into a strategic position that historically they did not achieve until a year later. The question then becomes can they keep up that kind of advance into and across the Alps.

Grant: Why was this a subject that you wanted to design a game around? What assumptions about history did you take into account?

Ty: Historically, we had 2 of Germany’s best field commanders, Rommel and Kesselring at complete odds with each other over theater-level strategy. Kesselring felt confident the Allies would not achieve a level of operational efficiency that would allow them to effectively exploit the supremacy in the seas along both of Italy’s coasts. History showed that he was correct in that assessment, but Rommel’s transfer to France was not a sure thing. Hitler actually tried to send him back to Italy, to take full charge there, shortly after Rommel had gotten on a plane to fly to France. Radio communications temporarily failed, and by the time Hitler’s communications people got that all sorted out, the dictator had again changed his mind and kept Kesselring in place.

Further, the fact Kesselring was shown to have been correct does not mean Rommel was necessarily wrong – and there’s a fun-to-play wargame inherent in that iron.

Grant: What is important from the overall period and setting to model in the game?

Ty: The opening of the campaign, in September 1943, is filled with opportunity – but also fraught with peril –  for both sides. At the start of play, there are only a few German garrison units in the far north of Italy, while the 10 (mostly elite) divisions of their Tenth Army start off-map to the south, where they just received Rommel’s order to run north. There are no Allied units setup on the map at all. They enter on the south edge during the first turn, and both players operate using the sequence below.

5.3 Allied Reinforcement & Replacement Phases

During these phases, the Allied player may bring onto the map newly arriving units and reclaim into play units that had been previously eliminated in combat. This phase is skipped on Turn 1.

5.4 German Reinforcement Phases

During these phases, the German player may bring onto the map newly arriving units and reclaim into play units that had been previously eliminated in combat. This phase is skipped on Turn 1.

5.5 Movement & Combat Sequence Determination Phases

In each of these phases, excluding that of Turn 1, the Allied player openly declares whether that turn’s movement phase or combat phase will be taken first. On Turn 1 the sequence is always the movement phase followed by the combat phase.

5.6 Alternating Actions Movement or Combat Phases

Always starting with the Allied player, the two players alternate either launching one attack or moving one unit, depending on whether the present phase is movement or combat. Individual attacks may have more than one attacking unit in them, but moves are always made one unit at a time. The unit(s) committed to those “actions” are, upon their completion, flipped over to show their disrupted sides. If a player does not actually want to make an attack or a move when it is his time to do so, he must flip one unit to its disrupted side, just as if it had moved or launched an attack: no “passing” is allowed.

5.7 Movement or Combat Recovery Phases

A movement or combat phase continues as described above until both players are out of undisrupted units or both agree they want to end the phase. If one player runs out of undisrupted units before the other, the player with remaining undisrupted units may go ahead and complete whatever actions he wants to perform with them within normal strictures, but now uninterrupted by having to pause to allow the opposing player to take an action. When a combat or movement phase is ended, both players should cooperatively turn over all disrupted units on the map so their undisrupted sides are and showing.

5.8 German Supply Check Phases

In each of these phases, both players should cooperatively look over the map to find if there are any German units out of supply. Each such unit is immediately removed to the dead pile.

5.9 Allied Supply Check Phases

In each of these phases, both players should cooperatively look over the map to find if there are any Allied units out of supply. Each such unit is immediately removed to the dead pile.

5.10 Ending & Starting Turns

Each time a Allied Supply Check Phase has been completed, advance the Turn marker one box on the Turn Track printed on the mapsheet and start a new turn with Phase I. 

On the first turn, the Allied player has a relatively open front before him. If he can exploit that to get into the Po Valley quickly, he will move the strategic timetable significantly forward of the historic one. However, as he’s moving onto the map, so too it German Tenth Army. Depending on how bold both players are, it is not unusual to see pockets form inside other pockets. 

Grant: How has this design changed since its original publication in 2021 in Banzai Magazine under the title Rommel’s Last Stand: Italy 1943-44, What If?

Ty: The new publisher has fixed the (scant) errata from the first (bilingual) Japanese edition from Banzai Magazine. They have also taken all the Japanese off the map and out of the rules, presenting everything fully in English. Other than the removal of those irritants, it is the same game. 

Grant: What is the scale and force structure of units used for this design?

Ty: Each hex on the map equals 5 miles (8 km) from side to opposite side. Each full turn represents 2 weeks to 2 months, depending on the time of year. Every ground unit represents a regiment, brigade or division of about 2,500 to 12,000 men and/or 50 to 350 armored fighting vehicles.

Grant: How many maps are used in the game? 

Ty: There is 1 large-hex based 34×22” map showing Italy north of the line of the Arno River to Ancona.

Grant: What is the anatomy of the counters?

Ty: The units are standard-classical in their data presentations, except their movement factors are not printed on them. All Allied units have (supplied) MF’s of 16 throughout the game, while the German MF’s are as follows.

German Mechanized Units Turns 1-6 – 16 MF’s

German Non-Mechanized Units Turns 1-6 – 8 MF’s

German Mechanized Units On Turns 7-10 – 12 MF’s

German Non-Mechanized Units On Turns 7-10 – 6 MF’s

Grant: What sources did you consult for the Order of Battle?

Ty: The Armies of Rommel by George Forty was an excellent source for the subtleties in the initial German Order of Battle. Beyond that, I pulled the roughly half-dozen historical Italian campaign games off my shelves and pulled information out of them. This is one of the most thoroughly simulated campaigns in the hobby, going all the way back to Avalon Hill’s Anzio, so I was not looking to find any heretofore undiscovered anomalies in either sides’ OB. The uniqueness in this game’s treatment of it comes from the changed strategic context combined with the tension inherent in the turn sequence, which requires both players to remain alert for sudden danger or fortuitous opportunities all throughout its play

Grant: How does combat work?

Ty: Combat is always voluntary and, when viewed on a battle-by-battle basis, is standard/classical odds ratio using a six-sided die.

Grant: What are the victory conditions?

Ty: Operating in conjunction with the alternating-actions turn sequence, the victory conditions are a further element I used to keep both players on the edges of their seats at all times. See below.

4.1 In General. The Allied player is on the offensive, trying to win by advancing fast enough to cause a major disruption to the historic timeline. 

4.2 Allied Victory During 1943 Turns. If Phase 9 of Turn 1 or 2 or 3 or 4 ends with Venice or Milan or Trieste, or any one or more of the four German supply source hexes, occupied by an Allied unit or stack, that game ends at that time in an Allied victory.

4.3 Allied Victory During 1944 Turns. If Phase 9 of Turn 5 or 6 or 7 or 8 or 9 or 10 ends with any one or more of the four German supply source hexes occupied by an Allied unit or stack, that game ends at that time in an Allied victory.

4.4 German 1943 Sudden Death Victory. If any movement or combat phase of a 1943 turn ends with the German player having gained control of the containing the Allied Amphibious Invasion Beachhead marker, the games ends in a German victory at that time.

4.5 German 1944 Sudden Death Victory. If any movement or combat phase of a 1944 turn ends with one or more German units in any hex(es) on the south map edge, that game ends in a German victory at that time.

4.6 German End-Game Victory. If Phase 9 of Turn 10 ends without the Allied player having achieved a victory, the game ends at that time in a German victory. 

The “White Dragon Game Designer” dressed as a samurai.

Grant: What are you most pleased with about the design?

Ty: As I mentioned above, the Italian campaign has been one of our hobby’s most thoroughly plowed fields for decades. Despite that, I believe I have offered a new experience with it here. Players will get a new slant on it, one that operates within the broad parameters of the war’s historic decision-making, but that is also tense and entertaining for both commanders.

I also hope its appearance in an easily available all-English edition may lead this and other publishers to look into acquiring the rights to other of my designs that have so far appeared only in East Asia (where I am affectionately known as the “White Dragon Game Designer”). I have done several games that have been well-received there, but are barely known here in the West.

Grant: I know you are a busy man with game design projects as well as editing for various wargame magazines but what other games are you currently working on?

Ty: I am presently working on this alternative history design, which is scheduled to appear in World at War No. 130, called Stalin’s Missed Opportunity: What If He Invaded Romania in May 1940?.

If you are interested in Rommel in Italy, 1943-1944: A Counter Factual Simulation, you can pre-order a copy for $30.00 from the War Diary Publications website at the following link: https://wardiarymagazine.com/products/rommel-in-italy-1943-1944-a-counterfactual-simulation

-Grant
Interview with Volko Ruhnke Designer of 1943: Race to Rabaul from PHALANX

Von: Grant
15. Juni 2026 um 14:00

PHALANX does some really great games and they have 2 new games that have recently been placed on pre-order in a 2-pack called Pacific War Games (you can order them separately). This package includes 1943: Race to Rabaul designed by Volko Ruhnke and Tora Tora Tora! designed by Wataru Horiba. I have reached out to Volko Ruhnke to discuss his 1943: Race to Rabaul, which is part of the Keep ‘Em Rolling Series of logistics focused wargames that includes titles such as 1944: Race to the Rhine and 1941: Race to Moscow, and he was more than willing to share.

If you are interested in 1943: Race to Rabaul, or its sister game in the Pacific Wargames package called Tora Tora Tora!, you can pre-order copies on the Gamefound pre-order page at the following link: https://gamefound.com/en/projects/phalanx/pacificwar-games

Grant: Volko welcome back to the blog. What is your new upcoming game 1943: Race to Rabaul?

Volko: 1943: Race to Rabaul will be the next volume in Phalanx Games’ “Keep ‘Em Rolling” Series, following up on 1944: Race to the Rhine and 1941: Race to Moscow. Also set in World War II, this time you are supplying forces moving and fighting across the South Pacific–with the twists that players are fighting each other and have to manage sea, air, and land operations.

Grant: You have designed logistics focused games in the past such as the Levy & Campaign Series. How has that experience lead you to the Keep ‘EM Rolling Series?

Volko: I’ve always enjoyed wargames that include placing, moving, consuming, destroying actual supply bits on the map–going back at least to The Gamers’ Standard Combat Series AFRIKA. In Levy & Campaign, I wanted to show that for medieval campaigns, in a simple enough way to be fun rather than tedious. When I later played 1944: Race to the Rhine, I saw that that design accomplished that very well indeed, even made it the focus of play. So I was hooked.

Grant: How did this opportunity come to you?

Volko: Two Septembers ago, I was in Prague for Czech Con hosted by Levy & Campaign Žižka designer Petr Mojžíš, where I got to meet Phalanx co-owner Jaro Andruszkiewicz. He invited me to do a design with his company. I at once knew that it had to be something in their “Race” series. Via my research for Coast Watchers from GMT Games, I already had become fascinated by Japanese logistical challenges and Allied counter-logistics strategy in the South Pacific. So the fit seemed a natural.

Grant: What sources did you consult to get the historical details correct? What one must-read source would you recommend?

Volko: I had already done a lot of reading for Coast Watchers. The source that really laid out the Japanese perspective on their difficulties in reinforcing the front line was Kengoro Tanaka’s Operations of the Imperial Japanese Armed Forces in the Papua New Guinea Theater. I also picked up Breaking the Bismarcks Barrier, an official US Navy history of the campaign. My favorite general Pacific War history source is Ronald Spector’s Eagle Against the Sun (as I briefly had the opportunity to study history under Professor Spector at George Washington University.)

Grant: What is your overall design goal and thesis for Race to Rabaul?

Volko: In the South Pacific of 1943, the Allies were far more savvy than just piling their firepower and men directly against the well-fortified Japanese positions. Instead, they wore them down with air strikes over time, while blockading them by air and sea. The key challenge to the Japanese defense was the inability to get enough supplies and men through the growing Allied air and then sea superiority to reinforce–and even just feed the Japanese forces holding the line. In1943: Race to Rabaul, you manage that logistical and counter-logistical struggle on each side.

Grant: How tough was working within the constraints of an existing system?

Volko: I find it easier overall to start with an existing system that I know works and build from there (as I did with classic-CDG Wilderness War and the scenarios and C3i Magazine campaign that I’ve done within Combat Commander). The key challenges for me in bringing the Phalanx “Race” system to the South Pacific were expanding it to opposed play necessary to capture the critical counter-logistical aspect – and to a maritime environment – sea, air, amphibious and land warfare – all with the eye to adding just a dose of added complexity.

Grant: How does the vastness and remoteness of the pacific affect logistics? How did you model this?

Volko: The environmental problem that the Japanese faced and the Allies exploited in the South Pacific was that nearly all logistics came by sea, so air interdiction ruled. There were land campaigns in New Guinea’s interior. But the jungle and ridge terrain there required air lift or coastal transport to build up. And by 1943, the Allies increasingly dominated the air war. Race to Rabaul requires you to move your troops, ammunition, and food across sea–you can’t just march your corps forward. For the more constrained Japanese, that means launching Convoys that the Allies might detect and strike.

Grant: What was most important to model in the game? What about inter-service rivalry?

Volko: That Japanese challenge moving anything and the Allied effort to stop it is most characteristic of the design. But perhaps its most impactful addition to the “Race” system is opposed combat. Rabaul taps the same principle of counting supply bits to determine combat outcomes. But with 2 opposed players, playing cards to hope to out wit each other, as well as land and amphibious attacks, the combat subsystem in this volume is necessarily more involved. For non-wargamers, that is probably a hindrance. But for wargamers, it may make Rabaul even more up their alley than the earlier games. Inter-service rivalry comes to the fore in Rabaul when you have 3 or 4 players. Each side has two Commander roles, “racing” along either the east or west half of the map. Each represents the Japanese or Allied army or naval dominance of the New Guinea and Solomons campaigns, respectively. Whichever player (not side) reaches its goal first wins the game–so you can choose to cooperate with the other Commander on your side or not!

Grant: How does the logistics support differ between the Allies and the Japanese?

Volko: I’ve mentioned the Japanese use of Convoys and Allied Convoy Strikes above. The Allies have that easier–their abundance of transports is assumed wherever they have Air Cover. The problem is that they must take ground and build Air Bases to extend that Air Cover and Convoy Strike range forward. The Allies also get more abundant Men &Material–generally more bits per action at their Supply Bases than the Japanese get at theirs. But, as in the earlier “Race” games, here the Allies must work their Logistics Level up to add to that capacity. The Japanese also have an advantage stalwart austerity in feeding their troops: the Japanese, unlike the Allies, never lose their last Troops piece in a space due to lack of Food, they garden!

Grant: What was the process of taking a series designed for land based campaigns into one involving amphibious supply and operations?

Volko: I had to add some complication to show the maritime environment. Instead of one type of connection between spaces, Race to Rabaul has Land, Sea, and Straight. Instead of just Trucks (and in Moscow Trains), Rabaul has Japanese Freighters, Destroyers and Barges and Allied Landing Craft. Because you have to transport soldiers not just supplies across water, Rabaul has Troops bits instead of Fuel, and Troops become key to feeding requirements, building Air Bases, fortifying, and, naturally, combat. Allied amphibious landings can be disastrous if defeated with the sea at their backs. And air power looms far larger int he naval environment, with Commanders controlling up to 6 Air tokens instead of Rhine’s 1 each.

Grant: What other challenges does each side face in obtaining their goal?

Volko: The Japanese defenders are essentially playing for time, as each Logistics step that the Allies need to trigger will award Japanese medals for holding the Bismarcks Barrier. But just those Japanese medals probably won’t be enough: the Japanese Commanders need to find openings to strike and cause Allied Troop losses as well. That takes timing and will cost Japanese Men & Material or Air tokens–possibly accelerating the Allied drive that will break the Bismarcks Barrier and stop those medal awards for good. The Allied attackers need to manage the troops, supplies, and cards to take Japanese positions efficiently to reduce the number of enemy medals for those Logistics steps. But rushing too much will result in risky attacks–even a potentially disastrous failed invasion–not to mention exposure to Japanese Banzai counterattacks. Pushing Allied Men & Material forward needs to occur even while the Allies keep up the pressure on Japanese convoys and bomb Japanese positions to counter their defensive buildup and digging in.

Grant: What is the layout of the game board and the purpose of the different boxes?

Volko: The board shows 2 tracks, in effect: MacArthur (green player) is racing up the New Guinea coast on the west half, while Halsey (blue) is racing up the Solomon Island chain on the east. These work like the colored areas in the earlier “Race” games, except that each track has a human opponent trying to stop you: Imamura (gold) against MacArthur, and Kusaka (white) against Halsey. The various boxes serve as pools for each side’s Men & Materiel bits and Fleets of Convoys or Landing Craft. Boxes also track what is just temporarily removed or spent rather than out of play (off the board). An Allied Logistics track works very much like those in the earlier games, showing how much each Allied Commander has developed the logistical infrastructure, affecting how many M&M they get per action, how many Air tokens they have, and how many cards they hold.

1943: Race to Rabaul game board art by Donal Hegarty.

Grant: What is the general Sequence of Play?

Volko: The Sequence of Play is quite basic–first the Japanese take actions, then the Allies do. As in the other games, Commanders each get 2 core actions from a menu, plus Bonus actions from cards, in this case at most 1 of the latter.

But before each Japanese turn, there is a free Delivery step in which Convoys drop off cargo. That wrinkle in the sequence means that (mostly) there will be an Allied turn in between Japanese Convoy Launch (an action) and Delivery, so a chance for the Allied players to strike the Japanese ships. The exception is certain Japanese Bonus action cards representing particularly successful “Tokyo Express” runs and the like. Logistics steps, when (mostly) the Allies trigger them, always occur after Allied actions. There are a couple Japanese cards that can force a Logistics step, representing intervention by Japanese fleet commander Yamamoto. Victory is instantaneous, whenever any Commander takes their 12th medal or–far less likely–a Japanese Supply Base such as Rabaul falls.

Grant: How many players is the game designed for?

Volko: The game handles 2, 3, or 4 players. We always have Japanese and Allied players opposing each other, as both logistics and counter-logistics feature. With 4 players, each takes a Commander: the 2 Commanders on a side can help each other with longer-range strikes and intelligence, or they can withhold help or even sabotage each other if their ally is pulling ahead and getting too close to winning. With3 players, one takes both Commanders on a side and must win with both, facing 2 players each as a single Commander. The single player can be either on the Japanese or Allied side, either works. With 2 players, you can either each command a side–the 2 Japanese Commanders versus the 2 Allied–or you can pick either half of the map–New Guinea alone or the Solomons–and play a shorter game with just 1 Commander each side.

Grant: What different commanders do players have a choice to play as? How do they differ?

Volko: The paired Commanders personify not only the conditions in New Guinea and the Solomons, respectively, but also the bureaucratic friction between Army and Navy on each side.

-MacArthur in New Guinea is also the theater commander so gets say in any internal Allied dispute such as order of actions. As an Army General, he has more land assets such as Artillery cards and a related Special Ability to redraw them, more suitable anyway to the New Guinea “track” that involves some interior fighting. Also, MacArthur alone can use Airdrops to seize jungle airstrips.

-Halsey in the Solomons has more Naval Shelling, Cruisers against Japanese Convoys–also his Special Ability–plus Guerrillas but correspondingly less Artillery and attack Divisions. Halsey late in the campaign needs to be the most careful not to get the last of his Divisions beaten up and withdrawn.

-Facing MacArthur, General Imamura represents the overall Japanese Army’s focus on New Guinea and the overall Japanese priority on that axis over the Solomons chain–so that player is the senior partner on the Japanese side. Imamura has more Troop and Ammo unit cards at his disposal and a Special Ability that can redraw them. He has his own Bonus action cards like Supply Road and Barge Assault.

-Admiral Kusaka facing Halsey has an edge in Carrier Pilots–his Special Ability–naval advantages like Long Lance torpedoes, but also the defensively crafty Army General Sasaki, who held up the Allies bloodily on New Georgia.

Grant: How is victory achieved?

Volko: As in the other “Race” games, capture of a Supply Base–here an Allied Commander advancing to either Rabaul, Madang in New Guinea, or Kavieng in the islands–ends the game immediately in an Allied Commander win. But, as in those games, that rarely will occur: the main way to win is to be the first of the 4 Commanders to gather 12 medals along the way.

Grant: What different scenarios are included?

Volko: The game includes 4 scenarios, each of different length. They all end with capture of a Japanese Supply Base or with a 12th medal. They run different play lengths by starting at later and later points in the South Pacific campaign:

-TheFull Campaignbegins with the Japanese still to make their final push on the Kokoda track and Guadalcanal in late 1942. The Allies must battle their way to Buna in Papau before heading up the New Guinea coast, while throwing the Japanese off Guadalcanal before driving up the Solomons chain.

-CARTWHEEL begins with the Allies preparing their historical 1943 drive to conquer or encircle Rabaul. Buna and Guadalcanal are cleared and serving as Allied bases, but the great Allied offensive has not yet launched.

-POSTERN begins with MacArthur primed for the historical September invasion to capture the Japanese New Guinea base of Lae and Halsey’s forces having just fought across New Georgia in the central Solomons.

-Finally, CHERRY BLOSSOM is a small learning scenario for just 2 players on the Solomons half of the board, representing the moment that Halsey is about to invade the Japanese bastion island of Bougainville.

Grant: What do you feel the game models well?

Volko: Phalanx’s “Race” system does so well highlighting the need to gather and push supplies forward in a mobile mechanized campaign–especially one in which the defender is largely on the run. Race to Rabaul I hope similarly succeeds in showing that the overwhelming Allied logistical edge over the Japanese in the South Pacific by 1943 was alone not enough against tenacious, dug-in defenders. The Allies succeeded as they did by smartly targeting Japanese logistics first, and only then throwing ground forces at the enemy bastions. To me, this design makes that counter-logistics approach vivid. I hope players will agree!

Grant: What are you most pleased about with the design?

Volko: I’m pleased with how the one-sided “Race” concept ported here to a full wargame, force on force, and that some added map features, pieces types, and combat rules brought the Phalanx system to “tri-phibious” warfare. The game is more complicated than either 1944: Race to the Rhine or 1941: Race to Moscow, to be sure, but remains more accessible than my usual design space such as Levy & Campaign or Recon Series. (I think so, anyway.)

Grant: What other designs are you contemplating or already working on?

Volko: Jaro of Phalanx, who commissioned this design from me, and I have chatted back and forth about a wide range of settings for a possible next “Race” volume from me. I have a good idea what that would be, if players end up digging Rabaul. But it would be premature to raise particular expectations as yet.

Thank you for the intriguing questions!

If you are interested in 1943: Race to Rabaul, or its sister game in the Pacific Wargames package called Tora Tora Tora!, you can pre-order copies on the Gamefound pre-order page at the following link: https://gamefound.com/en/projects/phalanx/pacificwar-games

-Grant

❌