The American Civil War was the bloodiest conflict and a defining event in the history of the United States. The tragedy of the conflict was amplified by the fact the battles were brutally fought with Napoleonic tactics while using new and more lethal weaponry. As a result, over the course of nearly four full years of war, roughly 700,000 Americans were wounded or killed in battle along with another 400,000 soldiers dying from disease.
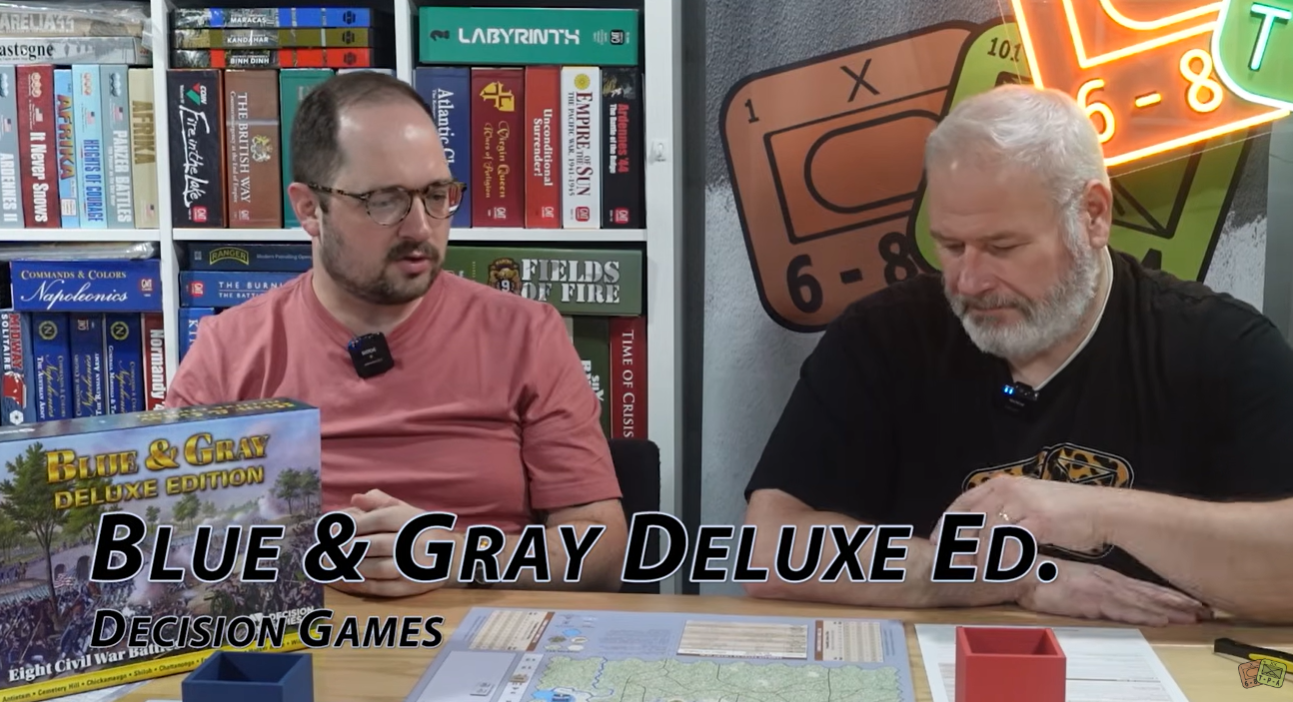
Blue & Gray Deluxe Edition consists of the original eight games from the SPI Blue & Gray I & II Quadrigames. The battles depicted are among the most important of the American Civil War: Shiloh, Antietam, Fredericksburg, Chancellorsville (Hooker & Lee), Gettysburg (Cemetery Hill), Chickamauga, Chattanooga, and The Battle of the Wilderness.
The game mechanics used in this series are based on the well-received Borodino/Napoleon at Waterloo system. Terrain is a significant factor, with everything from rolling farmland to untracked wilderness represented. Battles will often see a back-and-forth struggle for control of critical terrain. Rules for night turns are also provided. A standard set of rules are used, common to all eight games, while each game also has its own set of exclusive rules, historical set-ups, and player and design notes—all from the original SPI games.
Blue & Gray Deluxe Edition features new artwork, double-sided mounted game boards, enlarged counters, player aid cards, numerous optional rules gleaned from other game editions, and new variant counters and markers for use with several variants from Moves and Strategy & Tactics magazines. Reintroduce yourself to these classic games from SPI’s golden era and refight some of the best-known battles of the American Civil War which decided the fate of a nation at war with itself.
We have played several games designed by Adam Starkweather in his Company Scale System (CSS). These games are really good solid chit draw systems that really puts some unknown in what groups of units can activate and even when they will activate. There are also events and if the chit cup runs dry before all of the units can activate due to the end round chit then you are just sore out of luck. You have to prepare for this inevitability and I love the concept of prioritizing your activations and making sure you activate what you absolutely have to before doing those units that would be beneficial to activate. Now Adam has created his own publishing company called Bring it on Games and they have announced their first pre-order game in a new system called Advanced Company Scale System Game One:Anzio: A Lost Opportunity. This is a huge wargame and includes 10 large maps, 20 counter sheets and tons and tons of charts, tables and player aids. This is a MONSTER wargame…no doubt about it but it looks really good. I reached out to Adam to see if he could provide us some additional insight into the game and he was more than willing to discuss with us.
If you are interested in Advanced Company Scale System Game One:Anzio: A Lost Opportunity, you can pre-order a copy for $350.00 from the Bring it on Games website at the following link: Shop — Bring it on Games
Grant: Adam welcome to our blog. First off please tell us a little about yourself. What are your hobbies? What’s your day job?
Adam: First off, my hearty thanks to The Players’ Aid crew for giving me the opportunity to introduce myself and tell you about my new adventure.
As my waistline will attest, my hobbies and interests are decidedly sedentary. I love watching basketball and baseball (go Knicks – had a great year). And several years ago, I decided to rekindle – ha! – my love of reading. For many years, for work, I read non-fiction. But now, every night before I crash, I read for fun for a half hour. Currently, I’m reading both for work and for fun as I am journeying through Stephen King’s multiverse with a goal of making a game on it. I have an inside to get to King, and I’m hoping I can get him to glance at it and spark some interest. It will be decidedly war gamey in its presentation.
Believe it or not, for over 20 years, I have been blessed that wargame design has been my main gig and what I do for work. With over 50 titles that I’ve designed, developed, or project managed, it has been a productive period for me in the hobby.
Grant:What motivated you to break into game design? What have you enjoyed most about the experience thus far?What have you learned about design over the years?
Adam: A day I remember well. 3 friends and I were playing SPI’s Highway to the Reich, and it just fell apart while we were playing it. Things were happening that just didn’t make sense, and it wasn’t balanced. Once that suspension of disbelief is done, we wargamers just bail on a game. We thought we could do better. All four of us started making a Market-Garden game, but only I kept with it, and my first design The Devil’s Cauldron, was the result 7 years later. As for enjoying what I do, there are occasional hiccups, of course, but I have a dream job. I’m like a professional NBA player – doing something that is tons of fun, and I get paid to do it. I’m the luckiest man in the world.
As for what I’ve learned, of course, I’ve learned how to design – often under tremendous time pressure, but if I had to name one thing, it is knowing what I’m good at and when I need help. I’m great at coming up with new concepts and innovative mechanics, but I can’t research worth a damn nor do I have the patience to rewrite rules again and again. With my new company Bring it on Games, I have both the time and assets to attack my weaknesses and focus on what I do well – and love doing. I have dedicated researchers, dedicated rules editors, and dedicated playtesters. I finally have the time to do a game the right way.
Grant: What is your upcoming game ACSS Anzio about?
Adam: My first game for my new company is on the Battle of Anzio. It is at company level and at 500 meters a hex. It has two campaign games in the box – one for Operation Shingle (the landing and advance inward to the furious German counterattack) and Operation Buffalo – the final breakout and advance to Rome. The middle months in which a World War One type situation happened is not in the game. Two massive campaign games and some 20 smaller scenarios are included.
Grant: What does the subtitle “A Lost Opportunity” represent from the history?
Adam: It is likely for such a famous operation that most people reading this know that Anzio presented an opportunity to end the Italian Front with an aggressive approach to the battle. Instead, the General in charge (Lucas) was tentative and did not advance with the aggression needed. In all my research, I have found that it wasn’t entirely his fault, but it wasn’t a time to be tentative. In the Campaign game, you can try and defeat the Germans with the hand you were historically dealt, or there is an alternative scenario (aptly called “Killer Whale”) where the restrictions on your aggressiveness are removed, and perhaps you can end the Italian battle in two weeks.
There were also missed opportunities in the second campaign in the box. The Allies went for the glory to capture Rome but allowed the Germans to retreat from the Gothic Line mostly intact. The war in Italy was allowed to continue, but again, it didn’t have to be that way. As with Operation Shingle, there is an alternative campaign game in which glory is set aside for a few weeks, and you as the Allies attempt to cut off the German forces and end the war in Italy.
“We were hurling a wild cat on the shore, but all we got was a beached whale.” -Winston Churchill
Grant: Why was this a subject that drew your interest?
Adam: Why Anzio? As is often the case, the subject matter of a game is about work that has already been done. Why start from scratch if months of work have already been done? My historian worked on a game for another designer several years ago and had a great Order of Battle for the game. There was plenty of game in the battle, so Anzio it became. Utah Beach is likely next up for my company as I’ve already made the Grand Tactical Series game on the battle. So I have a complete order of battle and map already made. After that, or before that, might be Salerno. A gamer has already made the game using another system, but the conversion would be easy enough. And of course, a game for ACSS will be on Market-Garden. I have already made a game at this scale. Years of work have already been done. This also gives me time to start fresh on new topics like Omaha Beach or Gela – they become the game with work already done and join the conga line.
Grant: What is your design goal with the game?
Adam: Oh that’s easy. I want to finally be able to make the best company level game I can make. GTS was made when I was a novice and CSS was made when I was under tremendous time pressure. I have both the expertise and the time to do it right this time.
Grant: How have you modified the Company Scale System to become “Advanced”?
Adam: I started work on this a few years back and called it ACSS. The name stuck with me, and I kept it. It keeps Eric Smith’s brilliant combat system and is a chit pull, but much has also been improved and changed. I think I answer much of the realism issues of both systems with ACSS.
I have the rules available online for anyone to read – simply go to rules and you can read it and see where we are at. 3-4 more edits still to go, but it is more complete than anything I’ve made before, even as it sits now.
As for new stuff and mechanics that my playtesters have said they’ve never seen in a game before – I have two standouts. Situational Awareness matters in this game as does an orders system that influences what and how you do things. They are in the above rules so I won’t go deeply into it – but it has a novel way of presenting Fog of War but still allows for solitaire play. There is much, much more that is new – but those two are mentioned by my playtesters the most.
Grant: What elements do you feel are most important to model from World War II and the Allied invasion of Italy?
Adam: I make wargames, so to me, the most important aspect is to get the history correct and honor those that fought and risked their lives to make a better world for me and my children to live. So the history has to be right and fully immersive. In addition, playing a game on a battle is a different, albeit as involved as reading a book on the battle – but it is also a game. It should have decisions and fun aspects in it to make it fun to play.
Grant: What sources did you consult for the historical details?
Adam: If you go to my website at https://bringitongames.com/, you’ll find everything you need to play an introductory scenario using my system – but if you have a look at the end of the scenario book you can download, you’ll see the extensive bibliography for the game. As an aside, over the last 25 or so years of game design, it is really interesting to see how the web has become indispensable in researching military topics.
Grant: What one must-read source would you recommend?
Adam: I asked this very question of my historian a few months ago. He suggested:
Anzio 1944, The beleaguered beachhead, Osprey Publishing Campaign #155, Steven J. Zaloga, 2008, ISBN 978-1-84176-913-4
Although I’m partial to:
Fatal Decision, Anzio and the Battle for Rome, Carlo D’Este, 2008, ISBN 978-0-06-057649-3
A more involved read and perhaps not as great for wargamers as the Osprey volume, but I think the added effort is worth the trouble.
Grant: What is the scale of the game? Force structure of units?
Adam: As with my other company level systems, ACSS is 500 meters a hex, mostly company level units, and each turn is 2 hours. It is a scale I’ve used for two decades and I’m comfortable at this level. In addition, I fell in love with this scale because it offers both tactical mechanics but you can play an entire battle (although you’ll need space and time of course).
The system uses a chit-draw method to activate units and this is at division level. You draw a chit and do things with an entire division and then move to the next chit.
Grant: What are the differences between the playable factions of the Allies and Axis powers?
Adam: At this level of company actions, the difference between the two armies is quite evident. The Germans have fantastic equipment but are brittle, while the Allies have so much firepower at their disposal. To show one example of what you can show at this scale: the Germans based their tactical dogma on their excellent MG 42 machine gun, while the Americans based their tactics on the excellent Garand rifle. They each operated differently – and I can show this at this scale. Many other aspects from more effective counter-battery fire to specialized tactics are also there. Check out the rulebook above and you’ll see.
Grant: What is the layout of the board?
Adam: Almost all monster games focus on the campaign game, and the scenarios are snippets of the larger campaign game. That is certainly true of my large games. For me at least, it was always a matter of speed. I could test scenarios while I tested the campaign game. My scenarios often started when the campaign game started. There are a few exceptions to this where the scenarios are the primary game, and the campaign game is the added bonus. Games like Pacific War by Victory Games are like this.
I, however, want to have both scenarios and the campaign games have equal importance. Each scenario has its own counter set and its own map. The map size goes from 8 1/2 inches for the introductory scenarios, to one map for the majority of intermediate and advanced scenarios, to two maps for a larger game experience. Finally, there are the two full campaign games, which each have 4 full-sized maps and two half maps – a total of 5 maps. But there are some ten double-sided maps in the game (a total of 20 maps) – this is a map for each scenario and a campaign game map.
“The Rock” Scenario map.
Grant: How are units activated? Why do you feel chit-pull is such an effective method?
Adam: I love chit-pull as a mechanic and have used it for decades. It has the advantage of being great for solo play. There is the drawback that if you have a lot of players, you might have to wait for your turn to come up – although there are ways around this that I talk about in the rulebook, I find the great advantage of board games over computer games is the social aspect of playing them.
Grant: What is the general Sequence of Play?
Adam: A great question. When I first open a game, there are two things I look at first. The Sequence of Play and the victory conditions. They tell me more about the general concepts behind the game than anything else. Of course, a far more complete Sequence of Play is in the rulebook that you can download, but the basic SoP that is used in the VASSAL module is:
But check out the rules for a much more exhaustive Sequence of Play.
As for victory conditions, I blatantly steal from great designers that have great victory conditions – in concept. Some designers just know how to make victory conditions that drive a game and allow for incredible excitement in play. There are some 21 scenarios in the game, and I use different types of victory conditions in each and every one. I did the same thing to a lesser degree in my Greatest Day game. But whatever type of game you like, I’ll have you covered in one or more of the scenarios and the campaign game.
As for how the basic mechanics work, I have a ton of examples in the game for you to have a read and see how things work. Check them out.
Grant: Tell me about Bring it on Games. How are you different from other game companies?
Adam: I changed The Players’ Aid’s last question to talk about this a bit. I take the slogan “A Game Company run by Gamers” seriously. As we have aged, what we expect from games has changed. The games are expensive, but while we all, hopefully, have more money now, we have less time and less patience. I used to love reading rules, but now it is like pulling teeth – it is painful to get into a game. This game and all that follow are about making the games convenient and easy to approach. It is expensive for sure for all of this added stuff that you haven’t seen before – but again, we have more money but less time. You’ll see things here that will make you wonder why all the companies don’t do this.
Also, I don’t want to be GMT or MMP. I want to make games. I won’t have a warehouse, so only orders will be printed. Once I go to press, the game will be out of print. I’ll also limit the total number of orders I will accept. I like making the games. I don’t want to spend my time with all the company stuff. Trust me when I tell you that the owners of all the game companies aren’t having as much fun in the hobby as you are – they are busy running a company, tracking inventory, and all that stuff. I don’t enjoy that very much. So I’ll give up selling games after they print and keep having fun.
I hope you’ll go to my website at www.bringitongames.com and download the sample rules and Vassal set – and see if it’s your thing. I’d love your support. You can also subscribe to my newsletter. And I apologize in advance if you, as more than a few gamers have said to me, “you’ve ruined GTS and CSS for me”.
If you have any questions or comments, you can reach me at:
Thanks so much for your time in answering our questions Adam. I am very much looking forward to this system and wish you the best of luck in bringing it across the finish line. I have very much enjoyed my experience with the Company Scale System (Saipan: The Bloody Rock and The Enemy is at the Gates: Battle for Berlin, 1985 both from Compass Games) as well as the Grand Tactical Series (Devil’s Cauldron and Where Eagle’s Dare both from Multi-Man Publishing) and very much enjoy the feel of the game and the combat system.
If you are interested in Advanced Company Scale System Game One:Anzio: A Lost Opportunity, you can pre-order a copy for $350.00 from the Bring it on Games website at the following link: Shop — Bring it on Games
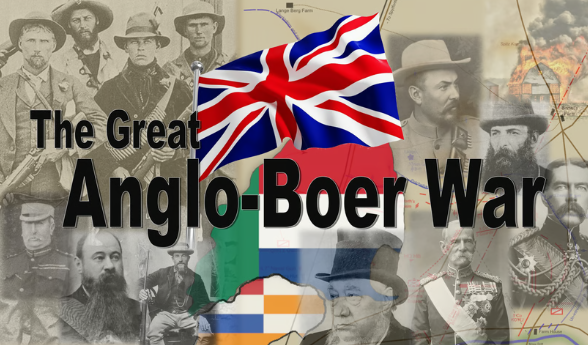
They recently announced their next Kickstarter project that would take their system to the Anglo-Boer War called The Great Anglo-Boer War: The Battle for South Africa 1899-1902. The game is currently on Kickstarter and I reached out to my contact there Kevin Talley who acts as one of the Developers on the team for his input into the design to give us a better picture of how this new game plays.
Grant: What is the focus of your new upcoming game called The Great Anglo-Boer War?
Kevin:The Great Anglo-Boer War is a grand-strategic level game of the war between the British Empire and the Boer Republics in South Africa from 1899 to 1902.
Grant: Who is the designer and what is their goal with the game?
Kevin: As with all of our designs, R.J. Mills is the designer. He has always been fascinated with the Boer War and the goal was to make a really good hex-and-counter wargame to cover the whole conflict.
Grant: What is important to model from the history of the Anglo-Boer War?
Kevin: Well, the Boer War was very unique. It began as an asymmetric conventional contest in 1899 between the relatively small citizen militia forces of the two Boer Republics (they had no standing professional armies) and nearly the entire army of the British Empire! Then, once the Empire had captured both Boer capitals in 1900, the Boers refused to surrender and instead decided to fight a guerrilla war (and that went on for 2 more years). So, given the dynamics of this truly unique conflict, making a realistic game presented some serious design challenges. The design had to accurately simulate the conventional period, where the fractional Boer forces soundly defeated the British in several key battles during the early months, and it also had to credibly represent the guerrilla phase of the war, where very small numbers of Boers roamed (often unseen) and raided (always with surprise) throughout a vast area nearly twice the size of Texas. For this phase, the Empire forces had 250,000 troops deployed unsuccessfully trying to defeat 20,000 guerrillas! It all ended (finally) 31 May, 1902, with the Treaty of Vereeniging.
Grant: What other games inspired this design?
Kevin: We had not intended to make a Boer War game here at Cadet until after we started seeking a good grand-strategic/operational game about the Boer War to play. We got the “Boer War bug” playing Geoff Noble’s Redver’s Reverse: The Battle of Colenso, 1899 from Legion Games and decided we wanted to play a game of the whole war. We had pledged the KS Campaign for Joseph Miranda’s The Boer War from Canvas Temple Publishing and were hopeful, but it wasn’t what we’d hoped for in the end. Then we tried all the other Boer War games out there, or at least those we knew about, but there just wasn’t a good, realistic, strategic level/operational game of the whole war – especially not with the kind of depth we were looking for. We wanted something more like Nick Karp’s Vietnam: 1965-1975 from Victory Games – but for the Boer War – something with that kind of simulative value, historical chrome and especially guerrilla war operational mechanics. The closest thing we found was the old 3W game from 1991 (Eric Faust and Lew Fisher) called The Boer War. It had a lot of what we were looking for, but it was under-developed, errata-riddled and had too many issues to list. Still, that game had some brilliant design ideas, so we decided to start with that framework and make our own game. We were surprised that this topic didn’t have more published games already.
Grant: How did warfare change during the Victorian Age? How did you capture these changes?
Kevin: The British Army was fighting in drill book formations all the way through the 19th century. Consider that, just a year before in 1898 at Omdurman, the infantry stood in close order (just like in the movie Zulu), easily repelling the 50,000-strong army of the Khalifa with Lee-Metford volleys, Maxims and quick-firing breech loading artillery. This all worked very well when the enemy had swords, spears or primitive firearms. But the Boers had Mausers. And Krupps. And Maxims! Tactics had to evolve to meet this new level of lethality and the British Army was not initially prepared to face an enemy that was equipped with the same weapons as they. And an enemy that chose trenches and concealment – inflicting severe losses on British troops in drill formations. The combat system in the game realistically models the advantages of entrenchments, terrain, unit formation posture, night marches and even artillery effects. The Boers on defense can be very tough. A typical attack will be costly. Best to use open order and artillery to great effect – even better to use maneuver and avoid the prepared defense altogether. It took the British some time to learn their lessons.
Grant: What sources were consulted for the historical details?
Kevin: The bibliography for the game is included in section 26 of the rulebook. We used 20+ books on the topic to get the information for the design, and of course those include all the most important works published about the war: Rayne Kruger, Pakenham, Farwell, Arthur Conan Doyle (who was there), Barthorp, Reitz (a famous Boer Journal of the war), Maurice’s official history, Amery (Times history) and more. Someone who has researched the war and knows the historiography will truly appreciate this game.
Grant: What is the scale of the game? Force structure of units?
Kevin: The map scale is 9 miles to a hex. The map is huge. 34″ x 44″ on the table. The unit scale can be as little as a half battalion on the Empire side (500 men) and a single commando element of as few as 333 for the Boers. But the system is so flexible that a single leader’s counter in a hex on the map could represent as many as 30,000 Empire soldiers (with supporting artillery) and up to 13,320 Boers with several batteries of their guns as well. The game scale works for both large conventional battles (early war) and small guerrilla actions (later war).
Grant: What is the layout and anatomy of the counters?
Kevin: The counters are the typical ½” variety, printed on both sides. There are Entrenchment markers that, when flipped, double as “Scorched Earth” markers; Rail markers (early war) that also double as Blockhouse Line markers (guerrilla phase); Boer Control markers that can also be used as Strength Point counters; Number markers that flip to various increments; dozens of Empire Detachment markers which flip to show either Infantry or Cavalry or Artillery Strength Points (and the rotated position of these markers indicates the detachment strength in the hex); Armoured Train unit counters; Supply Wagon unit counters; Unit Status markers for multiple conditions like Retreated, Disordered, Demoralized, Invasion VP’s and more; and of course the Empire and Boer Leader counters, which are the basic units of maneuver in the game.
Grant: What different types of units are available to both sides?
Kevin: A Leader counter on the map typically indicates a ‘Force’ (which is a leader and the Strength Points of soldiers and artillery in their command) for both sides. These Forces are the maneuver units that move around on the map. There are also Detachments, which are Strength Points of soldiers and artillery without a leader (these secure and patrol an area, with a ZOC but without the counter moving). The Empire Strength Points can be Infantry, Cavalry or Artillery, with each point equating to 500 soldiers or a battery of field guns. The Boers are basically all mounted infantry militia, with each Strength Point representing 333 Boers or one battery of their artillery. The Empire also has Armoured Train units (we kept the English spelling), which function as ‘line of communication’ forces that police Empire-controlled rail lines. The Boers also have their Republic Presidents (Steyn and Kruger) and their small government staffs, which serve to score Victory Points by avoiding capture and maintaining their presence as head of state, either in their capitals or out on the veldt.
Grant: What is the off-map Arrow/Wheel used for?
Kevin: There are “Unit Displays” for both sides. These typically show a small picture of the Leader next to a pair of Strength Point numbered ‘wheels’. The players use counters with little arrows on them to indicate on the ‘wheels’ how many SP’s of soldiers are in a Leader’s Force, with any artillery batteries indicated by using a number marker. This keeps the counter-density on the map low, since the battalions, regiments, batteries or commandos are indicated using these off-map strength displays, and only the Leader’s counter moves on the map.
Grant: What was the inspiration for this mechanism?
Kevin: This came from the 3W game. Some players dislike this method for managing unit strength, and it took some getting used to, but we eventually decided it was the best mechanic we had seen in any design for this aspect of the game. Now we love it. Especially because of the flexibility it allows once the war changes from conventional to guerrilla. Historically the forces changed from divisions and brigades fighting large Boer commandos to much smaller columns of Empire troops chasing small Boer units of a few hundred all over the map.
Grant: How does it show the importance of Leaders in the game?
Kevin: I think this whole method of organizing the armies of both sides by each “Leader’s Force” really works perfectly to simulate the Boer War. It matches the real history. Everything a Force does boils down to the influence and command capabilities of the Leader. And forces of widely varying strength and unit composition were assigned to different leaders on both sides at different times throughout the conflict.
Grant: What is the Leader specific initiative rating system? How does it aid in your telling of the Anglo-Boer War?
Kevin: A Leader has to ‘roll for initiative’ to do most actions. Each Leader has an initiative rating which either helps or hurts their odds of a successful die roll, and the ratings are based on the historical performance of that Leader. This represents more than simply a Leader’s tendency to act decisively or not, but also his relative command influence for scarcity of resources, typical Victorian-era officer rivalries, orders and communications variables, bad intelligence and other typical “frictions” of war. The history of the war is full of instances where orders didn’t get communicated, sometimes weren’t given at all, or were ignored. Battles were lost many times because this leader or that failed to act on their own initiative or had some other priority override their commander’s intent. There are some Leaders whose rating is so good, they can nearly always do anything the player wants (and those are almost exclusively Boers). Other Leaders are reliably ineffective, and special care must be taken by the players to choose the right missions for these people. The realism of the design is greatly enhanced by this aspect – a player might have a great plan, but there is no guarantee that their Leaders will enact it. As Lord Roberts said after the battle at Poplar Grove, “In war you can’t expect everything to come out right.”
Grant: What is the layout of the game board?
Kevin: The Game Map contains almost all of the area of the war, from the eastern Transvaal and much of Swaziland and Zululand all the way to the Kalahari desert in the west; from 150 miles west of Port Elizabeth on the coast all the way up past Durban in Natal – and all of the mountains, ridges, rough and veldt of South Africa contained therein. It is a very large area and the map scale is 9 miles per hex. Using .625 hexes (for standard ½” counters), the map is 34″ x 44″ on the table.
Grant: What key terrain features are included and how do they affect maneuver and tactics?
Kevin: The terrain types for hexes include mountain, rough and veldt. Special hexside types can be ridge or river, bridge or rail. The mountain ranges are all there, as are the ridgelines and heights, rivers and rail, towns, ports and capitals. Even the passes and “neks” are indicated. The actual escarpment of the Drakensberg are all mountain hexes, but the Biggarsberg north of Ladysmith, as an example, is treated as ridge-type hexsides with rough terrain hexes. There is a real distinction between mountains and typical rough country/hills. The geography of South Africa was a serious factor in the conduct of the war and the terrain effects for both movement and combat are significant in the game.
A Force attacking across a river hexside is reduced by 50%; a Force attacking across a ridge or into mountains is reduced by 25%; a Force defending in mountain terrain is doubled; a Cavalry Force crossing a river pays 2 extra movement points to do so, while an Infantry Force pays 3; a veldt hex costs 1 point to enter, a rough hex 2, a mountain hex 4, and crossing a ridge hexside adds 2 points. Geography is key. Often, the only way to effectively dislodge an enemy Force from a position is to maneuver them out of it, because the odds for a successful attack are slim based on the terrain. The Tugela River line in Natal is a famous example of a natural fortress, and so it is with the game. To get past a competent Boer defense there, it will take an Empire player who understands the map and the combat system (plus some good dice and a card or two).
Grant: What type of cards are included? Can you share a few examples.
Kevin: The cards are great. Mostly they modify the combat odds or DR’s by providing for an odds-column shift or a DR mod for one of the many on the Battle Board (the Empire Attack Scouting Effect, the Artillery Effect or the actual combat DR). But there are also many cards that influence very specific game actions – like evasions or recruiting, siege surrender extensions or supply situations, armoured trains or movement or initiative effects. Some cards influence the unit formation or entrenchment posture during a battle, while some may determine the outcome of night marches. Some are related to intelligence and reveal hidden enemy units or prevent unknown strength in a combat event. Others influence scouting and observation, signals and orders, escapes and ambushes…I could go on.
All the cards were created based on actual events that happened during the war. Here is an excerpt from the Campaign language and the “design notes” section of the rulebook: “The game cards are designed to build historic realism into the game, especially for the combat system. As in all wars, small instances of chance – moments of decisive leadership (or not) – a thunderstorm – an oil-less signals lamp – a wire fence – a flooded drift – a poorly drawn map – a mistaken guide – an enemy surprise…all these historic events and elements of chance are represented in our design by game cards for both sides. We think this adds to the design immensely, since these can account for odds column shifts and DR mods that the players cannot anticipate. Like their historical counterparts, the players cannot know exactly what their odds are until the battle is joined and the card(s) are revealed!”
Grant: How does combat work?
Kevin: The combat system uses an odds-based CRT and a combat die roll to determine battle results, so it is fairly typical of a hex-and-counter wargame. What gives the system the right depth is that combat can happen during the movement as well as the combat phases. Combat can also be initiated by the non-phasing player using a reaction mechanism – so it isn’t nearly as simple or predictable as “I go / You go”. Based on the history, we felt the combat system (even at this scale) needed to incorporate strength ratios, unit tactical formations, weather, visibility, unknown Boer strength, artillery strength and effects for both sides, leadership, scouting and intelligence, terrain, night march outcomes, unit morale, “dummy” defensive positions, entrenchments and more.
Grant: How does the Battle Board work?
Kevin: There are so many effects and modifiers that contribute to the combat system that we decided the only way to keep everything straight was to have a Battle Board. For example, an Empire attack vs. a defending Boer Force would look like this: First, the Force attacking commits their desired number of Strength Points to the battle using the Attacker’s SP display, then the defending Boer unit’s SPs are indicated on their display. Any unit status particulars (Disordered, Demoralized, Retreated) are also indicated. The next step is to see how many unknown Boer SPs there are, so a die is rolled and that number goes on the Board (usually the Empire player cannot know their exact combat odds until after they commit their SPs to the attack because of this “unknown SP” die roll). Then any terrain or supply state modifiers are applied (there are markers for these) for both sides to establish the initial combat odds, and a counter for that ratio is placed in the appropriate box on the odds track (always rounded in favor of the defender). Next, any factors that modify the combat odds are noted and applied (entrenchments, the Empire Attack Scouting Effect DR, any other enemy units in the attacker’s ZOC, a Demoralized defender, any cards – attacker first). Now a marker is placed for the final combat odds on the final odds track. The last bit is to calculate what modifier (if any) is going to apply to the combat DR. The Artillery Effect is determined with a DR, if the Empire is using a night march there is another DR, the Empire Force’s Leader combat rating is applied, if the attack is made from a rail-move ZOC it matters, and finally any cards that modify the DR – attacker first. Once the Battle Board has been completely and correctly configured, the combat die is rolled and the CRT consulted to determine the result. The Battle Board is really essential to keep track of all of it.
Grant: What role does scouting and intelligence play in the game?
Kevin: The British generals were famously ignorant of the Boer dispositions in the early battles, for they had almost no intelligence organization in their army corps and they were especially short on mounted troops for effective scouting. The Empire Attack Scouting Effect is built into the combat system to reflect this. If the “E.A.S.E.” DR is greater than the number of Cavalry SP’s in the attacking Force, there is an odds-column shift to the left for the combat on the CRT. Later in the guerrilla phase, there is a “mystery movement” dynamic which keeps the Empire player guessing about which Boer commando markers are real units and which are only decoys. Some of the game cards confer valuable intelligence by allowing the Empire player to reveal a “mystery” commando of their choice (and native spies can help both sides).
Grant: How is artillery used?
Kevin: There is an Artillery Effect Track on the Battle Board which compares the arty strength of the two sides in a battle – whomever wins this comparison gets a modifier that applies to the combat DR. The Boers get a DR to add to their battery count, so even an Empire Force with 8 batteries of guns might not win the Arty Effect Bonus if there are 3 Boer batteries (if they roll a 6, they have 9). This “Boer Arty Effect” DR does not necessarily represent additional unknown batteries/guns, but more simulates the Boer tendency to use superior artillery tactics, multiple prepared positions, gun re-positioning during a battle, indirect fires and hidden gun positions with range and target fire preparation. In addition, the British firepower was often wasted against cunningly prepared “dummy” trenches and positions such that seemingly impressive preparatory fires were completely ineffective. The Boer Arty DR serves to simulate both aspects. The Empire has far greater potential weight of fire, but qualitatively the Boer Arty is superior (as with the historical truth). There are cards for both sides that impact the Artillery Effect for a battle.
Grant; What is the role of Scorched Earth?
Kevin: As the Boers turned more towards guerrilla tactics, the Empire forces began burning farms and killing or confiscating livestock (and especially horses) as reprisals for Boer attacks and to destroy potential shelter and supply sources for the guerrillas. This often resulted in the re-settlement of the Boer women and children in concentration camps, where thousands perished from disease and hunger. There are several game mechanics during the guerrilla phase that simulate this aspect of the war, and one is the “Scorched Earth” program. If the Empire player chooses, they may assign Forces during a game turn to “Scorch” one or more district areas in the Boer Republics. A marker is placed, and Boer movement point costs in that district are doubled, while guerrilla recruiting is halved. Once “Scorched”, a district can no longer provide Boer VP’s during the District Control segment of the VP interphase. But there is a potential cost to this kind of “scorched earth” policy: every turn this is done the Boer rolls a die – if the result is equal to or less than the number of newly “scorched” districts for the turn, the Boers get 5 VP for each. These VP’s reflect negative public opinion, parliamentary outrage and press coverage back in England, as well as increased Boer resentment and dedication to fight to the bitter end to avenge the destruction of their homes and families. The Empire player must balance the military benefits against the possible consequences of the policy (and be careful).
Grant: How does the Attrition Phase work?
Kevin: There is a lot going on during the Attrition and VP interphase. Hundreds of the Boers in just about every Force will simply leave to go home (they are all volunteer militia, not regulars); The Empire may have thousands of losses to typhoid (it was a big deal during the war); Boer family deaths in the concentration camps may cause desertions in the commandos (and uproar back in Britain); Besieged Empire garrisons may suffer losses or surrender; Railheads may advance or be pushed back: Forces might entrench; Unit statuses (like Demoralized units) get updated; VP’s for the game turn are tallied and losses counted, and the totals for the war (or scenario) are arrived at. It gets even busier if a Boer capital has been captured during the turn, as this can drastically increase the number of Boers who choose to “take leave” and go home (low morale). At the end of the phase, the players advance the game turn marker and start the next month of the war.
Grant: How is victory determined?
Kevin: Victory Points are awarded to both sides for all kinds of events. Mostly major or minor battle victories, but also for siege outcomes (relief or surrender), Boer invasions of Empire territory, capture of Leaders and capitals, control of districts, consequences from the scorched earth policy and concentration camps, and even penalties for over-stacking. There is a VP table on the back of the rulebook so the players can double-check during the VP interphase, and there are handy player-turn and interphase record sheets to use as well. Whoever has the most VP’s at the end of the scenario wins, unless an automatic victory for either side ends the contest early.
Grant: What different scenarios are included in the design?
Kevin: There are three scenarios – the Conventional War, the Guerrilla War, and the Grand Campaign Game. Here’s an excerpt from the Campaign language: “The full campaign is the ultimate Boer War experience – from the first desperate siege defenses of 1899 to the treaty of Vereeniging (or maybe not?) – and everything tactical and otherwise in between: Battles, blockhouses, farm-burnings, evasions, escapes, raids, concentration camps, sieges, drives, armoured trains, 1-pdr automatic “pom-poms”, surrenders, entrenchments, typhoid, barbed-wire, native spies, night marches, supply wagons and more. If it was part of the real Boer war – it is in the game.”
Grant: What does the game do well in modeling the Anglo-Boer War?
Kevin: We feel the game succeeds in modeling just about every aspect of the war, but there are a few particulars. Again, from the Campaign language: “For our design, we wanted a more granular scale of both movement and combat than any other strategic-level Boer War game yet published. Rayne Kruger, in chapter 23 of his “Good-Bye Dolly Gray” pointed out that, perhaps more than any other Boer advantage, the Empire was fighting “a war against space.” We ended up having two 22″ x 34″ map sections at 9 miles/hex to pull this off. A very large game on the table – but very typically “Cadet.” As it goes here, bigger is better. More hexes = more realism.”
Also, the Empire forces during the war were especially dependent on the rail lines for supply, while the Boer forces were far less dependent on any supply system to keep their forces in the field. The supply rules in the game really do justice to history, as everything the Empire player wants to do will be substantially constrained by their proximity to a rail line. In fact, some remote districts simply cannot be effectively garrisoned by Empire forces or detachments, because those units will be out of supply. Moreover, the scarcity of draft animals (oxen and mules) during the war meant only a handful of supply wagon units were available to extend an Empire LOS away from any rail line, and so it is with the game. These few substantial wagon convoys are also prime targets for the marauding Boers (as with countless examples from the war).
Grant: What has been the experience of playtesters?
Kevin: The game plays very well, indeed, but there were a few unexpected outcomes from the initial design, especially the combat system. In our first run of the conventional war scenario, we discovered that the “Boer unknown SP DR” mechanic needed a change. The Boers simply fought too well. Every time the Empire committed SP’s to an attack, the Boers would essentially be ‘reinforced’, owing to their unknown SP die roll. It always added SP’s to the Boer Force, since it wasn’t designed to subtract them. True, this kept the Empire player uncertain as to the combat odds until the forces were joined, but it had the effect of representing the Boers as ahistorically disciplined regular troops – prepared to fight to the death and hold their ground even when attacked by 15, 20, or even 30,000 British with 50+ field guns. The Boers just didn’t do that. There are far more examples of the Boer volunteers fleeing in droves from large Empire forces (in spite of exhortations and even threats by their leaders and even presidents) than examples where they stood their ground. In many ways this tendency served to preserve their forces and denied the Empire the showdown battles they hoped for during the second phase of the conventional war. A small rearguard of hardcore Burghers (farmers) would usually hold off the exponentially larger Empire forces, allowing their thousands of fleeing comrades to make their escape. They traded ground for time and blood, almost always avoiding any decisive loss.
So, we amended the rule so the DR can go either way, depending on the size of the attacking Empire force and on another DR modified by the Boer Leader rating of the defending force. This solution made a huge difference and resulted in the historical outcomes we wanted. If you attack Botha with a large Empire Force, he will likely motivate several hundred more Burghers to join the defense. Attack Prinsloo, though, and he’s likely to have several hundred of them (or more) run away before the battle is joined. There is a card in the Empire deck that prevents the unknown SP DR altogether, and now freshly retreated or Demoralized defenders don’t roll either.
Grant: When can we expect the game to be fulfilled?
Kevin: We are optimistic that the community will support our Campaign for this one (gotta get successfully funded first), and we will start the production sample and the rest of the process immediately afterward. Our anticipated timeline is to have the games shipping to the backers by August of next year.
Grant: What projects are in the near future for Cadet Games?
Kevin: We would really like to get our Hamburger Hill game produced. The design is 100% done and it is a really detailed sim of that famous battle. We ran it on Gamefound back in 2025 but it didn’t hit the goal. So, we will likely run that one again to see if we can’t get that produced here sometime soon. We have a ton of other projects in the works, one of which is a solo design covering the Mayaguez incident and the battle for Koh Tang Island from May, 1975. We have been really immersed in the Boer War since the middle of last year, so this one has had almost all of our attention (and still does for now, since we are playing through multiple rounds of the guerrilla phase and all of its intricacies)! We also have Barbarossa ’41 on deck for our Armies & Alliances Series of WWII ‘miniatures and monster map’ designs. Thanks again for helping us get the word out about our passion for military history and wargames!
Thank you for your time in answering our questions Kevin and for the great care you guys are taking with these games to tell a fun and interesting part of history.
About a month ago, I started a new feature on the blog called Discussion Thread where I pose a question or a situation and seek your input and comments on the issue to gain greater understanding and to encourage thoughtful feedback. The response to the first post about In-Game Retribution was positive and there were a lot comments and opinions shared. I now wanted to do another post in the series but focus on the subject of Zones of Control and their importance in wargames.
A Zone of Control, typically referred to as ZOC, is the area immediately surrounding a military unit that exerts tactical influence over adjacent spaces, which in turn restricts enemy movement, closes up gaps in a line preventing enemy units from moving through, forces combat or triggers some sort of reactive action such as opportunity fire or engagement without the passive player needing to occupy those hexes or take any actions. They are designed to create some sort of resistance to enemy units as they approach. Mimicking real world combat and adding in this concept of awareness of enemy movement.
I think that everyone has an opinion on the subject of ZOC’s and these opinions are mixed regarding complexity, the type, being rigid or sticky, and their in-game effects, but there is a consensus that they simulate well the concept of military friction and holding frontline positions. Let’s take a quick look at the different types of ZOC’s and I will share my thoughts on each.
First up, is the rigid/locking ZOC where units must halt their movement the moment they enter a space where an enemy unit is exerting a Zone of Control. The ZOC in this case forces the moving unit to terminate its movement for that turn. I very much prefer these type of ZOC’s as I think that they really simulate the concept of prepared and even sometimes dug-in troops have the advantage and can force advancing units to stop trough interlocking fields of fire or heavy gun projection on the area such as off-board artillery.
Next, we have the soft ZOC where advancing enemy units can move through enemy ZOC influenced spaces, but suffer some sort of movement point penalties, attrition, or extra costs. I also really like this concept as it typically functions similarly to more rigid ZOC’s by costing a +2 or +3 movement cost which typically ends a units movement but not always. I have seen moving units have to take a step loss to take an extra move or more simply extra movement costs such as the placing of a disrupted marker or the like. This type really focuses on the pressures and cost of moving into and through these Zones of Control but are simpler than the more rigid variety.
Finally, I have seen more fluid ZOC’s such as when units can pass adjacent to enemies, but doing so might trigger attacks of opportunity or reactive fire at a disadvantage such as providing the units projecting the ZOC a positive DRM in their attacks or attacking with a column shift on the Combat Results Table. This concept is that moving or advancing units have less cover, less caution and open themselves up to attack more so than those that are forced to stop.
I think that all 3 of these types have their merits and downsides but their use typically depends on the situation represented in the design, the mindset or experience of the designer and the varying historical troop quality and fire power of the units. A line of tanks dug in is much more fearsome and demands a different level of respect in their ZOC projection than say a small arms squad of soldiers who do not have heavy weapons such as LMG’s. And I think that all are viable in design.
Then there is the lack of Zones of Control. I am not a fan of this concept at all but have found that it is typically used in more introductory wargames that are less complex and focuses on being less of a simulation than a traditional hex and counter affair. Many years ago, and at a time when we were still early in our wargame learning journey, I played a game called Paul Koenig’s Market-Garden: Arnhem Bridge from Victory Point Games. I think that I was attracted to it because of the subject of Market-Garden and the inclusion of Allied airborne units. In looking at the game, the main focus and goal is to move toward the bridge and capture it. The path to move to the bridge is through fairly dense urban hexes with a road leading right to the on-ramps.
Strategically, a German commander would have lined the streets with their best units to prevent the enemy from simply riding right down the middle of the street to the bridge. This commander would have given orders to fire on anything approaching and would have had reserve units located in the buildings to the left and right of the streets to prevent small unit interdiction through the back alleys. These units would have taken up positions to bring heavy fire upon any approach hex and this is typically simulated in other games through the use of a Zone of Control. This ZOC would typically cause advancing units to stop while taking fire from an adjacent unit but in this design, the units just kind of ride on by, waving to the nasty MG-42 nests on the 2nd floor of the buildings and blowing kisses to the Panzers hidden in or behind the piles of rubble!
In reviewing the history of the campaign, one of the major problems the British had in advancing on the bridge was that relatively small German forces had taken up positions in the woods and on the outskirts of the city and effectively pinned down most of the advance of British forces toward Arnhem. This, in my opinion, is a major design flaw and should be house-ruled or cause a redesign of an otherwise fun and good playing game. I have illustrated this point with the pictures below where the British 4-6 Infantry unit simply moves right down the street between 4 better groups of units (an 8-9 Tank, three 6-8 Mobile Infantry and a crack 6-6 SS unit) without taking fire or being stopped! Seems silly doesn’t it?!?
I really tend to prefer the sticky/rigid/locking Zones of Control that seem to be found in most of the hex and counter wargames we play. I am more ok with the less restrictive soft or fluid ZOC’s in a tactical wargame where I can hold actions to then inflict opportunity fire on advancing units. But, as I said before, once you introduce the big guns in the form or tanks or heavy artillery, I really like the sticky/rigid/locking Zones of Control. Is this a taste thing or am I in the minority?
So what are your thoughts on the importance of Zones of Control? Can you enjoy and play a game that doesn’t have them? What is your preference in their stickiness/level of exerted influence in a game? What games do them best? Thanks for reading and for sharing your thoughts. I will come up with a few more of these posts over the next few months to share and I hope to see lots of comments and reaction.
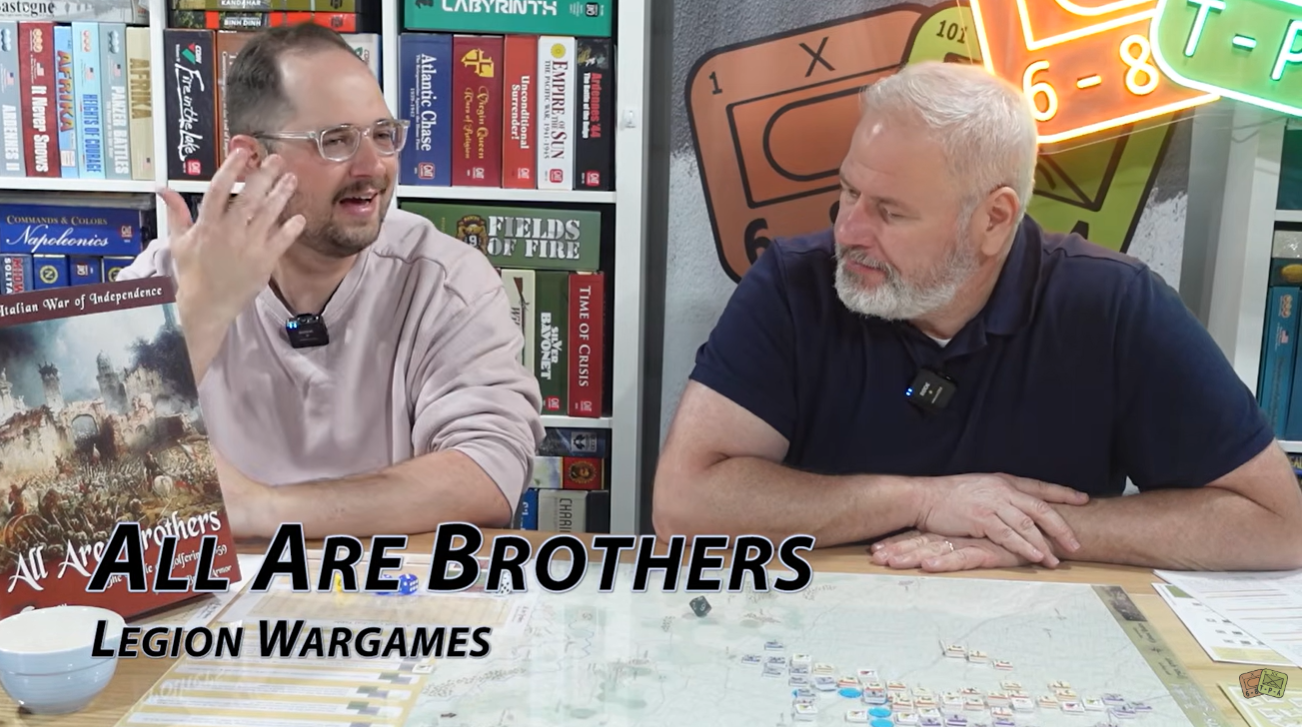
All Are Brothers: Solferino, 1859 simulates the decisive battle of the Second Italian War of Independence at the Brigade-level, with some additional Regimental-size and smaller detachments included. National and corps-level leaders are represented, on a map at 500 meters per hex, with 1-hour turns. Five scenarios are included: three that separately cover the north, central, and southern sectors of the battle, as well as a combined full battle scenario, along with a small introductory scneario. The combined scenario is suitable for up to four players (France, Sardinia-Piedmont, Austrian 1st Army, and Austrian 2nd Army).
The battle itself was a grinding slugfest often described as a “soldier’s battle” – a deliberate slight to the often uninspired leadership of the generals and a tribute to an allied victory gained only at the tip of the bayonet. Villagers in the surrounding region would do their best in the days after to treat the myriad wounded, and answer as to why Austrians, Hungarians, Czechs, Serbs, and Slovaks were treated as well as the Italians: “Tutti fratelli” (All are brothers). The battle pits two Austrian armies against the combined forces of France and Sardinia-Piedmont, and features the full panoply of colorful period units – Jagers and Grenzers, massed cavalry divisions of all types, Bersaglieri, French Imperial Guard, and the French African Zouaves and Turcos. Advances in infantry and artillery firepower would soon make the tactics of the time obsolete, and the carnage at Solferino reflected the start of this paradigm shift, soon to be highlighted bloodily by the Austro-Prussian and Franco-Prussian wars.
This treatment of Solferino features an adaptation of Hermann Luttmann’s Blind Swords System (At Any Cost, Hammerin’ Sickles, Stonewall’s Sword) as the core ruleset. The system is heavy on unpredictability and fog of war due to the chit pull mechanic. The chit pull mechanic also very much aids in solitaire play, as does variable activation rules and reinforcement tables. A number of other features help make face-to-face play attractive, including a number of scenario variants and optional rules, a free-setup full battle scenario, and the move-and-countermove of event chit play. Nation-specific event chits also inject some period flavor.
Battles in the East (BITE) is a series simulating World War II Eastern Front battles. The system rules are an evolution of the SPI classics Panzergruppe Guderian, Army Group South and Cobra. Unit integrity bonuses include Soviet Corps and vary to show the increasing Soviet cohesion and decreasing German cohesion as the war progresses. HQ units provide higher level combat support and supply advantages to corresponding units in range. BITE also incorporates standardized scales (unit size, distance, time) for easy comparisons. While the series rules allow players to play many games with the same core rules, the scenario rules add unique situational elements of each battle. Each volume includes two battles from one year with two copies of the charts and tables as well as scenario rules and set-up cards for easy reference. Battles in the East Volume 2 offers a strategic simulation of pivotal 1941 Eastern Front conflicts, including the fierce battles at Uman and Tula.
Day 2 dawned early with me getting up at 6:20am due to the sunlight beaming into our window as we had not carefully drawn the blinds together tightly. We got ready and left the room fur breakfast and arrived in the Winterberry Room at 8:30 ready to dive into the Grand Tactical Series.
As we approached the table, I was absolutely blown away by the size and scale of it and the multiple boards laid out on it with plexiglass and secured with binder clips and tape. The boards combined measure 17’ of wargaming good and include The Devil’s Cauldron: The Battles for Arnhem and Nijmegen and Where Eagles Dare: The Battle for Hell’s Highway from Multi-Man Publishing.
The game state is actually a continuation of a game that started at WBC last year. Joe and Matt took pictures of the game board and also of each of the formations and their position from last year’s game and had set it up in that state to play over the next week.
Here is a look at those carefully taken pictures. Such detail and care given to the game. How am I not going to love this experience?
There were a total of 6 of us playing the game and we were loosely assigned a few formations to be in charge of. Actually we were told we were in command and were to make plans and then discuss those with the CIC’s to get approval and then execute that plan. A lot of autonomy and ability to go about it individually.
Over the span of 10 hours we played and finished the 0700 and 0800 turns for September 19th. This system is very fun and crunchy but also involved. When attacks are made there is very structured procedure but that isn’t overly complex. Company bonus checks initiate the action and the player will have to roll less than or equal to their troop quality number to gain a +2 to their combat value. Typically this troop quality ranges from a high of 7 to as low as 2 for artillery. Once completed, this bonus is added to their combat factor and then is reduced for the terrain defensive bonus and any defense shown in the enemy counter. Typically you are targeting following under a 7 for good units and a 2 for lesser units. Sometimes these modifiers make it so only a roll of a 0 on a d10 will hit. A 0 is not a 10 in this game. But there is always a chance. Hits are then referred to the CRT which uses the rolled value to refer to the type of Fire to determine results. Types of Fire include indirect, HE or small arms and results include a Cohesion Hit, with multiple Cohesion Hits leading to step losses, step losses of 1, elimination or suppression. There is also limited opportunity fire and assaults that require a bravery/morale checks. At first it seemed over the top but once I picked it up was really fairly simple.
Activation is chit pull and works very well. A formation activating gets to do something with each unit but then can spend Command Points to take additional moves or attacks. Just a very solid system that reminds me a lot of the Company Scale System also designed by Adam Starkweather. The system focuses heavily on how well division and regimental HQ’s can coordinate their sub-units and handle combat stress. I liked it very much and look forward to playing a few more hours tomorrow before moving into some other games.
I also wanted to show off the ingenuity and commitment of these Grognards and their setup for GTS.
First off the lighting. They have light poles that provide above the board light which makes a huge difference in visibility of the game and its counters.
They also have magnetized the chits and when they are drawn are posted on a board for all to see who has activated and who is up. There are chits drawn early but that are hidden on the board to allow for the next player to begins planning to speed game play.
The table they use is also custom made and is modular to fit the various games in the series. The bases are sturdy and they appear to be solid but are assembled quickly.
They use 1/4” thick plexi that is quite thick and has somewhat of a magnifying effect. It is very well done and made playing the game more enjoyable.
While playing, there was another nearby big in-design East Front wargame being played by Antony Birkett, Chip Saltsman and Curtis Baer. If you didn’t know, all 3 have been involved with, designing and developing several volumes in the Operational Combat Series from MMP. Tony has designed several volumes including The Third Winter, The Forgotten Battles and Crimea.
The system is called the Operational Warfare System and its first game is called After Stalingrad designed by Antony Birkett. Think modern mechanics being brought to the Operational Combat System in Tony’s words.
The system is focused on maneuver and command and control and uses HQ’s with different amounts of Action Points used to activate units. The game play is back and forth and interactive and it was said there is little downtime. They hope to use this system to tell the study of other WWII battles in North Africa, the Mediterranean and Western Fronts, as well as the tried and true East Front.
The fame has been in designer and development over the past 6 months and is being made ready due extensive play testing. They are currently shopping the design to publishers and hope that it is published in 2027.
I was able to shoot a 15 minute interview with these guys and had some really good discussions about their goals with the game and the system highlights.
I also met at different times of the day several fans of the channel. I met 2 first time attendees this year who both watch our videos named Jason and Bill who were both class acts.
Jason.
Bill.
This is probably a bit personal but Bill told me that our videos helped during a time when his now deceased wife was sick and he was in a dark place. That was very touching to me and I appreciated that we somehow assisted him through that difficult time.
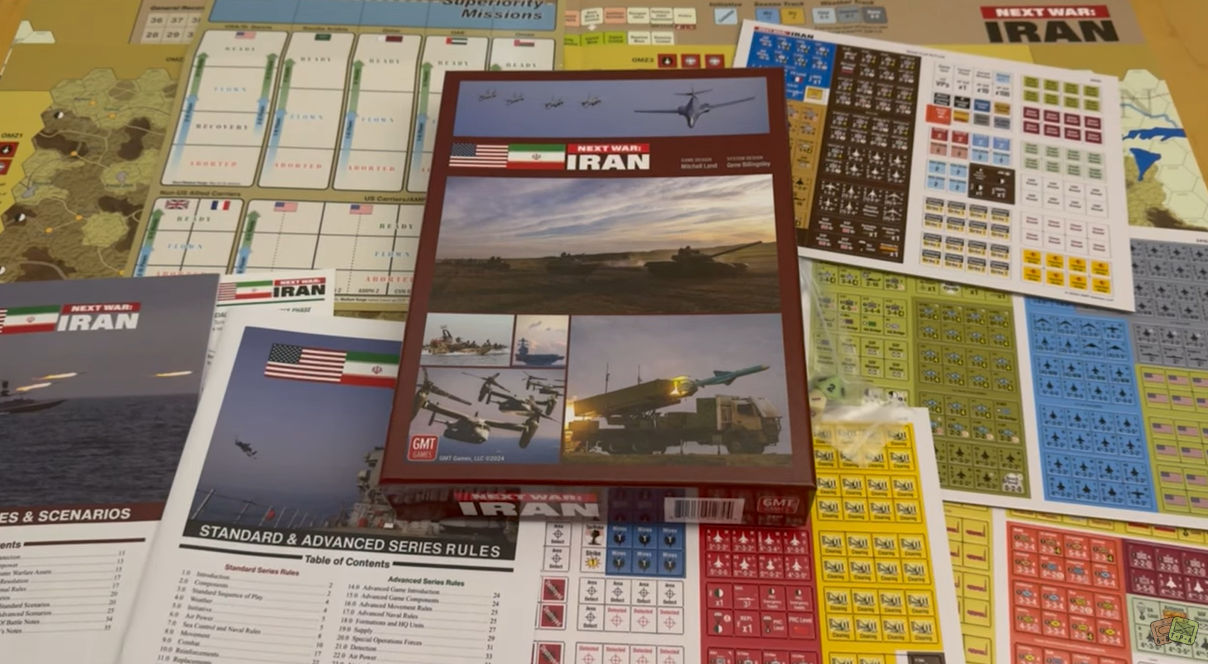
Next War: Iran is the sixth game in the Next War Series from GMT Games. It is unique in the series in that the Allied player has to do the attacking while the non-Allied player attempts to defend its territory against neo-imperial oppression. With a long logistical tail, few true allies in the region, and the menace of Iran’s A2AD capabilities, re-opening the Straits is a tall order.
Grant: Javier welcome back to the blog. What is your new game Battle of Pensacola 1781?
Javier: Thanks for having me again. Pensacola 1781 is a simulation of the American Revolution in the southeast region, stretching from the Mississippi River basin to the Floridas, from the Spanish entry in the war in 1779 to 1782. I must say that the title is a bit deceptive in its scope and included battles.
Grant: What was your inspiration for this game? Why did you feel drawn to the subject?
Javier: The Spanish participation in the American Revolution has recently attracted much interest in Spain. It was, so to speak, the swansong of the empire in the Americas. There aren’t any games that cover the entire campaign. There is only a wargame on the siege of Pensacola from GMT Games which is a part of their Battles of the American Revolution Series, which is a detailed and interesting situation. But I wanted an operational level game showing the big picture, from New Orleans to Mobile, Pensacola and St. Augustine. The game highlights the operations of Bernardo de Gálvez, who led one of the most brilliant campaigns in that theatre, clearing the Mississippi basin of English outposts as well as taking Mobile and Pensacola fighting against all odds. Against the advice of his subordinates, who deemed impossible defending Louisiana without reinforcements from Cuba, Gálvez declared that he preferred “having to answer charges of recklessness, than other type of charges” and took the offensive against the British in the lower Mississippi.
Grant: What was your design goal with the game?
Javier: My goal was to show a “multi domain” 18th century campaign, including amphibious operations, sieges, Indian warfare and diplomacy. The design puts the focus on leadership quality, Indian warfare and chaos. The campaign in Louisiana, modern day Alabama and the Floridas was a bit of a sideshow in a worldwide conflict fought from Canada to the Mediterranean, the 13 colonies, the British channel, Gibraltar or India. The design reflects this in several ways. In this game, reinforcements arrive at the beginning of each year and their arrival depend upon a number of factors, such as victories in earlier turns (thus gaining the favor of their respective courts in London and Madrid) as well as events elsewhere. Fleet squadrons come and go because this is an oceanic war being fought out across the seven seas, and the Caribbean was just only one more front.
Grant: What type of research did you do to get the details correct? What one must-read source wouldyou recommend?
Javier: There are plenty of Spanish sources on the campaigns of Bernardo de Gálvez in the Americas, many of them published in recent times. There are recent English language sources that recognize the major role of Spain in arming and supporting the American Revolution. For instance, the book by Larrie D. Ferreiro Brothers at Arms: American Independence and the Men of France and Spain Who Saved It. Another interesting source in English is the work by Joshua Provan Every Hazard and Fatigue: the Siege of Pensacola, 1781 published by Helion Books. This book provides solid evidence of “the true military consequences of the siege [of Pensacola] on the War of American Independence.”
Grant: What from the American Revolution in the Southeast was most important to model?
Javier: It was important to model that the Mississippi-Floridas campaign was one more theatre in a global war spanning from the Americas to Europe and India. Keeping open the Mississippi River basin to the arms and supplies shipments coming from Spain, France and other nations was a decisive factor in keeping alive the American Revolution. Being just one more theatre, the arrival of reinforcements depends on a number of a factors and events elsewhere. After the first successes of Gálvez, the Spanish decided to reinforce success and provide him with more ships, troops and resources.
Grant: What is the scale of the game? Force structure of units?
Javier: Units are basically regiments and Indian warbands, rated for Indian and Linear warfare. Using one or the other depends on a number of factors, namely leadership quality.
Grant: What area of the Southeast does the map cover?
Javier: The map covers a large area, from the lower Mississippi to Eastern Florida, with off map boxes for outposts in the upper Mississippi and Georgia.
Grant: What off map areas are represented and why are they important?
Javier: There are three: St. Joseph and St. Louis, which are important to keep the Mississippi supply route open, and Georgia, from where the Spanish/Patriot player can launch attacks against East Florida. The 1778 Patriot invasion of East Florida was defeated, but there was the possibility of new offensives in the following years. After the conquest of Pensacola the Allied forces (Spanish, French and Patriots) planned a joint operation against British forces in the Carolinas, but the end of the war cancelled it.
Grant: What key strategic points are contested in the area and what is the geographic goal of the combatants?
Javier: For the Spanish, the first objective is to defend the Mississippi Basin, although Havana is also included in the map so that the Spanish has to keep a sizeable defense there. Historically, the Spanish commander in chief in Havana was extremely reluctant to spare ships and troops for the Floridas. In the words of the chief of the Spanish navy in the island, “This [Cuba] is worth 50 Mobiles or Pensacolas…if the King was here, he would do the same”. The British capture of Havana in 1762 still loomed large.
For the British, the objective is to reach the Mississippi Basin, and, if not possible, to defend West and East Florida. With the arrival of Rodney’s fleet, he can also chance a surprise attack on New Orleans, or even Havana if the Spanish player doesn’t keep there a sizeable force.
Grant: What different unit types does each side have access to?
Javier: There are line infantry, militias, artillery, siege trains, supply trains, Indian warbands, fleets, transport ships, and leaders.
Grant: What is the anatomy of the counters?
Javier: Land units are rated for linear warfare (representing “proper” 18th century warfare) and Indian warfare (irregular tactics, hit and run, pillage, ambushes). Linear infantry and field artillery are better for the first, while militias and Indian warbands are better for the latter. Militias and Indian warbands are also very useful for finding out the makeup and location of the enemy or avoiding interception/ambushes by the enemy force. Leaders are rated for their tactical and diplomatic skills that add modifiers to initiative, combat, diplomacy and other actions. Supply trains are spent to avoid attrition, which can be heavy in the hostile wilderness.
Grant: What is the general Sequence of Play?
Javier: The sequence of play begins with the stratagem markers phase (both players pick at random stratagem markers), followed by reinforcements die rolls at the beginning of the campaign season. Then comes the Indian diplomacy phase, where both players use diplomacy stratagem markers to break or establish alliances with the various Indian tribes. After that both sides can try to recruit Indian warbands among neutral or allied Indian nations. Then comes the recruiting phase, where both sides use accumulated Treasury Points to rebuild destroyed units. Finally, the Spanish operates his naval and land forces in any order he sees fit, followed by the British operations phase. At the end of the turn, both sides roll for attrition, and for the possible withdrawal of Indian bands.
Grant: What type of experience did you want the Sequence of Play to invoke?
Javier: Players can activate their forces in any order they want, so that they can use any combination of land, amphibious and naval operations. The experience I wanted to invoke is that of uncertainty- this is the 18th century warfare in a remote colony. As in many other wars, both sides make plans, but there are many factors that can disrupt them, from hurricanes to unexpected arrival of enemy forces to events elsewhere. There are no communications other than messengers and courier ships, so the possibility of an enemy expedition arriving out of nowhere should make players to be cautious.
Grant: How do the different nations troops coordinate their maneuvers and attacks? What difficulty of command will players experience trying to coordinate French, Spanish and Patriot forces as well as British, Hessian and Loyalist forces?
Javier: In general the troops of different nations can operate together without problem. The Indian forces are a double edged weapon-very useful for reconnaissance and ambush (or to avoid enemy ambushes) but they can leave a force if they decided that they have to return or that they have captured enough loot and captives. Forces can operate any number of units of different nations.
Grant: What role do the Indians of the region play in the game?
Javier: In this game I wanted to emphasize the role of the various Indian nations. Indian warbands are useful for raiding and reconnaissance although they tended to return to their villages after a successful campaign. Historically, the British had a well developed network of Indian agents which gave them advantage in their Indian diplomacy. This is reflected in the “Indian agent” markers, that provide die roll modifiers to the British diplomacy attempts. Historian Josh Provan pointed out in his book on the Pensacola campaign that the Spanish victory was achieved with the assistance of Native American nations, “whom have routinely been dismissed outright for over two hundred years”.
Grant: What are Stratagem markers?
Javier: The Stratagem Marker is a mechanism that I use in many of my designs. These are very useful to simulate things that are beyond the control of players. Represent anything from tropical diseases, campaigns elsewhere in the Americas and in the World, to tactical events such as lucky hit, ambushes or military advantage. The marker “Surprise move” is particularly useful to simulate the uncertainties of 18th century in a remote wilderness such as the old Southeast. Given the right conditions, a surprise move may make a fleet appear out of nowhere and destroy an enemy force. This is the 18th century…there are no communications other than messengers and courier ships. Historically, upon learning about the presence in the Caribbean basin of the squadron of Admiral Rodney, the Spaniards feared that they could catch by surprise the forces besieging Pensacola. Stratagem Markers also simulate the spy networks of both sides. Before the war, Gálvez setup an extensive spy network that was very useful. For instance, his spies got hold of a copy of the secret orders sent to General Campbell at Pensacola, ordering him to organize, if possible, an attack on New Orleans with armed vessels from Jamaica and “as many faithful Indians and the Superintendent could supply”. Gálvez took the initiative and took the British outposts along the lower Mississippi before Campbell could arrange his own offensive.
Grant: What are Treasury Points? How are they gained and lost?
Javier: TP’s represent resources received from their respective metropolis, as well as local contributions used to recruit units. Treasury Points are received from their respective countries during reinforcement turns. Unlike other games, there are no treasury generating regions or cities-everything comes from Havana, Madrid or Britain. Treasury Points are used to rebuild destroyed units.
Grant: What role do Leaders play? What historic personalities are represented?
Javier: Leaders play a key role in diplomacy and combat. The better the leadership, the better chances of gaining initiative in combat, recruiting Indian allies, and so on. Among the historic personalities, the most notable is perhaps Bernardo de Gálvez, the most noted commander in that theatre. After fighting in Europe, North Africa and the Americas (against the Apaches), he was named governor of Louisiana in 1777. In May 1779, a month before Spain declared war on Britain, and three years after the Declaration of Independence, Gálvez assembled a small army with which he attacked the defensive posts the British held along the Mississippi. With a contingent that included free African Americans, Choctaw Indians, Canadians, and American volunteers, Gálvez captured forts such as Manchac, Baton Rouge, and Mobile, and expelled the British from the region. His greatest victory was the conquest of the port city of Pensacola, in northwest Florida in 1781. Galvez’ adversary at Pensacola, Major General John Campbell, a veteran of Culloden in 1746 and the siege of Havana in 1762, is an interesting figure as well.
Grant: How does combat work?
Javier: There are two odds-based Combat Tables-Indian and Linear. Indian represents Indian Warfare-emphasizing mobility, with night attacks, ambushes. Local militias and, of course, Indian warbands are better at them. The other CRT is linear warfare, representing “proper” 18th century linear warfare. In this, Line infantry are artillery are most useful. The choice of CRT is determined by an initiative die roll, modified by the leadership rating of any leaders in the forces, plus the play of Stratagem Markers such as military advantage or ambush.
Grant: What are Military Advantage and Ambush Markers used for?
Javier: They represent tactical opportunities and junior leadership and can be used to modify initiative, interception or operations points die rolls.
Grant: What is the makeup of the CRT?
Javier: As mentioned above, it is odds based. Units add their linear or Indian warfare factors-Linear units add 2 combat factors on the linear CRT, 1 on the Indian CRT. Artillery adds 2 combat factors on the linear CRT, 0 on the Indian CRT. So, a force containing mostly militias and Indian warriors against a force containing line infantry and artillery will chose the Indian CRT. Of course, the system rewards combined arms-it is advisable to combine all types of units in a single force. The Linear CRT is bloodier (more chances of completely destroying an enemy force) the Indian Warfare CRT is more indecisive.
Grant: How do Sieges work?
Javier: In the game there are Fortresses and forts. The first represent stone fortresses such as the ones in Mobile, St. Augustine and Pensacola, while forts represent minor positions made mostly of wood. Players can build siege works to approach the enemy defenses (representing parallel trenches, mining and so on). The force under siege may choose to launch a sortie to destroy the siege works. If the sortie fails, the siege works add a positive modifier to the assault operation against the fortress hex. The player then rolls on the siege table and apply results, which may include Bloody Repulse (Eliminate besieging units equivalent to the number of defending units), Honors of War (with Age of Enlightment chivalry), the defender is given the option to withdraw from the fort or fortress. The defenders are withdrawn and can enter as reinforcements during the next game turn) or Surrender: the fortress is conquered and all defenders are eliminated, including any naval units if it is a coastal fort or fortress.
Grant: How is victory achieved?
Javier: Victory is achieved by taking geographical objectives (Mobile, Pensacola, St. Augustine, New Orleans…) or by preventing the enemy from taking them. The British may win a sudden death victory if they manage to take Havana as in 1762.
Grant: What role do Naval Operations play? Why were they important to include?
Javier: Naval operations were very important because it was the only means to move sizeable forces in this theatre. Overland movement and supply was extremely slow, so the best way to move reinforcements, supplies and to take the fight to the enemy strongholds was by sea.
Grant: What optional rules are included?
Javier: There are four optional rules. In general, these add to the game narrative although it might make game turns somewhat longer. Optional rules are naval infantry. In this one, players can “land” marine infantry from naval ships, which can fight overland in a siege, for instance-if the naval ship is involved in naval combat, it has a negative modifier in combat, representing the missing crew and marines. The other optional rules are Indian supplies (players can purchase supplies to local Indian tribes, like Gálvez did, for instance, during the siege of Pensacola), destroyed forts (players have the option to burn forts, but not fortresses) and valley movement, where players follow river valleys to move faster across the wilderness territory.
Grant: What type of an experience does the game create?
Javier: It creates an experience of uncertainty, in particular with the unexpected arrival of enemy forces from out of nowhere. If this could happen at the tactical level, more so in a strategic game covering all of North America from the Mississippi river basin to Florida. Also, gamers must keep in mind the importance of the human geography-the Indian nations played key roles in the operations of the war, by supplying, providing information and combat troops to the empires at war. Elements such as the “Surprise move” markers, and the arrival of Rodney’s Fleet, provide the game with wild changes of initiative. The British, in particular in the early turns, can try to grab the initiative and attack towards the lower Mississippi or St. Louis.
Grant: What are you most pleased about with the design?
Javier: I think it makes a good work at simulating “multi domain” 18th warfare, covering many aspects, from conventional operations to irregular warfare to diplomacy with a relatively simple set of rules.
Grant: What other designs are you working on?
Javier: I am currently working on several games for SNAFU Design Team, Decision Games, VUCA, Bonsai Games and Compass Games/Paper Wars. S&T will publish in May-June 2026 another of my operational WW2 designs, Forgotten Front: Italy 1944-45. I just turned in to Decision Games the prototype for Ukraine Battles 2. This one covers the early, mobile campaign in Kharkiv in Eastern Ukraine in the spring and summer of 2022. It is an evolution of the system first used in Ukraine Battles 2014-15. Artillery plays a very important role in the system. It is precise and deadly, and can do a number of missions, from interdiction to destroying command posts to supply depots. Plus drones and long range fires, of course.
1942: Battle for the Mediterranean for VUCA Simulations, is, I hope, approaching completion. It is an old project that I first agreed to publish with the company of the late Jack Greene, Quarterdeck International, but later he suggested me to contact VUCA for publication since they did a great job with the new edition of his Bismarck design. 1942: Battle for the Mediterranean is what I would call an operational naval game, with turns representing one month of naval operations. Apart from supplying the war fronts and fighting the enemy at sea, players have to manage their assets and think in the long term. The campaign game covers 10 game turns, from January to October 1942. There are also shorter one turn scenarios simulating the major convoy battles of the 1942 campaign: Second Sirte, Harpoon/Vigorous (Battaglia di Mezzo Giugno, “Battle of Mid June” for the Italians), or Pedestal (Battaglia di Mezzo Agosto, “Battle of Mid August”).
Aragón 38 for SNAFU Team is also in development. Nils Johansson is working on the graphics aspect (map, counters, play aids and cover). It uses an evolution of the Santander ’37 System. While in the Santander campaign we have Brigade-sized units attacking across a mountain range, using speed, firepower and infiltration to overcome the Republican defenses, in Aragon we have a “push” of several Army Corps operating together, with front collapse followed by exploitation, consolidation and conquest of several bridgeheads as bases for future offensive operations. So we had to adapt the system to better simulate that campaign. Bonsai Games from Japan will publish my game Assault on Europe 1943, covering land operations in the Mediterranean Theatre in 1943, from Tunisia to Sicily and Southern Italy. The Allied player can decide whether to land in Corsica and Sardinia before Southern Italy. Rules simulate the painful US Army learning curve (from being called in Tunisia “our Italians” by the British, to a much better performance in Sicily and Southern Italy) and the surrender/collapse of the Italian army (operation Achse). After publishing Red Partisans for Paper Wars, I am working on a small unit game of the fight around Kyiv in February 2022. It is still in a very early design stage.
Thanks for your time Javier in answering our questions as I know you are a busy man and obviously have lots of interesting gaming subjects on your design table. I am very interested in this one, as the American Revolution is one of my favorite gaming topics.
We have interviewed the venerable designer Ty Bomba on numerous occasions over the 10-year life of the blog. In fact, I counted up the interviews and to date we have done 18 total! Wow but the last one we did was in January 2023 and we have just not had him on since. No reason for that other than I have been busy with other games. But recently I saw from War Diary Publications that they were printing one of his What If? style alternative history games called Rommel in Italy, 1943-1944: A Counter-Factual Simulation, which supposes Field Marshal Erwin Rommel had taken command of German forces in Northern Italy rather than being sent to help with the defense of France against the expected Allied invasion. I reached out to Ty and he was more than glad to give me some more information.
Grant: What is your upcoming game Rommel in Italy about?
Ty:Rommel in Italy, 1943-1944: A Counter-Factual Simulation allows 2 players (or one playing 2-hand solitaire) to investigate the strategic and operational potentials that would have been in place across northern Italy from September 1943 through May 1944 if Hitler had left Field Marshal Erwin Rommel in charge there rather than Kesselring. Rommel advocated for immediately pulling back to a shorter, easier to defend, position at the south edge of the Po Valley rather than trying to fight it out farther south, with both the German’s flanks exposed to possible encirclement via Allied amphibious end runs. In effect, it put the Allies into a strategic position that historically they did not achieve until a year later. The question then becomes can they keep up that kind of advance into and across the Alps.
Grant: Why was this a subject that you wanted to design a game around? What assumptions about history did you take into account?
Ty: Historically, we had 2 of Germany’s best field commanders, Rommel and Kesselring at complete odds with each other over theater-level strategy. Kesselring felt confident the Allies would not achieve a level of operational efficiency that would allow them to effectively exploit the supremacy in the seas along both of Italy’s coasts. History showed that he was correct in that assessment, but Rommel’s transfer to France was not a sure thing. Hitler actually tried to send him back to Italy, to take full charge there, shortly after Rommel had gotten on a plane to fly to France. Radio communications temporarily failed, and by the time Hitler’s communications people got that all sorted out, the dictator had again changed his mind and kept Kesselring in place.
Further, the fact Kesselring was shown to have been correct does not mean Rommel was necessarily wrong – and there’s a fun-to-play wargame inherent in that iron.
Grant: What is important from the overall period and setting to model in the game?
Ty: The opening of the campaign, in September 1943, is filled with opportunity – but also fraught with peril – for both sides. At the start of play, there are only a few German garrison units in the far north of Italy, while the 10 (mostly elite) divisions of their Tenth Army start off-map to the south, where they just received Rommel’s order to run north. There are no Allied units setup on the map at all. They enter on the south edge during the first turn, and both players operate using the sequence below.
5.3 Allied Reinforcement & Replacement Phases
During these phases, the Allied player may bring onto the map newly arriving units and reclaim into play units that had been previously eliminated in combat. This phase is skipped on Turn 1.
5.4 German Reinforcement Phases
During these phases, the German player may bring onto the map newly arriving units and reclaim into play units that had been previously eliminated in combat. This phase is skipped on Turn 1.
5.5 Movement & Combat Sequence Determination Phases
In each of these phases, excluding that of Turn 1, the Allied player openly declares whether that turn’s movement phase or combat phase will be taken first. On Turn 1 the sequence is always the movement phase followed by the combat phase.
5.6 Alternating Actions Movement or Combat Phases
Always starting with the Allied player, the two players alternate either launching one attack or moving one unit, depending on whether the present phase is movement or combat. Individual attacks may have more than one attacking unit in them, but moves are always made one unit at a time. The unit(s) committed to those “actions” are, upon their completion, flipped over to show their disrupted sides. If a player does not actually want to make an attack or a move when it is his time to do so, he must flip one unit to its disrupted side, just as if it had moved or launched an attack: no “passing” is allowed.
5.7 Movement or Combat Recovery Phases
A movement or combat phase continues as described above until both players are out of undisrupted units or both agree they want to end the phase. If one player runs out of undisrupted units before the other, the player with remaining undisrupted units may go ahead and complete whatever actions he wants to perform with them within normal strictures, but now uninterrupted by having to pause to allow the opposing player to take an action. When a combat or movement phase is ended, both players should cooperatively turn over all disrupted units on the map so their undisrupted sides are and showing.
5.8 German Supply Check Phases
In each of these phases, both players should cooperatively look over the map to find if there are any German units out of supply. Each such unit is immediately removed to the dead pile.
5.9 Allied Supply Check Phases
In each of these phases, both players should cooperatively look over the map to find if there are any Allied units out of supply. Each such unit is immediately removed to the dead pile.
5.10 Ending & Starting Turns
Each time a Allied Supply Check Phase has been completed, advance the Turn marker one box on the Turn Track printed on the mapsheet and start a new turn with Phase I.
On the first turn, the Allied player has a relatively open front before him. If he can exploit that to get into the Po Valley quickly, he will move the strategic timetable significantly forward of the historic one. However, as he’s moving onto the map, so too it German Tenth Army. Depending on how bold both players are, it is not unusual to see pockets form inside other pockets.
Grant: How has this design changed since its original publication in 2021 in Banzai Magazine under the title Rommel’s Last Stand: Italy 1943-44, What If?
Ty: The new publisher has fixed the (scant) errata from the first (bilingual) Japanese edition from Banzai Magazine. They have also taken all the Japanese off the map and out of the rules, presenting everything fully in English. Other than the removal of those irritants, it is the same game.
Grant: What is the scale and force structure of units used for this design?
Ty: Each hex on the map equals 5 miles (8 km) from side to opposite side. Each full turn represents 2 weeks to 2 months, depending on the time of year. Every ground unit represents a regiment, brigade or division of about 2,500 to 12,000 men and/or 50 to 350 armored fighting vehicles.
Grant: How many maps are used in the game?
Ty: There is 1 large-hex based 34×22” map showing Italy north of the line of the Arno River to Ancona.
Grant: What is the anatomy of the counters?
Ty: The units are standard-classical in their data presentations, except their movement factors are not printed on them. All Allied units have (supplied) MF’s of 16 throughout the game, while the German MF’s are as follows.
German Mechanized Units Turns 1-6 – 16 MF’s
German Non-Mechanized Units Turns 1-6 – 8 MF’s
German Mechanized Units On Turns 7-10 – 12 MF’s
German Non-Mechanized Units On Turns 7-10 – 6 MF’s
Grant: What sources did you consult for the Order of Battle?
Ty: The Armies of Rommel by George Forty was an excellent source for the subtleties in the initial German Order of Battle. Beyond that, I pulled the roughly half-dozen historical Italian campaign games off my shelves and pulled information out of them. This is one of the most thoroughly simulated campaigns in the hobby, going all the way back to Avalon Hill’s Anzio, so I was not looking to find any heretofore undiscovered anomalies in either sides’ OB. The uniqueness in this game’s treatment of it comes from the changed strategic context combined with the tension inherent in the turn sequence, which requires both players to remain alert for sudden danger or fortuitous opportunities all throughout its play
Grant: How does combat work?
Ty: Combat is always voluntary and, when viewed on a battle-by-battle basis, is standard/classical odds ratio using a six-sided die.
Grant: What are the victory conditions?
Ty: Operating in conjunction with the alternating-actions turn sequence, the victory conditions are a further element I used to keep both players on the edges of their seats at all times. See below.
4.1 In General. The Allied player is on the offensive, trying to win by advancing fast enough to cause a major disruption to the historic timeline.
4.2 Allied Victory During 1943 Turns. If Phase 9 of Turn 1 or 2 or 3 or 4 ends with Venice or Milan or Trieste, or any one or more of the four German supply source hexes, occupied by an Allied unit or stack, that game ends at that time in an Allied victory.
4.3 Allied Victory During 1944 Turns. If Phase 9 of Turn 5 or 6 or 7 or 8 or 9 or 10 ends with any one or more of the four German supply source hexes occupied by an Allied unit or stack, that game ends at that time in an Allied victory.
4.4 German 1943 Sudden Death Victory. If any movement or combat phase of a 1943 turn ends with the German player having gained control of the containing the Allied Amphibious Invasion Beachhead marker, the games ends in a German victory at that time.
4.5 German 1944 Sudden Death Victory. If any movement or combat phase of a 1944 turn ends with one or more German units in any hex(es) on the south map edge, that game ends in a German victory at that time.
4.6 German End-Game Victory. If Phase 9 of Turn 10 ends without the Allied player having achieved a victory, the game ends at that time in a German victory.
The “White Dragon Game Designer” dressed as a samurai.
Grant: What are you most pleased with about the design?
Ty: As I mentioned above, the Italian campaign has been one of our hobby’s most thoroughly plowed fields for decades. Despite that, I believe I have offered a new experience with it here. Players will get a new slant on it, one that operates within the broad parameters of the war’s historic decision-making, but that is also tense and entertaining for both commanders.
I also hope its appearance in an easily available all-English edition may lead this and other publishers to look into acquiring the rights to other of my designs that have so far appeared only in East Asia (where I am affectionately known as the “White Dragon Game Designer”). I have done several games that have been well-received there, but are barely known here in the West.
Grant: I know you are a busy man with game design projects as well as editing for various wargame magazines but what other games are you currently working on?
Ty: I am presently working on this alternative history design, which is scheduled to appear in World at War No. 130, called Stalin’s Missed Opportunity: What If He Invaded Romania in May 1940?.
Following the successful deployment of missiles on Cuba in 1962, the Communists gained much ground in Latin America. Western Europe became less convinced of American commitment to defend the continent. This led to the NATO alliance being dissolved and replaced by a neutral bloc.
America was now alone!
Live Free or Die is an alternate history simulation of battles associated with a Communist invasion of continental USA. Live Free or Die is a game set consisting of three independent games:
Asian Invasion captures the Peoples’ Asian Alliance landings in California;
Remember the Alamo covers the Organization of Central American States drive into Texas; and
Southern Discomfort focuses on a Warsaw Pact invasion of Florida, Georgia.
The Basic Game focuses on ground combat, providing a quick, entertaining game. The Advanced Game introduces air and naval units as well as additional specialized units like cruise missiles, laser defenses and political troops. And beware, there are rules for nuclear, biological and chemical warfare!

 Anmelden