 Anmelden


Wargame Watch – What’s New & Upcoming – September 2026
The year is quickly fading as we are nearing the start of the 4th quarter of 2026. Man the year has just gone by so quickly and I still have so many great games awaiting us to give them the attention they deserve. But there are always new games and they are also equally deserving. This month, I was able to find 19 games to share (including 6 games from our sponsor). I was also able to find 3 games being offered on Crowdfunding through Kickstarter and Gamefound.
If you missed the August Wargame Watch, you can read that here at the following link: https://theplayersaid.com/2026/08/03/wargame-watch-whats-new-upcoming-august-2026/
Again this month, we have a sponsor for the Wargame Watch post in Neva Game Press. This is Neva’s 3rd time sponsoring this post and they are very busy as they have a ton of new games upcoming. Neva Game Press is a new publisher who appeared on the scene 2 years ago. When I started seeing their posts on Twitter and Facebook, I was immediately impressed with their interesting topic choices for their upcoming games as well as the fact that they are trying to make small footprint wargames that pack a punch. And the art is also very appealing and brings an aesthetically pleasing and attractive look to their games!
Big Experiences, Small Footprint: New from Neva Game Press

At Neva Game Press, we believe great games don’t require massive boxes. Our ‘Hardcover Book’ box policy delivers premium components and deep, innovative mechanics in a shelf-friendly format—without compromising playability. We recently rebranded from Neva Wargames to Neva Game Press to reflect our expansion into thematic titles, though our commitment to wargaming remains stronger than ever.
End-of-Year Releases
We are closing 2026 on a high note with two major releases. After the rapid sell-out of Iwo Jima: Hell on Earth—the first volume of our Blind Valor Series—we are thrilled to bring it back as a Revised Edition, and we are grateful for the community’s support. We are also releasing an Iwo Jima: Hell on Earth Update Kit for owners of the original 1st Edition. Finally, we are launching our new tactical wargame, Peking: 55 Days of Fury—the first volume in our Breach Point Series.
Peking immerses 1–2 players in the 1900 Boxer Rebellion for a tense, 90-minute experience. Whether defending the International Legations or leading the attack, you’ll need to master our unique fog-of-war mechanic and hybrid system (featuring event cards and operation points split into two phases) to secure victory.
You can pre-order these titles via our Pre-orders section at the following link: https://nevagamepress.com/pre-order/
Looking Ahead to 2027
Our commitment to the community continues with an ambitious slate for 2027, featuring: Valls: Battle of the Goi Bridge, Spartacus: Rome under Threat, 1806: The Elbe Campaign and Reformation: Fire and Faith.
Discover all the details on our Upcoming Releases page: https://nevagamepress.com/upcoming-releases/
Pre-Order
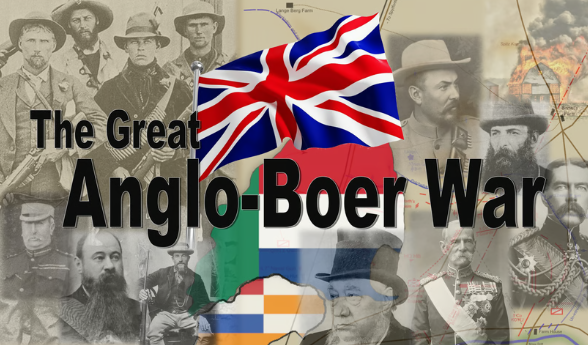
1. The Great Anglo-Boer War: The Battle for South Africa 1899-1902 from Cadet Games Currently on Kickstarter
A few years ago, I came across this interesting looking wargame from a new company Cadet Games called They Were Soldiers: Battle of the Ia Drang Valley that was heading to Kickstarter at the time. The game was a 2-player turn-based operational level design based on the battle for LZ X-Ray during the larger Battle of the Ia Drang Valley in Vietnam, 1965. Since that successful campaign, Cadet has designed and completed several other successful campaigns including Nguyen Hue ’72: The 1972 Easter Offensive in Vietnam, Linebacker II: The Historic B-52 Strikes Against North Vietnam, Armies & Alliances: Arnhem ‘44 – Operation Market Garden and Armies & Alliances: Blitzkrieg ’40 – The Battle for France.
They recently announced their next Kickstarter project that would take their system to the Anglo-Boer War called The Great Anglo-Boer War: The Battle for South Africa 1899-1902. The game is currently on Kickstarter and appears to be a very important addition to the many games on the period.
From the game page, we read the following:
The Great Anglo-Boer War is a grand-strategic level game of the war between the British Empire and the Boer Republics in South Africa from 1899 to 1902. The Boers were armed like no other adversary the Empire had ever faced. By October 1899, war had become inevitable—and both sides were equipped for the first ‘modern’ conflict. Both sides had rifled breech-loading artillery, machine guns, bolt-action magazine rifles, trenches, barbed wire, and more.
The war started as a conventional contest but morphed into the first modern guerrilla war of the 20th century. In the end, the Empire overwhelmed the Boers, but by 1910 all of South Africa (including the contested republics of 1899) was granted self-government as a Crown Dominion, with Louis Botha as the Prime Minister. The Boers can be said to have lost the war but won the peace. A fascinating bit of history but an even more interesting study in military history.
The game places you in the position of the military commanders of both armies. Political events are largely beyond your control, but may influence what you are allowed to do. There are three scenarios – the Conventional War, the Guerrilla War, and the Grand Campaign Game. The full campaign is THE ULTIMATE BOER WAR EXPERIENCE – from the first desperate siege defenses of 1899 to the treaty of Vereeniging (or maybe not?) – and everything tactical and otherwise in between. Battles, blockhouses, farm-burnings, evasions, escapes, raids, concentration camps, sieges, drives, armoured trains, 1-pdr automatic “pom-poms”, surrenders, entrenchments, typhoid, barbed-wire, native spies, night marches, supply wagons and more. If it was part of the real Boer war – it is in the game. If you know about the war – this is the one you’ve been hoping someone would make, and if you are learning about it – this IS THE GAME for that. With a 44×34 map at 9 miles/hex scale, monthly game turns and an accurate order of battle, this is a game that truly does justice to the topic.
We published an interview with one of the developers named Kevin Talley and you can read that at the following link: https://theplayersaid.com/2026/08/31/interview-with-kevin-talley-developer-for-the-great-anglo-boer-war-the-battle-for-south-africa-1899-1902-from-cadet-games-currently-on-kickstarter/
If you are interested in The Great Anglo-Boer War: The Battle for South Africa 1899-1902, you can back the project on the Kickstarter page at the following link: https://www.kickstarter.com/projects/647106057/the-great-anglo-boer-war?
As of September 1st, the Kickstarter campaign has raised $7,389 toward its $12,900 funding goal with 86 backers. The campaign will conclude on Tuesday, October 20th at 1:38pm EDT.
2. Combat! Vietnam from Compass Games
This month we had another pretty big downloading of new pre-order games from Compass Games that I have affectionately referred to in the past as “Pre-Order Palooza”. This one was not their normal 6-10 new titles but there were 4 new games offered and they all looked very good. The first game that I am highlighting here is the next volume in the highly thought of Combat! Series of solitaire wargames. These games represent man to man combat where typically each of the counters on the board represent a single soldier. They have focused exclusively on World War II previously but now they have announced this new game set during the Vietnam War called Combat! Vietnam. I have yet to play any of the previous volumes in the series, even though I own 4 of them, but they are high on my want to play list and I am very much interested in this system because I love Tactical level games, very much enjoy man to man combat in games and also enjoy games that are set in during the Vietnam War.
From the game page, we read the following:
Combat! Vietnam is a stand-alone solitaire game of man-to-man combat in the Vietnam War, covering the years from 1965 to 1972. This game depicts the countless small actions that were fought during those years, with the player commanding a squad of American, Communist, or South Vietnamese soldiers. In the 11 scenarios, the fighting rages across the widely varied terrain of Vietnam, from dense jungles to city streets.
The comprehensive Random Scenario Generator (and Campaign Game) further expands your gaming possibilities. With this tool, players can generate a limitless supply of unique scenarios for Combat! Vietnam.
Combat! Vietnam also includes Armor rules, allowing the player to relive iconic scenes such as T-54 tanks charging south during the Easter Offensive or Marine Patton tanks battling through Hué.
If you are interested in Combat! Vietnam, you can pre-order a copy for $105.00 from the Compass Games website at the following link: https://www.compassgames.com/product/combat-vietnam-pay-later/
3. Viking Dawn: A Game of Viking Exploration & Expansion 800-1040 A.D. from Compass Games
The 2nd game from Compass Games today is a good one. And I know that because I have played it. But, our friend Gregory M. Smith is a solitaire game designing genius and has done many of these solo, narrative driven style wargames that we have all enjoyed for hours on end while we have been unable to find an opponent or just because we want to play a game on our timeline. We have interviewed him many times for his games such as Zeppelin Raider, Interceptor Ace, The Hunted, Western Front Ace, Amerika Bomber, Defending America, American Tank Ace, British Tank Ace, Rebel Tide, Sinking Yamato and most recently for a magazine wargame called B-52D Linebacker II. But Greg is a versatile designer and also has done many great 2-player games as well. He always has something cooking in his game design kitchen and recently we spoke with him about his new design with Kevin McPartland called Viking Dawn: A Game of Viking Exploration & Expansion 800-1040 A.D. from Compass Games. I was able to play this 1-4 player game while at the World Boardgaming Championships last month and you can read about my experience at the following link: https://theplayersaid.com/2026/07/27/world-boardgaming-championships-2026-daily-debrief-series-day-3/
From the game page, we read the following:
Viking Dawn is a low-complexity strategic game, with rules for two, three, or four players, each controlling a faction of Vikings (Norse, Swede, Dane, and optionally Geat). Inspired by SPI’s game Conquistador! from the 1970’s, Viking Dawn has exploration, trade (both internal and external), and minor leaders. The game also contains rules for solitaire play with the Danes or Norse.
Faction descriptions:
Norse – closest to the New World, they have the additional advantage of two Explorers, Erik the Red and Leif Eriksson.
Danes – closest to the lucrative raiding and settlement targets of England, they also have the advantage of having several early leaders.
Swedes – although further from England, they are closest to several Russian settlement areas, and river portage routes to the east and Constantinople.
Geats – ostensibly the weakest faction, as they must pay tribute to the Swedes for protection, they have the best trading advantage in the game.
Players compete to raid lucrative settlements and explore the world with longships and warbands. Each faction has named historical leaders, who have an impact on combat and exploration. Players may trade with each other or nonplayer-controlled areas and establish settlements. Includes rules for settlements gaining independence, leader burials, and establishment of the Varangian Guard.
We published an interview with Greg Smith on the blog and you can read that at the following link: https://theplayersaid.com/2026/08/24/interview-with-gregory-m-smith-designer-of-viking-dawn-a-game-of-viking-exploration-expansion-800-1040-a-d-from-compass-games/
If you are interested in Viking Dawn: A Game of Viking Exploration & Expansion 800-1040 A.D., you can pre-order a copy for $54.00 from the Compass Games website at the following link: https://www.compassgames.com/product/viking-dawn-pay-later/
4. Tunnel Rats: The Vietnam War Underground from Compass Games
Game 3 in this month’s mini-Pre-Order Palooza from Compass Games is another very interesting looking game set during the Vietnam War called Tunnel Rats: The Vietnam War Underground. This game is a solitaire game, which I think makes a lot of sense historically and thematically and actually gets me very excited for the possibilities, and I very much look forward to seeing how this one works. I have great hope for this one. The designer is Lisa Smedman who has done several recent popular solo games including Trench Raid.
From the game page, we read the following:
Tunnel Rats is a single-player game set during the Vietnam War. You will control two American “tunnel rats” who have been tasked with exploring an underground tunnel complex created by the Viet Cong. This complex is made up of tiles representing tunnels and underground rooms in which the enemy may be lurking. In this claustrophobic environment, the tunnel rats need to be as quiet as possible to avoid alerting the enemy. Tense firefights and hand-to-hand combat feature a unique initiative system, and encounters are fast and furious.
With a procedurally generated map, nine tunnel rat characters to choose from, and a variety of weapon and equipment load-outs, each “run” will provide a new and dynamic challenge. Your team’s objective will vary, shifting the focus of play depending upon which lieutenant is in command of the team. Tunnel Rats also includes rules for campaign play, allowing surviving tunnel rats to gradually hone their skills over time – if they survive.
Be on your guard, as the tunnel rats never know what they will encounter down in “the black”. It might be a hidden punji stake pit, a Viet Cong command center filled with valuable documents, a venomous snake slithering along a tunnel, or a water trap they must swim through without drowning!
If you are interested in Tunnel Rats: The Vietnam War Underground, you can pre-order a copy for $54.00 from the Compass Games website at the following link: https://www.compassgames.com/product/tunnel-rats-the-vietnam-war-underground-pay-later/?sfw=pass1788184209
5. Against the Reich Deluxe Edition from Compass Games
Game 4 from the Compass Games mini Pre-Order Palooza is a classic hex and counter operational level wargame set in World War II called Against the Reich Deluxe Edition designed originally by Joseph Balkoski.
From the game page, we read the following:
In June of 1944, the world held its breath as land and naval forces of six Allied nations launched the largest amphibious assault ever attempted. The long-awaited second front, the Western Front, was finally open. The Allies had to force the unconditional surrender of Nazi Germany by crossing the great Rhine River into the Reich itself. Adolf Hitler was confident that the battered but undefeated Wehrmacht could hold two enormous fortified zones (the Atlantic and Westwalls) and repulse any attempt to cross into the German homeland. Against the Reich is the first game in years to cover the entire Western Front campaign. The players are in the positions of Eisenhower and Hitler, making the grand decisions that control the course of the campaign.
- A Quick-Playing Simulation: Designer Joseph M. Balkoski, whose specialty is the Western Front, has provided an accurate, realistic simulation that plays like a game. With short and long campaign games, you can choose the length of the simulation.
- Headquarters and Supplies are Realistically Linked: Players must decide where to concentrate their resources. Limited supplies make the placement of headquarters and depots a critical factor in the campaign.
- Choice of Invasion Sites: The Allied player must decide where to invade – do you strike a lightly defended area and accept a long, grinding ground campaign, or strike close to the Rhine and risk quick destruction?
- Historical Overview: Russel F. Weigley, author of Eisenhower’s Lieutenants, the definitive history of the Western Front, has analyzed the strategic options facing Eisenhower and Hitler – and the players.
- Loaded with other Features: A short “Battle of the Bulge” scenario, Second Invasion, Flooding Holland, Port Repair, The Roer Dams, Rail Movement, Mediterranean Front Reinforcements, Amphibious and Airborne Assaults, and much more.
If you are interested in Against the Reich Deluxe Edition, you can pre-order a copy for $54.00 from the Compass Games website at the following link: https://www.compassgames.com/product/against-the-reich-deluxe-edition/
6. Enlightenment Empires: Power and Politics in Eastern Europe, 1725-1795 from GMT Games
One of my favorite parts about historical wargaming is that I get exposed to and am able to learn about some of the more obscure parts of our world’s history. Now you might be saying to me that the subject of power politics in Eastern Europe form 1725-1795 is not obscure and I think that you would be correct if I was from Eastern Europe. But as I am from the United States, this is not a period or locale that we learned much about in grade school. That being said, I am very much interested in this concept and history and am glad to see Brian Asklev taking another crack at a topic that focuses on some of the history from his neck of the woods. When Enlightenment Empires: Power and Politics in Eastern Europe, 1725-1795 was first announced a few weeks ago, I was immediately interested because I do love games where several nations have to compete economically, politically, diplomatically and through force of arms. I also recently played Brian’s Baltic Empires at WBC and very much enjoyed that game and this one appears to be in a similar style and uses the very interesting Dramatis Personae cards to inject historical characters with their abilities into the game play.
From the game page, we read the following:
Enlightenment Empires is an approachable 2-5 player strategy game about conflicts between the states of Central and Eastern Europe region during the Enlightenment era, a transformative period of political upheaval, large-scale warfare, and constant struggles for power. Players will have to develop their economy, decide their internal policies on the ideas of individual liberty and effective governance, secure trade deals and financial assistance within the context of the global rivalry between Britain and France, and finally build armies to become the dominant power of Central and Eastern Europe. Russia, Poland-Lithuania, Prussia, Austria, and the Ottoman Empire will fight for hegemony, using variable victory conditions that reflect their respective historical objectives.
Building on the solid foundation provided by Baltic Empires, highlights of Enlightenment Empires include:
- Five new asymmetric factions with unique abilities and objectives, including a new “Constitution” objective reflecting the pinnacle of Enlightenment political ideals.
- Another highly thematic deck of historical Dramatis Personae to constitute your royal court, now also including random events that can disrupt players’ plans…or present them with new opportunities.
- A simplified, yet still deep and political, economic system that forces players to make tough decisions regarding their state’s internal policies (serfdom, noble privileges, and military spending) and its diplomatic relations to the superpowers of the period, England and France.
- The same streamlined battle system based on custom dice per unit type, now modified by military reforms.
- More detailed minor powers that players may form alliances with.
- Variable player counts (from 2 to 5 players), with scenarios ranging from a tight duel to a tense multiplayer conflict replete with alliances and betrayals.
If there is a word that could define the whole of 18th century, it would be the Enlightenment. The philosophical thought that applied reason to all spheres of life guided the social and political developments of the 1700s, and intellectuals, scientists, politicians, and rulers alike acted either in support of it or against it. And while in Western Europe the republican ideals of enlightenment brought about the French Revolution, in Central and Eastern Europe enlightenment became a tool for state-building for the absolutist monarchs, including the Holy Roman Emperor and Archduke of Austria Joseph II, King Frederick II of Prussia, or Empress Catherine the Great of Russia. The mid-18th century period was formative for these powers, with Prussia and Russia continuing to struggle to establish their dominance in the region, while Austria and the Ottoman Empire fought to preserve their status, and the weakened state of Poland-Lithuania struggled to reform its constitution before meeting an unlucky demise. Three of the traditional “pentarchy“ of Great European Powers (namely, Russia, Prussia, and Austria) were Eastern powers that achieved this status during the 18th century. Their dominance in the region was forged by the work of bureaucrats and reformers, as much as by the soldiers and generals on the fields of the Seven Years‘ War.
Keep in mind that these type of games can sometimes be very complex and have lots of moving parts. And I am not saying that this doesn’t have them but Brian has said that the game is very approachable.
Enlightenment Empires presents these political and military conflicts in a fun and accessible format, while also doing justice to the fascinating history of the region during this period. The game features five asymmetric factions with different strengths, internal political conditions, military forces, and historical objectives, along with the capacity to develop their states by conducting reforms along (or against) Enlightenment ideals, investing in economic infrastructure, and recruiting key historical characters that offer unique game effects. The game also includes several scenarios for variable player counts and durations, offering additional flexibility and replayability.
If you are interested in Enlightenment Empires: Power and Politics in Eastern Europe, 1725-1795, you can pre-order a copy for $79.00 from the GMT Games website at the following link: https://www.gmtgames.com/p-1256-enlightenment-empires-power-and-politics-in-eastern-europe-1725-1795.aspx
7. The Last Hundred Yards Volume 6: The Forgotten Hell from GMT Games
If you didn’t know we really enjoyed The Last Hundred Yards as well as Volume 2: Airborne Over Europe. The system is extremely interesting for a tactical game and uses some novel elements in regards to how victory points are scored including a focus on time to complete missions as well as the casualties incurred. Really an excellent system with lots of crunch and potential! Now, even though there are a total of 5 other volumes that have been released, Mike Denson has forged ahead with the next entry in the series which gives us a look at the operations in New Guinea and the Northern Solomon Islands during WWII with The Last Hundred Yards Volume 6: The Forgotten Hell.
From the game page, we read the following:
The Last Hundred Yards: The Forgotten Hell is Volume 6 in The Last Hundred Yards Series. This game examines the Allied campaigns against Japan in 1942, focusing on U.S. operations on Guadalcanal and Australian fighting in Papua New Guinea.
In New Guinea, Australian militia and the Australian Imperial Force troops fought a brutal and desperate
delayingcampaign along the Kokoda Track from Port Moresby to Buna, Battling through jungle, mountains, rain, mud, hunger, disease, and exhaustion, they resisted repeated Japanese advances and flanking attacks. Their stubborn defense slowed the enemy, shielded Port Moresby, and eventually helped reverse the campaign. At Milne Bay, Australian forces pushed the Japanese back and shattered the belief that the Imperial Japanese Army was invincible.On Guadalcanal, U.S. Marines and Army troops fought equally savage battles, destroying Ichiki’s force at Alligator Creek and later assaulting entrenched Japanese positions around Mount Austen. There, the enemy used caves, rocky ridges, and concealed strongpoints to prolong the struggle.
Together, these engagements reveal the intensity of jungle warfare in the Southwest Pacific, where endurance, small-unit leadership, and relentless attacks under terrible conditions shaped the early Allied offensive against Japan. These actions also showed how terrain, logistics, and morale could decide campaigns as surely as firepower across the battlefields of the Solomons and New Guinea alike.
If you are interested in The Last Hundred Yards Volume 6: The Forgotten Hell, you can pre-order a copy for $47.00 from the GMT Games website at the following link: https://www.gmtgames.com/p-1255-the-last-hundred-yards-volume-6-the-forgotten-hell.aspx
8. Shenandoah: Jackson and Sheridan in the Valley, 1862 – 1864 (Stonewall in the Valley and Sheridan in the Shenandoah) from Multi-Man Publishing
A BIG and well respected American Civil War operational system is what Great Campaigns of the American Civil War (GCACW) is and the newest volume in the series is called Shenandoah: Jackson and Sheridan in the Valley, 1862 – 1864. One of the things that I very much appreciate about this system is the fact that they use some of the best art out there for their covers.
From the game page, we read the following:
Shenandoah: Jackson and Sheridan in the Valley, 1862 – 1864 is the latest design in the award-winning Great Campaigns of the American Civil War (GCACW) Series. It contains both a complete redesign of the Stonewall in the Valley (SIV) game covering Stonewall Jackson’s 1862 valley campaign and a completely new game module Sheridan in the Shenandoah that depicts Sheridan’s 1864 valley campaign. The game is designed by Joe Balkoski (the original GCACW Series creator) and Chris Withers. The original SIV game maps have been upgraded to contain the latest GCACW map features, with map design executed by artist Charlie Kibler—whose work on the series dates to its creation in 1992.
Shenandoah: Jackson and Sheridan in the Valley, 1862 – 1864 uses the latest version of the GCACW Standard Basic Game Rules, which also apply to all other games in the series, and these rules are now printed at an increased 11-point font size instead of 9-point. After more than a quarter-century of refinement, these rules are extremely well organized and relatively easy to learn, even for series newcomers. The Advanced Game rules cover situations specifically applicable to these unique campaigns such as “The Burning” that depicts the desolation of the valley by Union cavalry in 1864.
Stonewall in the Valley includes one new Basic Game scenario, the four original Basic Scenarios rebalanced, and the original Advanced Game campaign scenario extensively revised:
- The Battle of Kernstown (March 23, 1862; 1 turn): Introductory scenario on the battle of Kernstown – ideal for beginners.
- My Last Council of War (March 10 to March 23, 1862; 14 turns): Heavily outnumbered, Jackson moves south from Winchester thru Strasburg to Mt. Jackson. A Union force of three divisions follows to Strasburg while sending two divisions out of the Valley to reinforce McClellan. Jackson races back north and attacks the remaining Union division at Kernstown but loses the battle.
- God Blessed Our Arms at McDowell (April 30 to May 11, 1862; 12 turns): Historically, Jackson moves west from Staunton and causes the Union force at McDowell to retreat north to Franklin. He briefly pursues them but then returns to the Valley. This scenario postulates what might have happened had Ewell’s division and Banks’ two divisions become involved in the McDowell campaign instead of holding fast in their camps in the south of the Valley.
- Rebel Blitzkrieg (May 21 to June 2, 1862; 13 turns): Jackson and Ewell advance north on the Luray Pike and surprise the small Union force at Front Royal. A Union division entrenched at Strasburg to the west belatedly discovers it is in danger of being cut off and just beats Jackson north to Winchester. Jackson defeats the Union at the first battle of Winchester and pursues to Harpers Ferry. Meanwhile strong Union forces are moving in behind Jackson from both the east and the west. Jackson turns south, marching to Strasburg and then Mt. Jackson and barely avoids the trap.
- Our Beautiful Valley Will be Cleansed (June 6 to June 11, 1862; 6 turns); Two Union columns, separated by the Shenandoah River, pursue Jackson south from Strasburg. Fremont’s force engages the Confederates at Harrisonburg and then two days later battles them at Cross Keys. Meanwhile Shields’ division advances into Jackson’s rear and almost captures his wagon train. Jackson turns his army from Fremont to Shields and defeats Shields in the battle of Port Republic causing both Union forces to pull back north.
- Jackson’s Shenandoah Valley Campaign (March 7 to June 19, 1862; 105 turns): The entire Valley campaign is covered in this scenario. Both sides typically have forces moving all over all three maps in exciting maneuvers and with forces coming and going due to external events. The scenario plays quite fast due to lulls where sets of 5 turns are skipped. The original advanced rules have been simplified, and the scenario has been extensively playtested and re-balanced.
Sheridan in the Shenandoah includes twelve Basic Game scenarios and two Advanced Game campaign scenarios, all extensively playtested:
- Second Winchester (June 13 to June 15, 1863; 3 turns): Ewell’s corps leads the Confederate army thru the Valley to invade Pennsylvania and routed the Union division at Winchester. The Rebels cut off the Union retreat and captured most of the Union division. The route was now clear for Lee’s invasion of the north.
- The Battle of New Market (May 15, 1864; 1 turn): Introductory scenario on the battle of New Market – ideal for beginners.
- Piedmont (June 4 to June 6, 1864; 3 turns): Picking up the after Sigel’s debacle at New Market, Union General David Hunter marches south from Winchester. With Breckinridge, Confederate hero of New Market, aiding Lee at Cold Harbor, defense of the Valley falls to a ragtag collection of troops that are rushed to the area under General W. E. “Grumble” Jones. The forces battle at Piedmont, Jones is killed, the Rebels are routed, and the Union captures Staunton.
- In the Valley Again (July 23 to August 5, 1864; 14 turns): Early’s army moved back into the Valley in mid-July after retreating from the outskirts of Washington, D.C. On July 23, Confederate scouting revealed that Early was only opposed by Crook’s forces and not the VI and XIX corps, which had returned to D.C. Early attacked Crook at Kernstown and routed the Union forces which retreated across the Potomac. Confederate infantry destroyed the B&O RR at Martinsburg and threatened to invade north. Two Confederate cavalry brigades advanced north towards Chambersburg, burned it, and were chased by 2 Union cavalry divisions. Meanwhile, the VI and XIX corps had been recalled to the Valley, but then along with Crook’s force, moved east to protect against an assumed invasion again by the Confederates. The Union force soon countermarched back to Harpers Ferry and the Confederates retreated south.
- Second Kernstown (July 24, 1864; 1 turn): A simple scenario covering the second battle of Kernstown – ideal for beginners.
- Sheridan Takes Command (August 10 to August 14, 1864; 5 turns): Sheridan took command of all forces in the region on August 7th. His orders were “wherever the enemy goes let our troops go also”. The plan was to trap the Confederate infantry in the northern valley, but Early knew the danger and moved south just ahead of the Union. Both sides marched rapidly south until the Confederates setup a strong line at the Fisher’s Hill. Sheridan prepared to attack but halted his plans when a strong force under Anderson entered the Valley at Front Royal.
- You Must Be Cautious (August 17 to August 21, 1864; 5 turns): With the Union infantry camped along Cedar Creek and the Confederates entrenched in a strong line at Fisher’s Hill just to the south, Sheridan learned of the approach of Kershaw’s division. This elicited a new directive from Grant warning Sheridan he “must be cautious and act on the defensive until movements … force them to detach” troops. Therefore, Sheridan conducted a night march to Winchester. From there the Union briefly defended at Berryville and then at Charlestown. The Confederates pursued and eventually tried to bring on a battle at Charlestown. However, Sheridan was cautious and followed the new defensive strategy and disengaged to retreat into a strong, compact line at Halltown, just in front of Harpers Ferry.
- Third Winchester (September 19, 1864; 1 turn): This scenario depicting the third battle of Winchester is only one turn but still features lots of maneuver and combat.
- From Winchester to Fisher’s Hill (September 19 to September 22, 1864; 4 turns): This scenario encompasses two significant battles in the valley campaign. The Union army attacked the Confederate defensive line just east of Winchester and eventually drove the Rebels back to Winchester. This final Confederate line collapsed, and they retreated south all the way to a formidable defensive position at Fisher’s Hill, just south of Strasburg. The Union pursued and then rolled the west flank of this line and routed the Confederates.
- Early’s About Played Out (September 23 to September 26, 1864; 4 turns): After the battle of Fisher’s Hill the Confederates retreated south. The Union pursued with their entire army, but the action for the next few days was limited to cavalry and rear-guard skirmishes. The Confederates safely made it to Brown’s Gap, while the Union infantry stopped at Harrisonburg and Union cavalry started burning the countryside.
- Tom’s Brook (October 9, 1864; 1 turn): This solitaire scenario is filled with cavalry action and is an excellent learning scenario for beginners.
- The Battle of Cedar Creek (October 19, 1864; 1 turn): While this is only a 1-turn scenario it is filled with the action that took place in the battle of Cedar Creek. The Confederate player starts with a Night March and a Surprise Attack. The Union responds with a special “Sheridan’s Ride” action to enable counterattacks.
- Sheridan Moves South (September 19 to October 20, 1864; 32 turns): This scenario spans the battles in the campaign from when Sheridan attacked the Confederates at Winchester, to when the Confederates were defeated at the battle of Cedar Creek. This campaign can be easily played in a weekend.
- The Last Valley Campaign (July 21 to October 20, 1864; 92 turns): This scenario encompasses the entire campaign from when Early’s army returned to the Valley after his raid on Washington, to when he was defeated at the battle of Cedar Creek. There is maneuver and combat all over all three maps in this scenario. The action often starts with a Confederate offensive and advance to the Potomac. The Union then gets significant reinforcements to launch counteroffensives.
If you are interested in Shenandoah: Jackson and Sheridan in the Valley, 1862 – 1864, you can pre-order a copy for $75.00 from the Multi-Man Publishing website at the following link: https://mmpgamers.com/shenandoah-jackson-and-sheridan-in-the-valley-1862-1864-p-470
9. Okinawa: The Last Battle of WWII Reprint from Best with 1
I love a new and interesting way to tell the story of a key battle and I found a very interesting one called Okinawa: The Last Battle of WWII from Best with 1 earlier this year. This is a solitaire only game and for each game the player will draw four objectives from a possible 12 that you must survive and capture before time runs out. On your turn, the player will roll special dice and then spend those to take actions such as movement, attack and take special actions from different unit action cards that will be set up in a square from from 1 to 10. The numbers coincide with the dice of the attacking Japanese and as the player moves through the rondel they will be able to activate and use their different soldiers to attack the Japanese defenders or use their special abilities to gain tokens that can be used for rerolls or healing of wounds
I think that the best part of the game is the concept of resource management as you have to use the dice appropriately to move and fight and also to manage your troops as you can upgrade certain cards as you pass the midway point of the round as well as when special actions are granted via the special resource chits. Upgrading units is very important as this will unlock things like heavy weapons in the form of bazookas, a Sherman tank and planes to be able to take out the Japanese armor units defending the island. The game is about efficiency of movement and doing the most with what you have. The dice determine what you can and can’t do and movement is optional as you don’t have to move unless you feel it is advantageous. But remember, that you have to defeat the defenders and the various objectives to be able to advance to your final objective and sitting in one space too long is not advisable.
The different units have various functions including attack, such as the Rifleman, Machine Gun Team and Sniper but also have secondary functions to remove the fog of war, heal your damaged units or gain additional resources. The Japanese defenders are well hidden and also have various defenses such as pill boxes and caves that will require the player to defeat these before moving to attack the units located inside.
In the end the game is about defeating the Japanese defenders while doing so in a set amount of revolutions around the rondel setup. This can be as few as 2 times around or as many as 4 and knowing when to use your resources to reroll your dice, as you either didn’t get the run of consecutive numbers you were looking for or just need a specific number, you will run out of resources quickly and you must plan them out as best you can to win the game. This one is really fun and I have played it about a dozen times winning about 70% of the time. The game plays in about an hour and the action is fast and furious and you are immediately beset by the staunch Japanese defenders and must act quickly.
Here is a link to our unboxing video:
Here is a link to my playthrough video:
Here also is a link to my video review:
If you are interested in Okinawa: The Last Battle of WWII Reprint, you can pre-order a copy through the Hero Bound Gamefound Campaign on the Add-Ons page found at the following link: https://gamefound.com/en/projects/gabe-barrett/herobound-solo-game-of-the-month#/section/addons
You do not have to buy the Hero Bound game but can order the game as an Add On.
10. Tank Clash: Eastern Front from Ameba Games
I love to highlight these little campaigns that I find on Kickstarter and this month there is a new company, or at least that I am not familiar with, called Ameba Games that is offering a small game called Tank Clash: Eastern Front. This games appears to be the 2nd game in the series with the 1st being called Tank Clash: Western Front.
From the game page, we read the following:
Tank Clash is back with new iconic World War 2 tanks!
The Red Army is spearheaded by the powerful Soviet armoured units like the T34, SU100 and IS2. Germany pins its hopes on the last of the panzer divisions to halt the Soviet advance. The Wehrmacht fields its fearsome tanks like the Stug III, Nashorn and Tiger II for the coming battle.
The stage is set for the largest clash of late-war heavy armour.
Tank Clash: Eastern Front is a standalone tactical tank warfare game for 2 players, designed for both newcomers and seasoned strategists. Easy to learn yet rich in tactical choices, it combines its signature checkers-style armour tracking system with dice rolling and hand management for intense skirmish battles.
Already own Tank Clash: Western Front?
Built with modularity in mind, Eastern Front is fully compatible with its predecessor. Combine both games to command 12 unique tank types across expansive battlefields with up to 4 players. Eastern Front’s new features – including new missions, battlefield tokens, event cards and enhanced gameplay elements can also be incorporated into Western Front for an even richer combat experience.
I know what you might be thinking, as the art is a bit cartoony, but I am going to give this one a chance. I think that any wargamer likes to use tanks and this one appears to be focused on these metal monsters and I am going to give it a go. Plus the components are really nice, including some very well made poker chips that are used on the board, and frankly the price of $40 is probably worth what you re getting.
If you are interested in Tank Clash: Eastern Front, you can back the project on the Kickstarter page at the following link: https://www.kickstarter.com/projects/ameba/tank-clash-eastern-front
As of September 1st, the Kickstarter campaign has funded and raised $9,054 toward its $3,928 funding goal with 108 backers. The campaign will conclude on Wednesday, September 16th at 9:00pm EDT.
New Release
1. A Hellish Fight: The Battle of Fort Sumter – 1863 from High Flying Dice Games
I love lesser gamed subjects. Or even sometimes games that have never seen the light of day and never touched certain subjects. It is always nice to play something unique and interesting while learning new parts of history. High Flying Dice Games does this exceptionally well as they have made their living on doing lesser (or even totally) unknow battles in their small format games. This month they have released a game that focuses on the 2nd siege of Fort Sumter in Charleston, South Carolina in 1863 called A Hellish Fight: The Battle of Fort Sumter – 1863. This one looks pretty interesting and appears to focus on the iron clad battles and bombardment of the ruins of the fort that were still held by the Confederates.
From the game page, we read the following:
Following the capture of Fort Wagner on September 7th, and the protracted bombardment of Fort Sumter by the Union navy’s ironclads as well as army land batteries, an assault to take the fort’s ruins was planned. Admiral Dahlgren and General Gilmore both felt that securing Fort Sumter’s capture would not only lead to Charleston’s surrender, but send a clear signal that the Confederacy’s days were numbered.
If you are interested in A Hellish Fight: The Battle of Fort Sumter – 1863, you can order a copy for $18.95 from the High Flying Dice Games website at the following link: https://www.hfdgames.com/sumter.html
2. Guadalcanal: The Battle for Henderson Field, Oct 23-26, 1942 from Dan Verssen Games
The Valiant Defense Series designed by David Thompson has been one of my favorite solitaire wargame series of the past nearly 10 years. Each of the volumes in the game address very specific situations and always have a very interesting take with fun mechanics, great art and fantastic production. The torch for the series though has been passed to a new designer in Vincent Cooper. He has designed Volume 5 Guadalcanal: The Battle for Henderson Field, Oct 23-26, 1942 and it has finally fulfilled off of Kickstarter.
From the game page, we read the following:
Take command of the valiant Marines of the 1st Marine Division, supported by Soldiers of the 164th Infantry Regiment, desperately defending Henderson Field against waves of Japanese troops. Guadalcanal: The Battle for Henderson Field is a solitaire and cooperative tactical wargame published by Dan Verssen Games (DVG) as Volume V in the Valiant Defense Series.
Here is a bit of a designer diary/commentary from the designer Vincent Cooper:
This all started about 3 1/2 years ago when I first played Pavlov’s House. I say played. I ‘played’ the game for about 10 minutes…and then I sat there in stunned disbelief at how a game could be sooooo good!!!!
By the time I finished there were two very clear ideas for games fully formed. I contacted DVG to see if there was any interest and they put me in touch with David Thompson. I didn’t hold much hope. There was no reason for him to trust his IP to me, a person he didn’t know.
But I gave it a try and David, it turns out, is one of the nicest people you can ever come into contact with. After some back and forth, the idea for Guadalcanal – The Battle for Henderson Field was born (not, in fact, one of the original ideas, but we’ll see what the future holds for them…).
The game has been through various stages of development and now stands ready to KS!!
Art by the supremely talented Nils Johansson
Thank you to all the play testers, and in particular Glenn Saunders, Shane Freshwater and Martin Fenwick Charlesworth
We published an interview with the designer Vincent Cooper on the blog and you can read that at the following link: https://theplayersaid.com/2024/07/29/interview-with-vince-cooper-designer-of-valiant-defense-series-volume-v-guadalcanal-the-battle-for-henderson-field-oct-23-26-1942-from-dan-verssen-games-coming-to-kickstarter-july-30th/
If you are interested in Guadalcanal: The Battle for Henderson Field, Oct 23-26, 1942, you can order a copy for $79.99 from the Dan Verssen Games website at the following link: https://dvg.com/products/guadalcanal?_pos=1&_psq=Guadalcanal&_psid=70d962a51&_ss=e
3. Road to the Rhine from Compass Games
A few years ago, Road to the Rhine designed by Frank Chadwick was announced and it is now ready to ship.
From the game page, we read the following:
In the cataclysmic battle of the Falaise Pocket, the Allied forces defeated the German army and drove them back across France in disorder. In the south of France, American and French troops of the 6th Army Group have stormed ashore and driven the remnants of the German 19th Army north toward the border.
Road to the Rhine covers the Allied pursuit of the German Army following the Normandy breakout through fierce fighting at the West Wall and bridging the Rhine River. The campaign game covers the period from September 1944 through April 1945, while separate shorter scenarios include Operation Market-Garden and the Battle of the Bulge. The game includes two battle games (one-turn scenarios), two longer scenarios, and one full campaign game. The game also includes extensive designer notes from original game designer Frank Chadwick and a historical play-through of the Bulge battle game.
Road to the Rhine is another classic by Game Designers’ Workshop, re-mastered by Compass Games. Originally designed by Frank Chadwick, this edition pays tribute to the classic by honoring the original game system while introducing many enhancements for gameplay purposes. In terms of presentation, we upgraded all components, including completely new full-color maps, new reinforcement and new unit displays, expanded turn and supply tracks, enhanced charts, a rulebook with incorporated errata, and larger counters.
This one does have two 22″x34″ maps but with only 2 countershafts so it is large in scope but not necessarily in scale as it appears to be fairly low counter density. One to keep an eye on though as it is designed by Frank Chadwick and is a remastering of the classis GDW release in 1979.
If you are interested in Road to the Rhine, you can order a copy for $69.00 from the Compass Games website at the following link: https://www.compassgames.com/product/road-to-the-rhine/
As usual, thanks so much for reading along and sticking with me this month as I navigated through the many websites and game pages looking for new and interesting games to share.
Finally, thanks once again to this month’s sponsor Neva Game Press!
-Grant