La Der des Ders – The War to End War from Hexasim – Action Point 5
La Der des Ders – The War to End War from Hexasim is a 1-2 player slightly abstracted strategic level look at World War I. The game allows the players to relive the First World War at a strategic level, with each player controlling one of the 2 sides either the Entente, consisting of France, England, Russia, Serbia and other minor nations or the Central Powers including Germany, Austria-Hungary, the Ottoman Empire and a few minors. La Der des Ders can also be played solo, with a dedicated solitaire bot called “Athena” who utilizes special Cornflower Cards to make decisions about what technologies to invest in, where to undertake offensives and how to utilize limited resources and reinforcements. Each turn, players gain an amount of Resource Points dependent on what nations are in the war, which they can allocate to different areas to guide their overall strategy. Victory is achieved by launching offensives that drain the morale of enemy nations, forcing them out of the conflict through collapse.
In Action Point 1, we looked at the Game Board, discussing the Collapse Tracks, Trade Tracks, Russian Revolution Track and Naval Control Table and other various on-board tables and offensive spaces. In Action Point 2, we covered the Technology Phase and the Technology Tree and Technological Improvement Boards. In Action Point 3, we examined the Event Cards and how they inject the historical narrative into the gameplay and also alter the conditions of the game. In Action Point 4, we walked through an example of an Offensive and took a look at the combat procedure. In this Action Point, we will simply review the Victory Conditions.
Victory Conditions
In La Der des Ders, there are a few ways to trigger the concept of Sudden Death, which leads to the game concluding and a victor being declared, or to win the game through armistice being signed and then through the accumulation of Prestige Points. Let’s first take a look at what I think is the most common way for the game to come to an end, Sudden Death.
Sudden Death
The game will end immediately in the event of Sudden Death and this Sudden Death can be triggered in three ways. First, if France surrenders, the Central Powers will immediately win the game, second if Germany surrenders, the Entente will immediately win the game and finally if any one side achieves 6 Victory Points then that side immediately wins the game. Really pretty simple. If countries other than France or Germany surrender, such as Austria-Hungary, Russia or the Ottoman Empire, the game will continue although the Production Value of the surrendered country will no longer be included in the sides Resource Points.
Now there is a remote possibility that both sides could trigger Sudden Death at the same time through an attack. Remember, that if the attacker rolls a 1 on their Attack Dice, it will result a Counter Attack and 1 loss on their Collapse Track and if this would cause them to have to surrender as well as inflicting enough hits on their target to reach the end of their Collapse Track, both will Surrender and then neither side will win. But also, this could possibly occur with the play of the Spanish Flu Event, which causes losses to all powers. This is a rare possibility but it can happen.
One of the things that I very much like about this game is the concept of Collapse and the fatigue and weariness of war. World War I drug on for 4 long years and particularly on the Western Front very little ground was actually gained. During the early years of the war in 1915–1916, these advances were measured in mere feet, while later in the war during the campaigns of 1918, particularly in the case of the Hundred Days Offensive, which began on August 8, 1918, the Allies achieved deep, lasting breakthroughs, pushing the Germans back to their original 1914 lines. But the war was a meat grinder, plain and simple, and attacks were made sometimes to keep the war going because High Command demanded action and not necessarily to gain any ground or obtain any key objectives. Resources dwindled, troops dried up as men were shattered, maimed and demoralized to the point of being unable to stand a watch or fight, and nation’s desire for the war to continue faded. I think that at points, one breakthrough or catastrophic loss could have ended the war and this is very well reflected in La Der des Ders as if you are too low on your own Collapse Track and decide to attack because you believe you can finish your opponent you always have a chance of catastrophe and losses of your own while on the offensive.
Armistice
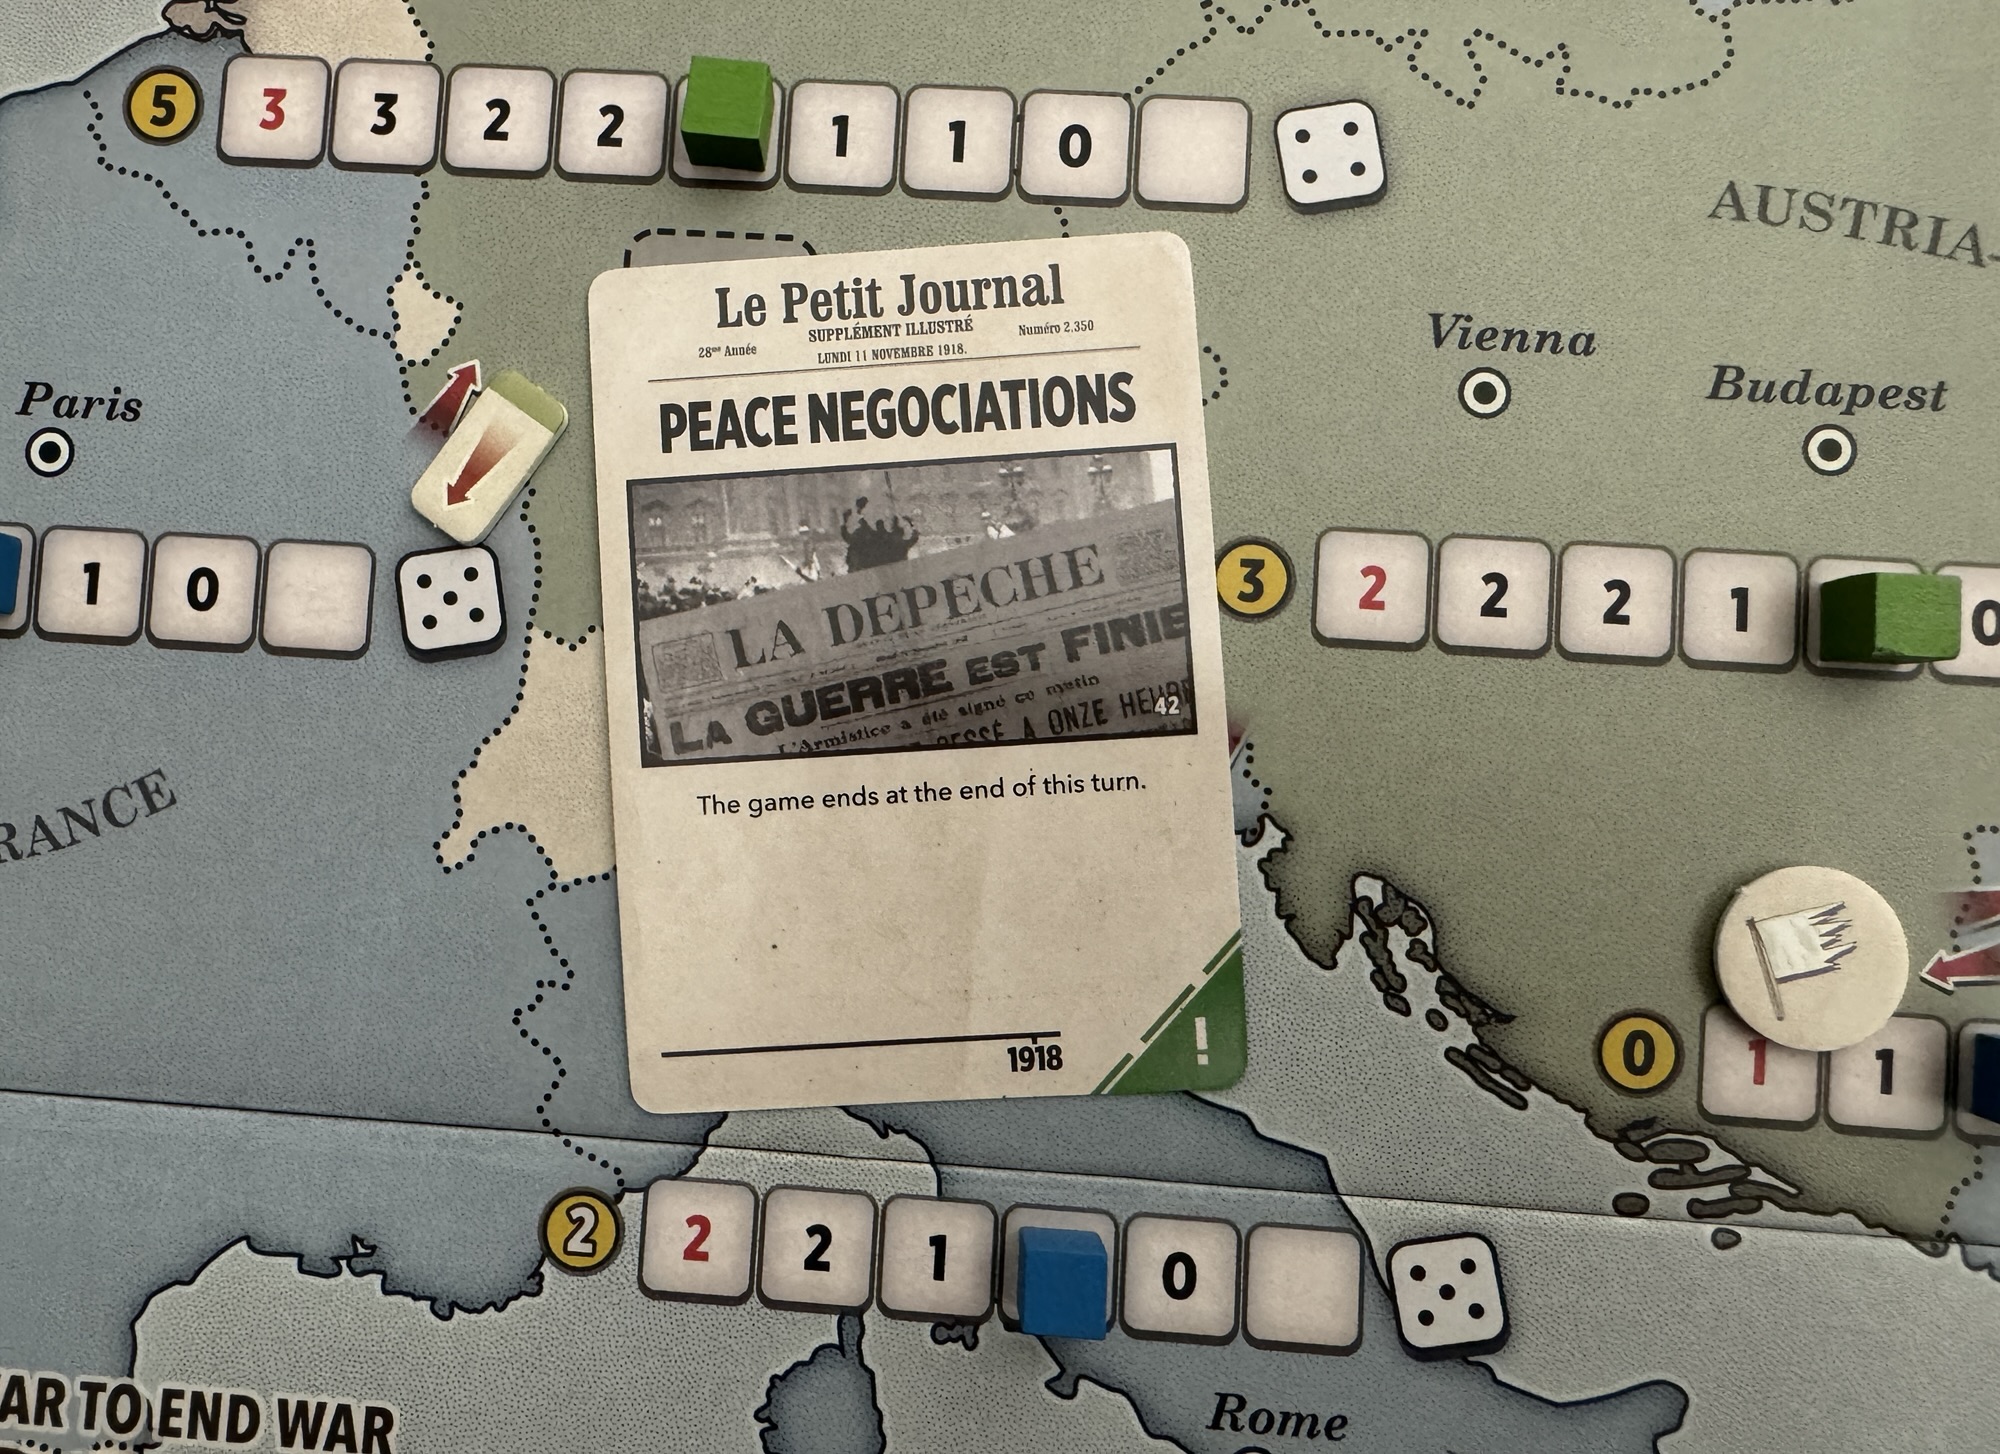
Aside from the Sudden Death ending, the game can end in 2 ways including at the end of the turn during which the Peace Negotiations card was drawn, or at the end of turn 14. In both of these cases, the side with the most Prestige Points is declared the winner. If there is a tie, the Central Powers will win the game.
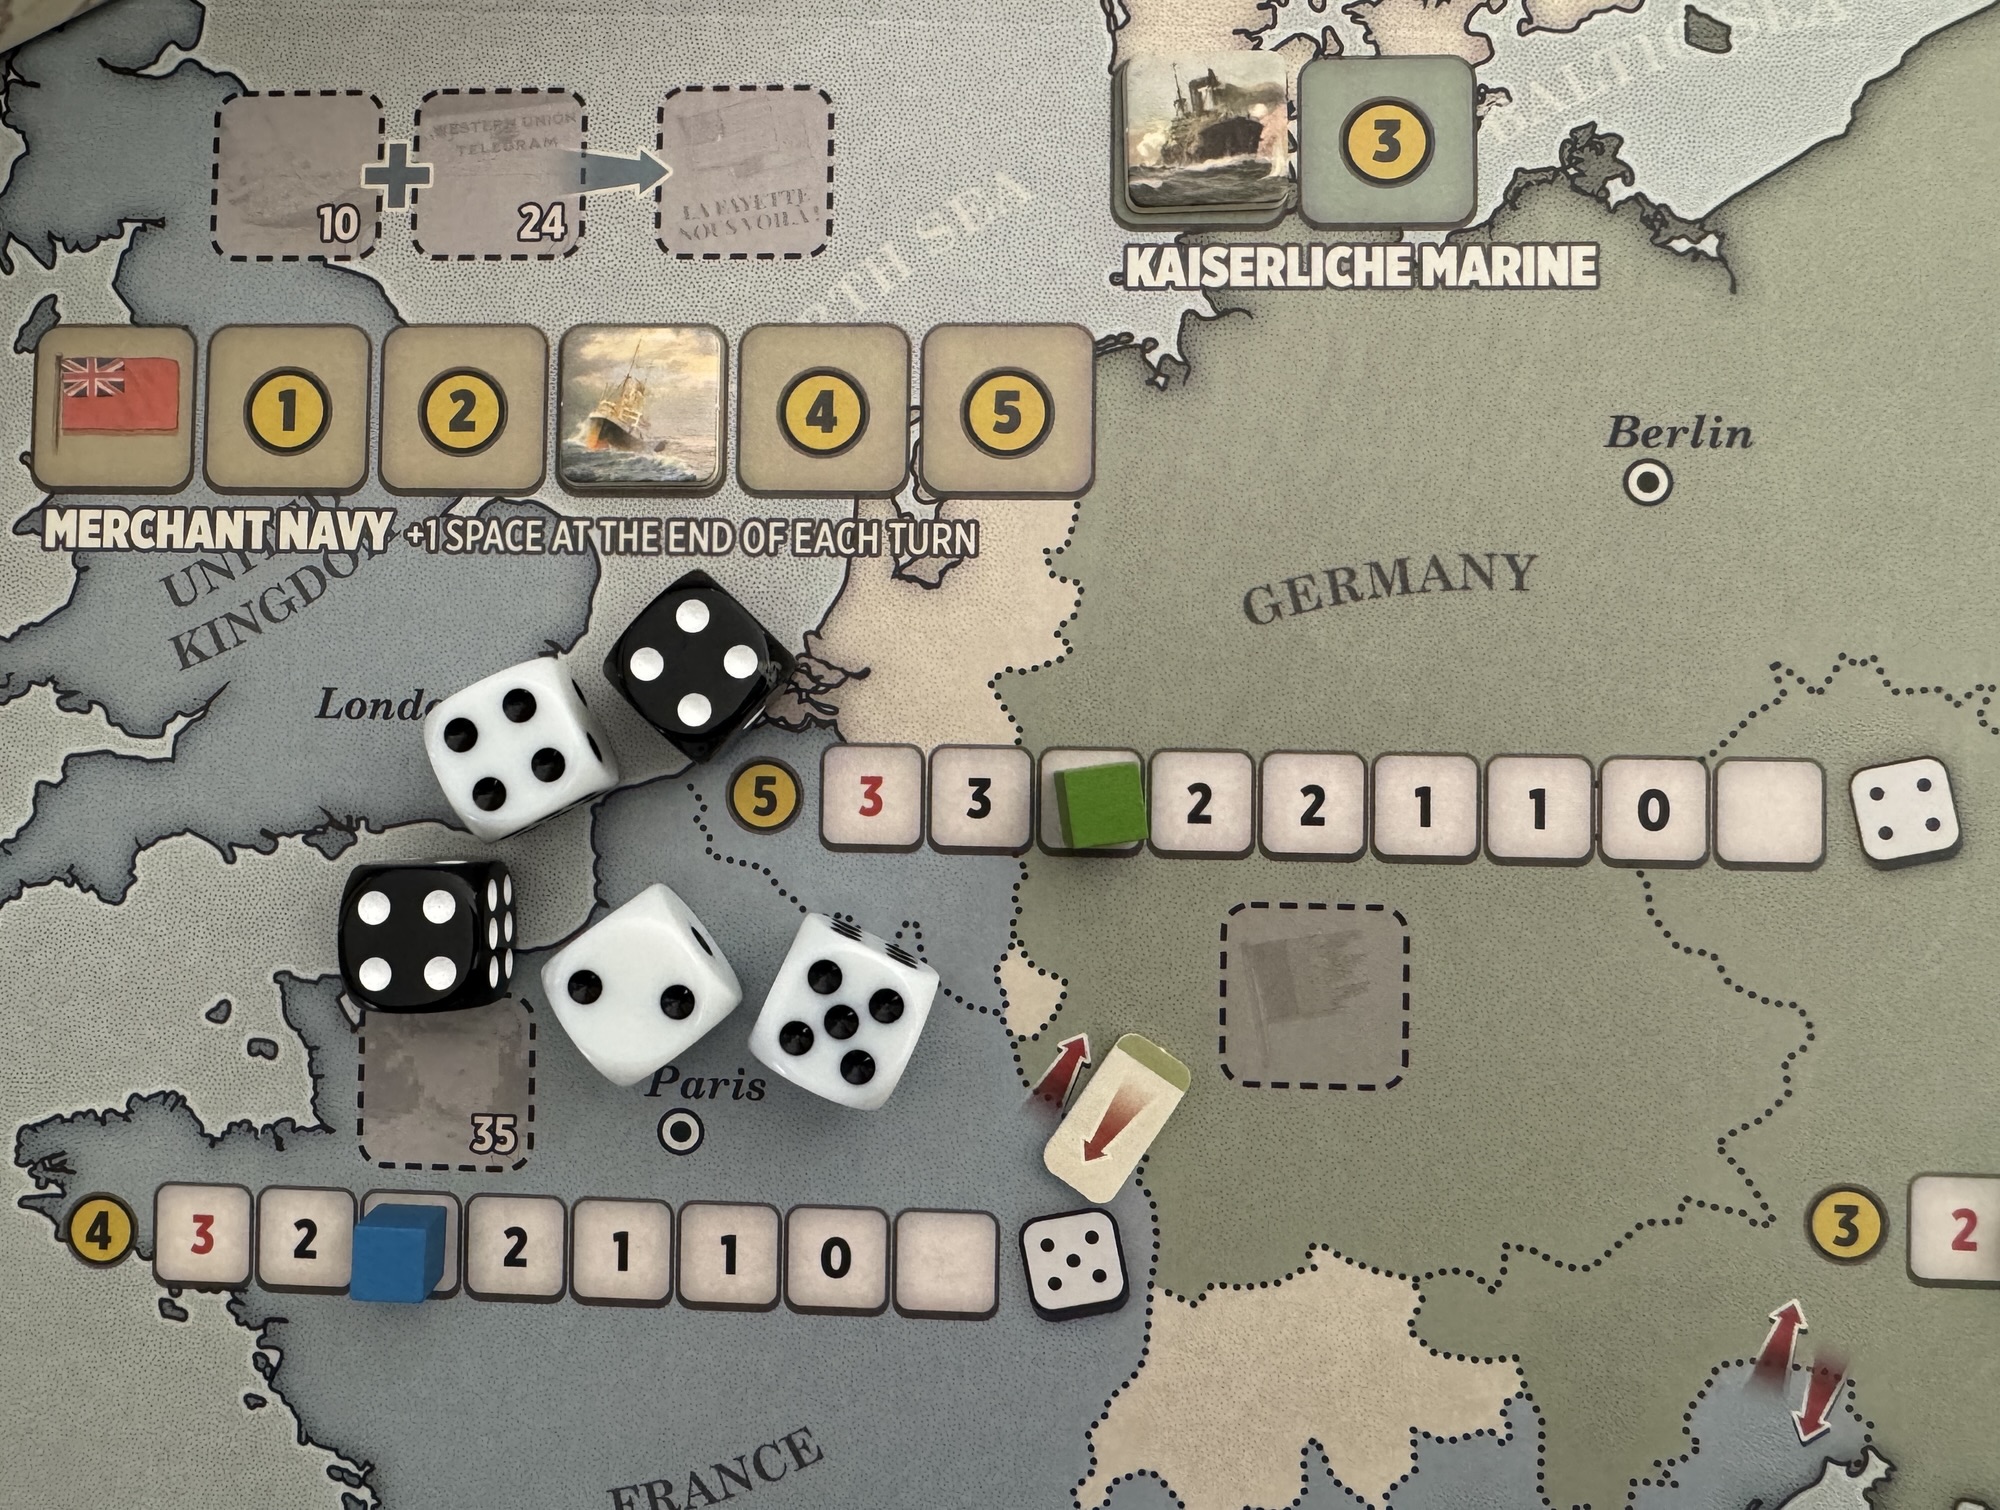
So what are Prestige Points? Prestige Points are a concept that takes into account the standing of each of the combatant nations on both sides, using the location of the Sector cube on their Collapse Track as a base, and then uses a simple mathematical formula to determine the overall standing and condition of the nations morale, production and will to fight. One of the most important parts of this calculation though is that it only takes into account nations that have not collapsed and surrendered. If a nation has been forced to surrender because their Collapse Track reached the end, they will not count toward the Prestige Points of their allied side.
Each player will calculate their total Prestige Points very simply by paying attention to several numbers such as the Operational Value and Prestige Value. For each country still At War during the Armistice, the player multiplies the sector’s current Operational Value (OV), which is shown by the location of the Sector cube on the Collapse Track, by its Prestige Value (PV), which is the value printed on the left side of the Collapse Track. The various nations’ Prestige Values are Germany 5, France 4, Austria-Hungary 3, Ottoman Empire 3, Italy 3, Middle East 3 and all other Sectors 1.
Let’s take a look at a quick example of how to calculate Germany’s Prestige Points. If Germany is still At War and their Collapse Track is showing an Operational Value of 2, then we will multiply their Prestige Value shown on the far left of the Collapse Track of 5 x the Operational Value of 2 resulting in a total of 10 Prestige Points. The players then add the number of Victory Points (VP) indicated by the location of their marker on the Victory Point Track. You might be wondering Where do Victory Points come from? Victory Points are specifically earned from forcing countries to surrender and the side that caused the surrender will earn a number of Victory Points as shown in the rules. For the Entente, their values are Russia 3 VP, Italy, Middle East and Romania 2 VP and Serbia, Africa and Greece 1 VP. For the Central Powers, their values are Austria-Hungary 3 VP, the Ottoman Empire and Bulgaria 2 VP and the German Colonies 1 VP.
I very much like the concept of only calculating the value for those countries who have not Collapsed and who are still in the war. We all know that it is easier to negotiate a peace that is favorable to your side when you are still a threat and if too many nations of either side have collapsed then their Prestige Points will reflect this as those countries won’t contribute to the final value. And I also like the simplicity of the scoring system. If certain key countries like France and Germany surrender, then that equates to a victory for the side causing the surrender and if the game continues to grind on through the final turn, then there is this calculation that is really pretty simple and gives importance to each goal with a different value that can be earned. Just a solid method for determining victory that makes sense and fits with the historical aspect of the outcome of the Great War.
In Action Point 6, which is the conclusion to this series, we will give an overview of the “Athena” solitaire bot and show how it works for solitaire play.
-Grant
![]()