Normale Ansicht

Interview with Larry Pinkerton Designer of And the War Came: American Civil War 1861-1865 from Pinkerton Games

Von: Grant
08. Juni 2026 um 14:00

While attending Buckeye Game Fest this spring, we were gifted a copy of a newly published game called And the War Came: American Civil War 1861-1865 from Pinkerton Games, which is published by Blue Panther LLC and Steve Jones. The designer and owner of Pinkerton Games Larry Pinkerton had been their earlier but had to leave due to some other pressing business and we were unable to meet but were very grateful for the game. Upon returning home, I reached out to Larry to see if he would give us a bit of an inside look at the design and he was more than willing to discuss the game.

Grant: Larry welcome to our blog. First off please tell us a little about yourself. What are your hobbies? What’s your day job?

Larry: Grant and Alex, first, thanks for the opportunity to tell you about myself, and my game, And The War Came. I’m a lifelong resident of southwest Ohio, from the Dayton area. I’ve got three great adult kids, each working on their families and/or careers. I’m now retired from both my civilian job, and my almost 34 years as a traditional Ohio National Guard member-last duty assignment as an Air Defense Brigade Commander-so now more time for hobbies. 

Now that And The War Came is finally done, I enjoy hanging with my kids, playing music, and traveling. I still do part time contract work in support of US Army training events, which I enjoy as well. And I hope to find more time for playing other wargames too!

Grant: What motivated you to break into game design? What have you enjoyed most about the experience thus far?

Larry: I’ve always been interested in the American Civil War, and many years ago it came to me that a block style game and a strategic level treatment of that war would make a great game-one that didn’t really seem to be available, at least for what I was looking for. I’ve really enjoyed developing the game, adopting, changing or dropping processes, seeking to get at the right balance of playability, workable mechanics and good history. It took a while, but I’m happy with the results.  

Grant: What is your upcoming game And the War Came about?

Larry: And the War Came is a strategic level American Civil War game, focused on the southeastern United States. It started life as a block game, but when I decided to self-publish, I switched to rotatable counters due to cost. But play is similar-it’s area movement and card driven, so those familiar with Columbia style block games will recognize some of the mechanics.

Grant: What does the title mean in relation to the history of the American Civil War?

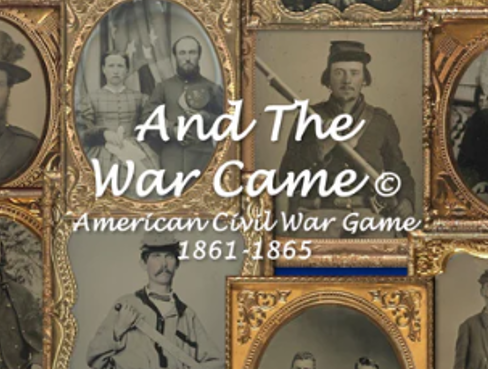
Larry: I bounced so many title ideas and finally settled on And The War Came, which is a sentence in Lincoln’s 2nd inaugural address (March 4, 1865). I felt that line summarized how the United States stumbled and staggered into civil war. And the wonderful Carte de Visite Collection images from the US Library of Congress I chose for the game box spotlight who the actual participants really were.

Grant: What games gave you inspiration for your design?

Larry: Columbia Game’s Hammer of the Scots and Victory Game’s The Civil War 1861-1865 were by far the strongest influences.

Grant: What is important to model or include in a game about the American Civil War?

Larry: Above all, I think it is leaders and leadership at the corps and army level. Any discussion of ACW campaigns seems to hit on the “what ifs” of senior leaders. There were simply so many generals I could have chosen to model in the game, but I finally settled on 22 Union and 19 Confederate leaders that did or could have risen to army or independent command. The formations on both sides were so similar, in my opinion it was the leadership that was truly decisive.

Grant: What challenges did you encounter in the design? How have you overcome them?

Larry: Wow, there were a lot; game flow, simple but historically accurate mechanics, relative strength and play balance, rail and naval capacity, re-playability, map scale-all had to be refined through trial and error, playtesting and compromise. And countless rulebook edits! Rules concepts I thought made perfect sense in my head and on the page drew several questions when reviewed by others. But I think it’s a pretty good final product.

Grant: What is the scale of the game? Force structure of units?

Larry: Regional area movement, and seasonal turns, representing three months. The map is bounded by eastern Kansas to eastern Texas on the western edge, New Jersey to northern Florida along the Atlantic Coast, lower Midwest on the northern edge, and Gulf of Mexico on the southern. Most states contain 4 to 10 areas-states with better road networks tend to have less areas. But there is more territory than units to control it. Fortress cities (i.e. Washington, D.C.), major railroads, navigable rivers, and mountains and swamp areas are also portrayed on the map. Rail and naval support capacity change each year.

Units represent infantry or cavalry corps, with a strength of from 1 to 4 divisions, or forts representing 1 to 4 installations. Unit count is: Union-33 Infantry counters, 10 Cavalry counters, 5 Fort counters, Confederate-26 Infantry counters, 8 Cavalry counters, 8 Fort counters.

Grant: What is the counter anatomy?

Larry: Very straightforward if familiar with Columbia style block wargames-a mechanic I have always admired for simple and clean fog of war, step reduction, and ranged or initiative combat. \Counters are square with strength point symbols (divisions) arrayed along each edge, plus movement and combat ratings. Infantry has a combat value of C2 with a move allowance of 1. Cavalry has a combat value of B1 with a move allowance of 3. Forts have a combat value of A1 with a move allowance of 0-they are stationary. There are also corps insignia (Union) or battle flags (Confederate) just to add historical flavor, and the branch insignia of the period for infantry, cavalry or forts. Ultimately, I chose to give similar units of both sides the same combat or movement ratings (since both Union and Confederate formations grew from the same organizational foundations and traditions), but those ratings can be modified by the leaders who command them, both at corps and army levels, and/or the battlefield terrain.

Grant: What does it mean the “game is We Go turn based”?

Larry: Most functions are conducted by both players at the same time. For example, in the Administration Step, both players recruit (buy) their new units/strength points, enter new or recovered from wounds generals, or administratively move/transfer generals already on the map to new assignments/commands. When both players are done, they go to the next step, (Operations), with Action Phases where each plays a card to determine who moves first, they complete their moves and then resolve any battles that result from movement. The Logistics Step and Victory check complete a turn.

Grant: What type of experience does this approach create?

Larry: It minimizes down time for one. Actions in the Administration Step, Operations Step, Logistics Step happen simultaneously. Only in the Operations Steps’ Action Phase (or depending on the season, phases) does movement happen sequentially. This limits the action/reaction dynamic to operations, where maneuver happens in small chunks due to the seasonal card play. Neither side is able to make big sweeping moves, while the other side can only watch-the mechanic enables campaigns like Gettysburg or Vicksburg, although they may not necessarily occur during the course of play.

Grant: How does the game use cards?

Larry: Cards list the number of “orders” you can issue to units in order to conduct movement or other actions. There are also cards with both events and orders where players must choose which to use. And most cards have a bonus action (improved combat, movement, or leader promotion) to spice things up. The season determines the number of cards each player receives that turn. The Winter season/turn, each player receives only one card-in the single Action Phase, each player compares their card to the other player’s to determine who moves first (initiative), then second, then resolve any combats. This makes for a short turn. In both Spring and Fall seasonal turns, players receive two cards each, then play their cards against each other in each of the two Actions Phases, conducting moves and combat. In the Summer seasonal turn, three cards are dealt to each player-thus there are three Action Phases that turn.

Grant: What type of cards are included? Can you share a few examples?

Larry: There are 30 cards in the common game deck (there are not separate unique decks for Union or Confederate players). The deck includes 22 orders cards, each card with a value of 1, 2, 3, 4 or 5 orders. The orders determine how many units (corps) or commands (see Leaders below) can be moved with that card-a card with only one order allows the movement of only one unit, etc. Orders can also be used to promote generals or repair rail roads, etc. Again, most, but not all of these 22 cards also have a bonus that improves movement, or combat for a unit, or gives a free general promotion.

There are also 8 cards that include a combination of orders and events such as blockade impacts, partisan activities, native uprisings, surprise attacks, diplomatic incidents, immigrant or native recruits, or spy activity-each event with favorable impacts for themselves, or negative impacts for the opposing player. I chose for the event cards to be generic in nature and usable for both sides, verses specific events (i.e. Trent Affair) scripted events. For these 8 cards, players have the option to play the event and still have two orders to move other units, or not play the event at all, and have all three orders for movement.

The entire deck is reshuffled at the start of a new year. Since each player only receives 8 cards in a four season/turn year, only 16 of the 30 cards are played each year-some cards may not get played during the entire war, while others may reappear several times.

Grant: How does combat work?

Larry: Again, similar to other Columbia style block games.

Paraphrased from the rulebook:

Units Fire or Retreat in a combat round. The sequence of combat is A class units fire/retreat first, before B class units, followed by C class units which fire/retreat last. If both sides units are the same class, the defender has the advantage, and fire/retreat before attacking units of the same class. A general’s initiative rating may change who has the first shot advantage. To Fire, roll as many dice as the unit’s current strength points (SP). A hit occurs for each die roll equal to, or less than the unit’s combat number rating. Hits on the enemy take effect as they happen, each hit immediately reducing the enemy unit strength point count by one. Say a 3 division (SP) infantry corps has a combat rating of C2-that corps rolls 3D6 dice and every “1” or “2” rolled is a hit, reducing enemy strength and effectiveness when returning fire. In a battle between a B1 cavalry unit and a C2 infantry unit, the B1 rolls first, but only scores a hit for each 1 rolled. The C2 rolls second and scores a hit for each 1 or 2 rolled. One round of combat is complete when each unit fires or retreats.

Some unit strength may be recovered at the end of combat if the unit is not destroyed-with this recovery rule I’m trying to account for after the battle return to duty wounded, stragglers, local prisoner exchanges, etc. I was aiming for about 20% casualty rates in combat.

Grant: How do Leaders work? How are they killed or wounded?

Larry: Leaders are used to command corps or armies (units under the command of a general are actually called “commands”, i.e. Sherman’s command). A leader imparts his initiative (A, B, or C class) and tactical ratings to the unit or units he commands. In Sherman’s case, he changes a C2 infantry corps under his command to a B2. A leader’s initiative and tactical ratings may change at different ranks. And I’ve added optional rules to randomize when leaders enter the game, and their ratings.

Leader counters also rotate-they all enter the game as a one star general. They may be promoted to two or three star rank. Grant and Sherman can even be promoted to four star (GEN) rank as they historically became army group commanders. A one star general (BG) controls one corps counter; a two star (MG) may command one or two corps.

The only way a leader can be promoted to three stars (LTG) rank is to take command of one of the 5 named armies: Potomac, Cumberland, and Tennessee for the Union; Northern Virginia and Tennessee for the Confederacy. Named armies may contain four or more corps, depending on the army. And only named armies may have subordinates of one or two star rank. If a three star army commander is relieved of command, there is a political cost, and the leader reverts to one or two star rank.

Leaders also represent staffs and logistics trains, so commanded units may engage in two rounds of combat, whereas corps without a commander may only initiate one round of combat-so even lower quality leaders can be beneficial since they allow you to fight an additional round. Most leaders also increase the movement allowance for infantry to 2 instead of the base 1.

And yes, leaders may be wounded, killed or captured. At the end of each combat which involved leaders, a leader casualty assessment is rolled-lower ranked leaders are more likely to be casualties. If assessed as a casualty, another D6 is rolled for severity of wound. Rolls of 1 through 5 indicate the leader is out for that many turns. A roll of 6 means the leader is killed. And if a commanded unit is destroyed but the leader is not killed or wounded, the leader is captured. Captured leaders may be exchanged as prisoners.

Grant: How does the design create fog of war and uncertainty?

Larry: The counter covers hide counter information until opposing units engage in combat. Of course, leader losses will occur, which adds to uncertainty. The cards also provide for a lot of variability in maneuver. And the strength replacement recruiting is a combination of fixed values for the year, plus a die roll for variable recruits each season. Recruitment strengths diminish for both sides over the course of the game. There’re several optional rules that address the Emancipation Proclamation, Drafts, Leader randomization, etc. to add historical flavor or variability to the game.

Grant: Who is the artist for the game?

Larry: I did the artwork…in MS PowerPoint. Whew, not the easiest thing to do! But I’m happy with the results. I used public domain art and was able to generate nice graphic quality with the tools available. And I found you can only go so far in development before you have to start addressing production concerns. And the War Came is definitely a game on a budget!

Grant: How is victory achieved?

Larry: Quite simply, players must accomplish more than their historical counterparts in the same period, for example the 1862 scenario, when the Border States, most of Tennessee and New Orleans were in Union hands by year’s end. So, victory usually means holding more territory, but there are also war weariness and political factors that contribute to, or detract from, victory. Examples are the midterm elections of 1862, Presidential elections of 1864, and weariness of the northern population.

Grant: What do you feel the game models well?

Larry: The overall ebb and flow of the conflict-using corps formations on a large area map just works well. And although there are abstracted naval and logistics rules that function well, I chose to focus on the senior commanders and Lincoln’s and Davis’s struggles to find effective military leadership for their troops at corps and army levels. And I think I’ve got the right level of political factors that contributed to the War’s outcome factored in. It’s hard for the CSA to win, but if the USA sits on it’s hands to build strength and perfect its leadership, the USA will lose. The USA must take the fight south early and often-and that’s a lot of territory to cover.  

Grant: What are you most pleased about with the design?

Larry: There’s so many classic ACW titles out there that cover the entire scope of the war in great detail, and yet I think And the War Came fills a niche. For those familiar with board wargames, it’s not overly complex and it plays fairly quickly. I like the unknowns and fog of war, and think the re-playability is there. The historical framework is solid. I tried to not model for effect, so historical campaigns and outcomes are certainly possible, but not preordained. I wanted an interesting beer and pretzels game, one that both those familiar and unfamiliar with the ACW could enjoy. Again, I’m satisfied with the results.  

Grant: What other designs are you contemplating or already working on?

Larry: I think if there’s another one in me, it’ll be a strategic treatment of the American Revolution-but to model that conflict will take some work, initially just to get the scope right, and factor in the interrelationship with the wider Anglo-French conflict.

Oh, and I must add a hearty thanks to Blue Panther Games, for their great production and distribution support! I just couldn’t nail down a publisher-but after consulting with Steve Jones (BPG) I realized I could partner with Blue Panther and do it myself! I would recommend them to any aspiring designer who’s interested in self-publishing.

If you are interested in And the War Came: American Civil War 1861-1865 from Pinkerton Games, you can order a copy for $65.00 from the Blue Panther LLC website at the following link: https://www.bluepantherllc.com/products/and-the-war-came

-Grant

Solitaire Playthrough Video: Pacific War 1942 Solitaire Travel Game from Worthington Publishing

Von: Grant
19. April 2026 um 14:00

In early 2024, Worthington Publishing announced a unique 2-pack of games on Kickstarter that were marketed as easy to play travel friendly solitaire games. And you know that I love a good solitaire wargame! And when I heard that these games were small, even portable, then I was even more interested. One of the games covered the Pacific Theater of WWII called Pacific War 1942 Solitaire and the other covers the War of 1812 called (you guessed it) War of 1812 Solitaire. These games are designed by Mike and Grant Wylie and each game has 4 pages of rules, a beautiful mounted board and double sided counters. I played both and really very much enjoyed the experience.

I wrote a fairly in-depth First Impression post and you can read that on the blog at the following link: https://theplayersaid.com/2024/08/20/first-impressions-pacific-war-1942-solitaire-travel-game-from-worthington-publishing/

-Grant

Unboxing Video: Operation Dragoon: The 2nd D-Day Solitaire Travel Game from Worthington Publishing

Von: Grant
11. April 2026 um 14:00

Operation Dragoon: The 2nd D-Day Solitaire Travel Game is a fast-playing corps and division-level operational solitaire game of the Operation Dragoon campaign from the initial invasion that hit the beaches on August 15th to the conclusion of the decisive Battle of Montelimar on August 29th.

As the Allies of the US VI Corps, French II Corps, and US/British/Canadian 1st Airborne Task Force advance, a column of German units of the Nineteenth Army, led by the powerful 11th Panzer Division, is marching up the Rhone River valley to escape envelopment and destruction at Montelimar.

The Allied player, aided by air support and bands of French Forces of the Interior (FFI), must eliminate as many German divisions as possible while ensuring the critical ports of Marseilles and Toulon are quickly seized.

We published an interview on the blog with the designer Dan Fournie and you can read that at the following link: https://theplayersaid.com/2024/08/21/interview-with-dan-fournie-designer-of-operation-dragoon-1944-from-worthington-publishing-currently-on-kickstarter/

-Grant

La Der des Ders – The War to End War from Hexasim – Action Point 6

Von: Grant
08. April 2026 um 14:00

La Der des Ders – The War to End War from Hexasim is a 1-2 player slightly abstracted strategic level look at World War I. The game allows the players to relive the First World War at a strategic level, with each player controlling one of the 2 sides either the Entente, consisting of France, England, Russia, Serbia and other minor nations or the Central Powers including Germany, Austria-Hungary, the Ottoman Empire and a few minors. La Der des Ders can also be played solo, with a dedicated solitaire bot called “Athena” who utilizes special Cornflower Cards to make decisions about what technologies to invest in, where to undertake offensives and how to utilize limited resources and reinforcements. Each turn, players gain an amount of Resource Points dependent on what nations are in the war, which they can allocate to different areas to guide their overall strategy. Victory is achieved by launching offensives that drain the morale of enemy nations, forcing them out of the conflict through collapse.

In Action Point 1, we looked at the Game Board, discussing the Collapse Tracks, Trade Tracks, Russian Revolution Track and Naval Control Table and other various on-board tables and offensive spaces. In Action Point 2, we covered the Technology Phase and the Technology Tree and Technological Improvement Boards. In Action Point 3, we examined the Event Cards and how they inject the historical narrative into the gameplay and also alter the conditions of the game. In Action Point 4, we walked through an example of an Offensive and took a look at the combat procedure. In Action Point 5, we reviewed the Victory Conditions. In this Action Point, which is the final entry in the series, we will give an overview of the “Athena” solitaire bot and how it works.

Athena

La Der des Ders – The War to End War is designed as a 2-player game but it does have a dedicated solitaire bot called Athena that can be used to simulate an opponent to play against. This Athena bot, named after the Greek goddess of strategy, can be used to play as either the Entente or as the Central Powers and is focused on the use of special cards referred to as Cornflower Cards. There are 12 of these Cornflower Cards and these are used to determine the various actions taken by the Athena bot during their turn. A solitaire play uses the usual rules for the 2-player game, with just a few exceptions.

The Cornflower Cards are multi-use cards that are divided into 3 different sections to be used at different points of the Sequence of Play in a solitaire game. They are drawn and referred to during the Technology Development Phase, the Reinforcement Phase and the Offensive Phase. Let’s take a look at the anatomy of these cards. In the above picture, you will notice that there are 3 main categories listed at the top of the card including Technologies at the top, Reinforcements in the middle and Offensives on the bottom of the card. During the appropriate phase, the player will draw 1 Cornflower Card for the Athena AI.

If it is the Technology Development Phase, the player will refer to the top of the card where there are listed the 6 different technologies that can be pursued. Under each of these categories will show the number of Resource Points that will be spent by Athena in order to attempt to unlock a new level in each of the technologies. If there is an X in that space, that means that Athena will not attempt to gain a level of that technology during this phase. If there is a 2 listed, this means that 2 RP will be spent and the roll for the technology will gain a +1 DRM. Keep in mind though, that if the technology shown is not available yet because the year it is available has not yet arrived, then the bot will not spend a resource to attempt that technology. If Athena doesn’t have enough Resource Points to make all the attempts shown on the card, she will spend as much as possible to attempt these technologies. Athena never re-rolls the die for these attempts by discarding a Technological Research Cube for previous failed attempts. One of the differences for Athena during this step is that if a success is earned in unlocking a level of technology, she will get to advance all cylinders of the corresponding technology in all sectors under Athena’s control. This means all of the countries of the alliance as well as the active minors. These technological improvements cost no Resource Points.

If it is the Reinforcement Phase, Athena will attempt to reinforce sectors that have suffered losses in previous turns according to the following priority order:

  1. The sector which suffered the most losses or in other words the sector whose cube is furthest from its maximum;
  2. The sector with the second most losses and then the sectors in the following order, ignoring the sectors already covered above:
  3. France, Russia, Italy, Serbia, Romania, Middle East, Africa, Greece (Entente), Germany, Austria-Hungary, Bulgaria, Ottoman Empire (Central Powers).

When you have chosen what sector is to receive reinforcements based upon the priority described, the player will draw as many Cornflower Cards as there are spaces separating the Sector Cube from the space with the red value. After drawing the cards, the player will count the instances of cards that have the name of that sector shown on them. If you look at the 3 cards shown above, if doing reinforcements for Germany they would move their Sector Cube up only 1 space on the Collapse Track as once Germany is listed in the middle of the card under Reinforcements. Very simple. Athena will also have to spend the required Resource Points from their total to actually move the Sector Cube up and if they cannot afford all of the reinforcements shown by the cards, they will move and pay for what they can afford. This phase ends when Athena no longer has enough Resource Points, or when all the sectors have been able to try to obtain reinforcements.

Finally, if it is the Offensive Phase, each side launches an offensive in turn starting with the side that has the initiative. When it is Athena’s turn to attack, the player will draw one Cornflower Card and refer to the bottom portion of the card, which will indicate the sector Athena is attacking. The sector to be attacked will be the one on the left of the card if Athena is playing the Entente, and the one on the right if she is playing as the Central Powers. The sector indicated on the card must always be attacked by the sector that has the best chance of inflicting damage. This usually means the sector with the highest current Operational Value and that has not yet launched an Offensive this turn. In the event of a tie, preference should be given to the sector least likely to be able to attack elsewhere during a later card draw in the turn. The size of the Offensive will be equal to the current Operational Value of the attacking sector only if the number of Resource Points Athena has remaining will allow for it. Otherwise the Offensive is reduced to the number of remaining RP. Once Athena’s Resource Points have been spent, the dice rolled and any losses applied, the player will then take their own turn to launch an Offensive or decide to pass. Then Athena will draw a new Cornflower Card to determine their next
Offensive. If there are ever 3 Cornflower Cards drawn by Athena without having the ability to attack because of sector availability or Offensives by adjacent sectors have already been taken, the Offensive Phase will come to an end.

That is all there is to the Cornflower Cards and the Athena bot. It is a really well designed system that removes most of the work by the player when playing solitaire. There will be times when you have to make a decision, as described above with Offensives, but these decisions are easy and the hard work is done by the simple flipping of a card.

I do want to point out one final thing. The sequence of play differs slightly from the 2-player game as it rearranges when the Athena bot does a few of the steps during the Spend Resource Points Phase as shown below. The human player will start by doing their Reinforcements first followed by their Technology investment. Athena will then go and do their Technology investment first followed by Reinforcements. Both players will then move into the Offensive Phase and the player with initiative as shown on the turn track will take the first Offensive of the turn.

The Athena bot works very well as a playable solitaire experience for La Der Des Ders. The Cornflower Cards are a stroke of genius and really are easy to use, which makes playing the game a much better experience. I found that the bot actually holds its own in the game, even though they are not in total control of their own actions like a human player would be. The changes also made in the Sequence of Play as well as to the way Technology Investments work more than make up for the lack of true intelligence by the system and will definitely give the player a run for their money. I have played the game about 5 times solitaire, both as the Entente and as the Central Powers, and have won just 2 out of 5 tries. But the experience was easy, enjoyable and pretty seamless. The game really is a great example of a slightly abstracted strategic level look at World War I and I would wholeheartedly recommend this game to anyone who has an interest in The Great War.

I shot a playthrough video for the solitaire system and you can watch that at the following link (beware as I did make a few errors but I have found errors make viewers understand the rules of the game better):

I also did a video review and you can watch that at the following link:

Thank you for allowing me to share this game with you through this series of posts over the past several months. I have very much enjoyed doing these and I hope that you find them helpful.

-Grant

La Der des Ders – The War to End War from Hexasim – Action Point 5

Von: Grant
02. April 2026 um 14:00

La Der des Ders – The War to End War from Hexasim is a 1-2 player slightly abstracted strategic level look at World War I. The game allows the players to relive the First World War at a strategic level, with each player controlling one of the 2 sides either the Entente, consisting of France, England, Russia, Serbia and other minor nations or the Central Powers including Germany, Austria-Hungary, the Ottoman Empire and a few minors. La Der des Ders can also be played solo, with a dedicated solitaire bot called “Athena” who utilizes special Cornflower Cards to make decisions about what technologies to invest in, where to undertake offensives and how to utilize limited resources and reinforcements. Each turn, players gain an amount of Resource Points dependent on what nations are in the war, which they can allocate to different areas to guide their overall strategy. Victory is achieved by launching offensives that drain the morale of enemy nations, forcing them out of the conflict through collapse.

In Action Point 1, we looked at the Game Board, discussing the Collapse Tracks, Trade Tracks, Russian Revolution Track and Naval Control Table and other various on-board tables and offensive spaces. In Action Point 2, we covered the Technology Phase and the Technology Tree and Technological Improvement Boards. In Action Point 3, we examined the Event Cards and how they inject the historical narrative into the gameplay and also alter the conditions of the game. In Action Point 4, we walked through an example of an Offensive and took a look at the combat procedure. In this Action Point, we will simply review the Victory Conditions.

Victory Conditions

In La Der des Ders, there are a few ways to trigger the concept of Sudden Death, which leads to the game concluding and a victor being declared, or to win the game through armistice being signed and then through the accumulation of Prestige Points. Let’s first take a look at what I think is the most common way for the game to come to an end, Sudden Death.

Sudden Death

The game will end immediately in the event of Sudden Death and this Sudden Death can be triggered in three ways. First, if France surrenders, the Central Powers will immediately win the game, second if Germany surrenders, the Entente will immediately win the game and finally if any one side achieves 6 Victory Points then that side immediately wins the game. Really pretty simple. If countries other than France or Germany surrender, such as Austria-Hungary, Russia or the Ottoman Empire, the game will continue although the Production Value of the surrendered country will no longer be included in the sides Resource Points.

Now there is a remote possibility that both sides could trigger Sudden Death at the same time through an attack. Remember, that if the attacker rolls a 1 on their Attack Dice, it will result a Counter Attack and 1 loss on their Collapse Track and if this would cause them to have to surrender as well as inflicting enough hits on their target to reach the end of their Collapse Track, both will Surrender and then neither side will win. But also, this could possibly occur with the play of the Spanish Flu Event, which causes losses to all powers. This is a rare possibility but it can happen.

One of the things that I very much like about this game is the concept of Collapse and the fatigue and weariness of war. World War I drug on for 4 long years and particularly on the Western Front very little ground was actually gained. During the early years of the war in 1915–1916, these advances were measured in mere feet, while later in the war during the campaigns of 1918, particularly in the case of the Hundred Days Offensive, which began on August 8, 1918, the Allies achieved deep, lasting breakthroughs, pushing the Germans back to their original 1914 lines. But the war was a meat grinder, plain and simple, and attacks were made sometimes to keep the war going because High Command demanded action and not necessarily to gain any ground or obtain any key objectives. Resources dwindled, troops dried up as men were shattered, maimed and demoralized to the point of being unable to stand a watch or fight, and nation’s desire for the war to continue faded. I think that at points, one breakthrough or catastrophic loss could have ended the war and this is very well reflected in La Der des Ders as if you are too low on your own Collapse Track and decide to attack because you believe you can finish your opponent you always have a chance of catastrophe and losses of your own while on the offensive.

Armistice

Aside from the Sudden Death ending, the game can end in 2 ways including at the end of the turn during which the Peace Negotiations card was drawn, or at the end of turn 14. In both of these cases, the side with the most Prestige Points is declared the winner. If there is a tie, the Central Powers will win the game.

So what are Prestige Points? Prestige Points are a concept that takes into account the standing of each of the combatant nations on both sides, using the location of the Sector cube on their Collapse Track as a base, and then uses a simple mathematical formula to determine the overall standing and condition of the nations morale, production and will to fight. One of the most important parts of this calculation though is that it only takes into account nations that have not collapsed and surrendered. If a nation has been forced to surrender because their Collapse Track reached the end, they will not count toward the Prestige Points of their allied side.

Each player will calculate their total Prestige Points very simply by paying attention to several numbers such as the Operational Value and Prestige Value. For each country still At War during the Armistice, the player multiplies the sector’s current Operational Value (OV), which is shown by the location of the Sector cube on the Collapse Track, by its Prestige Value (PV), which is the value printed on the left side of the Collapse Track. The various nations’ Prestige Values are Germany 5, France 4, Austria-Hungary 3, Ottoman Empire 3, Italy 3, Middle East 3 and all other Sectors 1.

Let’s take a look at a quick example of how to calculate Germany’s Prestige Points. If Germany is still At War and their Collapse Track is showing an Operational Value of 2, then we will multiply their Prestige Value shown on the far left of the Collapse Track of 5 x the Operational Value of 2 resulting in a total of 10 Prestige Points. The players then add the number of Victory Points (VP) indicated by the location of their marker on the Victory Point Track. You might be wondering Where do Victory Points come from? Victory Points are specifically earned from forcing countries to surrender and the side that caused the surrender will earn a number of Victory Points as shown in the rules. For the Entente, their values are Russia 3 VP, Italy, Middle East and Romania 2 VP and Serbia, Africa and Greece 1 VP. For the Central Powers, their values are Austria-Hungary 3 VP, the Ottoman Empire and Bulgaria 2 VP and the German Colonies 1 VP.

I very much like the concept of only calculating the value for those countries who have not Collapsed and who are still in the war. We all know that it is easier to negotiate a peace that is favorable to your side when you are still a threat and if too many nations of either side have collapsed then their Prestige Points will reflect this as those countries won’t contribute to the final value. And I also like the simplicity of the scoring system. If certain key countries like France and Germany surrender, then that equates to a victory for the side causing the surrender and if the game continues to grind on through the final turn, then there is this calculation that is really pretty simple and gives importance to each goal with a different value that can be earned. Just a solid method for determining victory that makes sense and fits with the historical aspect of the outcome of the Great War.

In Action Point 6, which is the conclusion to this series, we will give an overview of the “Athena” solitaire bot and show how it works for solitaire play.

-Grant

La Der des Ders – The War to End War from Hexasim – Action Point 4

Von: Grant
26. März 2026 um 13:00

La Der des Ders – The War to End War from Hexasim is a 1-2 player slightly abstracted strategic level look at World War I. The game allows the players to relive the First World War at a strategic level, with each player controlling one of the 2 sides either the Entente, consisting of France, England, Russia, Serbia and other minor nations or the Central Powers including Germany, Austria-Hungary, the Ottoman Empire and a few minors. La Der des Ders can also be played solo, with a dedicated solitaire bot called “Athena” who utilizes special Cornflower Cards to make decisions about what technologies to invest in, where to undertake offensives and how to utilize limited resources and reinforcements. Each turn, players gain an amount of Resource Points dependent on what nations are in the war, which they can allocate to different areas to guide their overall strategy. Victory is achieved by launching offensives that drain the morale of enemy nations, forcing them out of the conflict through collapse.

In Action Point 1, we looked at the Game Board, discussing the Collapse Tracks, Trade Tracks, Russian Revolution Track and Naval Control Table and other various on-board tables and offensive spaces. In Action Point 2, we covered the Technology Phase and the Technology Tree and Technological Improvement Boards. In Action Point 3, we examined the Event Cards and how they inject the historical narrative into the gameplay and also alter the conditions of the game. In this Action Point, we will walk through an example of an Offensive and take a look at the combat procedure.

Offensives

As we discussed in Action Point 1, shown on the board are the Offensive Arrows that will remind the players about what Offensives they can undertake, meaning what Sectors may be attacked, and what Sectors have already taken their one Offensive against that adjacent Sector per turn. These are identified by red arrows connecting adjacent Sectors and will be covered up by the appropriate Offensive Marker when undertaken. In the below picture, we will take a look at Serbia as an example. You can see that Serbia is surrounded by Central Power countries including Austria-Hungary and Bulgaria (Neutral at the start of the war). They also have a few of their Allied nations adjacent including Romania (Neutral at the start of the war) and Greece (Neutral at the start of the war). From each of the adjacent Sectors there are 2 Offensive Arrows represented meaning that this Sector can both be attacked and can attack the adjacent Sector.

The process of taking Offensives is really pretty simple as players take turns to activate one of their sectors that has not yet been activated this turn. The sector chosen will then be activated and must launch an Offensive against an adjacent enemy sector. There is a cost to the launching of Offensives though as the player will have to pay the appropriate cost by first choosing the size of their Offensive, which in game turns means the number of dice they will pay to roll in the Offensive. The size of the Offensive must be at least 1 and can be up to the current Operational Value of the attacking sector. The player launching the offensive then spends as many Resource Points as the size of the Offensive.

For example, The Entente player decides to attack Austria-Hungary from Russia. If Russia’s Operational Value is currently 2, the size of the Offensive must be between 1 and 2. If the Entente player chooses a size 2 Offensive they will have to spend 2 Resource Points. This would allow Russia to roll 2D6 along with any black dice for their Artillery Technology.

Once both of the players have activated a sector, each player may then continue with Offensives by choosing to activate a new sector until no new sectors can be activated. Each of the sectors can make but a single Offensive per turn. I really like this restriction as it reflects the logistical and material difficulties in planning, funding and executing these large Offensives. A player may always decide to pass rather than activate a sector but once you do pass the Resource Spending phase ends for them. The other player can continue to activate the sectors they want and are able to until they decide to pass on their turn or are no longer able to activate a sector.

Now let’s cover the mechanics of how the Offensive resolves with dice. The player will roll as many white dice as the size of the Offensive they funded. These dice are called Attack Dice and it is important to remember that some technologies allow modifiers to be added to Attack Dice or will grant additional dice to be rolled, usually in the form of Artillery Dice. Each level of Attack Technology implemented in the attacking sector grants a DRM (Die Roll Modifier) of +1 to each Attack Die roll. Each level of Defense Technology implemented in the targeted sector inflicts a Die Roll Modifier of -1 to each Attack Die roll. Each level of Artillery Technology implemented in the attacking sector allows the Attacker to roll 1 black Artillery Die. These dice are not subject to the bonuses/penalties conferred by either Attack or Defense Technologies. Also, keep in mind that the number of Artillery dice cannot exceed the size of the Offensive. This is a mistake that I have made many times in my plays of the game and wish there was a better way to remember this. In the case of Artillery Dice, if the player has developed the Aviation Technology, the attacker may re-roll as many Artillery Dice that failed to inflict a loss as the difference between their Aviation Level and the defender’s Aviation Level.

Each result greater than or equal to the attacking player’s Attack Value inflicts one loss on the defender. The Attack Value of a sector is represented by the die depicted at the end of the Collapse Track. Germany has the best value at a 4 while all other countries, with the exception of Greece who is a 6, have a 5. For each loss suffered in an Offensive, the defender moves the cube on the attacked sector’s Collapse Track by one space to the right. If a cube needs to be moved forward on the Collapse Track, but is already on the right-most space and can’t be moved forward, that country immediately surrenders. The Offensives process is really very simple, and it just fits with the chosen format and scale of the game. Nice and easy but fun with lots of dice rolling.

Counter Attacks

One more thing that I need to share about these Offensives is the concept of a Counter Attack. If at least one of the Attack Dice rolled comes up a natural 1, the attacker will suffer one loss and the cube in their own sector is moved forward one space on the Collapse Track. This is not one loss per 1 result but only 1 such loss with an Offensive. With my luck, I could lose my whole army and have to surrender! Also, remember that Artillery Dice are not affected by the Counter Attack rule.

The process of Offensives in La Der des Ders is very simple and straightforward but works very well in the framework of the game to create many tough choices about how to spend your limited Resource Points and who to attack and from where. As the Central Powers, attacking with Germany each turn makes the most sense as they have the best odds of scoring hits and causing losses to France and Russia but they will have to gauge where they stand and who else might be closer to Collapse and surrender. As the Entente, France and Russia should put a heavy focus on Germany and Austria-Hungary and force the Central Powers player to have to replace losses rather than spending on Technology upgrades and replacements. Continually attacking them will lead to results over the course of the game.

In Action Point 5, we will simply review the Victory Conditions.

-Grant

Solitaire Video Review: Pacific War 1942 Solitaire Travel Game from Worthington Publishing

Von: Grant
21. März 2026 um 13:00

In early 2024, Worthington Publishing announced a unique 2-pack of games on Kickstarter that were marketed as easy to play travel friendly solitaire games. And you know that I love a good solitaire wargame! And when I heard that these games were small, even portable, then I was even more interested. One of the games covered the Pacific Theater of WWII called Pacific War 1942 Solitaire and the other covers the War of 1812 called (you guessed it) War of 1812 Solitaire. These games are designed by Mike and Grant Wylie and each game has 4 pages of rules, a beautiful mounted board and double sided counters. I played both and really very much enjoyed the experience.

I wrote a fairly in-depth First Impression post and you can read that on the blog at the following link: https://theplayersaid.com/2024/08/20/first-impressions-pacific-war-1942-solitaire-travel-game-from-worthington-publishing/

-Grant

❌