HISPANIA from Draco Ideas is a slick little small box game with a big punch that sees the player controlling the Roman Empire and attempting to subjugate and put down resistance in the provinces of Hispania from 198 to 18BC. The game is extremely flexible and may be played cooperatively by 2-3 players, competitively with 4 players or as a solo game. The game is somewhat of a resource management game as the players must use their limited funds in the form of Denarii wisely to attack and put down revolts springing up around the country as local armies rally support for the resistance to Roman rule.
Mit den Hörspielen der Drei Fragezeichen schlafe ich noch heute gern ein … und sie begleiten mich bei so mancher langer Autofahrt. Erst neulich bin ich auf meine alte Kassetten- und digitalisierte Sammlung einiger Fundstücke gestoßen. Neben Kolumbus und Sohn gab es noch eine andere kleine Reihe mit nur 29 Folgen Scotland Yard. Aktuell führe ich meinen Sohn gerade in die große Welt der Hörspielserien ein, und da habe ich ihm vorgeschlagen, dass wir dazu das passende Brettspiel spielen. Die meisten Brettspiele in meiner Sammlung werden „nach eigenen Regeln“ bespielt. Das bedeutet vornehmlich, dass meine Miniaturen über einen großen Tisch in selbst gebaute Burgen oder Ähnliches für kurze Zeit entschwinden und Abenteuer ganz anderer Natur erleben. Spiele mit Karten oder Landschaften ziehen ihn magisch an. Wie läuft es mit dem Spiel des Jahres 1983? Wird es nach eigenen Regeln bespielt? Taugt das Spiel heute noch etwas?
Steckbrief
Spiel
Scotland Yard
Verlag
Ravensburger
Veröffentlichung
1983
Idee
Diverse
Illustration
Diverse
Rating (BGG)
6.5
Komplexität
1.94 (Familienspiel)
Spielweise
kooperativ
Mechaniken
one-versus-many, hidden movement
Spielprinzip
Mister X macht seit Monaten London unsicher und begeht einen meisterhaften Clou nach dem anderen. Scotland Yard ist ratlos. X kennt sich hervorragend in den Straßen von London aus und kann den Mitarbeitenden des Yards immer wieder entkommen. Nun schickt der Polizeipräsident seine besten Detektive auf die Jagd. Werdet ihr Mister X entlarven und dingfestmachen? Wahrscheinlich würde Ravensburger das one-vs-many-Spiel so oder so ähnlich anpreisen, wenn der Klassiker heute erscheinen würde. Ihr könnt mit bis zu sechs Personen in die Geschichte eintauchen. Eine Person muss dabei Mister X übernehmen und sich durch London bewegen. Die anderen Personen schlüpfen in die Rolle der Detektive und versuchen, Mister X ausfindig zu machen.
Das Hauptelement ist ein Stadtplan, der aus nummerierten Verkehrspunkten besteht. Jeder Punkt kann dabei bis zu drei Farben – für jedes der Verkehrsmittel Taxi, Bus oder Untergrundbahn – haben. Mister X hat einen unerschöpflichen Vorrat an Tickets für jedes Verkehrsmittel. Die armen Detektive haben nur eine bestimmte Anzahl (10x Taxi, 8x Bus und 4x Untergrundbahn).
Mister X gewinnt, wenn er entweder nach Runden immer noch unentdeckt ist oder ein Detektiv nicht mehr in der Lage ist, sich zu bewegen. Die Detektive gewinnen, wenn ein Detektiv auf demselben Feld wie Mister X landet oder Mister X sich nicht mehr bewegen kann, ohne auf ein Feld der Detektive zu landen.
In jedem Zug geben die Spielenden einen ihrer Verkehrsmittel-Karten ab und bewegen sich mit dem Verkehrsmittel auf das nächstgelegene Feld mit der gleichen Verkehrsmittel-Farbe.
Alle paar Runden muss Mister X sich zeigen und gibt den Yard-Mitarbeitenden so die notwendigen Hinweise, um ihn einzukesseln.
Der besondere Reiz entwickelt sich dabei, dass man nach einer Offenbarung die Verkehrsmittel verfolgen kann und sich damit die Möglichkeiten erschließen, in welchen Feldern Mister X sein kann.
Dabei ist es so ausgelegt, dass mit dem Taxi meist nur kurze Streckenabschnitte, mit dem Bus teilweise mittlere Strecken und mit der Untergrundbahn lange Abschnitte machbar sind.
Neulich haben wir Beast gespielt, das in der Grundmechanik tatsächlich wie Scotland Yard ist – inklusive des Mustererkennens, wo das Beast langgegangen ist.
Unboxing
Meine Version ist das Originalspiel aus den 80ern. Ich habe gesehen, dass es mittlerweile auch moderne Varianten gibt, habe sie mir aber nicht weiter angeschaut.
Meine alte Version hat eine detailreiche Karte mit 3d-Effekt von London, ein Plastik-„Klemmbrett“ für die Dokumentation der Mister X-Wege, verstärkte Pappmarker für die Verkehrsmittel und einfache Meeple. Diese sind allerdings mit einem transparenten Fuß versehen, sodass man die Zahlen jederzeit gut lesen kann.
Ob im Original wirklich zugeschnittene Blätter dabei waren, weiß ich nicht. In meiner Version ist dies leider kein gängiges Blattformat.
Nicht zu vergessen natürlich den Mister X-Schutzschirm, sodass man nicht erkennen kann, wohin Mister X auf die Karte schaut. Das wirkt in etwa so gut, wie die schwarze Maske für den Meister aus Das Schwarze Auge (glaube zweite Edition). Eher Show als nützlich.
Bewertung
Als ich meinem siebenjährigen Sohn eine thematisch stimmige Einführung gegeben habe, wollte er natürlich sofort der Dieb sein. Wir haben es ihm einmal „vorgespielt“, Mister X zu spielen, und dann durfte er es (und ist es bis heute noch).
Tatsächlich habe ich nicht viel von dem Spiel erwartet, aber wir wurden alle positiv überrascht. Ihm macht es Spaß, aufgeregt durch die Gegend zu fahren und später zu merken, dass es eng wird. Mittlerweile nutzt er die Joker-Karten „2x hintereinander bewegen“ und die „Black“-Tickets (wir wissen nicht, womit er gefahren ist) absolut zielsicher ein, um aus brenzligen Situationen herauszukommen.
Die Züge, wo er sich zeigen muss, plant er im Voraus, sodass er dort auf Stationen landet, von denen man mit möglichst vielen Verkehrsmitteln wegkommt. Dadurch wird die Jagd quer durch London ein tolles Logik-Rätsel, das wir mit genügend Zwischenrufen, Bluffen und Trash-Talk zu kleinen immersiven Abenteuern gestalten.
Klar ist das keine drei Rock-Meeple wert, aber den silbernen Meeple hat es sich verdient. Hätte ich nicht mit gerechnet. Und jetzt hören wir gemeinsam Scotland Yard-Hörspiele und sind über die Karte gebeugt und verfolgen die Fährten der Junior-Detektive. Und ganz nebenbei werden die Zahlen bis 250 sicher. Großer Spaß für die gesamte Familie.
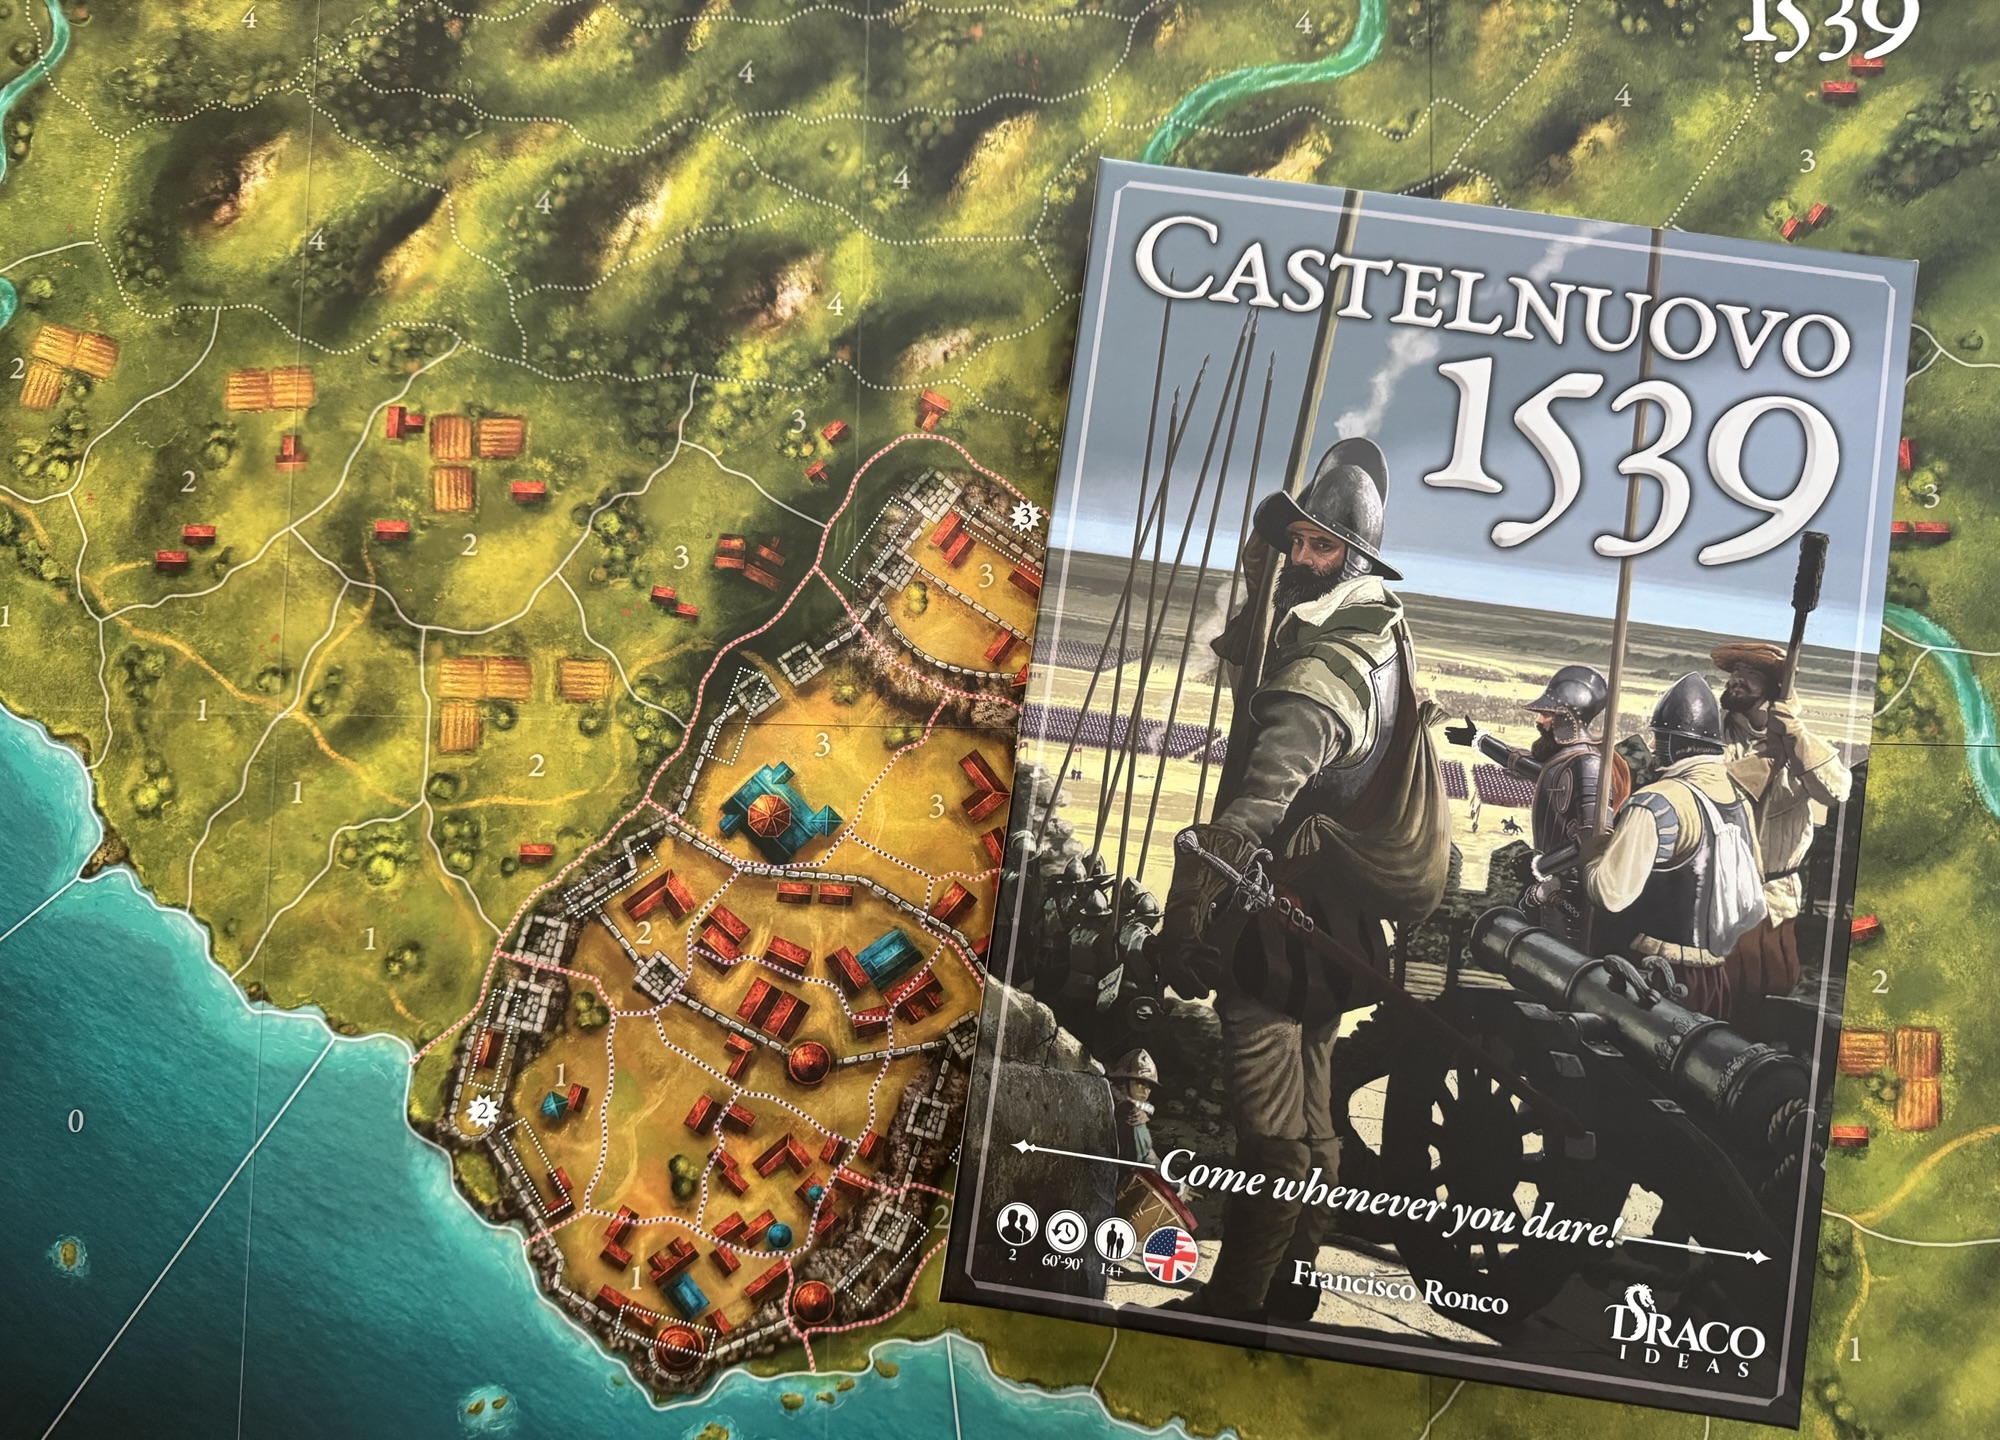
In 1539, a small Spanish garrison of troops numbering 3,500 men held the Albanian village of Castelnuovo for 22 days against the massive Ottoman army consisting of over 54,000 Turk soldiers. This siege took place as a part of the Ottoman-Habsburg struggle for control of the Mediterranean Sea in July 1539 at the walled town of Castelnuovo, which is the location of present-day Herceg Novi, Montenegro. After days of open trench warfare and more than a month of smaller combats, skirmishes, assaults and bombardments from the Turkish navy, the last Spanish defenders fell ending the siege. Castelnuovo 1539 is a wargame that focuses on this siege designed by Francisco Ronco. The defenders are safe behind sturdy walls and battlements but time and continual shelling from the Ottomans will lead to assaults over the walls. The battle is hopeless for the defenders but they can win the game by doing enough damage to the Ottomans to end their campaign and stop them from invading further into the Albania and then onto Spain and the rest of Europe. The game is very well produced using wooden blocks for soldiers, stylized walls, siege trenches and cannon along with ships and the board is also beautifully illustrated. The game is a block wargame where the strength of units are hidden from the opponent and plays pretty quickly in less than 90 minutes and really is a great representation of the battle and its history.
In Action Point 1, we took a look at the beautiful Game Board and its area movement scheme. In this Action Point, we will examine the units available to both sides and compare their relative strengths and weaknesses.
Units
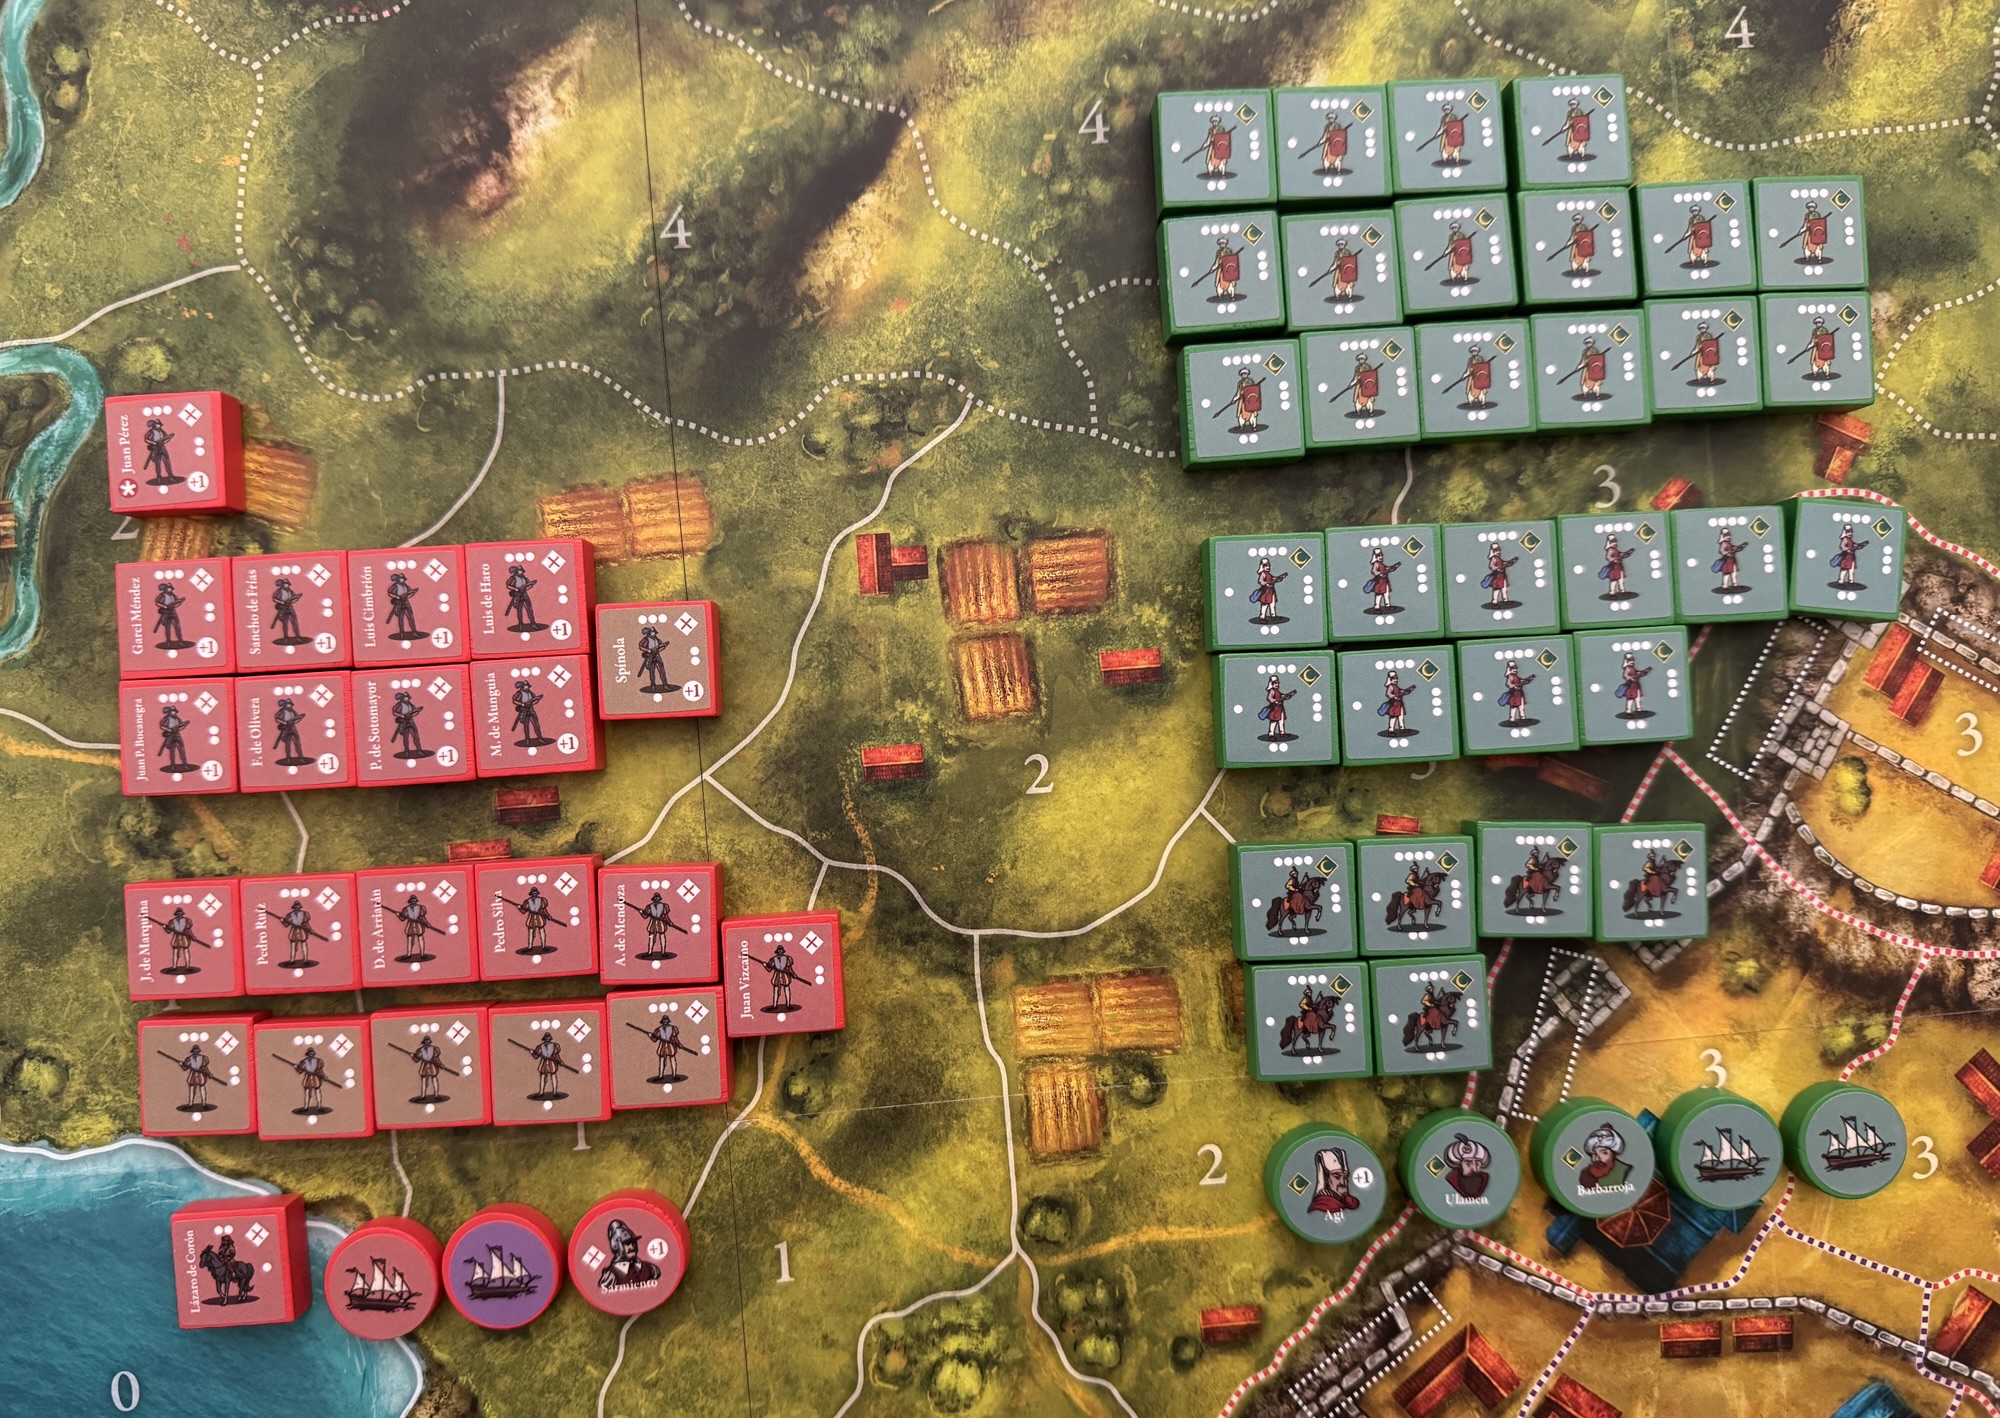
As a block wargame, all of the units in the game are represented by wooden blocks that have stickers affixed to them representing the fighting forces of the Spanish and the Ottomans. There are generally 3 types of units including Infantry, Cavalry and Naval. Infantry is a large category that includes Arquebusiers and Pikemen for the Spanish and Turkish Janissaries and Azab for the Ottomans. Cavalry units are fewer and include Albanian Cavalry for the Spanish and Sipahi for the Ottomans. Each Infantry and Cavalry sticker has a central icon with groups of dots printed on its sides which represent their Combat Strength and the number of dice that each unit will roll in combat. The blocks range in Combat Strength from 2 to 4 dots as not all units have the same Combat Strength. The number of dots oriented at the top of the individual block units represents the current Combat Strength of the unit and can be reduced when entering combat and taking losses. Naval units do not have dots, as they are used in a different way to Infantry and Cavalry units.
All blocks start the game at full Strength and each time a block receives 1 or more hits, it will be rotated counterclockwise so that the top of the block shows the Strength it has remaining. When a Spanish block loses its last Strength Point, it will be removed from the game permanently. The same will happen for Turkish Janissary blocks but for eliminated Ottoman Azab and Sipahi Cavalry units they will be able return to the game at the end of each round during the Reinforcement Phase.
Fleets represent the use of galleys as artillery platforms to support the land forces in their siege and to provide the opportunity to perform some amphibious landing operations with ground troops. The Fleet discs are placed on the board horizontally, unlike the other blocks, and in this way their presence is not hidden from the opponent. Fleet blocks cannot leave the sea areas and count as Artillery Batteries when playing Bombardment and Friendly Fire cards. Once placed, Fleets do not move during the game.
Let’s take a quick look at the statistical makeup of the opposing forces.
In the following table, you will see the number of different types available to each of the combatants. The Ottoman forces have a numerical superiority as they have the most Infantry units with 26, comprising 10 elite Janissaries and 16 Azab. The Spanish have just 21 Infantry, with 10 of those being Arquebusiers and 11 Pikemen. The Ottomans also have the edge in the number of Cavalry units available with 6 Sipahi as compared to just 1 Cavalry unit from the Spanish in the form of a single Albanian Cavalry. The Infantry typically are the backbone of the army and will do most of the fighting and do most of the damage while the Cavalry units will be used to move ahead quickly to seize key areas and set up defenses to allow for the Infantry who have slower movement to catch up. Each side has 2 Fleets and these are vitally important for the Ottomans as this is the means that they can bring onto shore additional units to siege Castelnuovo.
And a look at total Combat Strength for each side. But, first it is important to explain the Combat Strength of each of the units for both sides. The Spanish Arquebusiers have a Combat Strength of 3 as do their Pikemen. This means that these units will roll 3 dice in combat and will be able to take 3 hits before being killed. The Ottoman Janissaries have 4 Combat Strength as do the Azab. When you simply multiply the Combat Strength by the number of blocks of each type you will get their Total Infantry Combat Strength. The Ottoman has a total of 104 Combat Strength spread out amongst their 26 Infantry units and the Spanish have a total of 63 Combat Strength among their 21 Infantry units. This can be used to get a quick idea about which side is better and has more power but this can be deceiving as the Spanish have the walls which can slow down the sieging Ottomans and absorb hits as well. The Ottomans have 49.1% more Infantry Combat Strength than the Spanish with a numerical difference of 41. A fairly significant difference and when coupled with the fact that the Ottomans can bring back killed Azab units where the Spanish Infantry are removed from the game, it is easy to see that the Spanish have the tougher time of it. Also, the Cavalry advantage is on the side of the Ottomans with Sipahi having a Combat Strength of 4 as compared to the Spanish Albanian Cavalry’s Combat Strength of 2. This gives the Ottoman the advantage in Total Cavalry Combat Strength of 24 as compared to just 2 for the Spanish.
I do want to point out that the Spanish have better Leaders and some of their units are considered elite and gain advantage on their combat rolls. The Arquebusiers Blocks have a +1 printed on them as a reminder that they have a +1 bonus to their combat roll and this is a major advantage in combat.
The other difference in combat is a unit’s priority and when they get to roll their attack dice and if hits are scored steps will be removed before lower priority units get to roll. The priority is as follows:
Pikemen go first if enemy Cavalry is present and they are fighting in clear or rough terrain.
Cavalry, if no opposing Pikemen are present and the battle is fought in clear or rough terrain.
Arquebusiers.
All other Infantry will then attack simultaneously.
Cavalry, only if there are opposing Pikemen in clear or rough terrain.
Hits are scored when players roll a modified 5 or 6 result on their 6-sided dice. Remember that Arquebusiers get a +1 to hit, which means they hit on a roll of 4-6, which is a huge advantage. Also remember that there are Leaders and certain Leaders will give a +1 bonus to specific troops that are located in their areas.
Leaders must always have blocks of their side present in their areas on the board but do not count toward the 3-block limit per area. Leaders Agi (Ottoman Janissary Leader) and Sarmiento (Spanish Leader that affects all units with him) grant benefits to the dice rolls of the units they escort. Leaders do not have to accompany specific units and as such can move with any unit in the area they are in, or they can stay there with units other than the ones they originally moved in with. But Leaders must perform the full movement with the units they started moving with as you cannot drop or pick up a Leader during movement. You can move units from where the Leader is without taking the Leader with them, but some units will need to stay behind so the Leader is not alone in the area. If during combat, all blocks accompanying the Leader are eliminated, the Leader is eliminated as well.
Artillery Batteries
Both players have Artillery Batteries at their disposal, which represent vitally important siege pieces used to both defend and attack the city walls. These Artillery Batteries are in the form of red and green cannon meeples (they are very cute) and make a huge impact on the presence of the board as when they are placed they command respect. The Batteries allow players to play cards that fire from a distance and there can never be more than 1 of these Batteries in a single area of the map. The Spanish player’s Artillery Batteries are placed at the beginning of the game and cannot be moved while the Ottoman player can install an Artillery Battery when building Trenches with any cards that allow it. They can also move the Batteries through areas connected by Trenches using those same cards.
In Castelnuovo 1539, the Spanish and Ottoman fighting forces are deeply asymmetrical. The Spanish field a small, fixed and irreplaceable garrison of elite veteran Tercios focused on defense and repairing fortifications, whereas the Ottomans possess an overwhelming, recyclable horde of Azabs, Sipahi Cavalry, and Janissaries arriving by land and sea. You will feel the asymmetry in the game and I think that it is really very well done by the designer to represent this very difficult siege from history.
With this My Favorite Wargame Cards Series, I hope to take a look at a specific card from the various wargames that I have played and share how it is used in the game. I am not a strategist and frankly I am not that good at games but I do understand how things should work and be used in games. With that being said, here is the next entry in this series.
Card #88: National American Woman Suffrage Association from Votes for Women from Fort Circle Games
Votes for Women is a very interesting card-driven game that covers the American Women’s Suffrage Movement from 1848-1920, culminating in the ratification of the Nineteenth Amendment which granted women the right to vote. The game is a 2-player game, that has a fully developed solitaire mode with an “Oppobot” and offers a cooperative mode for those who don’t wish to play as they Opposition. The Suffragist player will have to push Congress to propose the Nineteenth Amendment, and then focus on campaigning to have a minimum of 36 states to ratify the Amendment. The Opposition side will try to prevent Congress from proposing the amendment and failing that to have 13 states reject the amendment.
The game uses cards in a fairly traditional CDG way as there are events that can be be taken or the cards can be played to do things like Campaign, Organize or Lobby Congress. Each card has a specific Card Era that is used to create of the each players’ Draw Decks. Late cards will be on the bottom of the deck, Middle cards will be in the middle of the deck and Early cards will be on the top of the deck. The Suffragist and Opposition decks each have one Start card that will be placed in the player’s hand at the start of the game. Some Event Cards have a prerequisite and some of the cards require a player to roll a 6-sided die and only take the the action on a roll of 3-6. Otherwise, the Event Card is discarded with no effect. The cards in this game are also steeped in historical details, from the name of the events that tie back to specific individuals or happenings, to major moments in the struggle. This game is about the history of the struggle for the right to vote and it is very good!
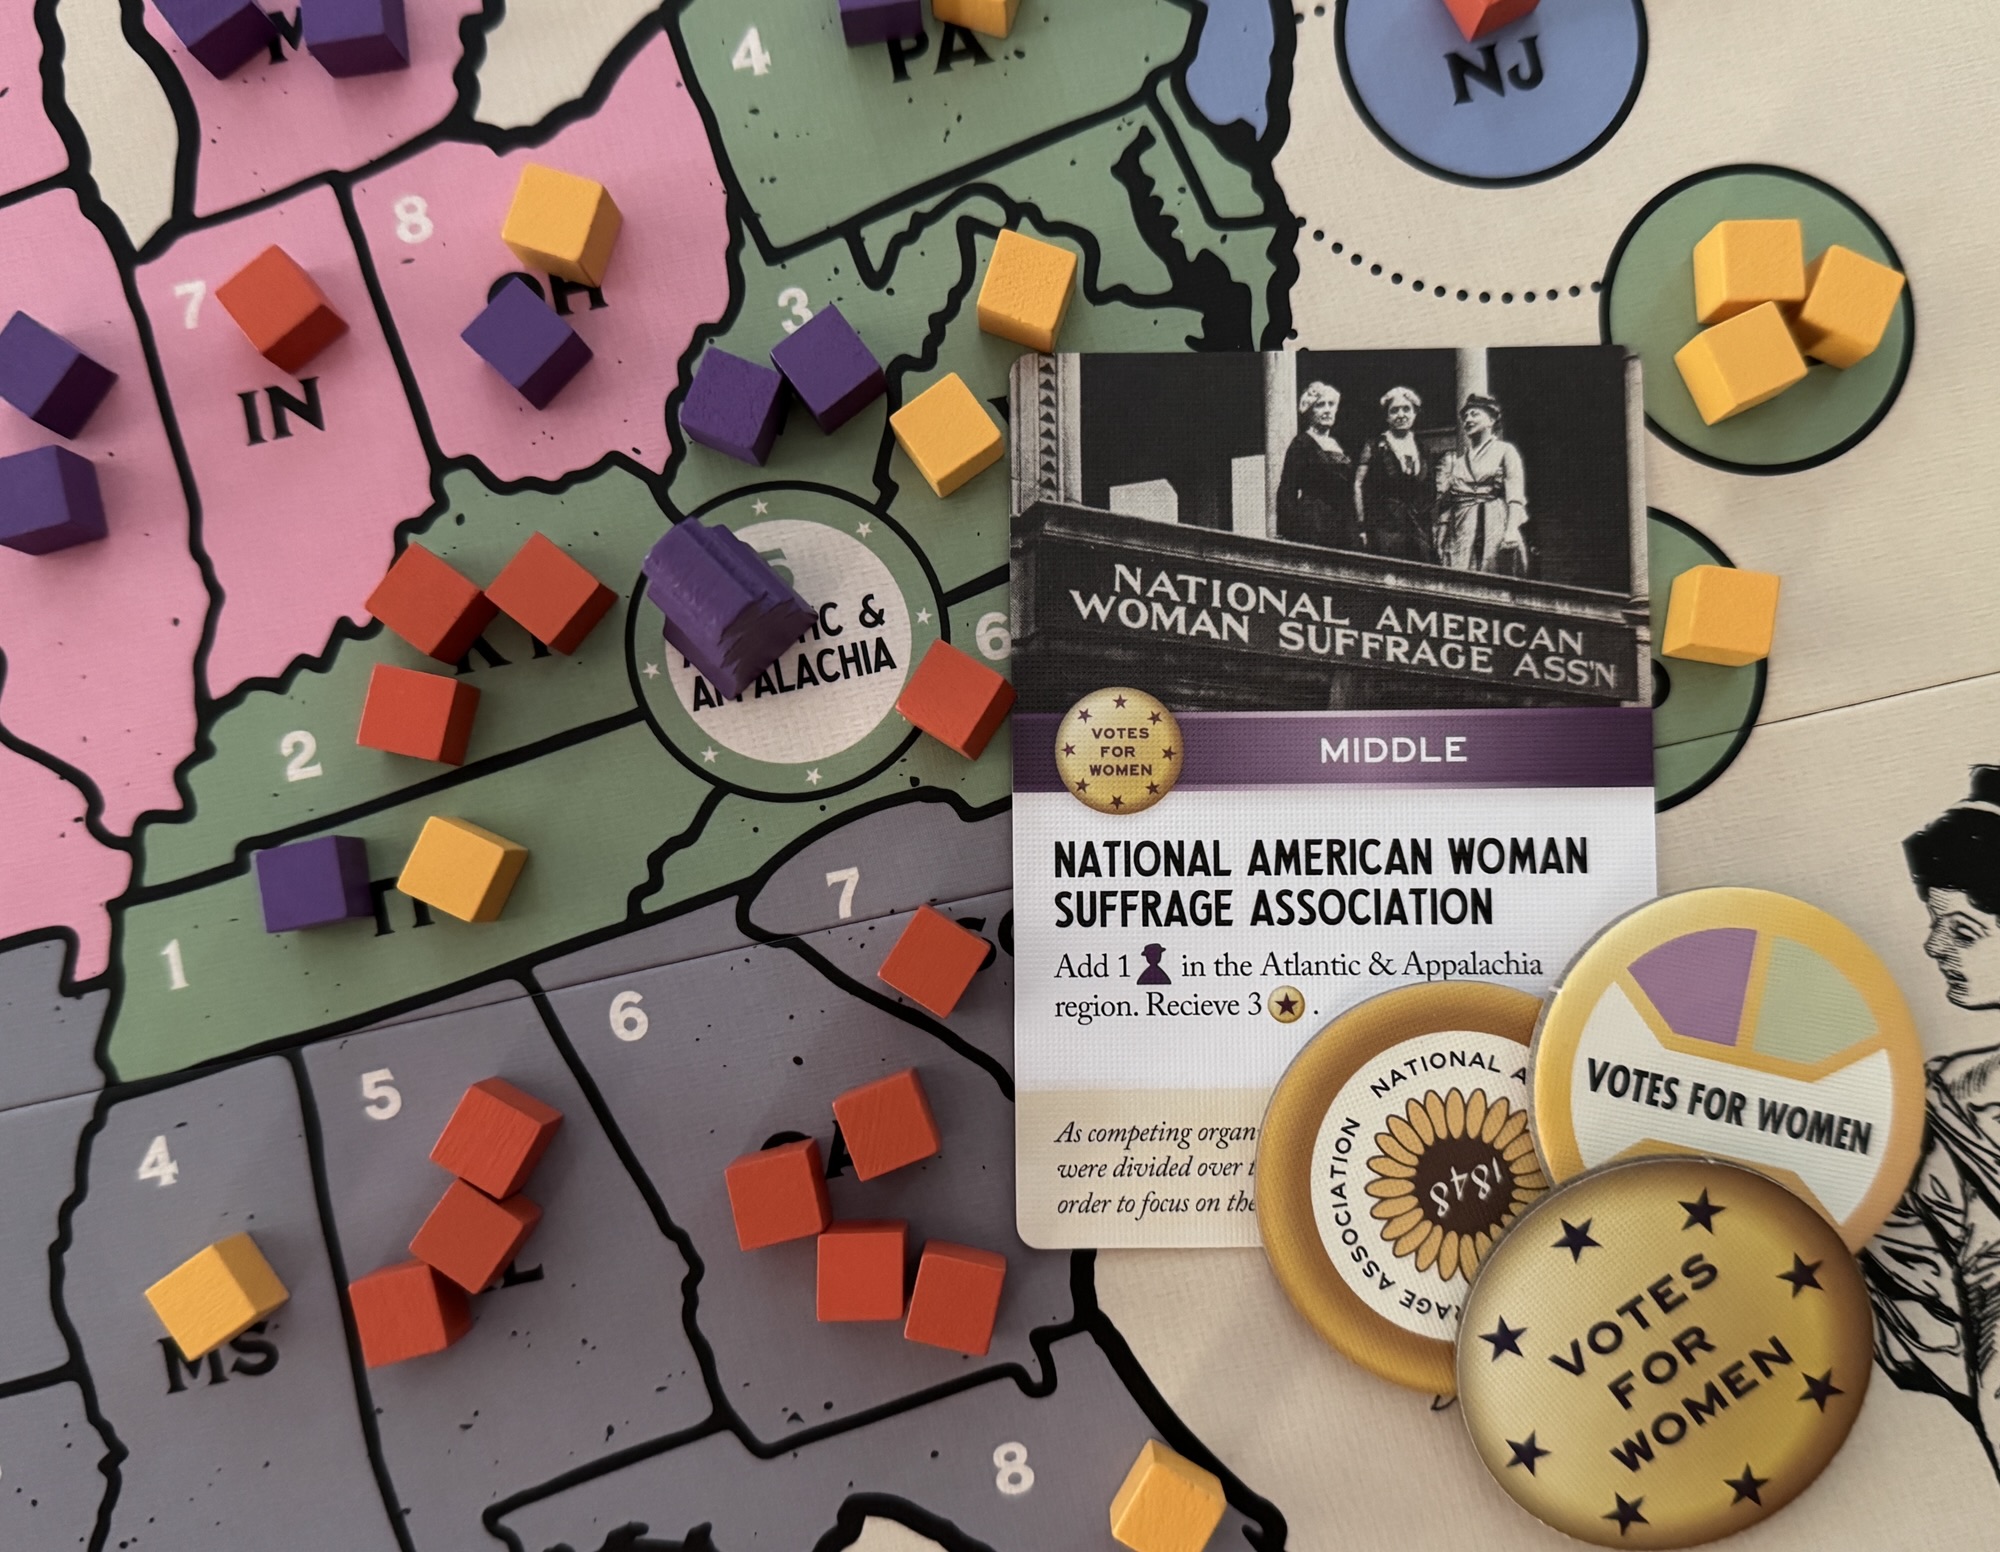
One of the more interesting aspects about the mechanics of the game is the use of Campaigners to go about trying to influence the attitude of the people and legislators regarding the Nineteenth Amendment through the Campaign Action. When a card is played for a Campaign Action, the player rolls a die, either a 6-sided or 8-sided die depending on what cards have been activated, for each Campaigner they have in play. The player then gets to take the dice and their results, which range from 1-8, and assign a specific die to each of their Campaigners. Each Campaigner may then place the corresponding number of cubes, matching the Campaigner’s color, in the States within the region that the Campaigner is located in. The player may spend a Button to move the Campaigner to a different region, but all of the corresponding cubes must be put into the same region. This is a great way to get a lot of influence out on the board to begin taking control of various States for the final vote in the game. This also is a very efficient way of doing this as you will be rolling 2-3 dice for your Campaigners and then spamming the States. With that in mind, today’s card is the National American Woman Suffrage Association and it provides the Suffragist player with a new Campaigner (purple) to place out specifically into the Atlantic & Appalachia Region that includes the States of Kentucky, Tennessee, West Virginia, Pennsylvania, Virginia, North Carolina, Maryland and Delaware. The card also grants the Suffragist player with 3 Buttons that can be used as described above to relocate a Campaigner from one state to another. This card is very helpful and should be played for the Event 9 times out of 10 and will make a huge difference in the outcome of the game. Once a 2nd or 3rd Campaigner is deployed, I tend to take Campaign Actions rather than some of the less intensive placement options or Events.
The National American Woman Suffrage Association (NAWSA) was an organization formed on February 18, 1890, to advocate in favor of women’s suffrage in the United States. It was created by the merger of two existing organizations, the National Woman Suffrage Association (NWSA) and the American Woman Suffrage Association (AWSA). Its membership, which was about 7,000 at the time it was formed, eventually increased to 2 million, making it the largest voluntary organization in the nation. It played a pivotal role in the passing of the Nineteenth Amendment to the United States Constitution, which in 1920 guaranteed women’s right to vote.
Helen Hamilton Gardener, Maud Wood Park and Carrie Chapman Catt at Suffrage House in Washington, D.C.
Susan B. Anthony, a long-time leader in the suffrage movement, was the dominant figure in the newly formed NAWSA. Carrie Chapman Catt, who became president after Anthony retired in 1900, implemented a strategy of recruiting wealthy members of the rapidly growing women’s club movement, whose time, money and experience could help build the suffrage movement. Anna Howard Shaw’s term in office, which began in 1904, saw strong growth in the organization’s membership and public approval.
After the Senate decisively rejected the proposed women’s suffrage amendment to the U.S. Constitution in 1887, the suffrage movement had concentrated most of its efforts on state suffrage campaigns. In 1910 Alice Paul joined the NAWSA and played a major role in reviving interest in the national amendment. After continuing conflicts with the NAWSA leadership over tactics, Paul created a rival organization, the National Woman’s Party.
Here is a link to our full video review of the game:
With this My Favorite Wargame Cards Series, I hope to take a look at a specific card from the various wargames that I have played and share how it is used in the game. I am not a strategist and frankly I am not that good at games but I do understand how things should work and be used in games. With that being said, here is the next entry in this series.
#84: Marconi Transmitter from The Hunt from Salt & Pepper Games
I have played several hidden movement games over the years and enjoyed them all. Some of these titles have included wargames such as They Come Unseen from Osprey Games, Sniper Elite: The Board Game from Rebellion Unplugged and Bomber Command from GMT Games as well as a few board games including Hunt for the Ring from Ares Games. The concept of moving cautiously, attempting to evade pursuers, all while trying to locate and acquire or destroy objectives makes for a very interesting gaming experience. These situations can make for some really tense games that cause your head to ache and your wits to be tested. But they rely on some bluffing as well. Trying to force your opponent to anticipate where they think you should be and then trying not to be there. A really great mechanic in board games but not always easy to pull off and make for a very playable and interesting game. In 2022, we played a new design from Matthias Cramer and Engin Kunter that took this hidden movement concept and put it into a historically based game about the struggle over control of the South Atlantic between the British Royal Navy and the German Kriegsmarine during the early years of World War II called The Hunt from Salt & Pepper Games.
The Hunt is a Card Driven Game where the German player has to attempt to stay hidden while trying to sink merchant shipping as the Royal Navy hunts for them throughout the South Atlantic. The players each have asymmetric actions to use to accomplish their missions and each has a tough time doing what they have to do. But, if they manage their cards wisely, using them as effectively as possible, they can successfully either evade their pursuer or catch their prey.
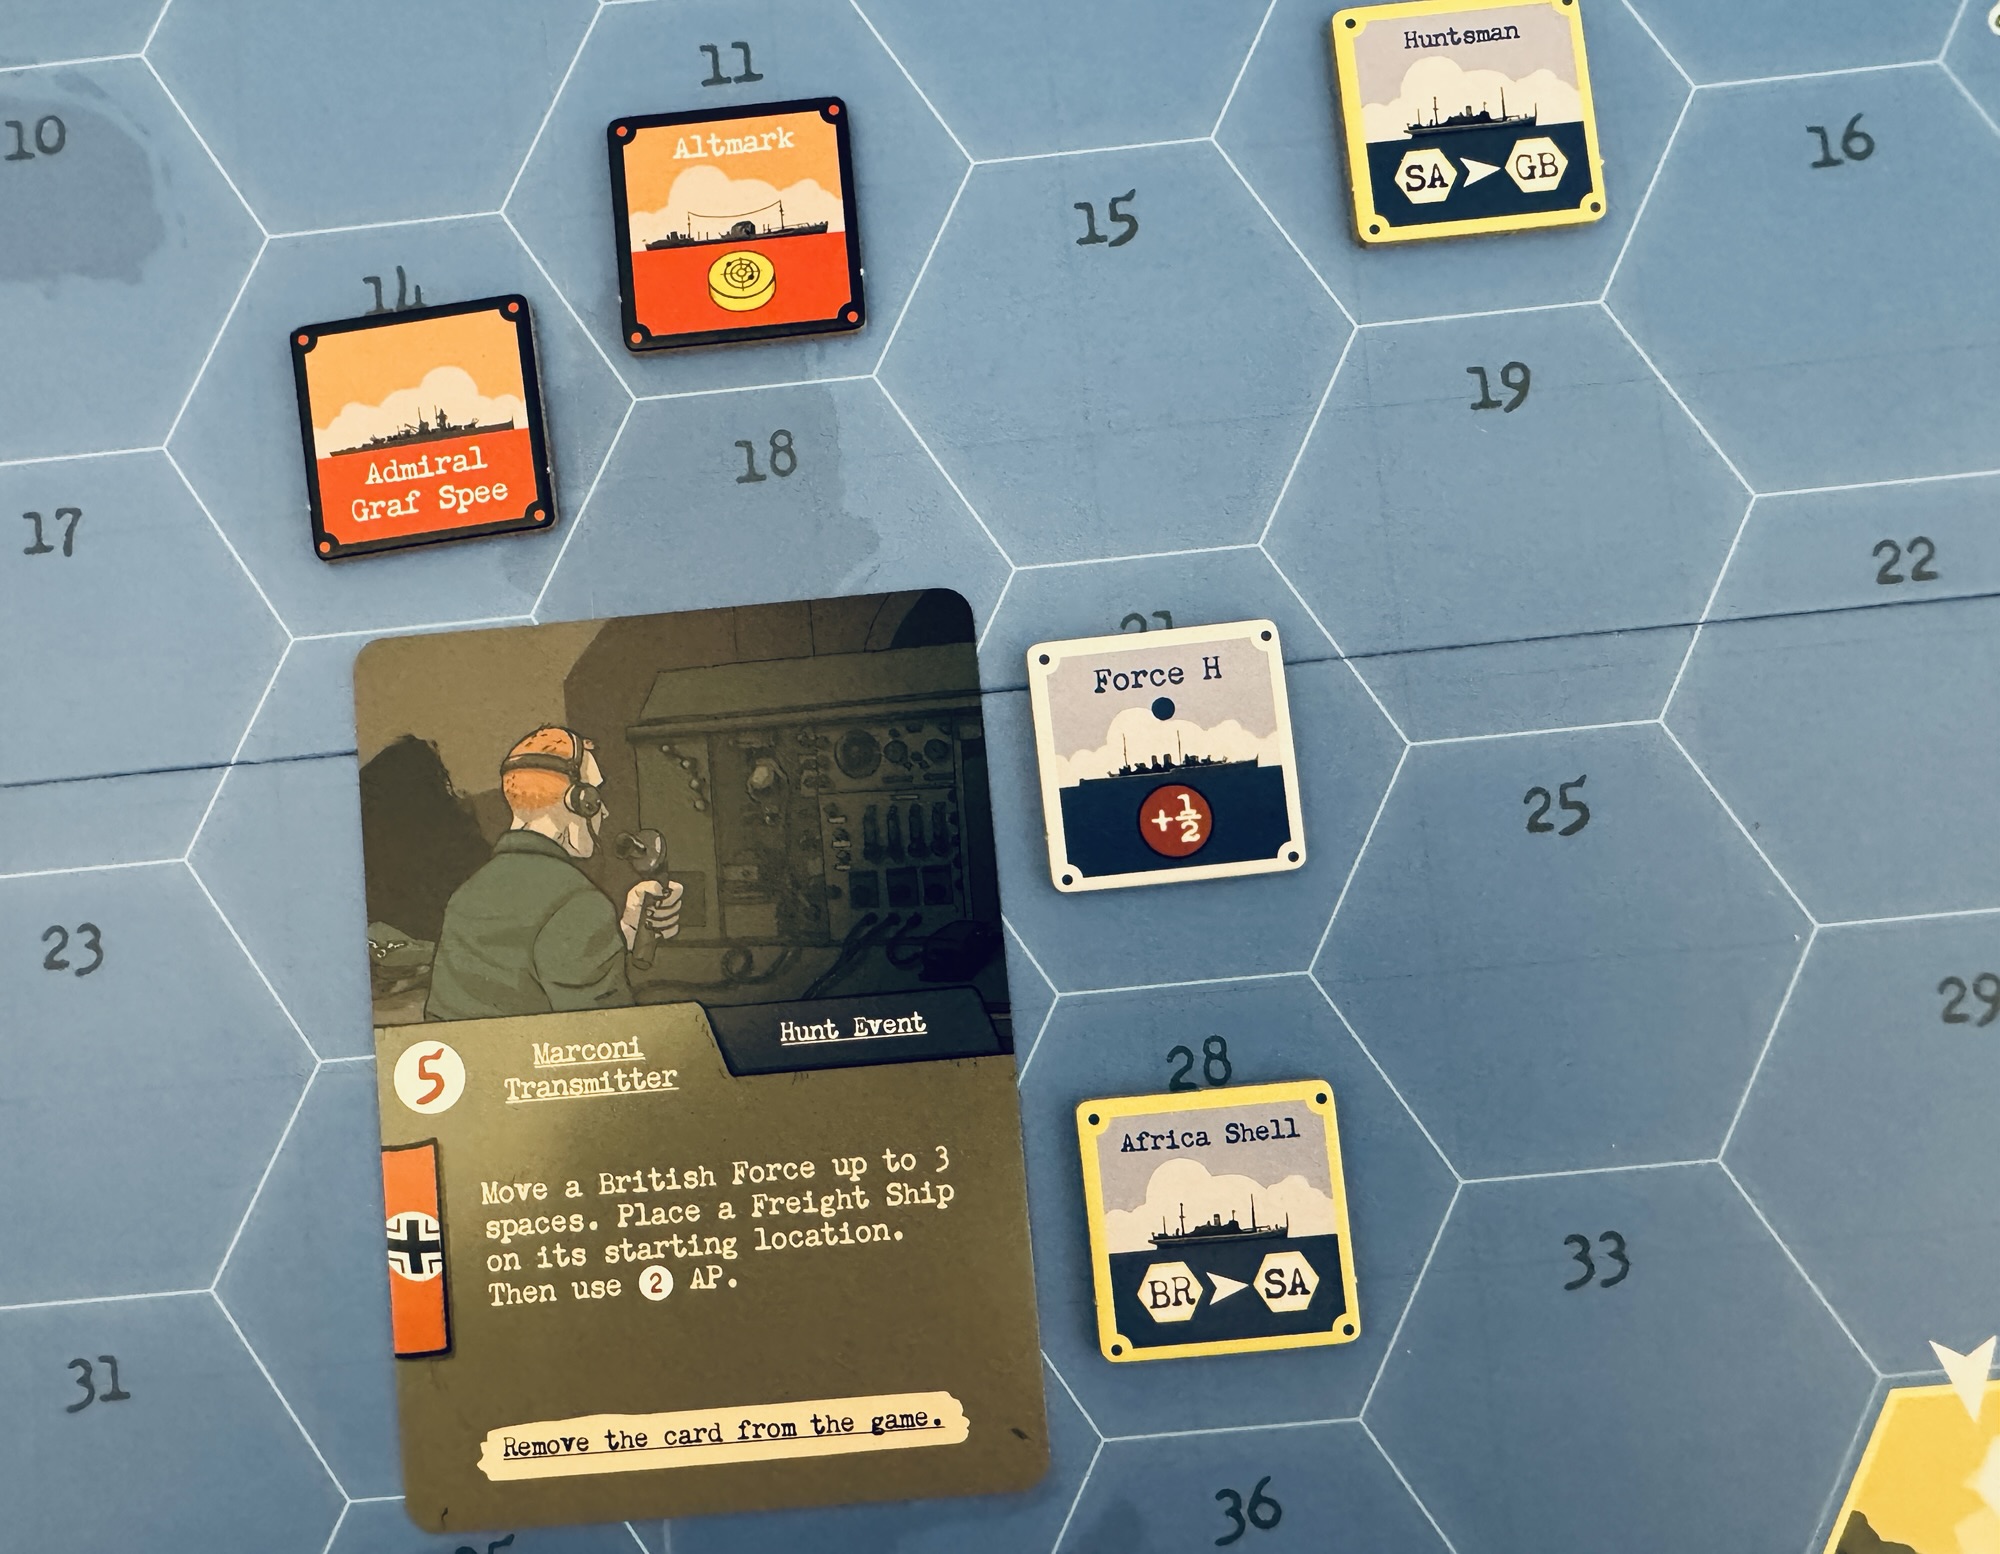
In today’s post, we will take a look at the very useful German card Marconi Transmitter. Marconi Transmitter is a 5 Ops card, which makes it a very important card in the German deck as it allows for the taking of 2-3 actions in a single turn, but for which there is an even more important use as a means of setting yourself up for that easy score to sink a merchant vessel. In the game, the British have multiple Task Forces that will search the South Atlantic for the Graf Spee attempting to find her, engage her and sink her to the bottom. As a Hidden Movement game, the German player has surprise on their side and must use tactics that manipulate and change things for the British player making their searches much more difficult and time consuming. The Marconi Transmitter allows the German player to move a British Task Force up to 3 hexes away and then to choose a Freight Ship and then place that ship back onto its starting location on the board. This card has the ability to clear the way of enemy ships searching for the Graf Spee but then follows that up with the relocation of an unsuspecting Freight Ship to place it within striking distance of the pocket battleship for an easy kill. I just love these kind of cards that manipulate things and provide means to change up the current situation.
Marconi transmitters were pioneering early radio devices developed by Guglielmo Marconi in the late 1890’s. Primarily consisting of spark-gap transmitters, they generated radio waves that allowed ships and continents to communicate via Morse code without wires, paving the way for modern broadcasting and other telecommunications. This advancement was used by the Allies to hunt for the Graf Spee in the South Atlantic and caused the German pocket battleship to change some of its operating procedures. The Admiral Graf Spee did not elude the Marconi radio transmitters through electronic jamming. Instead, her commanding captain, Hans Langsdorff, successfully evaded Allied interception by using strict radio silence and executing aggressive threats to ensure merchant vessels never broadcasted their distress calls.
When the Graf Spee intercepted a merchant ship, she used her speed and imposing silhouette to intercept before a signal could be sent. The standard British raider defense was to use their Marconi-equipped transmitters to call for help. However, as soon as a merchant ship began transmitting a warning, the Graf Spee would flash a signal demanding they cease transmission immediately, threatening to open fire with her devastating main armament. Outgunned and at the mercy of the German ship, the merchant crews complied, shutting off their wireless.
Because the Graf Spee traveled thousands of miles across the remote South Atlantic and Indian oceans, she remained unseen by simply avoiding the heavy shipping lanes. Captain Langsdorff further deceived Allied forces by utilizing visual camouflage. By attaching fake turrets and a dummy funnel, and flying false colors, he bypassed merchant shipping unmolested while maintaining strict radio silence to keep his location hidden.
Here is a link to our full video review of the game:
In 1539, a small Spanish garrison of troops numbering 3,500 men held the Albanian village of Castelnuovo for 22 days against the massive Ottoman army consisting of over 54,000 Turk soldiers. This siege took place as a part of the Ottoman-Habsburg struggle for control of the Mediterranean Sea in July 1539 at the walled town of Castelnuovo, which is the location of present-day Herceg Novi, Montenegro. After days of open trench warfare and more than a month of smaller combats, skirmishes, assaults and bombardments from the Turkish navy, the last Spanish defenders fell ending the siege. Castelnuovo 1539 is a wargame that focuses on this siege designed by Francisco Ronco. The defenders are safe behind sturdy walls and battlements but time and continual shelling from the Ottomans will lead to assaults over the walls. The battle is hopeless for the defenders but they can win the game by doing enough damage to the Ottomans to end their campaign and stop them from invading further into the Albania and then onto Spain and the rest of Europe. The game is very well produced using wooden blocks for soldiers, stylized walls, siege trenches and cannon along with ships and the board is also beautifully illustrated. The game is a block wargame where the strength of units are hidden from the opponent and plays pretty quickly in less than 90 minutes and really is a great representation of the battle and its history.
In this series of Action Points, we will first take a look at the beautiful Game Board and its area movement scheme, examine the units available to both sides and compare their relative strengths and weaknesses, take a look at the 5 different types of Command Cards and discuss how they are used, look at the 2 different types of rounds including a Siege Round and an Assault Round and how they differ, take a look at an example of combat and bombardment and finally examine the victory conditions for both sides and how casualties effect this outcome.
Game Board
The Game Board represents the fortified city of Castelnuovo and its surrounding areas, including the Mediterranean Sea to the south and the rolling countryside to the north. The Game Board is divided up into areas which are used to regulate the movement and positioning of the block units. The Game Board is pretty large really measuring in at 29″ x 21″ and is a fully mounted map board and is very nicely illustrated by Paco Arenas and absolutely was a joy to play on.
As you look at the Game Board in the picture above you will notice a few things. The areas of the city of Castelnuovo are outlined in red with a dotted line representing the city walls around its perimeter. There are also 4 inner areas of the city itself outlined in purple. Sometimes the game rules make reference to the “Fortress”, which means the 4 areas of the city and the walls surrounding them.
Here is a closeup of the Fortress where you can see the colored lines a bit better. You will also notice that there are rectangular boxes on top of the walls in the Fortress outlined with white dotted lines. These are spaces where the wooden wall segments are placed to represent the Resistance Level of the walls. You will see that in each area of the city that has walls, there is a number found in a white star that represents this Resistance Level. There are areas with both Resistance 1, 2 and 3 inside the Fortress. As the walls are attacked with bombardments from artillery, their Resistance Level will be degraded represented by placing wooden cubes in each area marking the current Resistance Level with 1, 2 or 3 cubes. If an area has 3 Resistance Level and takes a hit, the player will remove one wooden piece indicating that the Resistance points have dropped. Once the Resistance Level reaches 0, the walls are destroyed and the wooden wall pieces are removed from the board. The Ottoman player may then storm the walls and attack the defending units in the city.
There are 2 types of terrain found in the countryside of the Game Board with clear terrain being shown by a solid white outline and rough terrain outlined by a white dotted line. Each area of the map has a Height Level value printed in its location, which indicates the height of the area. The heights are 0 being the lowest, or basically the sea level with a 4 being the highest which represents a mountain level. The height effects the shooting of firearms. In addition, other terrain features are printed on the Game Board including the coastline, which separates the sea areas from the land areas, and also is a landing point for a majority of the Ottoman player’s reinforcement troops. Also, the 3 areas with Resistance Levels of 2 and 3, marked with the white star, are the areas that the Ottoman army must occupy at the end of any round to win the game.
Movement is specifically tied to the type of lines found in the areas of terrain. Units and Leaders can move by playing Action Cards, which allow a group of 1 to 3 units that are in the same area to one or more areas. Activated Infantry units will have 2 movement points and Cavalry have 4 movement points. Moving into a clear terrain area costs 1 movement point while moving into a rough terrain area, which is marked with white dotted lines will cost 2.
The countryside areas have various depictions of buildings including shacks, storage sheds, houses as well as farm fields. These buildings do not affect combat or movement and are simply illustrative of the surroundings of the city. They are also many trees and bushes drawn on the Game Board with connecting roads also shown.
There are a few pieces that the players will place on the Game Board at the outset of playing including the wall blocks already mentioned as well as the Bastions. These Bastions are used by the Spanish player and are placed at the beginning of the game in any terrain areas outside of the city proper. These Bastions function similarly to the walls of Castelnuovo’s fortifications. Once these are placed, they cannot be moved and will remain on the board even if their Resistance drops to 0 and they are destroyed. The Ottoman player can destroy them with artillery Bombardments or by spending Trench Points from Command Cards when entering them. These Bastions do not provide defense to the Ottoman player.
The Casualty Track is printed in the bottom left hand corner of the Game Board and is used to keep track of the number of blocks lost by the Ottoman player. In addition, also tracked will be Leaders and the number of Assault Rounds used by the Ottoman player.
The game really is a nicely made production with the Game Board being one of the best parts of the package. It is clear, well laid out and takes little to no time to understand its locations and areas. I think that one of the strengths of this game is that it is not only nicely produced but the rules are very clear and the strategy of what each side should be doing, by taking advantage of their defenses and the terrain.
In Action Point 2, we will examine the units available to both sides and compare their relative strengths and weaknesses.
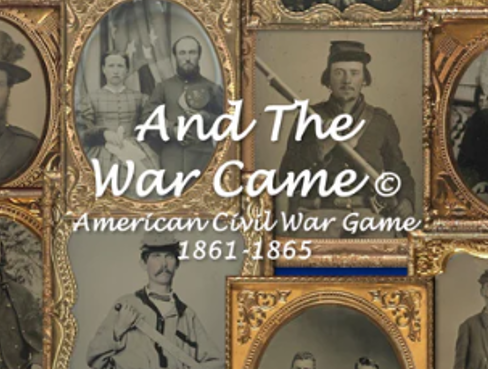
While attending Buckeye Game Fest this spring, we were gifted a copy of a newly published game called And the War Came: American Civil War 1861-1865 from Pinkerton Games, which is published by Blue Panther LLC and Steve Jones. The designer and owner of Pinkerton Games Larry Pinkerton had been their earlier but had to leave due to some other pressing business and we were unable to meet but were very grateful for the game. Upon returning home, I reached out to Larry to see if he would give us a bit of an inside look at the design and he was more than willing to discuss the game.
Grant: Larry welcome to our blog. First off please tell us a little about yourself. What are your hobbies? What’s your day job?
Larry: Grant and Alex, first, thanks for the opportunity to tell you about myself, and my game, And The War Came. I’m a lifelong resident of southwest Ohio, from the Dayton area. I’ve got three great adult kids, each working on their families and/or careers. I’m now retired from both my civilian job, and my almost 34 years as a traditional Ohio National Guard member-last duty assignment as an Air Defense Brigade Commander-so now more time for hobbies.
Now that And The War Came is finally done, I enjoy hanging with my kids, playing music, and traveling. I still do part time contract work in support of US Army training events, which I enjoy as well. And I hope to find more time for playing other wargames too!
Grant: What motivated you to break into game design? What have you enjoyed most about the experience thus far?
Larry: I’ve always been interested in the American Civil War, and many years ago it came to me that a block style game and a strategic level treatment of that war would make a great game-one that didn’t really seem to be available, at least for what I was looking for. I’ve really enjoyed developing the game, adopting, changing or dropping processes, seeking to get at the right balance of playability, workable mechanics and good history. It took a while, but I’m happy with the results.
Grant: What is your upcoming game And the War Came about?
Larry:And the War Came is a strategic level American Civil War game, focused on the southeastern United States. It started life as a block game, but when I decided to self-publish, I switched to rotatable counters due to cost. But play is similar-it’s area movement and card driven, so those familiar with Columbia style block games will recognize some of the mechanics.
Grant: What does the title mean in relation to the history of the American Civil War?
Larry: I bounced so many title ideas and finally settled on And The War Came, which is a sentence in Lincoln’s 2nd inaugural address (March 4, 1865). I felt that line summarized how the United States stumbled and staggered into civil war. And the wonderful Carte de Visite Collection images from the US Library of Congress I chose for the game box spotlight who the actual participants really were.
Grant: What games gave you inspiration for your design?
Larry: Columbia Game’s Hammer of the Scots and Victory Game’s The Civil War 1861-1865 were by far the strongest influences.
Grant: What is important to model or include in a game about the American Civil War?
Larry: Above all, I think it is leaders and leadership at the corps and army level. Any discussion of ACW campaigns seems to hit on the “what ifs” of senior leaders. There were simply so many generals I could have chosen to model in the game, but I finally settled on 22 Union and 19 Confederate leaders that did or could have risen to army or independent command. The formations on both sides were so similar, in my opinion it was the leadership that was truly decisive.
Grant: What challenges did you encounter in the design? How have you overcome them?
Larry: Wow, there were a lot; game flow, simple but historically accurate mechanics, relative strength and play balance, rail and naval capacity, re-playability, map scale-all had to be refined through trial and error, playtesting and compromise. And countless rulebook edits! Rules concepts I thought made perfect sense in my head and on the page drew several questions when reviewed by others. But I think it’s a pretty good final product.
Grant: What is the scale of the game? Force structure of units?
Larry: Regional area movement, and seasonal turns, representing three months. The map is bounded by eastern Kansas to eastern Texas on the western edge, New Jersey to northern Florida along the Atlantic Coast, lower Midwest on the northern edge, and Gulf of Mexico on the southern. Most states contain 4 to 10 areas-states with better road networks tend to have less areas. But there is more territory than units to control it. Fortress cities (i.e. Washington, D.C.), major railroads, navigable rivers, and mountains and swamp areas are also portrayed on the map. Rail and naval support capacity change each year.
Units represent infantry or cavalry corps, with a strength of from 1 to 4 divisions, or forts representing 1 to 4 installations. Unit count is: Union-33 Infantry counters, 10 Cavalry counters, 5 Fort counters, Confederate-26 Infantry counters, 8 Cavalry counters, 8 Fort counters.
Grant: What is the counter anatomy?
Larry: Very straightforward if familiar with Columbia style block wargames-a mechanic I have always admired for simple and clean fog of war, step reduction, and ranged or initiative combat. \Counters are square with strength point symbols (divisions) arrayed along each edge, plus movement and combat ratings. Infantry has a combat value of C2 with a move allowance of 1. Cavalry has a combat value of B1 with a move allowance of 3. Forts have a combat value of A1 with a move allowance of 0-they are stationary. There are also corps insignia (Union) or battle flags (Confederate) just to add historical flavor, and the branch insignia of the period for infantry, cavalry or forts. Ultimately, I chose to give similar units of both sides the same combat or movement ratings (since both Union and Confederate formations grew from the same organizational foundations and traditions), but those ratings can be modified by the leaders who command them, both at corps and army levels, and/or the battlefield terrain.
Grant: What does it mean the “game is We Go turn based”?
Larry: Most functions are conducted by both players at the same time. For example, in the Administration Step, both players recruit (buy) their new units/strength points, enter new or recovered from wounds generals, or administratively move/transfer generals already on the map to new assignments/commands. When both players are done, they go to the next step, (Operations), with Action Phases where each plays a card to determine who moves first, they complete their moves and then resolve any battles that result from movement. The Logistics Step and Victory check complete a turn.
Grant: What type of experience does this approach create?
Larry: It minimizes down time for one. Actions in the Administration Step, Operations Step, Logistics Step happen simultaneously. Only in the Operations Steps’ Action Phase (or depending on the season, phases) does movement happen sequentially. This limits the action/reaction dynamic to operations, where maneuver happens in small chunks due to the seasonal card play. Neither side is able to make big sweeping moves, while the other side can only watch-the mechanic enables campaigns like Gettysburg or Vicksburg, although they may not necessarily occur during the course of play.
Grant: How does the game use cards?
Larry: Cards list the number of “orders” you can issue to units in order to conduct movement or other actions. There are also cards with both events and orders where players must choose which to use. And most cards have a bonus action (improved combat, movement, or leader promotion) to spice things up. The season determines the number of cards each player receives that turn. The Winter season/turn, each player receives only one card-in the single Action Phase, each player compares their card to the other player’s to determine who moves first (initiative), then second, then resolve any combats. This makes for a short turn. In both Spring and Fall seasonal turns, players receive two cards each, then play their cards against each other in each of the two Actions Phases, conducting moves and combat. In the Summer seasonal turn, three cards are dealt to each player-thus there are three Action Phases that turn.
Grant: What type of cards are included? Can you share a few examples?
Larry: There are 30 cards in the common game deck (there are not separate unique decks for Union or Confederate players). The deck includes 22 orders cards, each card with a value of 1, 2, 3, 4 or 5 orders. The orders determine how many units (corps) or commands (see Leaders below) can be moved with that card-a card with only one order allows the movement of only one unit, etc. Orders can also be used to promote generals or repair rail roads, etc. Again, most, but not all of these 22 cards also have a bonus that improves movement, or combat for a unit, or gives a free general promotion.
There are also 8 cards that include a combination of orders and events such as blockade impacts, partisan activities, native uprisings, surprise attacks, diplomatic incidents, immigrant or native recruits, or spy activity-each event with favorable impacts for themselves, or negative impacts for the opposing player. I chose for the event cards to be generic in nature and usable for both sides, verses specific events (i.e. Trent Affair) scripted events. For these 8 cards, players have the option to play the event and still have two orders to move other units, or not play the event at all, and have all three orders for movement.
The entire deck is reshuffled at the start of a new year. Since each player only receives 8 cards in a four season/turn year, only 16 of the 30 cards are played each year-some cards may not get played during the entire war, while others may reappear several times.
Grant: How does combat work?
Larry: Again, similar to other Columbia style block games.
Paraphrased from the rulebook:
Units Fire or Retreat in a combat round. The sequence of combat is A class units fire/retreat first, before B class units, followed by C class units which fire/retreat last. If both sides units are the same class, the defender has the advantage, and fire/retreat before attacking units of the same class. A general’s initiative rating may change who has the first shot advantage. To Fire, roll as many dice as the unit’s current strength points (SP). A hit occurs for each die roll equal to, or less than the unit’s combat number rating. Hits on the enemy take effect as they happen, each hit immediately reducing the enemy unit strength point count by one. Say a 3 division (SP) infantry corps has a combat rating of C2-that corps rolls 3D6 dice and every “1” or “2” rolled is a hit, reducing enemy strength and effectiveness when returning fire. In a battle between a B1 cavalry unit and a C2 infantry unit, the B1 rolls first, but only scores a hit for each 1 rolled. The C2 rolls second and scores a hit for each 1 or 2 rolled. One round of combat is complete when each unit fires or retreats.
Some unit strength may be recovered at the end of combat if the unit is not destroyed-with this recovery rule I’m trying to account for after the battle return to duty wounded, stragglers, local prisoner exchanges, etc. I was aiming for about 20% casualty rates in combat.
Grant: How do Leaders work? How are they killed or wounded?
Larry: Leaders are used to command corps or armies (units under the command of a general are actually called “commands”, i.e. Sherman’s command). A leader imparts his initiative (A, B, or C class) and tactical ratings to the unit or units he commands. In Sherman’s case, he changes a C2 infantry corps under his command to a B2. A leader’s initiative and tactical ratings may change at different ranks. And I’ve added optional rules to randomize when leaders enter the game, and their ratings.
Leader counters also rotate-they all enter the game as a one star general. They may be promoted to two or three star rank. Grant and Sherman can even be promoted to four star (GEN) rank as they historically became army group commanders. A one star general (BG) controls one corps counter; a two star (MG) may command one or two corps.
The only way a leader can be promoted to three stars (LTG) rank is to take command of one of the 5 named armies: Potomac, Cumberland, and Tennessee for the Union; Northern Virginia and Tennessee for the Confederacy. Named armies may contain four or more corps, depending on the army. And only named armies may have subordinates of one or two star rank. If a three star army commander is relieved of command, there is a political cost, and the leader reverts to one or two star rank.
Leaders also represent staffs and logistics trains, so commanded units may engage in two rounds of combat, whereas corps without a commander may only initiate one round of combat-so even lower quality leaders can be beneficial since they allow you to fight an additional round. Most leaders also increase the movement allowance for infantry to 2 instead of the base 1.
And yes, leaders may be wounded, killed or captured. At the end of each combat which involved leaders, a leader casualty assessment is rolled-lower ranked leaders are more likely to be casualties. If assessed as a casualty, another D6 is rolled for severity of wound. Rolls of 1 through 5 indicate the leader is out for that many turns. A roll of 6 means the leader is killed. And if a commanded unit is destroyed but the leader is not killed or wounded, the leader is captured. Captured leaders may be exchanged as prisoners.
Grant: How does the design create fog of war and uncertainty?
Larry: The counter covers hide counter information until opposing units engage in combat. Of course, leader losses will occur, which adds to uncertainty. The cards also provide for a lot of variability in maneuver. And the strength replacement recruiting is a combination of fixed values for the year, plus a die roll for variable recruits each season. Recruitment strengths diminish for both sides over the course of the game. There’re several optional rules that address the Emancipation Proclamation, Drafts, Leader randomization, etc. to add historical flavor or variability to the game.
Grant: Who is the artist for the game?
Larry: I did the artwork…in MS PowerPoint. Whew, not the easiest thing to do! But I’m happy with the results. I used public domain art and was able to generate nice graphic quality with the tools available. And I found you can only go so far in development before you have to start addressing production concerns. And the War Came is definitely a game on a budget!
Grant: How is victory achieved?
Larry: Quite simply, players must accomplish more than their historical counterparts in the same period, for example the 1862 scenario, when the Border States, most of Tennessee and New Orleans were in Union hands by year’s end. So, victory usually means holding more territory, but there are also war weariness and political factors that contribute to, or detract from, victory. Examples are the midterm elections of 1862, Presidential elections of 1864, and weariness of the northern population.
Grant: What do you feel the game models well?
Larry: The overall ebb and flow of the conflict-using corps formations on a large area map just works well. And although there are abstracted naval and logistics rules that function well, I chose to focus on the senior commanders and Lincoln’s and Davis’s struggles to find effective military leadership for their troops at corps and army levels. And I think I’ve got the right level of political factors that contributed to the War’s outcome factored in. It’s hard for the CSA to win, but if the USA sits on it’s hands to build strength and perfect its leadership, the USA will lose. The USA must take the fight south early and often-and that’s a lot of territory to cover.
Grant: What are you most pleased about with the design?
Larry: There’s so many classic ACW titles out there that cover the entire scope of the war in great detail, and yet I think And the War Came fills a niche. For those familiar with board wargames, it’s not overly complex and it plays fairly quickly. I like the unknowns and fog of war, and think the re-playability is there. The historical framework is solid. I tried to not model for effect, so historical campaigns and outcomes are certainly possible, but not preordained. I wanted an interesting beer and pretzels game, one that both those familiar and unfamiliar with the ACW could enjoy. Again, I’m satisfied with the results.
Grant: What other designs are you contemplating or already working on?
Larry: I think if there’s another one in me, it’ll be a strategic treatment of the American Revolution-but to model that conflict will take some work, initially just to get the scope right, and factor in the interrelationship with the wider Anglo-French conflict.
Oh, and I must add a hearty thanks to Blue Panther Games, for their great production and distribution support! I just couldn’t nail down a publisher-but after consulting with Steve Jones (BPG) I realized I could partner with Blue Panther and do it myself! I would recommend them to any aspiring designer who’s interested in self-publishing.
If you are interested in And the War Came: American Civil War1861-1865 from Pinkerton Games, you can order a copy for $65.00 from the Blue Panther LLC website at the following link: https://www.bluepantherllc.com/products/and-the-war-came
So schreibt sich Spielegeschichte: Auf dem SpieleWahnsinn 2026 in Herne kennengelernt und in entspannter Viererrunde als Bestie knapp verloren, weil ich dann doch zu übermütig war und meine geheime Identität als Raubtier vorzeitig enttarnt wurde. Eine interessante Erfahrung, die sich allerdings im viel besuchten Gerne der Hidden-Movement-Spiel abspielt, von denen ich schon eine ganze Menge besitze. Trotzdem ist La Bête ausreichend anders.
Alles neu? Keineswegs, denn La Bête wurde schon 2023 auf der BerlinCon in lokalisierter Version als „La Bête – Die Bestie“ von Multivers vorgestellt. In Frankreich gab es das Hidden-Movement-Spiel vom Autor Charlec Couronnaud schon ein Jahr länger. Inzwischen ist es wieder auf Deutsch verfügbar und befindet sich nun im Vertrieb von Koalla Spiele. Die sind mit ihrem Geheimtipp Kauri desselben Autors auf der Empfehlungsliste zum Kennerspiel des Jahres 2025 gelandet. Auf dem diesjährigen SpieleWahnsinn in Herne am ersten Maiwochende ergab sich durch einen freien Tisch für meine Spielrunde und mich die Gelegenheit, „La Bête – Die Bestie“ vor Ort kennenzulernen. Wie das alles im Jahr 1764 eine Geschichte ergibt, die wir in weitergedachter Scotland-Yard-Manier gemeinsam gegen die Bestie spielen, erfahrt Ihr im Audiomitschnitt direkt vom Koalla Spiele Messestand – reingelauscht:
„La Bête – Die Bestie“ bietet als Blickfang eine schön atmosphärische Optik mit auffälligen Holzfiguren und wuchtigen Identitätsscheiben. Genau diese wurde mir auch zum Verhängnis, denn wenn der passende Ermittler meine wahre Identität herausfinden kann, dann habe ich als gejagte Bestie verloren. Dabei wollte ich doch nur ein paar Dorfbewohner von ihrem elendigen Leben erlösen. In Gestalt des vorab gewählten Raubtiers wähnte ich mich recht sicher und dieser Übermut wurde mir schließlich zum Verhängnis, als sich die Ermittlerschlinge enger zog. Dabei hätte ich auch gut und gerne das Wolfsrudel, der Graf, der Teufel oder alternativ der Landstreicher sein können. Nur alleine meine Position aufzusuchen, die ich Runde für Runde sowieso offenbaren muss, reicht für die Ermittler nicht aus. Stattdessen müssen die mich innerhalb von drei Spieljahren mit jeweils vier Jahreszeit-Runden davon abhalten, meine 25 Opfer zu töten oder eben meine geheime Identität zu entlarven. Dabei stochern die Ermittler wie genreüblich ein wenig im Nebel herum und werden allzu gerne von der Bestie in Bluff-Situationen gelockt.
Mir hat die Spielpartie gefallen. „La Bête – Die Bestie“ auf Seiten der titelgebenden Bestie Spaß gemacht, weil ich wissend statt deduzierend agieren konnte. Zudem fand ich es äußerst amüsant, den wilden Spekulationen der lieben Ermittler zu lauschen. Die lagen erstaunlich oft richtig, nur um sich dann doch für eine alternative Vorgehensweise zu entscheiden. Während sich die bis zu vier Ermittler gemeinsam offen absprechen und sich so auch gegenseitig bei Regelfragen helfen können, spielt es sich auf der Gegenseite der Bestie doch recht einsam. Deshalb solltet Ihr in dieser Position auch das Regelwerk ausreichend verinnerlicht haben, denn unklare Regeldetails oder gar falsche Spielzüge behindern bis zerstören die Spielpartie. Die dauert auch nur rund 60 Minuten, sofern das Ermittlerteam nicht immer alles bis ins letzte Detail durchdenken möchte. Wer eine gute Mischung aus Fury of Dracula in kürzerer Form und Scotland Yard mit moderneren Spielmechanismen und einem atmosphärischen Thema sucht, der kann sich hier bei „La Bête – Die Bestie“ richtig fühlen.
Wenn Ihr allerdings wie ich die Hidden-Movement-Spiele Die Akte Whitechapel, Der Whitehall Mord, Mind MGMT, Nuns on the run, Terrorscape und 1ers Contacts im Spieleschrank stehen habt, dann stellt sich die Frage, ob „La Bête – Die Bestie“ ausreichend anders ist. Vom Grundprinzip durchaus vergleichbar, aber besonders durch den thematischen Hintergrund und die Nutzung der verschiedenen Identitäten mit ihren Sondereigenschaften eine Bereicherung für das Genre. Wenn Ihr Euch somit am Genre noch nicht satt gespielt oder weiterhin dort Euer Lieblingsspiel noch nicht gefunden habt, dann ist diese Bestie durchaus eine Anspielpartie wert.
It’s Women’s Day! A great opportunity to look pair a book and a game on the American women’s suffrage struggle: The Woman’s Hour (Elaine Weiss) and Votes for Women (Tory Brown, Fort Circle).
The Woman’s Hour was published in 2018 by Viking Press. It focuses on the campaigns for and against Tennessee to ratify the 19th Amendment which enshrined women’s suffrage in the US constitution – as the 36th, and decisive, state to do so.
Votes for Women was published in 2022. It is Tory Brown’s first published board game. The card-driven game can be played in a solo or cooperative mode with the player(s) representing the American suffrage movement from 1848 to 1920 against an automated opposition, or with two to four players facing off against each other (half of them for, the other against women’s suffrage). In either case, the suffrage players must win 36 states (either by shoring them up decisively during the game, or in the final vote on ratification of the federal amendment) to win.
Connections & Conclusions
At first look, book and game seem to have very different scopes. After all, Votes for Women sets in with the Seneca Falls Convention (at which women’s suffrage was first voiced as a political demand in the United States) in 1848 and covers the following 72 years, whereas The Woman’s Hour begins with the arrival of activists Carrie Chapman Catt, Sue White, and Josephine Pearson at the Nashville station in the sweltering summer of 1920. Yet as the narrative progresses, background stories are woven into the tapestry – on the context of the 1920 presidential election, suffragists’ previous efforts to gain voting rights for women in the states and to lobby for a federal amendment, the women’s suffrage movement’s relationship with abolitionism, and all the way back to Seneca Falls (and a little bit of Abigail Adams’s “Remember the Ladies”). If you have played Votes for Women, you will recognize many of the people and events on the cards from the early and middle periods of the game when reading The Woman’s Hour.
The Seneca Falls Convention is the Start card for the suffragist player with which any game of Votes for Women kicks off, following the tradition laid out by protagonist Elizabeth Cady Stanton that this was the starting point of the American women’s suffrage movement.
What unites book and game is their focus on procedural politics. Historical change does not simply happen, nor is momentarily decided upon. Instead, it is brought into effect by the “strong, slow drilling into hardwood boards with passion as well as sound judgment” (Max Weber). The drills used come in both cases from the toolbox of political activism:
The Woman’s Hour details how suffragists (suffs) and anti-suffragists (antis) lobbied the Tennessee lawmakers, how they organized in associations and clubs to channel their activists’ time, funds, and energy, and, of course, how they campaigned for public opinion to win the hearts and minds of the American people with newspaper articles, public speeches, great processions, and all kinds of civil disobedience.
Votes for Women makes these the three actions from which the players choose on a given turn: Lobbying (for and against the 19th Amendment in Congress), organizing (to gain the crucial buttons which are the currency for some powerful in-game effects and die re-rolls), and campaigning (which spreads influence cubes and thus eventually decides if enough states come out in favor of ratification of the 19th Amendment or not).
Early in the game: There are still a lot of orange Opposition cubes, but the women’s suffrage movement has made some inroads (yellow and purple cubes). The large round buttons represent the movement’s organizational strength, the white columns (one already placed on the track under the picture of the Capitol) the willingness of Congress to pass the women’s suffrage amendment.
As we’ve mentioned civil disobedience already: The women’s suffrage movement was no monolithic bloc. One of the great dividing lines was that of styles: The more conventional part of the movement, organized in the late 19th and early 20th century in the National American Women’s Suffrage Association (NAWSA) led by Carrie Chapman Catt, paid close attention to appear as respectable as possible (knowing full well that their demand for equal suffrage was enough of a provocation to the male public opinion of the time). Others adopted a more radical style, inspired by the British suffragettes: The Women’s Party, led by Alice Paul (and represented in Tennessee by Sue White) referred to the president as “Kaiser Wilson” in reference to the German war enemy, burned him in effigy, and (successfully) provoked the police into arresting activists over minor infractions. The dainty young women and respectable matrons who served some prison time then embodied the injustice of depriving women of their vote.
The Woman’s Hour details these fractions within the movement, as NAWSA and the Women’s Party led entirely separate campaigns for Tennessee’s ratification of the 19th Amendment. While infighting was avoided, the reader is left to wonder if the movement could have been more effective if not for these parallel structures – or if the split between a more moderate and a more radical wing was able to compel a broader spectrum of audiences by working in parallel.
Votes for Women depicts the multifaceted character of the women’s suffrage movement by splitting the suffragist player into campaigner figures and influence of cubes of two colors (yellow/gold, the traditional color of the American women’s suffrage movement, and purple, a color which Alice Paul had coopted from the British suffrage movement). As several Opposition event cards target the highest concentration of one or the other color, the Suffragist player is well-advised to aim for an even spread of colors in the individual states.
The pluralism of the women’s suffrage movement is exemplified by the two colors… and a plethora of Opposition events which target only one or the other.
Votes for Women also tackles another split in the women’s suffrage movement which is outside the scope of The Woman’s Hour – that on strategy. After the initial push for women’s suffrage as a part of a great campaign for equal suffrage regardless of sex and race had failed in the aftermath of the Civil War, the suffragists disagreed on how to proceed: Some pushed for a federal amendment to the Constitution (like the 15th Amendment had codified the voting rights of black men), others wanted to win voting rights in the individual states first. While the struggle for women’s voting rights was eventually won with the ratification of the 19th Amendment in Tennessee, the voting rights advances in the individual states had laid the groundwork: Wyoming had established women’s suffrage as early as 1869, Montana sent Jeannette Rankin as the first woman to Capitol Hill, and by 1917, women in 19 states – mostly in the West and Midwest – had won the right to vote (sometimes only in a limited fashion, like voting in local elections).
Votes for Women’s stance is that it needs both – after all, the game is lost for the suffragist player if their lobbying fails to get the federal amendment through Congress, but to win, they need the strength amassed in dozens of local campaigns to have the amendment ratified in enough states. The game, however, makes a statement about timing: While it is possible for the suffragist to have Congress pass the 19th Amendment in the mid-game already, that is a decidedly risky strategy which gives the Opposition a lot of opportunity to snatch individual states and rack up the necessary 13 rejections which mean the failure of the amendment. The ideal move for the suffragist is to build up the strength in the states as much as possible before pushing Congress into action as late as possible. While that is not without its risks (Opposition can still try to throw wrenches in the wheels of congressional action), it spreads them more evenly between federal and local action.
As mentioned above, equal suffrage spread from the American West and Midwest. It had a much harder time in the Northeast and in southern states – like Tennessee. The southern states were not only more conservative in general, suffragists also faced specific obstacles there: Many southern whites remained committed to the cause of white supremacy after the defeat of the Confederacy in the Civil War. Enfranchising women would give the right to vote to black as well as white women, and in the mind of the white supremacists, white women would be much less likely to actually exercise it (be it because they, as “proper” women, would rely on their men to represent them, or because they would not go to a polling station where they might meet with Black Americans). Others, while generally in favor of women’s suffrage, resented the method: After the Civil War, the 13th, 14th, and 15th Amendments had enshrined certain rights (including male voting) for Black Americans in the Constitution. Federal amendments were thus unpopular with many southern whites.
As The Woman’s Hour details, this provided for a lot of traction for the anti movement in Tennessee. Activists like Nina Pinckard and Josephine Pearson railed against carpet-bagging outsiders swooping down from the North to meddle with Tennessee’s affairs, warned of impending “negro domination”, and appealed to the chivalry of southern men to rescue their women from being thrown into the dirty cesspit of politics. That they themselves were knee-deep in that cesspit – after all, they were political activists! – bothered them as much as modern-day “tradwives” are bothered by the fact that their plea for women to be submissive to and dependent on their men is at odds with their often successful social media enterprises.
Somewhat counter-intuitively, many women opposed women’s suffrage on moral or political grounds. Votes for Women does a great job in showing the multi-facetedness of the anti movement beyond the male political and business establishment.
Inherent contradictions aside, the antis’ arguments needed to be countered by the suffs. Many of the white suffragists were willing to make rhetorical or substantial compromises: One of NAWSA’s most-cited statistics in the Tennessee campaign was that the number of white women in the south exceeded that of black men and women combined. Enfranchising women, so the more-or-less subtle subtext, would thus not threaten white supremacy – it might even strengthen it. In the end, the tacit agreement was like that found after the Reconstruction amendments designed to protect Black Americans’ rights in the South: The women’s suffrage amendment made its way into the constitution. Yet voting rights were overseen by the individual states, and federal institutions looked the other way about the blatant disenfranchisement of black voters in the South until the Voting Rights Act almost half a century later.
Neither The Woman’s Hour nor Votes for Women shies away from this uncomfortable part of the women’s suffrage movement: The protagonists of the movement are not portrayed as infallible saints in the book. While they held wildly progressive views for their time on women’s suffrage, their stances on issues of race and class were often more in keeping with those of their contemporaries. They also made tactical mistakes, like Carrie Chapman Catt railing against outsiders trying to influence Tennessee – a charge that was immediately turned against her, a Northerner herself, and restricted her visibility for the remainder of the campaign. And most of them were willing to make compromises for the cause of women’s suffrage – sometimes with themselves (Carrie Chapman Catt supported the US effort in World War I against her pacifist convictions lest the women’s suffrage movement be branded unpatriotic), and sometimes at the expense of others. In short, they were human.
Would the 19th Amendment have passed in Tennessee if the suffragists had been less willing to assuage the fears of southern whites about “black domination”? – Probably not – maybe another state could have become the decisive 36th then, but all likely options had been exhausted before. Did the Black Americans in the South, men and women, suffer from the continued disenfranchisement after 1920? – Undoubtedly.
The South is notoriously tough for the suffragists. Placing a ton of cubes there (plus some additional perks) is a tempting proposition.
Suffragist players in Votes for Women face the same strategic and ethical question (of course, with infinitely lower stakes): One of the most powerful cards in the game is The Southern Strategy which places an immense amount of suffragist influence in the South (representing the union between suffragists and white supremacists). It does open the suffragist for some counter-plays from the opposition, though. Savvy suffragist players might hold the card from turn to turn to play it as late as possible, as an uncounterable stratagem in the final struggle for women’s suffrage. Victories won that way have an odd aftertaste, I assure you.
Since Votes for Women has been released, it’s been in the top 5 of games I have played most often. And while I rarely re-read books, especially non-fiction (because there are always intriguing new books to read), I have come back to The Woman’s Hour and have now both read the physical book and listened to the (excellent) audiobook production. Besides all their worthy exploration and analysis of history, that speaks to both the game and the book being excellently crafted, incredibly engaging pinnacles of their respective medium.

 Anmelden