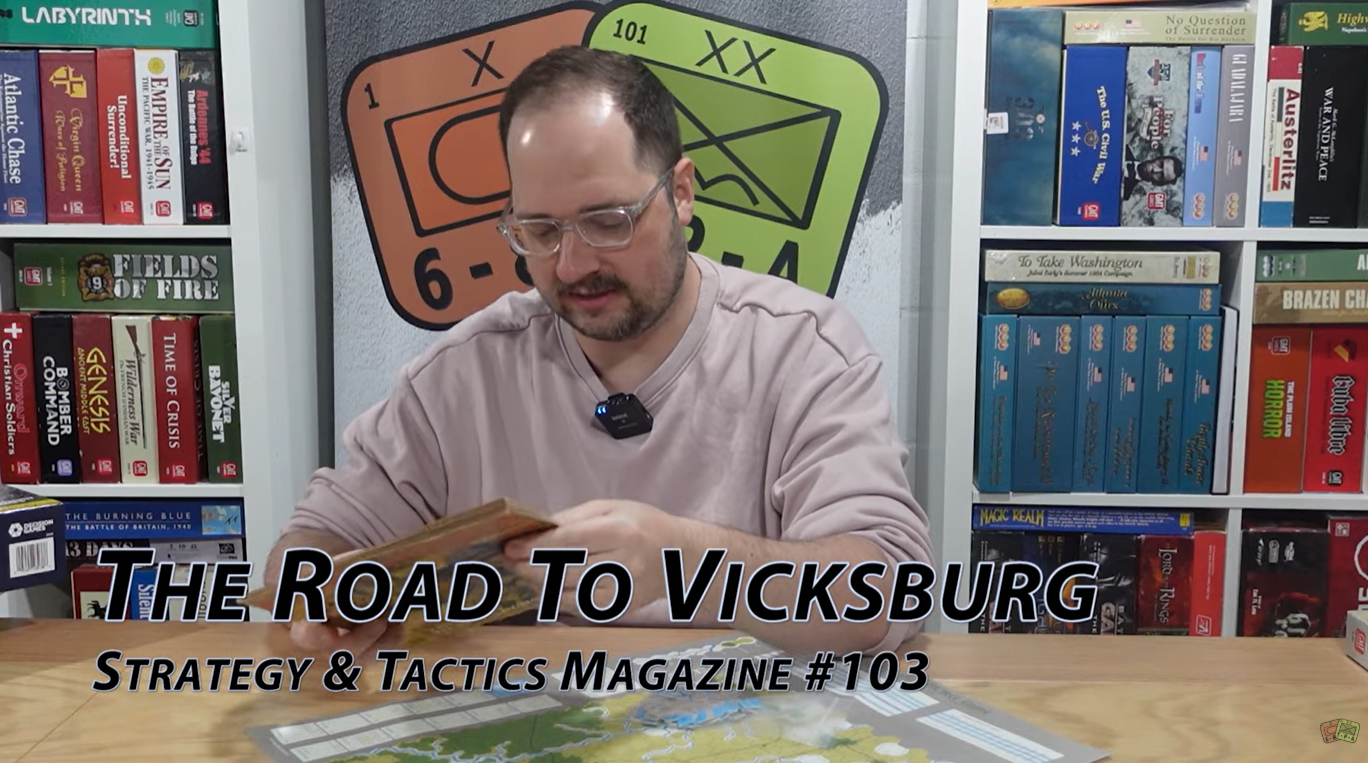
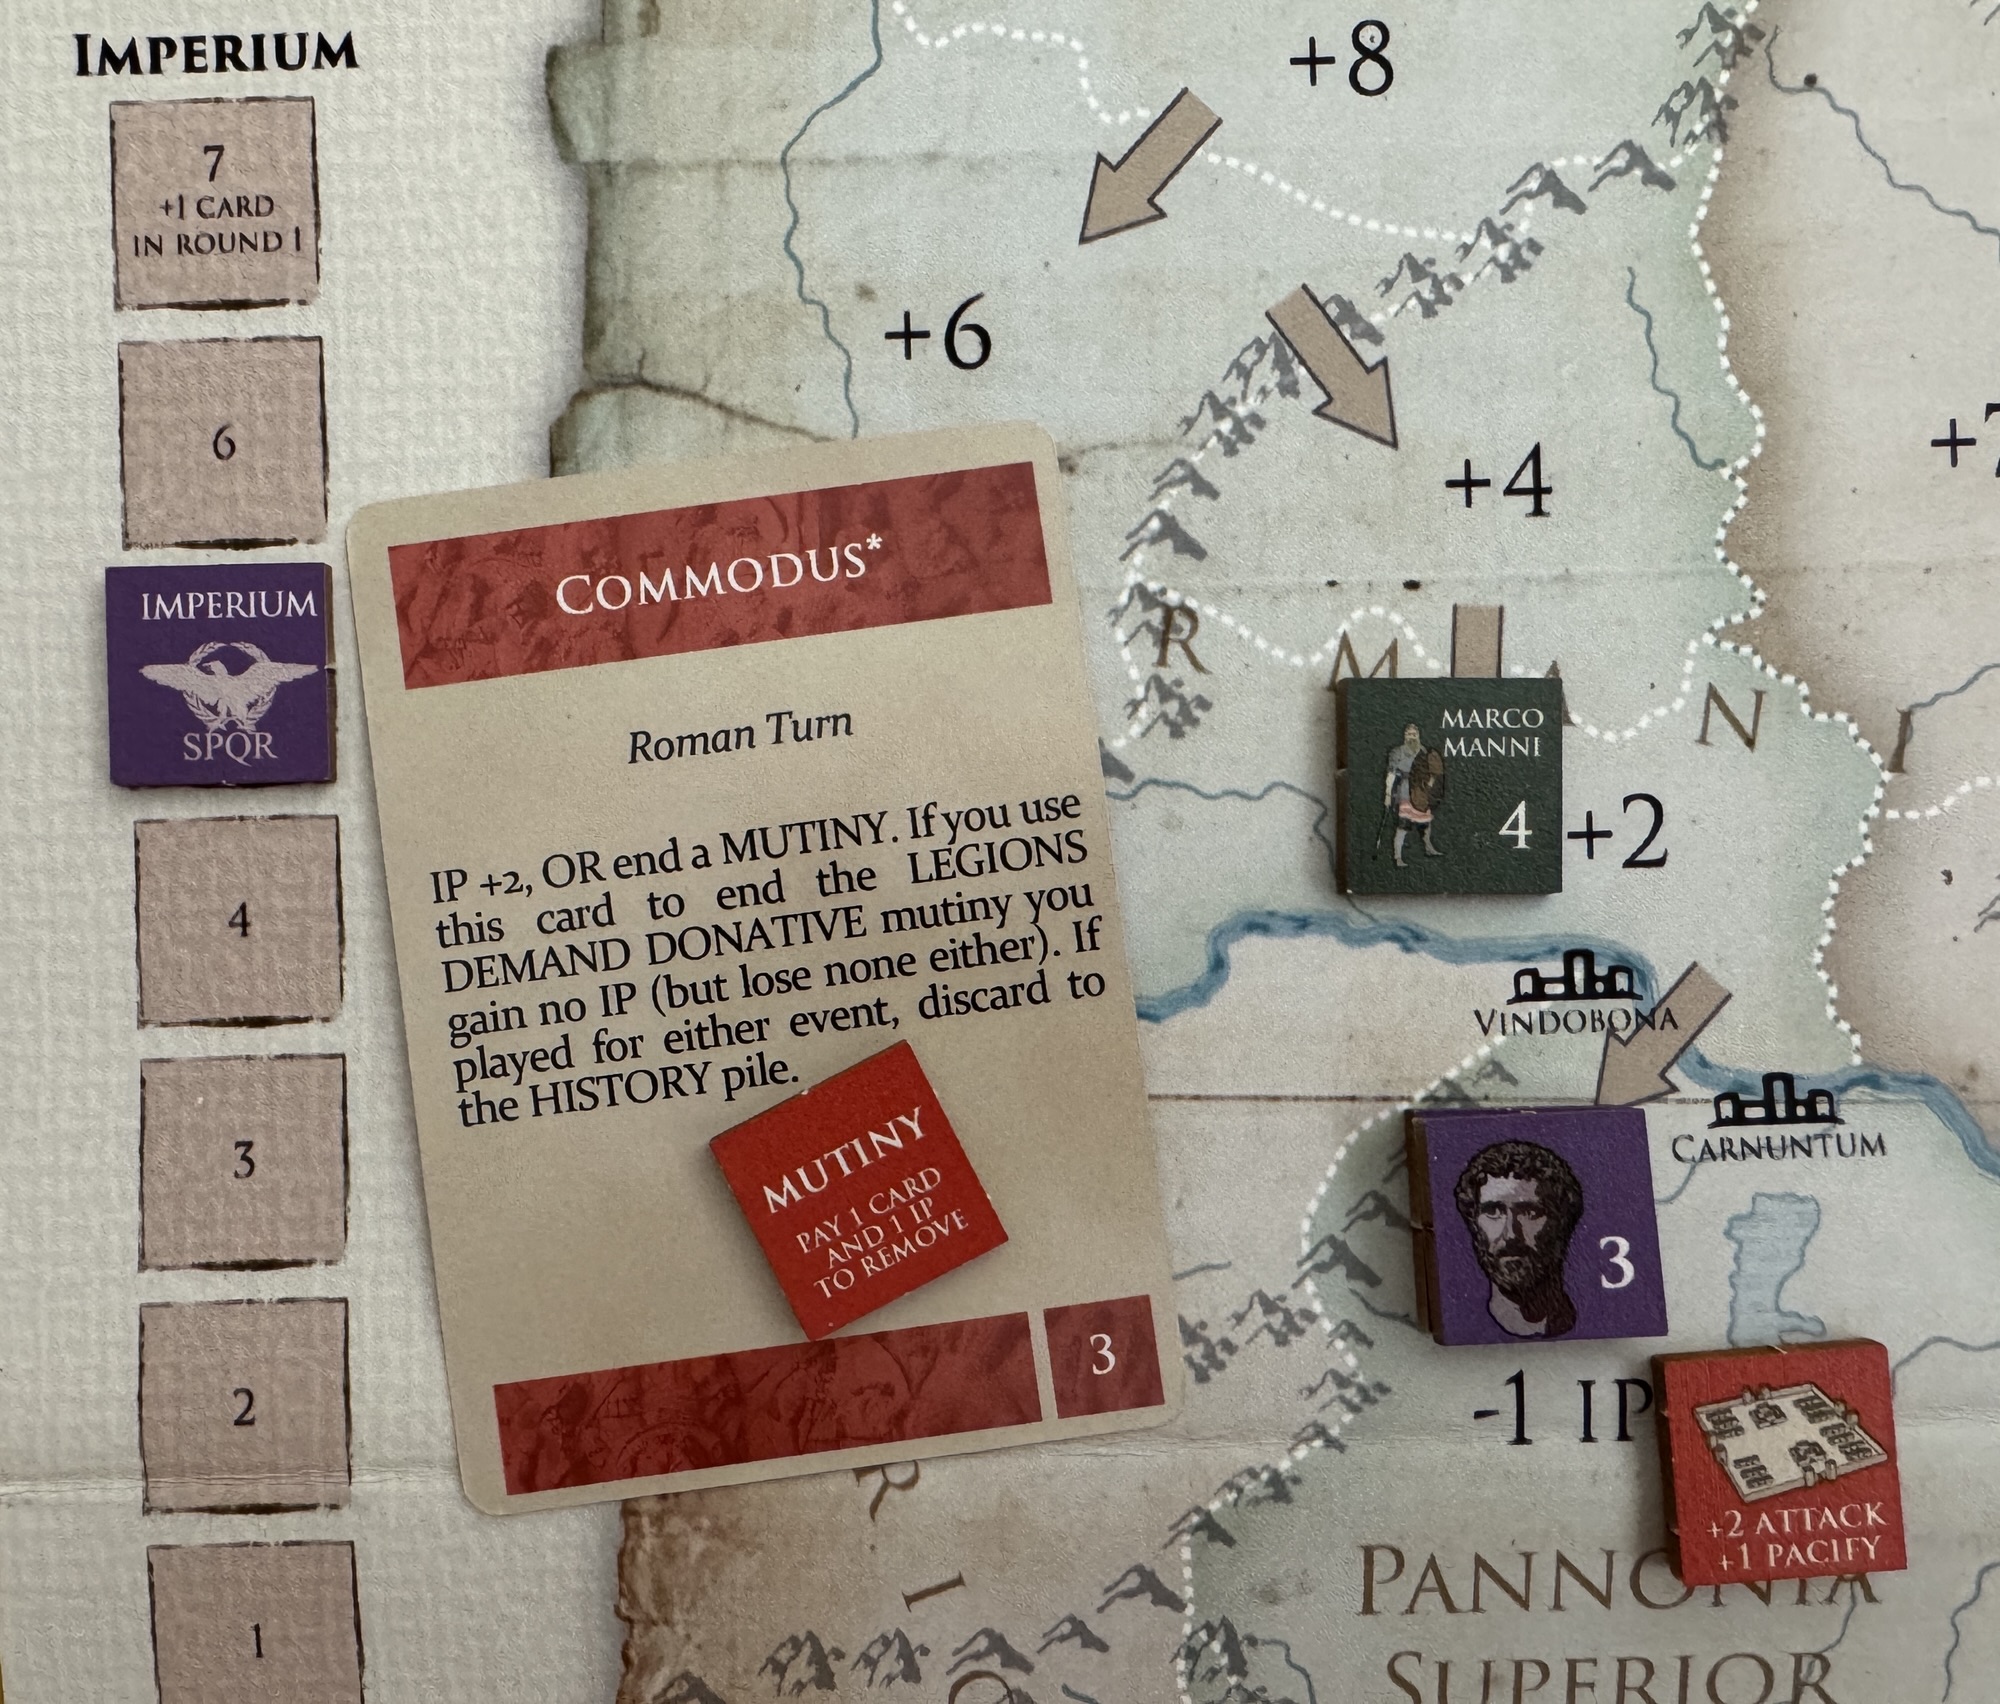
John Poniske is a prolific designer and we have enjoyed several of his games including Revolution Road from Compass Games, Plains Indian Wars from GMT Games, Bleeding Kansas from Decision Games, Hearts and Minds from Worthington Games and Maori Wars: The New Zealand Land Wars 1845-1872 from Legion Wargames. We also own several of his designs but have not had a chance to get them tabled yet including King Philip’s War from Multi-Man Publishing and Pontiac’s War: Frontier Rebellion, 1763-66 from Compass Games. We have done several interviews with John over the years and I always enjoy this thoughts on the subjects that he decides to cover. In this entry in the Best 3 Games with…Series, I take a look at 3 of John’s designs that have spoken to me.
3. Maori Wars: The New Zealand Land Wars, 1845-1872 from Legion Wargames
Maori Wars: The New Zealand Land Wars, 1845-1872 from Legion Wargames is a game that uses as a background the uprisings that took place between 1845 and 1872 due to British colonial incursions into native Maori lands on the North Island of New Zealand. The ensuing conflict over a period covering nearly 30 years involved the destruction of a number of Maori villages, Pas, which are fortified villages that featured intricate trench-works and some colonial settlements. The war introduced the British to a very skilled and strategic combatant who used a strategy of ambushes and bush raiding to catch off guard and frustrate the professional British ranks. The hallmark of the game is that it is highly playable by featuring low counter density, a play time of under two hours for most of the scenarios and easy to understand rules.
Playing as the British, players will have to deal with swinging tribal loyalty and will need to master the rivers and seas to move their more powerful troops and gunboats around while the Maori player will be focused on bush-raiding, which allows the Maori to move units temporarily off the board and out of harms way, but then to later bring them back in a more favorable strategic location of their choosing. The asymmetry in the fighting styles is really very good and I like the way it factors into account the history.
Maori Wars is a great game with some really beautiful art, not only on the board but also on the counters. The game is a slugfest between the mighty British and their Queenite allies against the inhabitants of the island in the various Maori tribes that resisted their colonial oppressors. The tribes have lots of tricks up their sleeves and use the land and their knowledge of it to great advantage as they conduct bush raids regularly and are very difficult to bring to decisive battle.
Here is a look at our unboxing video for Maori Wars: The New Zealand Land Wars, 1845-1872 :
We also did a video review and you can watch that at the following link:
2. Bleeding Kansas from Decision Games
Bleeding Kansas is a very well designed 2-player game that deals with the violence and politics of pre-statehood Kansas from 1854-1861. The game focuses on the tensions between pro-slave and abolitionist parties and their attempts to win over emigrants to Kansas to their cause and thereby influence the outcome of elections to move the state toward their leaning on the issue of slavery. The game has four elections that players will fight over trying to have the most influence in Kansas counties to score victory points. At its heart, the game is an area control game that has splashes of election dynamics that feels very Euro-like as it uses cubes to represent forces.
The core mechanism in the game is the cards. Each of these cards is tied to an historical event, important person or other factor involved in the conflict and allows players to choose their actions for that immediate turn. The game proceeds as players alternate the play of one of the cards from their hand to take various actions from symbols that appear on the cards. These symbols provide actions such as influencing new settlers to the region to join their side in the conflict, build up forces for the coming battle, take control of counties by moving these forces around or displacing those of your opponent, attacking the opposition, burning down their population centers, enticing settlers to migrate to their areas or request intervention from the Federal Garrison stationed at Leavenworth. The cards carry out the plans of players and create a historical narrative of the conflict.
The game really is pretty simple mechanically but don’t let the game’s simplicity fool you. This is a knock down drag out bare knuckle fight for supremacy in the Kansas Territory and will test you’re meddle as you fight back and forth undoing what your opponent has just done. The game boils down to staying the course and playing your cards smartly to gain the upper hand in elections. You have to be able to judge where control stands as you play each card and you have to plan as scoring elections can really sneak up on you if you are not paying attention.
Here is a look at our unboxing video so you can get a good look at the components:
Here is a look at our video review of the game:
Here also are links to a series of Action Points on the various aspects of the game:
1. Devil Dogs: Belleau Wood 1918 from Worthington Publishing
Devil Dogs: Belleau Wood 1918 is an easy to learn, fast-playing card-driven game for 2 players. The play map covers the historical French battlefield geography and the 300 counters and markers represent the historical units and incidents involved along with chits that determine initiative and order choice. The game is unique in that it captures the tension and high rate of casualties without ever casting a single die, relying more on planning and issuing orders as the active or reactive player. Each side will have a 30 card deck that is faction specific.
I love Multi-Use Cards in a game and this one uses faction specific decks that can be used in several different ways. The combat system is also quite unique as hits are not calculated by a die roll and reference to a CRT but by the combat strength of the units attacking determined by the play of a card and then in what terrain the targets are hiding. The best element of the game though was having to play a card to each sector on the map without knowing what your opponent will play and then seeing how you did. Really interactive and interesting game and this one was a big hit with both of us! Although the rules were a bit challenging in their format and presentation but nothing that we couldn’t handle after a few turns into the game.
Here is a link to our video review of the game:
There you have it. My Best 3 Games with…Designer John Poniske! He has done so many good games and the narrative and historical immersion of all of them are top notch.
A few years ago, we became acquainted with Andrew Rourke through his Coalitions design from PHALANX that went on to a successful crowdfunding campaign and has recently been delivered. He has since been a busy guy with starting his own publishing company called Form Square Games and also publishing the first 5 designs in a new series called Limits of Glory that will take a look at the campaigns of Napoleon and other contemporary conflicts. In Campaign I, which is called Bonaparte’s Eastern Empire, the game is focused on the campaign of the French in Egypt between 1798 and 1801. Campaigns II, III and IV was Maida 1806 and Santa Maura & Capri. Campaign V was Donning the Sacred Heart, which covers the Vendee Civil War, and just recently fulfilled as I have my copy sitting on my gaming table awaiting an unboxing video.
And now, recently, Form Square Games has announced the next entry in the series which is a two-fer with Campaigns VI and VII called Jersey New Jersey and is set during the American Revolutionary War but also including a 2nd game called A Strong War set during the French & Indian War. I think that these games are well timed with this year being the 250th Anniversary of the signing of the Declaration of Independence and I look forward to playing and exploring both of these games. I reached out to the designer of Jersey who is Peregrine Nicholls about an interview to give us a look inside the design and get more information and he was interested in answering our questions.
Grant: Peregrine welcome to our blog. First off please tell us a little about yourself. What are your hobbies? What’s your day job?
Peregrine: I have been a wargamer ever since my Dad came home with a 1912 1st edition of Little Wars by H G Wells, when I was 8. I have very fond memories of us playing toy soldiers on the floor using these rules and firing matchsticks at each other’s troops from toy artillery pieces. I still have the book and even recently bought a Britains 25pdr gun on eBay to add to my display shelf! Wargaming ballooned from there and today 50 years later I have almost 25,000 miniatures and over 400 board games!
Apart from reading (mainly history books or historically based novels), my main other hobby is following my beloved Leeds United, an English football team, whom I always watch on TV and also manage to get to 4-5 homes fixtures per year – a 500 mile round trip from where I live now in south west England.
My day job is working in the family property business, where with my wife & son we buy, sell, manage and develop property.
Grant: What motivated you to break into game design? What have you enjoyed most about the experience thus far?
Peregrine: Andy, that is Andy Rourke of Form Square Games. I was being shown one of his games at a convention and after he had soundly beaten me, we had a beer and I told him about a game idea that had been sitting in my filing cabinet for almost 40 years! After boring him to death for 20 minutes, he said “I’ll publish that!” – at which point I was speechless! But two years later now here we are, at the Gamefound funding stage!
The most enjoyable part of the process has been rediscovering the history. A lot of reading was needed and now having the internet as a tool, (when previous work on the topic was pre-word processing software!), was a massive advantage and led me down countless rabbit holes of historical threads and narratives.
Grant: What is your upcoming game Limits of Glory Campaign VI: Jersey about?
Peregrine: I am responsible for the Jersey game, not the New Jersey game, which is Andy’s baby.
The Isle of Jersey is the biggest of a small group of islands just off the coast of France in the English Channel. When William the Conqueror (as Duke of Normandy, of which Jersey was a part) invaded England in 1066 the Channel Island become part of the English crown. When Bad King John (he of Robin Hood fame) lost Normandy to the French in the early 1200’s, the Channel Islands decided to remain English and they have been ever since – they are now self-governing British Crown Dependencies.
The French did try to capture them during medieval times, but it was half-hearted as the islands really had no particular value at that time. This changed when England and France became constant enemies in the early 1700’s as by then Jersey had quite a merchant fleet (because of its trade with its colony New Jersey) and like all merchantmen when war came, privateering beckoned.
Jersey then became a real thorn in the French side, massively disrupting French coastal trade; after the first year of the American War of Independence the Jersey fleet had captured and brought back to the island over 200 “prizes”. This is what led the French to the two invasion attempts; the 1779 aborted landing and the 1781 successful landing.
The game covers both these actions, with the 1779 scenario allowing a campaign to develop as if the French had actually landed and the 1781 scenario allowing the player to recreate the actual very brief campaign to see if they get the same or a different outcome.
Grant: Why was this a subject that drew your interest?
Peregrine: That’s easy – I grew up in Jersey! The Battle of Jersey was something we learned about, although since I left the island in the early 1980’s its anniversary has been elevated locally to include uniformed re-enactors in the town square and all the trimmings!
Grant: What is your design goal with the game?
Peregrine: To give the player an enjoyable game on a topic about which 99.9% of them will know nothing! That is one of the things I love about our hobby, discovering history, stories, narratives and personalities from military history about which one would have been ignorant, without our hobby.
Grant: How have you modified the Limits of Glory System to fit the American Revolutionary War?
Peregrine: I have not really had to change anything about the series. Andy and I have added lots of small flavor elements, but fundamentally the game will be very familiar to anyone who has played other games in the system.
Grant: How has designing a game in a tested and established system been? How constrained did you feel?
Peregrine: A little, but not hugely, as Limits of Glory is after all a very clever and innovative system, particularly the Event Clock and the Glory concept – so there was lots to work with.
Grant: What elements do you feel is most important to model in a game set in the American Revolutionary War?
Peregrine: The Jersey game really doesn’t have the feel of the AWI, in the sense that it is set in Europe, without all the quirks (terrain, native Americans, divided loyalties, etc.), that the fighting in America involves. It was coincidental really that the French decided to attack Jersey during the AWI, it could have easily been in a period during say the War of the Austrian Succession or the Seven Years War – or in the French Revolutionary & Napoleonic Wars that followed.
We have included John Paul Jones though – so there is an American link!
Grant: What sources did you consult for the historical details? What one must-read source would you recommend?
Peregrine: Lots of sources. The Societe Jersiaise was most helpful with access to the online resources, some of the contemporary documents were brilliant.
For example, we found a set of standing orders (in Jersey French – a local Normandy dialect) issued by the Colonel of a Jersey Militia regiment, specifying what his men were to bring to the muster point (the parish church) at that time when invasion alert was sounded. Once I had found a connection in Jersey, through an old school friend, who could translate it for us, (although there were a few words in the old copperplate hand writing that alluded us), we had a real flavor for the situation and it even led us to introduce a special rule into the game for 1779 – “harrows” – but you’ll have to buy the game to find out what they are and how they can be used by a player to frustrate his opponent!
One “must read” source? The Battle of Jersey by Richard Mayne, Phillimore Press 1981. There are still second-hand copies floating around on the web bookstores.
Grant: What was it about the French invasion of the Island of Jersey that made you believe the Limits of Glory System would work well modelling the campaign?
Peregrine: The Limits of Glory System is a very open one in campaign terms so fitting Jersey into its strategic mechanics was actually very easy.
Grant: What different units are represented in the game and what advantages do they bring to the battlefield?
Peregrine: In Jersey there are only four types – British Regulars, Jersey Militia, French Nassau Legion infantry and French Royal Regular infantry. There is also some light artillery floating about as well.
The troops were all of a similar standard, although the Legion was an inferior unit, represented by their stats on the Combat table.
We did of course incorporate contemporary doctrine, so you will find that a Jersey Militia officer cannot issue command to British Regular forces – “After all Sir, the cheek of the fellow!”.
Grant: What challenges does this campaign bring to the system? How did you address them?
Peregrine: Great question. There were several:
Tides – how were we to represent that Jersey has one of the most difficult tidal systems in the world (it’s tide range is in the top 5 on the planet), and it frustrated the 1779 attempt to invade and had an affect in 1781 also.
Alarm – in 1781, the island was asleep when the French landed, so we had to bring in rules for how the alarm would be sounded, spread, and how local troops would muster, etc.
Hopefully players will feel we have successfully dealt with these issues, with some simple and innovative mechanics.
Grant: What area does the map cover? Who is the artist and how does their style assist in creating theme and immersion?
Peregrine: It covers the whole island. Jersey is not a big place, approximately 45 square miles, so this was not difficult. We also have a separate “break-out” map showing key locations in the capital, St Helier, which will be the focus of the fighting in 1781.
The artist is from 1795! We were lucky that a contemporary map – The Richmond Map – has been digitized by the Societe Jeriaise and is available through their web portal, so were able to use that. Andy worked his usual graphic magic to clean up the color and tones and we are really pleased with the result. Little details like the fact that we have put the parish crest by the church for each of the 12 Jersey parishes (very important in the cultural & contemporary heritage of the island), is very pleasing and really adds to the period feel.
Also, the picture on the box cover and superimposed behind the map & the player aids is contemporary too – being the painting The Death of Major Pierson by John Singleton Copley which was created in 1782-3 and now hangs in the Tate Britain gallery in London.
The Death of Major Pierson by John Singleton Copley which was created in 1782-3 and now hangs in the Tate Britain gallery in London
Grant: What purpose do the various numbers appearing in each space on the board serve?
Peregrine: These are “difficulty” ratings – the lower the number the more difficult it is going to be to move your forces out of an area. You will notice that the Jersey map has some land and sea spaces that are rated “0” – we built some special rules in for those!
Grant: For those that are not familiar, what is a Glory Rating? What role does it play in the game?
Peregrine: It is a major part of all the Limits of Glory Series games – every Leader has a glory rating. It represents the ability, resources, luck and circumstance of each Leader and is used by them to mitigate failures or to turn success into better success. It becomes intuitive to use after a few game turns.
Grant: What was the process like assigning these ratings to the commanders on both sides?
Peregrine: Fun and difficult! Glory must be set to be playable as well as accurate, so we tinkered and play tested until it felt right.
Grant: What Commanders are included for each side? Are there any real interesting personas here?
Peregrine: Lots – I’m not quite sure where to start, so I’ll give you a few from 1781.
Major Pierson – the British hero, who has a St, Helier street and a pub named after him. At 24, he was young for a Major and because the two Colonels on the island were in England on Christmas leave when the French landed (12th night, 6 January, 1781), he found himself the most senior British officer on the island. He defied a written instruction to surrender his troops from the Governor of the Island (who had been captured by the French), mustered his men and some militia, assaulted St Helier, won, and was killed at the climatic moment of the final assault! Hollywood where are you!
Baron de Rullecourt – the French commander in 1781, who had been the 2IC for the 1779 expedition also. Not a Baron at all, but rather a clever charleton & adventurer who had ingratiated himself in the right circles and persuaded these people to let him command the invasion and had secured a promise he would become the new Governor on the island if successful. A good planner, he pulled off the daring night landing and marched to the capital without detection, capturing the governor in his nightgown! At this point though success went to his head and he assumed all the Jersey & British forces would just surrender as ordered – they didn’t! He was also killed in the climatic battle, at about the same instant as Major Pierson. Some very interesting artifacts were found in his travelling trunk after the battle – I’ll leave the reader hanging here!
Emir Said – a mysterious Indian Muslim “prince”. He accompanied De Rullecourt, dressed in full flowing Arab style dress, turban, the “works”, including a nasty looking large scimitar on his belt. He stood behind De Rullecourt making unintelligent but threatening noises during the surrender negotiations. We have brought him into the game as an NPC – he is fun and unpredictable!
John Paul Jones – a single source identifies the AWI hero as the commander of the naval flotilla for 1781, (following his success at the Battle of Flamborough Head), so of course we had to include the “Father of the American Navy” in the game!
Grant: What is the makeup of the Combat Table?
Peregrine: It is pretty standard for the Limits of Glory System with different troop types (British Regulars, Jersey Militia, Nassau Legion & French Regulars) being given different abilities and success ratings.
Grant: How does combat work in the design?
Peregrine: Again, pretty standard for the Limits of Glory System – although that said there may be some slight changes to reflect the continual nature of the running fights, in what is a truly small campaign in terms of time span.
The big change for Jersey is that there are no sieges. The time span of the campaign is tiny where compared to other games in the system. The actual 1781 campaign lasted less than 1 day; and had 1779 resulted in a landing, 1-2 days would have brought the campaign to a conclusion. That doesn’t mean there are not castles & forts in the game however – we just have a different way of them possibly being captured!
Grant: What is the general Sequence of Play?
Peregrine: If the player has played any Limits of Glory Series game they will be right at home.
Each turn starts with an event, followed by momentum rolls, followed by alternate turns for the players to move or initiate combat, until both players run out of momentum.
Grant: What multiple strategic decisions are presented to the player every turn in this campaign?
Peregrine: Like all Limits of GlorySeries games the player must focus in on the objective and get cracking with their plan or they will run out of time.
Who do I move? Where do I move them to? Can I risk it? Have I got the Glory to mitigate a failure? Where do I muster forces? Do I go and attack the French now, or do I wait until I can rouse more militia out of their beds?
Decisions, decisions, decisions!
Grant: How is victory achieved?
Peregrine: In 1781 the key to the whole game is Royal Square in the center of St Helier (this is where the real climatic battle took place) and whoever holds this location when the time clock runs out, wins.
In 1779 taking overall control of the island is the objective for the French and denying this to them is the Jersey players goal.
Grant: What are some basic strategies for the French and the British players?
Peregrine: That is probably too detailed to go into here, but Andy has promised that I can have multiple pages in the rulebook to walk players thorough some basic ideas for strategies for both games.
In essence though the French must successfully negotiate the tides & coastline to get their force ashore in a concentrated way and then either push for St Helier with the Governor & Royal Square as their prizes in 1781; or spread across the island capturing & holding militia mustering points & forts, whilst also beating the resident troops in battle in 1779.
For the Jersey player it is all about getting your troops mustered and then into strong enough groups to deny the French their objectives – in the words of Wellington, “give them a damned good thrashing!”
Both sides have equal chances of winning the game and with the fluid nature of the Limits of Glory System, replayability is high.
Grant: What type of an experience does the game create?
Peregrine: Tense, with an increase in this tension as the game proceeds – and hopefully fun! This has certainly been the experience of the scores of play testers we have played it with.
Grant: What are you most pleased about with the design?
Peregrine: All of it! The idea to bring a game about my childhood home to market has sat in my filing cabinet for almost 40 years, so brushing the dust off and making it a reality has been a dream come true for me. To think that the history of this obscure, globally unimportant, battle will be available to a wider audience is fabulous, as it has a fascinating and vibrant narrative with great characters and heroes that deserves to be better known.
I particularly love the map and the use of the John Copley painting in the game also, as a copy of this painting has hung in my home for as long as I can remember.
Grant: What other designs are you working on?
Peregrine: Wow, give me a chance! Just working on this one has been a major task! Let the dust settle on JerseyNew Jersey and I’ll cogitate from there!
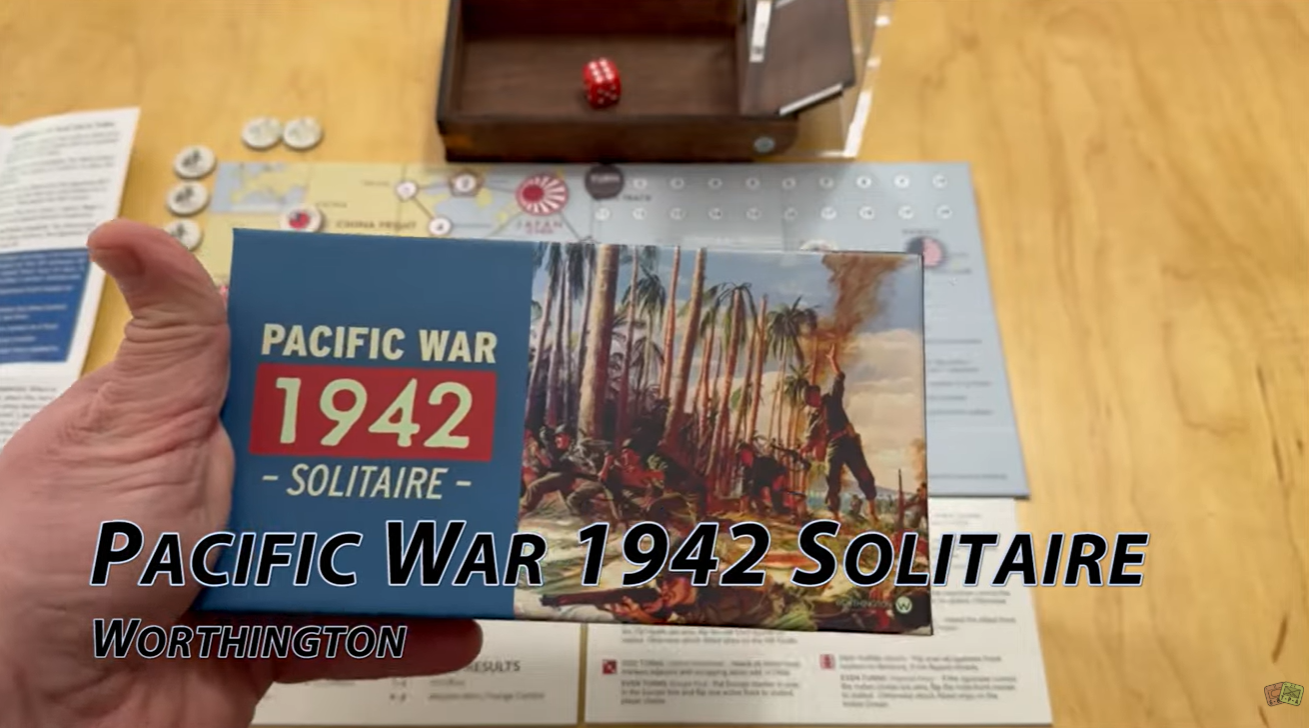
In early 2024, Worthington Publishing announced a unique 2-pack of games on Kickstarter that were marketed as easy to play travel friendly solitaire games. And you know that I love a good solitaire wargame! And when I heard that these games were small, even portable, then I was even more interested. One of the games covered the Pacific Theater of WWII called Pacific War 1942 Solitaire and the other covers the War of 1812 called (you guessed it) War of 1812 Solitaire. These games are designed by Mike and Grant Wylie and each game has 4 pages of rules, a beautiful mounted board and double sided counters. I played both and really very much enjoyed the experience.
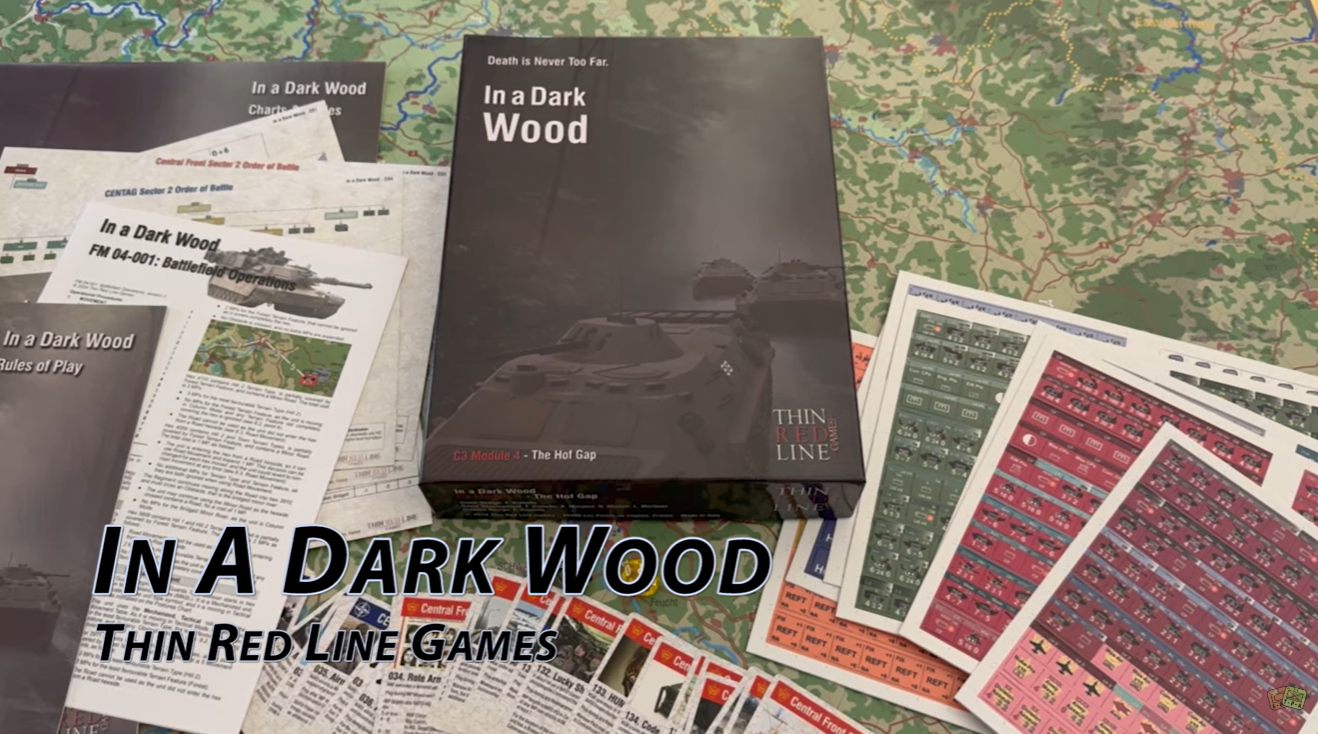
Taking its roots from SPI’s Central Front and NATO: Division Commander, In a Dark Wood is the fourth module of the C3 series, focused on Command, Control and Communication and pioneered by Less Than 60 Miles – one of the five nominees for the 2019 Charles Roberts Awards as Best Post-WW2, Cold War, & Hypothetical Era Board Wargame.
Several typical wargame mechanics have been reinterpreted, and both sides must fight three equally dangerous foes: the enemy, their own plan and time. Even a simple action can quickly turn into a disaster when facing an opponent using more efficiently the real key to victory: the OODA Loop theorized by John Boyd in the early ‘80s and used today as the basis for several military doctrines.
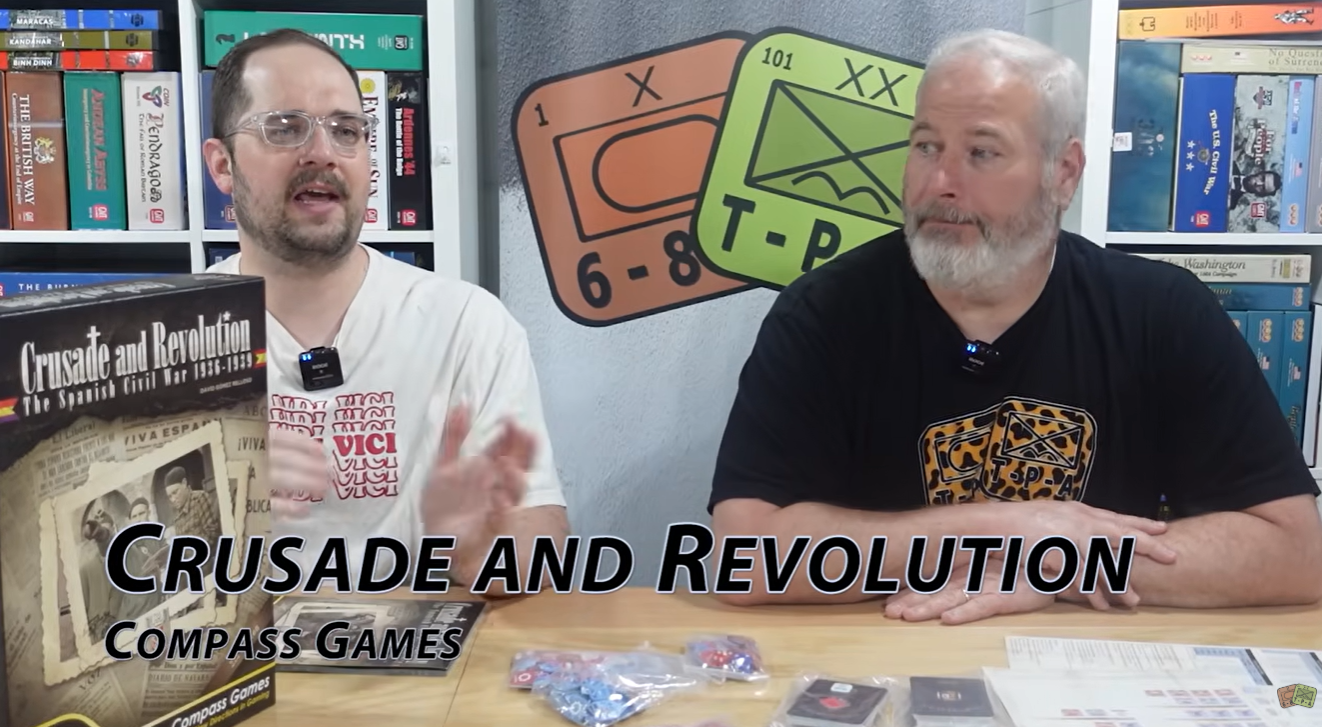
Crusade and Revolution: The Spanish Civil War 1936-1939 Deluxe 2nd Edition is a card-driven point-to-point movement strategic-operational wargame that covers all the Spanish Civil War (1936-1939). Its rules are based on Ted Raicer’s Paths of Glory. Each player takes command of one of the sides (Nationalist or Republican), and looks after all the aspects that involve a war including mobilization, recruitment, movement of troops, offensives and construction of defenses. There are also historical events that must be taken into consideration, thinks such as foreign military aid, international policy, change of Republican Government, etc.
As I have done with my Top 10 Wargames of each year list I am going to do the same with the Top 10 Solitaire Wargames/Games that I played that were published in 2025. I played a total of 17 new published solo games in 2025 so take this list with a grain of salt as I didn’t play all the titles released in 2025 nor even all of the games that I purchased this past year. The games that I played include the following:
Okinawa: The Last Battle of WWII from Solo Game of the Month
Iwo Jima 1945 from Worthington Publishing
The Pursuit of John Wilkes Booth from Blue Panther
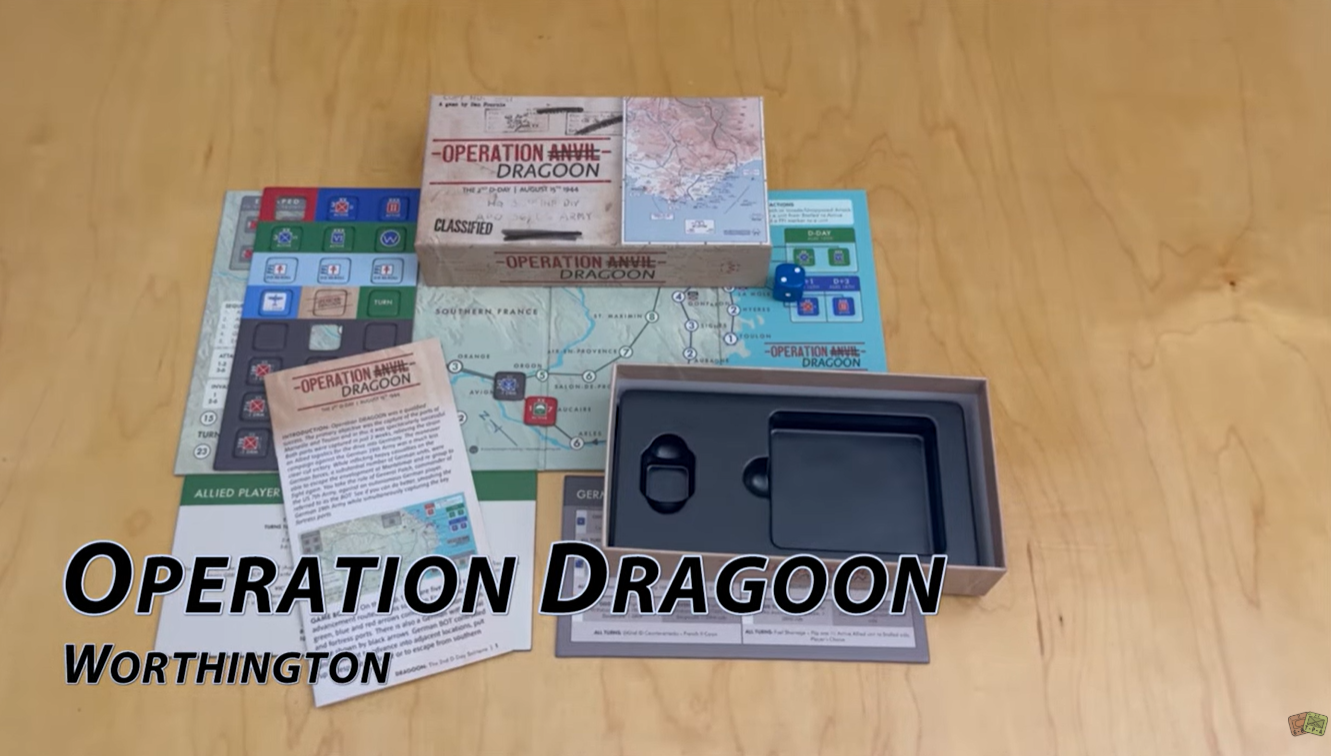
Operation Dragoon Travel Game from Worthington Publishing
Crusaders: The Siege of Acre 1291 from Art of Wargames and Blue Panther
SPQR: The Battle of Alesia 52 BC from Art of Wargames and Blue Panther
Siege Works: A Napoleonic Siege Roll & Write from Solo Wargame
War In The Pacific: A WW2 Roll & Write from Solo Wargame
Fields of Fire Deluxe 2nd Edition from GMT Games
Europe at War 1940 Solitaire from Worthington Publishing
Shogun Solitaire from Worthington Publishing
Black Skin Black Shirt: Ethiopia vs Fascist Italy 1935-1937 from White Dog Games
Empire of Grass from White Dog Games
Onoda from Salt & Pepper Games
Iwo Jima: Hell on Earth from Neva Game Press
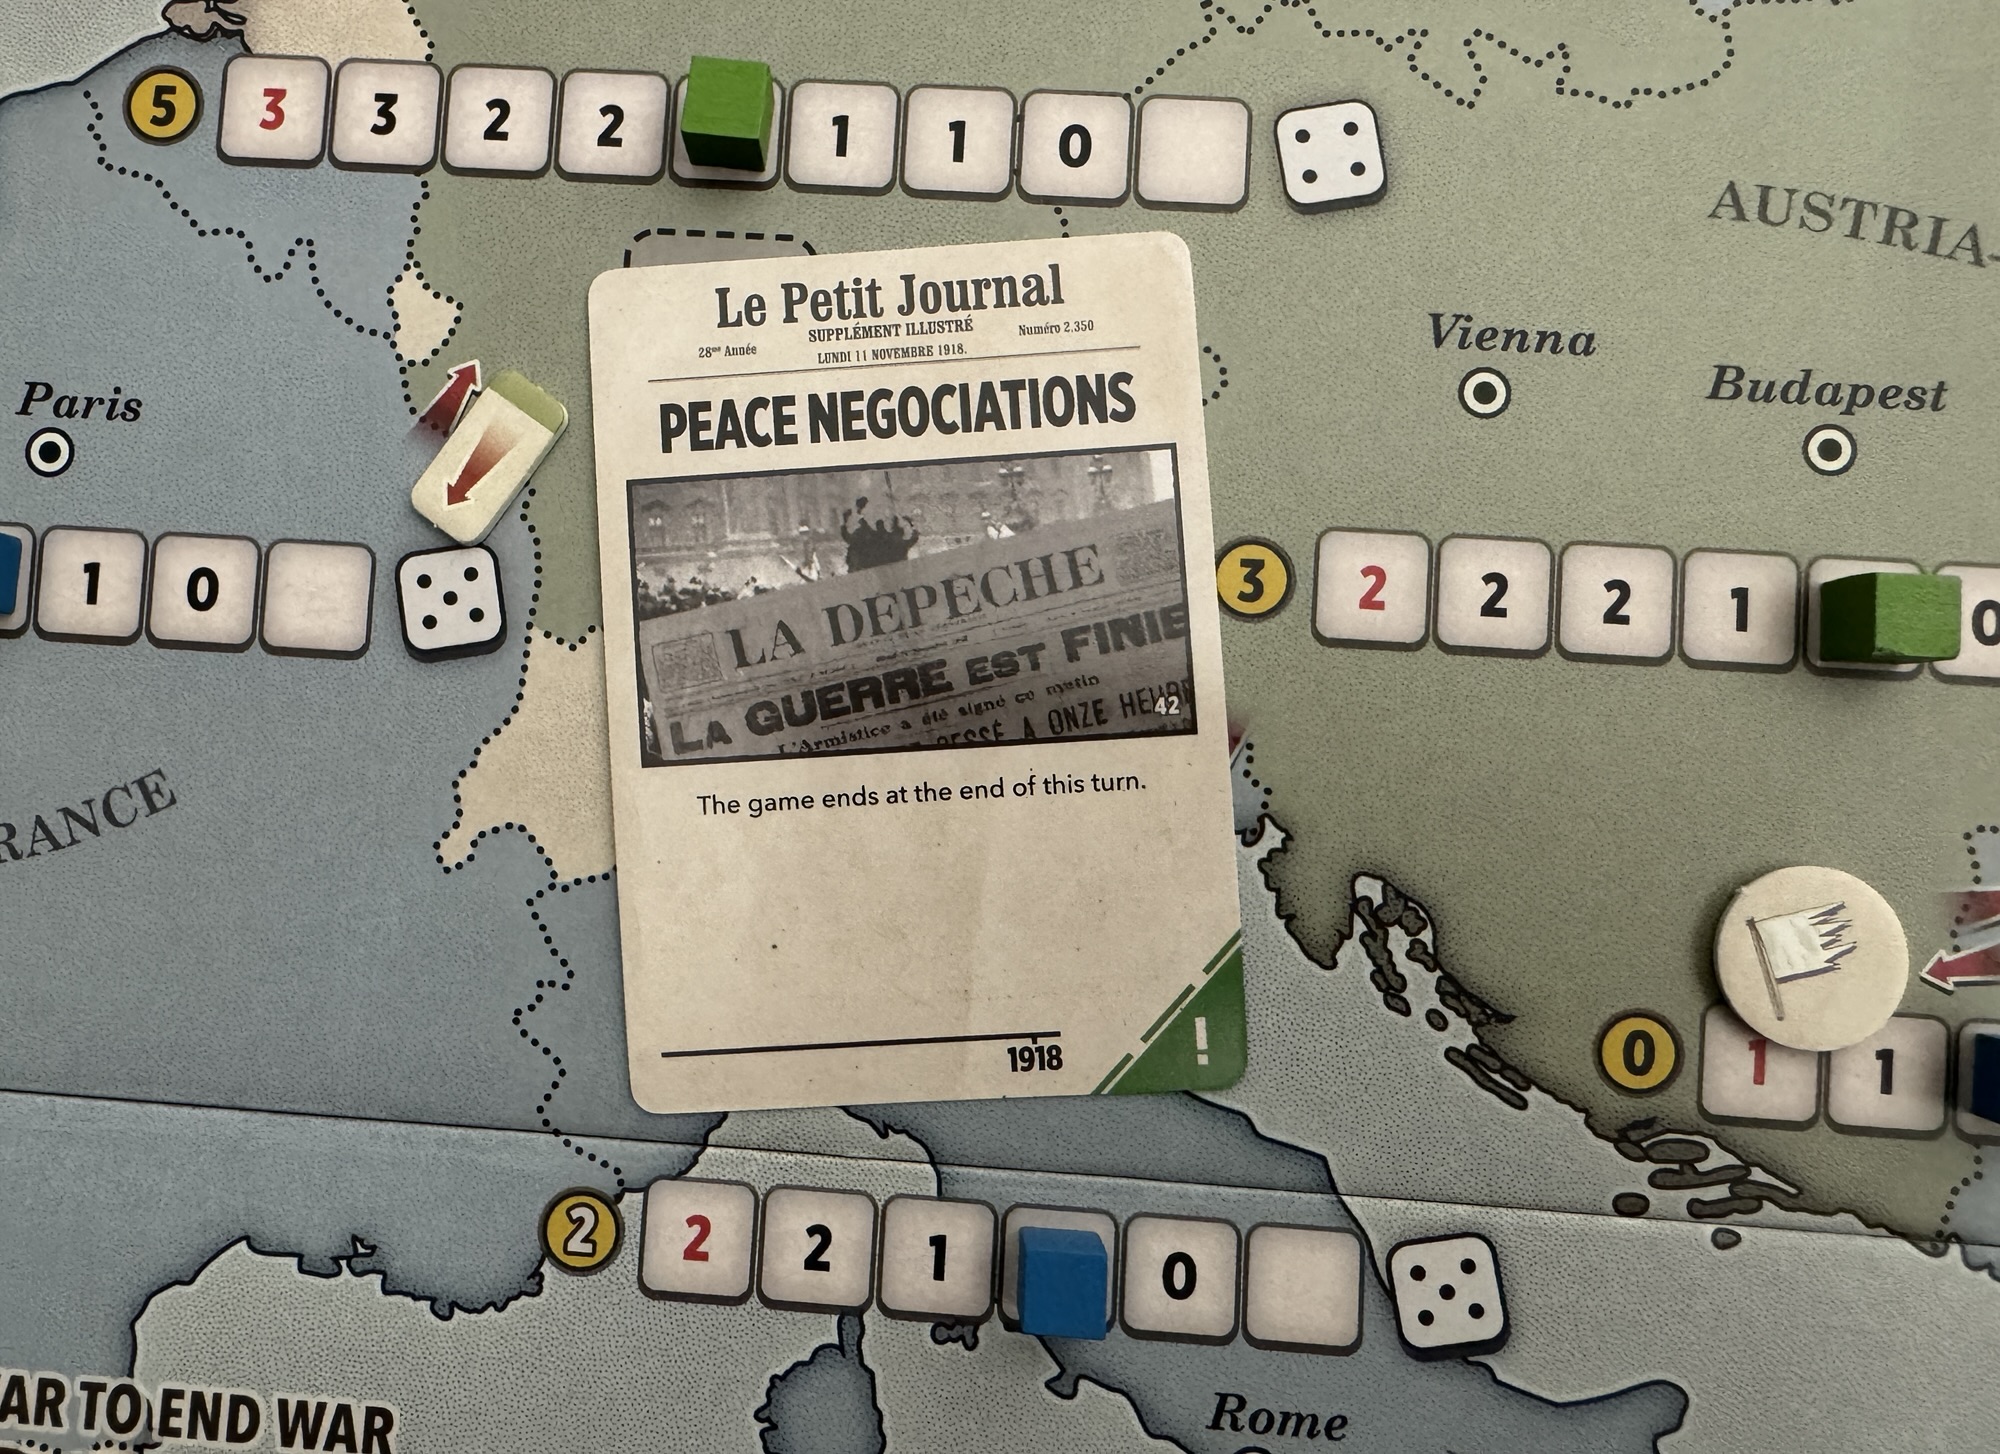
La Der de Ders – The War to End War from Hexasim
Thermopylae: Last Stand from Solo Wargame
I have really grown to love my solo wargaming and it is partly because there are plenty of well designed and engaging games out there that continue to feed my curiosity and hunger for a tough challenge. Here I present to you my list of the Top 10 Solitaire Wargames of 2025!
10. Crusaders: The Siege of Acre 1291 from Art of Wargames and Blue Panther
A new solitaire game is always welcome on my table…and if that game is about the Crusades, even better! Earlier this year, Blue Panther released a new game designed by Joe Fernandez called Crusaders: The Siege of Acre 1291. The game is what I would call a lite dice-chucker with some very interesting aspects of a siege baked into the game. There are tracks on the board that track the condition of the outer wall, inner wall and accursed tower and the Crusader Knights, including Templars, Hospitallers and Teutonic Knights, inside the city of Acre have to defend against the Mamluk siege for 13 turns.
The game has a random event that kicks off each turn that will do damage to the city walls, kill knights and advance the Mamluk miners who are attempting to tunnel under the walls. There is just one event that if rolled can do a loss to the attackers but this occurs only on a roll of 3 on a 10-sided die.
The rules are very simple clocking in at 5 pages and are easy to understand and once read the game can be played only from the excellent player aid. I very much enjoyed the Deus Vult actions that are special actions that can be used to do things like repair a wall, reverse a Mamluk mining action or sally out of the city to offensively attack the besieging units. But, these actions can be nullified if certain conditions occur so you should use them while you have them and not wait too long or they might disappear.
I feel like this game really scratches that quick playing, easy to get into but intense and difficult game itch. The Crusaders have an uphill battle for sure as they really don’t have as many options or choices as I would like to see but what is there makes sense, is full of historical flavor and plays well. I have not been that successful with the game, meaning that I haven’t won very often, but despite that I still want to come back play after play and that should tell you something about the game and what it is. If your dice luck is really bad, this one can snowball quickly ending in a catastrophic defeat. I think that the other real attractive part of the game is that it is quick to set up, has good rules and plays quickly. This one will not blow your socks off but it is good for what it is and it comes in a small box that is very portable. In fact, I played it first while attending a work conference.
Staying in the small, travel sized wargame department is Shogun Solitaire from Worthington Publishing. I say wargame, but it is probably more of a strategy card game with a war theme being set in the period of the Sengoku Jidai. Shogun Solitaire is a card based dedicated solitaire game where the player is leading a coalition of four clans to unite feudal Japan. These clans are one of 4 different colors in the game including green (Hōjō), purple (Takeda), red (Katō) and blue (Amago). Each of the clans must secure 3 objectives within their territory to achieve unification under a single Shogun including the port, village and castle of that region. To accomplish this, you’ll need to deploy armies in the form of cards in strategic combinations to gain control of those objectives. These cards are built up in the players tableau and you must get a run of 3 same colored cards (not the same type of soldiers although you cannot play 2 of the same soldiers consecutively) played in order to win the next objective. But, there are Enemy cards colored black or gray that represent assassins, Ronin and raids. There are also neutral Envoy cards that are bronze colored that act as dead space in your tableau and represent the court responsibilities and diplomacy of the Shogun with allied clans and if you ever build up too many of them in the area you will have to take a breath and wipe the slate clean by sending them home.
The really great part of this game is that each of the different types of cards have different special abilities and you must deploy them properly in order to gain the greatest advantage before the 102 card deck runs out. There are six types of Shogun cards that represent the available forces that can be deployed to seize objectives. Samurai can protect and will cancel enemy cards before they can do damage. The Ninjas allow the player to search the top 4 cards of the deck and then reorder them in order to finish a run of the same color cards before bad things can happen. And one of the most important cards is that of the Leaders which act as a wild card that can be played like any Shogun card of its color. I found that trying to utilize these cards to their highest effect was very fun and tense and I found myself really trying to utilize each ability at the right time.
This game is fast playing, playing in 20-30 minutes, and is very fun. But it can be very luck dependent as when you draw bad cards a few hands in a row, there is not much that you can do and the game begins to pound you down and it can come to an end very quickly. But, this game is very good and well designed for what it is; a lite, card based, quick playing travel sized game that is also very beautifully produced with gorgeous period art, thick cards and a fantastic board that flips over to show a
A look at a very lucky win! Notice the back of the board turned over the reveal the beautiful art!
A few years ago, Worthington Publishing published their first game in the Island Fight Series called Tarawa 1943. That game was awesome and was truly difficult to win, as it should be. Now, they have published the 2nd volume in the series called Iwo Jima 1945 that covers the only island assault during the Pacific war that the attacking US forces would suffer worse casualties than the Japanese defenders. On February 19, 1945 the USMC would land 30,000 marines on the island against a Japanese defensive force that numbered roughly 21,000 Japanese soldiers. Facing a Japanese commander who had learned valuable lessons from the losses on other Japanese islands, the USMC would eventually land over 70,000 marines and suffer over 25,000 casualties during the 36 day campaign.
In this solitaire game, the player takes on the role of the USMC commander leading the invasion of Iwo Jima. The game system, driven by cards, will simulate the strategies of the Japanese defenders, often referred to as the Japanese AI, adding a layer of historical authenticity to your gaming experience. If you have played Tarawa 1943, you will be familiar with the system.
Iwo Jima’s play deck is larger than that of Tarawa’s, which provides a bit of breathing room in the game but doesn’t necessarily change the difficulty appreciably. There are also added mountain positions on the island where the attacking USMC will roll 1 less attack dice making it very challenging to overtake several of the key positions and that will need the player to use special cards to assist. The USMC player is allowed to play any number of the cards from their hand during their turn as opposed to just 3 from the previous entry in the series. The other rules are almost all the same, and you can begin playing with just a brief read of them.
I have played this one about 10 times and have not even come close to winning. It is tough and the way the dice system for combat works it is truly difficult for the Marines to score hits quickly enough to make significant progress, which is how it should be. But, the game is fun, tactically challenging as you have to manage your Cohesion as well as decide when to deploy and replace front line troops with fresh troops and plays pretty quickly. I have never had a bad play of this system and very much look forward to other entries in the series.
I am always on the lookout for an interesting and different type of historical game. And when that game is solitaire and allows the player to experience and gain insight into the life of a tragic figure then I am very interested. A few years ago, I came across this very interesting looking solitaire game designed by Francisco Gradaille called Onoda from Salt & Pepper Games. Onoda follows the tragic life of Hiroo Onoda who was a Japanese soldier who wouldn’t believe that Japan had lost World War II and stayed at his post on the island of Lubang in the Philippines from 1945-1974 when he finally surrendered after a visit from his commanding officer. I have played this one several times and can say the game is very interesting, educational and also gives the player an opportunity to learn and gain insight into the life of this person who is remembered as an insane criminal and a story of tragedy.
During 6 rounds of variable duration, the player has to obtain a number of resources represented by rice that will allow them to finish the round without suffering penalties, such as reduced health and morale. In each round, the player will have to undertake a series of missions, earning honor points for accomplishing them. During the game, the player will get to experience some of the events that the real-life Onoda had during his stay in Lubang as well as some of the tragedies. The missions includes things like sabotaging key infrastructure, gathering equipment and other useful items all the while trying to evade detection and capture. But the game goes deeper than that as the crux of the game is the management of morale and the level of insanity in the mind of the soldier due to paranoia, death of comrades or illness.
During these missions, the player will have to draw tokens from a draw bag that represent the level of alarm that is present on the island due to his shenanigans. Each time that a player has to perform a check to accomplish a mission or to avoid danger from the random events, the player must take a Resource/Resolution token from the bag and check its number side against the relevant level of alarm or paranoia in the are where the operation is being undertaken. These Checks are successfully passed when the token’s number is higher than the Alarm or Paranoia level so keeping these low and also moving around the island stealthily will spread out the alarm level and keep Onoda safer and more able to accomplish these missions. Failure will lead to negative effects and lost opportunities as the game has only 6 turns.
I very much enjoyed this game and also loved it because it made me think about this tragic “hero” and his motivations and life those 30 years on the island. What commitment he must have had as well as derangement and you have to respect that or at least give it some thought. Just a great little narrative generator with some very gamey mechanics that create an interesting experience.
6. Black Skin Black Shirt: Ethiopia vs Fascist Italy 1935-1937 from White Dog Games
I have really enjoyed my plays of several games designed by R. Ben Madison. He has a knack for including elements of the history into the gameplay while placing the events into the framework of his chosen system, which is usually the States of Siege Series…but not always. His newest offering called Black Skin Black Shirt: Ethiopia vs. Fascist Italy 1935-1937 from White Dog Games uses the States of Siege Series System and delves into pre-WWII conflict in Africa.
First off, this game is very challenging, as is to be expected as the Ethiopians are desperately outmanned and outgunned by the Fascists as they invaded to take over the oil rich area for their own purposes and I have not done well at it at all in my few plays. I normally would have played it a few more times before adding to the list but I just had such a good experience with it and the history that I felt that I needed to add it to the list. It uses the States of Siege Series but in a bit of a different layout as there are not tracks per se but there are paths that lead through various regions of the country of Ethiopia as they converge on the capital of Addis Ababa.
The game is chit pull and the chits that are pulled give instructions about the actions of the AI Italians as they move on each path. The player will also gain a number of action points that can be used to take actions such as attacking to drive back the invaders. I very much like the concept of support of the Fascist invasion as they have the ability to place their support focused bases on the map as they advance and this leads to the player no longer being able to drive them back to beyond that point so the pressure really ratchets up as the game goes along.
As is the case generally with these games, Black Skin Black Shirt is an easy-to-play, straightforward solitaire game that creates a very interesting historical narrative about how the conflict plays out. There are really lots of tough choices and the game is about the management of your resources and assets, such as your Ras warlords who can go out and make devastating ambush attacks but can also be killed in action and removed from the game, The game forces the player to take charge of the defenses, by calling up troops and marshalling resources as well as attempting to call on the League of Nations for aid and support.
Here is a link to my unboxing video:
If you are interested in Black Skin Black Shirt: Ethiopia vs Fascist Italy 1935-1937, you can order a copy for $56.00 from the White Dog Games website at the following link: https://www.whitedoggames.com/ethiopia
5. The Pursuit of John Wilkes Booth from Blue Panther
A few years ago, while attending the WBC, I had the chance to meet Wes Crawford who was demoing his upcoming game Engine Thieves. He was a very nice guy and his game was pretty interesting as well. Since that time, he has another game that has been released designed in partnership with Ryan Heilman in The Pursuit of John Wilkes Booth published by Blue Panther. I had a chance to play the game solitaire (with Wes overseeing the game and giving me guidance and pointers) at WBC in 2024 and have since played the game on my own several times and had a really great time with it. Great little solo game with several other modes where the player uses resources like police and detectives to search for clues in the hunt for Lincoln’s assassin after the events at Ford’s Theater on the evening of April 14, 1865. Definitely not a subject that has been gamed before and it is really refreshing to be able to experience this history in an interesting and engaging game. There really is a lot to like with the way that clues are found and chits are blindly drawn to verify clues from a bag. There is also a great little movement mechanic with police and detectives to try to acquire more clues.
I know that this is not a traditional wargame but the topic is just so very interesting and the variety of modes you can play in is also very cool. I think that this one is a game that will stay in my collection for years to come and I think that you will enjoy the chit pull, use of your special Stanton Cards that give special events or actions and the way that the movement, searching and raiding works when you find Booth.
4. Siege Works: A Napoleonic Siege Roll & Write from Solo Wargame
Until a year or so ago, I had literally never heard of the concept of a Roll & Write game. But, I started seeing these things pop up on Kickstarter from a new company called Solo Wargame and I was immediately intrigued as the topics for the games were so interesting and varied that I thought that there just might be something worth looking into. Since that time, I have played 2 of these Roll & Write games from Solo Wargame and really found that Siege Works: A Napoleonic Siege Roll & Write was my favorite. I say my favorite because who doesn’t like a siege game and a game set during the Napoleonic Wars is always fun!
Roll & Write Games are typically small and portable games, some are even Print ‘n Play games like Siege Works, that involve the player rolling dice and then marking the results on sheets of paper or sometimes erasable boards. These markings can mean several different things including goals being met, pre-requisites being completed or enemies defeated. The genesis or archetype for these Roll & Write Games is Yahtzee, where players roll a handful of dice looking for various combinations of results to mark off on their sheet that then score points in the end. But recently that game genre has started to include a bit more player agency and choice about how they go about reaching goals including dice selection from those that are rolled, choosing results that are needed at the time but may be less than optimal in the long run and in completing certain goals that will open the door for additional future beneficial options for the player. Don’t get me wrong. A Roll & Write Game is very simple and is not a traditional style of wargame with hexes, counters and Combat Results Tables. But the game tells a story of a siege and how it works. So I was initially skeptical about this form of game and just had to give it a try to see what it was about. I have actually played 2 of them and found them to be lite, fun and interesting. And Siege Works is a solitaire Roll & Write Game so I have played it by myself on my gaming table and had a good time with them.
The biggest plus to the game is the simple rules, easy setup and fast onboarding with learning and being able to get the game played. You can play this easily with a simple read of the rules and a bit of review of the Game Sheet before playing. The sequence of play is very good and easy to follow as well and I found that the game is pretty intuitive. My only issue with the rules was that I found that they sometimes needed just a few more words or an additional sentence for clarity. But this is combated somewhat by the fact that the rules contain a lot of good play examples for the different actions in the game.
3. La Der de Ders – The War to End War from Hexasim
La Der des Ders – The War to End War from Hexasim is a 1-2 player slightly abstracted strategic level look at World War I. The game allows the players to relive the First World War at a strategic level, with each player controlling one of the 2 sides either the Entente, consisting of France, England, Russia, Serbia and other minor nations or the Central Powers including Germany, Austria-Hungary, the Ottoman Empire and a few minors. La Der des Ders can also be played solo, with a dedicated solitaire bot called “Athena” who utilizes special Cornflower Cards to make decisions about what technologies to invest in, where to undertake offensives and how to utilize limited resources and reinforcements. Each turn, players gain an amount of Resource Points dependent on what nations are in the war, which they can allocate to different areas to guide their overall strategy. Victory is achieved by launching offensives that drain the morale of enemy nations, forcing them out of the conflict through collapse.
One of the best parts of La Der de Ders, and typically the best part of any strategic level wargame, is the Technology Phase and the player’s ability to spend their limited resources on various types of technologies to improve their performance on the battlefield and in the economic war. But, keep in mind that there is a risk here as resources are limited and you have to pay to develop these technologies and there is no guarantee of success as it is up to a dice roll, albeit a modified one at that. Each of the players has their own Technology Tree board that is used to track their technological progress over the course of the game. There are a total of 6 different Technologies that can be researched including Attack, Defence, Artillery, Aviation, Naval, and Air Raid.
The process of taking Offensives is really pretty simple as players take turns to activate one of their sectors that has not yet been activated this turn. The sector chosen will then be activated and must launch an Offensive against an adjacent enemy sector. There is a cost to the launching of Offensives though as the player will have to pay the appropriate cost by first choosing the size of their Offensive, which in game turns means the number of dice they will pay to roll in the Offensive. The size of the Offensive must be at least 1 and can be up to the current Operational Value of the attacking sector. The player launching the offensive then spends as many Resource Points as the size of the Offensive. Dice rolling is fun and the real key here is how to plan for an prioritize your chosen Offensives as you cannot just do one each turn or you will risk collapse and will be unable to do other things such as invest in technology development.
Victory in the game is well done and I very much like the concept of only calculating the value for those countries who have not Collapsed and who are still in the war when the end game is triggered. We all know that it is easier to negotiate a peace that is favorable to your side when you are still a threat and if too many nations of either side have collapsed then their Prestige Points will reflect this as those countries won’t contribute to the final value. And I also like the simplicity of the scoring system. If certain key countries like France and Germany surrender, then that equates to a victory for the side causing the surrender and if the game continues to grind on through the final turn, then there is this calculation that is really pretty simple and gives importance to each goal with a different value that can be earned. Just a solid method for determining victory that makes sense and fits with the historical aspect of the outcome of the Great War.
The Athena bot is the solitaire mode of the game and it is not just tacked on but is very well done and creates an interesting and challenging game. It is a really well designed system that removes most of the work by the player when playing solitaire. There will be times when you have to make a decision, such as the priority of how Offensives occur from the non-player side, but these decisions are easy and the hard work is done by the simple flipping of a card. I do want to point out one final thing. The sequence of play differs slightly from the 2-player game as it rearranges when the Athena bot does a few of the steps during the Spend Resource Points Phase as shown below. The human player will start by doing their Reinforcements first followed by their Technology investment. Athena will then go and do their Technology investment first followed by Reinforcements. Both players will then move into the Offensive Phase and the player with initiative as shown on the turn track will take the first Offensive of the turn.
I wrote a series of Action Point posts on the game and you can read those at the following links:
Neva Game Press (formerly Neva Wargames) is a new publisher who appeared on the scene 2 years ago. When I started seeing their posts on Twitter and Facebook, I was immediately impressed with their interesting topic choices for their upcoming games as well as the fact that they are trying to make small footprint wargames that pack a punch. And the art is also very appealing and brings an aesthetically pleasing and attractive look to their games! Recently, they released their first game called Iwo Jima: Hell on Earth which is a solitaire look at the amphibious invasion of the island of Iwo Jima in 1945 during the end of WWII.
Iwo Jima: Hell on Earth is the first game in their Neva Skirmish Line and it is a hex and counter wargame with some interesting mechanics for combat and a combination of secondary mechanics to keep the game fresh and replayable. This solitaire game lets you play as the U.S. Marines during Operation Detachment. It offers a challenge for both intermediate and experienced wargamers and is really very, very good. I have only played the game 1 time all the way through but as the year is getting away from me already I had to finish up and decided that this was a very good experience deserving of the position on this list. I hope to play again very soon and put together some video content to share more about the game.
One of the things that I really liked was the focus on the hidden Japanese units that play a significant role in the game. Collecting intelligence for the U.S. as they move up the beaches and onto the mainland ensures more strategic planning and greater success of attacks. Additionally, hidden units, combined with a randomized initial Japanese unit setup, enhance the game’s fog of war and replayability. No play will be the same and I think that is a good way to design a solitaire game. U.S. intelligence has some information about potential Japanese defenses, but it is important to verify on the map that there are actual units at those locations. Additionally, more information about those units should be gathered by revealing them to see their actual composition and plan a better attack. Units can be revealed through successful bombardment, combat or reconnaissance. Making a better attack means that the player has access to different type of weapons and attacking a tank unit with a heavy weapon will give modifiers that will not be gained if the asset is not present.
If you attack a hidden unit or if a hidden unit is supporting the attacked Japanese unit, you will draw Intelligence Chits that provide information about the unit and their combat support value. While attacking hidden units can be risky in certain situations, it is essential to continue advancing to achieve timely victory. Understanding when to attack hidden units or gather intelligence through reconnaissance actions is crucial for success and one of the better parts of the game.
Combat is varied and there is a lot of choice about how to go about attacking the defenders. A unit can engage in combat through Direct Attack, Indirect Attack, or a combination of both. In a Direct Attack (with a maximum of 2 U.S. units adjacent to the target), the combat factor value of these units is utilized. For an Indirect Attack (with a maximum of 3 U.S. units if conditions are met), the units’ combat support type and value are used to participate in the combat. Units involved in a Direct Attack may also be used for Indirect Attacks as needed. The next step of combat involves comparing the combat ratio to determine the appropriate table column for checking the die result. Die Roll Modifiers must then be determined, based on factors such as the type of Japanese defense units, which could include Trenches, Pillboxes, or Caves, the comparison between the combat support from the U.S. player and the Japanese side, and terrain effects. The combat is very crunchy and fairly involved and I will definitely classify this one as a good hex and counter wargame experience.
I need to get this one back to the table soon but this is a keeper and I cannot wait to play again.
1. Okinawa: The Last Battle of WWII from Best with 1
I love a new and interesting way to tell the story of a key battle and I found a very interesting one called Okinawa: The Last Battle of WWII from Best with 1 earlier this year. This is a solitaire only game and for each game the player will draw four objectives from a possible 12 that you must survive and capture before time runs out. On your turn, the player will roll special dice and then spend those to take actions such as movement, attack and take special actions from different unit action cards that will be set up in a square from from 1 to 10. The numbers coincide with the dice of the attacking Japanese and as the player moves through the rondel they will be able to activate and use their different soldiers to attack the Japanese defenders or use their special abilities to gain tokens that can be used for rerolls or healing of wounds
I think that the best part of the game is the concept of resource management as you have to use the dice appropriately to move and fight and also to manage your troops as you can upgrade certain cards as you pass the midway point of the round as well as when special actions are granted via the special resource chits. Upgrading units is very important as this will unlock things like heavy weapons in the form of bazookas, a Sherman tank and planes to be able to take out the Japanese armor units defending the island. The game is about efficiency of movement and doing the most with what you have. The dice determine what you can and can’t do and movement is optional as you don’t have to move unless you feel it is advantageous. But remember, that you have to defeat the defenders and the various objectives to be able to advance to your final objective and sitting in one space too long is not advisable.
The different units have various functions including attack, such as the Rifleman, Machine Gun Team and Sniper but also have secondary functions to remove the fog of war, heal your damaged units or gain additional resources. The Japanese defenders are well hidden and also have various defenses such as pill boxes and caves that will require the player to defeat these before moving to attack the units located inside.
In the end the game is about defeating the Japanese defenders while doing so in a set amount of revolutions around the rondel setup. This can be as few as 2 times around or as many as 4 and knowing when to use your resources to reroll your dice, as you either didn’t get the run of consecutive numbers you were looking for or just need a specific number, you will run out of resources quickly and you must plan them out as best you can to win the game. This one is really fun and I have played it about a dozen times winning about 70% of the time. The game plays in about an hour and the action is fast and furious and you are immediately beset by the staunch Japanese defenders and must act quickly.
Here is a link to our unboxing video:
Here is a link to my playthrough video:
Here also is a link to my video review:
If you are interested in Okinawa: The Last Battle of WWII, you can order a Print and Play copy from the Best with 1 website at the following link: https://bestwith1.com/product/okinawa-pnp/
There you have it. My list of the best solitaire wargames/games that I played in 2025! What a year. There were just so many great games but unfortunately only so much time. There were other games that I was unable to get played that I had acquired and I regret not getting to but there is only so much time.
What were your favorite solitaire wargames from 2025?
With this My Favorite Wargame Cards Series, I hope to take a look at a specific card from the various wargames that I have played and share how it is used in the game. I am not a strategist and frankly I am not that good at games but I do understand how things should work and be used in games. With that being said, here is the next entry in this series.
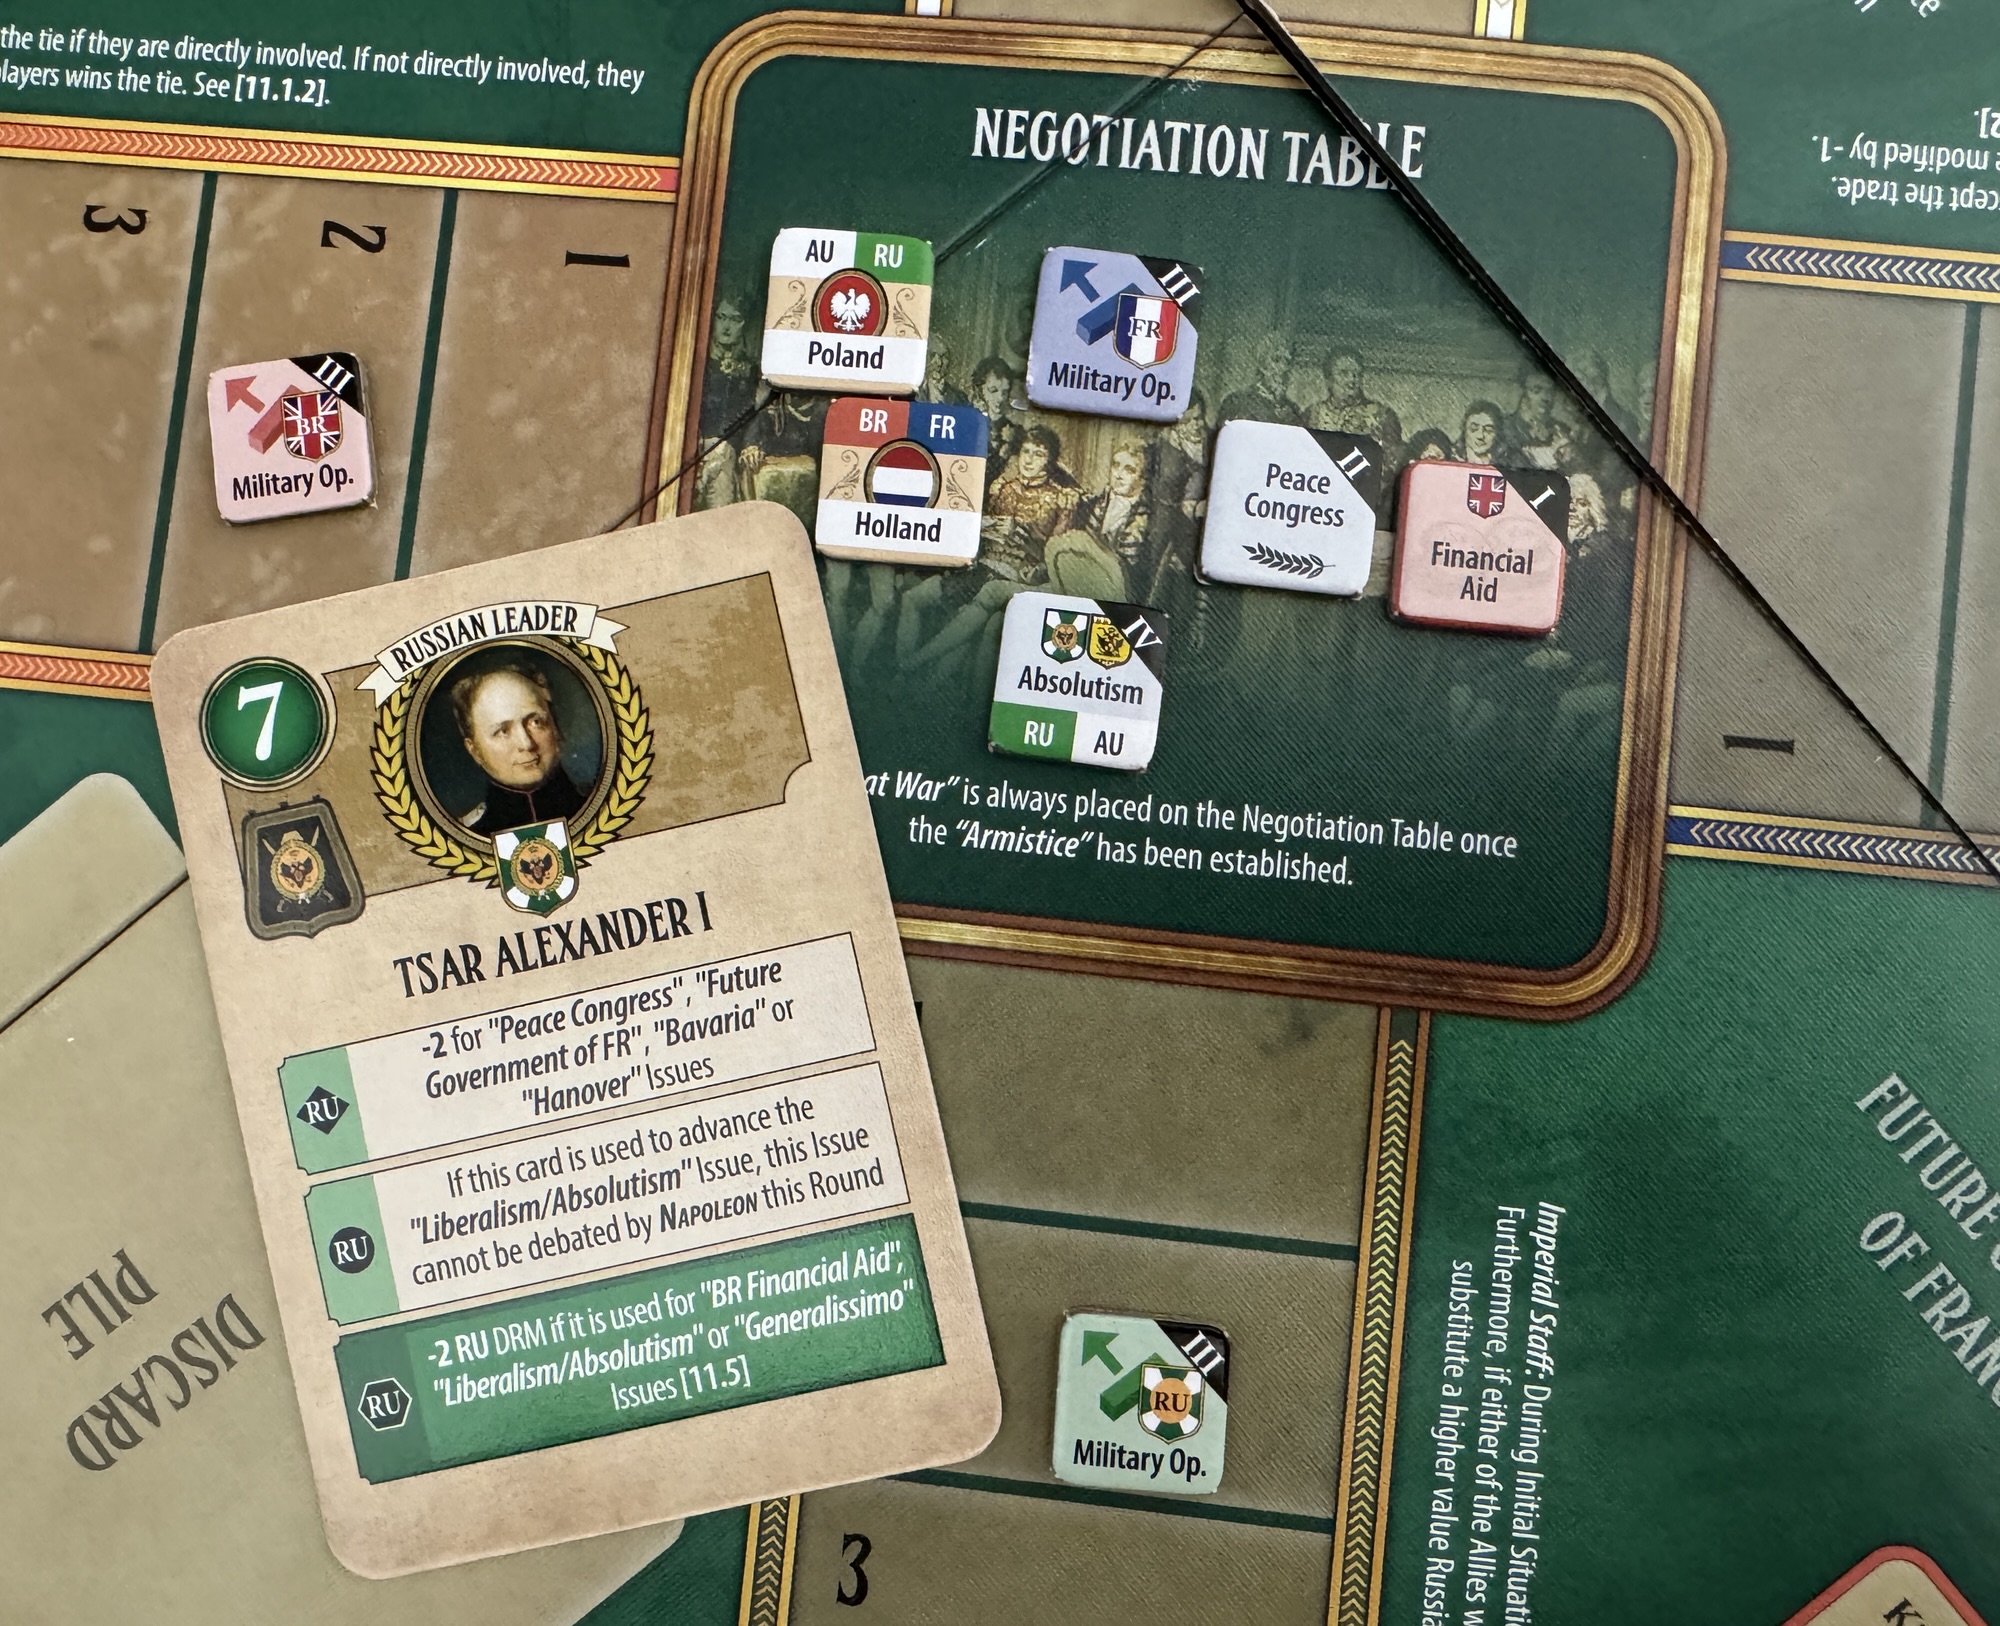
#73: Russian Leader Tsar Alexander I from Congress of Vienna from GMT Games
Congress of Vienna from GMT Games is a diplomatic card driven wargame based on Churchill and is the 4th game in the Great Statesmen Series. The game is set during the years of 1813-1814 and sees players take on the role of the main characters of the struggle between the Napoleonic Empire and the coalition of Russia, Austria, and Great Britain with their Prussian, Spanish, Portuguese, and Swedish allies. Congress of Vienna has two different but related phases including the conference table where players first debate over the control of issues germane to the factions and the period of the war and second these issues are then used on the battlefield to recruit units, attack and take overall command of battles. The players will be playing cards from their hands to “debate” over the various issues that were placed on the table, which include all types of things such as Military Operations, Recruitment, who will lead the combined Coalition forces (Generalissimo), Future of French Government, British Financial Aid, Liberalism vs. Absolutism, Austrian Neutrality and several other issues, and then later the players will use their accumulated Resources gained from the issues to enact action on the Military Map and do things like mobilize troops, place Military Support Markers and the ultimately to conduct warfare.
The game relies on cards and cards can be used to negotiate, i.e. move an issue to your National Track. Cards can provide a particular issue with positive and negative DRM’s depending on which nation plays them and can also be traded with another player during the Diplomacy Phase. Certain cards are better than others for debating an issue moved by another player; and finally, if they are saved for the War Phase, staff cards can be used to modify dice rolling in battles. These are very versatile cards and the players will have to learn them and their benefits in order to be effective at the game.
In this entry, we are going to take a look at the Russian Leader Tsar Alexander I card. The fist thing that you may notice about this Leader Card is that is that it has no benefit for military operations, meaning that Tsar Alexander is watching the war from the sidelines and not directly involved like Napoleon, but does have a potential negative effect if used on certain Issues. But his power lies in the ability to utilize his 7 value to influence issues significantly on the Negotiating table. Particularly, Tsar Alexander I is an ardent believer in the philosophy of Absolutism and wants to retain his crown as the leader of Russia. This concept is played out in the game between the great powers of the time, including Russia and Austria for Absolutism, and the more democratic players including Britain and France for Liberalism. On the board appears this Liberalism/Absolutism Track, which provides the players an opportunity to debate over the Liberalism/Absolutism Issue and gain various advantages and Victory Points from the track. On this Liberalism/Absolutism Track, Europe’s post-war governing philosophy is fought over. This is a double track in green and red with a common At Start area for the use of 2 pawns. Tracks for Liberalism (red: Britain/France) and Absolutism (green: Russia/Austria) each have four boxes and an assigned total Victory Point amount. In order to score the VP from this track though, the player scoring must have their philosophical leaning portion of the track occupying a space at least 1 box ahead of their opponent. Also, if they want to score the maximum Victory Points listed at the top, they have to occupy the top box and their opponent cannot occupy theirs. For the Russia player, this should be a huge part of their strategy as 5VP is nothing to sneeze at in this game. But, in order to do that they will most likely have to try to go first and use Tsar Alexander and his 7 value to try and move that Issue up the track to end under their control. If an Issue every reaches a Track’s Seat, meaning the 7th space, or more after any declared debate is calculated in, then that Issue is considered to be secured and can no longer be moved through negotiation during future rounds. This reminds me a bit of the way that I always plan to use Joseph Stalin in Churchill, to go first and then bring the hammer down on the A-Bomb Research Issue. Getting control of this Absolutism/Liberalism Issue at least 4 times is very important for the Russian player and they will need to utilize this ability as much as possible. But remember that there is a penalty called the “Meddling Tsar” Rule where if Tsar Alexander is used for the negotiation of the British Financial Aid, Liberalism/Absolutism or the Generalissimo Issues, it will inflict a -2 DRM on all battles involving 1 or more Russian units during the upcoming War Phase. This is quite a cost and the player should carefully consider if and when they use the ability throughout the game. If the turn is expected to contain little to no combat for Russian units, then it is safe to use but if France is being aggressive and pushing on Poland and Prussia you might want to consider not going after the Liberalism/Absolutism Issue this turn and instead focus on Recruitment and Military Operation Issues.
The other part of this ability is that if Tsar Alexander I is used to move the Liberalism/Absolutism Issue then Napoleon cannot be used to Debate that movement. I would say that this is not an issue though as typically the France player will be using Napoleon on the battlefield for his DRM abilities.
I also like the historical and personality connection between this card and the game. At the top of the card you will notice that if you use Tsar Alexander I to negotiate the Peace Congress, Future Government of France, Bavaria or Poland Issues, that you will gain a -2 on his value bringing it from a 7 down to a 5. I think that this ability really highlights the philosophy and view of the Tsar regarding the time. He doesn’t believe that France should get to continue to exist as a main player in the power structure of the time and definitely doesn’t want to see France become more democratic. But, he also has a feeling that Bavaria and Poland are Russian vassals and should not be allowed to be turned to any other side’s allegiance. If he has to be used in this manner to defend or negotiate these issues I feel like the -2 Value penalty really shows that leaning in his thinking and probably causes him to be more brunt and less diplomatic thereby losing some of his influence in the court of opinion. Ultimately, Tsar Alexander I thought that monarchy is a noble and viable alternative to the crude and materialistic mob mentality of republicanism and the abilities of his Leader Card definitely cement that view.
After playing now a few times, I am here to say that Congress of Vienna is probably my favorite game in the Great Statesmen Series. I believe that this game has matured the system and made it something that is more than where it started. Congress of Vienna is very much more like a true wargame and was extremely interesting. We are still learning and need to keep playing this one but I did enjoy what it was that we were doing.
Alexander I, nicknamed “the Blessed”, was Emperor of Russia from 1801, the first King of Congress Poland from 1815, and the Grand Duke of Finland from 1809 to his death in 1825. He ruled Russia during the chaotic period of the Napoleonic Wars.
The eldest son of Emperor Paul I and Sophie Dorothea of Württemberg, Alexander succeeded to the throne after his father was murdered. As prince and during the early years of his reign, he often used liberal rhetoric but continued Russia’s absolutist policies in practice. In the first years of his reign, he initiated some minor social reforms and in 1803–04 major liberal educational reforms, such as building more universities. Alexander appointed Mikhail Speransky, the son of a village priest, as one of his closest advisors. The over-centralized Collegium ministries were abolished and replaced by the Committee of Ministers, State Council, and Supreme Court to improve the legal system. Plans were made, but never consummated, to set up a parliament and sign a constitution. In contrast to his westernizing predecessors such as Peter the Great, Alexander was a Russian nationalist and Slavophile who wanted Russia to develop on the basis of Russian rather than European culture.
In foreign policy, he changed Russia’s position towards France four times between 1804 and 1812, shifting among neutrality, opposition, and alliance. In 1805 he joined Britain in the War of the Third Coalition against Napoleon, but after suffering massive defeats at the battles of Austerlitz and Friedland, he switched sides and formed an alliance with Napoleon in the Treaty of Tilsit and joined Napoleon’s Continental System. He fought a small-scale naval war against Britain between 1807 and 1812 and took Finland from Sweden in 1809 after Sweden’s refusal to join the Continental System. Alexander and Napoleon hardly agreed, especially regarding Poland, and the alliance collapsed by 1810. Alexander’s greatest triumph came in 1812 when Napoleon’s invasion of Russia descended into a catastrophe for the French. As part of the winning coalition against Napoleon, he gained territory in Poland. He formed the Holy Alliance to suppress the revolutionary movements in Europe, which he saw as immoral threats to legitimate Christian monarchs.
During the second half of his reign, Alexander became increasingly arbitrary, reactionary, and fearful of plots against him; as a result, he ended many of the reforms he had made earlier on in his reign. He purged schools of foreign teachers, as education became more religiously driven as well as politically conservative. Speransky was replaced as advisor with the strict artillery inspector Aleksey Arakcheyev, who oversaw the creation of military settlements. Alexander died of typhus in December 1825 while on a trip to southern Russia. He left no legitimate children, as his two daughters died in childhood. Neither of his brothers wanted to become emperor. After a period of great confusion (that presaged the failed Decembrist revolt of liberal army officers in the weeks after his death), he was succeeded by his younger brother, Nicholas I.
We have done 2 videos on this game including the following RAW Video after out 1st play at Buckeye Game Fest in May 2025:
We then did the following full Review Video after our 2nd play at WBC last July:
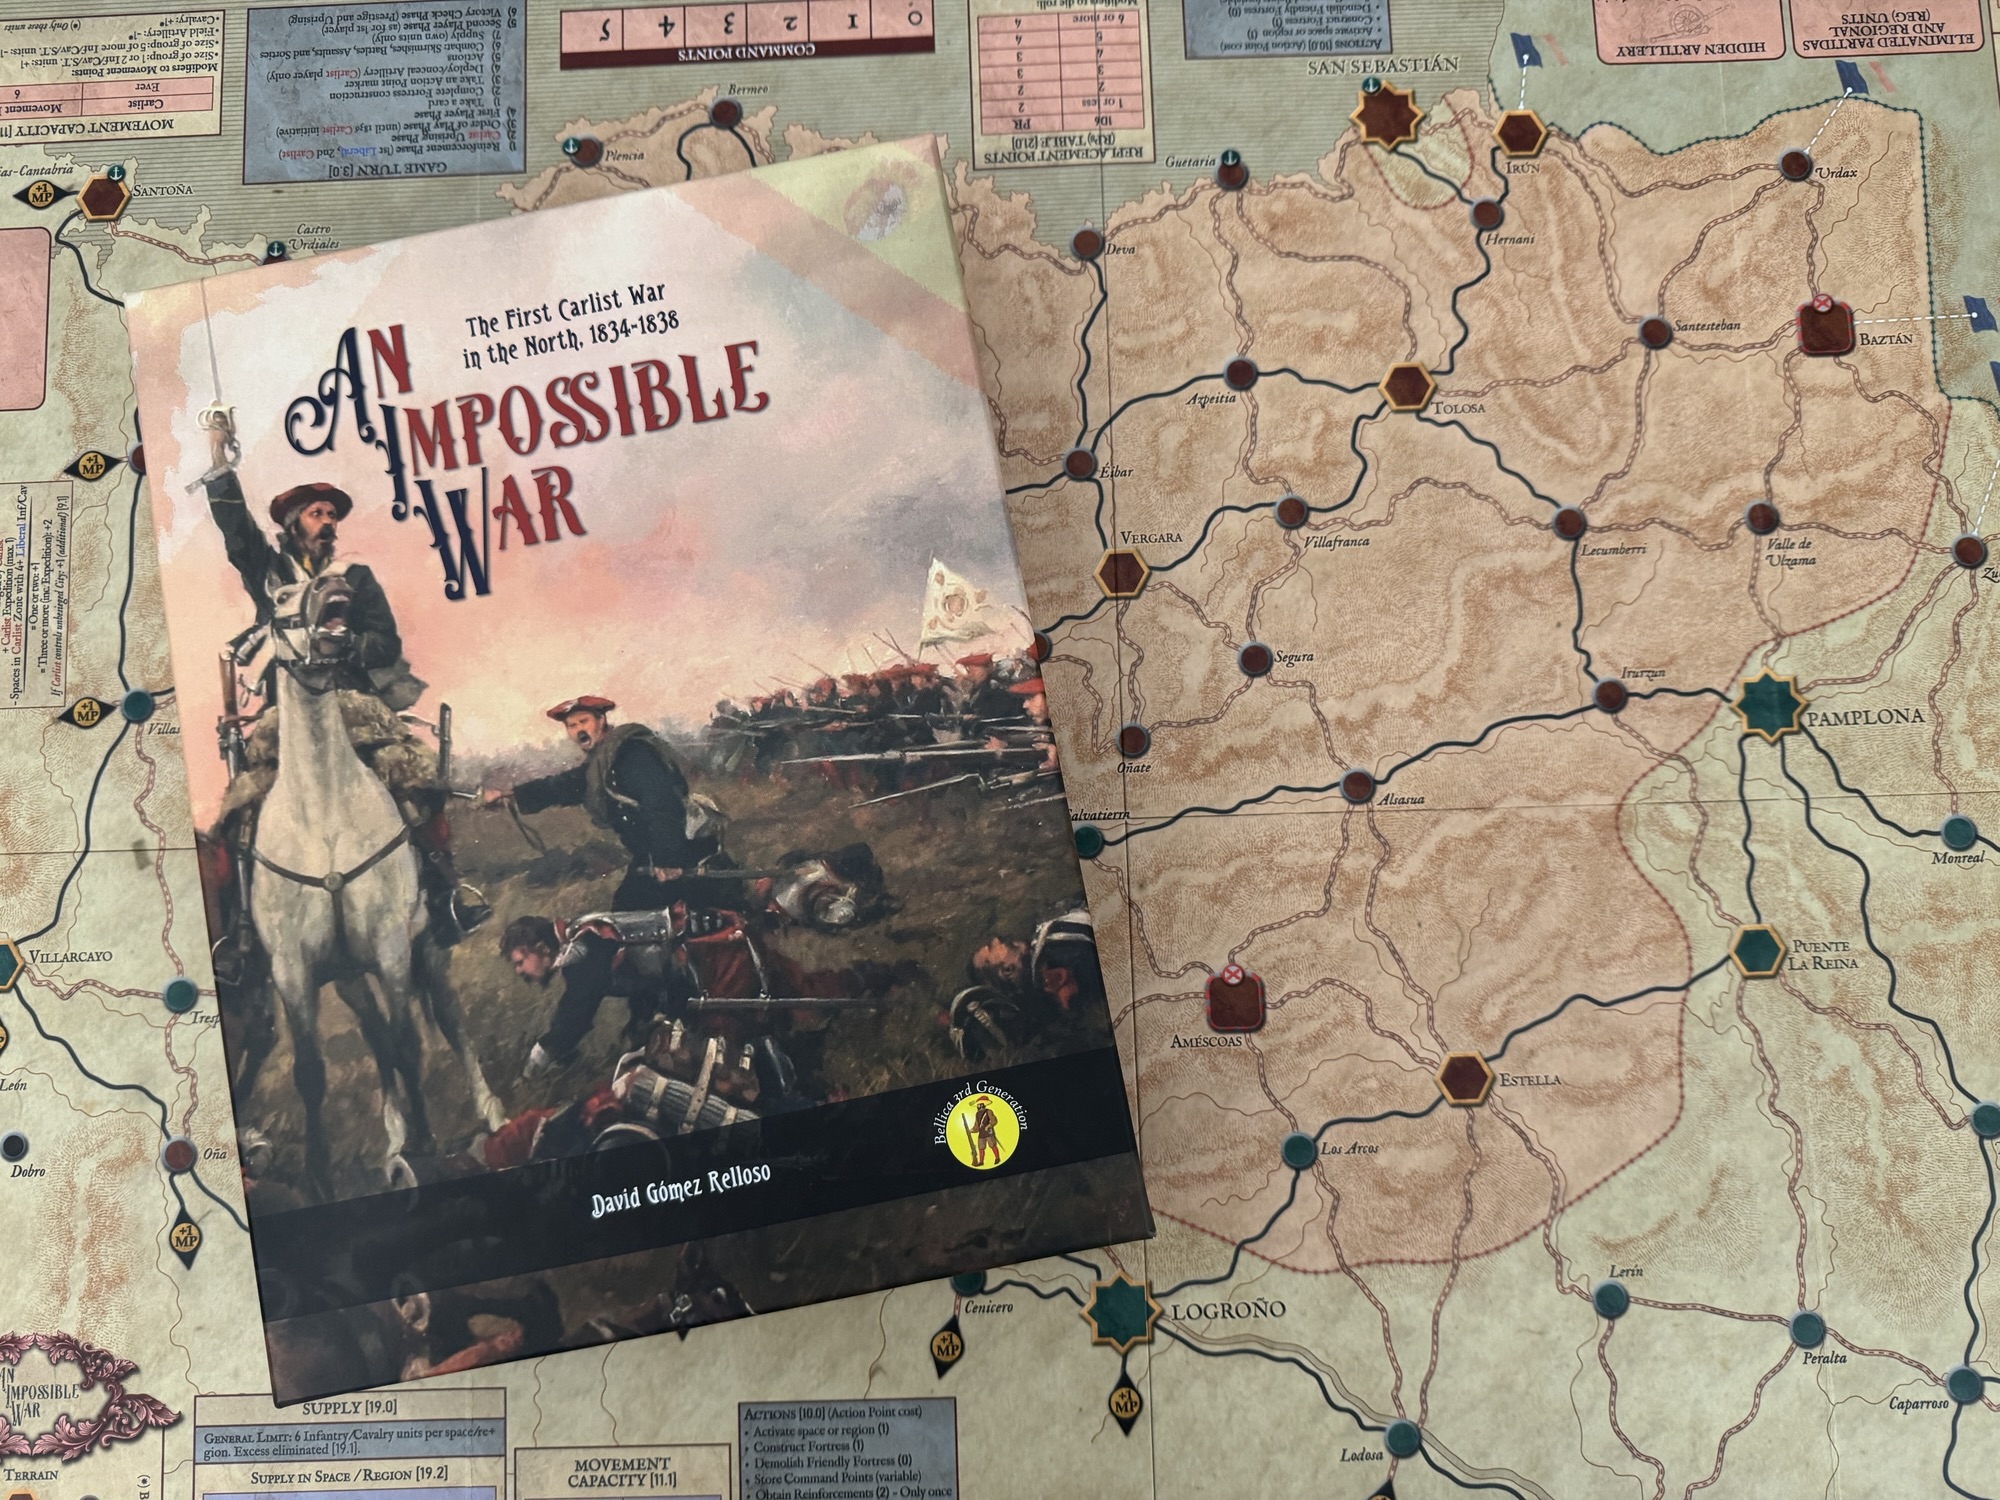
An Impossible War: The First Carlist War in the North, 1834-1838 from Bellica Third Generation is a block wargame that recreates the First Carlist War in the North of Spain which was a civil war between the Carlists who supported the succession of the late king’s brother Carlos de Borbón and the progressive and centralist supporters of the regent Maria Christina acting for Isabella II of Spain who were referred to as the Liberals. The game uses blocks representing units but also includes counters and uses cards. I was able to play the game about a month or so ago with Francisco Ronco who owns the publishing company Bellica Third Generation and very much enjoyed the game and how it represented this interesting struggle.
In this series of Action Points, we will first take a look at the Game Map, discussing the point-to-point movement configuration, the various spaces and the delineation of the Carlist versus the Liberal Zones, as well as explain the use of the Rest of Spain smaller map, examine the units available to both sides and cover the importance of Supply, take a look at the Carlist Uprising Phase and what it means for the game, take a look at the activation system and the use of Action Point Markers, and cover some examples of Battle, focusing on the tactical aspect of combat with the use of the Battlefield Board, as well as an example of a Siege.
Main Game Map
There is a Main Game Map, which is commonly referred to as the Northern Map, shows the northernmost tier of Spain along the coast of the Cantabrian Sea including Navarre, the Basque Provinces and part of Cantabria, Burgos and La Rioja, and a small secondary Game Map that reflects the regions of the rest of the country, where Carlist uprisings break out and the expeditions sent from the North may operate.
The Main Game Map contains various elements including named settlements, such as Towns and Cities, and also identify key Carlist Refuges and has a clear demarcation of Carlist and Liberal territory. There are locations identified by the name of a settlement or area, which can be of greater or lesser importance and size. There are four types of spaces including Cities, Main Towns, Carlist Refuges and Other Spaces.
Cities
Cities are represented on the Game Map by an octagonal shape and the name of the city is capitalized. If the City is Liberal it will be colored turquoise and if it leans Carlist it is colored red. There are five Cities on the Game Map including Bilbao, San Sebastián, Vitoria, Pamplona, and Logroño. All of them have a permanent Fortress as well as an Intrinsic Garrison marker indicating the controlling side. Also, the Bilbao space has a Port, identified by the anchor symbol, because it is connected to the Cantabrian Sea via the River Nervión. If the Carlist player is besieging Bilbao, or controls or is besieging either of the two spaces located next to the river (Portugalete or Guecho), the Port of Bilbao is cancelled for the purposes of naval transport and supply.
Supply is also determined based on 2 things, a Region and then each of the Cities within that Region. A Region can supply up to 6 Liberal Infantry and Cavalry units. But, a Region does not supply any Carlist units, which must obtain supply from a Supply Train or Knapsack in the Region. Without a Supply Train or a Knapsack, in order for Carlist units to get supply they then must attempt to forage. Each space can supply a certain number of units, depending on whether the space is located in the Carlist or Liberal Zone, the type of space, and the side the units belong to. We will cover this a bit more in Action Point 2 when we discuss units.
A player will gain +3 VP’s for capturing a City during the game. These are the most important ways to score in the game and protecting them is vital to either side. It is also important to keep in mind that if the Carlist player ever gains control of 2 Cities at the same time that were initially held by the Liberal player, that player will immediately gain an automatic victory.
Connecting the various Cities and Towns are the Roads. Units can move along these roads and there are 2 types of Roads including Main Roads and Secondary Roads. The Main Roads are indicated by a continuous thick black line while Secondary Roads are indicated by dashed brown lines. The cost of moving along a Main Road is 1 Movement Point and along a Secondary Road is 2 Movement Points. I found it very important to properly plan out your movements to maximize the distance that you can gain with a single action. These roads are somewhat of a spiderweb connecting points and you can reach all points eventually but finding the best and most efficient route is important. Studying the Game Map and the layout of the roads is key to playing the game well as you can block off the use of certain Main Roads and force your opponent ot move much slower on Secondary Roads frustrating their plans and efforts.
Main Towns
Main Towns are generally populated areas that have some political, economic or strategic importance and are identified on the board with a hexagonal shape that is of a similar size and proportion as the Cities. Also, the name of the town will be capitalized the same as the Cities. If the Main Town is Liberal it will be colored turquoise and if it leans Carlist it is colored red.
A player will gain +1 VP for capturing a Main Town that was held by the other side. These are not as valuable as the Cities but there are more of these on the Game Map than the Cities with 13 Main Towns as compared to only 5 Cities. Prioriting their capture and control is important for many purposes such as Supply, movement and being able to avoid interceptions and
Carlist Refuge
There are 2 Carlist Refuges identified on the Game Map including Améscoas and Baztán. These are spaces where the Carlists are particularly favored by geography and local popular support. Neither player may construct fortresses in these spaces. These Refuges are identified with a square with an X at the top and a dashed brown line.
Carlist Zones and Liberal Zones
The Carlist Zones take up a considerable portion of the Game Map which is denoted with a red shaded background and a dotted red line. All locations within it are considered to be in the Carlist Zone, while all locations outside of it are considered to be in the Liberal Zone. Also, spaces adjacent to the Carlist Zone are spaces belonging to the Liberal Zone, but that are connected via a road to any space within the Carlist Zone.
The Carlist units in the game are tied to specific localities—Navarre, the Basque Provinces, or “Castilians”—rather than a standard, monolithic national army and are numerically outnumbered by the Liberals. As such, they have a clear need to be nimble and move around the board causing difficulties. One of the ways the Carlist player scores Victory Points through the increase in Prestige is by is controlling at least 4 spaces with at least 4 units. If there are at least four Liberal infantry or Cavalry units in the same space in the Carlist Zone 1 is subtracted from the sum of besieged Cities and active Expedition.
Essentially, the zone embodies the “Impossible War” by forcing the Carlist player to maximize localized, high-quality forces in their home territory against a numerically superior foe. The Carlist player increases their Prestige by besieging cities and launching expeditions. They also benefit from the growing Carlist uprising in the rest of Spain. The Liberal player will be busy countering Carlist Prestige, putting down uprisings, and hunting down expeditions. They have the advantage that, in the long run, war fatigue will affect the enemy.
The terrain is simple with each space containing rough or open terrain, depending on the relief of its area. Much of the northern geography was rugged, which played an important role in favor of Carlism, as it mitigated three of the advantages of government troops: their superiority in numbers, cavalry, and artillery.
The spaces at the western, southern, and eastern ends of the map have connections to regions on the map of the rest of Spain, which can be used to move from one map to another.
Finally, the Game Map includes various game tables (Year, Turn, Initiative, Victory Points, Carlist Prestige, etc.), as well as a lot of information about commonly used rules, so players don’t need to consult the rulebook that often.
Rest of Spain Smaller Map
The map of the Regions of Spain is smaller and simpler. It consists of nine large regions that cover large territories. This map’s purpose is to record the spread of the Carlist uprisings, to enable Carlist expeditions to operate and for the Liberal player to hunt them down. We will take a closer look at the Carlist Uprising Phase in a later post but I wanted to show you the map so you understand its layout.
I very much enjoyed An Impossible War, even though I played just a few turns of a smaller scenario with Francisco Ronco. He was a master at the game, as obviously as the publisher and a playtester he is intimately familiar with the rules and strategies, and I learned a lot from him about how the game should be played. I am looking forward to future plays as the game is just very good and has some interesting aspects that create a very tense and interesting game of maneuver and strategy. The Game Map is very well done, from an aesthetic perspective as well as functionally, and the board makes playing the game easier.
In Action Point 2, we will examine the units available to both sides and cover the importance of Supply.
A few years ago, I played and very much enjoyed a cool little solitaire WWII card-driven game called Campaign: Fall Blau from Catastrophe Games and designer Martin Melbardis where the player attempted to breach the Soviet defenses on the East Front in the pivotal German summer campaign of 1942. The game system is very playable and simple, but has some strategic depth to it as the player has to make a lot of choices about what to go after, how to manage their scarce resources (fuel) and what generals to use to take advantage of their special abilities to amass enough VP to claim victory over the Soviet Union. They now have the counter punch of that game in a new entry in the series called Campaign: Operation Bagration and it is currently being offered on Kickstarter.
Grant: Welcome back to the blog Martin. What is your current game Campaign: Operation Bagration?
Martin: Thanks for having me back! Campaign: Operation Bagration is the long-awaited successor to my very first published game, Campaign: Fall Blau and tells the story of the Soviet offensive in 1944 to take back the occupied center of Russia gained by the Germans during Operation Barbarossa and is based on the successful Campaign: Fall Blau game system.
Grant: What was your design goal with the game?
Martin: My design goal for Campaign:Operation Bagration was to switch perspectives to the Soviet side using my tried-and-tested Campaign Game System. I wanted players to take command of the Soviets during one of the most devastating offensives of the war….Operation Bagration, which tore through German Army Group Center in 1944. From a design standpoint, I found it very rewarding to adapt new game mechanics and ideas to fit this pivotal WWII Campaign on the Eastern Front, while keeping the core of the system intact.
Grant:What are the hallmarks of this solitaire Campaign Series?
Martin: I’d say a minimalist approach to wargaming. Very streamlined, using only cards, dice, and cubes, with a 6–7 page rulebook. These are light solitaire wargames designed to be fast and furious with no extra fat or bloat, especially when compared to more traditional hex-and-counter wargames that can take hours to play.
Grant: As a follow up to Campaign: Fall Blau, what do you believe you have improved in the gaming experience?
Martin: While the system as a whole is more or less exactly the same as Fall Blau, I injected some new ideas into the experience to better reflect the historical realities of this campaign. The core game, such as defeating Campaign Cards, the Order system and how Generals work, will remain familiar to players of Fall Blau, but the feel is distinctly different.
Grant: What elements from Operation Bagration did you need to model in the design?
Martin: Operation Bagration was a completely different beast to tackle than Fall Blau. In addition to taking control of the Soviet army this time around, the mountainous regions of the Caucasus region have been replaced with the swamps of Belorussia and Poland. You’re also facing a much weaker and mostly static German Army Group Center, desperately trying to rebuild a frontline and stop the Soviet advance from swarming into their rear echelons. This is represented by the new “Rebuild Frontlines” rule, which replaces the old “Local Counter-Attacks” rule from Fall Blau. In Bagration, counter-attacks are now only triggered by Event Cards representing Panzer Divisions trying to blunt the Soviet offensive. In fact, the entire Event Deck has been changed to reflect the research I did on Operation Bagration with all sorts of cool ideas popping up on how to reflect the history, units and tactics of this Campaign.
Grant: As a solitaire game, what type of experience does the game create?
Martin: The game system prides itself on being fast, easy to learn but hard to master. It creates a very similar experience to Fall Blau such as tough decisions weighing the player down each turn on how to best use your limited Orders and finding the right balance between Attacking, Advancing, or stopping for Logistics to catch up.
Grant: What is the goal of the player?
Martin: The goal is to capture enough Campaign Cards before the game ends and earn enough Victory Points from those Campaign Cards to reach the victory or even the Brilliant Victory threshold.
Grant: How does the player go about choosing and managing their Generals?
Martin: Each game starts with the player choosing three Soviet Generals. All of these generals are historically accurate, with options such as Bagramyan, Konev, Rokossovsky, and a few others. Each General has the generic “Hero of the Soviet Union” special ability plus one unique ability. Additionally, each General leads a certain type of army: either a Tank army or a regular Infantry army. Tank armies have fewer manpower cubes but benefit from added mobility, which helps them bring more Campaign Cards to the frontline when using the Advance Order. Infantry armies, on the other hand, have more “meat” and thus more manpower cubes to absorb losses. Each General also has a set number of cubes representing their starting strength in manpower and available forces. Managing your Generals comes down to picking a balanced mixture and using each general’s individual strengths (number of cubes and abilities) to maximum effect.
Grant: What unique abilities do the different Generals possess?
Martin: As mentioned, each General has the “Hero of the Soviet Union” special ability, which allows you to discard a red cube to re-roll a single die. This represents the Soviet ability to historically take massive casualties and still push on. On top of that, each General also has a unique ability reflecting their historical traits. For example, General Bagramyan is an offensive-minded General, while Rokossovsky was known to always plan two steps ahead and this is represented by his ability to draw extra cards from the Event Deck.
Grant: What type of events does the Event Deck contain?
Martin: In addition to the Campaign Cards, the Event Deck is really where the historical aspects of the Bagration Campaign really come to life. I made sure to only include Soviet and German units and tactics that were instrumental to the Bagration campaign. The Event Deck contains mostly cards that help you during the game, such as attached Soviet units like the 3rd Guards Cavalry Corps, which can help you exploit the flanks of the German frontline by removing adjacent defenses, or the 4th Tank Army, which grants extra attack dice when attacking a Campaign Card. These cards not only add flavor to the game but also a strong sense of historical flavor.
Grant: What are the different type of German effects included in the Event Deck?
Martin: The Event Deck also contains cards that hurt the player, such as German Panzer divisions that trigger a counter-attack when drawn, or German reinforcement cards that add additional German cubes to active Campaign Cards on the frontlines. In addition, things like German bombers or bad weather can and will slow your progress.
Grant: What Actions/Orders are available to the player?
Martin: There are three available Orders each turn, and you may perform one per General. The Advance Order (costs 1 supply) brings unlocked Campaign Cards to the frontline. Once a card is on the frontline, an Attack Order (also costs supplies) can be used to attack and remove any cubes (representing German formations or defenses) on that card in order to capture it and gain the VP listed on the card. Finally, the Logistics Order adds supplies and reinforces a General with a cube to replace losses.
Grant: How do they manage their Supplies? How can they obtain additional fuel?
Martin: As mentioned, each Advance and Attack Order costs supplies, and the Logistics Order replenishes supplies as well as lost manpower cubes from attacking. Finding the right balance and knowing when to rest using a Logistics Order instead of Attacking or Advancing is very important. However, resting too long will slow your progress, as the clock is always counting down. A General who uses the Logistics Order adds two supplies to your shared supply pool and adds a single manpower cube to their card.
Grant: How do they manage to defeat the various Campaign Cards?
Martin: After using the Advance Order to bring an unlocked Campaign Card to the frontline in front of a General’s Card, that Campaign Card then immediately deploys a number of grey cubes (listed on the card) onto itself. The card is now available to be attacked using the Attack Order. When you attack, you pay supplies then calculate the number of cubes on the attacking General’s Card and roll that many dice. You need rolls of 4+ to remove a single white (defense) or grey (German units) cube from the Campaign Card. Some Campaign Cards such as fortress cities (Festerplatz) or swamps reduce the attack dice by -1. Rolls of 1–2 result in your General losing a manpower cube (red cube). Once all German cubes are removed from the Campaign Card, it is considered captured and removed from the frontline, and you gain the Victory Points listed on the card. Capturing Campaign Cards also unlocks additional Campaign Cards.
Grant: How do the German forces fight back?
Martin: This time around, the Germans are much more static than in Fall Blau, which better reflects the historical situation in 1944. While you may still lose manpower cubes through bad rolls on Attack Orders, counter-attacks are now only triggered through Event Cards. A Panzer Division drawn as an event will immediately counter-attack by deploying to the frontline and attacking the General directly in front of it. There’s also the Operation Doppelkopf Event Card, which is placed near the end of the Event Deck during setup and represents a large German offensive action late in Operation Bagration, designed to blunt Soviet momentum.
Grant: What strategy should the player use to do well?
Martin: Pick a good, balanced mixture of Generals and learn when to attack versus when to build up supplies and manpower through the Logistics Order. Using Generals with Tank Army abilities to bring multiple Campaign Cards to the frontlines helps a lot but too many Tank Generals will lower your overall manpower total. Also, optimize your use of Event Cards to either prioritize Attacks or to regain manpower cubes. Overall, calculated risk management is the single most important factor in the game.
Grant: What different options are built in to make the game more of a challenge?
Martin: The game is already pretty challenging, but we are also currently planning on developing a Hard-Mode for the Kickstarter that adds 4–5 additional very difficult Event Cards to the deck for those players who love challenges or are even simply masochists.
Grant: What are you most pleased about with the design?
Martin: I’m pleased with the way I’ve adapted the old Fall Blau Game System to incorporate new game mechanics and Events to reflect the different historical aspects of Bagrations’ unique Campaign. Such things such as the German’s use of blocking detachments to try to stop the Soviet steamroller with whatever they could (represented by the rebuilding the frontline mechanic), and the use of Festerplatze or Fortress cities in Belorussia to hold at all cost. Added to this is the liberal use of Soviet tactics such as mine sweeping tanks, the massive God of War bombardment to signal the start of Bagration, Maskirovka deception techniques and American lend-lease trucks to help the Offensive are all well-represented in the game through the Event Deck.
Grant: What has been the response of playtesters?
Martin: Early on, I got some great and positive responses from playtesters when I initially designed the game. Later, I handed off playtesting and development to Catastrophe Games, who further developed the game and ran additional playtests. I’ve heard good things from them as well.
Grant: What other historical campaigns might the series delve into?
Martin: Next up, I am planning to adapt the series to either the North African or the Pacific Theaters in WWII. I also strangely find that representing the Japanese early-war successes against the Allies in the Philippines, Hong Kong, Indonesia and Singapore a very interesting twist and is a subject rarely touched upon in wargaming. This could also be a good option in the future but who really knows where my creativity can take me?
Grant: What other designs are you currently working on?
Martin: As always, I am continuing to design lighter Print & Play wargames with my own independent company, Solo Wargame. I usually release a new wargame every two months or so on Kickstarter and want to continue that trend with a WWII wargame about commanding a Soviet battalion during the Battle of Stalingrad in 1942. I also plan to release a new version of my continuing series on WW2 Roll & Write games, this time focusing on the Torch landings in North Africa in 1942–43 with new ideas about convoy interdiction, diplomacy with the Vichy government and eventually pushing the Germans all the way to Tunisia. Like most other creatives, I honestly have way too many ideas and too little time!
Thanks so much once again for having me on!
If you are interested in learning more about the Campaign Series and how it works, you can watch my preview video for the Campaign: Fall Blau Kickstarter from 2022 at the following link:
The Battle of Champion Hill game is called The Road to Vicksburg and uses the Blue & Gray System. It was included in Strategy & Tactics Magazine Issue #103.
The May 16, 1863 Battle of Champion Hill was the largest, bloodiest, and most significant action of Grant’s Vicksburg Campaign. 32,000 advancing Union soldiers met 23,000 Confederates in a fierce struggle for a vital crossroads roughly halfway between Vicksburg and Jackson, Mississippi. The field was dominated by bald Champion Hill, from which Confederate artillery opened fire on the Union army at 9:45 A.M. The first Federal assault on the hill drove the Southerners back with bayonets and clubbed muskets. As the Union soldiers tried to reform and consolidate their gains, they were swept away by a counterattack led by John Bowen’s Missourians and Arkansans. Ulysses S. Grant ordered more men towards the hill and Bowen’s Confederates were themselves driven off, compelling a general retreat. Southern Brig. Gen. Lloyd Tilghman was killed while directing a desperate rearguard action that enabled most of the Confederate army to escape towards Vicksburg. The decisive Union victory at Champion Hill was instrumental in forcing the Confederates out of the open field and into a doomed position inside the walls of Vicksburg.
Operation Dragoon: The 2nd D-Day Solitaire Travel Game is a fast-playing corps and division-level operational solitaire game of the Operation Dragoon campaign from the initial invasion that hit the beaches on August 15th to the conclusion of the decisive Battle of Montelimar on August 29th.
As the Allies of the US VI Corps, French II Corps, and US/British/Canadian 1st Airborne Task Force advance, a column of German units of the Nineteenth Army, led by the powerful 11th Panzer Division, is marching up the Rhone River valley to escape envelopment and destruction at Montelimar.
The Allied player, aided by air support and bands of French Forces of the Interior (FFI), must eliminate as many German divisions as possible while ensuring the critical ports of Marseilles and Toulon are quickly seized.
Drop Zone: Southern France is a company-level wargame covering the Allied airborne assault that spearheaded Operation Dragoon, which was the invasion of Southern France or the Second D-Day on August 15, 1944. The history behind this operation is really very interesting as early on the morning of D-Day, the allied First Airborne Task Force (1st ABTF) parachuted a dozen miles behind the Riviera landing beaches to seize key towns and road junctions, to prevent the German occupation forces from counter-attacking the amphibious landing, and to facilitate the advance of Allied forces. The 4:00 AM parachute drop was badly scattered due to an unexpected dense fog bank that blanketed the battlefield. Drop Zone: Southern France covers the first two days of this airborne operation in six game turns, when the American and British paratroopers and glider-men fought surrounded and alone, supported only by French resistance bands. This game is very good and is just a solid wargame.
La Der des Ders – The War to End War from Hexasim is a 1-2 player slightly abstracted strategic level look at World War I. The game allows the players to relive the First World War at a strategic level, with each player controlling one of the 2 sides either the Entente, consisting of France, England, Russia, Serbia and other minor nations or the Central Powers including Germany, Austria-Hungary, the Ottoman Empire and a few minors. La Der des Ders can also be played solo, with a dedicated solitaire bot called “Athena” who utilizes special Cornflower Cards to make decisions about what technologies to invest in, where to undertake offensives and how to utilize limited resources and reinforcements. Each turn, players gain an amount of Resource Points dependent on what nations are in the war, which they can allocate to different areas to guide their overall strategy. Victory is achieved by launching offensives that drain the morale of enemy nations, forcing them out of the conflict through collapse.
In Action Point 1, we looked at the Game Board, discussing the Collapse Tracks, Trade Tracks, Russian Revolution Track and Naval Control Table and other various on-board tables and offensive spaces. In Action Point 2, we covered the Technology Phase and the Technology Tree and Technological Improvement Boards. In Action Point 3, we examined the Event Cards and how they inject the historical narrative into the gameplay and also alter the conditions of the game. In Action Point 4, we walked through an example of an Offensive and took a look at the combat procedure. In Action Point 5, we reviewed the Victory Conditions. In this Action Point, which is the final entry in the series, we will give an overview of the “Athena” solitaire bot and how it works.
Athena
La Der des Ders – The War to End War is designed as a 2-player game but it does have a dedicated solitaire bot called Athena that can be used to simulate an opponent to play against. This Athena bot, named after the Greek goddess of strategy, can be used to play as either the Entente or as the Central Powers and is focused on the use of special cards referred to as Cornflower Cards. There are 12 of these Cornflower Cards and these are used to determine the various actions taken by the Athena bot during their turn. A solitaire play uses the usual rules for the 2-player game, with just a few exceptions.
The Cornflower Cards are multi-use cards that are divided into 3 different sections to be used at different points of the Sequence of Play in a solitaire game. They are drawn and referred to during the Technology Development Phase, the Reinforcement Phase and the Offensive Phase. Let’s take a look at the anatomy of these cards. In the above picture, you will notice that there are 3 main categories listed at the top of the card including Technologies at the top, Reinforcements in the middle and Offensives on the bottom of the card. During the appropriate phase, the player will draw 1 Cornflower Card for the Athena AI.
If it is the Technology Development Phase, the player will refer to the top of the card where there are listed the 6 different technologies that can be pursued. Under each of these categories will show the number of Resource Points that will be spent by Athena in order to attempt to unlock a new level in each of the technologies. If there is an X in that space, that means that Athena will not attempt to gain a level of that technology during this phase. If there is a 2 listed, this means that 2 RP will be spent and the roll for the technology will gain a +1 DRM. Keep in mind though, that if the technology shown is not available yet because the year it is available has not yet arrived, then the bot will not spend a resource to attempt that technology. If Athena doesn’t have enough Resource Points to make all the attempts shown on the card, she will spend as much as possible to attempt these technologies. Athena never re-rolls the die for these attempts by discarding a Technological Research Cube for previous failed attempts. One of the differences for Athena during this step is that if a success is earned in unlocking a level of technology, she will get to advance all cylinders of the corresponding technology in all sectors under Athena’s control. This means all of the countries of the alliance as well as the active minors. These technological improvements cost no Resource Points.
If it is the Reinforcement Phase, Athena will attempt to reinforce sectors that have suffered losses in previous turns according to the following priority order:
The sector which suffered the most losses or in other words the sector whose cube is furthest from its maximum;
The sector with the second most losses and then the sectors in the following order, ignoring the sectors already covered above:
When you have chosen what sector is to receive reinforcements based upon the priority described, the player will draw as many Cornflower Cards as there are spaces separating the Sector Cube from the space with the red value. After drawing the cards, the player will count the instances of cards that have the name of that sector shown on them. If you look at the 3 cards shown above, if doing reinforcements for Germany they would move their Sector Cube up only 1 space on the Collapse Track as once Germany is listed in the middle of the card under Reinforcements. Very simple. Athena will also have to spend the required Resource Points from their total to actually move the Sector Cube up and if they cannot afford all of the reinforcements shown by the cards, they will move and pay for what they can afford. This phase ends when Athena no longer has enough Resource Points, or when all the sectors have been able to try to obtain reinforcements.
Finally, if it is the Offensive Phase, each side launches an offensive in turn starting with the side that has the initiative. When it is Athena’s turn to attack, the player will draw one Cornflower Card and refer to the bottom portion of the card, which will indicate the sector Athena is attacking. The sector to be attacked will be the one on the left of the card if Athena is playing the Entente, and the one on the right if she is playing as the Central Powers. The sector indicated on the card must always be attacked by the sector that has the best chance of inflicting damage. This usually means the sector with the highest current Operational Value and that has not yet launched an Offensive this turn. In the event of a tie, preference should be given to the sector least likely to be able to attack elsewhere during a later card draw in the turn. The size of the Offensive will be equal to the current Operational Value of the attacking sector only if the number of Resource Points Athena has remaining will allow for it. Otherwise the Offensive is reduced to the number of remaining RP. Once Athena’s Resource Points have been spent, the dice rolled and any losses applied, the player will then take their own turn to launch an Offensive or decide to pass. Then Athena will draw a new Cornflower Card to determine their next Offensive. If there are ever 3 Cornflower Cards drawn by Athena without having the ability to attack because of sector availability or Offensives by adjacent sectors have already been taken, the Offensive Phase will come to an end.
That is all there is to the Cornflower Cards and the Athena bot. It is a really well designed system that removes most of the work by the player when playing solitaire. There will be times when you have to make a decision, as described above with Offensives, but these decisions are easy and the hard work is done by the simple flipping of a card.
I do want to point out one final thing. The sequence of play differs slightly from the 2-player game as it rearranges when the Athena bot does a few of the steps during the Spend Resource Points Phase as shown below. The human player will start by doing their Reinforcements first followed by their Technology investment. Athena will then go and do their Technology investment first followed by Reinforcements. Both players will then move into the Offensive Phase and the player with initiative as shown on the turn track will take the first Offensive of the turn.
The Athena bot works very well as a playable solitaire experience for La Der Des Ders. The Cornflower Cards are a stroke of genius and really are easy to use, which makes playing the game a much better experience. I found that the bot actually holds its own in the game, even though they are not in total control of their own actions like a human player would be. The changes also made in the Sequence of Play as well as to the way Technology Investments work more than make up for the lack of true intelligence by the system and will definitely give the player a run for their money. I have played the game about 5 times solitaire, both as the Entente and as the Central Powers, and have won just 2 out of 5 tries. But the experience was easy, enjoyable and pretty seamless. The game really is a great example of a slightly abstracted strategic level look at World War I and I would wholeheartedly recommend this game to anyone who has an interest in The Great War.
I shot a playthrough video for the solitaire system and you can watch that at the following link (beware as I did make a few errors but I have found errors make viewers understand the rules of the game better):
I also did a video review and you can watch that at the following link:
Thank you for allowing me to share this game with you through this series of posts over the past several months. I have very much enjoyed doing these and I hope that you find them helpful.
With this My Favorite Wargame Cards Series, I hope to take a look at a specific card from the various wargames that I have played and share how it is used in the game. I am not a strategist and frankly I am not that good at games but I do understand how things should work and be used in games. With that being said, here is the next entry in this series.
#72: Commodus from The Wars of Marcus Aurelius: Rome 170-180CE from Hollandspiele
TheWars of Marcus Aurelius: Rome 170-180CE is a solitaire only game that uses cards similarly to a CDG to simulate the strategic level struggle of the Romans led by Marcus Aurelius to stave off the invasions of Germanic tribes and Sarmatian raiders as they encroach on Roman territory across the Danube River. That’s the history. And it is really well integrated. The game play is very fun, strategic, with lots of decision points about what to do and what cards to use, and it is really challenging.
In the game, the Roman player has a deck of Roman Cards that can be used for the printed events for various effects or that can be discarded to take any number of actions such as attack a Barbarian army or Off-Map Conflict enemy, advance the marker on the Imperium Track, add two Level 1 Forts to any eligible map spaces, flip one Level 1 Fort to a Level 2 Fort among several other actions. Sometimes the printed events in the game are just more powerful than discarding a card for just 1 action so you have to pay attention to this economy and make sure you get the most out of your cards. Now, keep in mind, sometimes discarding a good card whose ability is not right for the current situation you find yourself in is part of the game but you have to use these cards wisely to do well in the game.
The game uses two separate decks of cards including the Barbarian Deck (Green) and The Roman Deck (Red). Both of the decks are made up of 50 cards each but each have very different purposes. The Barbarian Deck is used to determine the actions of the invading Germanic tribes as well as events that effect the war effort including mutinies, plague and the will of the people. While the Roman Deck provides the resources and events that are used by the Roman player to mount a defense against the invasions and to fight back each of the different barbarian tribes. There are unique cards called Late War Cards in the deck that will be held out until the start of the 175CE turn at which time they will be mixed in with the cards to form a new Late War Deck. There are also special cards that are marked with an asterisk that if played for the event will be discarded from the game to form what is called a History Pile.
In this entry, we will focus on the Roman Card Commodus, which provides some opportunity to shore up your failing Imperium Points or even cancel an ongoing Mutiny of your troops on the board. In my first 5 or 6 plays of the game, the most common way that I lost was by allowing the Imperium Point Track to reach zero, which results in Marcus Aurelius being usurped and the player immediately losing the game. I was confounded and very frustrated about why I couldn’t prevent this from happening! I could see the end coming but struggled with keeping that Track above water. There are a few cards included in the Roman Deck that provide increases to the Imperium Track and I highly recommend you take these type of events when they come into your hand rather than discarding these cards to take another action, that might seem important at the time, but in the end these events are just too efficient to pass on. Commodus will provide you an option. This option is taking the +2 IP or another type of action such as ending a Mutiny (very important as it usually takes you discarding a card and losing an IP) or drawing two cards to add to your hand (imagine if you can only draw that Local Guides card you have been looking for or the Ambush that you need to take on the Quadi in their Home space). It becomes a choice of “either/or” and I am here to tell you the only reason the “or option” is provided is to lure you away from the real prize in that of gaining the +2 IP. Please listen to my advice and take the +2 IP. You will thank me in the end! Remember, that the concept of Imperium Points (IP) represent the Emperor’s overall political authority and stability in Rome. If the IP track ever reaches zero, the player immediately loses due to usurpation. Points are lost from specific card events, barbarian surges, and certain combat results, requiring players to prioritize special events to gain them back
Commodus was Roman emperor from 177 to 192AD, first serving as nominal co-emperor under his father Marcus Aurelius and then ruling alone from 180AD. Commodus’s sole reign is commonly thought to mark the end of the Pax Romana, a golden age of peace and prosperity in the history of the Roman Empire.
Commodus accompanied his father during the Marcomannic Wars in 172AD and on a tour of the Eastern provinces in 176AD. The following year, he became the youngest emperor and consul up to that point, at the age of 16. His solo reign saw less military conflict than that of Marcus Aurelius, but internal intrigues and conspiracies abounded, goading Commodus to an increasingly dictatorial style of leadership. This culminated in his creating a deific personality cult, including his performances as a gladiator in the Colosseum. Throughout his reign, Commodus entrusted the management of daily routine affairs to his palace chamberlain and praetorian prefects, namely Saoterus, Perennis, and Cleander. Roman soldiers and the general populace generally liked Commodus during his reign, largely because he was popular with the masses and focused on lavish spending rather than costly foreign wars. He was adored for presenting himself as a masculine, gladiatorial Hercules, though the Senate despised him
Commodus was assassinated by the wrestler Narcissus in 192AD, ending the Nerva–Antonine dynasty. He was succeeded by Pertinax, the first claimant in the tumultuous Year of the Five Emperors.
I shot a playthrough video for the game and you can watch that at the following link:
I also followed that up with a full video review sharing my thoughts:
A few years ago, I came across a new designer named Wolfgang Klein (no relation to Alexander Klein) and his new company Assault Games. They create fantastic tactical level wargames and we have played several fo them and also got a chance to meet both Wolfgang and his friend and partner Erich Rankl. They are currently working on a new edition of their first game called Assault – Red Horizon ’41: Revised Edition and they readying it for a Gamefound campaign yet this spring. I reached out to Wolfgang to get some information about the revisions and changes to the game and he was more than willing to provide a lot of great information.
Wolfgang: Over the past 5 years, Red Horizon ’41 has evolved significantly through continuous development, community feedback, and extensive gameplay experience. What began with Rulebook 1.0 has gradually been refined into a much more mature and developed system. The new revised edition incorporates years of player feedback, integrates content from various expansions, and improves clarity, balance, and presentation across the entire game.
Over the past 5 years, RH41 has developed considerably, both in terms of the Assault System rules and its graphical presentation. In particular, with Sicily ’43 – Gela Beachhead (Rulebook version 2.0) and its expansion Primosole Bridge, we feel that we gained valuable experience that directly influenced the design of this revised edition and that will assist us in future volumes as well to improve the player experience and simulation value of the game.
Most of all, however, we are grateful for the intensive exchange we have had with our Assault fans over many years. We have remained very active in our forums on BoardGameGeek, and it is there that we have gathered, discussed, and evaluated a huge amount of positive and constructive feedback. With all the great ideas and contributions from our players, we have continued refining the rules step by step.
As far as version 2.5 is concerned, the door for feedback will remain open until the end of the upcoming Gamefound campaign.
In concrete terms, rules have been refined, adjusted, expanded, or removed. All texts have been revised to make them easier and more efficient to read. We have also made a clear step forward in wording and terminology. However, we have not changed the core gameplay mechanics. So players familiar with version 1.0 should still find it easy to get back into the system.
Wolfgang: The upcoming version is referred to as a Revised Edition of Assault: Red Horizon ’41. It is not simply a reprint, but a comprehensive refinement of the system.
Major changes to the game and the Assault System include the following:
A box inlay designed for the safe storage of all game components
Overall, the revised edition reflects everything we have learned about the system from our players and through continual play on our end since the original release. I do believe that the system will continue to evolve as other rule clarifications or needed changes come to light.
Wolfgang: After the original edition sold out, interest in the game continued to grow. At the same time, years of development, playtesting, and community feedback had accumulated.
In addition, RH41 is something like the core game for the Eastern Front within the Assault System. Our plan is to design an entire series of modules focused on the Eastern Front, and Red Horizon ’41 is the natural foundation for that planned series.
This created the perfect opportunity to bring the game back in a fully refined and improved edition rather than simply reprinting the original version.
Wolfgang: I would describe it as a very special journey. We have now been working in cooperation with Sound of Drums for 3 years.
What makes this collaboration different from the traditional designer–publisher model is that we at Assault Games work with Sound of Drums on equal footing while maintaining our own independence.
The goal of this cooperation was to free ourselves from the typical publishing tasks such as production, logistics, and distribution, so that we could focus more fully on developing the Assault System and expanding into future opportunites. In many respects, this has worked very well. In other areas, there are still things that can be improved.
Sound of Drums, and Uwe Walentin in particular, has worked very hard to keep our backs free for designing by carrying the responsibility for taking care of the worldwide distribution network, logistics, and shipping. From my point of view, that works very well. Uwe is also a highly knowledgeable and perceptive figure when it comes to wargame design, and he has become an important advisor for us. His experience in the games industry helps us do things the right way — and focus on the right things.
One area of the cooperation where we have made major progress is in the structuring and preparation of our print files. I would especially like to thank Marc von Martial (Art Director at Sound of Drums) on this point. Thanks to his templates, we are now able to turn our designs into print-ready files in a much shorter time. That has been a tremendous help for Sicily 43, Primosole Bridge, and now also RH41 Revised Edition.
In the end, I would say that our journey is not over yet. Sound of Drums, like us, is still a young company, so there are new challenges every day. But as the saying goes: “Everything will be fine at the end of the road. If it is not fine yet, then the road is not over.”
Wolfgang: We started the Assault System a long time ago as a new tactical game system, and from the very beginning it was clear that both the rules and the content would continue to evolve over time. Other systems refer to their rulebooks as “Living Rules,” and that is very much how we see the Assault System rules and the game as a whole.
At the same time, it is important to us that we do not do this alone. We want to actively involve our player base in the further development of the system so that it can become the best game system possible. Standing still is simply not an option for us.
Many of the changes were driven by years of gameplay feedback from the community and by our own experience with the system. Over time, we identified:
areas where rules could be streamlined
components that could be improved or added
visual elements that could be made clearer
The goal was always to improve clarity, usability, and gameplay flow without changing the core identity of the system.
Wolfgang: The most visible aspect of the game’s development is undoubtedly the graphical redesign and the addition of new visual features. Michael Grillenberger, supported by Marc from Martial, once again did outstanding work, just as they did on Sicily ’43 and Primosole Bridge. I would like to thank them both once again for that work.
The map artwork in particular will immediately catch the eye. We have raised it to the same high standard seen in Sicily ’43 and Primosole Bridge, which creates an even greater sense of immersion.
Overall, the graphic design has been significantly refined compared to the first edition. Maps, symbols, counters, and other visual elements have been redesigned to improve readability and consistency. Vehicle artwork has also been updated, and the game’s entire visual language has been unified to create a stronger overall identity.
Wolfgang: The visual style supports the core philosophy of the system: clarity, immersion, and functionality.
The artwork strikes a balance between historical authenticity and tabletop readability, which is essential in a tactical wargame where players need to process information quickly. In that sense, the artwork helps reduce the players’ workload so they can focus fully on the game and on the tactical situation on the battlefield.
Wolfgang: One major improvement is the integration of visual symbols directly onto the maps. Last year, we conducted a survey among our players because it was important for us to understand what they thought about the idea of including symbols on the map boards. The result was extremely close.
Many players were concerned that such symbols might reduce immersion. Because we take those concerns seriously, we decided on a more subtle compromise. Elevation levels and some terrain rules are now represented with discreet graphical indicators, allowing players to understand the battlefield layout more quickly without constantly consulting the rulebook.
That, in turn, makes things much easier for the players.
Wolfgang: Quite simply, these changes make the Assault System much more accessible and easier to play. The need to search for information is reduced, and the overall handling of the game becomes smoother.
In particular, readability, gameplay flow, and ease of learning have all improved. Players can now interpret terrain and elevation at a glance, which speeds up play and reduces rule lookups.
Wolfgang: The vehicle illustrations have been updated and refined, providing clearer identification and a more consistent visual style across all units. I think Michael also worked on them simply because he really enjoyed doing so.
These changes enhance both the historical feel and the table presence of the game.
Wolfgang: The revised edition introduces several new terrain types:
Wheat and crop fields
Steep slopes
Covered trails
These elements are closely tied to the historical landscape of the Eastern Front, particularly the region around Białystok in the summer of 1941. Large expanses of wheat and crop fields dominated the countryside and often influenced visibility and movement for advancing troops. During the opening phase of Operation Barbarossa, German and Soviet forces frequently fought across agricultural land where tall grain could provide concealment but also limit observation.
Steep slopes and covered trails reflect the natural terrain features of the area, which included rolling ground, wooded ridges, and narrow rural tracks. Such features often shaped the movement of infantry and vehicles, creating opportunities for ambushes or concealed manoeuvres.
Including these terrain types allows the game to better represent the tactical realities soldiers faced during the early battles around Białystok, while also expanding the range of strategic options available to players.
Wolfgang: The system now includes additional fortifications and obstacle elements, allowing players to represent defensive battlefield preparations more realistically. These counters reflect the kinds of improvised and field-built defenses commonly used by Soviet forces in the border regions during the first days of Operation Barbarossa.
In June 1941, Soviet units attempted to delay the rapid German advance by establishing temporary defensive lines, often using field entrenchments, tank barricades, and hastily constructed obstacles. Barricaded roads and reinforced firing positions were typical features in defensive positions around key crossroads and villages. Although many of these defences were incomplete because of the speed of the German attack, they nevertheless influenced the course of local engagements.
By incorporating such fortifications and obstacles, the game is able to reflect the defensive measures historically present on the battlefield. These new counters expand the tactical possibilities in scenarios and campaigns, while also helping to recreate the atmosphere of the chaotic and desperate fighting that characterised the opening days of the campaign around Białystok.
Wolfgang: The revised edition features an improved box design, including:
A box inlay designed for sleeved cards
A transparent lid for better organisation and visibility of components
These changes were made to improve both storage and usability for players. Many players prefer to sleeve their cards to protect them during repeated play, particularly in games with frequent handling such as card-driven tactical systems. The redesigned inlay ensures that sleeved cards fit comfortably inside the box without bending or compressing them, allowing players to keep their components protected while still maintaining a compact storage solution.
The transparent lid also helps players organise and identify the different components more easily. Counters, cards, and markers can be seen at a glance, which speeds up setup and makes it easier to keep the game organised during play. For a system that may include multiple scenarios and campaign elements, quick access to components is especially useful.
Overall, the improved box design reflects feedback from players of the original edition. By making the storage solution more practical and user-friendly, the new edition aims to make preparation, transport, and long-term storage of the game more convenient.
Wolfgang: The rules have evolved from Rulebook 1.0 to version 2.5, and possibly eventually to 3.0.
Key changes include:
Integrated expansion content
Clarified rules
Streamlined mechanics
Improved structure and organisation
Since the release of the original rulebook, the system has gradually developed through playtesting, player feedback, and the addition of expansion material. Earlier supplements introduced new mechanics and scenario elements that are now fully integrated into the core rules, allowing players to access the complete system without needing to consult multiple documents.
Another important goal of the revision was to clarify rules that had previously caused questions during play. Certain mechanics have been rewritten with clearer wording and additional examples, making it easier for players to understand how the system works in practice. This also reduces ambiguity during gameplay and allows players to focus more on tactical decision-making rather than rule interpretation.
The revised rulebook also streamlines several mechanics. While the core gameplay remains unchanged, some procedures have been simplified to maintain the fast-paced flow of the system. The intention was not to make the game less detailed, but rather to ensure that its mechanics remain intuitive and efficient during play.
Finally, the overall structure of the rulebook has been improved. Sections are now organized more logically, making it easier to locate specific rules during a game. Together, these changes reflect the natural evolution of the system and aim to provide both new and experienced players with a clearer and more accessible ruleset.
Over the years, extensive playtesting and feedback from players helped identify areas where the original rules could be improved. Ambiguities in certain mechanics were clarified, and procedures that occasionally slowed down gameplay were simplified. As a result, the revised rulebook presents the system in a more accessible and consistent way, allowing new players to learn the game more quickly while still preserving the depth that experienced players expect.
The streamlined mechanics also improve the overall flow of play. Turns progress more smoothly, and players can focus more on tactical decisions rather than consulting the rulebook. This is particularly important in a fast-moving tactical system set during the opening stages of Operation Barbarossa, where battlefield situations changed rapidly and decisions had to be made under pressure.
In addition, the revisions helped refine the balance of the system. Through years of scenario testing and community feedback, certain interactions between units, terrain, and combat mechanics were adjusted to ensure that engagements feel both challenging and historically plausible. Together, these improvements create a more polished and engaging gameplay experience while remaining faithful to the original design of the system.
As mentioned before, feedback on Rulebook version 2.5 will remain open until the end of that campaign.
Our goal is to use this period to gather final community input, complete the last refinements, and move the project into production in the best possible shape. A more precise release timeline will be shared as soon as the campaign and production planning are finalised.
Wolfgang: Well, I think Assault Games might become a never-ending story. We will keep working on it as long as we continue to enjoy it—and that could still take a very long time.
Joking aside, we are very active when it comes to new ideas. I actually talked about some of this in our most recent SITREP (a bit of self-promotion here):
We have started publishing a development roadmap so that everyone can see what we are currently working on and what might be coming in the future. Of course, the roadmap only shows the official topics we want to share publicly—and yes, there are also a few unofficial ideas we are exploring behind the scenes.
To give you a small glimpse of what might be ahead, you can already see a draft cover for our upcoming Normandy journey. And that’s not all—there are several other things in development.
Thank you so much for your time in answering our questions Wolfgang and I look forward to future games from Assault Games and Sound of Drums.
This is a board game blog. Board games are a medium which can help us understand – for example, they can provide a uniquely active perspective on history. Yet which other medium can provide a fresh perspective on board games? – This is where novels come in handy. Today, we’re going to look at The Third Reich (Roberto Bolaño), a study in obsession as well as gaming and history.
Spain in the 1980s. Udo Berger, a young German, has just arrived in a small seaside town for a vacation with his girlfriend Ingeborg. Yet Udo’s mind is not on the beach. He has just won the national championship at the wargame The Third Reich (clearly based on Rise and Decline of the Third Reich (Don Greenwood/John Prados, Avalon Hill)) and plans to use his vacation to write an article on his new strategy for the Axis. Ingeborg, however, has more traditional vacation activities in mind, and so they spend some of their swimming, tanning, and partying, through which they befriend another German couple, some locals, and the enigmatic paddleboat renter who is only known as El Quemado (The Burned One) for the burn marks which cover his body. When the vacation comes to an end, Udo remains in Spain, supposedly to help in the case of an acquaintance lost at sea windsurfing… yet the real reason is the game of Third Reich which he plays against El Quemado.
Chilean novelist Roberto Bolaño wrote the novel in 1989. Since he turned his hand-written first draft into a typoscript (and later typed the first 20% into his first computer), it is assumed that he wanted to eventually publish it, but he didn’t do so before his death in 2003. When the novel was found among his papers, it was posthumously published in 2010. In addition to the original Spanish (El Tercer Reich), the book has been widely translated. I read the German translation.
Warning: Spoilers for the plot of The Third Reich ahead – but frankly, this is not a book you read for plot, you read it for the vibes.
Obsession: Conquest, Validation, Control
Udo Berger is wargame-obsessed, but the book is not a study of how an outsider has outsider fixations. On the one hand, Berger’s obsession with conquest and domination sets him by no means apart from his peers – just that they usually direct their respective urges to amorous exploits. On the other, our protagonist does not only want to conquer in the game either. In addition to his girlfriend, he also pursues the hotel manager Frau Else (who has been his crush when he was vacationing in Spain as a teen), and the underage chambermaid Clarita. And maybe most of all, Berger is fixated on being respected by his wargame peers, which he can only imagine obtaining by finding strategies (and publishing articles about them) which will obliterate all conventional wisdoms about the game.
As Berger is acutely aware of his lack of linguistic sophistication, he decides to practice by writing a diary during his vacation (which is what we read in the novel). The development of this diary reflects the changes in the writer: Originally, his daily entries are very structured (one per day, headlined by the date), and mostly concerned with banal reports on what he did, what he ate, and what he has in mind for the game/article). As Berger is drawn more and more into his duel with El Quemado, the diary gets more confused: He jumps from one level of narration to another within the same paragraph, extensive passages are solely dedicated to what’s happening in the game (down to which counters are placed on which individual hex numbers on the board), and the chapters are not only named after the dates, but also entitled “With El Lobo and El Cordero [his Spanish acquaintances]”, “Spring 1942” or “My Favorite Generals”.
Berger’s inability to focus also dooms his conquests (ludic and erotic): He sets out to prove that opening a second front early is not a liability, but an asset, and enthusiastically reports early in the game to a friend at home that it’s “Blitzkrieg on all fronts”. Yet as he conducts an amphibious assault of Britain at the same time as he invades the Soviet Union, his forces are overstretched and his Axis collapses before the historical date. And broadcasting his erotic attention over Ingeborg, Frau Else, and Clarita, does not further his relationship with either of them.
As things slide out of his grip, his attitude to control changes: Initially, Berger is fixated on the superior strategy. He notes down the exact moves – which corps need to occupy which hex in which turn to win. This chess-like approach collapses after the turning point of the game: Once El Quemado begins his counter-attack, Berger mentions for the first times that there are die rolls in the game (and how they favor his opponent) – not unlike many board gamers I have seen.
Gaming and History
Besides the main theme of obsession, the novel also offers many glimpses on gaming, history, and the relation between the two.
Berger arrives in Spain with his life compartmentalized between the gaming and the “normal” part – his girlfriend and the office job. This compartmentalization is already eroding with his plan to write the strategy article (which immediately chafes against the confines of a conventional vacation – the hotel employees are bewildered by his request for a large table to be set up in his room, and Ingeborg demands he come to the beach) and fully collapses over the course of the book, when he even unilaterally extends his vacation to play the game (and gets fired for it).
The shadow of history hangs over Berger. Our protagonist does not only play games about World War II, he also reads “patriotic” literature of the era, knows about the lives and deeds of the German generals (especially those of the SS), and the only of his wargamer friends for whom he has a certain reverence is a veteran of World War II. Despite this clear fascination for the history of Nazi Germany, Berger twice disavows being a Nazi himself (having been asked by El Quemado and Clarita). Once he even calls himself an “opponent of the Nazis”, but does not expound on it. His personal politics do not factor into the novel – Berger, having been born around 1960 in democratic, liberal, prosperous post-war Germany enjoys the luxury of only engaging with history at his leisure. He thus remains at the surface of it…
…unlike his gaming opponent. El Quemado comes from South America, and it is rumored among his Spanish acquaintances that the scars he bears are the result of torture (by one of the many right-wing regimes which took power in the 1970s). History has thus seeped into his body and gives him the strength to withstand the ludic assault of the experienced player Berger.
Bolaño himself was arrested after the 1973 coup in Chile and, to his own wonder, was released after eight days without having been tortured (he ascribed it to two of the detectives having attended school with him). He then emigrated to Spain where he worked odd jobs in the tourism industry like El Quemado.
Another allusion to Chile is made in a much-misunderstood scene: On September 11, everyone is out at the beach to celebrate the Catalan national holiday. Yet when a plane flies overhead, an eerie sense of dread overcomes the spectators. Many reviewers see this as a revision which Bolaño must have made after the September 11, 2001 terrorist attacks (or, as an odd coincidence) – but I think the likeliest reason for the scene is that the coup in Chile began on September 11, 1973 with the rebelling air force bombarding the presidential palace in Santiago.
Verdict
Roberto Bolaño’s The Third Reich starts with the innocent concept of a beach vacation. As it grows darker, the novel develops a hypnotic pull. The author’s own deep knowledge of wargames allows him to paint a vivid picture of the game itself – and of the hold it can have over its players.
In Aces & Armor from PKB Games players take the role of a general (United States, Russia or Germany) in this complex (but easy to learn) strategy game. In addition to attack strength and armor of your troops, their tactical setup, combat experience, damage and terrain have a decisive influence on the outcome of the battle. Since each unit brings its own strengths, you must cleverly assemble your army to win the victory over your opponents. The game can be played either cooperatively or competitively and has a dedicated solitaire mode. The game uses detailed miniatures with many different unit types and has a high re-playability due to the variable start setup. The combat system is involved and a bit complex and depends on type of unit, combat damage, experience, strategic formation, terrain and armor (known from highly rated game Trench Club).
The American Civil War was the bloodiest conflict and a defining event in the history of the United States. The tragedy of the conflict was amplified by the fact the battles were brutally fought with Napoleonic tactics while using new and more lethal weaponry. As a result, over the course of nearly four full years of war, roughly 700,000 Americans were wounded or killed in battle along with another 400,000 soldiers dying from disease.
Blue & Gray Deluxe Edition consists of the original eight games from the SPI Blue & Gray I & II Quadrigames. The battles depicted are among the most important of the American Civil War: Shiloh, Antietam, Fredericksburg, Chancellorsville (Hooker & Lee), Gettysburg (Cemetery Hill), Chickamauga, Chattanooga, and The Battle of the Wilderness.
The game mechanics used in this series are based on the well-received Borodino/Napoleon at Waterloo system. Terrain is a significant factor, with everything from rolling farmland to untracked wilderness represented. Battles will often see a back-and-forth struggle for control of critical terrain. Rules for night turns are also provided. A standard set of rules are used, common to all eight games, while each game also has its own set of exclusive rules, historical set-ups, and player and design notes—all from the original SPI games.
Blue & Gray Deluxe Edition features new artwork, double-sided mounted game boards, enlarged counters, player aid cards, numerous optional rules gleaned from other game editions, and new variant counters and markers for use with several variants from Moves and Strategy & Tactics magazines. Reintroduce yourself to these classic games from SPI’s golden era and refight some of the best-known battles of the American Civil War which decided the fate of a nation at war with itself.
Continuing along in this series devoted to the best looking boards found in the wargaming world where I will highlight the art and layout of a different board in a wargame that we have played to show you the various talents of the artists and graphic designers involved. In my humble opinion, a well designed and attractive board can make all the difference in the world to me enjoying a wargame. Don’t get me wrong, the game has to be good, but if it’s also good looking it always is a better experience. A board can draw me in. Can make me feel that I’m there. Can set the stage for the thematic immersion that we all crave. And I have found many of these type of boards and I want to make sure that I share them with you.
In this entry in the series, we will be taking a look at the fantastic looking board for Phantom Fury: Iraq, November 9, 2004 The Second Battle for Fallujah 2nd Edition from Nuts! Publishing. Now you might be looking at the board and thinking that is is just a jumbled mess of various colored squares and blocks but there is some hidden and obscured beauty in these squares but also a lot of great photo realistic depictions of city blocks, streets and dark alleys that were present in the city of Fallujah during this pivotal battle of the Iraq War in 2004. Nicolas Roblin is an emerging artist who has five or six game boards to his credit to date and we have played and really enjoyed then including This War Without an Enemy (2020) from Nuts! Publishing, 300: Earth and Water from Nuts! Publishing (2018), Saladin (2022) from Shakos and Border States (2022) from Shakos. But he also is starting to branch out more and has done the board for the very interesting solitaire wargame called Phantom Fury: Iraq, November 9, 2004 The Second Battle for Fallujah 2nd Edition. I would say that he has a very easy style that is focused on showing key locations in a light that emphasizes their importance to the historical story that the game designer is attempting to tell. What I mean by that will be evident as we take a look at the board for Phantom Fury, but one thing I would point out is the focus on the boundaries of the various districts inside the city. He gives these areas a very interesting treatment as well as a focus on the aesthetic elements of the setting. When you look at the board, you get the feeling that you are inside the city itself with a look at small buildings, walls, streets and even key locations such as the mosque.
Phantom Fury 2nd Edition is a solitaire wargame that simulates at a tactical level the operations carried out by United States Marines (USMC) to secure the town of Fallujah, Iraq in November 2004 and to attempt to suppress all armed resistance by the insurgents. The game focuses specifically on the fighting carried out by the 3rd Battalion, 1st Marines on the morning of the 9th of November 2004, in the district of Jolan in the north-west portion of the town. The player will control the USMC forces and the game system manages the actions of the insurgents. The Marines will have to move block by block and house by house clearing out resistance all while trying to minimize casualties and trying not to allow insurgents to infiltrate their lines and reappear in the rear to wreak havoc. This is very much easier said than done though as the first priority is to identify suspected insurgents as the Marines enter new areas that are enemy controlled.
The board for the game measures 22″ x 34″ and represents a part of the Jolan District of the city of Fallujah, divided into 61 Zones of about 50 x 50 meters and into Street Sections of equivalent size. The Zones are marked on the map by dotted lines or continuous lines and are identified by a number in a black or white circle in the Control Box. A target symbol in a Zone indicates that there is a Line of Fire between that Zone and the Zones whose numbers are printed below the symbol. The Target Zones are considered to be Neighboring a particular Zone for the purpose of Fire Combat only.
As you look at the Zones shown below from the upper left hand corner of the board, you will see that various boxes are printed in each of these Zones. These represent buildings and these buildings are multi-storied so they start at the bottom with the red entry areas, that have a nice little door shaped icon in the bottom right hand corner of the box, and then you see stylistic arrows that point up and down at the bottom of each of the above stories. There are also arrows that go to the right and left which mean they enter an adjacent building. At the top of the Zones you will see a black box, that has a neat little roof peak symbol in the upper right hand corner of the box, that represents the roof of the building. These are areas of entry from one building to the next and if used by the Marines or the Insurgents, will grant them a bonus DRM in combat. I remember when I first set eyes on the board, I was a bit discombobulated and confused but once I get into the rules I quickly realized that this graphical depiction of the stories and the means of ingress/egress was a stroke of genius and worked really well to quickly be able to identify what you are entering.
Certain Zones are considered to be Fortified and this means that they are tougher to break into. Some of the zones, such as Zone 26 (Mosque) identified by a red box around the area is a Fortified Zone by default. No unit may carry out movement called Flooding in a Fortified Zone. The Mosque area is a really interesting graphical representation as the background, as is the case with all of the areas, has the overhead satellite images of the Mosque shown on the board. In the game, this area cannot be entered by Marines but can be searched and entered by Iraqi Intervention Force (IIF) troops. I think that the red box really highlights this entry prohibition and is a key reminder to the player of the need for them to bring on the IIF troops although they might want to get more Marines on the board.
The IIF Troops holding box at the bottom of the board. There are 3 units stored here that can be brought onto the board at a later time. Notice the nice flag to the right and the id of the counter to the left using NATO symbols.
Each Zone on the board consists of several Locations in the form of boxes, which are used mostly to regulate movement. There are 5 types of Locations identified on the board including Open Ground, Courtyard, 1st Story with one of 3 notations including either l, 1′ or 1″), 2nd Story (2 and 2′) and Rooftop. Each Location is marked with one of these letters including OG, C, 1 or 2 and is a really well done part of the board which clearly identifies the type of Location. Locations are used for the placement of Suspect markers and certain Zones may have several Locations of the same type or no Locations at all of a particular type. Upon first glance, you might think that the color of the Suspect Markers, which are all tan with various shaded areas of brown and white, is a wrong choice and doesn’t necessarily work well visually with the sandy, tan colored board. But, because the Suspect Markers cover up the small boxes when placed, they still retain the thick brown outline on the outer edge of the board and these act as a visual highlighting of the unit. To me, this is a fantastic graphical design choice to highlight these important boxes and Zones as all of the action and most of the player’s focus will be on these areas as they move around the board block by block.
As in the case of these games, the on-board player aids and tracks need to be large, clear and have the pertinent information that the player will need to play the game. This is very well done on the board as they have created a circular Turn Track and Victory Point Track that are large and in the upper right hand corner of the board. This positioning really keeps the time deadline at the forefront of the players mind as they have to clear and control all 61 Zones for a victory. I say control but players must also eliminate resistance there as well and prevent the Suspect Markers from popping up in areas where they are adjacent to that have already been cleared and controlled.
One of the other really interesting parts of the game that causes a lot of tough decisions is the use of the military assets located on the bottom left hand side of the board. Here are tracked the player’s available Hornet Strikes, Super Cobra Support and UAV’s. All of these provide various benefits including DRM’s and direct attacks against fortified blocks to try to eliminate Suspect Markers without Marines having to put their life on the line in those areas.
I think that the graphic design for this board is truly excellent. I am not sure that it is beautiful but how it was done and how it works together is a stroke of genius and really took some thought and understanding of the game and its systems to be able to put together. These choices were reinforced with the color accents, use of lines and borders as well as with color choices for the most important Zones. Just a very well done and aesthetically pleasing package put together by Nicolas Roblin.
This game is just so very good and I love the decisions that the player has to make about how they go about clearing the areas with limited resources and under a time limit. Just a very good game design that shows how difficult this task was that was asked of the Marines.
If you are interested, I shot a short RAW video on the game during my first play and you can watch that at the following link:
We also did an unboxing video showing off the components and you can watch at the following:
If you are interested in Phantom Fury: Iraq, November 9, 2004 The Second Battle for Fallujah 2nd Edition, you can order a copy for 50.00 € ($58.37 in US Dollars) from the Nuts! Publishing website at the following link: https://www.nutspublishing.com/eshop/our-games/phantom-fury-v2-en
The next board that we will take a look at in the series is Almost a Miracle!: The Revolutionary War in the North in Against the Odds Magazine #51 from LPS, Inc.
Here are links to the previous entries in the series:
La Der des Ders – The War to End War from Hexasim is a 1-2 player slightly abstracted strategic level look at World War I. The game allows the players to relive the First World War at a strategic level, with each player controlling one of the 2 sides either the Entente, consisting of France, England, Russia, Serbia and other minor nations or the Central Powers including Germany, Austria-Hungary, the Ottoman Empire and a few minors. La Der des Ders can also be played solo, with a dedicated solitaire bot called “Athena” who utilizes special Cornflower Cards to make decisions about what technologies to invest in, where to undertake offensives and how to utilize limited resources and reinforcements. Each turn, players gain an amount of Resource Points dependent on what nations are in the war, which they can allocate to different areas to guide their overall strategy. Victory is achieved by launching offensives that drain the morale of enemy nations, forcing them out of the conflict through collapse.
In Action Point 1, we looked at the Game Board, discussing the Collapse Tracks, Trade Tracks, Russian Revolution Track and Naval Control Table and other various on-board tables and offensive spaces. In Action Point 2, we covered the Technology Phase and the Technology Tree and Technological Improvement Boards. In Action Point 3, we examined the Event Cards and how they inject the historical narrative into the gameplay and also alter the conditions of the game. In Action Point 4, we walked through an example of an Offensive and took a look at the combat procedure. In this Action Point, we will simply review the Victory Conditions.
Victory Conditions
In La Der des Ders, there are a few ways to trigger the concept of Sudden Death, which leads to the game concluding and a victor being declared, or to win the game through armistice being signed and then through the accumulation of Prestige Points. Let’s first take a look at what I think is the most common way for the game to come to an end, Sudden Death.
Sudden Death
The game will end immediately in the event of Sudden Death and this Sudden Death can be triggered in three ways. First, if France surrenders, the Central Powers will immediately win the game, second if Germany surrenders, the Entente will immediately win the game and finally if any one side achieves 6 Victory Points then that side immediately wins the game. Really pretty simple. If countries other than France or Germany surrender, such as Austria-Hungary, Russia or the Ottoman Empire, the game will continue although the Production Value of the surrendered country will no longer be included in the sides Resource Points.
Now there is a remote possibility that both sides could trigger Sudden Death at the same time through an attack. Remember, that if the attacker rolls a 1 on their Attack Dice, it will result a Counter Attack and 1 loss on their Collapse Track and if this would cause them to have to surrender as well as inflicting enough hits on their target to reach the end of their Collapse Track, both will Surrender and then neither side will win. But also, this could possibly occur with the play of the Spanish Flu Event, which causes losses to all powers. This is a rare possibility but it can happen.
One of the things that I very much like about this game is the concept of Collapse and the fatigue and weariness of war. World War I drug on for 4 long years and particularly on the Western Front very little ground was actually gained. During the early years of the war in 1915–1916, these advances were measured in mere feet, while later in the war during the campaigns of 1918, particularly in the case of the Hundred Days Offensive, which began on August 8, 1918, the Allies achieved deep, lasting breakthroughs, pushing the Germans back to their original 1914 lines. But the war was a meat grinder, plain and simple, and attacks were made sometimes to keep the war going because High Command demanded action and not necessarily to gain any ground or obtain any key objectives. Resources dwindled, troops dried up as men were shattered, maimed and demoralized to the point of being unable to stand a watch or fight, and nation’s desire for the war to continue faded. I think that at points, one breakthrough or catastrophic loss could have ended the war and this is very well reflected in La Der des Ders as if you are too low on your own Collapse Track and decide to attack because you believe you can finish your opponent you always have a chance of catastrophe and losses of your own while on the offensive.
Armistice
Aside from the Sudden Death ending, the game can end in 2 ways including at the end of the turn during which the Peace Negotiations card was drawn, or at the end of turn 14. In both of these cases, the side with the most Prestige Points is declared the winner. If there is a tie, the Central Powers will win the game.
So what are Prestige Points? Prestige Points are a concept that takes into account the standing of each of the combatant nations on both sides, using the location of the Sector cube on their Collapse Track as a base, and then uses a simple mathematical formula to determine the overall standing and condition of the nations morale, production and will to fight. One of the most important parts of this calculation though is that it only takes into account nations that have not collapsed and surrendered. If a nation has been forced to surrender because their Collapse Track reached the end, they will not count toward the Prestige Points of their allied side.
Each player will calculate their total Prestige Points very simply by paying attention to several numbers such as the Operational Value and Prestige Value. For each country still At War during the Armistice, the player multiplies the sector’s current Operational Value (OV), which is shown by the location of the Sector cube on the Collapse Track, by its Prestige Value (PV), which is the value printed on the left side of the Collapse Track. The various nations’ Prestige Values are Germany 5, France 4, Austria-Hungary 3, Ottoman Empire 3, Italy 3, Middle East 3 and all other Sectors 1.
Let’s take a look at a quick example of how to calculate Germany’s Prestige Points. If Germany is still At War and their Collapse Track is showing an Operational Value of 2, then we will multiply their Prestige Value shown on the far left of the Collapse Track of 5 x the Operational Value of 2 resulting in a total of 10 Prestige Points. The players then add the number of Victory Points (VP) indicated by the location of their marker on the Victory Point Track. You might be wondering Where do Victory Points come from? Victory Points are specifically earned from forcing countries to surrender and the side that caused the surrender will earn a number of Victory Points as shown in the rules. For the Entente, their values are Russia 3 VP, Italy, Middle East and Romania 2 VP and Serbia, Africa and Greece 1 VP. For the Central Powers, their values are Austria-Hungary 3 VP, the Ottoman Empire and Bulgaria 2 VP and the German Colonies 1 VP.
I very much like the concept of only calculating the value for those countries who have not Collapsed and who are still in the war. We all know that it is easier to negotiate a peace that is favorable to your side when you are still a threat and if too many nations of either side have collapsed then their Prestige Points will reflect this as those countries won’t contribute to the final value. And I also like the simplicity of the scoring system. If certain key countries like France and Germany surrender, then that equates to a victory for the side causing the surrender and if the game continues to grind on through the final turn, then there is this calculation that is really pretty simple and gives importance to each goal with a different value that can be earned. Just a solid method for determining victory that makes sense and fits with the historical aspect of the outcome of the Great War.
In Action Point 6, which is the conclusion to this series, we will give an overview of the “Athena” solitaire bot and show how it works for solitaire play.