Lese-Ansicht

Interview with Adam Starkweather Designer of Advanced Company Scale System Game One: Anzio: A Lost Opportunity from Bring it on Games

We have played several games designed by Adam Starkweather in his Company Scale System (CSS). These games are really good solid chit draw systems that really puts some unknown in what groups of units can activate and even when they will activate. There are also events and if the chit cup runs dry before all of the units can activate due to the end round chit then you are just sore out of luck. You have to prepare for this inevitability and I love the concept of prioritizing your activations and making sure you activate what you absolutely have to before doing those units that would be beneficial to activate. Now Adam has created his own publishing company called Bring it on Games and they have announced their first pre-order game in a new system called Advanced Company Scale System Game One: Anzio: A Lost Opportunity. This is a huge wargame and includes 10 large maps, 20 counter sheets and tons and tons of charts, tables and player aids. This is a MONSTER wargame…no doubt about it but it looks really good. I reached out to Adam to see if he could provide us some additional insight into the game and he was more than willing to discuss with us.

If you are interested in Advanced Company Scale System Game One: Anzio: A Lost Opportunity, you can pre-order a copy for $350.00 from the Bring it on Games website at the following link: Shop — Bring it on Games

Grant: Adam welcome to our blog. First off please tell us a little about yourself. What are your hobbies? What’s your day job?

Adam: First off, my hearty thanks to The Players’ Aid crew for giving me the opportunity to introduce myself and tell you about my new adventure.

As my waistline will attest, my hobbies and interests are decidedly sedentary. I love watching basketball and baseball (go Knicks – had a great year). And several years ago, I decided to rekindle – ha! – my love of reading. For many years, for work, I read non-fiction. But now, every night before I crash, I read for fun for a half hour.  Currently, I’m reading both for work and for fun as I am journeying through Stephen King’s multiverse with a goal of making a game on it. I have an inside to get to King, and I’m hoping I can get him to glance at it and spark some interest. It will be decidedly war gamey in its presentation.

Believe it or not, for over 20 years, I have been blessed that wargame design has been my main gig and what I do for work. With over 50 titles that I’ve designed, developed, or project managed, it has been a productive period for me in the hobby.
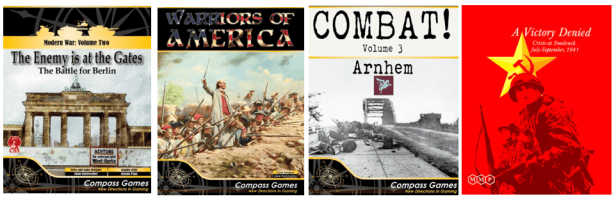
Grant: What motivated you to break into game design? What have you enjoyed most about the experience thus far? What have you learned about design over the years?

Adam: A day I remember well. 3 friends and I were playing SPI’s Highway to the Reich, and it just fell apart while we were playing it. Things were happening that just didn’t make sense, and it wasn’t balanced. Once that suspension of disbelief is done, we wargamers just bail on a game. We thought we could do better. All four of us started making a Market-Garden game, but only I kept with it, and my first design The Devil’s Cauldron, was the result 7 years later. As for enjoying what I do, there are occasional hiccups, of course, but I have a dream job. I’m like a professional NBA player – doing something that is tons of fun, and I get paid to do it. I’m the luckiest man in the world.
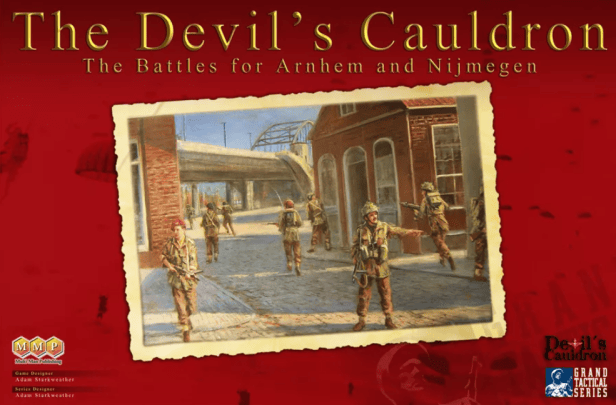
As for what I’ve learned, of course, I’ve learned how to design – often under tremendous time pressure, but if I had to name one thing, it is knowing what I’m good at and when I need help. I’m great at coming up with new concepts and innovative mechanics, but I can’t research worth a damn nor do I have the patience to rewrite rules again and again. With my new company Bring it on Games, I have both the time and assets to attack my weaknesses and focus on what I do well – and love doing. I have dedicated researchers, dedicated rules editors, and dedicated playtesters. I finally have the time to do a game the right way.
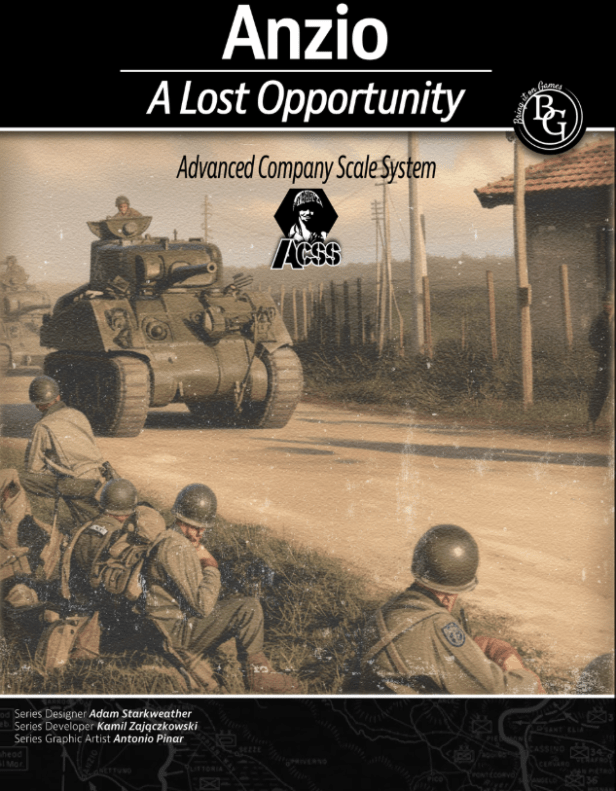
Grant: What is your upcoming game ACSS Anzio about?

Adam: My first game for my new company is on the Battle of Anzio. It is at company level and at 500 meters a hex. It has two campaign games in the box – one for Operation Shingle (the landing and advance inward to the furious German counterattack) and Operation Buffalo – the final breakout and advance to Rome. The middle months in which a World War One type situation happened is not in the game. Two massive campaign games and some 20 smaller scenarios are included.

Grant: What does the subtitle “A Lost Opportunity” represent from the history?

Adam: It is likely for such a famous operation that most people reading this know that Anzio presented an opportunity to end the Italian Front with an aggressive approach to the battle.  Instead, the General in charge (Lucas) was tentative and did not advance with the aggression needed. In all my research, I have found that it wasn’t entirely his fault, but it wasn’t a time to be tentative. In the Campaign game, you can try and defeat the Germans with the hand you were historically dealt, or there is an alternative scenario (aptly called “Killer Whale”) where the restrictions on your aggressiveness are removed, and perhaps you can end the Italian battle in two weeks.

There were also missed opportunities in the second campaign in the box. The Allies went for the glory to capture Rome but allowed the Germans to retreat from the Gothic Line mostly intact. The war in Italy was allowed to continue, but again, it didn’t have to be that way. As with Operation Shingle, there is an alternative campaign game in which glory is set aside for a few weeks, and you as the Allies attempt to cut off the German forces and end the war in Italy.

“We were hurling a wild cat on the shore, but all we got was a beached whale.” -Winston Churchill

Grant: Why was this a subject that drew your interest?

Adam: Why Anzio? As is often the case, the subject matter of a game is about work that has already been done.  Why start from scratch if months of work have already been done? My historian worked on a game for another designer several years ago and had a great Order of Battle for the game. There was plenty of game in the battle, so Anzio it became. Utah Beach is likely next up for my company as I’ve already made the Grand Tactical Series game on the battle. So I have a complete order of battle and map already made. After that, or before that, might be Salerno. A gamer has already made the game using another system, but the conversion would be easy enough. And of course, a game for ACSS will be on Market-Garden. I have already made a game at this scale.  Years of work have already been done. This also gives me time to start fresh on new topics like Omaha Beach or Gela – they become the game with work already done and join the conga line.

Grant: What is your design goal with the game?

Adam: Oh that’s easy. I want to finally be able to make the best company level game I can make. GTS was made when I was a novice and CSS was made when I was under tremendous time pressure. I have both the expertise and the time to do it right this time.

Grant: How have you modified the Company Scale System to become “Advanced”? 

Adam: I started work on this a few years back and called it ACSS. The name stuck with me, and I kept it. It keeps Eric Smith’s brilliant combat system and is a chit pull, but much has also been improved and changed. I think I answer much of the realism issues of both systems with ACSS.

I have the rules available online for anyone to read – simply go to rules and you can read it and see where we are at. 3-4 more edits still to go, but it is more complete than anything I’ve made before, even as it sits now.

As for new stuff and mechanics that my playtesters have said they’ve never seen in a game before – I have two standouts. Situational Awareness matters in this game as does an orders system that influences what and how you do things. They are in the above rules so I won’t go deeply into it – but it has a novel way of presenting Fog of War but still allows for solitaire play. There is much, much more that is new – but those two are mentioned by my playtesters the most.

Grant: What elements do you feel are most important to model from World War II and the Allied invasion of Italy?

Adam: I make wargames, so to me, the most important aspect is to get the history correct and honor those that fought and risked their lives to make a better world for me and my children to live. So the history has to be right and fully immersive. In addition, playing a game on a battle is a different, albeit as involved as reading a book on the battle – but it is also a game. It should have decisions and fun aspects in it to make it fun to play.
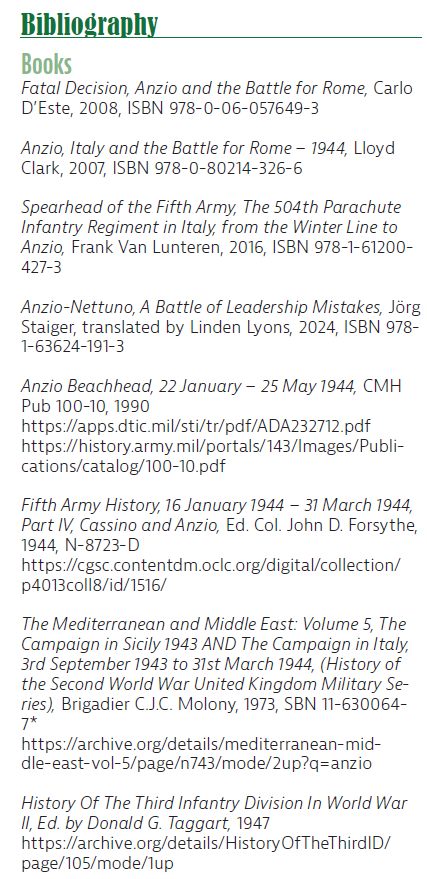
Grant: What sources did you consult for the historical details?

Adam: If you go to my website at https://bringitongames.com/, you’ll find everything you need to play an introductory scenario using my system – but if you have a look at the end of the scenario book you can download, you’ll see the extensive bibliography for the game. As an aside, over the last 25 or so years of game design, it is really interesting to see how the web has become indispensable in researching military topics.

Grant: What one must-read source would you recommend?

Adam: I asked this very question of my historian a few months ago.  He suggested:

Anzio 1944, The beleaguered beachhead, Osprey Publishing Campaign #155, Steven J. Zaloga, 2008, ISBN 978-1-84176-913-4

Although I’m partial to:

Fatal Decision, Anzio and the Battle for Rome, Carlo D’Este, 2008, ISBN 978-0-06-057649-3

A more involved read and perhaps not as great for wargamers as the Osprey volume, but I think the added effort is worth the trouble.

Grant: What is the scale of the game? Force structure of units?

Adam: As with my other company level systems, ACSS is 500 meters a hex, mostly company level units, and each turn is 2 hours. It is a scale I’ve used for two decades and I’m comfortable at this level. In addition, I fell in love with this scale because it offers both tactical mechanics but you can play an entire battle (although you’ll need space and time of course).

The system uses a chit-draw method to activate units and this is at division level. You draw a chit and do things with an entire division and then move to the next chit.

Grant: What are the differences between the playable factions of the Allies and Axis powers?

Adam: At this level of company actions, the difference between the two armies is quite evident. The Germans have fantastic equipment but are brittle, while the Allies have so much firepower at their disposal. To show one example of what you can show at this scale: the Germans based their tactical dogma on their excellent MG 42 machine gun, while the Americans based their tactics on the excellent Garand rifle. They each operated differently – and I can show this at this scale. Many other aspects from more effective counter-battery fire to specialized tactics are also there. Check out the rulebook above and you’ll see.

Grant: What is the layout of the board?

Adam: Almost all monster games focus on the campaign game, and the scenarios are snippets of the larger campaign game. That is certainly true of my large games. For me at least, it was always a matter of speed. I could test scenarios while I tested the campaign game. My scenarios often started when the campaign game started.  There are a few exceptions to this where the scenarios are the primary game, and the campaign game is the added bonus. Games like Pacific War by Victory Games are like this. 

I, however, want to have both scenarios and the campaign games have equal importance. Each scenario has its own counter set and its own map. The map size goes from 8 1/2 inches for the introductory scenarios, to one map for the majority of intermediate and advanced scenarios, to two maps for a larger game experience. Finally, there are the two full campaign games, which each have 4 full-sized maps and two half maps – a total of 5 maps.  But there are some ten double-sided maps in the game (a total of 20 maps) – this is a map for each scenario and a campaign game map.
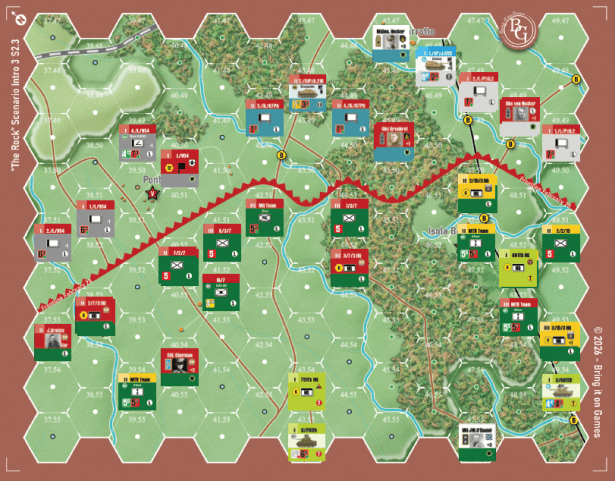
“The Rock” Scenario map.

Grant: How are units activated? Why do you feel chit-pull is such an effective method?

Adam: I love chit-pull as a mechanic and have used it for decades. It has the advantage of being great for solo play. There is the drawback that if you have a lot of players, you might have to wait for your turn to come up – although there are ways around this that I talk about in the rulebook, I find the great advantage of board games over computer games is the social aspect of playing them.

Grant: What is the general Sequence of Play?

Adam: A great question. When I first open a game, there are two things I look at first. The Sequence of Play and the victory conditions. They tell me more about the general concepts behind the game than anything else. Of course, a far more complete Sequence of Play is in the rulebook that you can download, but the basic SoP that is used in the VASSAL module is:
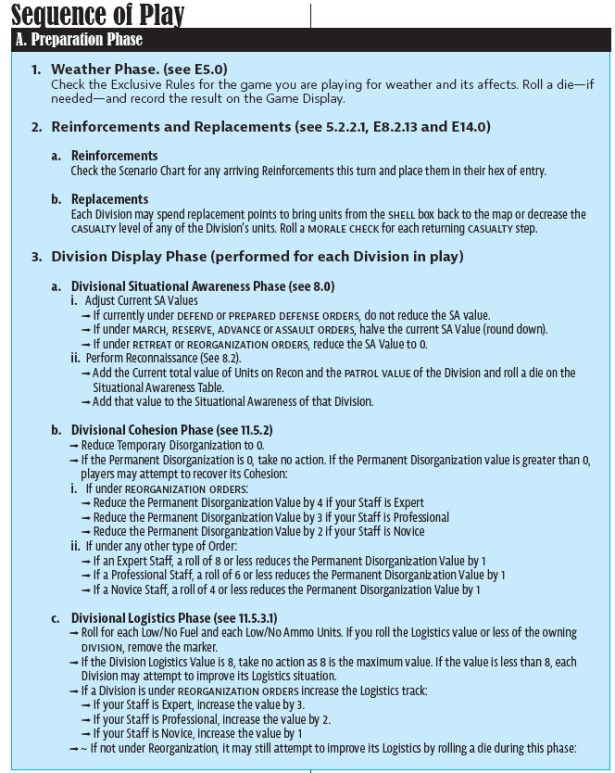
But check out the rules for a much more exhaustive Sequence of Play.

As for victory conditions, I blatantly steal from great designers that have great victory conditions – in concept. Some designers just know how to make victory conditions that drive a game and allow for incredible excitement in play. There are some 21 scenarios in the game, and I use different types of victory conditions in each and every one. I did the same thing to a lesser degree in my Greatest Day game. But whatever type of game you like, I’ll have you covered in one or more of the scenarios and the campaign game.

As for how the basic mechanics work, I have a ton of examples in the game for you to have a read and see how things work. Check them out.
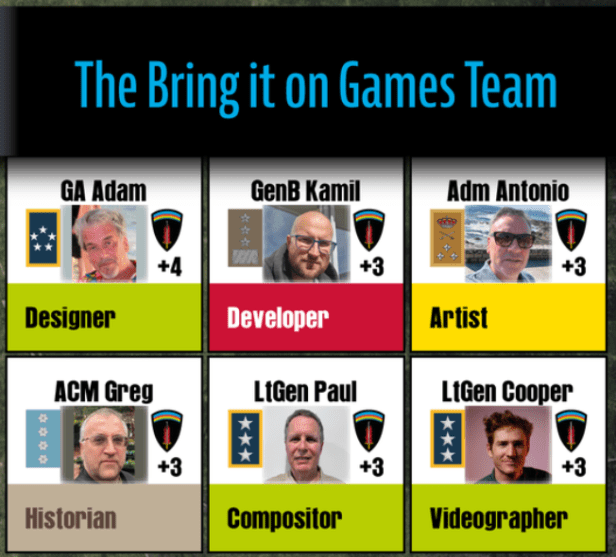
Grant: Tell me about Bring it on Games. How are you different from other game companies?

Adam: I changed The Players’ Aid’s last question to talk about this a bit. I take the slogan “A Game Company run by Gamers” seriously. As we have aged, what we expect from games has changed. The games are expensive, but while we all, hopefully, have more money now, we have less time and less patience. I used to love reading rules, but now it is like pulling teeth – it is painful to get into a game. This game and all that follow are about making the games convenient and easy to approach. It is expensive for sure for all of this added stuff that you haven’t seen before – but again, we have more money but less time. You’ll see things here that will make you wonder why all the companies don’t do this.

Also, I don’t want to be GMT or MMP. I want to make games. I won’t have a warehouse, so only orders will be printed. Once I go to press, the game will be out of print. I’ll also limit the total number of orders I will accept. I like making the games. I don’t want to spend my time with all the company stuff. Trust me when I tell you that the owners of all the game companies aren’t having as much fun in the hobby as you are – they are busy running a company, tracking inventory, and all that stuff. I don’t enjoy that very much. So I’ll give up selling games after they print and keep having fun.

I hope you’ll go to my website at www.bringitongames.com and download the sample rules and Vassal set – and see if it’s your thing. I’d love your support. You can also subscribe to my newsletter. And I apologize in advance if you, as more than a few gamers have said to me, “you’ve ruined GTS and CSS for me”.
If you have any questions or comments, you can reach me at:

Email: adam@bringitongames.com

Discord: https://discord.gg/tRSUe2Tr

Facebook: https://www.facebook.com/groups/843702163901347

BGG: https://boardgamegeek.com/boardgame/470818/anzio-a-lost-opportunity

Comsimworld: https://talk.consimworld.com/WebX?14@@.1de55d9f/60

Thanks so much for your time in answering our questions Adam. I am very much looking forward to this system and wish you the best of luck in bringing it across the finish line. I have very much enjoyed my experience with the Company Scale System (Saipan: The Bloody Rock and The Enemy is at the Gates: Battle for Berlin, 1985 both from Compass Games) as well as the Grand Tactical Series (Devil’s Cauldron and Where Eagle’s Dare both from Multi-Man Publishing) and very much enjoy the feel of the game and the combat system.
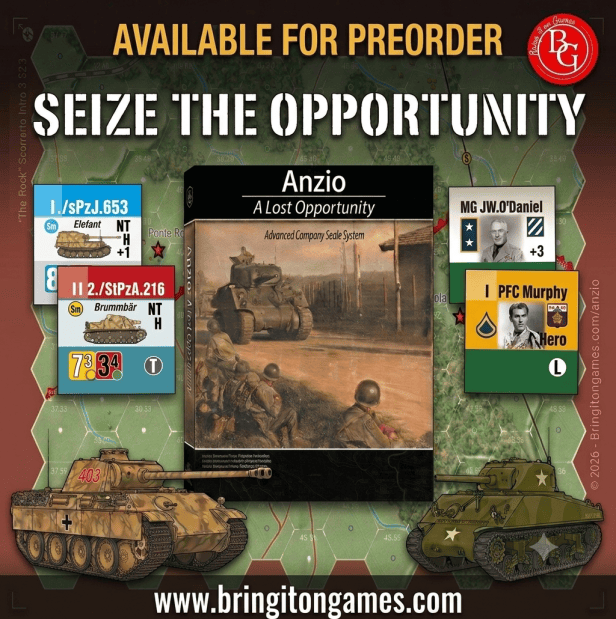
If you are interested in Advanced Company Scale System Game One: Anzio: A Lost Opportunity, you can pre-order a copy for $350.00 from the Bring it on Games website at the following link: Shop — Bring it on Games

-Grant
  •  

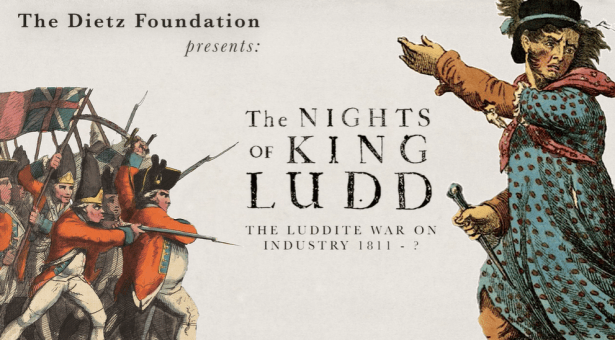
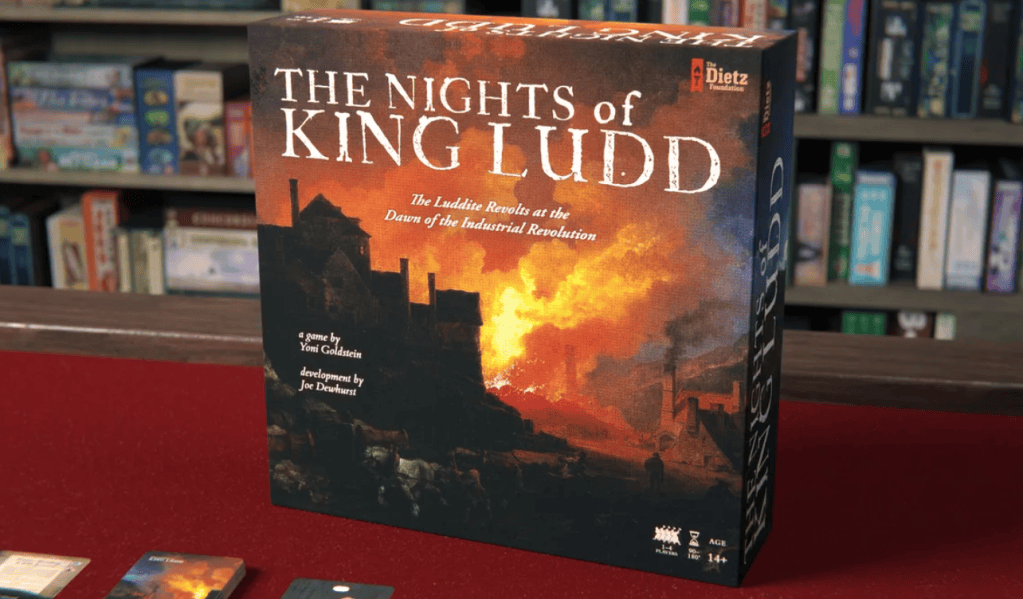
Interview with Yoni Goldstein Designer of The Nights of King Ludd: The Luddite War on Industry, 1811-? from The Dietz Foundation Currently on Kickstarter – Part I

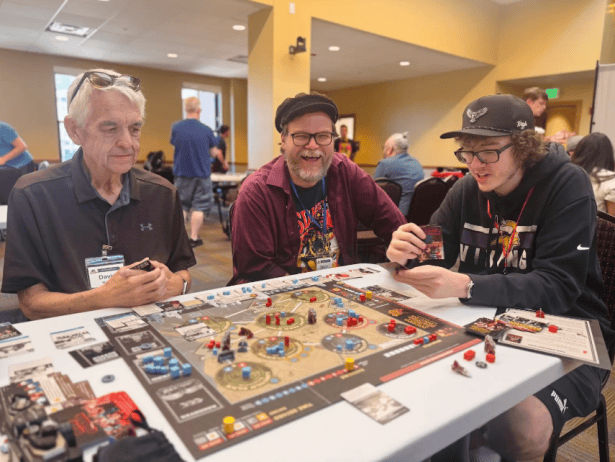
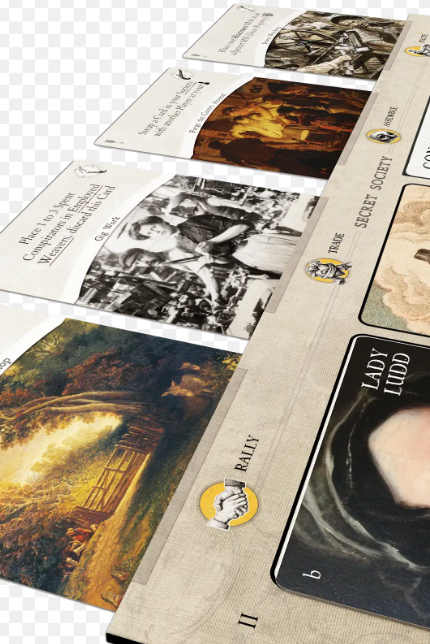
As you know, I do love me a good Card Driven Game….or a game that uses cards….multi-use cards. I love cards because it allows for the designer to keep a game going while using a vehicle that incorporates special rules that fit a historical situation but also to be able to use bits of the history itself to teach the players about the topic. A few months ago, I caught wind that The Dietz Foundation was working again with Yoni Goldstein on his second game called The Nights of King Ludd: The Luddite War on Industry, 1811-? that recently launched on Kickstarter (the game has already funded). The Nights of King Ludd is a 2-4 player game that deals with direct oath-sworn secret societies of English Luddites at the dawn of the Industrial Revolution in the English Midlands. Working together, players will build a secret network of saboteurs, ferry provisions and weapons on the black market, assemble raiding parties, and if all goes as planned, smash those “dark satanic mills” to cinders. I reached out to Yoni to get a bit more information about the design and he was more than willing to share.

If you are interested in The Nights of King Ludd, you can back the project on the Kickstarter page at the following link: https://www.kickstarter.com/projects/dietzfoundation/the-nights-of-king-ludd

Grant: Yoni welcome back to our blog. What have been your feelings about the reception of your great game Chicago ‘68?

Yoni: I’ve joked that I’ve taught this game now more than I’ve played it (of course this is only true if one just counts the last couple years!). Since 2024, I’ve taught it to a diverse and intergenerational cohort of non gamers, grognards, peace activists, veterans, and even a few spooks. Inevitably players relate the experience they are having on the board to what they see in their neighborhoods: protests and tear gas, troops deployed into cities, election interference, and so on. Those conversations are still ongoing and I’m heartened that Chicago ‘68 is facilitating a space for that.

Grant: What lessons did you learn from that experience that have helped you with your new game?

Yoni: I’m grateful that Joe Dewhurst, who developed both Chicago ‘68 and the upcoming The Nights of King of Ludd, guided me through the design, testing, and development processes. Ludd is my second game and it went through a number of iterations, but this time we had a proper methodology in place. Likewise, The Dietz Foundation was very transparent with the manufacturing and publishing side of things, which gave me a deeper understanding of the timeline and proofing / editing process that accompanies those final stages of production.

Grant: What is your new upcoming game The Nights of King Ludd about?

Yoni: The Nights of King Ludd is a collaborative game for 2-4 players about the Luddite revolts in the English Midlands. Set roughly around 1811, the game tells the story of local workers in the textile industry (“weavers”) forming secret societies and leading armed raids against mills and factories in their communities. Players command an oath-sworn organization of conspirators working with the Luddites to achieve the collective goal of machine wrecking while also attempting to meet their individual motivations (which may include assassinating the local manufacturer, spurring a republican revolution, or just avoiding an Australian exile).

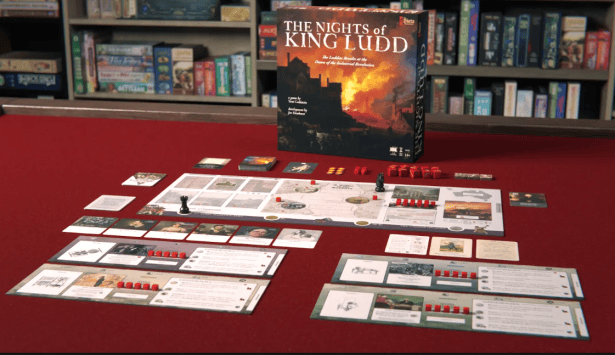
In terms of game mechanics, you are building a dice pool while also maneuvering pieces and collecting multi-use cards to modify your roles. Collectively you are building a tableau and operating it together to mount a series of raids against the three Mills on the map.

Grant: What is the meaning of the title of the game? What should it convey to players about the game and the history it represents?

Yoni: The title of the game is borrowed from a chapter in Gavin Mueller’s book from 2021, Breaking Things at Work. Mueller is among a cohort of authors, including Kirkpatrick Sales (Rebels Against the Future), Brian Merchant (Blood in the Machine) and Cory Doctorow, who are working to reconsider the Luddites’ reputation in the age of AI and the gig economy. Rather than seeing them as misguided revolts against the inevitability of technological progress, these writers appraise the Luddites in their historical context as severely desperate labor movements against tech oligarchies. The Luddites’ aims were, ultimately, to raise the minimum wage, cease child labor, and to maintain a higher standard of craftsmanship and quality in the production of textile goods. At every point their appeals to authority were spurned. So they turned to mob justice. “You may call the people a mob,” remarked Lord Byron before Parliament, “but do not forget that a mob too often speaks the sentiments of the people.”

The subtitle of the game, “The Luddite War on Industry, 1811-?” is also a cheeky nod to Volko’s Labyrinth: The War on Terror, 2001 – ?. While these games don’t share a mechanical similarity, they both explore the ongoing and unpredictable nature of insurgencies. 

Grant: Why was this a subject you wanted to focus on?

Yoni: My area of interest in game design, broadly speaking, is movement politics on an operational scale. As with Chicago ‘68, the Luddite war on industry feels an under-explored subject matter in historical gaming. While there are certainly titles about the Industrial Revolution from the perspective of barons and magnates (especially in the Euro game niche), little is mentioned about the social, political, and ecological costs of these endeavors for progress. 

Moreover, the story of the Luddites and their “secret societies” is about the tensions of modernity. New technologies combined with extensive wars abroad drove a rise in food costs and detonated an affordability crisis in the imperial homeland. Communication media (handbills, newspaper editorials, and pseudonymous letters) was an instrument of persuasion, vitriol, and threats. Suspected Luddites and their sympathizers were surveilled by the state, which increasingly saw its interests entwined with industrial capital. We’ve seen this all before! 

Grant: What are the unique features with the system used for the game?

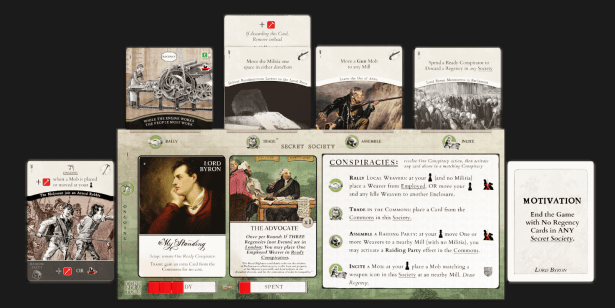
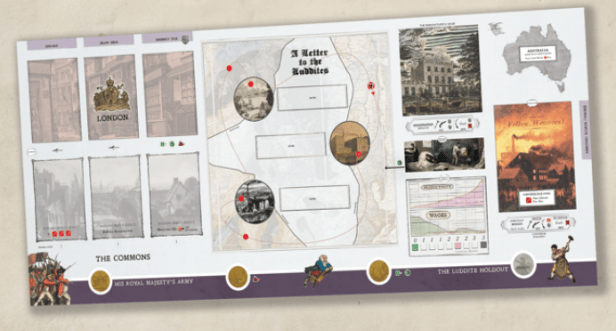
Yoni: The Nights of King Ludd has a unique framework for collaborative engine building. Initially, players draw from “The Commons” (a shifting card pool) where each card has the same “trade cost.” On your turn, you may activate a Conspirator (spending an action point) to draw a card into one of the columns in your tableau. Each column upgrades your actions with a permanent ability. If you specialize your actions, you can harmonize a collective strategy between players and hone in on the steps you need to take to sabotage the mills. 

In the Commons we are evoking the notion of a shared economy. But this may shift dramatically when decreasing wages and increasing productivity converge. Then, the Commons transforms into the “Common Market.” Now, players are building their tableaux with an increasing cost, similar to the Pax Series (for example, Pax Pamir or Pax Renaissance). Each player is now facing a decision: overwork their cabal of conspirators or draw on the labor power of the workers in the textile industry (which drains their militant power on the map).

Grant: What does the collaborative portion of the subtitle mean for the game? How do the players cooperate?

Yoni: I choose “collaborative” not “cooperative” as a descriptor to emphasize the multi-victor nature of the game. In The Nights of King Ludd, each player chooses not only their persona and their role in the Luddite struggle (with asymmetric abilities and effects), they also put forward a “Motivation.” Motivations are personal victory conditions that unlock if the collective win condition (destroying all three mills on the map) is met. This gives shape to the degree of player friction in the game. For example, Lord Byron’s motivation is to turn down the heat from the ruling Regency. His motivation is in conflict with George Mellor’s, the famed assassin, whose attempts at the Manufacturer’s life will ratchet up the crown’s crackdown. But pair John Baines, a republican agitator, with the Molyneux sisters, two young women destined to labor in the mills, and the gameplay will tilt more toward cooperation. In this case, Baines is working to regulate the industriousness of the mill (keeping productivity low and wages high) while the Sisters are interested in keeping workers employed. So the degree of cooperation is up to the players, and as often happens, someone may have to make a noble sacrifice for the collective good.

Grant: What did you need to model regarding the English Luddites at the dawn of the Industrial Revolution?

Yoni: As EP Thompson (The Making of the English Working Class) notes, the history of the Luddites is, at best, “opaque.” We are grappling with a story about secret societies in an era where workers associations were illegal and damaging weaving frames was a capital offence. As such, we have dubious claims from government spies, confessions before “hanging judges,” and pseudonymous letters and handbills. Consequently, the model had to be expansive enough to capture the granular nature of these conspiratorial operations, but also open enough to allow for the plausibility of a broad range of player actions.

For example, one of the core actions is to “rally local weavers,” which is a form of recruitment. In game terms, this means moving one of the Employed Weaver cubes into an Enclosure where they can contribute to your force strength. This action may represent members of your secret society swearing in sympathetic workers in local pubs, or calling a clandestine meeting in the nearby woods. We don’t know precisely how the Luddites organized themselves, so the language has to be inclusive of these possibilities. Players then “assemble a raiding party”, which is to move the cubes from the enclosure into a nearby Mill. Each cube in the Mill space adds a die to the Sabotage roll (which is the primary means of wrecking machines). So here is a group of raiders hiding in the hedge and awaiting the signal from King Ludd. They are spurred on by the Mobs who have surrounded the site, represented by these Mob tiles. Matching a die roll to the symbol on the Mob Tile is how you roll a “hit.” The intention is to shape a series of amorphous and difficult to historicize chain of events into a familiar wargaming mechanism: rolling a handful of dice representing an “attack” and applying modifiers to the results.

Grant: What is your design goal with the game?

Yoni: My overall aim was to develop a system that could express a relationship between an abstract economic system, worker uprisings, and the coming together of industry and aristocracy to form a ruling class. But on a purely design level, I wanted to work within the framework of a Pax Series style market that you encounter in games like Pax Pamir and Pax Renaissance. That is, a shifting market of cards that players can purchase and place into their tableau. It’s an evocative description of history as a bazaar of possibilities and counterfactuals. The Nights of King Ludd tweaks this vision of history as somewhere between a commons (a gift economy) and a market (which costs worker power as in-game resources).

But really, I want this to be a “raiding party game.” Beneath the heady layers of history and theory is a brisk experience featuring dice odds, clever combos, and cooperation with your friends (while slyly pushing your own agenda!).

Grant: What other games did you use as inspiration?

Yoni: John Company from Wehrlegig Games is certainly one of the biggest inspirations, taking place in a similar era of British imperial economic imperialism (Ludd is at the tail end of JoCo’s later scenarios) and drawing on the satirical printworks of the time. Like John Company, players are asked to intervene in an existing ecosystem. In both games, player actions accelerate a system that will simultaneously reward and punish everyone at the table. How this is doled out is uneven, so players have to weave and dodge to make best of a collapsing infrastructure. 

Grant: What sources did you consult about the history?

Yoni: An invaluable resource for all things Luddite is the Luddite Bicentenary curated by Richard Holland. This is a comprehensive digital archive of historical ephemera devoted to Luddism, including handbills, court transcripts, and other images and texts. I also quote extensively from Rebels Against the Future by Kilpatrick Sale and The Risings of the Luddites: Chartists and Plug-Drawers by Frank Peel, E.P. Thompson, as well as The Making of the English Working Class also by E.P. Thompson.

Other reference texts include: 

Writings of the Luddites edited by Kevin Binfield

Ben o’ Bill’s, The Luddite: A Yorkshire Tale by Daniel Frederick Edward Sykes, George Henry Walker

Breaking Things at Work: The Luddites Are Right About Why You Hate Your Job by Gavin Mueller

The Luddite Rebellion by Brian Bailey

Blood in the Machine by Brian Merchant

Women in Protests 1800-1850 by Malcolm Thomis

Convict Lives at the Launceston Female Factory (A swing rioter: Elizabeth Studham by Keryn Rivett), edited by Lucy Frost & Meredith Hodgson,

Grant: What is the dice pool building mechanic and how does it work in the design?

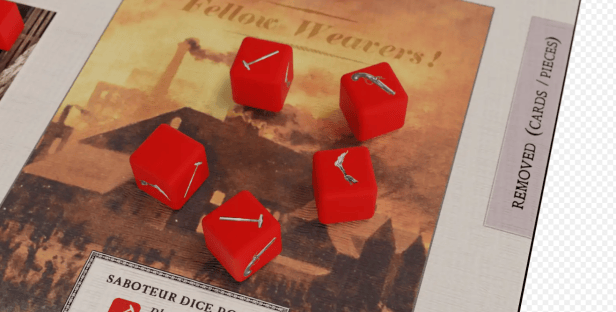
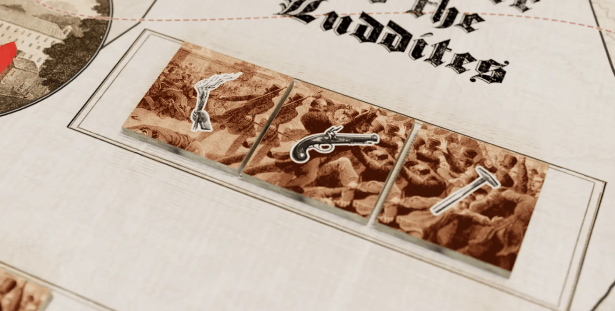
Yoni: At the core of the game is a fairly straightforward dice mechanic for resolving raids against the three mills on the map. Throughout the course of the round, players add “saboteur dice” to the dice pool, representing the Luddite’s militant capacity. These are D6’s with the following icons: gun, hammer, and torch (matching the “mobs tiles” – armed rabble surrounding the mill). The remaining three sides are blank and always result in a miss.

When a sabotage operation is initiated, the number of dice rolled is determined by the number of raiders you’ve positioned at the mill and what constitutes a possible hit is determined by the matching icons on the nearby mob tiles (again; gun, hammer, or torch). All misses are returned to supply but if at least one hit is rolled, you may push on and carry out multiple raids, striking at other mills as well.  

As your readers can deduce, the purpose of the tableau building and the card engine is to modify the odds of the roll in your favor, i.e. the more raiders you assemble the more dice you will roll, and the more mobs you’ve fomented the more likely you are to roll a hit.

Grant: What is the general Sequence of Play?

Yoni: As neighboring societies of Luddites, you have three rounds before the Crown musters its army and crushes the revolts. Each round is structured the same: 

  1. Dawn: Industry Operates – at the beginning of the second and third round your adversaries in London will take actions against you, sending the militia on patrols and accelerating industrial production.
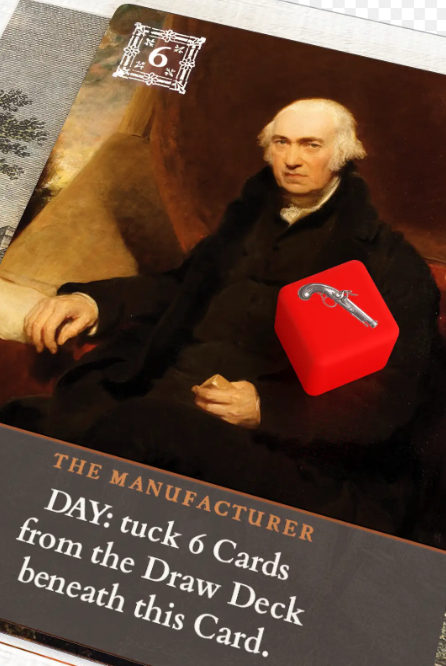
  1. Day: The Manufacturer Speculates – during this phase, the local manufacturer will take an action, depleting the Commons of its resources.
  1. Night: The Luddites Conspire – this is the main phase of the game, where each player takes turns resolving a Conspiracy action by spending a Ready Conspirator cube on their boards. Each player takes a primary Conspiracy Action and resolves any secondary effects on Cards tucked into the Column of that Conspiracy on their Player Boards. In this phase, players can attempt a sabotage roll to destroy the Mills.
  2. Round’s End – when there are no Ready Conspirators (or all players pass) players reset the components for the next round. 

Thank you for your time in answering our questions Yoni! I am very much interested in this game and its efforts to tell this very interesting story of resistance. While this is not a traditional wargame, in my opinion it certainly merits a serious look from wargamers who are interested in CDG’s and games that use cards and that are interested in seeing these type of non-traditional historical subjects represented. I have backed the project and look forward to getting my copy next year!

If you are interested in The Nights of King Ludd, you can back the project on the Kickstarter page at the following link: https://www.kickstarter.com/projects/dietzfoundation/the-nights-of-king-ludd

In Part II of the interview, we will dive more into the makeup and uses of the card, concepts of Breaking the Oath, profit and market manipulation.

-Grant

  •  

Interview with Kevin Talley Developer for The Great Anglo-Boer War: The Battle for South Africa 1899-1902 from Cadet Games Currently on Kickstarter

A few years ago, I came across this interesting looking wargame from a new company Cadet Games called They Were Soldiers: Battle of the Ia Drang Valley that was heading to Kickstarter at the time. The game was a 2-player turn-based operational level design based on the battle for LZ X-Ray during the larger Battle of the Ia Drang Valley in Vietnam, 1965. Since that successful campaign, Cadet has designed and completed several other successful campaigns including Nguyen Hue ’72: The 1972 Easter Offensive in Vietnam, Linebacker II: The Historic B-52 Strikes Against North Vietnam, Armies & Alliances: Arnhem ‘44 – Operation Market Garden and Armies & Alliances: Blitzkrieg ’40 – The Battle for France.

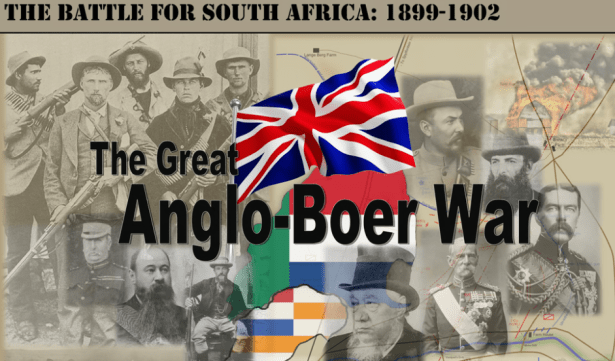
They recently announced their next Kickstarter project that would take their system to the Anglo-Boer War called The Great Anglo-Boer War: The Battle for South Africa 1899-1902. The game is currently on Kickstarter and I reached out to my contact there Kevin Talley who acts as one of the Developers on the team for his input into the design to give us a better picture of how this new game plays.

If you are interested in The Great Anglo-Boer War: The Battle for South Africa 1899-1902 you can back the project on the Kickstarter page at the following link: https://www.kickstarter.com/projects/647106057/the-great-anglo-boer-war

Grant: What is the focus of your new upcoming game called The Great Anglo-Boer War?

Kevin: The Great Anglo-Boer War is a grand-strategic level game of the war between the British Empire and the Boer Republics in South Africa from 1899 to 1902.

Grant: Who is the designer and what is their goal with the game?

Kevin: As with all of our designs, R.J. Mills is the designer. He has always been fascinated with the Boer War and the goal was to make a really good hex-and-counter wargame to cover the whole conflict.

Grant: What is important to model from the history of the Anglo-Boer War?

Kevin: Well, the Boer War was very unique. It began as an asymmetric conventional contest in 1899 between the relatively small citizen militia forces of the two Boer Republics (they had no standing professional armies) and nearly the entire army of the British Empire! Then, once the Empire had captured both Boer capitals in 1900, the Boers refused to surrender and instead decided to fight a guerrilla war (and that went on for 2 more years). So, given the dynamics of this truly unique conflict, making a realistic game presented some serious design challenges. The design had to accurately simulate the conventional period, where the fractional Boer forces soundly defeated the British in several key battles during the early months, and it also had to credibly represent the guerrilla phase of the war, where very small numbers of Boers roamed (often unseen) and raided (always with surprise) throughout a vast area nearly twice the size of Texas. For this phase, the Empire forces had 250,000 troops deployed unsuccessfully trying to defeat 20,000 guerrillas! It all ended (finally) 31 May, 1902, with the Treaty of Vereeniging.

Grant: What other games inspired this design?

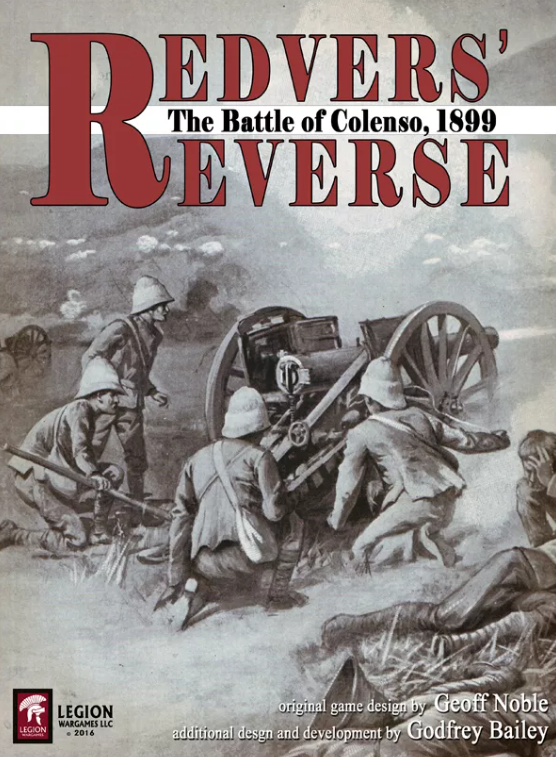
Kevin: We had not intended to make a Boer War game here at Cadet until after we started seeking a good grand-strategic/operational game about the Boer War to play. We got the “Boer War bug” playing Geoff Noble’s Redver’s Reverse: The Battle of Colenso, 1899 from Legion Games and decided we wanted to play a game of the whole war. We had pledged the KS Campaign for Joseph Miranda’s The Boer War from Canvas Temple Publishing and were hopeful, but it wasn’t what we’d hoped for in the end. Then we tried all the other Boer War games out there, or at least those we knew about, but there just wasn’t a good, realistic, strategic level/operational game of the whole war – especially not with the kind of depth we were looking for. We wanted something more like Nick Karp’s Vietnam: 1965-1975 from Victory Games – but for the Boer War – something with that kind of simulative value, historical chrome and especially guerrilla war operational mechanics. The closest thing we found was the old 3W game from 1991 (Eric Faust and Lew Fisher) called The Boer War. It had a lot of what we were looking for, but it was under-developed, errata-riddled and had too many issues to list. Still, that game had some brilliant design ideas, so we decided to start with that framework and make our own game. We were surprised that this topic didn’t have more published games already.

Grant: How did warfare change during the Victorian Age? How did you capture these changes?

Kevin: The British Army was fighting in drill book formations all the way through the 19th century. Consider that, just a year before in 1898 at Omdurman, the infantry stood in close order (just like in the movie Zulu), easily repelling the 50,000-strong army of the Khalifa with Lee-Metford volleys, Maxims and quick-firing breech loading artillery. This all worked very well when the enemy had swords, spears or primitive firearms. But the Boers had Mausers. And Krupps. And Maxims! Tactics had to evolve to meet this new level of lethality and the British Army was not initially prepared to face an enemy that was equipped with the same weapons as they. And an enemy that chose trenches and concealment – inflicting severe losses on British troops in drill formations. The combat system in the game realistically models the advantages of entrenchments, terrain, unit formation posture, night marches and even artillery effects. The Boers on defense can be very tough. A typical attack will be costly. Best to use open order and artillery to great effect – even better to use maneuver and avoid the prepared defense altogether. It took the British some time to learn their lessons.

Grant: What sources were consulted for the historical details?

Kevin: The bibliography for the game is included in section 26 of the rulebook. We used 20+ books on the topic to get the information for the design, and of course those include all the most important works published about the war: Rayne Kruger, Pakenham, Farwell, Arthur Conan Doyle (who was there), Barthorp, Reitz (a famous Boer Journal of the war), Maurice’s official history, Amery (Times history) and more. Someone who has researched the war and knows the historiography will truly appreciate this game.

Grant: What is the scale of the game? Force structure of units?

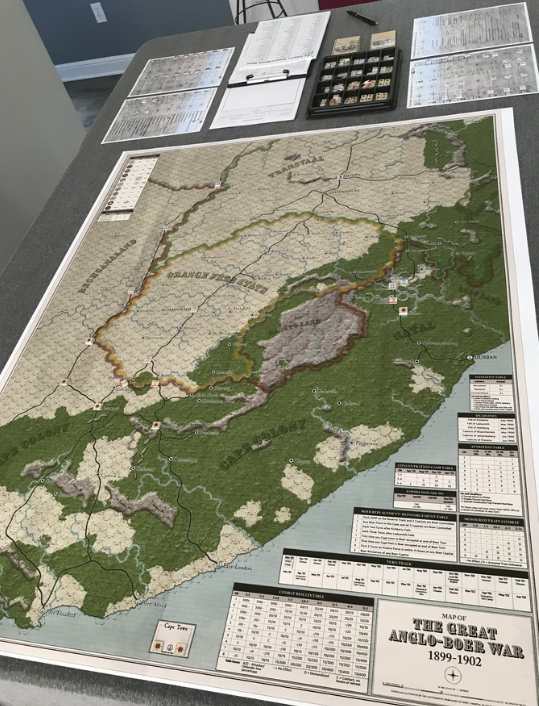
Kevin: The map scale is 9 miles to a hex. The map is huge. 34″ x 44″ on the table. The unit scale can be as little as a half battalion on the Empire side (500 men) and a single commando element of as few as 333 for the Boers. But the system is so flexible that a single leader’s counter in a hex on the map could represent as many as 30,000 Empire soldiers (with supporting artillery) and up to 13,320 Boers with several batteries of their guns as well. The game scale works for both large conventional battles (early war) and small guerrilla actions (later war).

Grant: What is the layout and anatomy of the counters?

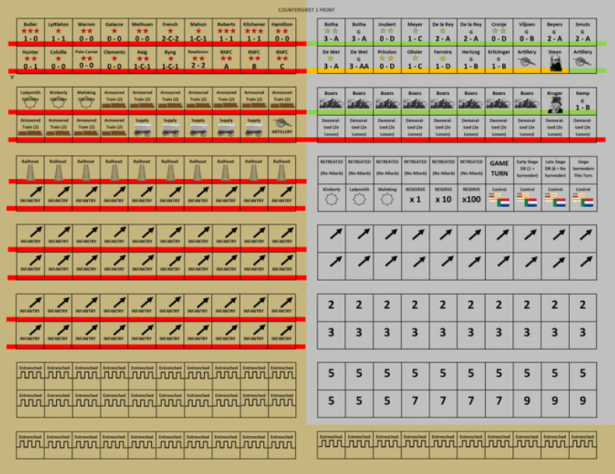
Kevin: The counters are the typical ½” variety, printed on both sides. There are Entrenchment markers that, when flipped, double as “Scorched Earth” markers; Rail markers (early war) that also double as Blockhouse Line markers (guerrilla phase); Boer Control markers that can also be used as Strength Point counters; Number markers that flip to various increments; dozens of Empire Detachment markers which flip to show either Infantry or Cavalry or Artillery Strength Points (and the rotated position of these markers indicates the detachment strength in the hex); Armoured Train unit counters; Supply Wagon unit counters; Unit Status markers for multiple conditions like Retreated, Disordered, Demoralized, Invasion VP’s and more; and of course the Empire and Boer Leader counters, which are the basic units of maneuver in the game.

Grant: What different types of units are available to both sides?

Kevin: A Leader counter on the map typically indicates a ‘Force’ (which is a leader and the Strength Points of soldiers and artillery in their command) for both sides. These Forces are the maneuver units that move around on the map. There are also Detachments, which are Strength Points of soldiers and artillery without a leader (these secure and patrol an area, with a ZOC but without the counter moving). The Empire Strength Points can be Infantry, Cavalry or Artillery, with each point equating to 500 soldiers or a battery of field guns. The Boers are basically all mounted infantry militia, with each Strength Point representing 333 Boers or one battery of their artillery. The Empire also has Armoured Train units (we kept the English spelling), which function as ‘line of communication’ forces that police Empire-controlled rail lines. The Boers also have their Republic Presidents (Steyn and Kruger) and their small government staffs, which serve to score Victory Points by avoiding capture and maintaining their presence as head of state, either in their capitals or out on the veldt.

Grant: What is the off-map Arrow/Wheel used for?

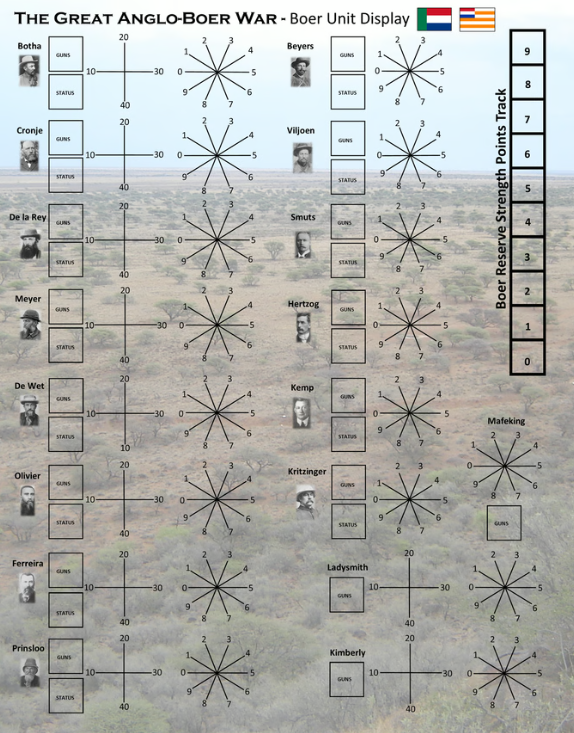
Kevin: There are “Unit Displays” for both sides. These typically show a small picture of the Leader next to a pair of Strength Point numbered ‘wheels’. The players use counters with little arrows on them to indicate on the ‘wheels’ how many SP’s of soldiers are in a Leader’s Force, with any artillery batteries indicated by using a number marker. This keeps the counter-density on the map low, since the battalions, regiments, batteries or commandos are indicated using these off-map strength displays, and only the Leader’s counter moves on the map.

Grant: What was the inspiration for this mechanism?

Kevin: This came from the 3W game. Some players dislike this method for managing unit strength, and it took some getting used to, but we eventually decided it was the best mechanic we had seen in any design for this aspect of the game. Now we love it. Especially because of the flexibility it allows once the war changes from conventional to guerrilla. Historically the forces changed from divisions and brigades fighting large Boer commandos to much smaller columns of Empire troops chasing small Boer units of a few hundred all over the map.

Grant: How does it show the importance of Leaders in the game?

Kevin: I think this whole method of organizing the armies of both sides by each “Leader’s Force” really works perfectly to simulate the Boer War. It matches the real history. Everything a Force does boils down to the influence and command capabilities of the Leader. And forces of widely varying strength and unit composition were assigned to different leaders on both sides at different times throughout the conflict.

Grant: What is the Leader specific initiative rating system? How does it aid in your telling of the Anglo-Boer War?

Kevin: A Leader has to ‘roll for initiative’ to do most actions. Each Leader has an initiative rating which either helps or hurts their odds of a successful die roll, and the ratings are based on the historical performance of that Leader. This represents more than simply a Leader’s tendency to act decisively or not, but also his relative command influence for scarcity of resources, typical Victorian-era officer rivalries, orders and communications variables, bad intelligence and other typical “frictions” of war. The history of the war is full of instances where orders didn’t get communicated, sometimes weren’t given at all, or were ignored. Battles were lost many times because this leader or that failed to act on their own initiative or had some other priority override their commander’s intent. There are some Leaders whose rating is so good, they can nearly always do anything the player wants (and those are almost exclusively Boers). Other Leaders are reliably ineffective, and special care must be taken by the players to choose the right missions for these people. The realism of the design is greatly enhanced by this aspect – a player might have a great plan, but there is no guarantee that their Leaders will enact it. As Lord Roberts said after the battle at Poplar Grove, “In war you can’t expect everything to come out right.”

Grant: What is the layout of the game board?

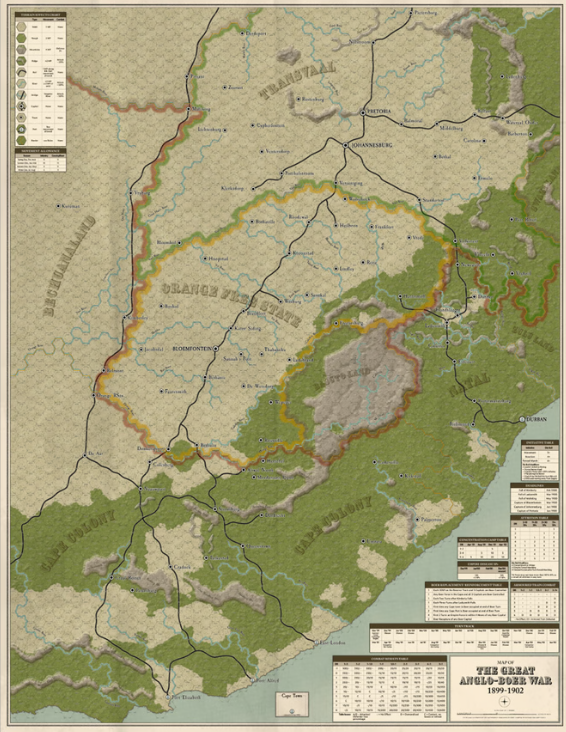
Kevin: The Game Map contains almost all of the area of the war, from the eastern Transvaal and much of Swaziland and Zululand all the way to the Kalahari desert in the west; from 150 miles west of Port Elizabeth on the coast all the way up past Durban in Natal – and all of the mountains, ridges, rough and veldt of South Africa contained therein. It is a very large area and the map scale is 9 miles per hex. Using .625 hexes (for standard ½” counters), the map is 34″ x 44″ on the table.

Grant: What key terrain features are included and how do they affect maneuver and tactics?

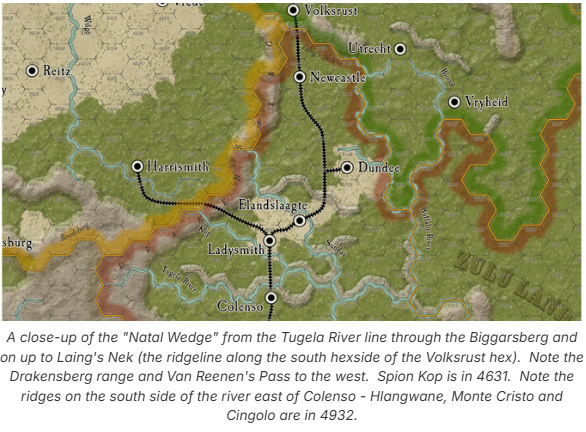
Kevin: The terrain types for hexes include mountain, rough and veldt. Special hexside types can be ridge or river, bridge or rail. The mountain ranges are all there, as are the ridgelines and heights, rivers and rail, towns, ports and capitals. Even the passes and “neks” are indicated. The actual escarpment of the Drakensberg are all mountain hexes, but the Biggarsberg north of Ladysmith, as an example, is treated as ridge-type hexsides with rough terrain hexes. There is a real distinction between mountains and typical rough country/hills. The geography of South Africa was a serious factor in the conduct of the war and the terrain effects for both movement and combat are significant in the game.

A Force attacking across a river hexside is reduced by 50%; a Force attacking across a ridge or into mountains is reduced by 25%; a Force defending in mountain terrain is doubled; a Cavalry Force crossing a river pays 2 extra movement points to do so, while an Infantry Force pays 3; a veldt hex costs 1 point to enter, a rough hex 2, a mountain hex 4, and crossing a ridge hexside adds 2 points. Geography is key. Often, the only way to effectively dislodge an enemy Force from a position is to maneuver them out of it, because the odds for a successful attack are slim based on the terrain. The Tugela River line in Natal is a famous example of a natural fortress, and so it is with the game. To get past a competent Boer defense there, it will take an Empire player who understands the map and the combat system (plus some good dice and a card or two).

Grant: What type of cards are included? Can you share a few examples.

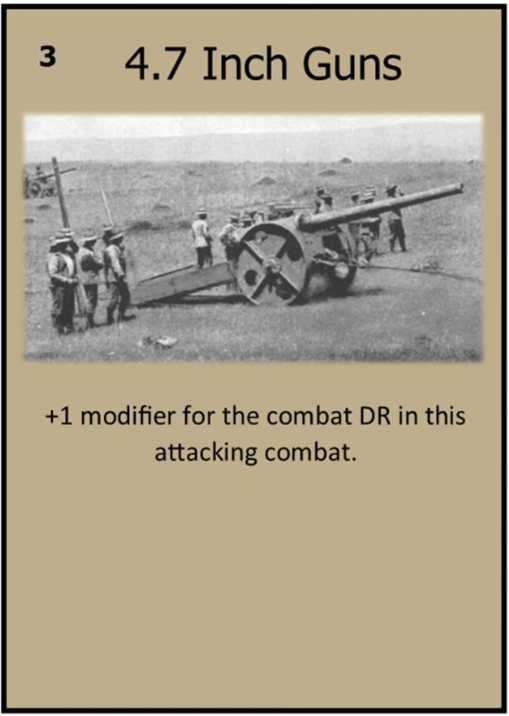
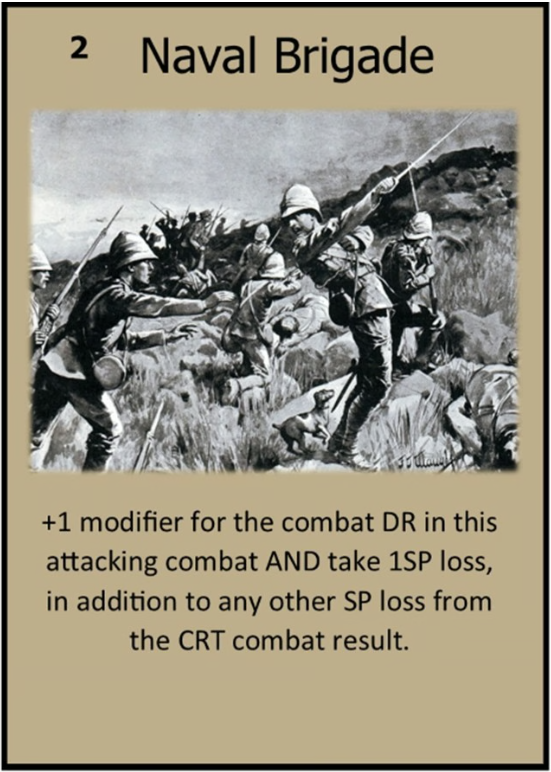
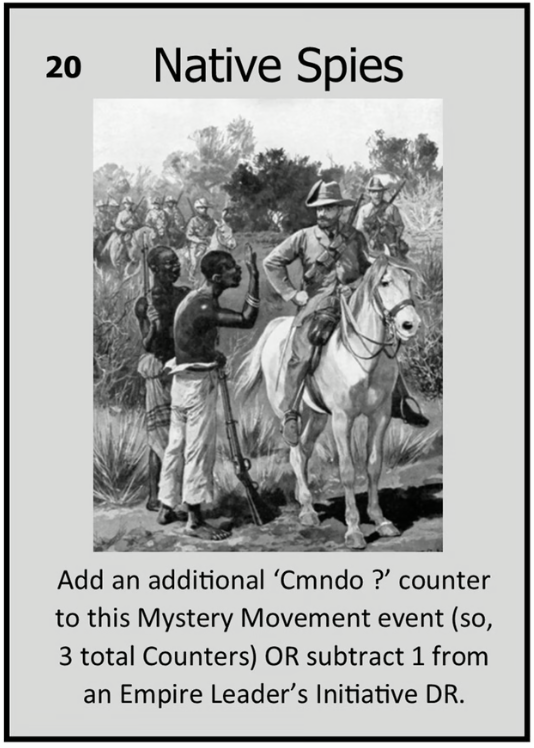
Kevin: The cards are great. Mostly they modify the combat odds or DR’s by providing for an odds-column shift or a DR mod for one of the many on the Battle Board (the Empire Attack Scouting Effect, the Artillery Effect or the actual combat DR). But there are also many cards that influence very specific game actions – like evasions or recruiting, siege surrender extensions or supply situations, armoured trains or movement or initiative effects. Some cards influence the unit formation or entrenchment posture during a battle, while some may determine the outcome of night marches. Some are related to intelligence and reveal hidden enemy units or prevent unknown strength in a combat event. Others influence scouting and observation, signals and orders, escapes and ambushes…I could go on.

All the cards were created based on actual events that happened during the war. Here is an excerpt from the Campaign language and the “design notes” section of the rulebook: “The game cards are designed to build historic realism into the game, especially for the combat system. As in all wars, small instances of chance – moments of decisive leadership (or not) – a thunderstorm – an oil-less signals lamp – a wire fence – a flooded drift – a poorly drawn map – a mistaken guide – an enemy surprise…all these historic events and elements of chance are represented in our design by game cards for both sides. We think this adds to the design immensely, since these can account for odds column shifts and DR mods that the players cannot anticipate. Like their historical counterparts, the players cannot know exactly what their odds are until the battle is joined and the card(s) are revealed!”

Grant: How does combat work?

Kevin: The combat system uses an odds-based CRT and a combat die roll to determine battle results, so it is fairly typical of a hex-and-counter wargame. What gives the system the right depth is that combat can happen during the movement as well as the combat phases. Combat can also be initiated by the non-phasing player using a reaction mechanism – so it isn’t nearly as simple or predictable as “I go / You go”. Based on the history, we felt the combat system (even at this scale) needed to incorporate strength ratios, unit tactical formations, weather, visibility, unknown Boer strength, artillery strength and effects for both sides, leadership, scouting and intelligence, terrain, night march outcomes, unit morale, “dummy” defensive positions, entrenchments and more.

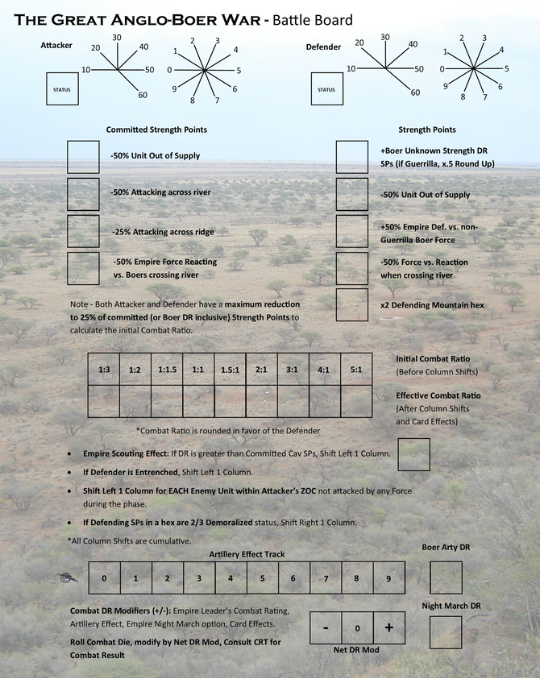
Grant: How does the Battle Board work?

Kevin: There are so many effects and modifiers that contribute to the combat system that we decided the only way to keep everything straight was to have a Battle Board. For example, an Empire attack vs. a defending Boer Force would look like this: First, the Force attacking commits their desired number of Strength Points to the battle using the Attacker’s SP display, then the defending Boer unit’s SPs are indicated on their display. Any unit status particulars (Disordered, Demoralized, Retreated) are also indicated. The next step is to see how many unknown Boer SPs there are, so a die is rolled and that number goes on the Board (usually the Empire player cannot know their exact combat odds until after they commit their SPs to the attack because of this “unknown SP” die roll). Then any terrain or supply state modifiers are applied (there are markers for these) for both sides to establish the initial combat odds, and a counter for that ratio is placed in the appropriate box on the odds track (always rounded in favor of the defender). Next, any factors that modify the combat odds are noted and applied (entrenchments, the Empire Attack Scouting Effect DR, any other enemy units in the attacker’s ZOC, a Demoralized defender, any cards – attacker first). Now a marker is placed for the final combat odds on the final odds track. The last bit is to calculate what modifier (if any) is going to apply to the combat DR. The Artillery Effect is determined with a DR, if the Empire is using a night march there is another DR, the Empire Force’s Leader combat rating is applied, if the attack is made from a rail-move ZOC it matters, and finally any cards that modify the DR – attacker first. Once the Battle Board has been completely and correctly configured, the combat die is rolled and the CRT consulted to determine the result. The Battle Board is really essential to keep track of all of it.

Grant: What role does scouting and intelligence play in the game?

Kevin: The British generals were famously ignorant of the Boer dispositions in the early battles, for they had almost no intelligence organization in their army corps and they were especially short on mounted troops for effective scouting. The Empire Attack Scouting Effect is built into the combat system to reflect this. If the “E.A.S.E.” DR is greater than the number of Cavalry SP’s in the attacking Force, there is an odds-column shift to the left for the combat on the CRT. Later in the guerrilla phase, there is a “mystery movement” dynamic which keeps the Empire player guessing about which Boer commando markers are real units and which are only decoys. Some of the game cards confer valuable intelligence by allowing the Empire player to reveal a “mystery” commando of their choice (and native spies can help both sides).

Grant: How is artillery used?

Kevin: There is an Artillery Effect Track on the Battle Board which compares the arty strength of the two sides in a battle – whomever wins this comparison gets a modifier that applies to the combat DR. The Boers get a DR to add to their battery count, so even an Empire Force with 8 batteries of guns might not win the Arty Effect Bonus if there are 3 Boer batteries (if they roll a 6, they have 9). This “Boer Arty Effect” DR does not necessarily represent additional unknown batteries/guns, but more simulates the Boer tendency to use superior artillery tactics, multiple prepared positions, gun re-positioning during a battle, indirect fires and hidden gun positions with range and target fire preparation. In addition, the British firepower was often wasted against cunningly prepared “dummy” trenches and positions such that seemingly impressive preparatory fires were completely ineffective. The Boer Arty DR serves to simulate both aspects. The Empire has far greater potential weight of fire, but qualitatively the Boer Arty is superior (as with the historical truth). There are cards for both sides that impact the Artillery Effect for a battle.

Grant; What is the role of Scorched Earth?

Kevin: As the Boers turned more towards guerrilla tactics, the Empire forces began burning farms and killing or confiscating livestock (and especially horses) as reprisals for Boer attacks and to destroy potential shelter and supply sources for the guerrillas. This often resulted in the re-settlement of the Boer women and children in concentration camps, where thousands perished from disease and hunger. There are several game mechanics during the guerrilla phase that simulate this aspect of the war, and one is the “Scorched Earth” program. If the Empire player chooses, they may assign Forces during a game turn to “Scorch” one or more district areas in the Boer Republics. A marker is placed, and Boer movement point costs in that district are doubled, while guerrilla recruiting is halved. Once “Scorched”, a district can no longer provide Boer VP’s during the District Control segment of the VP interphase. But there is a potential cost to this kind of “scorched earth” policy: every turn this is done the Boer rolls a die – if the result is equal to or less than the number of newly “scorched” districts for the turn, the Boers get 5 VP for each. These VP’s reflect negative public opinion, parliamentary outrage and press coverage back in England, as well as increased Boer resentment and dedication to fight to the bitter end to avenge the destruction of their homes and families. The Empire player must balance the military benefits against the possible consequences of the policy (and be careful).

Grant: How does the Attrition Phase work?

Kevin: There is a lot going on during the Attrition and VP interphase. Hundreds of the Boers in just about every Force will simply leave to go home (they are all volunteer militia, not regulars); The Empire may have thousands of losses to typhoid (it was a big deal during the war); Boer family deaths in the concentration camps may cause desertions in the commandos (and uproar back in Britain); Besieged Empire garrisons may suffer losses or surrender; Railheads may advance or be pushed back: Forces might entrench; Unit statuses (like Demoralized units) get updated; VP’s for the game turn are tallied and losses counted, and the totals for the war (or scenario) are arrived at. It gets even busier if a Boer capital has been captured during the turn, as this can drastically increase the number of Boers who choose to “take leave” and go home (low morale). At the end of the phase, the players advance the game turn marker and start the next month of the war.

Grant: How is victory determined?

Kevin: Victory Points are awarded to both sides for all kinds of events. Mostly major or minor battle victories, but also for siege outcomes (relief or surrender), Boer invasions of Empire territory, capture of Leaders and capitals, control of districts, consequences from the scorched earth policy and concentration camps, and even penalties for over-stacking. There is a VP table on the back of the rulebook so the players can double-check during the VP interphase, and there are handy player-turn and interphase record sheets to use as well. Whoever has the most VP’s at the end of the scenario wins, unless an automatic victory for either side ends the contest early.

Grant: What different scenarios are included in the design?

Kevin: There are three scenarios – the Conventional War, the Guerrilla War, and the Grand Campaign Game. Here’s an excerpt from the Campaign language: “The full campaign is the ultimate Boer War experience – from the first desperate siege defenses of 1899 to the treaty of Vereeniging (or maybe not?) – and everything tactical and otherwise in between: Battles, blockhouses, farm-burnings, evasions, escapes, raids, concentration camps, sieges, drives, armoured trains, 1-pdr automatic “pom-poms”, surrenders, entrenchments, typhoid, barbed-wire, native spies, night marches, supply wagons and more. If it was part of the real Boer war – it is in the game.”

Grant: What does the game do well in modeling the Anglo-Boer War?

Kevin: We feel the game succeeds in modeling just about every aspect of the war, but there are a few particulars. Again, from the Campaign language: “For our design, we wanted a more granular scale of both movement and combat than any other strategic-level Boer War game yet published. Rayne Kruger, in chapter 23 of his “Good-Bye Dolly Gray” pointed out that, perhaps more than any other Boer advantage, the Empire was fighting “a war against space.” We ended up having two 22″ x 34″ map sections at 9 miles/hex to pull this off. A very large game on the table – but very typically “Cadet.” As it goes here, bigger is better. More hexes = more realism.”

Also, the Empire forces during the war were especially dependent on the rail lines for supply, while the Boer forces were far less dependent on any supply system to keep their forces in the field. The supply rules in the game really do justice to history, as everything the Empire player wants to do will be substantially constrained by their proximity to a rail line. In fact, some remote districts simply cannot be effectively garrisoned by Empire forces or detachments, because those units will be out of supply. Moreover, the scarcity of draft animals (oxen and mules) during the war meant only a handful of supply wagon units were available to extend an Empire LOS away from any rail line, and so it is with the game. These few substantial wagon convoys are also prime targets for the marauding Boers (as with countless examples from the war).

Grant: What has been the experience of playtesters?

Kevin: The game plays very well, indeed, but there were a few unexpected outcomes from the initial design, especially the combat system. In our first run of the conventional war scenario, we discovered that the “Boer unknown SP DR” mechanic needed a change. The Boers simply fought too well. Every time the Empire committed SP’s to an attack, the Boers would essentially be ‘reinforced’, owing to their unknown SP die roll. It always added SP’s to the Boer Force, since it wasn’t designed to subtract them. True, this kept the Empire player uncertain as to the combat odds until the forces were joined, but it had the effect of representing the Boers as ahistorically disciplined regular troops – prepared to fight to the death and hold their ground even when attacked by 15, 20, or even 30,000 British with 50+ field guns. The Boers just didn’t do that. There are far more examples of the Boer volunteers fleeing in droves from large Empire forces (in spite of exhortations and even threats by their leaders and even presidents) than examples where they stood their ground. In many ways this tendency served to preserve their forces and denied the Empire the showdown battles they hoped for during the second phase of the conventional war. A small rearguard of hardcore Burghers (farmers) would usually hold off the exponentially larger Empire forces, allowing their thousands of fleeing comrades to make their escape. They traded ground for time and blood, almost always avoiding any decisive loss.

So, we amended the rule so the DR can go either way, depending on the size of the attacking Empire force and on another DR modified by the Boer Leader rating of the defending force. This solution made a huge difference and resulted in the historical outcomes we wanted. If you attack Botha with a large Empire Force, he will likely motivate several hundred more Burghers to join the defense. Attack Prinsloo, though, and he’s likely to have several hundred of them (or more) run away before the battle is joined. There is a card in the Empire deck that prevents the unknown SP DR altogether, and now freshly retreated or Demoralized defenders don’t roll either.

Grant: When can we expect the game to be fulfilled?

Kevin: We are optimistic that the community will support our Campaign for this one (gotta get successfully funded first), and we will start the production sample and the rest of the process immediately afterward. Our anticipated timeline is to have the games shipping to the backers by August of next year.

Grant: What projects are in the near future for Cadet Games?

Kevin: We would really like to get our Hamburger Hill game produced. The design is 100% done and it is a really detailed sim of that famous battle. We ran it on Gamefound back in 2025 but it didn’t hit the goal. So, we will likely run that one again to see if we can’t get that produced here sometime soon. We have a ton of other projects in the works, one of which is a solo design covering the Mayaguez incident and the battle for Koh Tang Island from May, 1975. We have been really immersed in the Boer War since the middle of last year, so this one has had almost all of our attention (and still does for now, since we are playing through multiple rounds of the guerrilla phase and all of its intricacies)! We also have Barbarossa ’41 on deck for our Armies & Alliances Series of WWII ‘miniatures and monster map’ designs. Thanks again for helping us get the word out about our passion for military history and wargames!

Thank you for your time in answering our questions Kevin and for the great care you guys are taking with these games to tell a fun and interesting part of history.

If you are interested in The Great Anglo-Boer War: The Battle for South Africa 1899-1902 you can back the project on the Kickstarter page at the following link: https://www.kickstarter.com/projects/647106057/the-great-anglo-boer-war

-Grant

  •  

Interview with Gregory M. Smith Designer of Viking Dawn: A Game of Viking Exploration & Expansion 800-1040 A.D. from Compass Games

Our friend Gregory M. Smith is a solitaire game designing genius and has done many of these solo, narrative driven style wargames that we have all enjoyed for hours on end while we have been unable to find an opponent or just because we want to play a game on our timeline. We have interviewed him many times for his games such as Zeppelin RaiderInterceptor AceThe HuntedWestern Front AceAmerika BomberDefending AmericaAmerican Tank AceBritish Tank Ace, Rebel Tide, Sinking Yamato and most recently for a magazine wargame called B-52D Linebacker II. But Greg is a versatile designer and also has done many great 2-player games as well. He always has something cooking in his game design kitchen and recently we spoke with him about his new design with Kevin McPartland called Viking Dawn: A Game of Viking Exploration & Expansion 800-1040 A.D. from Compass Games. I was able to play this 1-4 player game while at the World Boardgaming Championships last month and you can read about my experience at the following link: https://theplayersaid.com/2026/07/27/world-boardgaming-championships-2026-daily-debrief-series-day-3/

I reached out to Greg recently to get a bit more information about the design to share with you and he was more than willing to talk with me about this new game.

Grant: Greg welcome back to the blog. What is your new upcoming game Viking Dawn about?

Greg: Hey Grant, a pleasure as always. I still think back to the first few of these interviews we did many years ago and laugh. Good times! [Editor’s note: When I reach out to Greg about doing one of these interviews, he is always willing to respond but often adds “don’t get medieval on my ass!” meaning he hopes that my questions are reasonable in number. He has a separate life to game design evidently.]

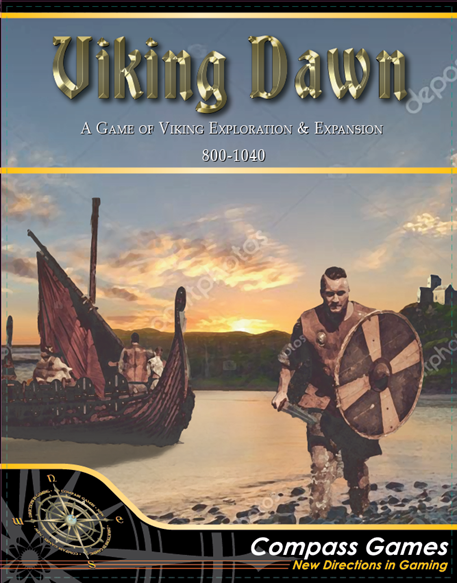
But, to business – Viking Dawn is an operational/strategic level look at the Viking raids and explorations in Europe, the New World and even into the Mediterranean and North Africa from roughly 800 to 1,000 A.D. 1-4 players will attempt to build a legacy for their faction, including the Swedes, Danes, Norwegians or Geats, by amassing Victory Points through wealth acquisition, exploration, area control, founding and growth of colonies and elaborate Leader burials. The game is playable in 4-5 hours with each of its 8 turns spanning a period of 20-40 years.

Grant: Why did you feel inspired to make this game?

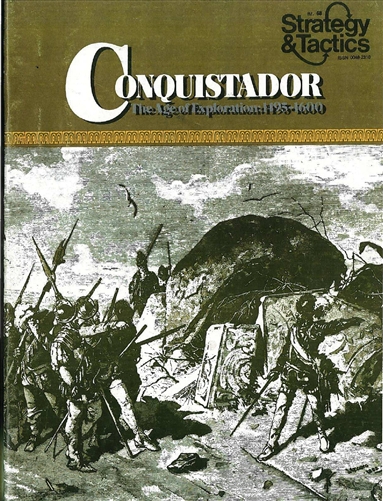
Greg: One of my favorite games in college was Conquistador: The Age of Exploration 1425-1600 from Strategy & Tactics Press and one evening I was watching Vikings (the recent series from the History Channel) and I thought, hey, I should make a Viking version of Conquistador. There’s nothing quite as dramatic as a game that covers 200+ years.

Grant: What sources did you consult to get the historical details correct?

Greg: As you might imagine, there was NO shortage of research materials, which is great on one hand, but on the other, can be daunting. I thought the most scholarly and overall excellent of the bunch was Johannes Brøndsted’s The Vikings. Another great overall look was Robert Ferguson’s The Vikings. Another similar book was Jonathan Clements’ The Vikings. (Nobody hesitates to use that name, you might notice.) The best resource with pictures of artifacts, drawings, and maps included was a book by Richard Hall titled The World of The Vikings.

Grant: I understand you have a design partner in Kevin McPartland. How did this partnership come about?

Greg: It was quite hilarious actually. Kevin is an accomplished designer in his own right, but a couple years back I brought the first prototype of Viking Dawn to the Compass Con and explained how the idea originated. The light bulbs went on in his head, because he ALSO loved Conquistador back in the day and was upset he hadn’t thought of this first! We laughed, then after playing the prototype, he was making nonstop suggestions (and historical corrections and additions). He so improved the prototype I felt I had to have him as co-designer, to which he graciously agreed.

Grant: What was the division of labor between you two?

Greg: Well, I did most of the initial design work, but every time we got together he had some fixes, tweaks, historical corrections, and additions. I’d say he almost acted more as a developer, but he came up with enough mechanics I think co-designer is probably more accurate.

Grant: What other games inspired your design approach?

Greg: As mentioned, Conquistador was the primary inspiration for the overall theme of raiding and exploration, with leaders that last a turn or two before dying (typically of old age, with 20 year turns).

Grant: What is the players goal in the game?

Greg: As with many games, the goal is to amass the most Victory Points, which will determine the winner. Unlike many games, this is achieved through exploration, pillaging, looting, building settlements, and my favorite element through lavish burials for your deceased Leaders. They may have accomplished great deeds in life but if you don’t bury them with gold they aren’t really truly memorable.

Grant: What does a victory look like in the game?

Greg: That is a bit hard to define, as there are many paths to victory, but the most likely path to victory involves settlement income, exploration Victory Points and burial income. If you don’t develop your network of settlements and establish your economy, you will not be able to generate the needed funds to pursue further exploration and settlement and will also not be able to afford to keep your empire going at the end of each turn as you have to pay upkeep on Warbands and Longships.

Grant; What was important to include or model about Vikings in the game?

Greg: Despite the operational/strategic nature of the game, we had to have pillaging and looting or it wouldn’t really be a game about Vikings as this was one of things they are best known for historically and the reason that they were greatly feared in Europe. Just as important (in my mind) was to model the exploration aspects of their seafaring, and this is encouraged by getting Victory Points by being the first to explore various far reaching corners of the map including Russia, Constantinople, Persia and the New World.

Grant: What was your greatest design challenge to overcome?

Greg: The game was too long in its initial versions, and it took some creative editing to chop it down to a more manageable eight turns. It was fun at 12 turns, but just took an inordinate amount of time (6+ hours). I really dislike games that take too long.

Grant: What is the time scale of the game? Why was this important?

Greg: Unlike games about more recent conflicts, the Viking heyday was several hundred years. This was a serious design challenge, but we finally decided on the first two turns being 40 years each <!> and the rest of the turns 20 years each. This sounds crazy, but it actually works, and allowed us to cover the main historical time frame in a playable system.

Grant: What are the different Viking factions in the game?  

Greg: You can have 1-4 players, with the Danes, Norse, Swedes and Geats, an offshoot of the Swedes. Think of the Geats as the Portuguese from Conquistador.

Grant: How do factions gain new Leaders? How historical are these Leaders represented?

Greg: The Leaders in the game are mainly the more famous/notorious of the Viking faction they represent. They arrive on the Turn Track via their historical arrival dates, and depart via the same (most last only a single turn, some survive for two turns.) However, each player may spend silver and purchase temporary Leaders and Explorers if they don’t have one arriving for awhile. Leaders give a bonus in combat, and Explorers give a bonus in seafaring, so they can be significant. Part of the asymmetrical build of the game is map location, but also Leader arrival times. The Danes have early advantage, but the Swedes and Norse are stronger later in the game.

Grant: Can you share a few examples of these leaders with us?

Greg: For example, these are the Norse Leaders. They have arrival/departure turns (which is sometimes the same turn) and the specialized Explorers have the circular symbol denoting that status.

Grant: What is the general Sequence of Play?   

Greg: In general, you receive income, buy units, send out expeditions in turn order, pillage, establish settlements, return home with exploration VP’s, and bury your dead Leaders. There’s more to it than that, but that’s the basic gist of things.  

Grant: What different units types are available to each side?

Greg: The basic combat unit is the Warband. The basic transport is the Longship. The basic “civilian” unit is a Settler.

Grant: How does combat and raiding work? How is it Press Your Luck?

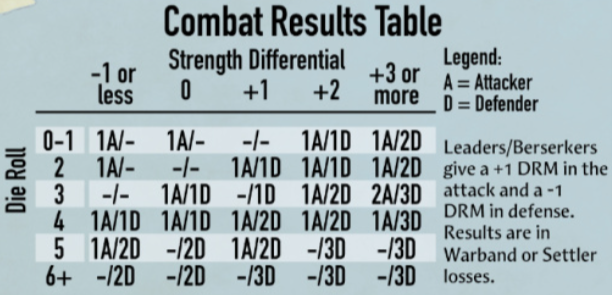
Greg: Combat is mainly a combination of how many Warbands you have, modified by Leaders and/or Berserker chits. There isn’t much of a Press Your Luck aspect to combat (exploration, yes, trading, yes, but combat, no.)  However, there is a CRT so you have to know your odds. Trying to pillage with only a 50/50 chance of success is risky and should be avoided.

Grant: What actions does each player have access to?

Greg: Players have almost complete freedom in what they want to do – but should obviously focus on doing things that earn Victory Points (making silver, or being the first to explore an area and return home to tell about it). Basically, the actions are external trade, exploration, creating settlements, pillaging, raiding, even demanding ransom. Players can send out multiple expeditions even, with the caveat they have to be able to afford it.

Grant: What is the layout of the board? Who is your artist?

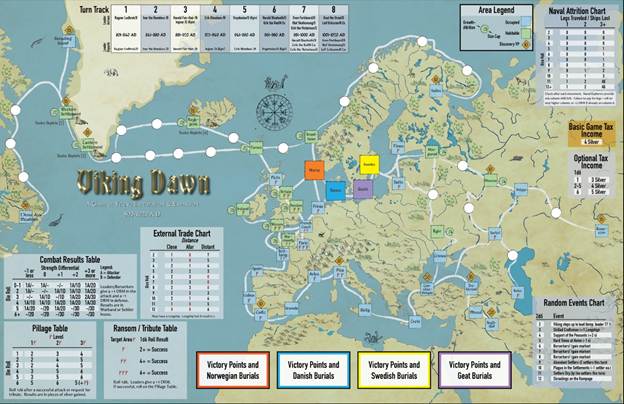
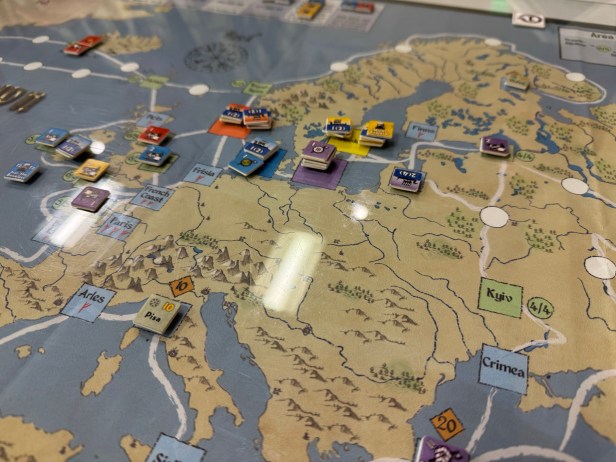
Greg: Here’s the map, being basically most of the places the Vikings went (which was a challenge to show!) Nadir Elfarra, my favorite artist, did the work.

Fun story about the map, I showed an earlier version to my wife, Cindy, and the first thing out of her mouth was “Where are the Sea Monsters???” So we corrected that 😊

Grant: How does trade work? 

Greg: Internal trade happens automatically with your settlements, assuming you’ve paid for their upkeep.   External trade, on the other hand, is a decision the player makes via the External Trade Chart. It requires you to risk a silver and a Longship, and you decide which column to use.

Grant: How are colonies established and how do they grow?  

Greg: If you have successfully pillaged a green (habitable area suitable to be settled) you can drop off Settler(s) if you brought any. Each area has a Growth/Attrition number and also a Size Cap. At the end of each turn, you roll to see if the settlement grows (up to the size cap) or suffers attrition.   Obviously, England has less attrition and a larger size cap than, say, Greenland. One fun problem is that when areas reach their size cap, they roll to break away and become independent from the homeland.

Grant: How does Longship travel work? What dangers are involved?

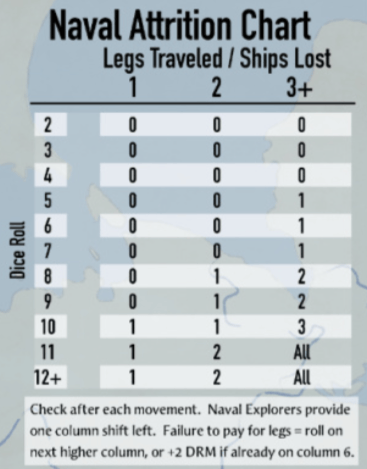
Greg: You may travel a maximum of three legs (each leg being six areas or fraction thereof). This makes the theoretical maximum 18 areas. However, the further you go, the more likely you are to lose Longships and/or your entire expedition. Explorers can mitigate these risks, but there are very few explorers in the game. So there is definitely risk in exploration.

Grant: What type of experience does the game create for players?

Greg; I would like to think of Viking Dawn as a “historical Euro” for lack of a better term. It’s certainly more of a game than an attempt at perfecting simulating all the historical events of the time. Kevin’s fantastic knowledge really helped to make it better historically, and I think it does a really good job of doing a “broad brush” rendering of the Viking age.

Grant: What are you most pleased about with the design?

Greg: I really thought the turn order mechanic made it very tense. Everybody secretly purchases Warbands and Longships, but turn order (a huge advantage to go first early in the game) is determined by who has the most silver remaining after purchases. If you buy a lot, you can do a lot, BUT you’re probably low on silver and going last in the turn. So determining turn order by remaining silver turned out to be a great mechanic.

Grant: What has been the feedback of your playtesters?

Greg: Anybody who knows me knows that I’m my own biggest cheerleader, BUT seriously, we had a great time playing this the last several years at Compass Con. It’s just fun multiplayer, especially when bad things happen. I am very happy with the design, and especially since Kevin McPartland made it ten times better with his involvement.

Grant: When can we expect to see the game released?

Greg: I refuse to answer this question on the grounds I’m never right 😊 but if pressed, I’d have to say early 2027. It’s done and at the printers.

Grant: What other designs are you currently working on?

Greg: I’ve got a few irons in the fire. Solo Banner (Burning Banners dungeon crawler), Western Desert Ace (North Africa WW2 version of Western Front Ace), Soviet Tank Ace, B-52D Linebacker II (magazine game), Gotha Raiders (magazine game), Project Z (Japanese hypothetical heavy bombers 1947), Ground Attack Ace (Stukas and Sturmoviks), Korean Tide (1950-53 Tide Series), Star-Spangled Tide (War of 1812 with Kevin McPartland again), a B-36 game, and a few others. Trust me I’m staying busy!

Thanks as always, enjoyed chatting.

If you are interested in Viking Dawn: A Game of Viking Exploration & Expansion 800-1040 A.D., you can pre-order a copy for $54.00 from the Compass Games website at the following link: https://www.compassgames.com/product/viking-dawn-pay-later/

-Grant

  •  

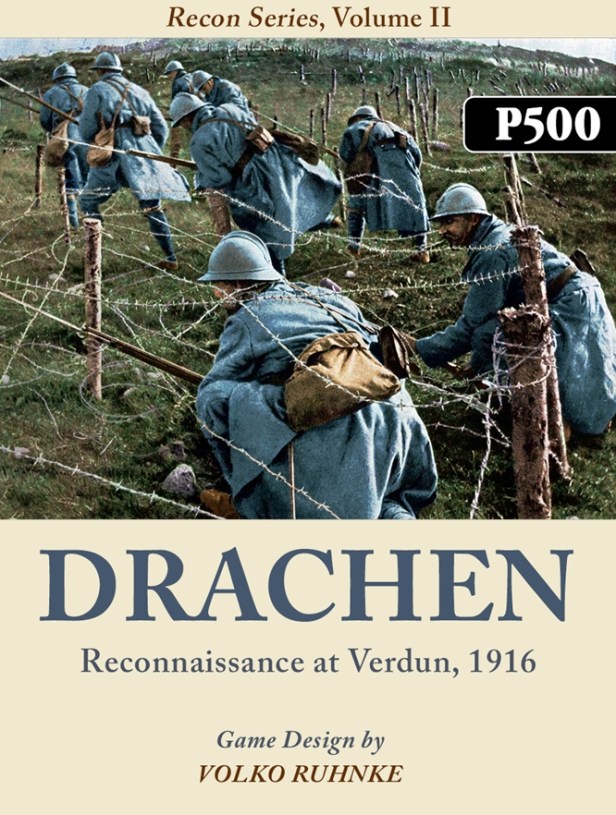
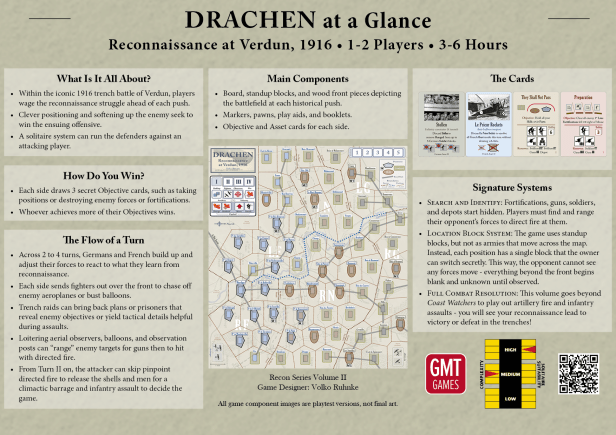
Interview with Volko Ruhnke Designer of Drachen: Reconnaissance at Verdun 1916 from GMT Games

I think that every single wargamer knows the name Volko Ruhnke. He has designed several great series in the COIN Series, that has now stretched to a full 15 volumes, and then more recently Levy & Campaign Series, which has an astounding 5 released volumes with several others that are announced and about a dozen more in design. He can make a good game for sure! One of our first experiences in wargaming and the first Volko design we played was Wilderness War. He is now at it again with a new design in a continuing newer series called the Recon Series that uses hide and seek elements and hidden blocks to tell the story of the Allied intelligence efforts during World War I during the campaigns around Verdun in 1916. The game is called Drachen: Reconnaissance at Verdun, 1916 and looks to be very interesting and we reached out to Volko to get a look into the design.

Grant: Volko welcome back to the blog. What is your new upcoming game Drachen about?

Volko: Hi Grant & Alex! Thank you for this opportunity. I love what you guys do.

Drachen continues my new Recon Series, following on to the series’ recently released first volume, Coast Watchers. Volume II – Drachen – is about the struggle for reconnaissance information in a World War I trench battles, specifically, Verdun in 1916.

Grant: What does the title mean and why did you want to use it for this game?

Volko: “Drachen” means “kite” in German and is simply short for “Drachenballon” – kite balloon. The tethered observation balloons famous as targets for balloon-busting fighter aeroplane missions were really the queens of the battlefield in their ability to see what the enemy was up to and guide artillery fire onto enemy targets. They were in effect hydrogen filled kites in that they faced into the wind for stability. On a clear day, even a windy one, a spotter with binoculars in a kite balloon could provide information on enemy movements and positions up to 15 miles away. Tethered to the ground, unlike observer aeroplanes with either no radio or early transmitters only, balloons had instant and secure communications with friendly headquarters or batteries to coordinate fire.

Grant: This is Volume II in the Recon Series. Why does this subject fit your vision for the series?

Volko: I’m looking for the Series to visit settings in which secrets and their discovery really mattered to the outcome of a conflict. The advent of trench warfare on the Western Front was a remarkable moment in land battle because the age-old means of reconnaissance – the horseman – could no longer roam. For the first time, you would know nothing of the enemy beyond the next ridge unless you got up in the air. We gamers have tended to focus on ace-versus-ace duels in the sky. I wanted to explore what all the dogfighting was really about: winning the right to peer down upon your enemy.

Grant: How has your experience with series games assisted you in the development of this Recon Series?

Volko: OK, that’s a big question! I do try to learn, and I have developed some principles for series design:

1) Openness – Make room for other designers to take the series where you never imagined.

2) Complexity – Bigger is not always better. I wrote about this in depth in C3i Nr29.

3) Variety – Make it familiar, not samey. I wrote about that in C3i Nr30.

Regarding variety within a series, it helps to articulate a focus to guide selection of topics, what you keep the same, and what you vary for each setting.

  • For the COIN Series, that was the premise that counterinsurgency and other popular conflicts were multifactional, that factional relations were key.
  • For Levy & Campaign, it was that medieval warfare was equally complex as modern but in distinct ways, especially regarding command and logistics.
  • For the Recon Series, then, it is that secret information – which side protects it or discovers it better – can decide the outcome, at least for certain conflicts.

That said, for me, principle 1) above trumps the other two. Other designers certainly have taken COIN and Levy & Campaign to places beyond my original intent. I hope the same for the Recon Series.

Regarding “bigger is not better” for Drachen in particular, that meant being sure that Volume II did not just add subsystems like more ornaments on a Christmas tree. Rather, I try to drop something unneeded out for every new thing added in. For example, Drachen gets much deeper into resolution of combat than does Coast Watchers, but then Drachen has a much simpler resolution of who won the struggle: just most of 3 Objective cards fulfilled, rather than Volume I’s “victory point salad”.

To keep Drachen “familiar but not samey”, we keep not only the location blocks and open versus secret spotting but also two chit cups for resolution, for example. Where Coast Watchers has Delivery and Patrol cups, Drachen features Air and Group cups to resolve clashes in…well, you can guess where for each.

Grant: What did you need to make sure to model from aerial reconnaissance in WWI?

Volko: The key historical dynamics that I was able to find and felt were important to incorporate in the game include:

  • The main purpose of fighter aeroplane engagements as clearing the way for friendly observers and countering enemy observers.
  • The difference between just spotting something and being able to loiter long enough to cooperate with guns or take photos.
  • Which observation activity would be known to the enemy and which would be secret.
  • The importance of attrition in aircraft to observation dominance.

Grant: What sources did you consult to get the historical details correct? What one must-read source would you recommend?

Volko: I scarfed up all I could about Great War trench warfare in general, including the nature and use of observation balloons, how aeroplanes cooperated with artillery, the purposes of trench raids, and so on. Naturally, I particularly dug into how things worked in the Battle of Verdun, which was a great learning laboratory for both sides.

My two key secondary sources were The First Air Campaign by Eric and Jane Lawson, which discusses the evolution of air power in World War I and the special juncture that Verdun was in its development, and Alistaire Horne’s The Price of Glory, still for me the best of the several English-language works on the iconic battle.

Grant: What is your overall design goal and thesis with Drachen?

Volko: The design goal is to take apart how reconnaissance worked in trench battles, with the premise that winning the reconnaissance struggle set up the possibility of winning the kinetic part, the fire and assault.

Grant: Why do you feel that blocks and chit pull are the best ways to tell this story?

Volko: Blocks are an age-old but powerful way to manage secret information on the tabletop, without writing or referees. The Recon Series uses blocks in a new way: not as units that the opponent can see massing and moving across the map but as location information about which you start out seeing nothing and have to act to gain any knowledge of.

Chit pull gives me as designer an ability unparalleled by dice to subtly manipulate probabilities – and to give the players abilities to influence those probabilities – in a relatively simple and inexpensively produced way.

Grant: What other mediums did you consider or explore?

Volko: One question was whether to use “record” markers for players to log what they find. The Japanese player in Coast Watchers has such markers on the board as reminders of what is known of Allied blocks that have stood up hidden again.

In Drachen, there is even more to keep track of: various sizes and types of units and fortifications. And some of what players spot they do so secretly. So Drachen provides a record sheet reproducing the battlefield in miniature, but with room to take notes, plus screens to hide that record, if players want to use them. I considered providing record markers to place on the sheet, but the variety of items to spot mean that it would have been a mess, a big pile of counters to sort through – not worth it when a pencil works fine!

Grant: What different units are available to the players?

Volko: Here is a look at the blocks and counters, including the units represented. By the way, no real art exists yet – these are just my homemade prototypes.…

The standup blocks represent the guns, soldiers, fortifications, and depots that fight out the duels between gun batteries and the offensive’s barrage and assault. They build up hidden and are the targets for enemy observation missions. Positioning your hidden blocks will be critical both to make them harder to spot and to get the best use out of them in your plan for combat.

The counters represent those forces carrying out or supporting reconnaissance. They build up openly on the battlefield, except for anti-aircraft emplacements that may be AA sections or just harmless trucks. (Other counters here are markers that support various missions and actions.)

Grant: What is the role of Depots?

Volko: Depot blocks – if they survive unsuppressed – during the offensive resupply guns to fire again or fire at double strength. If the attacker exploits an advance, the depots refill and can again supply guns.

Grant: What are the All Quiet blocks and what do they represent from history?

Volko: “All Quiet” blocks (also nicknamed “trees”) represent just the usual presence of defenses at a side’s positions. So they do not mean empty, rather nothing special to see and shoot at. There are some troops garrisoning the line in what are probably battered trench works, perhaps some wire or field guns. If attacked, at least a few machineguns hidden there will answer.

Grant: What different air assets are available to players?

Volko: The workhouse in the air is the “Air Patrol” – either single or group, the latter more effective but uses up more airframes. Each player has a supply of Air Patrols at their aerodromes (on their mat) and sends them on specific fighter and observer missions or puts them into the Air Cup to add generally to the density of friendly aircraft prowling and protecting the skies over Verdun. Air Patrols suffer loss in action, so you can run out if you don’t manage the air battle carefully, potentially requiring you to recall counters from the cup or the map.

Of course we have balloons too, aloft over friendly positions behind the front line. Enemy balloon-busting fighter missions can destroy them or, more commonly, force them to lower. As noted above, these Drachen are highly effective observers, in the game reaching out to a distance of 4 positions, spotting secretly – you won’t know where your opponent’s balloons are looking unless they range guns in on your blocks – and unlike aeroplane observers automatically succeed in spotting their targets.

On the ground but protecting your balloons and blocks against enemy Air Patrols, you get antiaircraft emplacements – “AA Sections” or dummy “Trucks”. These will make any enemy air missions at or adjacent to them more dangerous. They also occasionally can cause a loss among your own nearby defensive air patrols, representing friendly fire.

The counters for Balloons and AA Emplacements are round to signify that these units can built up, adjusted, and used for free – whereas use of Air Patrols and trench raiders cost actions.

Grant: How are the serial assets used to perform recon? How does this work?

Volko: As reconnaissance and the efforts of fighters to stop it are the focus of the sim, most Air Missions as well as Trench Raids use an articulated chit-pull procedure accounting for a wide range of circumstances.

On the Air Missions table, you can see that we account for the presence of the enemy’s defensive Patrols and AA, how deep behind enemy lines you are flying, whether you are using an Air Group, and how many enemy chits you are likely to draw.

Various Asset cards, like “Boelke & Immelmann”, can further affect these results.

Grant: Why do you feel this is so important to the game?

Volko: Most trench warfare games either focus on the assault by infantry and perhaps tanks or cover the air duels going on overhead. But before those assaults and the barrages supporting them kick off, there would have been a critical period in which the sides were struggling to figure out what the enemy was up to and where they were massed. And that is when most of those aerial dogfights would be going on. Drachen pulls all that together to try to illuminate just HOW reconnaissance got done and would then set the course of a “big push”.

Grant: What is the layout of the game board and the purpose of the different shaped fortifications?

Volko: The game board shows the battlefield of Verdun. Area spaces, called “positions”, each hold a single block hiding the forces or fortifications there.

Terrain is either Lowland, Hill, or Fort – the latter effectively on hills too but tougher to crack. Hills and Forts enable guns on them to shoot a little farther, are harder to take by infantry assault, and often are the very targets that the attacker is assigned to seize.

A road and rail network spans the battlefield. Its effect is to limit where depots can be built up.

Land and Meuse River segments separate the positions. Little wooden stick pieces will mark the front along these segments. Positions group into sectors, such as “Left French”, to guide setup and solo play.

A final feature of the map positions is that some are observation posts. They function much like balloons but with far more limited reach, and they can be suppressed by artillery fire.

Grant: What is the general Sequence of Play?

Volko: In each of between 2 and 4 turns total, each side first builds up forces (blocks and counters). Buildup limits are most lenient on Turn I, so players generally need to set a plan of attack or defense then and just adjust positioning on later turns. On Turn II and thereafter, revealed (face up) blocks hide again (stand back up) unless suppressed by enemy fire or under loitering air surveillance. On Turn III and IV – if the attacker has not yet launched an offensive – the defender receives reinforcement in the form of an added block.

The main part of the turn follows buildup, “Reconnaissance” activity by Fighters then Observers. That includes mounting defensive “Barrier Patrols” and offensive “Jagd” against enemy Air Patrols plus Balloon Busting, then Aerial Observation, Trench Raids, and spotting by Balloons and OPs.

After that, the sides will exchange “Directed Fire” by their guns onto previously “Ranged” targets. Or, on Turn II or later, the attacker can instead launch the offensive that will resolve the game.

Grant: How is victory achieved?

Volko: After the offensive, or after Turn IV in the rare case that the attacker never launches one, Victory depends on who has fulfilled more of their 3 drawn Objective Cards.

Grant: What are the purpose of the Attacker & Defender Objective Cards?

Volko: The simulation premise of the Objective Cards is that reconnaissance is trying not only to discover where the enemy is but what they are up to – what matters to them? Will the attack go for a breakthrough, or are they just trying to pin our forces in place and divert our attention from some other part of the front? Or even less, are they for now just trying to grind down our forces and soften up our fortifications? Is the defender set to hold everything at all cost? Or do they just want to bloody us as we advance?

A second set of questions concerns how big an enemy buildup we are dealing with. The Objective Cards give players more robust forces to carry out the more ambitious task. So that too is an essential element of information that reconnaissance is trying to gauge – what are we up against?

The Objective Cards provide a neat and easy way to set out that secret information. Through recon successes, such as finding out how your enemy’s fortifications or troops are deployed, you can discern what your opponent’s cards may be. And if you invest in trench raiding, your raiders might reveal one or more enemy Objectives for certain.

Grant: What are the various hidden objectives?

Volko: Attacker and Defender each draw 3 cards from up to 9 Objective Cards, most of which are unique tasks hidden from the opponent. Each card not only sets out a task to be achieved but also provides added blocks to that side’s “Reserves” and specifies a number of blocks that the player can build up on the map on Turn I.

One twist is that you don’t have to use a card’s specified forces for that task: the blocks just add to your total available.

A second twist is that particularly successful trench raids can obtain “Plans” that reveal your opponent’s Objective Cards to you: potentially highly useful, as you win not only by achieving your own Objectives but by impeding your enemy’s.

Grant: What different types of these cards are there?

Volko: There is a separate set each for Attacker and Defender. In sets of 3, they go from least to most ambitious/robust, for the Attacker, “Preparation”, “Push”, “All-Out Attack”; for the Defender, “Retrenchment”, “Attrition”, “They Shall Not Pass”. Different scenarios then might limit some of these sets for one or the other side to reflect that stage in the longer Battle of Verdun.

As you can see by the examples, the cards are specific as to their tasks and forces. Generally, the Attacker is either destroy certain defenses, mount strong attacks, or take key positions. The Defender generally is to hold key positions or destroy substantial attacking forces.

Grant: How do players go about accomplishing these?

Volko: A key premise of the game is that reconnaissance success unlocked success of an offensive push. So in the game, you won’t earn VP or whatever for how you run your reconnaissance effort. Rather, knowing what your enemy has where – and “Ranging” those targets for accurate fire by your gun – will set up the combat success that you will need to fulfill more of your own Objectives.

But you will need to add to that skillful positioning of your forces and fortifications to make use of the information that you gather, and then the right decisions when and where to uncover your guns to fire or send your infantry waves into assaults and counter-assaults.

So the game is about reconnaissance but also how that feeds into running trench war combat.

Grant: What challenges does each side face in their objectives?

Volko: Since fulfilling your Objectives flows from how you handle the entire Sequence of Play, they really distill all the game’s challenges. But specific challenges to do with the cards include that the easier tasks come with skinnier forces to fight with, and that you start out unaware of what your opponents Objectives are. That latter can be critical, as even decent performance against the goals in front of you may not be enough to win if your opponent does even better at their secret tasks.

Grant: How do offensives work?

Volko: When the Attacker decides to launch the Offensive, both sides first get to recover some of their suppressed positions. Then each side’s guns, Attacker first, can “Barrage” to suppress enemy positions without needing Ranging by observers, just using more shells. Then each side can “Bombard” Ranged targets to Suppress them more efficiently or destroy them outright (as in the earlier “Directed Fire” phase).

Then players place “Wave” markers to commit where infantry Assaults and counterattacks will occur. For the Attacker, these will attempt to take the defender’s frontline positions. Those get resolved rather simply, including a draw from the Ground cup to give at least some chance for a weaker attack or defense to succeed.

If any such Assault does succeed in taking ground, the attacker may “Exploit” – meaning one more round of Artillery and Infantry combat, usually to try to seize a 2nd-Line position.

Grant: How many players is the game designed for? Is there a solitaire mode?

Volko: Drachen is a 2-player game. A larger number of players, divided into 2 teams, has worked well at the many demos that I have done.

There is a solitaire mode that enables a solo player to take the Attacking side in all the scenarios, whether German or French. It uses instructions and scenario setups found in the Playbook, a “Defenses” display to guide hidden block buildup, and a deck of 18 “Army HQ” Cards to help run Defender actions.

Grant: What opportunities for deception and signaling are there?

Volko: Great question! A point of the Recon Series is to feature not only secret information but both open and secret collection of that information – in part to enhance such opportunities for deceptive signals.

In Drachen, you will have plenty of secret information about which to mislead your opponent. And, critically, you will have potentially or automatically open information that you can transit selectively in order to mislead. Some ideas…in the game, you can:

  • Put a few Soldiers to get spotted where you do not intend to assault, or fortifications that suggest Objectives that you did not draw.
  • Range targets that you cannot actually or do not intend to Bombard.
  • Deploy air defenses in areas that are unimportant to you.

And so on. Circumstances and your imaginings are the only limits!

Grant: What do you feel the game models well?

Volko: I am quite pleased with how the flow of the game models trench warfare’s set-piece buildups, the contest for control of the skies, the danger and importance of busting balloons and launching trench raids, the tit-for-tat artillery duels, including the danger of firing and exposing your batteries too soon, and more. In short, Drachen plays out on the table my mental model of WWI trench battles.

Grant: What are you most pleased about with the design?

Volko: The biggest thrill for me is that the design has held the interest of a talented corps of testers for many moons and many plays – and that it seems to get universally positive reactions at con demos. Ted Raicer has done wonders to bring out the fascinating aspects of the Great War, but even now trench battles don’t get the spotlight among us wargamers that I feel they warrant. And Verdun does not even have British or Americans (outside some volunteer fliers). So I’m proud that Drachen is adding to our hobby’s examination of WWI’s Western Front in between the famous mobile phases of 1914 and 1918.

Grant: What other designs are you contemplating or already working on in this series?

Volko: I already have a playable prototype for Volume III, and it even has seen some playtests. I call it Masher and it is set in Vietnam. Perhaps a topic for another visit here!

Thanks again for this opportunity to talk about the Recon Series!

I think that this new series, and this game particularly, look really interesting and I am all in on the subject matter and the approach. Also, the game offers 8 main scenarios and a solo learning situation spanning German and French offensives within the titanic 10-month Battle of Verdun. I did just receive my copy of Volume I in the Recon Series called Coast Watchers but have not had a change to get it to the table as of yet. I will rectify that sooner rather than later.

If you are interested in Drachen: Reconnaissance at Verdun, 1916, you can pre-order a copy for $79.00 from the GMT Games website at the following link: https://www.gmtgames.com/p-1162-drachen.aspx

-Grant

  •  

Interview with Sam London Designer of Common Sense: An American Revolution, 1775-1783 from GMT Games

In November 2024, while attending the SDHistCon, we sat down with designer Sam London to play his upcoming game called Common Sense (it was originally called Absolved from All Allegiance), which was announced on GMT Games P500 last year. The game is an American Revolutionary War Strategic Level game that uses trick taking and is a struggle over the Will to Fight Track that measures the level of commitment by both sides to the fight. We recently reached out to Sam to get some more details to share about the design and he was very glad to oblige our request.

If you are interested in Common Sense: An American Revolution, 1775-1783, you can pre-order a copy for $58.00 from the GMT Games website at the following link: https://www.gmtgames.com/p-1217-common-sense-an-american-revolution-1775-1783.aspx

*Keep in mind that the design is still undergoing playtesting and development and that any details or component pictures shared in this interview are for prototype purposes and will definitely change prior to final publication as they enter the art department.

Grant: Sam welcome back to the blog. How are your other announced game projects coming along?

Sam: Thanks for having me back! Things are going well. I am hands off on Firefight Tactical at this point. All of the content art is complete and we are just working on things like rulebook layouts. I am very much looking forward to getting it out the door and into people’s hands. Microverse has most of the art complete. I am doing a few tweaks to the bot still to get it to a point I am happy with it, but in truth it is not tracking far behind Firefight Tactical. They both have been wonderful experiences from a development and production stand point and I cannot speak highly enough of the various teams I have worked with at GMT on these games.

Grant: How have you changed as a designer over the past few years?

Sam: This is an awesome question and I am grateful to be asked it as it forced me to do some introspection. To explain I will have to make some references to film making. As I have stated previously I have been designing games for a couple of decades at this point and only started trying to get my designs out there after Covid. The truth is that while this gave me lots of opportunities to refine my design chops, it was ultimately just me learning in a bubble. Coming into the hobby as a designer rather than a gamer, I fancied myself as a sort of auteur designer. For those not familiar with the term in the context of film making, this is an approach to creative endeavor where everything is made to conform precisely to one person’s specific vision. After getting to work with so many fantastic people, decidedly outside of my bubble, I have taken a bit of a 180. While I still own the ultimate vision, I now recognize that the odds that I understand the optimal route to get to that destination are unlikely, and that pretending I do will often result in an inferior game. This isn’t to say that I am going to incorporate every bit of feedback I receive into my designs. It does mean that I am more able to recognize weaknesses in my designs as conceived and solicit feedback from others to get around my blind spots. 

Grant: What specific lessons have you learned about design?

Sam: The big one would be about systems pruning. Most people, myself included, understand academically that design complexity for complexity’s sake is not good. Putting that principle into practice, especially retroactively, is far more challenging. Every mechanism in the game has to serve the player’s enjoyment without making the cost of entry too daunting. This can often mean cutting mechanisms that I am particularly passionate about, but for which I am the sole audience (or close to it). This is especially difficult for me because I consider myself a systems designer, and I virtually always approach the mechanics of a design first.

Grant: What is your newest project Common Sense about?

Sam: Common Sense: An American Revolution, 1775-1783 is a card driven strategic level wargame covering the American Revolution. It attempts to offer a comprehensive view of the conflict, all the way from the battlefield to the halls of the Continental Congress and British Parliament.

Grant: Why was this a subject that drew your interest?

Sam: I always knew I would want to do an American Revolution game. The problem was that I needed a system that would fit my thesis of the conflict. A few years back I was working on a Barbarossa game and every step of the way I was thinking I would rather do that system in the American Revolution. The more passionate I became about that, the more I started to flesh out the system in ways that didn’t make sense for Barbarossa. Eventually that game ended up in the trash bin and Common Sense got my attention instead. I think the American Revolution is such a fascinating subject because it’s a real David and Goliath story. I of course am keenly aware that in reality it was more of David vs Goliath while Goliath is arm wrestling another giant while also trying to solve a Rubik’s cube, but there is still a lot of inherent heroic optimism to that history. Also, everyone loves a good underdog story.

Grant: What is your design goal with the game?

Sam: My design goal for the system was to see how much personality I could give to the belligerents without making their asymmetries require too much rules overhead. We have all played asymmetrical games where you feel like after you read your rulebook you need to read the other player’s rulebook to have a comprehensive understanding of the game. Here, while there are some mechanisms that are specific to each side, the asymmetry is more in terms of each player’s strategic concerns rather than their tools to execute upon them. All of these relate back to this unifying concept of “resolve” which is an abstraction that allows us to relate the varying strategic concerns into a single mechanism.

Grant: How did you focus on creating asymmetry on each side? What are some basic examples of these differences?

Sam: As noted above, I viewed each side in terms of what was unique about their concerns and what was unique about their tools to address them. For the British as an example, they are tremendously constrained by supply. It isn’t just a supply line (though it is that too), it’s a currency they spend to move and battle with units. Obviously historically supply was a concern for the Colonials as well, but it did not hamstring them to the same degree, so the Colonials don’t have to worry about it at all. What’s more, this opens up strategic opportunities for the Colonial player to attack the British in other areas to force the British player to split their limited resources. An example for the Colonial player is Attrition Combat. Each time the Colonials battle in a space they control on their turn, they have the option to resolve Attrition Combat, in which they cede control of that space to the British but as a result can resolve the battle without risking return fire. At the beginning of the game this must be used strategically and sparingly, but as certain key personalities in the Colonial Deck, from George Washington to Francis Marion enter play it becomes far more powerful.

Grant: How does the game use trick taking? Why was this a good choice for your vision of the game?

Sam: I am actually trying to get away from that term, as I think it causes people to think that Common Sense is a lighter game than it is. It invokes pithy card games rather than sweeping strategic affairs played out on a map. The final rulebook will likely make no reference to standard trick taking terms. I chose it as a core mechanism though for a variety of reasons. One I will cover in a future question, but the other reason is because I became very interested in the question of card balance. If I have a card driven game with a variety of card effects, and I want them to vary in their power, they have to be balanced in some way. The most common way this is handled in game design is to make them have a proportionate cost to play using some in-game currency. I was more interested in making the powerful cards more difficult to play. In fact, I wanted to take a step beyond that and say that not only are they more difficult to play, but they are never guaranteed. This gave me a simple way to inject far more personality into the cards and make some have a tangible weight to them when they manage to enter play. “Ha ha, I play King George. You’re in trouble now.” Trick taking was a natural fit for this as the rules overhead for it is comparatively light and the cards come with their own intrinsic value based on the ease with which they can be used to win tricks.  

Grant: What is the makeup of the cards? Can you share a few examples with us and explain their use?

Sam: Each year players will begin their turn with a ten card hand. They can perform a strategic mulligan of up to 5 cards each year. This is not in case a player got a “bad hand” but rather so they can try to postpone getting cards that do not fit their strategic objectives at the start of the year. The year is then played out over a series of ten “clashes” in which the initiative player plays a card face up and then the other player does the same. The initiative player’s card sets the suit for the clash and the non-initiative player must follow the suit of that played card if able. Then the player who played the card with the higher initiative value (ties going to the non-initiative player) resolves their card. 

In this example (all placeholder art at this point in the game’s development by the way), the Colonial player has initiative and plays the Artemis Ward card into the clash who is a 6 value of the Battle suit. The British player then plays Battle of Quebec into the clash which is a 7 value of the Battle suit. Battle of Quebec then resolves.

The British player immediately gains a supply (the orange wagon in the upper right corner). This is a special bonus effect present on some cards. The equivalent effect for the Colonials is to go up on the Continental Congress Track. They now have the option to cancel the resolution of the card to perform any one of their available actions. If they choose to continue to resolve the card they resolve its event first. Battle of Quebec’s event is of the type “special action,” which offers additional effects to the action on the card. In this case, if the Battle action is used to resolve a battle north of the Winter Line, the Colonial player must reroll all their successful hit dice once. The last piece is the yellow star under the Battle suit icon which indicates Battle has “advantage” over the Special suit. This means that if the non-initiative player does not have a card of the clash’s suit to play into the clash, any Battle card will always beat a Special card.

Grant: What different suits are included? What use does each have for players?

Sam: There are three common suits which are universals and one special suit which is player specific. The three common suits are March, Battle, and Recruit. March is used to move armies about the board, Battle is used to fight, and Recruit is used to get more units to fight with. There are asymmetries in how these resolve but the goals of their use are the same, which is why they are considered the common suits. 

Grant: What is different about the Special Suit? How does it benefit players?

Sam: The Special suit is different for a couple of reasons. First all of the actions contained in the Special suit cards are unique to that player. The Colonial player can train their militia units into the Continental Army and negotiate with the French, eventually bringing in and performing actions with French pieces once they enter the conflict. The British player can recruit, move, fight, and raid with Native units and move and battle with the British navy. A lot of the flavor of the two sides are contained in the Special suit. The other thing that is different about the suit is that the Special suit allows you to resolve any combination of these actions. For example a Battle x 3 card allows you to resolve up to three Battle actions. A Colonial Special x 3 on the other hand will allow them to perform a mix of any 3 train and French actions which offers flexibility.

Grant: What is the purpose of the Resolve Track?

Sam: I mentioned the Resolve Track earlier when I was describing how most of the asymmetrical concerns of the players coalesce into a singular concept. The Resolve Track serves three purposes. Firstly, it is the game clock. While the game can end in the event that you completely resolve the year 1783, it will more commonly end when the British and Colonial Resolve markers cross. Each player’s Resolve marker starts on opposite ends of the track and moves towards the other end as they lose resolve. Once they cross, the year is completed and final scoring occurs.  

Grant: How do players manipulate this track? What benefits or detriments does it provide to players?

Sam: This is where the other functions of the Resolve Track come in. The second purpose is that many of the points for determining final score and victory come from the Resolve Track. Finally, resolve has a tremendous impact on both sides’ ability to recruit new units, the Colonials in particular. This is another demonstration of the game’s asymmetries actually, as the Colonials are far more impacted by resolve loss both from a scoring perspective and a recruitment perspective than the British. In regards to how the track is manipulated, common track manipulations only cause a loss of resolve. There are several ways resolve is regained, but they are all due to specific card effects. The British primarily lose resolve by losing British Regulars in battle and by being overcommitted to the American conflict at the expense of their other global conflicts. They can also lose resolve by overusing Hessian mercenaries, who are good and reliable but cost money that parliament is loath to spend. The Colonials on the other hand will lose resolve mostly due to the British seizing control of colonies, Winter Attrition, and failure of the Continental Congress to offer a believable alternative as a governing power to the crown.

Grant: What is dynamic about the initiative system?

Sam: I said I would come back to this when I was describing why I went with trick taking as a core mechanism. Essentially, you are the active (initiative) player for as long as you continue to win subsequent clashes. For the duration the other player is what I would consider a “reactive” player. They still have choices to make of course, for example which card to play into clashes, whether to resolve combat as a siege or not in fortified spaces, how much supply to commit to a protracted battle, etc. The point however is that while by sheer odds you are guaranteed to eventually get your turns in, the duration of the runs of turns is strongly connected to the skill of the player and their familiarity with the game. This is very much a game where a player will become far better after repeated plays. The other cool thing about this is that the events on cards require skill and forethought to combo them together. You may have the thought that if cards A, B, and C resolve in order you will have all but won the game, only to lose the clash for card C and have to pivot. This dynamism does a lot to keep the game fresh and challenging rather than thinking “I have cards A, B, and C so I already know how I will play this out.”

Grant: What different unit types does each player have access to? How does each type benefit them?

Sam: Again pursuing asymmetry I wanted to give each unit type its own character. Each unit has a potency and a resilience but this is just the tip of the iceberg. Militia are able to pop up virtually anywhere and are able fire first in battles where they are the aggressor, but they are poorly trained and can’t leave where they are recruited unless they are picked up by an army. British navies can contribute to naval sieges and amphibious assaults while they are also required end points for British supply lines. French regulars are able to operate as a distinct force while also being able to launch coordinated actions with the Continental Army, offering them incredible command flexibility. British Field Artillery is powerful, but is unable to retreat quickly when the battle is lost, meaning it will be commandeered by the Colonials (and may exchange hands several times over the course of the war). There are also Continental Army, Native Warband, Hessian Mercenary, French Navy, Tory Loyalist, Colonial Artillery, and British Ranger units. Each has its own complement of traits to figure out how to employ them optimally. 

Grant: How does combat work in the design?

Sam: As I have alluded to, there are a variety of special combat resolutions possible like Attrition Combat, Sieges, Naval Bombardment, Raids, and Surprise Attacks. I will just be describing the standard battle procedure here though. Each unit has a number of dice they grant during battles. The British player will have to pay a supply for each unit they want to activate to gain dice this way. Players then roll all their dice simultaneously. Dice come in three flavors, red, white, and blue (see what I did there?). Red dice hit on 3 or better, blue on 4 or better, and white on 5 or better. No matter the die color, a 6 counts as 2 hits. The other player then takes as many dice as they have incoming hits (at this point color doesn’t matter) and rolls them. For each 6 they roll, they discard the lowest die among their rolled dice. They then go from their lowest rolled die to their highest, assigning dice to their units if possible. Each unit has a limited range of dice values they can be assigned which represents their morale. For example, the British and French Regulars are a professional army and so they can only be assigned 1s and 2’s. The Colonial Militia and Tory Loyalists on the other hand can be assigned anything from a 1 to a 4. After all dice have been assigned or there are no more rolled dice that can be assigned to any units legally, all units with a die assigned to them are eliminated. Then, if the resolving card grants additional Battle actions, the initiative player can choose to either resolve another round of battle in this space, or not, potentially beginning to resolve another battle in a different space. If no further battle rounds will occur in the current space, the total number of casualties is compared. If one side took fewer casualties and did not control the space, they gain control of the space. Then, if the side that took more casualties lost at least as many units as half the size of their army (stack), they are forced to retreat from the space.

Grant: What is the British Commitment Check? How does it work?

Sam: The British player uniquely tracks the number of clashes they win each year on their own “British Perception” Track. At the end of the year, they add their current level on this track to the number of British Regular and Navy units outside of the American Colonies available to fight the French and the Spanish. If this total is less than 10, they lose 1 level of resolve for each point of shortfall. This means that if they have run the table the entire year, they are free to overcommit to the colonies, thematically because the optics are good back home. If however they have a rough year, they may have to hold some forces back to avoid the war being cut short by Parliament because opinions have turned against it. 

Grant: What is the Continental Congress Level? How does it work?

Sam: On average, every card in the Colonial deck is one initiative value lower than every card in the British deck. However, every card in the Recruit suit grants the Colonial players levels on the Continental Congress Track. Levels can be spent from the track as cards are played to increase the initiative value of the played card. The problem is that at the end of the year, the Colonial player is expected to have an ever increasing level on the Continental Congress track or they will lose resolve equal to the shortfall. This obligation is an even bigger potential headache for the Colonial player as the Continental Congress isn’t just a track on the board, it’s also a piece on the map. If the Continental Congress is forced to relocate (retreat) because their current space falls into British control, the Continental Congress levels reset to 0. Done later in the war this can be devastating to the Colonial player. Even worse, if the Continental Congress would have to retreat, but it has no valid place to do so since it is surrounded by British Controlled spaces, the Congress surrenders and the Colonial player loses the game outright with no points counted. 

Grant: I have seen where you describe the game as a sandbox. What does this mean and how does it benefit the design?

Sam: I think this can best be demonstrated by the card I showed earlier, Battle of Quebec. Now of course, the Battle of Quebec occurred when Richard Montgomery and Benedict Arnold attempted to siege Quebec City on December 31, 1775. The Colonials suffered heavy losses and were soundly defeated by the elements as well as the British. Nowhere in that card does it specify that the battle needs to occur on a specific date, or at a specific location, just that it must be north of the Winter Line for the event to have an effect. There have been plenty of times in playtests where the card has been resolved in 1775 in Canada, but also many times where it hasn’t. This approach enables me to inject historicity into the game without shackling the player to recreate historical decisions. I think many historical gamers want experiences where they can recreate history, but they are not obligated to do so. Roughly paraphrasing what Gene Billingsley said about the game, “all the events are there, all the major players, and the outcomes, even though potentially very different from history, are entirely conceivable.” Put differently, it’s like the game hands you a toy box filled with American Revolution action figures to play with as you will. There will of course be some players who will miss some rigidity holding them to a more strictly historical course. However, I think this sandbox approach offers an opportunity to sink your teeth into the history and better appreciate the moving parts by seeing the different ways they could have fit together.

Grant: What are some general strategies for both sides?

Sam: From a general strategy perspective things are very historical. The British want a quick war. The fastest way to do this is to take the more valuable northern colonies which will tank the Colonial resolve and secure most of the significant strategic locations. By doing this they can force the Continental Army to suffer brutal winters away from the cities and put enough pressure on the Continental Congress that their resolve rapidly drains and they are forced to surrender. The Colonials want the opposite. They just want to hold out long enough using delaying tactics to organize a proper army, get the French into the war, and retake whatever key fortified locations they ceded to the British in the early war so they can force the British to the bargaining table. 

Grant: What is the layout of the board? 

Sam: Again, this map is placeholder art. The game uses point to point movement, with some spaces representing precise fortified locations and some representing large tracts of land (even entire colonies in some cases). Spaces are grouped into colonies that each have an associated hit to Colonial resolve if they are lost. There is also a British “in Europe” area and a number of tracks tied to the various game mechanics.

Grant: Why did you feel point to point movement was best?

Sam: The only two contenders here were point to point vs area based movement. Given the level of abstraction the system uses, any sort of hexed based representation was never an option. I decided to go with point to point because the game’s focus is really on the narrative more than anything else. An area based map would have forced me to have the visual importance of areas be at least somewhat to scale by the size of the colony. Instead by doing point to point I can give a colony as many spaces and fortifications as are thematically appropriate for the importance of that colony in the actual conflict. 

Grant: What type of an experience does the game create?

Sam: The game is punchy. It is very competitive and intentionally so. You are only able to achieve so much on a given turn, and at the end of each turn you have another clash and a chance for your opponent to seize the initiative. The elation when the other player plays a card out and you realize you can beat it and put out Benjamin Franklin when you thought you weren’t going to get a turn for at least 2 more clashes is fantastic. It also plays very quickly for a game of its weight. Most games between players who know how to play will be under 2 hours.

Grant; What are you most pleased about with the design?

Sam: I would say three things. First, because it’s top of mind as I just finished it, the solo play. I knew how I wanted the solo to feel, but I wasn’t quite sure how I was going to make it happen mechanically. I will be putting out some videos soon showing how it works, but suffice it to say for the moment that I am very pleased with it. Second, every game I design, I design to create stories at the table. If it always tells the same story it isn’t memorable. If there are never any surprises it isn’t memorable. Common Sense succeeds in both of these areas to a tremendous degree. Each time I catch up with a player I have played Common Sense with before they are able to remind me of our whole game by invoking strange or exciting moments from our game a year ago like it happened yesterday. Finally, when I design a new game I generally try to think about what aspects of it are specific to the topic and which could be modified slightly to make it work for other topics. I have my own plans for a Vietnam War version of this system that I am very excited about. What surprised me though was how many great designers have been inspired by the system and want to do their own designs with it. At the moment I am only at liberty to say that Ananda Gupta wants to do a French Revolution game with the system, which is such an incredible honor since Twilight Struggle is the primary inspiration for it. 

Grant: What other designs are you working on?

Sam: I am always working on something. I have a non-historical game I am working on that has been picked up but I cannot talk about it yet. I have a train game that I may be able to talk about more publicly soon and an American Civil War game that I will be debuting at HistCon North. Oh, and I have a Sengoku Jidai wargamer’s party game that I am tooling around with. There are more, but that’s enough of a teaser. Thanks for the interview!

Thank you Sam for your thoughts on your game and for the effort you have obviously put into it. Having played the game while attending SDHistCon ta few years ago, I can say that we had a great time with the game, felt all of the aspects you discussed and very much enjoyed the way cards were played, how the initiative kept with the winner and the various frustrations of the asymmetry of each of the sides. I think that this one will be a winner and I look forward to playing it further in the future!

For a bit more information, we posted a quick video interview with Sam while at SDHistCon and you can view that at the following link:

If you are interested in Common Sense: An American Revolution, 1775-1783, you can pre-order a copy for $58.00 from the GMT Games website at the following link: https://www.gmtgames.com/p-1217-common-sense-an-american-revolution-1775-1783.aspx

-Grant

  •  

Interview with David Thompson Codesigner of Rebels Against Rebellion from Flying Pig Games Currently on Kickstarter

About 18 months ago, while attending Buckeye Game Fest in Columbus, Ohio, we met up with David Thompson to get a quick look at a few of his newest upcoming games at the time including Line of Fire: Burnt Moon from Osprey Games and the very interesting American Civil War game with a twist called Rebels Against Rebellion from Flying Pig Games. I got to play Rebels Against Rebellion and very much enjoyed the game and what it was trying to convey about the lack of support for the secession of Tennessee from the Union as most of the residents of Scott County voted against breaking away during the American Civil War. The game pits the local groups against each other as the Free and Independent State of Scott fights against the local secessionist residents as violent confrontations between Loyalist and secessionist-aligned partisans and outlaws engaged in raids on farms, stealing livestock, and destroying property. Since that time, the game has progressed and has launched on Kickstarter. I reached out to one of the game’s designer David Thompson to see if he would be willing to share about the design and as always he was more than happy to oblige us.

If you are interested in Rebels Against Rebellion, you can learn more about the project on the Kickstarter page at the following link: https://www.kickstarter.com/projects/markhwalker/rebels-against-rebellion

Grant: David, welcome back to our blog. What is your new upcoming game Rebels Against Rebellion about?

Davind: Thanks for having me back! Rebels Against Rebellion is a card-driven war game for one or two players, set in Scott County, Tennessee, during the American Civil War. Tennessee’s own path to secession was messy. The state voted against a secession convention in February 1861, then reversed course and voted to join the Confederacy in June, following Fort Sumter. But East Tennessee never went along with it. And of all the counties in East Tennessee, none rejected secession more decisively than Scott County: 521 to 19. Later that year, the county court went so far as to pass a resolution declaring Scott County’s own independence from the state of Tennessee, calling itself the “Free and Independent State of Scott.” That’s the story we’re telling: Southern Loyalists trying to hold their ground against the Confederate army and their allied secessionist guerrillas, for the whole length of the war.

Grant: What should the title convey to the players?

David: I wanted the title to carry that irony right up front. Rebels Against Rebellion. The people of Scott County were, technically, rebelling against a rebellion by resisting the Confederacy in order to maintain their ties with the Union. History likes to flatten “Rebel” down to one side of the Civil War, but in Scott County that word cuts the other way too. I liked that the title does some of the historical educating on its own, before a player has even opened the box.

Grant: Why was this a subject you wanted to focus on?

David: It’s a story that doesn’t get told nearly enough. We hear a lot about the big battles and the big generals, but the internal fractures within the South (communities that stayed loyal to the Union under occupation, that organized home guards, that got raided by their own state’s army) that’s a different and much more personal kind of Civil War story. I’ve made a habit of chasing these under-told corners of history rather than the well-trodden ones, and Scott County is about as under-told as it gets. Once you learn about Julia Marcum defending her father’s house with an axe, or the Home Guard’s oath at the Huntsville courthouse, it’s hard not to want to build a game around it.

Grant: What are the unique features with the system used for the game?

David: The core of it is a deck that represents both your units and your locations. Playing a card from your hand isn’t just “move a piece,” it’s your people and your settlements acting together. Every location you control is physically a card sitting in your deck, hand, or discard pile, so controlling territory and building your deck are the same action. You don’t have a separate “buy phase” and “map phase.” When you improve control of a location or bolster in a new unit, you’re deck-building in exactly the same motion as you’re expanding on the board. I think that tight coupling between deckbuilding and area control is the thing that sets Rebels Against Rebellion apart.

Grant: What did you need to model regarding the American Civil War and the situation in Scott County, Tennessee?

David: Quite a lot, honestly. We needed the asymmetry between the two sides to feel true to what actually happened. The Loyalists start the game already holding six locations and 11 points, reflecting how entrenched they already were in the county by the time real fighting started, while the Confederates start with nothing on the board and have to earn their presence. We needed the food economy to reflect how much this was a war of resources and raiding: burned farms, stolen livestock, the constant question of how you feed yourself when supply lines are contested. We needed supply lines themselves to matter for Confederate regulars in a way they didn’t for local guerrillas, since regular units like the 43rd Alabama or Morgan’s Raiders came in from outside the county and depended on a route back to it, while home-grown units like the Home Guard didn’t need that at all. And we needed the map’s road, water, and path connections to reflect the real terrain. Scott County’s isolation and rugged geography is a huge part of why guerrilla warfare took hold there in the first place.

Grant: What is your design goal with the game?

David: We wanted a game that plays cleanly as a tight, two-player card-driven war game, and we wanted a player who knows absolutely nothing about Scott County going in to come away from a session with real curiosity about what actually happened there. Every named card, every location, every unit in the game is drawn from the historical record. If the mechanics are doing their job, “Capt. William Robbins” isn’t just a card with shield and gun icons on it. It’s a doorway into a real person’s story.

Grant: What other games did you use as inspiration?

David: The DNA is definitely there from our work on Undaunted, that idea of your deck representing your force on the board rather than being an abstract resource. But Rebels Against Rebellion pushes further into area control than Undaunted ever did, so we were also looking hard at how area-control and card-driven wargames handle territory scarcity and endgame tension. The most obvious influence comes from Martin Wallace’s A Few Acres of Snow, which serves as a the origin for the core concept of playing a location card as the source of movement. A lot of our actual influences, though, came out of the playtesting process itself. 

Grant: What sources did you consult about the history?

David: We leaned heavily on the Scott County Historical Society throughout, especially David Jeffers, Alan Keeton, and James Cecil, who were enormously generous with their research and their archives. On the written side, Paul Roy’s Scott County in the Civil War was probably our single most important source. His overview chapter and his 148-page account of individual Scott County soldiers did a lot of heavy lifting for us. We also relied on Esther Sharp Sanderson’s County Scott and Its Mountain Folk and Scott County Gem of the Cumberlands, H. Clay Smith’s Dusty Bits of the Forgotten Past, Noel C. Fisher’s War at Every Door for the statistical picture of East Tennessee loyalism, Ben Garrett’s Enclave, decades of back issues of the Scott County Chronicle and the First National Bank Chronicle, and the Official Records of the Union and Confederate Armies for the military correspondence. Dr. Stuart Ellis-Gorman did our proofing and copyediting to help make sure we got the details right.

Grant: What did you learn from your trip to this area as part of your research?

David: Back in the fall of 2025 I went to Scott County to meet with folks from the Historical Society and access primary sources that were otherwise unavailable. This trip was absolutely critical to the design process. The men I met at the Historical Society had deep knowledge on the subject, so I conducted interviews with them. They also provided me some of the primary sources I had read about, but could not access without their help (mostly in the form of photocopied versions of printed documents from local authors). My trip to Scott County also gave me the opportunity to visit the area and experience the topography for myself. 

Grant: What are the differences between the playable factions of the Confederates and the rebels?

David: Thematically, the Loyalists are defenders who start the game already dug in. They begin with six locations and a head start on the scoreboard, and their whole arc is about holding what’s theirs and expanding cautiously outward. The Confederates start with nothing on the board and have to fight for every location, but they’ve got the raw power to do it: bigger regular units, the ability to bring in outside firepower, provided they can maintain a supply line back to where those units are actually based.

Grant: How did you differentiate them in their mechanics?

David: A few ways. The Loyalists have much more extensive access to the Improve Control action, which allows them to place a second control marker into a location for an additional victory point and card benefit, while a couple of key Loyalist locations, Brimstone and Trammell’s, double as both a location and a unit card depending how you want to play them that turn. The Confederates, on the other hand, get access to harder-hitting regular army units, but those units can carry a supply line requirement, so playing them isn’t as simple as just having them in hand. You need an unbroken road connection back to their origin. It creates a real asymmetry: the Loyalists play a tighter, more efficient game, while the Confederates have more raw strength but have to work to unlock it.

Grant: How does the game use cards?

David: Cards do double duty as your units and your locations, and every card you play resolves a specific action before it goes to your discard pile. Food is the one shared resource, but everything else, from combat strength to your area-control footprint, lives directly on the cards moving through your deck.

Grant: Can you show us a few examples and explain their use?

David: Sure, take the Home Guard. It’s a Loyalist unit card linked to Huntsville, and if you upgrade it, you get an improved version with better combat value. Or take Chitwood’s, a basic location card: play it for its Take Food action to add to your supply, or play it to Move into an adjacent location, which is how you expand your territory or launch an attack. And then there’s Brimstone, which starts as a plain location card but can be improved into Capt. William Robbins. At that point it’s simultaneously the location and a combat unit, with its own attack value and shield icons, giving you flexibility about how you use it depending on what your turn needs.

Grant: How do the cards upgrade or power up?

David: There are two upgrade paths. Improve Control takes a basic location card, has you pay food, and swaps it for its improved version, which usually comes with better attributes and, for a couple of key locations, unlocks a linked unit. Improve Unit works the same way for unit cards directly. You pay the listed food cost, and the improved version replaces the original in your discard pile while the old card goes out of the game for good. Either way, you’re not adding new cards on top of old ones. You’re replacing weaker cards with stronger ones, so your deck gets more powerful without getting bigger and bloated.

Grant: How important is this to the design?

David: It’s central. Deck quality, not just deck size, is what wins you the game, and the choice of when to spend food on upgrading versus expanding onto the board versus bolstering in new units is the core tension every turn. 

Grant: What is the layout of the board?

David: The board depicts Scott County and its surrounding area, with locations connected by roads, water, and paths. Each connection type governs how many cards you can commit to an attack moving along it, from one card on a path up to three on a road. Locations within Scott County proper are marked in brown; locations outside the county, like Somerset, Jacksborough or Jamestown, are marked in grey and generally serve as Confederate staging points and supply origins. Each location shows its star value, which doubles as its point value and its food cost to take control, along with any food production and, for locations that can be improved, their upgraded attributes.

Grant: What is the anatomy of the counters?

David: We use control markers rather than traditional counters. One per location per player, showing who currently holds it, with some locations (mostly limited to the Loyalists) able to carry a second marker once improved. The real “unit anatomy” lives on the cards themselves: name, faction affiliation, attack and defense attributes, a linked location, an improvement cost, and icons indicating whether the unit returns to its supply or is removed from the game entirely after a successful attack.

Grant: How are units activated?

David: You activate units by playing their card from your hand as part of a Move action or in response to an attack. There’s no separate “activation phase.” A unit card played in combat commits its attack or defense value to that fight; the same card, played on its own, might instead trigger a Bolster or Improve Unit action. Context and the icon panel on the card tell you what’s legal in the moment.

Grant: What is the general Sequence of Play?

David: Turns alternate, Confederates first. On your turn you play cards from your hand one at a time to take actions, resolving each fully, including paying food and playing any additional required cards, before moving to the next, and you can stop whenever you like. Once you’re done taking actions, you discard down as much as you want from what’s left in hand, then draw back up to a five-card hand, reshuffling your discard pile into a new deck if you run out.

Grant: What actions are available to players?

David: Take Food, Improve Control, Bolster, Improve Unit, and Move, which is also the action that triggers combat if you’re moving into a location your opponent controls.

Grant: How does combat work?

David: Once you move into a contested location, the attacker plays one required combat-eligible card face down, and the defender either matches with a card of their own (up to a maximum of two, since they can also commit the target location’s own card) or passes. This goes back and forth, both sides adding cards until they hit their limits or choose to stop, with the attacker’s ceiling set by the connection type they’re attacking along. Everyone reveals at once: the attacker totals their attack icons, the defender totals their defense (and any dual-purpose attack icons used defensively), and the defender wins all ties. Win as the attacker, and you strip your opponent’s control marker, shift points in your favor, and get the option to immediately take control as a follow-up action.

Grant: How is victory achieved?

David: You’re racing toward one of a few thresholds: reach 20 points while your opponent sits at 10 or fewer, or simply hold more points than your opponent once the game’s light-colored food tokens run dry and it tips into sudden death. The Confederates have a separate, blunter win condition too: if the Loyalists ever lose every control marker on the board, the Confederates win outright. And if the very last food token, one of the ten darker ones, gets taken, the game ends in a draw, so there’s a real, ticking clock underneath everything you do.

Grant: Who is the artist and how does their style assists in thematic immersion?

David: Kwanchai Moriya handled illustration and Jina Rueter handled graphic design, and I couldn’t be happier with how it came together. Kwanchai has this warm, painterly quality that makes Scott County’s mountains and creeks feel lived-in rather than just decorative. It goes a long way toward making cards like Capt. William Robbins or Julia Marcum feel like real people from a real place rather than generic Civil War stand-ins. Jina’s layout work keeps the cards (action icons, attributes, linked locations, improvement costs) legible at a glance, which matters enormously in a system where you’re constantly reading your hand.

Grant: What type of experience does the game create?

David: Tense and personal. Because the map is so tightly connected, and because food is always ticking down toward sudden death, every attack matters and every food token spent is a decision you feel. It plays fast for a war game, but it doesn’t feel light. The historical grounding and the asymmetry between a scrappy, entrenched Loyalist defense and a Confederate side that has to earn its foothold give it real dramatic shape.

Grant; What are you most pleased about with the design? 

David: I’m just happy that we had such an amazing team come together to work on this game. Trevor and me from a design perspective, Kwanchai and Jina bringing the game together through their illustration and graphic design, with Denver at Flying Pig Games leading the way. It was a dream team for this project that I am so passionate about. Of all the games I’ve worked on recently, this is the game closest to my heart. I just want to spread the word about these amazing people who fought for what they believed in. 

Grant: What other games are you currently working on?

David: It’s a busy stretch. Alongside Rebels Against Rebellion, I’ve got Night Witches coming, co-designed with Liz Davidson (Fort Circle Games); two expansions for Sniper Elite with Roger Tankersley (Rebellion Unplugged); Flintlock!, a Seven Years’ War and French & Indian War game built on Paolo Mori’s Blitzkrieg! System, also with Roger (Floodgate Games); For the Gods!, co-designed with Trevor and Brett J. Gilbert (Mighty Boards); Zheng He, co-designed with Geoff Engelstein (GMT); and Undaunted 2200: Revolution, co-designed with Trevor (Osprey Games). There are some others on the way, but those are further off…

Thanks as always for having me!

As always, thank you so much David for your time in answering our questions and for showing me the game about a year and a half ago. I very much look forward to playing the final product and wish you well with the Kickstarter campaign.

If you are interested, we did an interview video with David while attending Buckeye Game Fest in the spring of 2025 and you can watch that at the following link for more information on the game:

If you are interested in Rebels Against Rebellion, you can back the project on the Kickstarter page at the following link: https://www.kickstarter.com/projects/markhwalker/rebels-against-rebellion

-Grant

  •  

World Boardgaming Championships 2026 Daily Debrief Series – Day 2

Day 2 dawned early with me getting up at 6:20am due to the sunlight beaming into our window as we had not carefully drawn the blinds together tightly. We got ready and left the room fur breakfast and arrived in the Winterberry Room at 8:30 ready to dive into the Grand Tactical Series.

As we approached the table, I was absolutely blown away by the size and scale of it and the multiple boards laid out on it with plexiglass and secured with binder clips and tape. The boards combined measure 17’ of wargaming good and include The Devil’s Cauldron: The Battles for Arnhem and Nijmegen and Where Eagles Dare: The Battle for Hell’s Highway from Multi-Man Publishing.

The game state is actually a continuation of a game that started at WBC last year. Joe and Matt took pictures of the game board and also of each of the formations and their position from last year’s game and had set it up in that state to play over the next week.

Here is a look at those carefully taken pictures. Such detail and care given to the game. How am I not going to love this experience?

There were a total of 6 of us playing the game and we were loosely assigned a few formations to be in charge of. Actually we were told we were in command and were to make plans and then discuss those with the CIC’s to get approval and then execute that plan. A lot of autonomy and ability to go about it individually.

Over the span of 10 hours we played and finished the 0700 and 0800 turns for September 19th. This system is very fun and crunchy but also involved. When attacks are made there is very structured procedure but that isn’t overly complex. Company bonus checks initiate the action and the player will have to roll less than or equal to their troop quality number to gain a +2 to their combat value. Typically this troop quality ranges from a high of 7 to as low as 2 for artillery. Once completed, this bonus is added to their combat factor and then is reduced for the terrain defensive bonus and any defense shown in the enemy counter. Typically you are targeting following under a 7 for good units and a 2 for lesser units. Sometimes these modifiers make it so only a roll of a 0 on a d10 will hit. A 0 is not a 10 in this game. But there is always a chance. Hits are then referred to the CRT which uses the rolled value to refer to the type of Fire to determine results. Types of Fire include indirect, HE or small arms and results include a Cohesion Hit, with multiple Cohesion Hits leading to step losses, step losses of 1, elimination or suppression. There is also limited opportunity fire and assaults that require a bravery/morale checks. At first it seemed over the top but once I picked it up was really fairly simple.

Activation is chit pull and works very well. A formation activating gets to do something with each unit but then can spend Command Points to take additional moves or attacks. Just a very solid system that reminds me a lot of the Company Scale System also designed by Adam Starkweather. The system focuses heavily on how well division and regimental HQ’s can coordinate their sub-units and handle combat stress. I liked it very much and look forward to playing a few more hours tomorrow before moving into some other games.

I also wanted to show off the ingenuity and commitment of these Grognards and their setup for GTS.

First off the lighting. They have light poles that provide above the board light which makes a huge difference in visibility of the game and its counters.

They also have magnetized the chits and when they are drawn are posted on a board for all to see who has activated and who is up. There are chits drawn early but that are hidden on the board to allow for the next player to begins planning to speed game play.

The table they use is also custom made and is modular to fit the various games in the series. The bases are sturdy and they appear to be solid but are assembled quickly.

They use 1/4” thick plexi that is quite thick and has somewhat of a magnifying effect. It is very well done and made playing the game more enjoyable.

While playing, there was another nearby big in-design East Front wargame being played by Antony Birkett, Chip Saltsman and Curtis Baer. If you didn’t know, all 3 have been involved with, designing and developing several volumes in the Operational Combat Series from MMP. Tony has designed several volumes including The Third Winter, The Forgotten Battles and Crimea.

The system is called the Operational Warfare System and its first game is called After Stalingrad designed by Antony Birkett. Think modern mechanics being brought to the Operational Combat System in Tony’s words.

The system is focused on maneuver and command and control and uses HQ’s with different amounts of Action Points used to activate units. The game play is back and forth and interactive and it was said there is little downtime. They hope to use this system to tell the study of other WWII battles in North Africa, the Mediterranean and Western Fronts, as well as the tried and true East Front.

The fame has been in designer and development over the past 6 months and is being made ready due extensive play testing. They are currently shopping the design to publishers and hope that it is published in 2027.

I was able to shoot a 15 minute interview with these guys and had some really good discussions about their goals with the game and the system highlights.

I also met at different times of the day several fans of the channel. I met 2 first time attendees this year who both watch our videos named Jason and Bill who were both class acts.

Jason.
Bill.

This is probably a bit personal but Bill told me that our videos helped during a time when his now deceased wife was sick and he was in a dark place. That was very touching to me and I appreciated that we somehow assisted him through that difficult time.

That was it for Day 2 and I’m actually going to get to bed tonight by 10:30pm. Tomorrow, we have more GTS and I also sit down with my friends Gregory M. Smith and Kevin McPartland to look at their projects and play some games. Both of them are providing us with a “scoop” and I’m excited about what I might get to show you.

See you tomorrow!

-Grant

  •  

Interview with Akar Bharadvaj Designer of Chalice of Poison: The Iran-Iraq War, 1980-1988 from GMT Games

We met Akar Bharadvaj while attending SDHistCon in 2023 and played his award winning design Tyranny of Blood: India’s Caste System Under British Colonialism, 1750-1947 and very much enjoyed the experience and talking with him about game design. Since that time, he has been working on another designer called Chalice of Poison: The Iran-Iraq War, 1980-1988 from GMT Games, which was announced in March on their P500. Chalice of Poison is the first volume in a new series that models complex conflicts not only as clashes between adversaries in the air, land, and sea, but also as political struggles within the regimes and military forces fighting it. We reached out to Akar and he was more than willing to share.

*Keep in mind that the design is still undergoing playtesting and development and that any details or component pictures shared in this interview are for prototype purposes and will definitely change prior to final publication as they enter the art department.

Grant: Akar welcome to our blog. First off please tell us a little about yourself. What are your hobbies? What’s your day job?

Akar: Thanks, Alex and Grant! It’s great to be here. I live in sunny Arlington, Virginia, just across the river from our nation’s capital. Besides board games, I enjoy travel, museums, graphic design, bad movies, comedy shows, and nice meals. As for my day job, I work as professional wargame designer. I work on teams that make analytic games and tabletop exercises to help policymakers think through challenging issues related to international relations. That said, Chalice of Poison is solely a personal project, and does not reflect my day job or the views of my employer.

Grant: What motivated you to break into game design? What have you enjoyed most about the experience thus far?

Akar: I’ve always enjoyed board games since I was a kid, and have gotten into historical games in the last 15 years or so. I flirted with the idea of designing my own for years, but then I actually decided to design one in 2020 when I heard about the Zenobia Award, which is a competition and mentorship program for historical games on underrepresented topics. I was looking for a good project to distract me from the ongoing pandemic, so I entered the contest on a lark, not expecting it to go anywhere. But Zenobia did a great job of helping me walk gradually through the game design process, and before I knew it, I was hooked. When the award project finished, I learned that I had won first place. But more importantly, I had discovered a new passion.

My two favorite things about game design are the creative process and the people. I find the creative process immensely satisfying. I get to analyze systems, experiment, and iteratively solve problems and improve a process, and there’s few consequences to failing! If I find that a design doesn’t work, I can just move on to another one, and hopefully return at some point in the future. It’s a beautiful process, and one that actually feels a lot like playing a game.

I also love the people I’ve met through game design. I’ve made lots of designer friends through various cons, and it’s always a delight playing games with them, talking about game design, and just chatting. I always leave cons full of inspiration and ideas, and it’s largely due to all the great people in this field.

Grant: What was it like winning the 2021 Zenobia Award for Tyranny of Blood? Where does this game stand at the present time?

Akar: Winning the award was one of the greatest moments of my life. As I mentioned earlier, I started designing the game just to see what it was like, and I didn’t expect it to go anywhere. (If I knew there would eventually be interest, I would’ve designed a simpler game as my first one!) So, I was pleasantly surprised when I learned that I won, and was excited at how much interest it received.

For those who do not know, Tyranny of Blood is about changes to the Indian social structure under British colonialism, through the lens of the caste system. I designed a fully playable game during the Zenobia Award process, but like so many first designs, it had a bit of a “kitchen sink” approach, and had far too many layers placed on top of each other.

I realized that the game had lots of great elements, but it had some flaws at its core, and so I needed to redesign lots of it. The topic is a difficult one, both ethically and in terms of complexity, so I needed to get the game right to do justice to the subject matter and avoid creating something offensive. On top of all that, the rapid prototyping during the Zenobia process left me exhausted (in a good way). So, I decided to take a break from it, and work on other games in the meantime to improve my game design skills before I can return to Tyranny. Now that Chalice is in development, I can return to that project. That said, it’s been a while, so I need to read through my notes and remember all the nuances of the topic.

While attending SDHistCon in November 2023, we played Tyranny of Blood with Akar and had a great time. We shot the following video interview at the time and you can watch that at the following link:

Grant: What is your upcoming game Chalice of Poison about?

Akar: Chalice of Poison is about the Iran-Iraq War, which took place in the 1980’s. The game focuses on the interplay between external conflict and internal regime stability. You play as one of the two countries, and you are trying to improve your military effectiveness so that you can win the war, without making your military so effective that it becomes a threat to your own regime. Players can win the game if they capture certain objectives in the war, or they can lose if their regime collapses due to political challenges.

The actual combat resolution and prosecution of the war is only one part of the game; the other part is managing your regime and ensuring it does not fall to internal threats, whether that be generals who instigate a coup d’etat or dissident groups fighting against your government. 

Grant: What should the name convey to players about the history of the Iran-Iraq War?

Akar: The phrase “chalice of poison” comes from a quote from Iran’s then-Supreme Leader Ayatollah Ruhollah Khomeini. When he signed the ceasefire agreement in 1988 that ended the war, without any major concessions despite all the bloodshed, he described it as “more deadly than drinking from a chalice of poison.”

Additionally, I found the evocative phrase to be an appropriate name for a game about accepting risk and making sacrifices to achieve objectives. The game is full of hard decisions that seem enticing at first, but end up doing internal damage.

On a lighter note, ever since Tyranny of Blood, I’ve been trying to give each of my designs a name that sounds like a heavy metal album.

“Taking this decision is more deadly than drinking from a chalice of poison.”
~ Ayatollah Khomeini, on accepting the ceasefire that ended the Iran-Iraq War

Grant: What is the new series called? What type of games might be included?

Akar: I haven’t been able to find that perfect name yet, despite coming up with a long list of ideas. So, the series doesn’t yet have a name. If anyone has an idea, I would love to hear them! Please sound off in the comments.

The system best models historical conflicts where major dynamic changes occurred within the halls of state power and the military command structure, rather than with territorial exchanges on the battlefield. So, future games in the series could model other conflicts where weak states fought each other while dealing with significant internal tensions. There are no shortage of those throughout history, from the modern Middle East to 1960’s Vietnam to Ancient Rome.

Grant: What games have you used as inspiration for your design?

Akar: I tend to prefer historical games that include strong political dynamics over straightforward wargames. So, a major point of inspiration has been the Great Statesmen Series, to include Congress of Vienna, Versailles 1919, and Churchill. Those games do an excellent job of demonstrating the interplay between peace negotiations and warfare, and it inspired a lot of the ideas I had about war being played in two phases, and how the two interact with each other. Instead of the connection between fighting war and negotiating peace, I focused on the connection between fighting war and improving military effectiveness. From a purely user experience perspective, I enjoy the tactile feel of placing cubes on cards that was in Versailles 1919, and the mechanic seemed to work well in this game.

Additionally, the war mechanics are loosely based on the States of Siege Series, though with a lot of complexity added. That system offers a simple push-pull model for combat, which I employed for a 2-player tug-of-war. I needed a fairly simple mechanism at the core, so that I could layer many other mechanics on top of it without overwhelming players.

Lastly, one of the solitaire modes is inspired by Mark Herman’s Peloponnesian War, a genius solitaire game where players face off against a bot, but if they begin to defeat the bot by too much, they then switch sides and have to fight against everything they set up in previous turns.

Grant: How have you used and followed the academic research of Dr. Caitlin Talmadge?

Akar: Dr. Talmadge’s 2015 book The Dictator’s Army explores the question of why some authoritarian regimes, especially so-called “strongman regimes,” are ironically so bad at fighting war. Her research delves deeply into 2 case studies: Iran versus Iraq, and North versus South Vietnam.

Her argument is that the factors that reduce the threat of coups also reduce military effectiveness at fighting adversaries. The ideal military promotes based on merit, trains troops robustly, incentivizes open and honest communication, and empowers junior officers to improvise within reason. Conversely, strongman regimes tend to do the opposite: promoting based on sycophancy, avoiding training, incentivizing lies and secrecy, and making all decisions through an inefficient centralized command structure. These traits help dictators feel more secure, but they make militaries less flexible to deal with changing circumstances.

This argument underpins the core argument of Chalice of Poison. The main thrust of the game is reforming your military to improve each of those four factors, but at a cost to your own political power.

Grant: What is important to model or include in a game about the Iran-Iraq War?

Akar; A game on the Iran-Iraq War needs to provide a very specific incentive structure, by which players feel the hubris of thinking a quick victory is possible, but also a deep sense of desperation when things go poorly. It also requires mechanics for dealing with internal stability within each country, and being able to affect stability in the adversary’s country. Lastly, such a game must afford players the latitude to take a wide variety of actions; the story of the Iran-Iraq War is two countries quickly falling into a stalemate, and then experimenting with a large number of strategies and unsavory steps to break the stalemate and achieve victory.

Grant: What challenges did you encounter in the design? How have you overcome them?

Akar: I had to design the game carefully to reflect some misperceptions that the actual historical figures had. We know now that the Iran-Iraq War was an enormous catastrophe for both countries, but the game had to give players some false hope that the game could end at any turn. As such, I had to implement a variable game length, with victory conditions that contract as the game progresses. I had to pace the game well so that players always feel like they’re on the verge of victory (or collapse), and I think the game is nearly there.

The early iterations for the game were very mathy, with a lot of dice roll modifiers and additions to provide bonuses for military reform. It wound up not being fun; either players would have their eyes glaze over due to the excessive math, or they would try to calculate every little decision and descend into analysis paralysis. Instead, I replaced all the bonuses with card play mechanisms, which thematically worked, because it gave players more flexibility to deal with bad situations. I replaced most of the math with a simple card color-matching system.

The game has a unique action costing system that requires players to push their luck, carefully budgeting their political power or else risk losing it all (and the game). I learned that most players instinctually spend their full action allotment, so if I give them 10 points, they want to spend 10 points! So, I had to add in some “brakes” to stop new players from losing the game immediately.

I had 2 additional in-game challenges that I needed to solve. One was how to depict the more unsavory aspects of the conflict, such as chemical weapons and human wave attacks, which were historical atrocities, but necessary to tell the story of this conflict. Typically, a game would have a penalty or cost for doing such things, but in the actual historical case, neither country actually suffered a penalty for these actions until well after the war. Additionally, I needed to balance the game a bit more, to give the losing side a chance. I quickly realized that both of these challenges could actually solve each other. I created a “Desperate Measures” mechanic that allows the losing side to catch up a bit, but at a moral cost.

Grant: What is the scale of the game? Force structure of units?

Akar: The game plays at the political and strategic level, so it is pretty abstract. It models the conflict along up to six fronts: the air, three or four different ground fronts, and the naval front. Each one has an abstracted military strength represented by zero to six wooden chevrons. Each side has one air force, one navy, and three different ground forces: the elite guard, the regular army, and the paramilitary. Each of these five forces has a commander in charge of it. That is as complex as the game’s force structure gets; it does not model more specific units or officer ranks.

Grant: What is each player’s overall goal in the game? What does this mean?

Akar: Each player is trying to win the war while preserving their regime.

Winning the war means capturing a certain amount of territory. Most spaces on the map contain stars representing the relative importance of that space. A player advances on the War Progress Track one space for each star captured. Additionally, the War Progress Track includes an Objective counter that starts at 10, but decreases as the game goes on, representing war-weariness and a reduction in expectations for what players define as “victory.” If a player’s War Progress meets or exceeds the current Objective, that player wins the war (and the game). Of note, a player can potentially win even with zero points, which reflects what happened in real life.

Preserving the regime means holding onto political power cubes within the Regime pool on the board. If the Regime pool has zero cubes in it, the player’s regime falls and that player loses. Cubes move out of the Regime pool when players reform their military, improve their commanders, face problems with dissidents, or fight against a coup d’etat. The fewer cubes in the Regime pool, the higher the risk of internal problems erupting.

Grant: How do players go about developing a professional army that values competence and skill?

Akar: Players start with a “coup-proof” military that is pretty ineffective at fighting, but they can expend political power, and thereby accepting risk to their regimes, to make reforms. 

Grant: What actions are available to players to reform their military?

Akar: Players have four major actions they can take. They can coordinate to allow commanders to communicate openly with each other and their underlings, empower their forces in the field to make decisions for themselves, promote commanders based on competence instead of personal loyalty or family ties, and train existing commanders to be better at fighting. Each of these actions has four different levels; players can upgrade the actions to improve their effectiveness, but at a cost of political power.

Grant: What are the costs of this process? How do players manage these threats?

Akar: The costs of each action comes in political power cubes. Each action starts at level zero, which does not cost anything, but is not very useful. Players can make reforms, which essentially upgrades each of these actions one step at a time, up to level four. Upgrading to a higher level requires placing that number of cubes on that card. Actually taking actions usually has an additional cost in power cubes.

Players need to “push their luck” to best achieve reforms gradually. Doing too much too fast is a recipe for disaster. Players can spend a large number of cubes each turn, but they will not necessarily get them all back at the end of the turn. Reforming too quickly can threaten regime stability. To protect against these threats, players will need to go slow, keeping enough political power behind to stabilize their regimes, but inaction can also be risky if it means losing the war.

Grant: What is the Turn Sequence?

Akar: The game has up to 9 turns, each representing a year from 1980 to 1988. Each turn has 4 phases:

  1. In the Planning Phase, players issue hidden orders for six fronts to carry out this turn.
  2. In the Action Phase, players reform their militaries so that they can improve the likelihood that these orders are successful.
  3. In the Battle Phase, players resolve orders, change territorial control, fight dissident groups, and learn lessons for future battles.
  4. Finally, in the Unrest Phase, players face internal threats, to include popular outcry, dissident groups, and coup attempts.

Grant: How are hidden orders issued?

Akar: Each front has a space for an order tile, which players place face-down during the Planning Phase, so that they are secret from the other player. Each order tile has four options, which are chosen by how players rotate their tile:

  1. Attack allows players to start a battle against the adversary, and to advance into their territory if they have a stronger force after the battle.
  2. Defend allows players to fight against an attacker at an advantage, and to bring in a small amount of reinforcements, but does not permit advancement.
  3. Subjugate (Air and Ground only) allows players to fight a battle against dissidents.
  4. Attack Tankers (Navy only) allows players to threaten the adversary’s political power.
  5. Regroup allows players to bring in a large amount of reinforcements, but not to fight in any battle that occurs.

Air and Naval forces have one order tiles each, but Ground forces have three different order tiles, representing the three different ground forces in the game: the Guard, Regular Army, and Paramilitary. The more elite the ground force, the earlier it gets to execute its order and deal damage, which gives it a slight advantage in combat.

Grant: How is combat handled?

Akar: Combat strength is a function of 3 different factors:

  1. The Order tile, which represents orders from on high, determines whether a battle occurs, and if it does, which order the forces use to deal damage.
  2. The Commander card, which represents high-level military leadership, determines the damage the front will do that turn. Each commander has a hit value for each of three battle suits: Fervor, Discipline, and Leadership.
  3. The Battle card, which represents forces in the field, determines which suit on the Commander is used to deal hits on the opposing force. A new Battle card is drawn during each battle.

For each hit defined in the previous step, players remove one military strength, represented by wooden chevrons, from that front. If an attacking front is stronger than the opposing front, it may advance and capture enemy territory, for some bonuses.

In each battle where one side deals more damage than the other, the active Commander learns a lesson about how to fight, which changes his stats. Of note, not every lesson is a good one; some lessons can actually make the Commanders worse at fighting; for instance, if it makes them complacent or arrogant.

Grant: What elements of unrest confront the players? How do they handle these challenges?

Akar: Unrest comes in 3 forms, during the Unrest phase:

  1. Public outcry occurs if a player does not attack in a given turn. This removes a political power cube from the game.
  2. Dissidents represent groups that threaten the regime’s power. The strongest dissident group on the map each turn has a massive negative effect, the second strongest has a moderate penalty, and the other three have a slight penalty. If left unchecked, the dissident groups can cause major chaos, but any troops dedicated to fighting dissidents are necessarily not fighting the adversary, so balance is important.
  3. Coup attempts may break out if a commander has more political support than the regime. Each commander has a number of cubes on the card, which corresponds to his risk to the regime and typically corresponds with his competence. If a commander (or a group of commanders allowed to coordinate) has more cubes than the regime, a coup attempt may break out, and then the player will have to fight battles against the rebellious commander(s).

Grant: How does the design use cards?

Akar: The game has 4 types of cards:

Action cards allow players to choose from among four different military changes each turn, as listed above. Players can “reform” or upgrade these actions to have more of an effect, at the cost of political power.

Personnel cards represent the major figures involved in the conflict. They are dual use cards:

  1. When horizontal, they are Commander cards, meaning that the person on the card now Commands forces. These Commanders each have different strengths across three suits (discipline, fervor, and leadership), which dictate how much damage they do each turn.
  2. When vertical, they are Battle cards, meaning that they are forces in the field who are actually fighting the enemy. Battle cards dictate which suit on the Commander deals damage in a given fight. 
  3. Dissident cards represent the negative penalties from the five dissident groups that are in the game. Each turn, during the Unrest phase, players draw one of these cards, which determines what effect they have. The strongest dissident group this turn has a major penalty, the second-strongest has a moderate penalty, and the other three groups have a small penalty.

Grant: What is the layout of the board? What do the point to point tracks represent?

Akar: The War Map is a point-to-point map, which was a necessary design choice because the terrain along the Iran-Iraq border only allows approaches through specific narrow corridors, to avoid marshes, mountains, and other rough terrain. Additionally, the amount of land that each side managed to capture in the war was miniscule, so having a map to scale made little sense.

The map has different squares representing ground territory and sea locations. Black squares are Iraqi-controlled at game start, and red ones are Iranian-controlled. Each space has icons: stars are Victory Points, representing strategically and symbolically important areas; circles are Economy, representing oil infrastructure and sea lanes, and hexagons show the presence of dissident groups.

Beyond the map is a series of tracks representing the current turn, the strength of each country’s economy, and the current war progress (i.e., the winning side’s victory points and current objective).

Additionally, each side of the board has an area to show each regime’s current political power and active military commanders.

Grant: How is victory achieved?

Akar: The most important spaces on the board have stars on them, which represent victory points. Every time a side captures a starred space, the War Progress counter advances that many spaces. (Of note: this value is zero-sum, so only the War Progress of the winning side is marked; if the winning side flips, the counter flips to show that the other side is winning.)

Additionally, an Objective counter, marked with a dove, represents the current victory condition. The game begins with the Iraqi side having maximalist objectives, but as the game progresses, each side is willing to scale down their goals and definition of “victory.” So, the Objective counter moves left each turn, and additionally moves due to player actions.

If the War Progress counter ever meets or exceeds the Objective marker at the end of the Battle Phase, the game ends and that side is the winner! Of note, a side can even win with zero victory points, which probably was the real-world historical outcome.

Additionally, if a side ever runs out of Political Power cubes from their pool at the end of the Unrest Phase, that regime collapses and loses the game. If the other side still has cubes, then they win the game! If both regimes collapse on the same turn, then both players lose and Henry Kissinger wins the game.

Grant: What do you feel the game models well?

Akar: The game does a great job of building tension, fostering an alternating sense of hubris and desperation, and encouraging experimentation through trying different combinations of actions until one comes out ahead. All of these factors were present in the actual history, so I am excited that the game design reflects these traits.

Grant: What are you most pleased about with the design?

Akar: I am pleased about the game’s originality. I don’t know of another game that shows the competing priorities of internal political stability and external military effectiveness quite in this way. I would be most excited if I (and eventually, other designers) could employ this system to explore other conflicts through history, or perhaps even outside of history.

Grant: What other designs are you contemplating or already working on?

Akar: As I mentioned earlier, I’m hoping to return to Tyranny of Blood, my game about the Indian caste system, and finally finish it. This one is the furthest along, but I have other games that I’m in the early stages of designing.

I’m hoping to adapt the Chalice of Poison system for a 3-4 game about the Vietnam War, tentatively called Riding the Tiger. My idea so far is to add some more asymmetry to the system. The South Vietnam player will likely play similarly to the two sides in Chalice, as an unstable strongman regime prone to coup attempts. The United States player will not face coup attempts, but will have to deal with popular support and an election every four turns. The North Vietnam player will have to manage its politburo, attempting to exert influence over the southern revolutionaries and balance between its Chinese and Soviet patrons (and their competing priorities for Vietnam).

I have another game concept, tentatively called Iron and Cardboard, about intra-alliance dynamics and competition among the Warsaw Pact nations as they rebuild from the destruction of WWII under Soviet domination.

Lastly, I have a concept called Pillars of Fire about competition and conflict among Iran, Iraq, and Saudi Arabia from 1979 to 1991. It will be asymmetrical, based on the 3 different systems of government (revolutionary theocracy, strongman dictatorship, and conservative monarchy), which will vie for dominance of the region. Chalice actually began as the military module of Pillars before it took on a life of its own, but I think the grand strategy of this rivalry is worth exploring in its own game.

If you are interested in Chalice of Poison: The Iran-Iraq War, 1980-1988, you can pre-order a copy for $69.00 from the GMT Games website at the following link: https://www.gmtgames.com/p-1225-chalice-of-poison-the-iran-iraq-war-1980-1988.aspx

-Grant

  •  

Interview with John Lapham Designer of A More Perfect Union: The Struggle to Ratify the Constitution from Catastrophe Games Coming to Kickstarter Soon

While attending Buckeye Game Fest in spring 2024, we met with a new designer named John Lapham. John had with him a new game called A More Perfect Union and we got a chance to play the game and chat about it with him. A More Perfect Union is a 2-player card driven game that simulates the public debate over the ratification of the Constitution that took place across the United States from 1787-1789. The game uses the same system as Twilight Struggle and 1960: The Making of the President but felt very fresh and unique to the situation. Catastrophe Games is planning a Kickstarter campaign in the near future and we reached out to John to see about getting some more insight into the design and he was more than willing to share.

If you are interested in A More Perfect Union: The Struggle to Ratify the Constitution, you can back the project on the Kickstarter page at the following link: https://www.kickstarter.com/projects/campaign-fall-blau/a-more-perfect-union-a-game-about-the-us-constitution?

Grant: John welcome to our blog. First off please tell us a little about yourself. What are your hobbies? What’s your day job?

John: Thanks so much for having me, Grant. My main hobbies will surprise no one – gaming and history. I also enjoy hiking, cooking, and theater. As for my day job, that is in the past. I’m retired now. Before that, I had jobs in both the legal and educational professions.

Grant: What motivated you to break into game design? What have you enjoyed most about the experience thus far?

John: I wanted a game on this topic and no one else seemed willing to oblige me—although Jason Matthews and Christian Leonhard came close with Founding Fathers. I enjoyed the beginning and end of the experience. I love historical research and pondering messy interpretive narratives and historical hypotheticals. So, I was not surprised by how much I enjoyed the front end of the design processWhat surprised me was how much I enjoyed the collaboration that occurred near the end of the project, and the practical and artistic challenges of turning an idea into an actual, physical gameI had no experience with that process and enjoyed learning about it.

Grant: What is your upcoming game A More Perfect Union about?

John: A More Perfect Union is about the political struggle to ratify the U.S. Constitution in the thirteen states from 1787-1789. The game employs the popular card-driven mechanics of such well-known games as Twilight Struggle and 1960: The Making of the President

Grant: Why was this a subject that drew your interest?

John: It was the subject of some of my earliest graduate school research in the late 1980’s (yeah, don’t ask, I’ve been around the block more than a few times). As a history educator, I was drawn to less well-known stories, involving people and events that popular and school histories have neglected. This is one such story, and it is an important one that has enduring relevance for understanding much of American history and our current turbulent moment.

Grant: What is your design goal with the game?

John: I had two main goalsI wanted the game to offer a window into the history of that moment and to spark interest in the topicI also wanted it to be a fun, tense game that could be played in a couple hours but with enough complexity and variability to invite repeated plays.

Grant: What from the Constitutional Convention was most important to model?

John: Ok, that’s a hard one. I cannot give you just one. Several things were important to me.

First, I wanted the game to capture the intense war of words that occurred in the nationwide debate. America was on the leading edge of the first wave of mass media made possible by high literacy rates and the printing press. Americans of the period were highly literate, avid consumers of news, and intensely interested in politics. Ninety different newspapers and hundreds of presses across the country printed thousands of essays, letters, and pamphlets over the course of the debate.

Second, I wanted the game to capture the importance of political strategy in terms of grabbing and holding onto the initiative in the debate through the scheduling of the thirteen state conventions, as well as exploiting the momentum gained from successful outcomes in those conventions.

Third, I wanted to express the tension and uncertainty felt by the delegates during the actual conventions themselvesDelegates often went into these conventions uncertain of their outcomes.

Finally, and perhaps most importantly, I wanted players to come away with an understanding of the immense challenges faced by the new nation to come together and form a strong union that did not threaten the individual liberty that Americans prized at this time. It is in large part the work of the Anti-Federalists that delivered the country its Bill of Rights, a fact that is perhaps too often overlooked or forgotten by modern Americans.

Grant: What sources did you consult about the details of the history? What one must read source would you recommend?

John: Tremendous digital resources are available on the ratification debate thanks to the phenomenal work done by the Center for the Study of the American Constitution at the University of Wisconsin-Madison (https://csac.history.wisc.edu/). I encourage anyone interested in this topic to explore their website and the treasure trove of material available there.

For a more curated collection of primary source material, the Library of America has published an excellent two-volume collection of many of the most important essays, speeches, newspaper articles, pamphlets, and private letters, The Debate on the Constitution, which also includes a detailed chronology and biographical information on the participants in the debates.

For a single, narrative history of the entire series of events, the best choice is Pauline Maier’s Ratification: The People Debate the Constitution, 1787-1788, published in 2010. Reading that book was the last nudge that I needed to start designing the game.

Grant: What is the goal of the game? How do players go about trying to sway States to their way of thinking?

John: Fortunately for me as a designer, the main goal of the game was set out for me in the Constitution itself, which required nine states to ratify it to become binding on those statesThus, the Federalists win the game immediately if nine states ratify the constitution without recommended amendments, and conversely the Anti-Federalists need five state conventions to reject the Constitution to win immediately. If enough states thread the needle of compromise and ratify the Constitution with recommended amendments, then victory is determined by the weight of the states on each side of the ledger.

The primary tools to convince voters in the states are direct campaign efforts, which involve the use of the campaign points in particular states, and the play of publication eventsPublication events address one of three broad sets of issues that animated the debate – commerce, states rights, and individual rights. Each state in turn has a rating that reflects how important each of those sets of issues is to its voters. As a result, the effect of a publication will be more or less, depending on the state in which it appears.

Grant: What is the layout of the board?

John: The board includes several broad features – a map of the thirteen states with a state information and holding box for each state, turn and round tracks, a convention track, a state status track, and a table of information.

Grant: What information is contained in each State Box?

John: Each State Box has a number that reflects the maximum number of combined player cubes that can be present in the state, icons showing if either player starts with cubes in the state, numerical ratings for each of the publication issues, the convention value, and the momentum value of the state, and a spot for the state’s status marker, which shows if the state has scheduled or held its convention. Finally, the state boxes are color coded to show the section of the card deck in which the state’s convention card is seeded.

Grant: What are the 5 different words and corresponding values in these boxes mean? How are these elements connected to the cards?

John: The words “Commerce, States, and Individual” relate to the three publication issues and the numbers (0,1, or 2) next to them reflects the effect that a publication on that issue will have in the state – either adding or removing that number of player cubes in the state. The word “Convention” refers to the convention value of the state and the number next to that is the number of campaign points (CP) a player must expend either to call an early convention in the state or to attempt to take control of the State Status Marker through legislative maneuvering. The word “Momentum” refers to the campaign bonus a player will earn if they win the state’s convention.

The issues ratings connect directly to the publication event cards. The Convention ratings connect to the expenditure of CP gained from card play. The Momentum rating does not connect to the cards but instead relates to the outcome of the convention in the state.

Grant: What is the purpose of the State Factors Table and the State Issues Table?

John: This table summarizes in one place the information contained in the individual State Boxes, and it groups the states by their color codes to show players when they will draw the State Convention Cards over the course of the game.

Grant: What is the Back Room? What role does this play in the game?

John: Each player has a Back Room in which they can place a maximum of two cards. Cards in the Back Room are not part of a player’s hand, cannot be played during a player’s action round, and are not discarded at the end of the turn. Players can access the cards in their Back Room at three times – (1) during the card draw phase of each turn, when they can freely remove or add cards to the Back Room, (2) at the start of any convention, when they can remove, but not add, cards from their Back Room, and (3) during an action phase by playing a card for the sole purpose of adding or removing cards from their Back Room.

The Back Room plays two main roles in the game: (1) it provides a means by which players can hold onto powerful events that are not yet ripe to play – often convention events for conventions that will happen on a future turn, and (2) it provides a way to avoid playing a strong opponent’s event at an inopportune time.

Grant: How does the game use cards? 

John: This a classic Card-Driven-Game. Each player is dealt a hand of cards each turn and plays one card each round either to spend the Campaign Points provided by the card or to implement an event described on the card.

Grant: What different types of cards are there? What is the purpose of these different types?

John: There are five different types of cards: State Convention Cards, Publication Events, Convention Events, Reaction Events, and General Events.

Each state in the game has a State Convention Card, which are mandatory events that must be played in the turn in which they are drawnThey grant the player cubes in the state and control of the State Legislature, and they schedule the state’s convention by placing the state’s status marker on the Convention Track.

Publication Events publish and distribute a publication addressing a particular issue in a particular state that and a few of its neighbors. Most of these events will specify the state in which they originate and the issue that they address. A few allow the player to pick the state and/or issue for the publication.

Convention Events can be played for their event only during a convention and will have some effect on the outcome of that convention.

Reaction Events are played in response to some other game effect.

General Events are a catch-all for any other type of event.

Grant: Can you share a few examples of cards and explain their use?

John: Sure, here is an example of a State Convention Card:

Each state has one of these cards and they all work the same way.

  • These cards trigger the scheduling of State Conventions. 
  • They must be played on the same turn they are drawn and cannot be discarded or placed in a player’s Back Room.
  • They are seeded in a particular quarter of the draw deck at the start of the game, as indicated by the colored banner in the upper right corner of the card
  • When played, you move the indicated state’s Status Marker from the map to Box 1 on the Convention Track and mark it with a cube of your colorThis represents that you are in control of the state legislature and can spend CP to call an early convention in this state on a later turnIn addition, you may add or remove 2 cubes in the state.

Here is an example of a Publication Event:

These are the most involved events in the game but like the State Convention Cards they all work the same way. So, once you’ve done it a few times, it becomes straightforward. 

  • The red star identifies this card as an Anti-Federalist Event.
  • The “3” in the star shows that this card is worth 3 CP. 
  • The newspaper icon under the star shows that this card is a publication event, as do the words in the white banner running along the left side of the card.
  • When played for the event, publications are distributed in a number of states equal to the CP value of the card. In this case, that means 3 statesThe first state the publication must be distributed in is the state identified by the postal code in the title of the cardIn this case, it must be distributed in VirginiaIn addition, the publication may be distributed in two additional states that are adjacent to Virginia for a total of 3 states
  • The issue addressed by this publication is individual rights, which is indicated in text at the bottom of the cardThe issue controls how many cubes the player will add or remove from each state based on that issue’s value (from 0-2) in each state. The individual rights value in Virginia, Pennsylvania, and North Carolina is 2, but it is only 1 in MarylandThat means that this publication with add or remove 2 cubes in Virginia, Pennsylvania or North Carolina, but will only add or remove only 1 cube in Maryland.

Grant: What happens if you play an opponent’s event? What type of thinking and strategy does this create?

John: Generally, the event triggers, although the player gets to decide whether the event happens before or after they use the card for campaign points. There are two ways to mitigate powerful opponent events. They can be played during the Initiative Phase of the turn to bid for initiative without triggering the event, although doing so often reduces the player’s chance of winning the initiative for the turn, which is costly in its own right. They can also be stored in the player’s Back Room for possible play on a future turn when the event might be less damaging. This too is costly as the Back Room can hold only two cards and those spaces can also be used to save your own events for a future turn when they will be more effectiveThematically, in both instances you are spending time and energy managing a potential problem rather than advancing your own agenda.

Grant: What is the general Sequence of Play?

John: Each turn has the following phases:

Card Draw – Slightly more involved than a standard CDG because each turn you can change the cards in your backroom, which is often a challenging decision.

Initiative Phase – This phase sets the initiative and the first player for the turn.

Action Phase – The heart of the game when players alternate playing cards from their hands.

Convention Phase – State Conventions are resolved or move closer to resolution.

Voter Apathy Phase – Some voters lose interest and players remove some cubes from the map.

Grant: What is a Convention and how does it work? What is the outcome of this process?

John: A Convention is when a state makes its final decision as to whether it will ratify the Constitution. Thematically, this is the moment that elected delegates meet, debate, and vote on the Constitution. To model the drama of these events, players have a final opportunity to play cards that can affect the outcome. After that, the player’s cube totals in the state are compared. If the Federalists have the most cubes, the state ratifies the ConstitutionIf the Antifederalists have the most, the state does not ratify. If the two factions have an equal number of cubes, the state ratifies with recommended amendments.

Grant: How does Campaigning work?

John: Each state has a set number of votersThis number puts a cap on the number of combined player cubes that may be placed in that state. Players can think of it this way: the voters in each state can have one of three states of mind – undecided, Federalist, or AntifederalistAt the start of the game, most voters are still undecided, which is reflected by the fact that only a few cubes are placed on the board during setup. Campaigning involves the expenditure of Campaign Points (CP) to persuade these votes to change their mind, represented by placing or removing cubes in the statesIt costs 1 CP to place a cube in a stateIt costs 2 CP to remove a cube from a state. If a state is already at its cube limit, the player will first have to spend points to remove an opponent’s cube before they can place their own cube. Thus, to replace an opponent’s cube with one of your own costs 3 CP. Cards range in CP from 1-4. So many cards will not grant the player enough CP to replace an opponent’s cube with one of their own.

Grant: How is victory achieved?

John: The Federalists gain an immediate victory if nine states ratify the Constitution without amendments. Conversely, the Antifederalists win if five states reject the Constitution. If neither player achieves these conditions before the end of the final turn of the game, at least one state has ratified the Constitution with recommended amendments. Victory at that point is determined by comparing the values of the states in each section of the State Status Track. Each state has a value that represents its political and economic importance – the larger the state the more it is worthEach player gets full credit for each of the states in their column and the Antifederalists get partial credit (the Convention value) for each state that ratified with recommended amendmentsThematically, this represents a compromise situation, where the Constitution is ratified but with amendments. The stronger the opposition to the original Constitution, the more impactful those amendments will be. Strong amendments represent a partial victory for the Antifederalists. Historically, the Antifederalists efforts resulted in the adoption of the first ten amendments to the Constitution, including the Bill of Rights.

Grant: Which side has the tougher challenge to meet their goal?

John: The challenges faced by the two sides are different, but I hope they are roughly equal in difficulty.

Grant: What are some basic strategies the Federalist and the Anti-Federalist players?

John: The Federalists need to strive to win states quickly and build on that early momentum. They may need to consider making aggressive moves early in the game to take states off the board. They also must stay competitive is as many states as possible. They can only afford to lose four states, and the deck is stacked against them in two states – North Carolina and Rhode Island. The Antifederalist player has a wider range of strategic choices. They can focus on winning outright victory in one or two of the early states in an effort to reach the five states they need for an automatic victory, or they can build up their strength in several of the more valuable states that hold their conventions later in the game and improve their chances of winning the game on the basis of points at the end of the game. They cannot afford to compete with the Federalists in every state. They need to pick their battles carefully.

Grant: What type of an experience does the game create?

John: My hope is that it offers players challenging strategic and tactical decisions and creates dramatic moments of high tension where careful planning or bold action can alter the course of the game.

Grant: What are you most pleased about with the design?

John: Overall, I am pleased with the way it models the challenges and choices faced by the historical actors. With respect to the game play, I particularly like the Initiative, Back Room, and Convention mechanisms.

Grant: What other designs are you working on?

John: I’m working on a four-player game about the labor movement in Chicago, during the late 19th-century, and a solitaire game about the Civil War in which the player takes on the role of Lincoln and has to prosecute the war as commander-in-chief, while also navigating the challenges of domestic policy and political campaigning.

While attending Buckeye Game Fest in spring 2024, we met John Lapham and shot a video interview discussing the game and its mechanics:

If you are interested in A More Perfect Union: The Struggle to Ratify the Constitution, you can back the project on the Kickstarter page at the following link: https://www.kickstarter.com/projects/campaign-fall-blau/a-more-perfect-union-a-game-about-the-us-constitution?

-Grant

  •  

Interview with Matt White Designer of Spearhead: Hell on Wheels – Tank Battles in Normandy Print and Play Currently on Kickstarter

Over the past several years, we have done interviews with Matt White, publicized his games and played a few of them as well and he always has something cooking. Recently, I came across his newest offering on Kickstarter called Spearhead: Hell on Wheels – Tank Battles in Normandy. This game is a solitaire or 2-player print and play tactical game that allows players to take command of US tanks in German occupied France. I reached out to Matt and as always he was more than willing to share on the design.

If you are interested in Spearhead: Hell on Wheels – Tank Battles in Normandy, you can back the project on the Kickstarter page at the following link: https://www.kickstarter.com/projects/mattwhite-wargames/spearhead-hell-on-wheels-tank-battles-in-normandy

Grant: What is your new project on Kickstarter called Spearhead: Hell on Wheels?

Matt: This is a brand new solitaire and co-op World War II print and play tactical wargame. In this game you are in command of a group of 3 US tanks in brutal and intense tank combat in enemy-occupied territory. 

The players must lead their tanks, through unforgiving terrain, finding and then engaging the enemy in fierce fire fights. They must defeat any encountered enemy tanks and forces, whilst meeting the objectives as they move across the map. 

Grant: What was your inspiration for the name? What do you want it to convey about the design?

Matt: My biggest inspiration was reading accounts from various US armored units. Keeping your tank crews alive and positioning your tanks whilst dealing with unexpected enemy positions is key to survival and success and truly seemed to be “Hell on Wheels”. 

Grant: What about the battles during Normandy inspired you to make this game?

Matt: Basically I wanted to focus on and show the difficulties with the survivability of the armored crews and their vehicles during the D-Day invasion and the days after as the Allies broke out into France. That was the biggest point I wanted to make. 

An American M10 Tank Destroyer.

Grant: What research did you do on the subject?

Matt: As with all my games, in trying to get the historical aspects correct both in the mechanics of the game as well as the look and feel of the art, I basically try to do lots and lots of reading! I read as much as I can on the subject, from various authors and viewpoints, and when I am not spending time playing games or making them, I basically read! This knowledge is part of the inspiration for my games as I draw upon things that I have rad and then translate them to the page.

Grant: As a tactical level wargame, what are the most important areas of focus for the design?

Matt: The positioning of your tanks in relation to where the enemy could be, and not only the tank hull but also the turret. Keeping your tank crews alive and positioning your tanks whilst dealing with unexpected enemy positions is key to survival and success. This game is point-to-point based where you must place your tank orientation and can aim the turret separately. Being able to keep the front of the hull forward towards the enemy tanks whilst hopefully being able to fire on their flank is critical.

Grant: How does the game differ in its 2 modes including solitaire and cooperative?

Matt: In the game you are in command of a number of US tanks – these can be split between players if you wish. Its quite unlike a number of solitaire WW2 tank games where you are in command of one tank. In this game you have a number which makes it really suitable for co-op play.

Grant: I know the design is a Print and Play offering. Why do you feel this model is best suited for your designs?

Matt: I like making print and play games as it forces you, as the designer, to make every component count and making the most of the physical space on a sheet of paper. I find that challenge one of the most interesting parts of the creative process. I also like the print and play model because it is very affordable for all parties, both me and the players, and allows the game to be available to anyone at anytime and on their terms.

Grant: I see that the board has a point-to-point movement layout. Why was this your chosen method of conveying information about the battlefield?

Matt: As much as I love traditional hex based games (and continue to play a lot of them), I also like point-to-point too. I like the way you can combine not only line of sight but also information about the environment in the game.

Grant: What is the meaning of the different symbols that appear on the board?

Matt: Movement is from point-to-point and where you move from a Position Point (the rectangle points) to an Observation Point (the circle points) where you will test for observation and perform the majority of combat. If combat is successful then you will be able to move to the next position point. 

As you can see from the map there are multiple paths from Position Points to Observation Points and then onto other Position Points. Plus there are a variety of pros and cons to various paths to allow for a variety of terrain types and observation challenges. These paths are illustrated on the map in the shape of lines which are known as Movement & Observation Lines.

For each Movement & Observation Line there is a symbol at one end. The most common symbol is a black arrow, which denotes normal terrain and normal observation. There are other symbols which mean more difficult terrain or harder observation. These are:

Black Arrow – Normal Movement – Normal Observation

White Arrow – Normal Movement – Hard Observation

White Square – No Movement – Normal Observation

Black Circle – Difficult Movement – Normal Observation

White Circle – Difficult Movement – Hard Observation

Grant: What difficult decisions do players have to make in the game?

Matt: You will have to deal with enemies and you discover them but you don’t know where they are and so you must make some decisions based on information you do and don’t have. The player will also have several simultaneous objectives that must be obtained and will have to contend with both the German forces defending them that you know about and those that you do not.

“Lady luck” plays a part, as with any military operation, but your decisions and tactics are crucial, especially in how you position your tanks on the map when facing enemies as you cautiously roll through the environment.

A German Panther.

Grant: What dangers and threats meet the players on the battlefield?

Matt: There are a variety of dangers but not only the enemy forces as tank obstacles and mines can be a serious threat, combined with the environment itself.

Grant: What objectives does the player have to accomplish?

Matt: For each game session the objectives are randomly generated with Objective markers provided. All you have to do is safely get your tanks to those Objective markers, all the whilst dealing with the enemy!

Grant: How are hidden German units handled?

Matt: Every time you move your tanks you will need to check what they can observe and into which other points then can see. At this time you will roll on a couple of charts to see if you can see enemy units. However, just because you can’t see any doesn’t mean that they are not there.

Grant: What is the makeup of the Tank Cards? What information do they contain?

Matt: Using the Tank Cards you record the status of the major components of your tank such as the engine and tracks plus any gun jams. You also record the status of the various tank crew, all of which can have an impact in the game. Counters are provided to record all the status of both the tank and the crew.

Grant: What different types of tanks are included on both sides?

Matt: There are variety of tanks in the game with each tank having its own unique gameplay – for example the M10 tank destroyer has no hull machine gun (but does have a better anti-tank weapon). There are also Stuart M5A1 Tanks, StuG’s, Panzer IV’s, and many more.

Grant: How does combat work?

Matt: In the combat phase, you determine the order in which both your tanks and the enemy tanks fire. This is crucial to how the combat plays out as in real life WW2 tank combat, the results will favor the tank crew who can fire first on their target. 

You will roll a few dice, depending on your tank positioning and other factors, and retain the highest number. You can increase your number of rolled dice by certain criteria – the more dice you roll the better! For example, if your tank turret is facing the enemy, the terrain type, the health of both the tank and the crew and if the enemy have been observed all are major factors. The enemy tanks will be doing the same, so factors such as successful enemy observation in the previous phase are crucial!

Grant: What is the goal of the game? How is victory obtained?

Matt: Your goal is to reach your various objectives on the map, whilst trying to keep your tanks and crew alive.

For each game session the objectives are randomly generated with Objective markers provided. All you have to do is safely get your tanks to those Objective markers, all whilst dealing with the enemy!

Grant: What are you most pleased about with the design?

Matt: I am most pleased to be coming to the end of the design and getting it ready for people to play! Finishing or coming close to it, is the hardest part of the development. In terms of the actual game, I really enjoy being able to get a game that has depth and is engaging that can be printed on just a few sheets of paper. 

Grant: What kind of an experience does the game create?

Matt: I hope that the game creates a thoughtful representation of actual tank combat and how decisive it can be!

But that is not all. The game is modular and has several options included. As well as the map shown above, the game will also come complete with another map, additional counters and a rulebook which allows for you to create your own unique scenarios. 

This map has the same points but where you will roll on tables to determine the various Movement & Observation Lines from each Position Point and Observation Point. There will be counters that you can place between the Position and Observation Points as an aid. You will be using various charts and tables to procedurally generate your map as you play, determining those gameplay elements as you progress. This type of game session will present you with a new challenge as you really have to deal with more unknown elements as you progress your tanks across the map.

Grant: What other designs are you currently working on?

Matt: I have a few games I am working on – currently working on something involving WW2 Mosquito aircraft! 

For a YouTube video overview of the game, please check out Matt’s overview video here:

Thanks to Matt for his time in answering our questions and for his great little print and play games. I love it when one of these new games is brought to light as I get to oodle over the art and see what new things he has created!

If you are interested in Spearhead: Hell on Wheels – Tank Battles in Normandy, you can back the project on the Kickstarter page at the following link: https://www.kickstarter.com/projects/mattwhite-wargames/spearhead-hell-on-wheels-tank-battles-in-normandy

-Grant

  •  

Interview with Javier Romero Designer of Battle of Pensacola 1781 in Strategy & Tactics Magazine #358 from Decision Games

We became familiar with the work of Javier Romero when we played his game Lion of Judah: The War for Ethiopia, 1935-1941 from Compass Games in 2017. Since that time, we have done 6 designer interviews with him for World War Africa: The Congo 1998-2001 in Modern War No. 52 from Strategy & Tactics PressSoviet Fallout: The Nagorno-Karabakh War: 1992-1994 in Modern War No. 54 from Strategy & Tactics PressSantander ’37 from SNAFU DesignThe Chaco War, 1932-1935 in World at War #86 from Decision Games, Caporetto: The Italian Front 1917–18 in Strategy & Tactics Magazine #337 from Decision Games and Partizan! The War in Yugoslavia, 1941-1944 (Walter’s War) from Kilovolt Studio. A few months ago, and in connection with the 250th anniversary of the Declaration of Independence and the establishment of the United States of America, I saw where Javier was designing a game on the American Revolutionary War in the Southeast titled Battle of Pensacola 1781 in Strategy & Tactics Magazine #358. We reached out to Javier and as always he was more than willing to share.

Grant: Javier welcome back to the blog. What is your new game Battle of Pensacola 1781?

Javier: Thanks for having me again. Pensacola 1781 is a simulation of the American Revolution in the southeast region, stretching from the Mississippi River basin to the Floridas, from the Spanish entry in the war in 1779 to 1782. I must say that the title is a bit deceptive in its scope and included battles.

Grant: What was your inspiration for this game? Why did you feel drawn to the subject?

Javier: The Spanish participation in the American Revolution has recently attracted much interest in Spain. It was, so to speak, the swansong of the empire in the Americas. There aren’t any games that cover the entire campaign. There is only a wargame on the siege of Pensacola from GMT Games which is a part of their Battles of the American Revolution Series, which is a detailed and interesting situation. But I wanted an operational level game showing the big picture, from New Orleans to Mobile, Pensacola and St. Augustine. The game highlights the operations of Bernardo de Gálvez, who led one of the most brilliant campaigns in that theatre, clearing the Mississippi basin of English outposts as well as taking Mobile and Pensacola fighting against all odds. Against the advice of his subordinates, who deemed impossible defending Louisiana without reinforcements from Cuba, Gálvez declared that he preferred “having to answer charges of recklessness, than other type of charges” and took the offensive against the British in the lower Mississippi.

Grant: What was your design goal with the game?

Javier: My goal was to show a “multi domain” 18th century campaign, including amphibious operations, sieges, Indian warfare and diplomacy. The design puts the focus on leadership quality, Indian warfare and chaos. The campaign in Louisiana, modern day Alabama and the Floridas was a bit of a sideshow in a worldwide conflict fought from Canada to the Mediterranean, the 13 colonies, the British channel, Gibraltar or India. The design reflects this in several ways. In this game, reinforcements arrive at the beginning of each year and their arrival depend upon a number of factors, such as victories in earlier turns (thus gaining the favor of their respective courts in London and Madrid) as well as events elsewhere. Fleet squadrons come and go because this is an oceanic war being fought out across the seven seas, and the Caribbean was just only one more front.

Grant: What type of research did you do to get the details correct? What one must-read source would you recommend?

Javier: There are plenty of Spanish sources on the campaigns of Bernardo de Gálvez in the Americas, many of them published in recent times. There are recent English language sources that recognize the major role of Spain in arming and supporting the American Revolution. For
instance, the book by Larrie D. Ferreiro Brothers at Arms: American Independence and the Men of France and Spain Who Saved It. Another interesting source in English is the work by Joshua Provan Every Hazard and Fatigue: the Siege of Pensacola, 1781 published by Helion Books. This book provides solid evidence of “the true military consequences of the siege [of Pensacola] on the War of American Independence.”

Grant: What from the American Revolution in the Southeast was most important to model?

Javier: It was important to model that the Mississippi-Floridas campaign was one more theatre in a global war spanning from the Americas to Europe and India. Keeping open the Mississippi River basin to the arms and supplies shipments coming from Spain, France and other nations was a decisive factor in keeping alive the American Revolution. Being just one more theatre, the arrival of reinforcements depends on a number of a factors and events elsewhere. After the first successes of Gálvez, the Spanish decided to reinforce success and provide him with more ships, troops and resources.

Grant: What is the scale of the game? Force structure of units?

Javier: Units are basically regiments and Indian warbands, rated for Indian and Linear warfare. Using one or the other depends on a number of factors, namely leadership quality.

Grant: What area of the Southeast does the map cover?

Javier: The map covers a large area, from the lower Mississippi to Eastern Florida, with off map boxes for outposts in the upper Mississippi and Georgia.

Grant: What off map areas are represented and why are they important?

Javier: There are three: St. Joseph and St. Louis, which are important to keep the Mississippi supply route open, and Georgia, from where the Spanish/Patriot player can launch attacks against East Florida. The 1778 Patriot invasion of East Florida was defeated, but there was the possibility of new offensives in the following years. After the conquest of Pensacola the Allied forces (Spanish, French and Patriots) planned a joint operation against British forces in the Carolinas, but the end of the war cancelled it.

Grant: What key strategic points are contested in the area and what is the geographic goal of the combatants?

Javier: For the Spanish, the first objective is to defend the Mississippi Basin, although Havana is also included in the map so that the Spanish has to keep a sizeable defense there. Historically, the Spanish commander in chief in Havana was extremely reluctant to spare ships and troops for the Floridas. In the words of the chief of the Spanish navy in the island, “This [Cuba] is worth 50 Mobiles or Pensacolas…if the King was here, he would do the same”. The British capture of Havana in 1762 still loomed large.

For the British, the objective is to reach the Mississippi Basin, and, if not possible, to defend West and East Florida. With the arrival of Rodney’s fleet, he can also chance a surprise attack on New Orleans, or even Havana if the Spanish player doesn’t keep there a sizeable force.

Grant: What different unit types does each side have access to?

Javier: There are line infantry, militias, artillery, siege trains, supply trains, Indian warbands, fleets, transport ships, and leaders.

Grant: What is the anatomy of the counters?

Javier: Land units are rated for linear warfare (representing “proper” 18th century warfare) and Indian warfare (irregular tactics, hit and run, pillage, ambushes). Linear infantry and field artillery are better for the first, while militias and Indian warbands are better for the latter. Militias and Indian warbands are also very useful for finding out the makeup and location of the enemy or avoiding interception/ambushes by the enemy force. Leaders are rated for their tactical and diplomatic skills that add modifiers to initiative, combat, diplomacy and other actions. Supply trains are spent to avoid attrition, which can be heavy in the hostile wilderness.

Grant: What is the general Sequence of Play?

Javier: The sequence of play begins with the stratagem markers phase (both players pick at random stratagem markers), followed by reinforcements die rolls at the beginning of the campaign season. Then comes the Indian diplomacy phase, where both players use diplomacy stratagem markers to break or establish alliances with the various Indian tribes. After that both sides can try to recruit Indian warbands among neutral or allied Indian nations. Then comes the recruiting phase, where both sides use accumulated Treasury Points to rebuild destroyed units. Finally, the Spanish operates his naval and land forces in any order he sees fit, followed by the British operations phase. At the end of the turn, both sides roll for attrition, and for the possible withdrawal of Indian bands.

Grant: What type of experience did you want the Sequence of Play to invoke?

Javier: Players can activate their forces in any order they want, so that they can use any combination of land, amphibious and naval operations. The experience I wanted to invoke is that of uncertainty- this is the 18th century warfare in a remote colony. As in many other wars, both sides make plans, but there are many factors that can disrupt them, from hurricanes to unexpected arrival of enemy forces to events elsewhere. There are no communications other than messengers and courier ships, so the possibility of an enemy expedition arriving out of nowhere should make players to be cautious.

Grant: How do the different nations troops coordinate their maneuvers and attacks? What difficulty of command will players experience trying to coordinate French, Spanish and Patriot forces as well as British, Hessian and Loyalist forces?

Javier: In general the troops of different nations can operate together without problem. The Indian forces are a double edged weapon-very useful for reconnaissance and ambush (or to avoid enemy ambushes) but they can leave a force if they decided that they have to return or that they have captured enough loot and captives. Forces can operate any number of units of different nations.

Grant: What role do the Indians of the region play in the game?

Javier: In this game I wanted to emphasize the role of the various Indian nations. Indian warbands are useful for raiding and reconnaissance although they tended to return to their villages after a successful campaign. Historically, the British had a well developed network of Indian agents which gave them advantage in their Indian diplomacy. This is reflected in the “Indian agent” markers, that provide die roll modifiers to the British diplomacy attempts. Historian Josh Provan pointed out in his book on the Pensacola campaign that the Spanish victory was achieved with the assistance of Native American nations, “whom have routinely been dismissed outright for over two hundred years”.

Grant: What are Stratagem markers?

Javier: The Stratagem Marker is a mechanism that I use in many of my designs. These are very useful to simulate things that are beyond the control of players. Represent anything from tropical diseases, campaigns elsewhere in the Americas and in the World, to tactical events such as lucky hit, ambushes or military advantage. The marker “Surprise move” is particularly useful to simulate the uncertainties of 18th century in a remote wilderness such as the old Southeast. Given the right conditions, a surprise move may make a fleet appear out of nowhere and destroy an enemy force. This is the 18th century…there are no communications other than messengers and courier ships. Historically, upon learning about the presence in the Caribbean basin of the squadron of Admiral Rodney, the Spaniards feared that they could catch by surprise the forces besieging Pensacola. Stratagem Markers also simulate the spy networks of both sides. Before the war, Gálvez setup an extensive spy network that was very useful. For instance, his spies got hold of a copy of the secret orders sent to General Campbell at Pensacola, ordering him to organize, if possible, an attack on New Orleans with armed vessels from Jamaica and “as many faithful Indians and the Superintendent could supply”. Gálvez took the initiative and took the British outposts along the lower Mississippi before Campbell could arrange his own offensive.

Grant: What are Treasury Points? How are they gained and lost?

Javier: TP’s represent resources received from their respective metropolis, as well as local contributions used to recruit units. Treasury Points are received from their respective countries during reinforcement turns. Unlike other games, there are no treasury generating regions or cities-everything comes from Havana, Madrid or Britain. Treasury Points are used to rebuild destroyed units.

Grant: What role do Leaders play? What historic personalities are represented?

Javier: Leaders play a key role in diplomacy and combat. The better the leadership, the better chances of gaining initiative in combat, recruiting Indian allies, and so on. Among the historic personalities, the most notable is perhaps Bernardo de Gálvez, the most noted commander in that theatre. After fighting in Europe, North Africa and the Americas (against the Apaches), he was named governor of Louisiana in 1777. In May 1779, a month before Spain declared war on Britain, and three years after the Declaration of Independence, Gálvez assembled a small army with which he attacked the defensive posts the British held along the Mississippi. With a contingent that included free African Americans, Choctaw Indians, Canadians, and American volunteers, Gálvez captured forts such as Manchac, Baton Rouge, and Mobile, and expelled the British from the region. His greatest victory was the conquest of the port city of Pensacola, in northwest Florida in 1781. Galvez’ adversary at Pensacola, Major General John Campbell, a veteran of Culloden in 1746 and the siege of Havana in 1762, is an interesting figure as well.

Grant: How does combat work?

Javier: There are two odds-based Combat Tables-Indian and Linear. Indian represents Indian Warfare-emphasizing mobility, with night attacks, ambushes. Local militias and, of course, Indian warbands are better at them. The other CRT is linear warfare, representing “proper” 18th century linear warfare. In this, Line infantry are artillery are most useful. The choice of CRT is determined by an initiative die roll, modified by the leadership rating of any leaders in the forces, plus the play of Stratagem Markers such as military advantage or ambush.

Grant: What are Military Advantage and Ambush Markers used for?

Javier: They represent tactical opportunities and junior leadership and can be used to modify initiative, interception or operations points die rolls.

Grant: What is the makeup of the CRT?

Javier: As mentioned above, it is odds based. Units add their linear or Indian warfare factors-Linear units add 2 combat factors on the linear CRT, 1 on the Indian CRT. Artillery adds 2 combat factors on the linear CRT, 0 on the Indian CRT. So, a force containing mostly militias and Indian warriors against a force containing line infantry and artillery will chose the Indian CRT. Of course, the system rewards combined arms-it is advisable to combine all types of units in a single force. The Linear CRT is bloodier (more chances of completely destroying an enemy
force) the Indian Warfare CRT is more indecisive.

Grant: How do Sieges work?

Javier: In the game there are Fortresses and forts. The first represent stone fortresses such as the ones in Mobile, St. Augustine and Pensacola, while forts represent minor positions made mostly of wood. Players can build siege works to approach the enemy defenses (representing parallel trenches, mining and so on). The force under siege may choose to launch a sortie to destroy the siege works. If the sortie fails, the siege works add a positive modifier to the assault operation against the fortress hex. The player then rolls on the siege table and apply results, which may include Bloody Repulse (Eliminate besieging units equivalent to the number of defending units), Honors of War (with Age of Enlightment chivalry), the defender is given the option to withdraw from the fort or fortress. The defenders are withdrawn and can enter as reinforcements during the next game turn) or Surrender: the fortress is conquered and all defenders are eliminated, including any naval units if it is a coastal fort or fortress.

Grant: How is victory achieved?

Javier: Victory is achieved by taking geographical objectives (Mobile, Pensacola, St. Augustine, New Orleans…) or by preventing the enemy from taking them. The British may win a sudden death victory if they manage to take Havana as in 1762.

Grant: What role do Naval Operations play? Why were they important to include?

Javier: Naval operations were very important because it was the only means to move sizeable forces in this theatre. Overland movement and supply was extremely slow, so the best way to move reinforcements, supplies and to take the fight to the enemy strongholds was by sea.

Grant: What optional rules are included?

Javier: There are four optional rules. In general, these add to the game narrative although it might make game turns somewhat longer. Optional rules are naval infantry. In this one, players can “land” marine infantry from naval ships, which can fight overland in a siege, for instance-if the naval ship is involved in naval combat, it has a negative modifier in combat, representing the missing crew and marines. The other optional rules are Indian supplies (players can purchase supplies to local Indian tribes, like Gálvez did, for instance, during the siege of Pensacola), destroyed forts (players have the option to burn forts, but not fortresses) and valley movement, where players follow river valleys to move faster across the wilderness territory.

Grant: What type of an experience does the game create?

Javier: It creates an experience of uncertainty, in particular with the unexpected arrival of enemy forces from out of nowhere. If this could happen at the tactical level, more so in a strategic game covering all of North America from the Mississippi river basin to Florida. Also, gamers must keep in mind the importance of the human geography-the Indian nations played key roles in the operations of the war, by supplying, providing information and combat troops to the empires at war. Elements such as the “Surprise move” markers, and the arrival of Rodney’s Fleet, provide the game with wild changes of initiative. The British, in particular in the early turns, can try to grab the initiative and attack towards the lower Mississippi or St. Louis.

Grant: What are you most pleased about with the design?

Javier: I think it makes a good work at simulating “multi domain” 18th warfare, covering many aspects, from conventional operations to irregular warfare to diplomacy with a relatively simple set of rules.

Grant: What other designs are you working on?

Javier: I am currently working on several games for SNAFU Design Team, Decision Games, VUCA, Bonsai Games and Compass Games/Paper Wars. S&T will publish in May-June 2026 another of my operational WW2 designs, Forgotten Front: Italy 1944-45. I just turned in to Decision Games the prototype for Ukraine Battles 2. This one covers the early, mobile campaign in Kharkiv in Eastern Ukraine in the spring and summer of 2022. It is an evolution of the system first used in Ukraine Battles 2014-15. Artillery plays a very important role in the system. It is precise and deadly, and can do a number of missions, from interdiction to destroying command posts to supply depots. Plus drones and long range fires, of course.

1942: Battle for the Mediterranean for VUCA Simulations, is, I hope, approaching completion. It is an old project that I first agreed to publish with the company of the late Jack Greene, Quarterdeck International, but later he suggested me to contact VUCA for publication since they did a great job with the new edition of his Bismarck design. 1942: Battle for the Mediterranean is what I would call an operational naval game, with turns representing one month of naval operations. Apart from supplying the war fronts and fighting the enemy at sea, players have to manage their assets and think in the long term. The campaign game covers 10 game turns, from January to October 1942. There are also shorter one turn scenarios simulating the major convoy battles of the 1942 campaign: Second Sirte, Harpoon/Vigorous (Battaglia di Mezzo Giugno, “Battle of Mid June” for the Italians), or Pedestal (Battaglia di Mezzo Agosto, “Battle of Mid August”).

Aragón 38 for SNAFU Team is also in development. Nils Johansson is working on the graphics aspect (map, counters, play aids and cover). It uses an evolution of the Santander ’37 System. While in the Santander campaign we have Brigade-sized units attacking across a mountain range, using speed, firepower and infiltration to overcome the Republican defenses, in Aragon we have a “push” of several Army Corps operating together, with front collapse followed by exploitation, consolidation and conquest of several bridgeheads as bases for future offensive operations. So we had to adapt the system to better simulate that campaign. Bonsai Games from Japan will publish my game Assault on Europe 1943, covering land operations in the Mediterranean Theatre in 1943, from Tunisia to Sicily and Southern Italy. The Allied player can decide whether to land in Corsica and Sardinia before Southern Italy. Rules simulate the painful US Army learning curve (from being called in Tunisia “our Italians” by the British, to a much better performance in Sicily and Southern Italy) and the surrender/collapse of the Italian army (operation Achse). After publishing Red Partisans for Paper Wars, I am working on a small unit game of the fight around Kyiv in February 2022. It is still in a very early design stage.

Thanks for your time Javier in answering our questions as I know you are a busy man and obviously have lots of interesting gaming subjects on your design table. I am very interested in this one, as the American Revolution is one of my favorite gaming topics.

If you are interested in Battle of Pensacola 1781 in Strategy & Tactics Magazine #358 from Decision Games, you can order a copy for $54.95 from the Strategy & Tactics Press website at the following link: https://shop.strategyandtacticspress.com/ProductDetails.asp?ProductCode=ST358

-Grant

  •  

Interview with Ty Bomba Designer of Rommel in Italy, 1943-1944: A Counter-Factual Simulation from War Diary Publications

We have interviewed the venerable designer Ty Bomba on numerous occasions over the 10-year life of the blog. In fact, I counted up the interviews and to date we have done 18 total! Wow but the last one we did was in January 2023 and we have just not had him on since. No reason for that other than I have been busy with other games. But recently I saw from War Diary Publications that they were printing one of his What If? style alternative history games called Rommel in Italy, 1943-1944: A Counter-Factual Simulation, which supposes Field Marshal Erwin Rommel had taken command of German forces in Northern Italy rather than being sent to help with the defense of France against the expected Allied invasion. I reached out to Ty and he was more than glad to give me some more information.

If you are interested in Rommel in Italy, 1943-1944: A Counter Factual Simulation, you can pre-order a copy for $30.00 from the War Diary Publications website at the following link: https://wardiarymagazine.com/products/rommel-in-italy-1943-1944-a-counterfactual-simulation

Grant: What is your upcoming game Rommel in Italy about?

Ty: Rommel in Italy, 1943-1944: A Counter-Factual Simulation allows 2 players (or one playing 2-hand solitaire) to investigate the strategic and operational potentials that would have been in place across northern Italy from September 1943 through May 1944 if Hitler had left Field Marshal Erwin Rommel in charge there rather than Kesselring. Rommel advocated for immediately pulling back to a shorter, easier to defend, position at the south edge of the Po Valley rather than trying to fight it out farther south, with both the German’s flanks exposed to possible encirclement via Allied amphibious end runs. In effect, it put the Allies into a strategic position that historically they did not achieve until a year later. The question then becomes can they keep up that kind of advance into and across the Alps.

Grant: Why was this a subject that you wanted to design a game around? What assumptions about history did you take into account?

Ty: Historically, we had 2 of Germany’s best field commanders, Rommel and Kesselring at complete odds with each other over theater-level strategy. Kesselring felt confident the Allies would not achieve a level of operational efficiency that would allow them to effectively exploit the supremacy in the seas along both of Italy’s coasts. History showed that he was correct in that assessment, but Rommel’s transfer to France was not a sure thing. Hitler actually tried to send him back to Italy, to take full charge there, shortly after Rommel had gotten on a plane to fly to France. Radio communications temporarily failed, and by the time Hitler’s communications people got that all sorted out, the dictator had again changed his mind and kept Kesselring in place.

Further, the fact Kesselring was shown to have been correct does not mean Rommel was necessarily wrong – and there’s a fun-to-play wargame inherent in that iron.

Grant: What is important from the overall period and setting to model in the game?

Ty: The opening of the campaign, in September 1943, is filled with opportunity – but also fraught with peril –  for both sides. At the start of play, there are only a few German garrison units in the far north of Italy, while the 10 (mostly elite) divisions of their Tenth Army start off-map to the south, where they just received Rommel’s order to run north. There are no Allied units setup on the map at all. They enter on the south edge during the first turn, and both players operate using the sequence below.

5.3 Allied Reinforcement & Replacement Phases

During these phases, the Allied player may bring onto the map newly arriving units and reclaim into play units that had been previously eliminated in combat. This phase is skipped on Turn 1.

5.4 German Reinforcement Phases

During these phases, the German player may bring onto the map newly arriving units and reclaim into play units that had been previously eliminated in combat. This phase is skipped on Turn 1.

5.5 Movement & Combat Sequence Determination Phases

In each of these phases, excluding that of Turn 1, the Allied player openly declares whether that turn’s movement phase or combat phase will be taken first. On Turn 1 the sequence is always the movement phase followed by the combat phase.

5.6 Alternating Actions Movement or Combat Phases

Always starting with the Allied player, the two players alternate either launching one attack or moving one unit, depending on whether the present phase is movement or combat. Individual attacks may have more than one attacking unit in them, but moves are always made one unit at a time. The unit(s) committed to those “actions” are, upon their completion, flipped over to show their disrupted sides. If a player does not actually want to make an attack or a move when it is his time to do so, he must flip one unit to its disrupted side, just as if it had moved or launched an attack: no “passing” is allowed.

5.7 Movement or Combat Recovery Phases

A movement or combat phase continues as described above until both players are out of undisrupted units or both agree they want to end the phase. If one player runs out of undisrupted units before the other, the player with remaining undisrupted units may go ahead and complete whatever actions he wants to perform with them within normal strictures, but now uninterrupted by having to pause to allow the opposing player to take an action. When a combat or movement phase is ended, both players should cooperatively turn over all disrupted units on the map so their undisrupted sides are and showing.

5.8 German Supply Check Phases

In each of these phases, both players should cooperatively look over the map to find if there are any German units out of supply. Each such unit is immediately removed to the dead pile.

5.9 Allied Supply Check Phases

In each of these phases, both players should cooperatively look over the map to find if there are any Allied units out of supply. Each such unit is immediately removed to the dead pile.

5.10 Ending & Starting Turns

Each time a Allied Supply Check Phase has been completed, advance the Turn marker one box on the Turn Track printed on the mapsheet and start a new turn with Phase I. 

On the first turn, the Allied player has a relatively open front before him. If he can exploit that to get into the Po Valley quickly, he will move the strategic timetable significantly forward of the historic one. However, as he’s moving onto the map, so too it German Tenth Army. Depending on how bold both players are, it is not unusual to see pockets form inside other pockets. 

Grant: How has this design changed since its original publication in 2021 in Banzai Magazine under the title Rommel’s Last Stand: Italy 1943-44, What If?

Ty: The new publisher has fixed the (scant) errata from the first (bilingual) Japanese edition from Banzai Magazine. They have also taken all the Japanese off the map and out of the rules, presenting everything fully in English. Other than the removal of those irritants, it is the same game. 

Grant: What is the scale and force structure of units used for this design?

Ty: Each hex on the map equals 5 miles (8 km) from side to opposite side. Each full turn represents 2 weeks to 2 months, depending on the time of year. Every ground unit represents a regiment, brigade or division of about 2,500 to 12,000 men and/or 50 to 350 armored fighting vehicles.

Grant: How many maps are used in the game? 

Ty: There is 1 large-hex based 34×22” map showing Italy north of the line of the Arno River to Ancona.

Grant: What is the anatomy of the counters?

Ty: The units are standard-classical in their data presentations, except their movement factors are not printed on them. All Allied units have (supplied) MF’s of 16 throughout the game, while the German MF’s are as follows.

German Mechanized Units Turns 1-6 – 16 MF’s

German Non-Mechanized Units Turns 1-6 – 8 MF’s

German Mechanized Units On Turns 7-10 – 12 MF’s

German Non-Mechanized Units On Turns 7-10 – 6 MF’s

Grant: What sources did you consult for the Order of Battle?

Ty: The Armies of Rommel by George Forty was an excellent source for the subtleties in the initial German Order of Battle. Beyond that, I pulled the roughly half-dozen historical Italian campaign games off my shelves and pulled information out of them. This is one of the most thoroughly simulated campaigns in the hobby, going all the way back to Avalon Hill’s Anzio, so I was not looking to find any heretofore undiscovered anomalies in either sides’ OB. The uniqueness in this game’s treatment of it comes from the changed strategic context combined with the tension inherent in the turn sequence, which requires both players to remain alert for sudden danger or fortuitous opportunities all throughout its play

Grant: How does combat work?

Ty: Combat is always voluntary and, when viewed on a battle-by-battle basis, is standard/classical odds ratio using a six-sided die.

Grant: What are the victory conditions?

Ty: Operating in conjunction with the alternating-actions turn sequence, the victory conditions are a further element I used to keep both players on the edges of their seats at all times. See below.

4.1 In General. The Allied player is on the offensive, trying to win by advancing fast enough to cause a major disruption to the historic timeline. 

4.2 Allied Victory During 1943 Turns. If Phase 9 of Turn 1 or 2 or 3 or 4 ends with Venice or Milan or Trieste, or any one or more of the four German supply source hexes, occupied by an Allied unit or stack, that game ends at that time in an Allied victory.

4.3 Allied Victory During 1944 Turns. If Phase 9 of Turn 5 or 6 or 7 or 8 or 9 or 10 ends with any one or more of the four German supply source hexes occupied by an Allied unit or stack, that game ends at that time in an Allied victory.

4.4 German 1943 Sudden Death Victory. If any movement or combat phase of a 1943 turn ends with the German player having gained control of the containing the Allied Amphibious Invasion Beachhead marker, the games ends in a German victory at that time.

4.5 German 1944 Sudden Death Victory. If any movement or combat phase of a 1944 turn ends with one or more German units in any hex(es) on the south map edge, that game ends in a German victory at that time.

4.6 German End-Game Victory. If Phase 9 of Turn 10 ends without the Allied player having achieved a victory, the game ends at that time in a German victory. 

The “White Dragon Game Designer” dressed as a samurai.

Grant: What are you most pleased with about the design?

Ty: As I mentioned above, the Italian campaign has been one of our hobby’s most thoroughly plowed fields for decades. Despite that, I believe I have offered a new experience with it here. Players will get a new slant on it, one that operates within the broad parameters of the war’s historic decision-making, but that is also tense and entertaining for both commanders.

I also hope its appearance in an easily available all-English edition may lead this and other publishers to look into acquiring the rights to other of my designs that have so far appeared only in East Asia (where I am affectionately known as the “White Dragon Game Designer”). I have done several games that have been well-received there, but are barely known here in the West.

Grant: I know you are a busy man with game design projects as well as editing for various wargame magazines but what other games are you currently working on?

Ty: I am presently working on this alternative history design, which is scheduled to appear in World at War No. 130, called Stalin’s Missed Opportunity: What If He Invaded Romania in May 1940?.

If you are interested in Rommel in Italy, 1943-1944: A Counter Factual Simulation, you can pre-order a copy for $30.00 from the War Diary Publications website at the following link: https://wardiarymagazine.com/products/rommel-in-italy-1943-1944-a-counterfactual-simulation

-Grant

  •  

Interview with Volko Ruhnke Designer of 1943: Race to Rabaul from PHALANX

PHALANX does some really great games and they have 2 new games that have recently been placed on pre-order in a 2-pack called Pacific War Games (you can order them separately). This package includes 1943: Race to Rabaul designed by Volko Ruhnke and Tora Tora Tora! designed by Wataru Horiba. I have reached out to Volko Ruhnke to discuss his 1943: Race to Rabaul, which is part of the Keep ‘Em Rolling Series of logistics focused wargames that includes titles such as 1944: Race to the Rhine and 1941: Race to Moscow, and he was more than willing to share.

If you are interested in 1943: Race to Rabaul, or its sister game in the Pacific Wargames package called Tora Tora Tora!, you can pre-order copies on the Gamefound pre-order page at the following link: https://gamefound.com/en/projects/phalanx/pacificwar-games

Grant: Volko welcome back to the blog. What is your new upcoming game 1943: Race to Rabaul?

Volko: 1943: Race to Rabaul will be the next volume in Phalanx Games’ “Keep ‘Em Rolling” Series, following up on 1944: Race to the Rhine and 1941: Race to Moscow. Also set in World War II, this time you are supplying forces moving and fighting across the South Pacific–with the twists that players are fighting each other and have to manage sea, air, and land operations.

Grant: You have designed logistics focused games in the past such as the Levy & Campaign Series. How has that experience lead you to the Keep ‘EM Rolling Series?

Volko: I’ve always enjoyed wargames that include placing, moving, consuming, destroying actual supply bits on the map–going back at least to The Gamers’ Standard Combat Series AFRIKA. In Levy & Campaign, I wanted to show that for medieval campaigns, in a simple enough way to be fun rather than tedious. When I later played 1944: Race to the Rhine, I saw that that design accomplished that very well indeed, even made it the focus of play. So I was hooked.

Grant: How did this opportunity come to you?

Volko: Two Septembers ago, I was in Prague for Czech Con hosted by Levy & Campaign Žižka designer Petr Mojžíš, where I got to meet Phalanx co-owner Jaro Andruszkiewicz. He invited me to do a design with his company. I at once knew that it had to be something in their “Race” series. Via my research for Coast Watchers from GMT Games, I already had become fascinated by Japanese logistical challenges and Allied counter-logistics strategy in the South Pacific. So the fit seemed a natural.

Grant: What sources did you consult to get the historical details correct? What one must-read source would you recommend?

Volko: I had already done a lot of reading for Coast Watchers. The source that really laid out the Japanese perspective on their difficulties in reinforcing the front line was Kengoro Tanaka’s Operations of the Imperial Japanese Armed Forces in the Papua New Guinea Theater. I also picked up Breaking the Bismarcks Barrier, an official US Navy history of the campaign. My favorite general Pacific War history source is Ronald Spector’s Eagle Against the Sun (as I briefly had the opportunity to study history under Professor Spector at George Washington University.)

Grant: What is your overall design goal and thesis for Race to Rabaul?

Volko: In the South Pacific of 1943, the Allies were far more savvy than just piling their firepower and men directly against the well-fortified Japanese positions. Instead, they wore them down with air strikes over time, while blockading them by air and sea. The key challenge to the Japanese defense was the inability to get enough supplies and men through the growing Allied air and then sea superiority to reinforce–and even just feed the Japanese forces holding the line. In1943: Race to Rabaul, you manage that logistical and counter-logistical struggle on each side.

Grant: How tough was working within the constraints of an existing system?

Volko: I find it easier overall to start with an existing system that I know works and build from there (as I did with classic-CDG Wilderness War and the scenarios and C3i Magazine campaign that I’ve done within Combat Commander). The key challenges for me in bringing the Phalanx “Race” system to the South Pacific were expanding it to opposed play necessary to capture the critical counter-logistical aspect – and to a maritime environment – sea, air, amphibious and land warfare – all with the eye to adding just a dose of added complexity.

Grant: How does the vastness and remoteness of the pacific affect logistics? How did you model this?

Volko: The environmental problem that the Japanese faced and the Allies exploited in the South Pacific was that nearly all logistics came by sea, so air interdiction ruled. There were land campaigns in New Guinea’s interior. But the jungle and ridge terrain there required air lift or coastal transport to build up. And by 1943, the Allies increasingly dominated the air war. Race to Rabaul requires you to move your troops, ammunition, and food across sea–you can’t just march your corps forward. For the more constrained Japanese, that means launching Convoys that the Allies might detect and strike.

Grant: What was most important to model in the game? What about inter-service rivalry?

Volko: That Japanese challenge moving anything and the Allied effort to stop it is most characteristic of the design. But perhaps its most impactful addition to the “Race” system is opposed combat. Rabaul taps the same principle of counting supply bits to determine combat outcomes. But with 2 opposed players, playing cards to hope to out wit each other, as well as land and amphibious attacks, the combat subsystem in this volume is necessarily more involved. For non-wargamers, that is probably a hindrance. But for wargamers, it may make Rabaul even more up their alley than the earlier games. Inter-service rivalry comes to the fore in Rabaul when you have 3 or 4 players. Each side has two Commander roles, “racing” along either the east or west half of the map. Each represents the Japanese or Allied army or naval dominance of the New Guinea and Solomons campaigns, respectively. Whichever player (not side) reaches its goal first wins the game–so you can choose to cooperate with the other Commander on your side or not!

Grant: How does the logistics support differ between the Allies and the Japanese?

Volko: I’ve mentioned the Japanese use of Convoys and Allied Convoy Strikes above. The Allies have that easier–their abundance of transports is assumed wherever they have Air Cover. The problem is that they must take ground and build Air Bases to extend that Air Cover and Convoy Strike range forward. The Allies also get more abundant Men &Material–generally more bits per action at their Supply Bases than the Japanese get at theirs. But, as in the earlier “Race” games, here the Allies must work their Logistics Level up to add to that capacity. The Japanese also have an advantage stalwart austerity in feeding their troops: the Japanese, unlike the Allies, never lose their last Troops piece in a space due to lack of Food, they garden!

Grant: What was the process of taking a series designed for land based campaigns into one involving amphibious supply and operations?

Volko: I had to add some complication to show the maritime environment. Instead of one type of connection between spaces, Race to Rabaul has Land, Sea, and Straight. Instead of just Trucks (and in Moscow Trains), Rabaul has Japanese Freighters, Destroyers and Barges and Allied Landing Craft. Because you have to transport soldiers not just supplies across water, Rabaul has Troops bits instead of Fuel, and Troops become key to feeding requirements, building Air Bases, fortifying, and, naturally, combat. Allied amphibious landings can be disastrous if defeated with the sea at their backs. And air power looms far larger int he naval environment, with Commanders controlling up to 6 Air tokens instead of Rhine’s 1 each.

Grant: What other challenges does each side face in obtaining their goal?

Volko: The Japanese defenders are essentially playing for time, as each Logistics step that the Allies need to trigger will award Japanese medals for holding the Bismarcks Barrier. But just those Japanese medals probably won’t be enough: the Japanese Commanders need to find openings to strike and cause Allied Troop losses as well. That takes timing and will cost Japanese Men & Material or Air tokens–possibly accelerating the Allied drive that will break the Bismarcks Barrier and stop those medal awards for good. The Allied attackers need to manage the troops, supplies, and cards to take Japanese positions efficiently to reduce the number of enemy medals for those Logistics steps. But rushing too much will result in risky attacks–even a potentially disastrous failed invasion–not to mention exposure to Japanese Banzai counterattacks. Pushing Allied Men & Material forward needs to occur even while the Allies keep up the pressure on Japanese convoys and bomb Japanese positions to counter their defensive buildup and digging in.

Grant: What is the layout of the game board and the purpose of the different boxes?

Volko: The board shows 2 tracks, in effect: MacArthur (green player) is racing up the New Guinea coast on the west half, while Halsey (blue) is racing up the Solomon Island chain on the east. These work like the colored areas in the earlier “Race” games, except that each track has a human opponent trying to stop you: Imamura (gold) against MacArthur, and Kusaka (white) against Halsey. The various boxes serve as pools for each side’s Men & Materiel bits and Fleets of Convoys or Landing Craft. Boxes also track what is just temporarily removed or spent rather than out of play (off the board). An Allied Logistics track works very much like those in the earlier games, showing how much each Allied Commander has developed the logistical infrastructure, affecting how many M&M they get per action, how many Air tokens they have, and how many cards they hold.

1943: Race to Rabaul game board art by Donal Hegarty.

Grant: What is the general Sequence of Play?

Volko: The Sequence of Play is quite basic–first the Japanese take actions, then the Allies do. As in the other games, Commanders each get 2 core actions from a menu, plus Bonus actions from cards, in this case at most 1 of the latter.

But before each Japanese turn, there is a free Delivery step in which Convoys drop off cargo. That wrinkle in the sequence means that (mostly) there will be an Allied turn in between Japanese Convoy Launch (an action) and Delivery, so a chance for the Allied players to strike the Japanese ships. The exception is certain Japanese Bonus action cards representing particularly successful “Tokyo Express” runs and the like. Logistics steps, when (mostly) the Allies trigger them, always occur after Allied actions. There are a couple Japanese cards that can force a Logistics step, representing intervention by Japanese fleet commander Yamamoto. Victory is instantaneous, whenever any Commander takes their 12th medal or–far less likely–a Japanese Supply Base such as Rabaul falls.

Grant: How many players is the game designed for?

Volko: The game handles 2, 3, or 4 players. We always have Japanese and Allied players opposing each other, as both logistics and counter-logistics feature. With 4 players, each takes a Commander: the 2 Commanders on a side can help each other with longer-range strikes and intelligence, or they can withhold help or even sabotage each other if their ally is pulling ahead and getting too close to winning. With3 players, one takes both Commanders on a side and must win with both, facing 2 players each as a single Commander. The single player can be either on the Japanese or Allied side, either works. With 2 players, you can either each command a side–the 2 Japanese Commanders versus the 2 Allied–or you can pick either half of the map–New Guinea alone or the Solomons–and play a shorter game with just 1 Commander each side.

Grant: What different commanders do players have a choice to play as? How do they differ?

Volko: The paired Commanders personify not only the conditions in New Guinea and the Solomons, respectively, but also the bureaucratic friction between Army and Navy on each side.

-MacArthur in New Guinea is also the theater commander so gets say in any internal Allied dispute such as order of actions. As an Army General, he has more land assets such as Artillery cards and a related Special Ability to redraw them, more suitable anyway to the New Guinea “track” that involves some interior fighting. Also, MacArthur alone can use Airdrops to seize jungle airstrips.

-Halsey in the Solomons has more Naval Shelling, Cruisers against Japanese Convoys–also his Special Ability–plus Guerrillas but correspondingly less Artillery and attack Divisions. Halsey late in the campaign needs to be the most careful not to get the last of his Divisions beaten up and withdrawn.

-Facing MacArthur, General Imamura represents the overall Japanese Army’s focus on New Guinea and the overall Japanese priority on that axis over the Solomons chain–so that player is the senior partner on the Japanese side. Imamura has more Troop and Ammo unit cards at his disposal and a Special Ability that can redraw them. He has his own Bonus action cards like Supply Road and Barge Assault.

-Admiral Kusaka facing Halsey has an edge in Carrier Pilots–his Special Ability–naval advantages like Long Lance torpedoes, but also the defensively crafty Army General Sasaki, who held up the Allies bloodily on New Georgia.

Grant: How is victory achieved?

Volko: As in the other “Race” games, capture of a Supply Base–here an Allied Commander advancing to either Rabaul, Madang in New Guinea, or Kavieng in the islands–ends the game immediately in an Allied Commander win. But, as in those games, that rarely will occur: the main way to win is to be the first of the 4 Commanders to gather 12 medals along the way.

Grant: What different scenarios are included?

Volko: The game includes 4 scenarios, each of different length. They all end with capture of a Japanese Supply Base or with a 12th medal. They run different play lengths by starting at later and later points in the South Pacific campaign:

-TheFull Campaignbegins with the Japanese still to make their final push on the Kokoda track and Guadalcanal in late 1942. The Allies must battle their way to Buna in Papau before heading up the New Guinea coast, while throwing the Japanese off Guadalcanal before driving up the Solomons chain.

-CARTWHEEL begins with the Allies preparing their historical 1943 drive to conquer or encircle Rabaul. Buna and Guadalcanal are cleared and serving as Allied bases, but the great Allied offensive has not yet launched.

-POSTERN begins with MacArthur primed for the historical September invasion to capture the Japanese New Guinea base of Lae and Halsey’s forces having just fought across New Georgia in the central Solomons.

-Finally, CHERRY BLOSSOM is a small learning scenario for just 2 players on the Solomons half of the board, representing the moment that Halsey is about to invade the Japanese bastion island of Bougainville.

Grant: What do you feel the game models well?

Volko: Phalanx’s “Race” system does so well highlighting the need to gather and push supplies forward in a mobile mechanized campaign–especially one in which the defender is largely on the run. Race to Rabaul I hope similarly succeeds in showing that the overwhelming Allied logistical edge over the Japanese in the South Pacific by 1943 was alone not enough against tenacious, dug-in defenders. The Allies succeeded as they did by smartly targeting Japanese logistics first, and only then throwing ground forces at the enemy bastions. To me, this design makes that counter-logistics approach vivid. I hope players will agree!

Grant: What are you most pleased about with the design?

Volko: I’m pleased with how the one-sided “Race” concept ported here to a full wargame, force on force, and that some added map features, pieces types, and combat rules brought the Phalanx system to “tri-phibious” warfare. The game is more complicated than either 1944: Race to the Rhine or 1941: Race to Moscow, to be sure, but remains more accessible than my usual design space such as Levy & Campaign or Recon Series. (I think so, anyway.)

Grant: What other designs are you contemplating or already working on?

Volko: Jaro of Phalanx, who commissioned this design from me, and I have chatted back and forth about a wide range of settings for a possible next “Race” volume from me. I have a good idea what that would be, if players end up digging Rabaul. But it would be premature to raise particular expectations as yet.

Thank you for the intriguing questions!

If you are interested in 1943: Race to Rabaul, or its sister game in the Pacific Wargames package called Tora Tora Tora!, you can pre-order copies on the Gamefound pre-order page at the following link: https://gamefound.com/en/projects/phalanx/pacificwar-games

-Grant
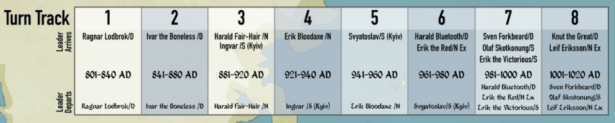
  •  

WBC 2025 Designer Interview Videos: Gregory M. Smith & Mark Herman

Last year, while attending the World Boardgaming Championships in Pennsylvania, we had the chance to sit down separately with 2 wargaming icons in Gregory M. Smith and Mark Herman and shoot interview videos.

The first is with Greg and covers his ongoing list of in-design games:

The second was with Mark and covered his now recently released Army of the Potomac from GMT Games:

-Grant

  •  

Interview with Larry Pinkerton Designer of And the War Came: American Civil War 1861-1865 from Pinkerton Games

While attending Buckeye Game Fest this spring, we were gifted a copy of a newly published game called And the War Came: American Civil War 1861-1865 from Pinkerton Games, which is published by Blue Panther LLC and Steve Jones. The designer and owner of Pinkerton Games Larry Pinkerton had been their earlier but had to leave due to some other pressing business and we were unable to meet but were very grateful for the game. Upon returning home, I reached out to Larry to see if he would give us a bit of an inside look at the design and he was more than willing to discuss the game.

Grant: Larry welcome to our blog. First off please tell us a little about yourself. What are your hobbies? What’s your day job?

Larry: Grant and Alex, first, thanks for the opportunity to tell you about myself, and my game, And The War Came. I’m a lifelong resident of southwest Ohio, from the Dayton area. I’ve got three great adult kids, each working on their families and/or careers. I’m now retired from both my civilian job, and my almost 34 years as a traditional Ohio National Guard member-last duty assignment as an Air Defense Brigade Commander-so now more time for hobbies. 

Now that And The War Came is finally done, I enjoy hanging with my kids, playing music, and traveling. I still do part time contract work in support of US Army training events, which I enjoy as well. And I hope to find more time for playing other wargames too!

Grant: What motivated you to break into game design? What have you enjoyed most about the experience thus far?

Larry: I’ve always been interested in the American Civil War, and many years ago it came to me that a block style game and a strategic level treatment of that war would make a great game-one that didn’t really seem to be available, at least for what I was looking for. I’ve really enjoyed developing the game, adopting, changing or dropping processes, seeking to get at the right balance of playability, workable mechanics and good history. It took a while, but I’m happy with the results.  

Grant: What is your upcoming game And the War Came about?

Larry: And the War Came is a strategic level American Civil War game, focused on the southeastern United States. It started life as a block game, but when I decided to self-publish, I switched to rotatable counters due to cost. But play is similar-it’s area movement and card driven, so those familiar with Columbia style block games will recognize some of the mechanics.

Grant: What does the title mean in relation to the history of the American Civil War?

Larry: I bounced so many title ideas and finally settled on And The War Came, which is a sentence in Lincoln’s 2nd inaugural address (March 4, 1865). I felt that line summarized how the United States stumbled and staggered into civil war. And the wonderful Carte de Visite Collection images from the US Library of Congress I chose for the game box spotlight who the actual participants really were.

Grant: What games gave you inspiration for your design?

Larry: Columbia Game’s Hammer of the Scots and Victory Game’s The Civil War 1861-1865 were by far the strongest influences.

Grant: What is important to model or include in a game about the American Civil War?

Larry: Above all, I think it is leaders and leadership at the corps and army level. Any discussion of ACW campaigns seems to hit on the “what ifs” of senior leaders. There were simply so many generals I could have chosen to model in the game, but I finally settled on 22 Union and 19 Confederate leaders that did or could have risen to army or independent command. The formations on both sides were so similar, in my opinion it was the leadership that was truly decisive.

Grant: What challenges did you encounter in the design? How have you overcome them?

Larry: Wow, there were a lot; game flow, simple but historically accurate mechanics, relative strength and play balance, rail and naval capacity, re-playability, map scale-all had to be refined through trial and error, playtesting and compromise. And countless rulebook edits! Rules concepts I thought made perfect sense in my head and on the page drew several questions when reviewed by others. But I think it’s a pretty good final product.

Grant: What is the scale of the game? Force structure of units?

Larry: Regional area movement, and seasonal turns, representing three months. The map is bounded by eastern Kansas to eastern Texas on the western edge, New Jersey to northern Florida along the Atlantic Coast, lower Midwest on the northern edge, and Gulf of Mexico on the southern. Most states contain 4 to 10 areas-states with better road networks tend to have less areas. But there is more territory than units to control it. Fortress cities (i.e. Washington, D.C.), major railroads, navigable rivers, and mountains and swamp areas are also portrayed on the map. Rail and naval support capacity change each year.

Units represent infantry or cavalry corps, with a strength of from 1 to 4 divisions, or forts representing 1 to 4 installations. Unit count is: Union-33 Infantry counters, 10 Cavalry counters, 5 Fort counters, Confederate-26 Infantry counters, 8 Cavalry counters, 8 Fort counters.

Grant: What is the counter anatomy?

Larry: Very straightforward if familiar with Columbia style block wargames-a mechanic I have always admired for simple and clean fog of war, step reduction, and ranged or initiative combat. \Counters are square with strength point symbols (divisions) arrayed along each edge, plus movement and combat ratings. Infantry has a combat value of C2 with a move allowance of 1. Cavalry has a combat value of B1 with a move allowance of 3. Forts have a combat value of A1 with a move allowance of 0-they are stationary. There are also corps insignia (Union) or battle flags (Confederate) just to add historical flavor, and the branch insignia of the period for infantry, cavalry or forts. Ultimately, I chose to give similar units of both sides the same combat or movement ratings (since both Union and Confederate formations grew from the same organizational foundations and traditions), but those ratings can be modified by the leaders who command them, both at corps and army levels, and/or the battlefield terrain.

Grant: What does it mean the “game is We Go turn based”?

Larry: Most functions are conducted by both players at the same time. For example, in the Administration Step, both players recruit (buy) their new units/strength points, enter new or recovered from wounds generals, or administratively move/transfer generals already on the map to new assignments/commands. When both players are done, they go to the next step, (Operations), with Action Phases where each plays a card to determine who moves first, they complete their moves and then resolve any battles that result from movement. The Logistics Step and Victory check complete a turn.

Grant: What type of experience does this approach create?

Larry: It minimizes down time for one. Actions in the Administration Step, Operations Step, Logistics Step happen simultaneously. Only in the Operations Steps’ Action Phase (or depending on the season, phases) does movement happen sequentially. This limits the action/reaction dynamic to operations, where maneuver happens in small chunks due to the seasonal card play. Neither side is able to make big sweeping moves, while the other side can only watch-the mechanic enables campaigns like Gettysburg or Vicksburg, although they may not necessarily occur during the course of play.

Grant: How does the game use cards?

Larry: Cards list the number of “orders” you can issue to units in order to conduct movement or other actions. There are also cards with both events and orders where players must choose which to use. And most cards have a bonus action (improved combat, movement, or leader promotion) to spice things up. The season determines the number of cards each player receives that turn. The Winter season/turn, each player receives only one card-in the single Action Phase, each player compares their card to the other player’s to determine who moves first (initiative), then second, then resolve any combats. This makes for a short turn. In both Spring and Fall seasonal turns, players receive two cards each, then play their cards against each other in each of the two Actions Phases, conducting moves and combat. In the Summer seasonal turn, three cards are dealt to each player-thus there are three Action Phases that turn.

Grant: What type of cards are included? Can you share a few examples?

Larry: There are 30 cards in the common game deck (there are not separate unique decks for Union or Confederate players). The deck includes 22 orders cards, each card with a value of 1, 2, 3, 4 or 5 orders. The orders determine how many units (corps) or commands (see Leaders below) can be moved with that card-a card with only one order allows the movement of only one unit, etc. Orders can also be used to promote generals or repair rail roads, etc. Again, most, but not all of these 22 cards also have a bonus that improves movement, or combat for a unit, or gives a free general promotion.

There are also 8 cards that include a combination of orders and events such as blockade impacts, partisan activities, native uprisings, surprise attacks, diplomatic incidents, immigrant or native recruits, or spy activity-each event with favorable impacts for themselves, or negative impacts for the opposing player. I chose for the event cards to be generic in nature and usable for both sides, verses specific events (i.e. Trent Affair) scripted events. For these 8 cards, players have the option to play the event and still have two orders to move other units, or not play the event at all, and have all three orders for movement.

The entire deck is reshuffled at the start of a new year. Since each player only receives 8 cards in a four season/turn year, only 16 of the 30 cards are played each year-some cards may not get played during the entire war, while others may reappear several times.

Grant: How does combat work?

Larry: Again, similar to other Columbia style block games.

Paraphrased from the rulebook:

Units Fire or Retreat in a combat round. The sequence of combat is A class units fire/retreat first, before B class units, followed by C class units which fire/retreat last. If both sides units are the same class, the defender has the advantage, and fire/retreat before attacking units of the same class. A general’s initiative rating may change who has the first shot advantage. To Fire, roll as many dice as the unit’s current strength points (SP). A hit occurs for each die roll equal to, or less than the unit’s combat number rating. Hits on the enemy take effect as they happen, each hit immediately reducing the enemy unit strength point count by one. Say a 3 division (SP) infantry corps has a combat rating of C2-that corps rolls 3D6 dice and every “1” or “2” rolled is a hit, reducing enemy strength and effectiveness when returning fire. In a battle between a B1 cavalry unit and a C2 infantry unit, the B1 rolls first, but only scores a hit for each 1 rolled. The C2 rolls second and scores a hit for each 1 or 2 rolled. One round of combat is complete when each unit fires or retreats.

Some unit strength may be recovered at the end of combat if the unit is not destroyed-with this recovery rule I’m trying to account for after the battle return to duty wounded, stragglers, local prisoner exchanges, etc. I was aiming for about 20% casualty rates in combat.

Grant: How do Leaders work? How are they killed or wounded?

Larry: Leaders are used to command corps or armies (units under the command of a general are actually called “commands”, i.e. Sherman’s command). A leader imparts his initiative (A, B, or C class) and tactical ratings to the unit or units he commands. In Sherman’s case, he changes a C2 infantry corps under his command to a B2. A leader’s initiative and tactical ratings may change at different ranks. And I’ve added optional rules to randomize when leaders enter the game, and their ratings.

Leader counters also rotate-they all enter the game as a one star general. They may be promoted to two or three star rank. Grant and Sherman can even be promoted to four star (GEN) rank as they historically became army group commanders. A one star general (BG) controls one corps counter; a two star (MG) may command one or two corps.

The only way a leader can be promoted to three stars (LTG) rank is to take command of one of the 5 named armies: Potomac, Cumberland, and Tennessee for the Union; Northern Virginia and Tennessee for the Confederacy. Named armies may contain four or more corps, depending on the army. And only named armies may have subordinates of one or two star rank. If a three star army commander is relieved of command, there is a political cost, and the leader reverts to one or two star rank.

Leaders also represent staffs and logistics trains, so commanded units may engage in two rounds of combat, whereas corps without a commander may only initiate one round of combat-so even lower quality leaders can be beneficial since they allow you to fight an additional round. Most leaders also increase the movement allowance for infantry to 2 instead of the base 1.

And yes, leaders may be wounded, killed or captured. At the end of each combat which involved leaders, a leader casualty assessment is rolled-lower ranked leaders are more likely to be casualties. If assessed as a casualty, another D6 is rolled for severity of wound. Rolls of 1 through 5 indicate the leader is out for that many turns. A roll of 6 means the leader is killed. And if a commanded unit is destroyed but the leader is not killed or wounded, the leader is captured. Captured leaders may be exchanged as prisoners.

Grant: How does the design create fog of war and uncertainty?

Larry: The counter covers hide counter information until opposing units engage in combat. Of course, leader losses will occur, which adds to uncertainty. The cards also provide for a lot of variability in maneuver. And the strength replacement recruiting is a combination of fixed values for the year, plus a die roll for variable recruits each season. Recruitment strengths diminish for both sides over the course of the game. There’re several optional rules that address the Emancipation Proclamation, Drafts, Leader randomization, etc. to add historical flavor or variability to the game.

Grant: Who is the artist for the game?

Larry: I did the artwork…in MS PowerPoint. Whew, not the easiest thing to do! But I’m happy with the results. I used public domain art and was able to generate nice graphic quality with the tools available. And I found you can only go so far in development before you have to start addressing production concerns. And the War Came is definitely a game on a budget!

Grant: How is victory achieved?

Larry: Quite simply, players must accomplish more than their historical counterparts in the same period, for example the 1862 scenario, when the Border States, most of Tennessee and New Orleans were in Union hands by year’s end. So, victory usually means holding more territory, but there are also war weariness and political factors that contribute to, or detract from, victory. Examples are the midterm elections of 1862, Presidential elections of 1864, and weariness of the northern population.

Grant: What do you feel the game models well?

Larry: The overall ebb and flow of the conflict-using corps formations on a large area map just works well. And although there are abstracted naval and logistics rules that function well, I chose to focus on the senior commanders and Lincoln’s and Davis’s struggles to find effective military leadership for their troops at corps and army levels. And I think I’ve got the right level of political factors that contributed to the War’s outcome factored in. It’s hard for the CSA to win, but if the USA sits on it’s hands to build strength and perfect its leadership, the USA will lose. The USA must take the fight south early and often-and that’s a lot of territory to cover.  

Grant: What are you most pleased about with the design?

Larry: There’s so many classic ACW titles out there that cover the entire scope of the war in great detail, and yet I think And the War Came fills a niche. For those familiar with board wargames, it’s not overly complex and it plays fairly quickly. I like the unknowns and fog of war, and think the re-playability is there. The historical framework is solid. I tried to not model for effect, so historical campaigns and outcomes are certainly possible, but not preordained. I wanted an interesting beer and pretzels game, one that both those familiar and unfamiliar with the ACW could enjoy. Again, I’m satisfied with the results.  

Grant: What other designs are you contemplating or already working on?

Larry: I think if there’s another one in me, it’ll be a strategic treatment of the American Revolution-but to model that conflict will take some work, initially just to get the scope right, and factor in the interrelationship with the wider Anglo-French conflict.

Oh, and I must add a hearty thanks to Blue Panther Games, for their great production and distribution support! I just couldn’t nail down a publisher-but after consulting with Steve Jones (BPG) I realized I could partner with Blue Panther and do it myself! I would recommend them to any aspiring designer who’s interested in self-publishing.

If you are interested in And the War Came: American Civil War 1861-1865 from Pinkerton Games, you can order a copy for $65.00 from the Blue Panther LLC website at the following link: https://www.bluepantherllc.com/products/and-the-war-came

-Grant
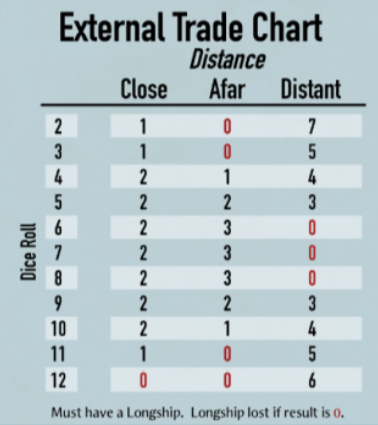
  •  
❌