Normale Ansicht

Best 3 Games with…Despair!

Von: Grant
25. März 2026 um 13:00

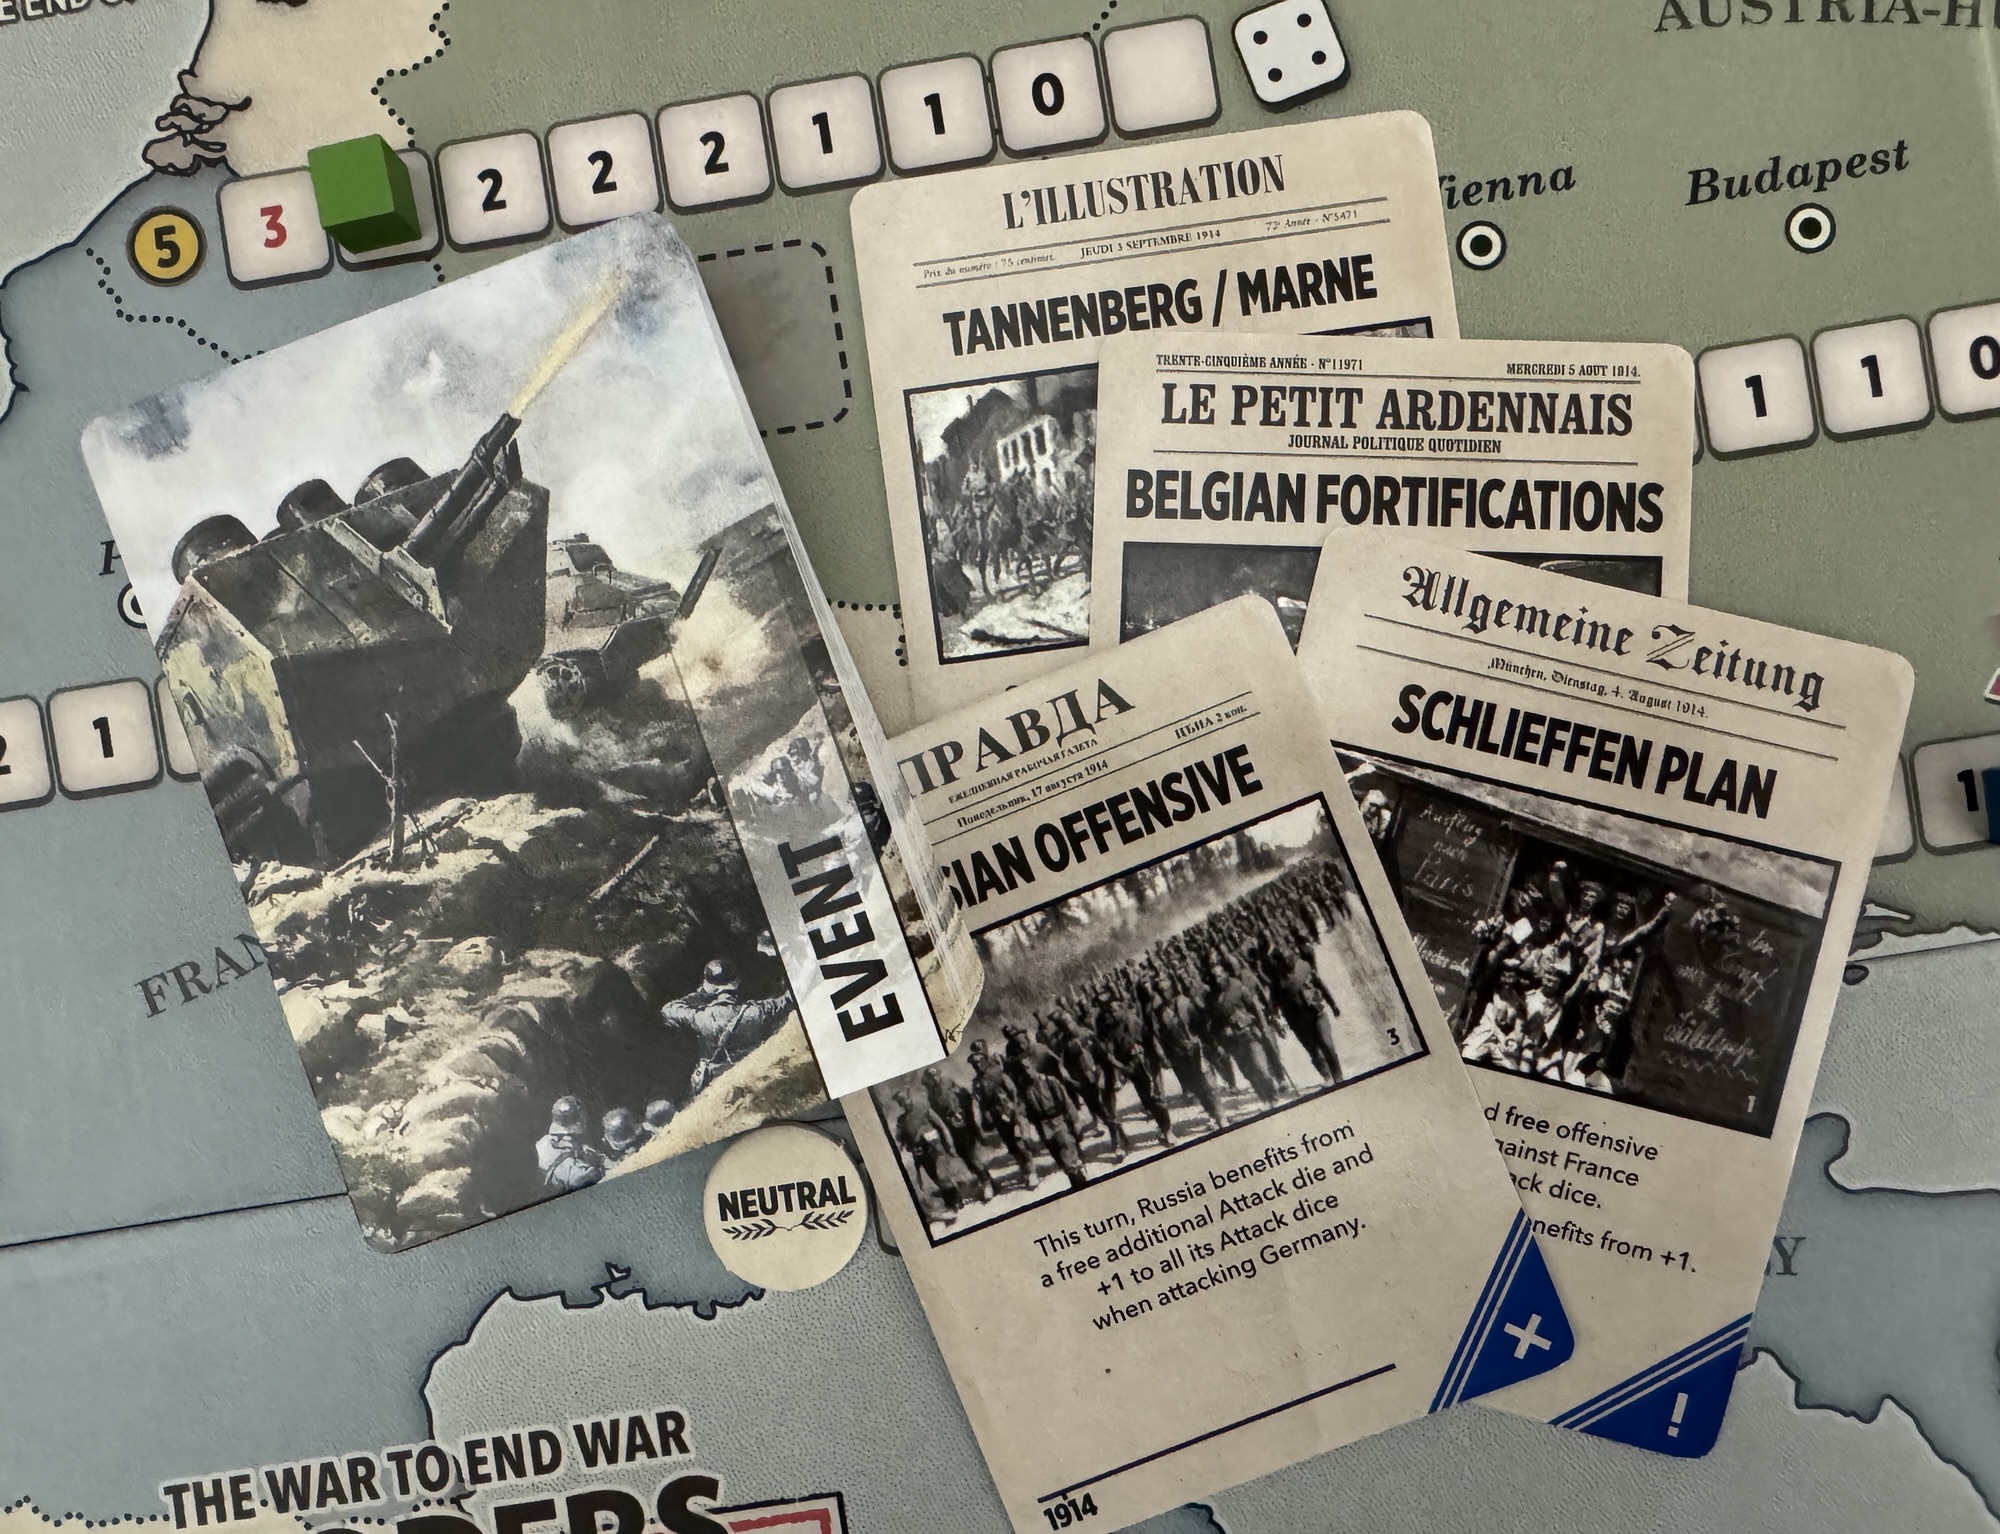
Recently, I have been playing a lot of Paths of Glory: The First World War, 1914-1918 from GMT Games on the fabulous Rally the Troops! and these gaming sessions have got me thinking. Thinking about the uselessness of war and conflict and the ultimate negative effects of it all. But not just the loss of life, maiming and disfigurement that comes with war but also the emotional scars. And this got me thinking about despair and hopelessness. Despair! A word that evokes very dark and scary feelings in all of us because it gives the impression of a lack of tomorrow. The dictionary definition of Despair is “the complete loss or absence of hope”. In my opinion, this is a word that can be used to describe many historic battles and wars as they have spiraled into pointless affairs with no end in sight. World War I comes to mind for me and the years of bloody and brutal trench warfare, bombardment and use of deadly chemical weapons such as mustard gas. In this post in the Best 3 Games with… series, I want to share with you games that have despair as a main focus.

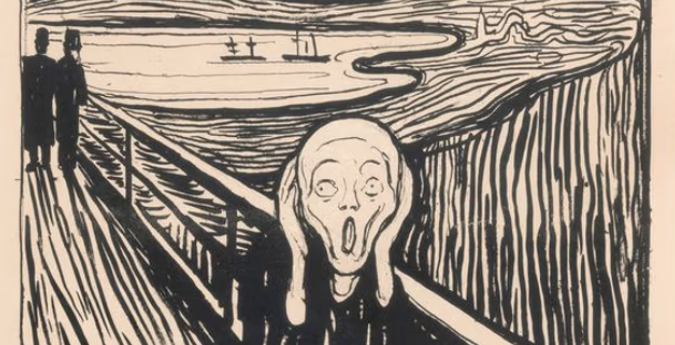
*As my Featured Image for this post, I used the painting The Scream by Edvard Munch (1895). He said about the piece that it felt like a “scream through nature,” and the painting features a distorted figure covering its ears, reacting to, rather than making, a sound.

3. Verdun from Dragon Dawn Productions

Verdun is a card game that is focused on the famous siege of Verdun during World War I. As player’s hands dwindle down as they play 2 cards per round but only draw 1, players will also have to play cards that help the other side, timing it strategically to minimize their own casualties. The teams alternate being the Attacker, and each card played leads to more and more deaths. You are fighting over positive victory points from trying to win several positions through over the top attacks that are worth a set amount of VP but that are hidden from view until they are taken so you never know if you are going for the high VP area or the low ones until you blow the whistle to initiate the attack.

A game of Verdun lasts about 16 rounds as players start with 12 cards, which they then play in a series of 12 tricks. When you win the trick, you gain the VP for the position but the winner will lose their lowest valued cards while the loser will lose their highest value cards to the dead pile representing mounting casualties. Low cards have fewer skulls on them representing deaths while higher cards have more. So even in victory you will be accumulating negative VP’s and this is one of the key aspects of the game…managing those deaths! Just like the high command.

In the end, the player with the highest score will win and this number will be very low or can even be negative. In our play of the game, my French defeated Alexander’s Germans by a final score of 3 VP to -14 VP. What a great little trick taking game! The really interesting part about the late game is that your hand has dwindled to being full of your worst cards as you have most likely used the good cards earlier to win tricks or cause losses to your opponent. The last few card plays just seem brutal and you are just hoping to not have to take a lot of skulls. This felt very fruitless and mimics the despair of commanders as they had to issue orders that they knew were not going to result in any positive gains but only the loss of life.

The game is also gorgeous with fantastic original period art used on the cards and amazing graphical layout and design. The images are very gritty and involve the feelings of the battle and create a very thematic portal for the players to experience the difficulties in the battle. Just a very slick little thematic game.

Here is a link to our video review of the game:

2. Paths of Glory: The First World War, 1914-1918 from GMT Games

Paths of Glory is widely thought to be a masterpiece on WWI and after just a few plays of the game, both in person and online on the fabulous Rally the Troops!, I can definitely see why people feel that way. Even though we are novices, the game is just that good and really tells the story of the fruitless efforts of both the Entente and Central Powers as they bashed their heads against each other over control of Europe. The game is long and you generally are going to have to play this one over a long weekend to get it all in and enjoy it properly but it is just such as great tool to understand the complexities of the struggles of trench warfare, supply and the balance of attacking versus taking a breath and regrouping. I really enjoyed the mix of historical events and the choices that I had to wage the war in a way that I felt was appropriate. But, my message to everyone who plays this game is beware of supply. Even in our few plays, supply has been an issue and we have had to make sure we didn’t make a few fatal mistakes that would get us in trouble. I want it to be clear here. I am not good at this game…at all and the nuances of supply and how to play have just eluded me as I continue to make the same errors game after game. But it is really good and I look forward to each new play with enthusiasm and am excited about the chance to get to learn more about this fascinating war that was so very fruitless.

With that being said, generally in every single game the Central Powers will start out by playing their Guns of August card. Guns of August is a crucial, high-stakes opening event for the Central Powers on Turn 1, enabling an immediate, powerful and historical offensive against France and Belgium. It kicks off the continual back and forth of trench warfare and frankly seems to never really generate a good outcome. Each attack is bloody, with both sides being brutalized by having to reduce units and the trenches make attacking more and more difficult as they evolve and grow to Level 2. Paths of Glory in a large part is about resource management and the constant pressure to continue offensive momentum and rebuild troops through the use of Replacement Points and events to bring on additional troops is a major problem for both sides. You can only attack for so long before you will burn yourself out and will have to spend time to recover and get ready for the next turn’s offensives. This process of back and forth will ultimately rarely see fruits on the Western Front and will devolve into stalemate as each side strengthens their defense and the Entente begin to bring in reinforcements from England to shore up the lines and nullify the early German advantage. But the real despair in this game are the decisions about how to play your cards. You can use them for their Ops Points to fuel attacks and movement on the board, use them for the printed event or play them for the Reinforcement Points located at the bottom of the card. This is the real key to the game and managing this process of maneuver, attack, shoring up defenses, buying replacement points and protecting supply lines is where the players lose their minds. You simply cannot continue a full out frontal assault round after round. If you do, you will grind your men to dust and dig their own graves as you will be unable to prepare for the next turn. This is a long game and this process wears on turn after turn and the first person that makes a mistake typically is the one that loses.

Here is a link to our initial impressions video of the game:

1. The Grizzled from CMON Games

The Grizzled is a special game. Not a big game. Not a complex game. And not a game for every one as it is different, focused on the friendship and bonds of a group of French soldiers caught in the trenches of World War I. The game is a cooperative card game set during The Great War, also known as “the war that no one in the U.S. really understands because we only ever learn about World War II”. Ironically, playing The Grizzled is somewhat of a rather peaceful affair, but our plays have found it to be quite challenging, sometimes unwinnable in fact, and that is where the despair comes in. No matter how well you play the cards you are dealt and no matter how hard you work together to overcome challenges, failure is a part of the game and winning is truly at a premium.

The cards represent threats to all of the men’s safety or a hard knock which impacts the player or their compatriots in some way. The goal of the game is to play through all of the Trials cards to find peace (literally a Peace card). A standard game starts with 25 Trial cards on the peace deck and the remaining 34 Trial cards are placed in a separate morale deck (a draw pile). Cards move from the Morale deck to the Trial deck at the end of a mission. The Morale deck sits on a card picturing a monument commemorating the sacrifices made in war. But if you ever see this Monument card, you’ve lost the game.

The goal of each mission is the same to play as many cards as you can before withdrawing from battle. Cards are played in one of two ways; placing a threat in No Man’s Land or placing a hard knock card next to your soldier. Every time you play a card, the group is one step closer to victory, but if there are ever 3 of the same threats showing on the table at any one time, the mission is lost but the game will continue.

Beyond playing a card, there are 2 other actions but they are rarely available. On each player’s character there is a Lucky Charm showing one of the 6 threats in the game. Playing the Lucky Charm as an action allows that player to remove a matching threat from No Man’s Land, making the mission a bit easier to continue. After you use your Lucky charm you flip your character card over and no longer have access to that action. The other action is to make a speech. There are a very limited number of Speech Tokens in the game – the mission leader will receive one after each mission until all the tokens have been distributed. When giving a speech as an action, you have to have the token and you have to choose one of the 6 threats. The OTHER players still active in the mission then remove ONE card from their hand that matches the declared threat. These can be useful but are not guaranteed to have an impact. Once played, a speech token is removed from the game. But, one of my favorite mechanic is when you withdraw and add a support token to your character. The token is, very thematically a cup of coffee. When the round ends, you will pass this coffee to a teammate as support. The teammate that gets the most support at the end of the round can remove two hard-knocks or recover their lucky charm.

While we love the game, and I find it to be supremely interesting, we have never won in over 20 plays. We simply seem to run the same course over and over again and never seem to gain much ground. And I really think that this is the point of the game. And where the despair comes into play. One of the other things that I love about the game is the tag line that appears on the front cover. It reads: Can friendship be stronger than war? This statement gives some pause and causes a lot of discussion in our group particularly with the concepts of the exhaustion of characters (using their Lucky Charm and turning them over), the speeches (removing a threat from the battlefield that you cannot get rid of because no one has the matching cards) and the cups of coffee (support). As if a cup of coffee can overcome anything…but you can always give it a go.

Now there are many games that could be included on this list but the games I have chosen perfectly evoke the level of despair that I was going for in this piece. I have played many other games that convey despair but feel that these 3 best demonstrate the level of hopelessness that I was thinking of. What are your favorite games that evoke despair?

-Grant

La Der des Ders – The War to End War from Hexasim – Action Point 3

Von: Grant
26. Februar 2026 um 14:00

La Der des Ders – The War to End War from Hexasim is a 1-2 player slightly abstracted strategic level look at World War I. The game allows the players to relive the First World War at a strategic level, with each player controlling one of the 2 sides either the Entente, consisting of France, England, Russia, Serbia and other minor nations or the Central Powers including Germany, Austria-Hungary, the Ottoman Empire and a few minors. La Der des Ders can also be played solo, with a dedicated solitaire bot called “Athena” who utilizes special Cornflower Cards to make decisions about what technologies to invest in, where to undertake offensives and how to utilize limited resources and reinforcements. Each turn, players gain an amount of Resource Points dependent on what nations are in the war, which they can allocate to different areas to guide their overall strategy. Victory is achieved by launching offensives that drain the morale of enemy nations, forcing them out of the conflict through collapse.

In Action Point 1, we looked at the Game Board, discussing the Collapse Tracks, Trade Tracks, Russian Revolution Track and Naval Control Table and other various on-board tables and offensive spaces. In Action Point 2, we covered the Technology Phase and the Technology Tree and Technological Improvement Boards. In this Action Point, we will take a look at the Event Cards and how they inject the historical narrative into the gameplay and also alter the conditions of the game.

Event Cards

La Der des Ders has used the vehicle of Event Cards to inject the historical events and happenings of World War I into the game. This choice makes a lot of sense and plays into some of the game’s mechanics such as the Air Raid Technology that we discussed in the last post. At the outset of each turn, the players will be instructed to draw 3 Event Cards from the Event Deck. These are the 3 cards that will be in effect for this portion of the year as each of the years are divided into 3 separate turns representing roughly 4 months, with the exception of 1914 which represents the period of August through end of December that year. At setup, the player will divide the Event Cards by year to make 5 piles (1914, 1915, 1916, 1917 and 1918). Then they will take the 1914 Deck, shuffle it and
place it on the game board, in its dedicated box. Place the other decks on the right of the game board, near their
respective boxes on the Turn Track.

The 4 Event Cards for 1914.

Some of the Events are applied immediately when drawn, while others take effect later in the turn. This is all typically based upon the color of the symbols found on the cards in the bottom right hand corner and the symbol that coincides with a specific phase, such as the Resource Phase or Offensives Phase. In the picture below, you can see different examples of these cards and their color and symbols. These are Event Cards from 1914 on the left all the way through 1918. Also, some of the Events are only applicable in 1914. These Events will be marked with a blue corner. In the picture above you can see the 4 different 1914 Event Cards and their blue corners. Some Events have effects that apply until the end of the game, while others until they are cancelled. The text found on the cards is generally self-explanatory and I only found maybe 1 instance where I had to really think over what the card was trying to tell me to do. If you need additional information about the meaning of the cards and to find a bit of clarity, you can refer to the Events List in the rule book for more information.

Blue corners mean that the effect is no longer applicable after the year 1914. Red corners mean that this card can never be cancelled by using the Air Raid Technology. I found that this was the thing that I missed the most in my plays. Green corners mean this card may be cancelled with the Air Raid Technology but only under certain
conditions. Most of the Event Cards do things like allow for additional Offensives that turn at no cost, add a +1 DRM to Offensive rolls, or make Offensives cause more losses (but at a cost as that Offensive will cause you to lose troops as well) and the like. They are not game breaking but do inject some very interesting bonuses into the mix that will cause you to think about your plan for the use of of your Resource Points for that turn.

One final thing that I want to point out about some of the Event Cards. Some of the Events will instruct the player to place out a marker onto the board. On the board, there are several dashed boxes with small white numbers printed in them in specific locations. These are the Event Boxes and act as a reminder of the effects of various Event Cards when they are pulled. When Event Cards happen, some will provide the players with a counter that should be placed in these boxes to remind them of the effects of the historical events. These act as an mnemonic device and are very helpful.

These include the introduction of specific characters from history, special Events that occurred that changed the course of the war or had an effect on countries and their allegiance or that simply allow one of the many minor nations on the board, such as Italy, Romania, Bulgaria and Greece, to join either the Entente or the Central Powers. Here is a list of those special Events:

•  #6 – Von Lettow in Africa
• #10 – The Lusitania Torpedoed
• #15 – Major German Defeat (Battle of Jutland)
• #16 – Wilson Intervenes!
• #23 – Unrestricted Submarine Warfare
• #24 – Zimmermann Telegram
• #35 – Unified Command
• #36 – Louis Franchet d’Espèrey
• #41 – Pariser Kanonen

I mentioned the characters that are introduced by Event Cards and one of my favorite is the Von Lettow in Africa Event Card. This card refers to Paul von Lettow-Vorbeck who was a German General who commanded the Schutztruppe (colonial forces) in East Africa. Leading a small force of 3,000 Germans and 11,000 African Askari, he fought a brilliant guerrilla campaign against superior Allied forces (up to 300,000 men), never losing a battle and surrendering only after the 1918 armistice. The effects of this Event are that any Offensives by the Central Powers undertaken in Africa will not cost any Resource Points. This card will not appear until 1915 but can be a real boon to the CP player as they can continue hammering on the African Entente trying to get them to Collapse and no longer contribute their Production Value to the Entente war effort.

One of the major events that are covered by the Event Cards include the likes of the sinking of the Lusitania by the German U-Boats. On May 7, 1915, a German U-Boat torpedoed and sank the British ocean liner RMS Lusitania off the Irish coast. The ship sank in just 18–20 minutes, killing 1,198 of the 1,959 people on board, including 128 Americans. The attack spurred international outrage and shifted U.S. public opinion against Germany, contributing to the eventual American entry into the war. The effects of the is card include the placement of the Lafayette Marker above the Merchant Navy Track and indicates the number of additional Resource Points awarded to the Entente for the current turn. This support was basically from the United States of America as their citizens were killed in the tragedy and can be a very tough pill to swallow for the Central Powers as it is a death knell due to additional resources to bring more troops and focus more attention on Technology and the launching of Offensives.

The Event Cards are a key part of the game and really make it different from play to play as events might come out in a different order giving the player new opportunities to exploit or new dilemmas to plan for and deal with.

In Action Point 4, we will go through an example of an Offensive and take a closer look at the combat procedure.

-Grant

La Der des Ders – The War to End War from Hexasim – Action Point 2

Von: Grant
20. Februar 2026 um 14:00

La Der des Ders – The War to End War from Hexasim is a 1-2 player slightly abstracted strategic level look at World War I. The game allows the players to relive the First World War at a strategic level, with each player controlling one of the 2 sides either the Entente, consisting of France, England, Russia, Serbia and other minor nations or the Central Powers including Germany, Austria-Hungary, the Ottoman Empire and a few minors. La Der des Ders can also be played solo, with a dedicated solitaire bot called “Athena” who utilizes special Cornflower Cards to make decisions about what technologies to invest in, where to undertake offensives and how to utilize limited resources and reinforcements. Each turn, players gain an amount of Resource Points dependent on what nations are in the war, which they can allocate to different areas to guide their overall strategy. Victory is achieved by launching offensives that drain the morale of enemy nations, forcing them out of the conflict through collapse.

In Action Point 1, we looked at the Game Board, discussing the Collapse Tracks, Trade Tracks, Russian Revolution Track and Naval Control Table and other various on-board tables and offensive spaces. In this Action Point, we will cover the Technology Phase and the Technology Tree and Technological Improvement Boards.

Technology Phase

One of the best parts of La Der de Ders, and typically the best part of any strategic level wargame, is the Technology Phase and the player’s ability to spend their limited resources on various types of technologies to improve their performance on the battlefield and in the economic war. But, keep in mind that there is a risk here as resources are limited and you have to pay to develop these technologies and there is no guarantee of success as it is up to dice roll, albeit a modified one at that. Each of the players has their own Technology Tree board that is used to track their technological progress over the course of the game. There are a total of 6 different Technologies that can be researched including Attack, Defence, Artillery, Aviation, Naval, and Air Raid.

The Entente Technology Tree.

Each of the different technologies are important and the failure to develop them can lead to a quick and ignominious defeat. I also really like the concept of keeping up with your enemy as sometimes you are simply investing not to gain ground but just not to lose it! This is particularly the case with the Attack and Defence Technologies as if one side gets too far ahead that +1 or -1 difference can make a huge impact on attacks and can lead to significant losses which creates a whole new problem and a sink for those scarce resources.

The Central Powers Technology Tree.

As you look at the Technology Trees you will see that each box on the Tree represents a level of technology. Each level contains important information about its name, the available date when the technology can be researched, the target number needed to unlock it denoted as a number with a + that means equal to or greater than the number and the bonus that is granted when it is discovered. Each time a level of technology is unlocked, the player will move their Technology marker to the box corresponding to that level. Each level of technology provides a specific bonus which only applies to sectors that have implemented that level. Implemented means having paid for the implementation as you actually pay first to discover the technology and then must spend resources to grant its ability to your different nations.

In addition to the Technology Tree Boards, each player has a board with Improvement Tracks that indicate which sectors or nations belong to their side. For each sector, the tracks correspond to Attack, Defence, Artillery, and Aviation technologies. When a level of Technology is unlocked on the Technology Tree, the relevant side can implement it in the sectors of its choice so that these sectors can benefit from the bonuses this level provides. This will require the expenditure of Resource Points and then the Technological Improvement cylinder on the Improvement Track is then moved accordingly.

Keep in mind that it is possible to attempt to unlock a level of technology only if the year shown on that technology’s row has been reached. The dates that each of the Technologies is available is shown on the outer edges of the level of Technology in large black letters. It can be overlooked from time to time so check during each of the Technology Phases to makes sure you can spend resources on the tech you desire. Also, an attempt to unlock the Technology may only be attempted if the previous level of Technology has been unlocked during a previous turn’s Technology Phase. And finally, keep in mind that for each of the various Technology types, only one level can be unlocked per turn.

Now let’s take a look at ways to improve your chances when rolling the dice to unlock the Technologies. The cost for each attempt at unlocking a Technology is 1 Resource Point. But there is a key decision point at this time as before rolling the die to unlock a level of Technology, the player may decide to spend additional Resource Points. Each additional 1 Resource Point spent provides a +1 bonus for this attempt. This can be very important during the game as it can be the difference between getting the Technology needed to push you over the top for the turn or not and this decision is very important. The more Resource Points you spend on Technology, the fewer you will have to move forward with Offensives to weaken your opponent and break them or even the less Reinforcements you will be able to afford to shore up your defenses.

Machine Guns are unlocked by the Entente in 1914 with a die roll of 4. The Machine Guns grant a -1 DRM to enemy Attack rolls.

If the attempt is failed, the player receives a Technological Research Cube which they will place in the box of the level they just tried to unlock. On future attempts this white cube will grant a +1 DRM to die roll per cube accumulated through failed rolls. Ultimately, you will unlock these Technology levels, either through blind luck, your persistence or due to the over expenditure and over commitment of Resource Points. But that is what makes this part of the game so good as it is all about choices and the management of risk along with your resources. You cannot do everything that you wish to each turn and you will have to manage these things as best as you can to taste victory.

The Technological Research Cubes grant a +1 DRM per cube to an unlock attempt. In this case, a die roll of 3 would normally fail to unlock the Heavy Artillery advancement for the Artillery Technology but the +2 DRM makes it a 5 which is a success.

In my opinion, the 3 most important Technologies are the first 3 listed on the Technology Tree being Attack, Defence and Artillery. This game is mostly about the planning and execution of Offensives to weaken and ultimately break the will of your opponent by causing their nations to reach collapse on their Collapse Track. Attack gives a positive modifier to each of the attack dice rolled. Typically a nation must roll a 4 (Germany), 5 (France, Russia, the Ottoman Empire, Middle East, Romania, Bulgaria, Africa both sides and Serbia) or a 6 (Greece) and this +1-+3 for attacks will make a huge. A lot of the times though having a good Attack modifier will be lessened our counteracted due to a good Defence value but this is where keeping up the pace with the enemy is a key decision. The Artillery dice are a special animal. For each level of the Artillery Technology, typically each nation will gain an additional Artillery Die (black) to roll along with their Attack Dice (white). These Artillery Dice are not modified by the Attack Technology but are an additional free chance to score a hit. These dice can also be rerolled through the Aviation Technology which will allow for an Artillery Die reroll per level shown on the Technology Tree.

The Naval Technology and Air Raid Technology represent these 2 important miliary advancements in the struggle for the economic aspect of the war. The Naval Technology will for the Central Powers moves the Naval Control Cube one space to the right on its track. With the exception of Level 1, each level of Technology unlocked by the Entente moves the Naval Control Cube one space to the left. As mentioned in Action Point 1, the Naval Control Table is used to represent the efforts of the German U-Boat attacks on commerce and mimic the associated receipt of foreign support by the Entente from the United States of America. At the outset of each turn, a die is rolled and the table referred to in order to determine a possible number of lost Resource Points. There are 2 rows on the table, 1 being the U-Boat for the Central Powers and the other the effects of the Blockade for the Entente.

The Table located under the Naval Control Table indicates the modifier that will be applied to the Central Powers’ Naval Control die rolls. It takes into account the Naval Technology levels of the Central Powers and that of the Entente. At the start of the game, only the Central Powers can carry out a Naval Control die roll. You may notice the small gray box with a lock linked to the Naval Control Table that indicates that the Entente cannot carry out a Naval Control die roll yet. Only once it has unlocked Naval Technology Level 1, can the Entente perform Naval Control die rolls.

And finally, the Air Raid Technology allows the Central Powers player (and them alone) to influence the course of Events, depending on the difference with the Entente’s level of Air Raid Technology. This advantage will allow the CP to cancel an event or more that is beneficial to their enemy or that will harm their efforts.

The Air Raid Technology is based on the difference between the Technology level of the CP as compared to the level of the Entente.

I feel that the inclusion of the Technology Advancement in La Der de Ders was a stroke of genius and I very much like how the designer Arnauld Della Siega made it have a Press Your Luck aspect to it. This forces some very critical decision points on the players but also keeps the game a game and gives it a really nice feel of hope.

We recently published an interview on the blog with the designer Arnauld Della Siega and you can read that at the following link: https://theplayersaid.com/2026/02/09/interview-with-arnauld-della-siega-designer-of-la-der-des-ders-the-war-to-end-war-from-hexasim/

In Action Point 3, we will take a look at the Event Cards and how they inject the historical narrative into the gameplay and also alter the conditions of the game.

-Grant

RAW Video: Crisis: 1914 from Worthington Publishing

Von: Grant
15. Februar 2026 um 14:00

Crisis: 1914 is a game of international brinkmanship – if you back down too soon, you lose. If you back down too late you lose. But you have hawks and doves in your cabinet and in your government, and out of these conflicting views you must somehow formulate a coherent response to the crisis to win the day and prevent war.

There are 3 interrelated concepts at the heart of Crisis: 1914: Prestige, Tension, and Diplomatic Pressure (DP). Diplomatic Pressure (DP) is how you score Prestige. Tension is how you lose. Every card has a DP value. You apply DP by playing cards. The player with the most Diplomatic Pressure at the end of a turn earns Prestige points. There are other ways of scoring Prestige points too, but this is the most important one. Prestige is how you win. The player with the most Prestige at the end of the game is the winner.

We published an interview on the blog with the designer Maurice Suckling and you can read that at the following link: https://theplayersaid.com/2023/07/12/interview-with-maurice-suckling-designer-of-crisis-1914-from-worthington-publishing-currently-on-kickstarter/

Also, in a lead up to the game’s release, I worked with the Maurice to do the following Event Card Spoiler posts:

Crisis: 1914 Event Card Spoilers with Designer Maurice Suckling – Series Introduction and General Mobilization Cards

Austria-Hungary, Part One

Austria-Hungary, Part Two

Russia, Part One

Russia, Part Two

Germany, Part One

Germany, Part Two

France, Part One

France, Part Two

Britain, Part One

Britain, Part Two

Britain, Part Three

While this game is not necessarily a wargame, but more of a war themed Euro game with a bit of negotiation and tension as you build your tableau of cards, we had a great time with it and really feel that the game is a bit under the radar of folks and should be one of those games that is played at conventions as it seats up to 5 players and is really quite good.

-Grant

La Der des Ders – The War to End War from Hexasim – Action Point 1

Von: Grant
12. Februar 2026 um 14:00

La Der des Ders – The War to End War from Hexasim is a 1-2 player slightly abstracted strategic level look at World War I. The game allows the players to relive the First World War at a strategic level, with each player controlling one of the 2 sides either the Entente, consisting of France, England, Russia, Serbia and other minor nations or the Central Powers including Germany, Austria-Hungary, the Ottoman Empire and a few minors. La Der des Ders can also be played solo, with a dedicated solitaire bot called “Athena” who utilizes special Cornflower Cards to make decisions about what technologies to invest in, where to undertake offensives and how to utilize limited resources and reinforcements. Each turn, players gain an amount of Resource Points dependent on what nations are in the war, which they can allocate to different areas to guide their overall strategy. Victory is achieved by launching offensives that drain the morale of enemy nations, forcing them out of the conflict through collapse.

In this series of Action Points, we will first take a look at the Game Board, discussing the Collapse Tracks, Trade Tracks, Russian Revolution Track and Naval Control Table and other various on-board tables and offensive spaces, cover the Technology Phase and the Technology Tree and Technological Improvement Boards, take a look at the Event Cards and how they alter the game, go through an example of an Offensive and the combat procedure, review the Victory Conditions and give an overview of the “Athena” solitaire bot and how it works.

Game Board

The Game Board used in La Der des Ders covers the entirety of the European and Eastern portions of World War I and is a simplified geographical representation of the major players involved in the war. You will not find anything more than simple borders of countries and then not all of each country is represented in its entirety such as the Ottoman Empire of the vastness of the Russian steppes. There is also an inset map in the bottom left hand corner that covers the war in Africa. The Game Board is divided up into what are called Sectors representing both the major and minor powers involved in World War I. These Sector representations are illustrative of the main countries that took part in the war and one Sector can actually represent multiple countries. For example, in the case of France, you will notice that England really has no specific direct playable area or a Collapse Track of its own on the Game Board other than the graphical representation of their island nation. The British troops, along with those of Belgium, are abstracted into those of France for simplicities sake and to meet the design goals of the game. To further differentiate these Sectors from each other and to make playing visually simpler, the Sectors are shaded blue if they belong to the Entente and then green if they are part of the Central Powers.

The Collapse Tracks

Let’s take a closer look at the various information that is contained in these Sectors. Above is a picture focused on Germany with France (lower left), Austria-Hungary (on the right) and Russia (upper right) also included. You will first notice a line of small boxes with numbers listed in each box numbered from 3 on the far left descending to 0 and a blank box on the far right. These numbers are referred to as the Operational Value. This Track is referred to as the Collapse Track and represents the morale, fighting spirit, economic stability, martial resources and preparation of each of the countries for war in the game. On the left end of the Collapse Track is the country’s Production Value printed in a yellow circle. The Production Value corresponds to the number of Resource Points (RP) that will be generated by this sector at the start of each turn, if it is at war. If this Production Value number is printed in black, this means that this Sector is at war at the start of the game. If the Production Value is printed in white, the Sector is not at war at the start of the game but will enter the war through the appropriate Event Card being drawn. If a Sector is not at war but is Neutral, for purposes of the game this means that it does not generate any Resource Points.

At the start of the game, a wooden cube is placed in the space to the right of the box containing the red value. As losses are inflicted in this Sector due to Offensives or Event Cards, the cube will be moved to the right on the Collapse Track. When the Sector receives reinforcements, the cube will be moved moved to the left. The cube will never be placed on the space with the red value and the player must read the number in the box to the left of the cube to ascertain the current Operational Value. The numbers indicate the maximum amount of Resource Points that can be allocated to this Sector during an Offensive, which will also determine the size and number of dice that are used for the Offensive. This Operational Value will change throughout the game due to losses in Offensives or due to specific Event Cards. If the cube ever reaches the end of the Collapse Track, and another reduction must be made, the country will surrender and fall to their enemies.

The other important piece of information found on the far right side of the Collapse Track is the Attack Value. The Attack Value is used for Offensives and is how players determine whether they score hits or not with their troops and artillery. This Attack Value is represented by a die face that shows the number needed to hit. If the rolled Attack Dice are equal to or greater than the printed Attack Value a hit will be scored and losses will be taken by the defender by moving the cube down on the Collapse Track. This Attack Value can be modified through the advancement of technologies including on Attack and on Defense. The player will simply add up all applicable modifiers from these Technologies or from Event Cards and then reduce or increase that target Attack Value accordingly.

Offensive Arrows

Shown on the board are the Offensive Arrows that will remind the players about what Offensives they can undertake, meaning what Sectors may be attacked, and what Sectors have already taken their one Offensive against that adjacent Sector per turn. These are identified by red arrows connecting adjacent Sectors and will be covered up by the appropriate Offensive Marker when undertaken. In the below picture, we will take a look at Serbia as an example. You can see that Serbia is surrounded by Central Power countries including Austria-Hungary and Bulgaria (Neutral at the start of the war). They also have a few of their Allied nations adjacent including Romania (Neutral at the start of the war) and Greece (Neutral at the start of the war). From each of the adjacent Sectors there are 2 Offensive Arrows represented meaning that this Sector can both be attacked and can attack the adjacent Sector.

It is important to remember that an individual Sector can only launch one Offensive per turn, and that is always against an enemy sector adjacent to it. During the same turn, a sector may be attacked by several adjacent enemy sectors, but each Offensive is resolved separately.

Trade Tracks

There are two Trade Tracks shown on the Game Board, both of which are located in the top left hand corner of the board, 1 for the Entente (Merchant Navy) and the other for the Central Powers (Kaiserliche Marine). These 2 tracks provide additional Resource Points to both sides at the beginning of a turn when they are collecting income. Naval Control die rolls can modify the number of RP’s received at the beginning of a turn. It is important to remember that the Merchant Navy Marker is moved forward 1 space at the end of each turn, which will result in advancing the Production Marker of the Entente. If the Lafayette Marker is on this track, it is also moved forward 1 space. These markers are never moved to the left. Once the end of the track has been reached, the markers will no longer need to be moved.

Russian Revolution Track

The Russian Revolution Track indicates the advance of the Russian people towards their ultimate Revolution, which historically broke out in March 1917. The Russian Revolution Marker will begin the game in the white
space. This marker may be moved to the right each time Russia obtains reinforcements. It is never moved to the left. When this marker reaches the last space, Revolution breaks out and Russia will no longer produce resources and can no longer receive reinforcements.

Naval Control Table and Track

The Naval Control Table is used to represent the efforts of the German U-Boat attacks on commerce and mimic the associated receipt of foreign support by the Entente from the United States of America. At the outset of each turn, a die is rolled and the table referred to in order to determine a possible number of lost Resource Points. There are 2 rows on the table, 1 being the U-Boat for the Central Powers and the other the effects of the Blockade for the Entente.

The track located under the Naval Control Table indicates the modifier that will be applied to the Central Powers’ Naval Control die rolls. It takes into account the Naval Technology levels of the Central Powers and that of the Entente. At the start of the game, only the Central Powers can carry out a Naval Control die roll. You may notice the small gray box with a lock linked to the Naval Control Table that indicates that the Entente cannot carry out a Naval Control die roll yet. Only once it has unlocked Naval Technology Level 1, can the Entente perform Naval Control die rolls.

There are also several administrative tracks on the Game Board including the Resource Track, used to track the current Resource Points of both the Entente and the Central Powers, the Turn Track and the Victory Point Track. You will also notice lots of dashed boxes with small white numbers printed in them all over the board. These are the Event Boxes and act as a reminder of the effects of various Event Cards when they are pulled. When Event Cards happen, some will provide the players with a counter that should be placed in these boxes to remind them of the effects of the historical events.

One final comment on the Game Board. Marc von Martial is the artist and he has done an excellent job with this game board as it is truly functional and aids play but also is very attractive and has a very clean and pleasing aesthetic. I enjoy the choice of colors, even though these old eyes are starting to have trouble differentiating gray and green when they are both light, that work well together and the tracks and information found on the board are all crisp and clean and easily read. I just like the overall appearance of the game board and wanted to congratulate him on his exemplary graphic design work.

In Action Point 2, we will cover what I would consider one of the better parts of the game in the Technology Phase and the Technology Tree and Technological Improvement Boards.

-Grant

Interview with Arnauld Della Siega Designer of La Der des Ders – The War to End War from Hexasim

Von: Grant
09. Februar 2026 um 14:00

Hexasim has really been stepping up their game recently with some great looking wargames. Late last year, they announced their newest game called La Der des Ders – The War to End War, which focuses on World War I and is designed by Arnauld Della Siega. We reached out to Arnauld and he was more than willing to provide us some insight into the design.

Grant: Arnauld welcome to our blog. First off please tell us a little about yourself. What are your hobbies? What’s your day job?

Arnauld: Hello, everyone. Despite my Italian-sounding name, I am French. My hobbies? Gaming, of course. Formula 1. American football and flag football – I am assistant coach for my youngest son’s team. Oh, and I play badminton. And when I had a little more time, astronomy. Add Motörhead and Lovecraft to that, and I think you’ll have a pretty good idea of who I am. My real job? I’ve been working for Hexasim for three years. I mainly handle communication and game development (clarity of the rules, layout of the rulebook, some of the graphics).

Grant: What motivated you to break into game design? What have you enjoyed most about the experience thus far?

Arnauld: I think this is true of many designers, but my brain is constantly buzzing, whether I’m writing stories or inventing game systems. I wanted to create something to give shape to the ideas swirling around in my head. Then, and perhaps most importantly, to leave something behind for my descendants. Creating is more frustrating than rewarding, but seeing your game released is a bit like the birth of a child. A culmination.

Grant: What is your upcoming game La Der des Ders about?

Arnauld: La Der des Ders is the story of the First World War in its entirety, from the early stages to 11 November (and even a little beyond). It follows the timeline of the war and focuses on technological developments. La Der des Ders is a grand-strategy game in which you control sectors. You decide how to allocate your resources between recruiting new soldiers to rebuild your forces, technological research and preparing offensives. La Der des Ders is a revised and corrected version, with greatly improved artworks, ergonomics and rules, published in VaeVictis Magazine #145.

A look at the game found originally in VaeVictis Magazine #145.

Grant: What is the translation of this French phrase La Der de Ders?

Arnauld: La Der des Ders means « the last of the last ». You may translate it by « The War to End War ». I asked my testers and Boardgame Geek whether to use a French or English title. The players unanimously opted for a French one.

Grant: Why was this a subject you wanted to create a game on?

Arnauld: After creating No Man’s Land – Trench Warfare 1914-1918 from Ludifolie Editions, I had acquired a good amount of knowledge about the First World War at a tactical level. I thought it would be a good idea to take a step back and look at the First World War from a different angle. That’s how La Der des Ders came about.

Grant: What are the unique features with the system used for the game?

Arnauald: It depends on what we mean by ‘unique’. Are there any truly unique games? When it was released in 2019, La Der des Ders was, to my knowledge, the only solo game covering the entire First World War. What makes it unique is its focus on technology (the game includes 41 levels of technology). It is also this abstraction, which facilitates the narrative without distorting it. This is particularly evident in the Collapse Tracks (which will be discussed later), which manage the erosion of the belligerents.

Grant: What is your design goal with the game?

Arnauld: What I look for above all else in a game is elegance. I like it when a lot of thought has gone into it, both in terms of the ergonomics and the gameplay. For La Der des Ders, I wanted to create a game that was easy to learn, designed for solo play, and with engaging mechanics. A game made to be played and able to learn more about the historical WW1.

Grant: What unique elements from WWI did you feel important to model in the game?

Arnauld: I think that sometimes a game is less about ‘what is important to model’ than ‘what the designer wants to model’. I like the ‘technical’ side of conflict. For this reason, 1914 interests me much less than 1918. I love all the technologies that abound. It was the shape of those funny steampunk-style tanks that made me love WW1 (basically, I’m more into Francis I, the Assyrians and the like).

Grant: As a Strategic Level wargame, what economic or political elements are included?

Arnauld: The entry of neutral countries into the war is managed by events. I did not want countries to be able to adopt a stance different from their historical one. That would have had too much of an impact on historicity. Neutral countries will therefore certainly enter the war in the same year as historically, but players do not really know on which turn (1 turn = 4 months).

The economy is managed by Resource Points awarded each turn. These Resource Points are the heart of the system, as they act somewhat like Action Points. Each sector contributes to the overall amount of Resource Points. The British and American navies also contribute an ever-increasing number of resources. The Naval Control Table simulates the war between merchant ships and U-boats.

Grant: How does the Collapse Track work?

Arnauld: The Collapse Track represents both a sector’s willingness to fight and its military potential. With each loss, a cube moves to the right, towards surrender. These losses also reduce the number of Attack dice a sector can roll during an offensive. Spending resources allows you to counteract this slow erosion and regain power.

Grant: What technologies can be developed?

Arnauld: There are six categories of Technology (Attack, Defense, Artillery, Air, Naval and Raid). Each category is divided into several levels, specific to each side.

Once unlocked, Technology levels grant bonuses in attack or defense, Artillery dice, rerolls, bonuses during the Naval Control Phase (which reduces the number of Resource Points available to the opponent), or the ability to cancel some events.

Grant: How does the game use cards?

Arnauld: There are two types of cards. Cornflower Cards are used to manage the solitaire bot.

The other cards are Events. Three are drawn at the beginning of each turn, and the effects are applied. Events are classified by year, and one card remains at the end of each year when the new year’s deck is brought into play. This adds variety to the game without sacrificing historical timeline.

What I am most proud of with these cards are the top banners. I made sure to copy the headlines from newspapers of the time, even going so far as to put a credible date and, above all, a number that, unless I am mistaken, should be correct. Yes, I had a lot of fun.

Grant: What different types of cards are included? Can you provide a few examples?

Arnauld: There are several types of Event Cards. Blue cards, such as the Schlieffen Plan, are only available in 1914. Red cards are Pivotal Cards that cannot be cancelled. These include cards that bring countries into the war, such as Lusitania and Zimmermann Telegram. Finally, green cards, which are the most numerous, allow players to obtain Resource Points, additional bonuses by attacking a particular country, but sometimes penalties. I looked for the most important events of the conflict, thought about their impact on the course of the war, and then translated that into game terms. A little tip: each color has a specific design, which means that color-blind players are not at a disadvantage.

Grant: How does combat work?

Arnauld: Combat is referred to as ‘offensives’. A single sector can only launch one offensive per turn, and a single sector can be attacked by multiple sectors. The player chooses the attacking sector and designates its target. They spend a number of Resource Points equal to the number of dice they wish to roll. This number cannot exceed the current Operational Value of the attacking sector (indicated by the position of the cube on the Collapse Track). To inflict a loss on the enemy, the player must obtain a certain value (often 5+). However, the dice roll is modified according to the technologies unlocked by the attacker or defender.

Artillery technology is important, as it allows black dice to be rolled that will not be modified. This highlights the power of artillery during conflict.

Grant: How are historical events handled?

Arnauld: By drawing three cards at the beginning of each turn. The cards do not go into the players’ hands. They are applied during the current turn. Some are applied immediately, others during offensives, and a few during the Resource Collection Phase. Some cards remain in play for several turns, such as Von Lettow, which allows the Germans to launch free offensives in Africa until the end of the war.

Grant: What variants are included?

Arnauld: The Fast Play variant speeds up games by bringing this version closer to the original version published in VaeVictis, removing the two new Technology categories and not charging sectors for implementing unlocked technology levels. I don’t really like it when a designer offers variants. It makes me think that they haven’t taken responsibility and are leaving it up to the player to figure it out.

You know what? I’m going to offer your fellow readers a great variant. This variant is for use in 1 vs 1 games, if you find it too difficult to win with the Entente.

Here it is:

Countries that are still neutral do not pay to implement an unlocked technology. Once the sector is at war, they must pay as normal.

You can consider this variant official. It has been tested.

Grant: How does the solitaire mode work? How are the Cornflower Cards used?

Arnauld: For each phase (Reinforcements, Technological Research, Offensives), the player draws a card and refers to what is indicated on the card.

It’s very simple to set up and effective. No need for endless dice rolls, referring to multiple tables, or having to make decisions for your opponent. Everything is indicated on the card. It’s elegant. Players seem to love this simplicity and the relevance of the decisions made by the bot.

Grant: How is victory achieved?

Arnauld: Victory can be achieved in several ways. Either by forcing France or Germany to surrender, or by earning 6 Victory points (obtained by forcing the enemy sectors to surrender), or at the end of the game (triggered when the Peace Negotiations Card is drawn) when the side with the most Prestige Points (calculated according to the position of the cubes on each of the Collapse Tracks).

Grant: What do you feel the game models well?

Arnauld: You can really feel the Entente gaining strength, with more and more resources at their disposal thanks to British and American support, and Germany’s obligation to finish the war as quickly as possible before the task becomes insurmountable.

But I also particularly like the story that the game tells, which is very close to the actual historical timeline.

Grant: What are you most pleased about with the design?

Arnauld: I like the fact that it is both simple and interesting. I like the fact that Dad can play with Junior. I like that players learn things while playing. I like the way it looks. And I like the price: we decided to make this game as affordable as possible so that more people could enjoy it. Games should not be a luxury item.

Grant: What other designs are you contemplating or already working on?

Arnauld: I have several projects in mind, mostly solo games. Some are well advanced, but I feel like I’m at a crossroads. I mean… there are too many games coming out. Designers need to learn to restrain themselves and, rather than flooding the market with games that are sometimes barely finished, take the time to polish them as much as possible and perfect the rulebook (which is often really awful). Given the price of games, I believe we should respect players and offer them flawless products. Fewer games, but higher quality. And that’s good, because that’s exactly Hexasim’s credo. If sales of La Der des Ders are fantastic, we can plan a sequel, perhaps World War II, to please as many people as possible, and/or fantasy. The ratings received on Boardgame Geek will decide.

If you are interested in La Der des Ders – The War to End War, you can order a copy for 49.90 € ($57.52 in US Dollars) from the Hexasim website at the following link: https://www.hexasim.com/en/4165-La-Der-des-Ders-The-War-to-End-War.html

-Grant

My Favorite Wargame Cards – A Look at Individual Cards from My Favorite Games – Card #64: Guns of August from Paths of Glory: The First World War, 1914-1918 from GMT Games

Von: Grant
03. Februar 2026 um 14:00

With this My Favorite Wargame Cards Series, I hope to take a look at a specific card from the various wargames that I have played and share how it is used in the game. I am not a strategist and frankly I am not that good at games but I do understand how things should work and be used in games. With that being said, here is the next entry in this series.

#64: Guns of August from Paths of Glory: The First World War, 1914-1918 from GMT Games

Paths of Glory is widely thought to be a masterpiece on WWI and after just a few plays of the game, both in person and online on the fabulous Rally the Troops!, I can definitely see why people feel that way. Even though we are novices, the game is just that good and really tells the story of the fruitless efforts of both the Entente and Central Powers as they bashed their heads against each other over control of Europe. The game is long and you generally are going to have to play this one over a long weekend to get it all in and enjoy it properly but it is just such as great tool to understand the complexities of the struggles of trench warfare, supply and the balance of attacking versus taking a breath and regrouping. I really enjoyed the mix of historical events and the choices that I had to wage the war in a way that I felt was appropriate. But, my message to everyone who plays this game is beware of supply. Even in our few plays, supply has been an issue and we have had to make sure we didn’t make a few fatal mistakes that would get us in trouble. I want it to be clear here. I am not good at this game…at all and the nuances of supply and how to play have just eluded me as I continue to make the same errors game after game. But it is really good and I look forward to each new play with enthusiasm and am excited about the chance to get to learn more about this fascinating war that was so very fruitless.

I am going to use snips of the board from Rally the Troops! in this post so it might look a bit different from my normal posts.

With that being said, generally in every single game the Central Powers will start out by playing their Guns of August card. Guns of August is a crucial, high-stakes opening event for the Central Powers on Turn 1, enabling an immediate, powerful, and historical offensive against France and Belgium.

The Guns of August is a 3/4 OPs card that is placed into the CP player’s hand at the outset and gives them the initiative immediately. First off, the card destroys the fortress at Liège and then gives a massive mobilization effort booster by moving 2 German Army counters from their starting spaces including the German 1st and 2nd Armies and then activating them both to attack along with the German 3rd Army who is located at the start of the game setup in Koblenz.

This gives the CP player 2 choices about how to start the war with this attack. They can focus on the British Expeditionary Force located in Brussels or the French 5th Army located in Sedan. The allows the CP to destroy the Liège fortress, advance armies, and immediately attack or pressure the British Expeditionary Force (BEF) and French forces. In my humble opinion, the BEF is the real target here as this unit cannot be replaced or rebuilt and its removal opens up the path for the Germans to take on the fortress at Antwerp.

While the Guns of August card play is an aggressive move, it does somewhat ensure Austria-Hungary can survive potential Russian pressure as the Allied player will have to quickly use their precious resources to fill the gaps created by this opening attack rather than using them to bolster the Russians in the east or to build up the Serbians a bit in the south to prolong the fall of Belgrade. Paths of Glory is a large part about resource management and the constant pressure to continue offensive momentum and rebuild troops through the use of Replacement Points and events to bring on additional troops is a major problem for both sides. You can only attack for so long before you will burn yourself out and will have to spend time to recover and get ready for the next turn’s offensives. Using the Guns of August cards efficiency will free up resources to use elsewhere.

There are alternative openings with the card that can be considered. If not using Guns of August for the event, the CP player can use 1 OP to destroy the Liège fort, allowing them to conserve the card for later or pivot to a more defensive strategy, such as defending the Rhine.

In the end, I would recommend the hammer approach versus any other use of the card as it will really put the pressure squarely on the Allies to do something about what you have just accomplished. In the picture to the right is the normal outcome of these attacks as you can see the BEF is reduced and the French 5th Army has broken and is now replaced by a smaller Corps counter that cannot really do anything offensively and is just there to protect the back side of the Maginot Line from being caught out of supply.

The Guns of August (published in the UK as August 1914) is a 1962 book centered on the first month of World War I written by Barbara W. Tuchman. After introductory chapters, Tuchman describes in great detail the opening events of the conflict. The book’s focus then becomes a military history of the contestants, chiefly the great powers.

The Guns of August provides a narrative of the earliest stages of World War I, from the decisions to go to war up until the start of the Franco-British offensive that stopped the German advance into France. This led to four years of trench warfare. The book discusses military plans, strategies, world events, and international sentiments before and during the war.

The book was awarded the Pulitzer Prize for General Nonfiction for publication year 1963, and proved very popular. Tuchman later returned to the subject of the social attitudes and issues that existed before World War I in a collection of eight essays published in 1966 as The Proud Tower: A Portrait of the World Before the War, 1890–1914.

In the next entry in this series, we will take a look at Georgi Zhukov from Churchill: Big 3 Struggle for Peace from GMT Games.

-Grant

Best 3 Games with…Designer R. Ben Madison!

Von: Grant
14. Januar 2026 um 14:00

I have really enjoyed my plays of several games designed by R. Ben Madison. He has a knack for including elements of the history into the gameplay while placing the historical events into the framework of his chosen system, which is usually the States of Siege Series…but not always. He has designed 24 games to date, with most of those being solitaire games, dealing with all types of history including the American Revolutionary War, World War I, World War II, the American Civil War, Ancient Egypt, the pre-Columbian Indian “mound builder” cultures that dominated eastern North America, the Falklands, Napoleonic Wars and many, many more and I frankly have never played one of his that I didn’t like.

A few years ago, I did a video showcasing many of Ben’s games on our YouTube Channel and you can check that out at the following link:

In this entry in the Best 3 Games with…Series, we will take a look at some of favorites games by Ben.

3. Jeff Davis: The Confederacy at War from White Dog Games

I love a really hard and involved solitaire wargame and I found a really good one in Jeff Davis: The Confederacy at War. The player takes on the role of President of the Confederacy Jefferson Davis, and you have to manage the Confederate government and the Southern war effort during the American Civil War. The choices help determine the fate of armies and the struggle between Robert E. Lee and Ulysses S. Grant. The game uses the States of Siege Series model with a central point being defended from advancing forces on 5 different tracks.

One of the more interesting design choices in this one was the inclusion of slaves held by the South. Their focus in the game is as a resource to advance and assist the war effort through their labor. These human resources are used to take extra actions for the Confederate States of America, as the noose of the Union closes around them, they will be starved for Action Points as their factories and railroads are taken over by the advancing Federal Troops. I truly appreciate this focus in the game to give a glimpse into the political and social issues that contributed to the start of the American Civil War. I think that all too often our wargames sanitize and whitewash history of all of the darker and less desirable aspects but I think that including this element into the game was a wise choice by the designer.

The game also uses a very interesting method of determining your per turn funds as you have to run blockades against the Union to get funds to supply armies, move your troops and invest in actions to build defenses. You can also use the Slave tokens as a sort of currency to take actions but then those tokens are used up and cannot be reused. I have really enjoyed this one although it is a full 3 hour game as you have to get through 40+ chits to survive to the end. Lots of tough choices, lots of interesting side issues, such as dealing with slaves in the southern economy and keeping politicians happy. This is a great solo game!

You can check out our unboxing video to get a good look at the components:

2. Mound Builders from Victory Point Games

Mound Builders from Victory Point Games is a solitaire States of Siege game that to me has a very intriguing theme that hasn’t been gamed very often and really caught my eye. In Mound Builders, you represent the two largest pre-Columbian Indian “mound builder” cultures that dominated eastern North America from before the time of Christ until the coming of the European colonists in the 17th century. Your empire represents the earlier Hopewell culture and the later Mississippian culture that derived from it.

The game plays in two distinct sections or modules. The first module deals with the Hopewell culture, which is the earlier of the two cultures in the game. During this phase of the game, your goal is to simply expand the influence of your empire across the land, trading with various chiefdoms and trying to incorporate their dominions into your own in order to increase your economic power through the accumulation of various types of resources. As time passes, your empire will grow and regress due to various factors including warfare, disease and drought, but more often than not, the real threat to your culture is simply that of the existence of other ways of life and beliefs that will ultimately mix with your own culture.

During the second phase of the game, you will be beset on all sides by competing tribes as well as the nasty Spaniards and will watch as the empire that you worked so hard to build during the Hopewell Era simply disappears from history. Each turn, a card will be drawn that tells you which of the 5 opposing cultures will move into your lands along a siege track. Sometimes only 1 will move but up to 3 can all move at once, and some can be moved more than once each turn. If you do not attack those cultures when they occupy one of your chiefdoms by the end of your turn and chase them off, your resource will be taken from you and you will no longer be able to produce or trade for that type of good, thereby weakening your economy. This States of Siege system is so very cool and has been replicated in may other additions to the series (such as Ottoman SunsetDawn of the Zeds and Hapsburg Eclipse but also has spawned, or at least inspired several other designers to create equally cool and interesting simulations (Pavlov’s House and Castle Itter). I have definitely reaped the benefits of this States of Siege Series and love me a good solo game with this cool mechanic.

This is a link to a video unboxing of the game showing off the great components but unfortunately we have never done any other videos on this game:

1. Kaiserkrieg! The Great War 1914-1918 from White Dog Games

Kaiserkrieg! is simply fantastic! A solitaire treatment of The Great War using the States of Siege Series model but with a change to a horizontal rather than vertical layout of spaces where enemy forces can build up and perform an “Over the Top” move if you don’t destroy their troops before then. The player takes the side of the Central Powers and must deal with events that replicate the history of the period and the tumult of various revolutions, threats and opportunities. Well done game by Ben Madison that uses chit pull to activate the enemies and cause events. Lots of chaos. Lots of tough choices. Lots of history. And it always seems to come down to the very end. The only draw back to the game though is that it is long, taking 2-3 hours to play through an entire game. Each chit drawn has lots of information and there are always lots of things to do each turn with your very limited actions.

One of my favorite parts is the use of Blockade Runners to gain your funds for the turn. During the Naval/Air Warfare Phase, the player will place out their available Blockade Runners on various seas zones numbered 1a, 1b, 2a, 2b, 2c, 3 and 4 in order to attempt to break Allied blockades and deliver goods and funds to Germany to fuel the war effort. Each of these numbered sea zones will provide a haul of Reichsmarks based on the number of the sea zone if they are able to evade the British Cruisers. This is determined by rolling 2d6 and consulting the British Cruisers Table to find out in what sea zones the available British Cruisers will be placed. If there is a Blockade Runner in the determined sea zone, it will be destroyed and placed in the Neutral Ports box where it will wait to be built later at a cost of 2 RM. If the rolled sea zone contains a Blockade Runner and the High Seas Fleet marker, the British Cruiser will be unable to destroy the Blockade Runner and a naval combat will ensue.

In the above picture, the Central Powers defeat the British Cruiser with the High Seas Fleet and the 3 Blockade Runners placed in seas zones 2b, 3 and 4 bring home a cash haul of 9 Reichsmarks that will be used to take actions and push back the amassing Entente forces in the various staging areas to avoid an Over the Top chit from being placed and prevent the built up forces there attacking into Germany. This process of gaining income is very interesting and unique and it really feels correct as you are trying to do your best to avoid and destroy the British Cruisers so that you have your choice of the best producing sea zones without the fear of Entente intervention.

You can check out our unboxing video to get a good look at the components:

Here is a link to my video review:

Well there you have my 3 favorite games from R. Ben Madison. There are so many good titles to choose from making this exercise very difficult but the 3 that I chose were very enjoyable to play. What are your favorite Ben Madison designs?

-Grant

❌