Normale Ansicht

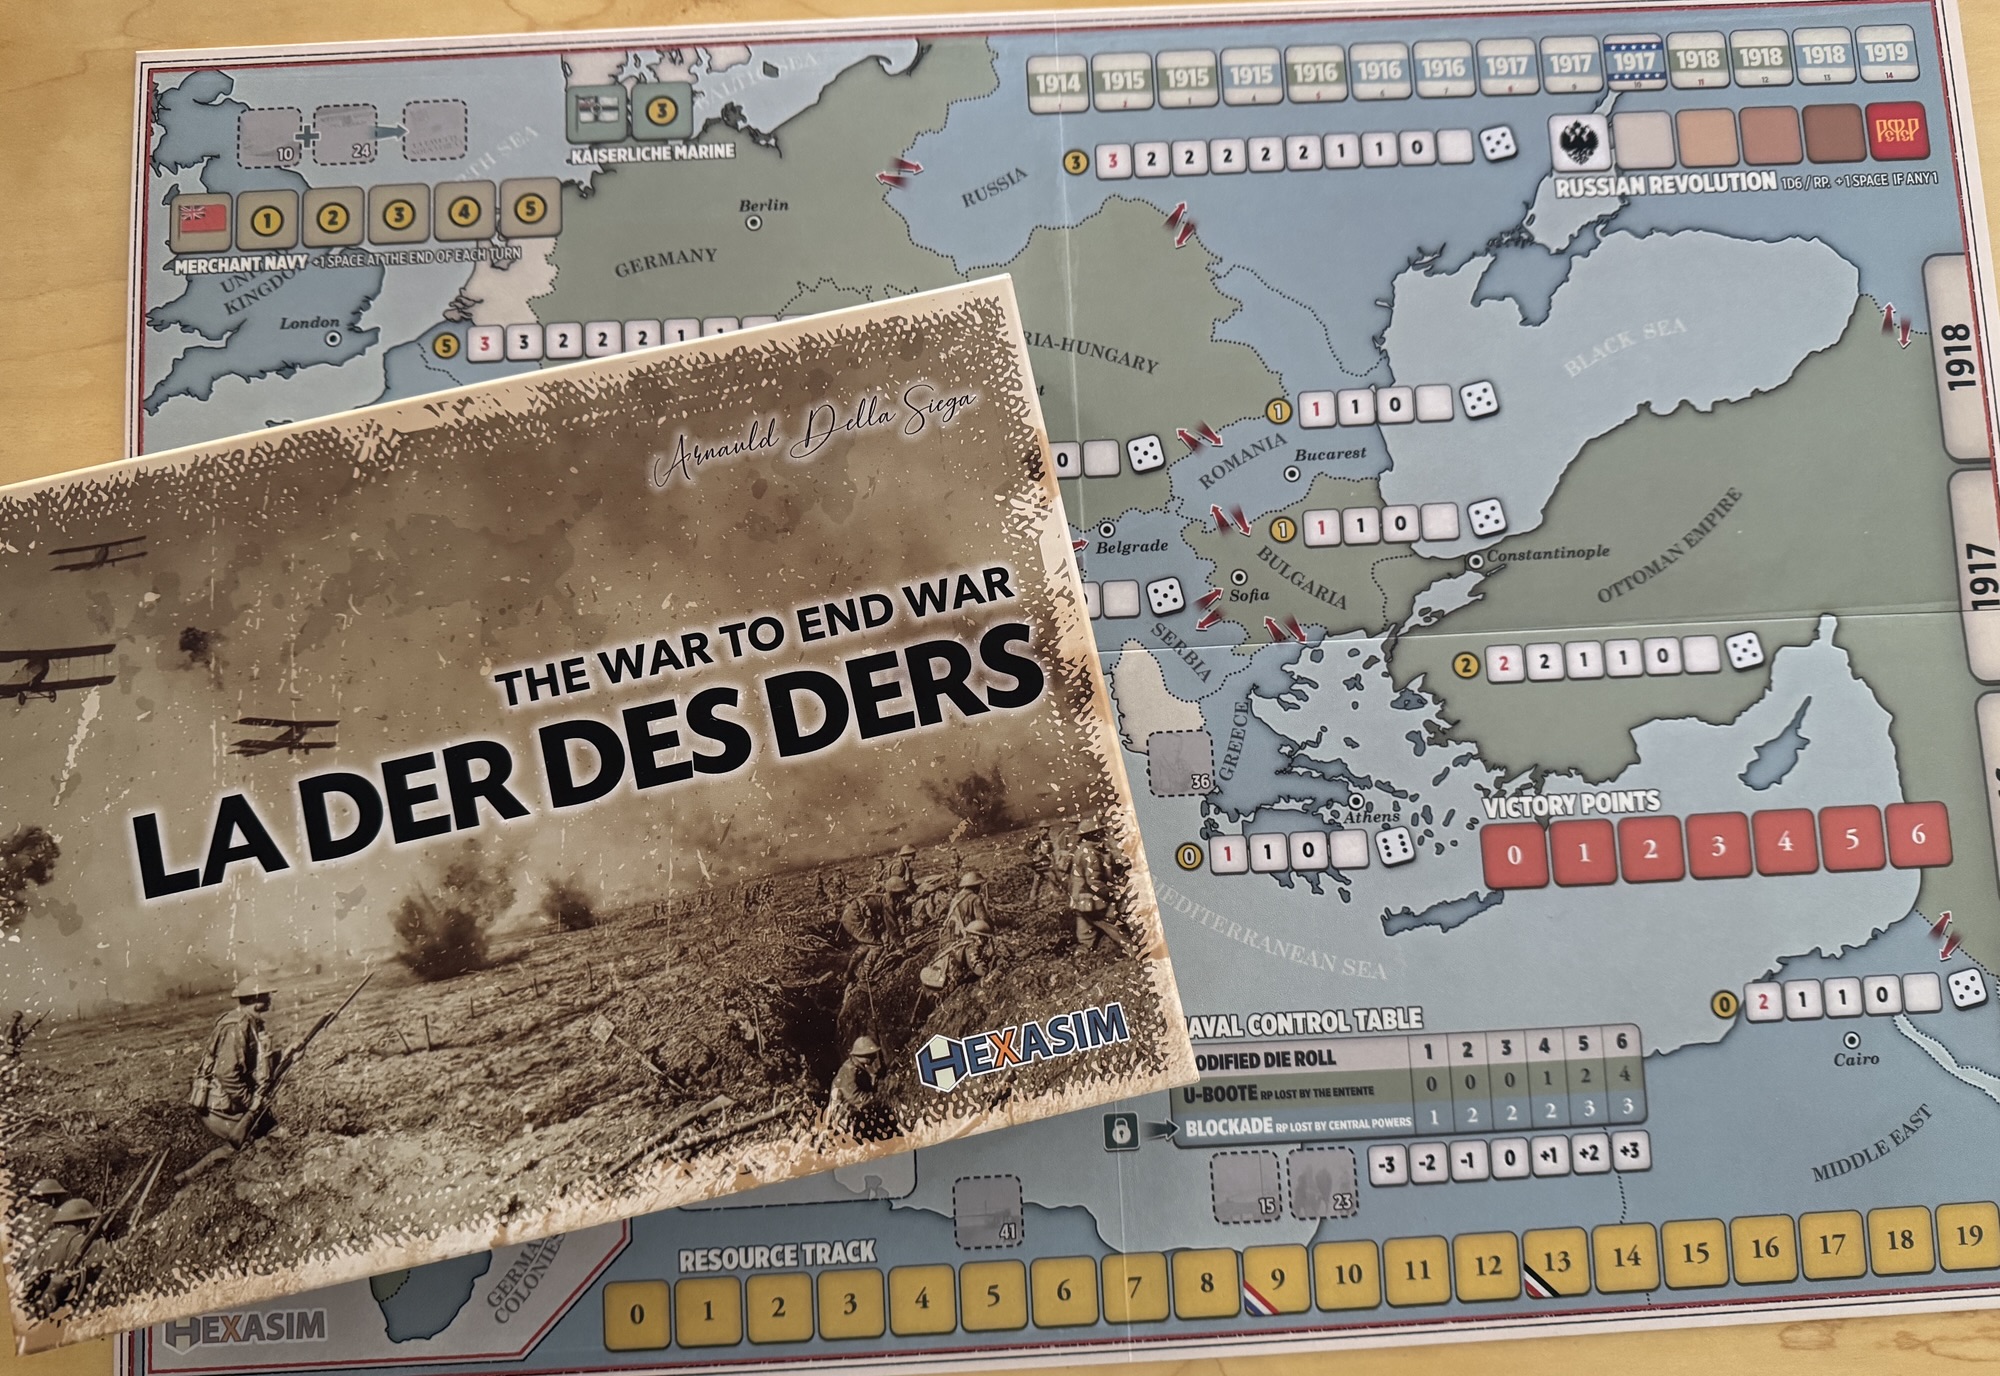
La Der des Ders – The War to End War from Hexasim – Action Point 2

Von: Grant
20. Februar 2026 um 14:00

La Der des Ders – The War to End War from Hexasim is a 1-2 player slightly abstracted strategic level look at World War I. The game allows the players to relive the First World War at a strategic level, with each player controlling one of the 2 sides either the Entente, consisting of France, England, Russia, Serbia and other minor nations or the Central Powers including Germany, Austria-Hungary, the Ottoman Empire and a few minors. La Der des Ders can also be played solo, with a dedicated solitaire bot called “Athena” who utilizes special Cornflower Cards to make decisions about what technologies to invest in, where to undertake offensives and how to utilize limited resources and reinforcements. Each turn, players gain an amount of Resource Points dependent on what nations are in the war, which they can allocate to different areas to guide their overall strategy. Victory is achieved by launching offensives that drain the morale of enemy nations, forcing them out of the conflict through collapse.

In Action Point 1, we looked at the Game Board, discussing the Collapse Tracks, Trade Tracks, Russian Revolution Track and Naval Control Table and other various on-board tables and offensive spaces. In this Action Point, we will cover the Technology Phase and the Technology Tree and Technological Improvement Boards.

Technology Phase

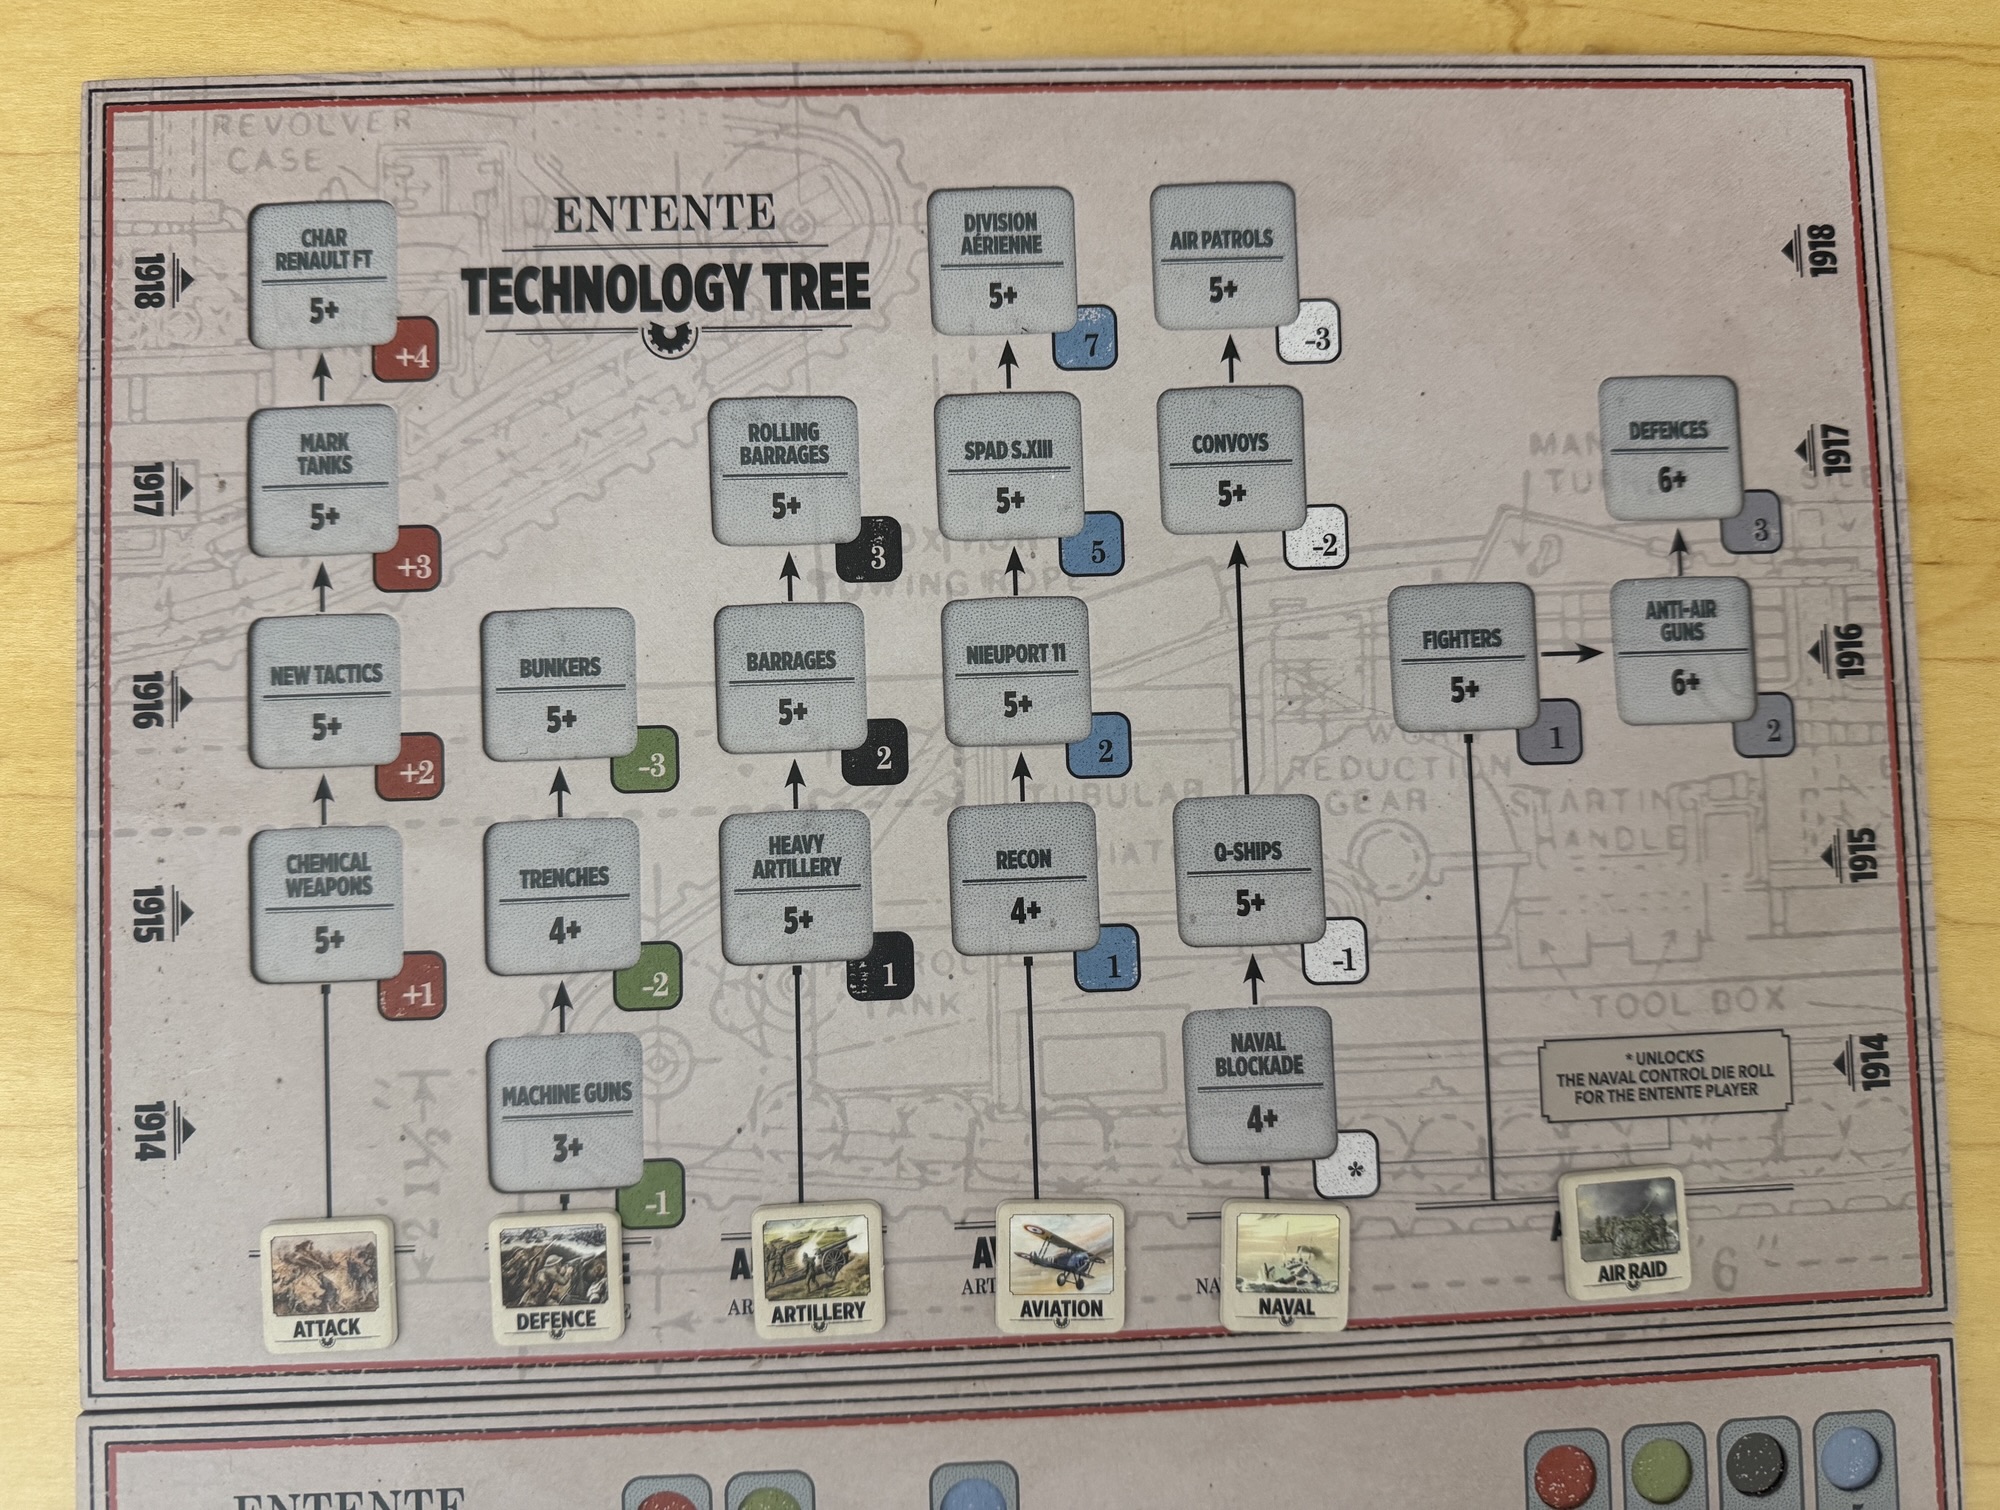
One of the best parts of La Der de Ders, and typically the best part of any strategic level wargame, is the Technology Phase and the player’s ability to spend their limited resources on various types of technologies to improve their performance on the battlefield and in the economic war. But, keep in mind that there is a risk here as resources are limited and you have to pay to develop these technologies and there is no guarantee of success as it is up to dice roll, albeit a modified one at that. Each of the players has their own Technology Tree board that is used to track their technological progress over the course of the game. There are a total of 6 different Technologies that can be researched including Attack, Defence, Artillery, Aviation, Naval, and Air Raid.

The Entente Technology Tree.

Each of the different technologies are important and the failure to develop them can lead to a quick and ignominious defeat. I also really like the concept of keeping up with your enemy as sometimes you are simply investing not to gain ground but just not to lose it! This is particularly the case with the Attack and Defence Technologies as if one side gets too far ahead that +1 or -1 difference can make a huge impact on attacks and can lead to significant losses which creates a whole new problem and a sink for those scarce resources.

The Central Powers Technology Tree.

As you look at the Technology Trees you will see that each box on the Tree represents a level of technology. Each level contains important information about its name, the available date when the technology can be researched, the target number needed to unlock it denoted as a number with a + that means equal to or greater than the number and the bonus that is granted when it is discovered. Each time a level of technology is unlocked, the player will move their Technology marker to the box corresponding to that level. Each level of technology provides a specific bonus which only applies to sectors that have implemented that level. Implemented means having paid for the implementation as you actually pay first to discover the technology and then must spend resources to grant its ability to your different nations.

In addition to the Technology Tree Boards, each player has a board with Improvement Tracks that indicate which sectors or nations belong to their side. For each sector, the tracks correspond to Attack, Defence, Artillery, and Aviation technologies. When a level of Technology is unlocked on the Technology Tree, the relevant side can implement it in the sectors of its choice so that these sectors can benefit from the bonuses this level provides. This will require the expenditure of Resource Points and then the Technological Improvement cylinder on the Improvement Track is then moved accordingly.

Keep in mind that it is possible to attempt to unlock a level of technology only if the year shown on that technology’s row has been reached. The dates that each of the Technologies is available is shown on the outer edges of the level of Technology in large black letters. It can be overlooked from time to time so check during each of the Technology Phases to makes sure you can spend resources on the tech you desire. Also, an attempt to unlock the Technology may only be attempted if the previous level of Technology has been unlocked during a previous turn’s Technology Phase. And finally, keep in mind that for each of the various Technology types, only one level can be unlocked per turn.

Now let’s take a look at ways to improve your chances when rolling the dice to unlock the Technologies. The cost for each attempt at unlocking a Technology is 1 Resource Point. But there is a key decision point at this time as before rolling the die to unlock a level of Technology, the player may decide to spend additional Resource Points. Each additional 1 Resource Point spent provides a +1 bonus for this attempt. This can be very important during the game as it can be the difference between getting the Technology needed to push you over the top for the turn or not and this decision is very important. The more Resource Points you spend on Technology, the fewer you will have to move forward with Offensives to weaken your opponent and break them or even the less Reinforcements you will be able to afford to shore up your defenses.

Machine Guns are unlocked by the Entente in 1914 with a die roll of 4. The Machine Guns grant a -1 DRM to enemy Attack rolls.

If the attempt is failed, the player receives a Technological Research Cube which they will place in the box of the level they just tried to unlock. On future attempts this white cube will grant a +1 DRM to die roll per cube accumulated through failed rolls. Ultimately, you will unlock these Technology levels, either through blind luck, your persistence or due to the over expenditure and over commitment of Resource Points. But that is what makes this part of the game so good as it is all about choices and the management of risk along with your resources. You cannot do everything that you wish to each turn and you will have to manage these things as best as you can to taste victory.

The Technological Research Cubes grant a +1 DRM per cube to an unlock attempt. In this case, a die roll of 3 would normally fail to unlock the Heavy Artillery advancement for the Artillery Technology but the +2 DRM makes it a 5 which is a success.

In my opinion, the 3 most important Technologies are the first 3 listed on the Technology Tree being Attack, Defence and Artillery. This game is mostly about the planning and execution of Offensives to weaken and ultimately break the will of your opponent by causing their nations to reach collapse on their Collapse Track. Attack gives a positive modifier to each of the attack dice rolled. Typically a nation must roll a 4 (Germany), 5 (France, Russia, the Ottoman Empire, Middle East, Romania, Bulgaria, Africa both sides and Serbia) or a 6 (Greece) and this +1-+3 for attacks will make a huge. A lot of the times though having a good Attack modifier will be lessened our counteracted due to a good Defence value but this is where keeping up the pace with the enemy is a key decision. The Artillery dice are a special animal. For each level of the Artillery Technology, typically each nation will gain an additional Artillery Die (black) to roll along with their Attack Dice (white). These Artillery Dice are not modified by the Attack Technology but are an additional free chance to score a hit. These dice can also be rerolled through the Aviation Technology which will allow for an Artillery Die reroll per level shown on the Technology Tree.

The Naval Technology and Air Raid Technology represent these 2 important miliary advancements in the struggle for the economic aspect of the war. The Naval Technology will for the Central Powers moves the Naval Control Cube one space to the right on its track. With the exception of Level 1, each level of Technology unlocked by the Entente moves the Naval Control Cube one space to the left. As mentioned in Action Point 1, the Naval Control Table is used to represent the efforts of the German U-Boat attacks on commerce and mimic the associated receipt of foreign support by the Entente from the United States of America. At the outset of each turn, a die is rolled and the table referred to in order to determine a possible number of lost Resource Points. There are 2 rows on the table, 1 being the U-Boat for the Central Powers and the other the effects of the Blockade for the Entente.

The Table located under the Naval Control Table indicates the modifier that will be applied to the Central Powers’ Naval Control die rolls. It takes into account the Naval Technology levels of the Central Powers and that of the Entente. At the start of the game, only the Central Powers can carry out a Naval Control die roll. You may notice the small gray box with a lock linked to the Naval Control Table that indicates that the Entente cannot carry out a Naval Control die roll yet. Only once it has unlocked Naval Technology Level 1, can the Entente perform Naval Control die rolls.

And finally, the Air Raid Technology allows the Central Powers player (and them alone) to influence the course of Events, depending on the difference with the Entente’s level of Air Raid Technology. This advantage will allow the CP to cancel an event or more that is beneficial to their enemy or that will harm their efforts.

The Air Raid Technology is based on the difference between the Technology level of the CP as compared to the level of the Entente.

I feel that the inclusion of the Technology Advancement in La Der de Ders was a stroke of genius and I very much like how the designer Arnauld Della Siega made it have a Press Your Luck aspect to it. This forces some very critical decision points on the players but also keeps the game a game and gives it a really nice feel of hope.

We recently published an interview on the blog with the designer Arnauld Della Siega and you can read that at the following link: https://theplayersaid.com/2026/02/09/interview-with-arnauld-della-siega-designer-of-la-der-des-ders-the-war-to-end-war-from-hexasim/

In Action Point 3, we will take a look at the Event Cards and how they inject the historical narrative into the gameplay and also alter the conditions of the game.

-Grant

La Der des Ders – The War to End War from Hexasim – Action Point 1

Von: Grant
12. Februar 2026 um 14:00

La Der des Ders – The War to End War from Hexasim is a 1-2 player slightly abstracted strategic level look at World War I. The game allows the players to relive the First World War at a strategic level, with each player controlling one of the 2 sides either the Entente, consisting of France, England, Russia, Serbia and other minor nations or the Central Powers including Germany, Austria-Hungary, the Ottoman Empire and a few minors. La Der des Ders can also be played solo, with a dedicated solitaire bot called “Athena” who utilizes special Cornflower Cards to make decisions about what technologies to invest in, where to undertake offensives and how to utilize limited resources and reinforcements. Each turn, players gain an amount of Resource Points dependent on what nations are in the war, which they can allocate to different areas to guide their overall strategy. Victory is achieved by launching offensives that drain the morale of enemy nations, forcing them out of the conflict through collapse.

In this series of Action Points, we will first take a look at the Game Board, discussing the Collapse Tracks, Trade Tracks, Russian Revolution Track and Naval Control Table and other various on-board tables and offensive spaces, cover the Technology Phase and the Technology Tree and Technological Improvement Boards, take a look at the Event Cards and how they alter the game, go through an example of an Offensive and the combat procedure, review the Victory Conditions and give an overview of the “Athena” solitaire bot and how it works.

Game Board

The Game Board used in La Der des Ders covers the entirety of the European and Eastern portions of World War I and is a simplified geographical representation of the major players involved in the war. You will not find anything more than simple borders of countries and then not all of each country is represented in its entirety such as the Ottoman Empire of the vastness of the Russian steppes. There is also an inset map in the bottom left hand corner that covers the war in Africa. The Game Board is divided up into what are called Sectors representing both the major and minor powers involved in World War I. These Sector representations are illustrative of the main countries that took part in the war and one Sector can actually represent multiple countries. For example, in the case of France, you will notice that England really has no specific direct playable area or a Collapse Track of its own on the Game Board other than the graphical representation of their island nation. The British troops, along with those of Belgium, are abstracted into those of France for simplicities sake and to meet the design goals of the game. To further differentiate these Sectors from each other and to make playing visually simpler, the Sectors are shaded blue if they belong to the Entente and then green if they are part of the Central Powers.

The Collapse Tracks

Let’s take a closer look at the various information that is contained in these Sectors. Above is a picture focused on Germany with France (lower left), Austria-Hungary (on the right) and Russia (upper right) also included. You will first notice a line of small boxes with numbers listed in each box numbered from 3 on the far left descending to 0 and a blank box on the far right. These numbers are referred to as the Operational Value. This Track is referred to as the Collapse Track and represents the morale, fighting spirit, economic stability, martial resources and preparation of each of the countries for war in the game. On the left end of the Collapse Track is the country’s Production Value printed in a yellow circle. The Production Value corresponds to the number of Resource Points (RP) that will be generated by this sector at the start of each turn, if it is at war. If this Production Value number is printed in black, this means that this Sector is at war at the start of the game. If the Production Value is printed in white, the Sector is not at war at the start of the game but will enter the war through the appropriate Event Card being drawn. If a Sector is not at war but is Neutral, for purposes of the game this means that it does not generate any Resource Points.

At the start of the game, a wooden cube is placed in the space to the right of the box containing the red value. As losses are inflicted in this Sector due to Offensives or Event Cards, the cube will be moved to the right on the Collapse Track. When the Sector receives reinforcements, the cube will be moved moved to the left. The cube will never be placed on the space with the red value and the player must read the number in the box to the left of the cube to ascertain the current Operational Value. The numbers indicate the maximum amount of Resource Points that can be allocated to this Sector during an Offensive, which will also determine the size and number of dice that are used for the Offensive. This Operational Value will change throughout the game due to losses in Offensives or due to specific Event Cards. If the cube ever reaches the end of the Collapse Track, and another reduction must be made, the country will surrender and fall to their enemies.

The other important piece of information found on the far right side of the Collapse Track is the Attack Value. The Attack Value is used for Offensives and is how players determine whether they score hits or not with their troops and artillery. This Attack Value is represented by a die face that shows the number needed to hit. If the rolled Attack Dice are equal to or greater than the printed Attack Value a hit will be scored and losses will be taken by the defender by moving the cube down on the Collapse Track. This Attack Value can be modified through the advancement of technologies including on Attack and on Defense. The player will simply add up all applicable modifiers from these Technologies or from Event Cards and then reduce or increase that target Attack Value accordingly.

Offensive Arrows

Shown on the board are the Offensive Arrows that will remind the players about what Offensives they can undertake, meaning what Sectors may be attacked, and what Sectors have already taken their one Offensive against that adjacent Sector per turn. These are identified by red arrows connecting adjacent Sectors and will be covered up by the appropriate Offensive Marker when undertaken. In the below picture, we will take a look at Serbia as an example. You can see that Serbia is surrounded by Central Power countries including Austria-Hungary and Bulgaria (Neutral at the start of the war). They also have a few of their Allied nations adjacent including Romania (Neutral at the start of the war) and Greece (Neutral at the start of the war). From each of the adjacent Sectors there are 2 Offensive Arrows represented meaning that this Sector can both be attacked and can attack the adjacent Sector.

It is important to remember that an individual Sector can only launch one Offensive per turn, and that is always against an enemy sector adjacent to it. During the same turn, a sector may be attacked by several adjacent enemy sectors, but each Offensive is resolved separately.

Trade Tracks

There are two Trade Tracks shown on the Game Board, both of which are located in the top left hand corner of the board, 1 for the Entente (Merchant Navy) and the other for the Central Powers (Kaiserliche Marine). These 2 tracks provide additional Resource Points to both sides at the beginning of a turn when they are collecting income. Naval Control die rolls can modify the number of RP’s received at the beginning of a turn. It is important to remember that the Merchant Navy Marker is moved forward 1 space at the end of each turn, which will result in advancing the Production Marker of the Entente. If the Lafayette Marker is on this track, it is also moved forward 1 space. These markers are never moved to the left. Once the end of the track has been reached, the markers will no longer need to be moved.

Russian Revolution Track

The Russian Revolution Track indicates the advance of the Russian people towards their ultimate Revolution, which historically broke out in March 1917. The Russian Revolution Marker will begin the game in the white
space. This marker may be moved to the right each time Russia obtains reinforcements. It is never moved to the left. When this marker reaches the last space, Revolution breaks out and Russia will no longer produce resources and can no longer receive reinforcements.

Naval Control Table and Track

The Naval Control Table is used to represent the efforts of the German U-Boat attacks on commerce and mimic the associated receipt of foreign support by the Entente from the United States of America. At the outset of each turn, a die is rolled and the table referred to in order to determine a possible number of lost Resource Points. There are 2 rows on the table, 1 being the U-Boat for the Central Powers and the other the effects of the Blockade for the Entente.

The track located under the Naval Control Table indicates the modifier that will be applied to the Central Powers’ Naval Control die rolls. It takes into account the Naval Technology levels of the Central Powers and that of the Entente. At the start of the game, only the Central Powers can carry out a Naval Control die roll. You may notice the small gray box with a lock linked to the Naval Control Table that indicates that the Entente cannot carry out a Naval Control die roll yet. Only once it has unlocked Naval Technology Level 1, can the Entente perform Naval Control die rolls.

There are also several administrative tracks on the Game Board including the Resource Track, used to track the current Resource Points of both the Entente and the Central Powers, the Turn Track and the Victory Point Track. You will also notice lots of dashed boxes with small white numbers printed in them all over the board. These are the Event Boxes and act as a reminder of the effects of various Event Cards when they are pulled. When Event Cards happen, some will provide the players with a counter that should be placed in these boxes to remind them of the effects of the historical events.

One final comment on the Game Board. Marc von Martial is the artist and he has done an excellent job with this game board as it is truly functional and aids play but also is very attractive and has a very clean and pleasing aesthetic. I enjoy the choice of colors, even though these old eyes are starting to have trouble differentiating gray and green when they are both light, that work well together and the tracks and information found on the board are all crisp and clean and easily read. I just like the overall appearance of the game board and wanted to congratulate him on his exemplary graphic design work.

In Action Point 2, we will cover what I would consider one of the better parts of the game in the Technology Phase and the Technology Tree and Technological Improvement Boards.

-Grant

❌