My Favorite Wargame Cards – A Look at Individual Cards from My Favorite Games – Card #66: Harwood’s Intuition from The Hunt from Salt & Pepper Games
With this My Favorite Wargame Cards Series, I hope to take a look at a specific card from the various wargames that I have played and share how it is used in the game. I am not a strategist and frankly I am not that good at games but I do understand how things should work and be used in games. With that being said, here is the next entry in this series.
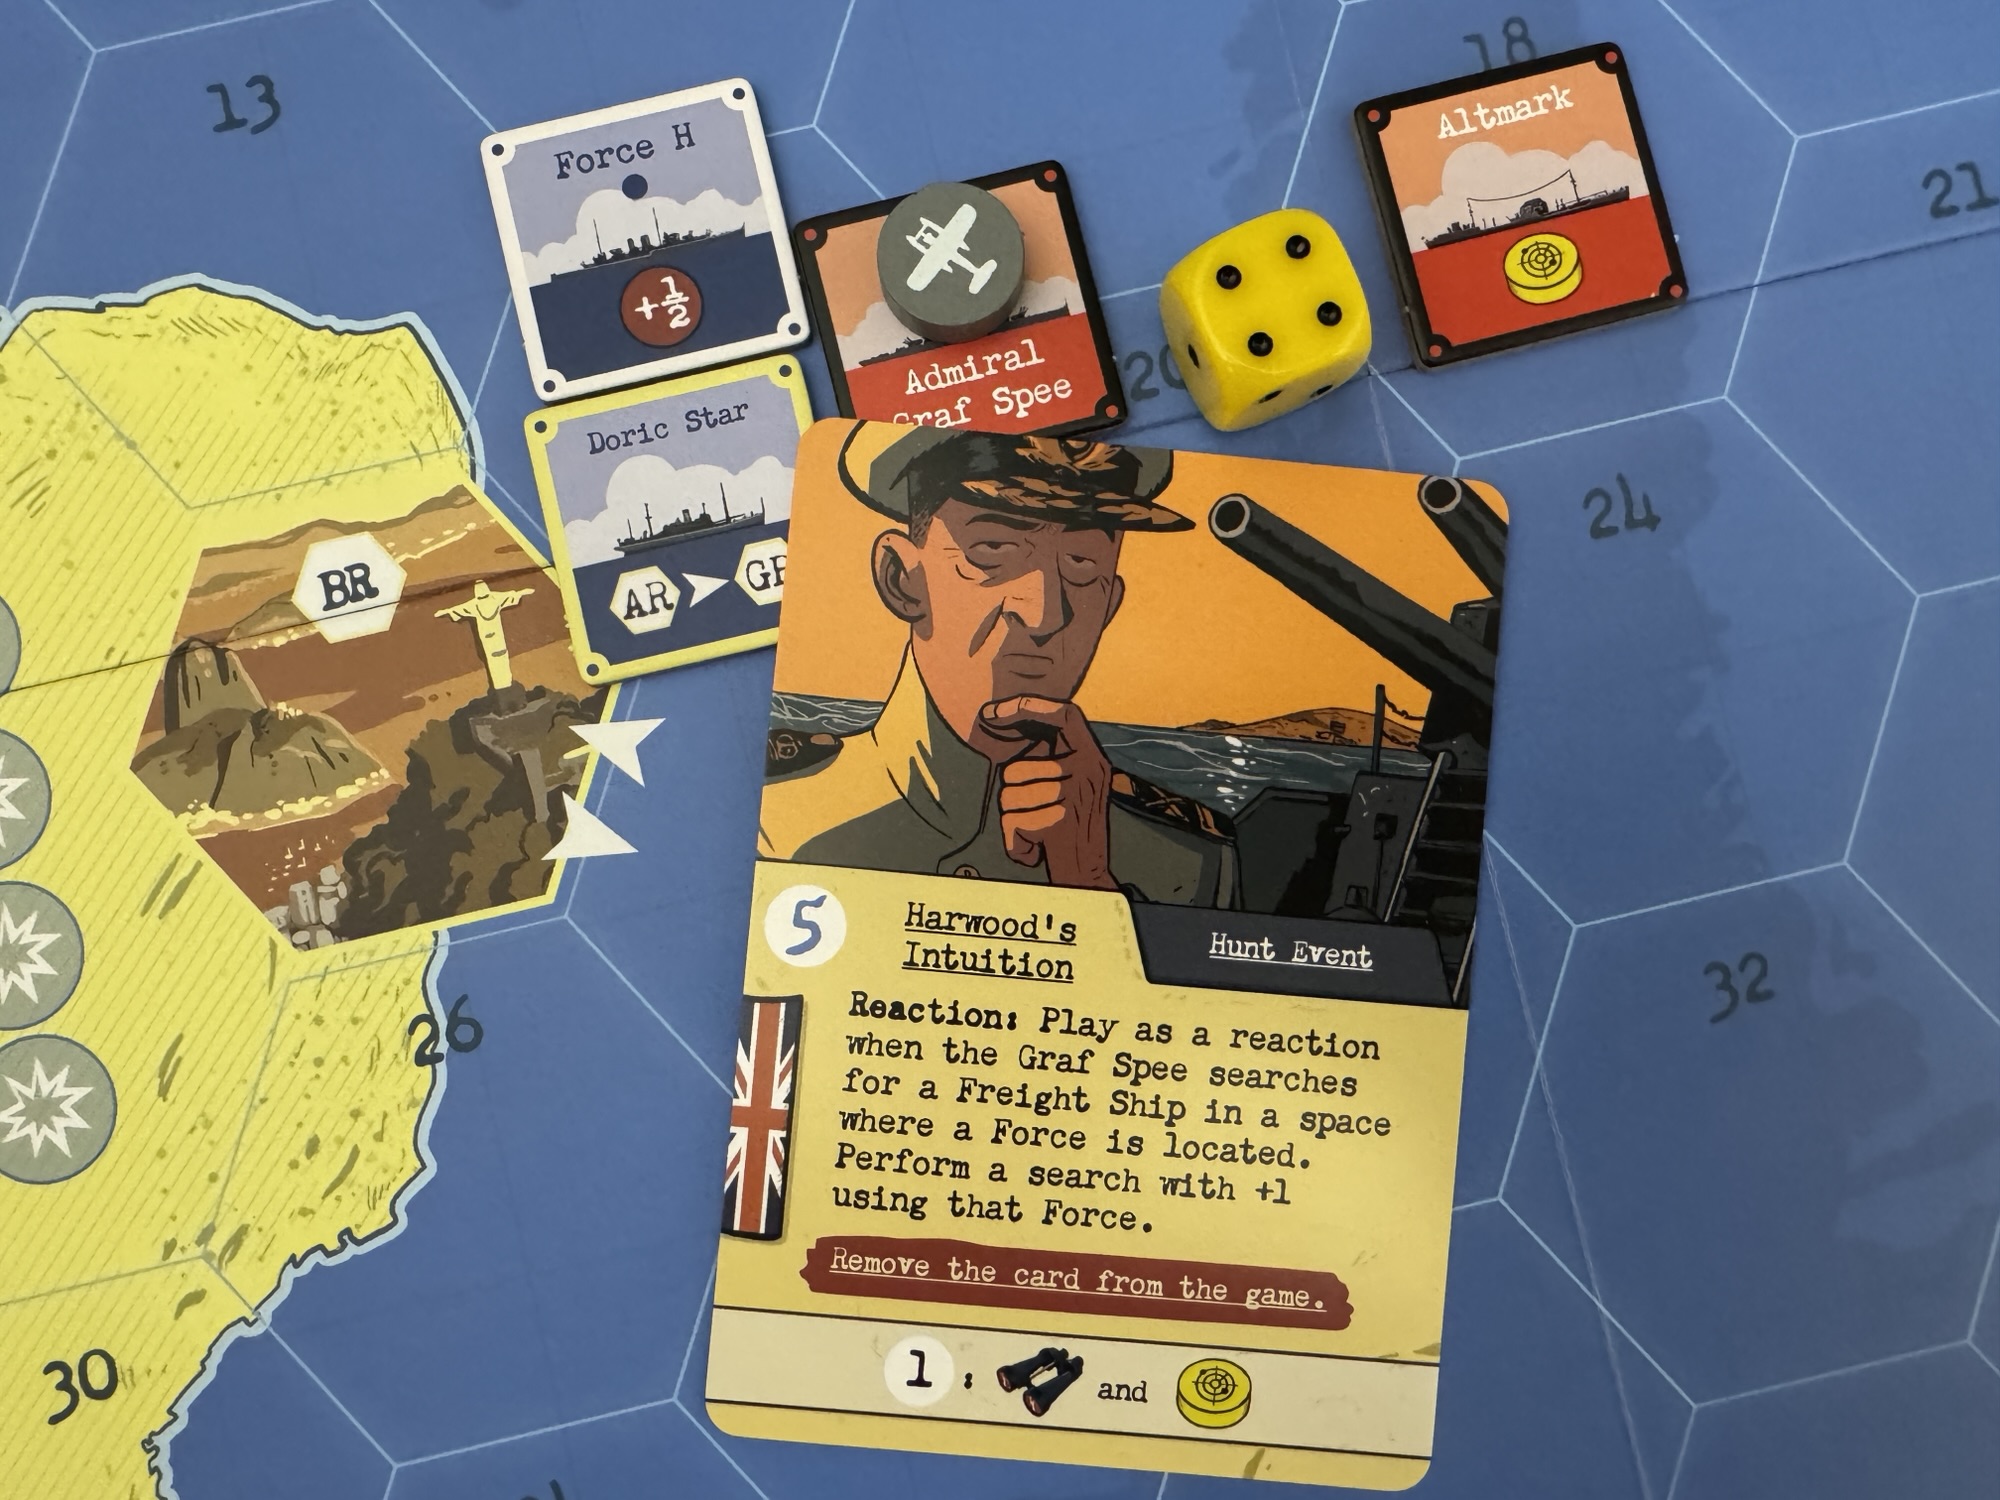
Card #66: Harwood’s Intuition from The Hunt from Salt & Pepper Games
I have played several hidden movement games over the years and enjoyed them all. Some of these titles have included wargames such as They Come Unseen from Osprey Games, Sniper Elite: The Board Game from Rebellion Unplugged and Bomber Command from GMT Games as well as a few board games including Hunt for the Ring from Ares Games. The concept of moving cautiously, attempting to evade pursuers, all while trying to locate and acquire or destroy objectives makes for a very interesting gaming experience. These situations can make for some really tense games that cause your head to ache and your wits to be tested. But they rely on some bluffing as well. Trying to force your opponent to anticipate where they think you should be and then trying not to be there. A really great mechanic in board games but not always easy to pull off and make for a very playable and interesting game. In 2022, we played a new design from Matthias Cramer and Engin Kunter that took this hidden movement concept and put it into a historically based game about the struggle over control of the South Atlantic between the British Royal Navy and the German Kriegsmarine during the early years of World War II called The Hunt from Salt & Pepper Games.
The Hunt is a Card Driven Game where the German player has to attempt to stay hidden while trying to sink merchant shipping as the Royal Navy hunts for them throughout the South Atlantic. The players each have asymmetric actions to use to accomplish their missions and each has a tough time doing what they have to do. But, if they manage their cards wisely, using them as effectively as possible, they can successfully either evade their pursuer or catch their prey.
In today’s post, we will take a look at the very useful British card Harwood’s Intuition. Harwood’s Intuition is a 5 Ops card, which makes it a very important card in the British deck as it allows for the taking of 2-3 actions in a single turn, but for which there is an even more important use as an ambush by playing it as a Reaction to a German action. If the German player ever searches for a Freight Ship in a space where there is a British Task Force, and Harwood’s Intuition is played as a reaction, the British will get a free Search action with a +1 DRM to the roll. Normally, a Search requires a 5+ on a d6 to be successful, but with this bonus +1 that will mean success on a 4+ which is a 50/50 proposition. And remember, the point of the game for the British is to find and sink the Graf Spee at the Battle of the River Plate. Such as tasty surprise card for the British! I know that when I play as the Germans, I have to always keep in the back of my mind that this card exists and that if there is a Force present, I have a risk of being ambushed. This is one of the elements that makes this game so good.
The Battle of the River Plate was fought in the South Atlantic on December 13, 1939 and was officially the first British naval battle of World War II. In the months leading up to this infamous date, due to several successful sinkings of merchant shipping by the Graf Spee, the Royal Navy was ordered by Admiral Sir Henry Harwood Harwood to keep observation between Medanos and Cape San Antonio located off the coast of Argentina south of the River Plate estuary. In the lead up to the climactic final battle, following various raider-warning radio messages from the merchantman Doric Star, which was sunk by Admiral Graf Spee off South Africa, Harwood suspected that the raider would try to strike next at the merchant shipping off the River Plate estuary between Uruguay and Argentina. He ordered his squadron to steam toward the position 32° south, 47° west. Harwood chose that position, according to his dispatch, because it was the most congested part of the shipping routes in the South Atlantic and therefore the point at which a raider could do the most damage to enemy shipping. A Norwegian freighter saw Admiral Graf Spee practicing the use of her searchlights and radioed that her course was toward South America; the three available cruisers of Force G rendezvoused off the estuary on December 12th and conducted maneuvers.
Though generally considered a river, the River Plate has been considered by some geographers as a large bay or a marginal sea of the South Atlantic. Principally this is due to the River Plates enormous width, if we are considering it a river the widest in the world, with a maximum width of about 140 miles. Acting as the marine border between Argentina and Uruguay, the River Plate was a main artery of maritime trade and a gateway into the interior of the South American continent.
It was here that Harwood predicted the German raider would strike and his assumption made sense. The River Plate’s Estuary acted as a natural bottleneck for ships with perilous tides and sandbanks additionally hampering any ability for a British Merchant vessel to escape the guns of a German raider. So it was near the Estuary of the River Plate that Harwood’s H.M.S Exeter, Ajax and Achilles would make their stand. With their force concentrated here, on December 12th preparations were made and tactics drawn up in anticipation for an arriving adversary and to spring the trap and catch the elusive Admiral Graf Spee off-guard and send her to the bottom.
Here also is a link to our full video review of the game:
We also published an interview on the blog with the designers Matthias Cramer and Engin Kunter and you can read that at the following link: https://theplayersaid.com/2023/03/13/interview-with-matthias-cramer-and-engin-kunter-designers-of-the-hunt-from-salt-pepper-games-coming-to-gamefound-march-15th/
In the next entry in this series, we will take a look at Frederick Douglas from Votes for Women from Fort Circle Games.
-Grant
![]()