If you want to read more posts like this strategy post – for example my upcoming deep dives on the God cards in Julius Caesar, I strongly recommend you subscribe to the blog: All new posts in your inbox right when they go live!
The victory conditions in Julius Caesar are straightforward: Have 10 victory points (VP) at the end of any year or more VP than your opponent at the end of the full five years of war. Absent the rare VP from a leader kill, these come from the control of victory cities on the board (up to 13). At the beginning, Pompeius controls cities worth 7 VP, Caesar only Massilia for 1 VP. That leaves five VPs in vacant cities: As it is much easier to take empty cities than those defended by your opponent, these should be your focus for the first year.
VP cities: Pompeius’s holdings are green, Caesar’s red. Rome and the three cities in the Greek East in blue are up for grabs.
2 VP come from Rome, which Caesar must take and hold early (which shouldn’t be a problem for the plethora of Caesarian legions nearby). That leaves the 3 VP from three cities in the Greek-speaking East (Athens, Byzantium, and Ephesus) as the first spaces of contention between the players. Either should send an army there early, and make it strong enough not to be swatted away by the other. Especially when you use the Free Deployment, you can try to position yourself for the rush to the east. Try out a few different deployments, maybe with navis (ships) in different ports to reach cities by sea – or block your opponents from doing so. Which brings us to…
Win Naval Superiority
Once the front lines are drawn, ships become even more important. As defenders have the combat advantage of dealing hits first when battle priorities (ranging from A to D) are tied, defending is a lot easier than attacking in Julius Caesar. Successful attacks thus hinge on local superiority, and ships are the way to achieve it:
You can transport your land forces amphibically much further than they could march on land. Instead of bashing your head against a well-prepared defensive position, your amphibious force can go ashore where the enemy is weakest.
Instead of being limited to however many troops you can march into battle by road (four on a main road, two on the regular roads), the ships can join attacks on port cities and give you the boost needed to overcome the defenders.
Whoever has naval superiority thus usually decides where the action happens. You should gain it, or at least deny it to your opponent.
Caesar has gotten a massive fleet of four blocks into the Mare Internum, which gives him a plethora of offensive options: He can transport land forces to Sicily (1a) or North Africa (1b). He can strike east into the Mare Aegypticum and, in the following turn, directly attack Alexandria (2a) – defended by the lone blue Cleopatra block – or Antioch (2b) – defended by the lone green Pompeian block. He could also sail up the Aegean and into Propontis and help force the straits in a combined land-sea attack in the following turn (3).
Don’t Overdo It With the Gods
Yes, I know. The God cards look great. Surprise attack with Mars! Bonus movement with Mercury! Volcanic eruption with, well, Vulcan! They are, however, not always better than the regular move/levy cards, and the more you have of them, the less flexible you are. So: One God card is fine (although I have sometimes discarded the only God card I was dealt). Two are a lot, and you should strongly consider discarding one of them. If you are ever dealt three, curse your luck and discard one for sure.
Over the next weeks, I’ll add a few more specific thoughts on the God cards. Watch this space.
Which of these cards would you discard on turn 1? Does it make a difference if you’re playing as Caesar or Pompeius?
Which tricks do you use to win at Julius Caesar? Let me know in the comments!
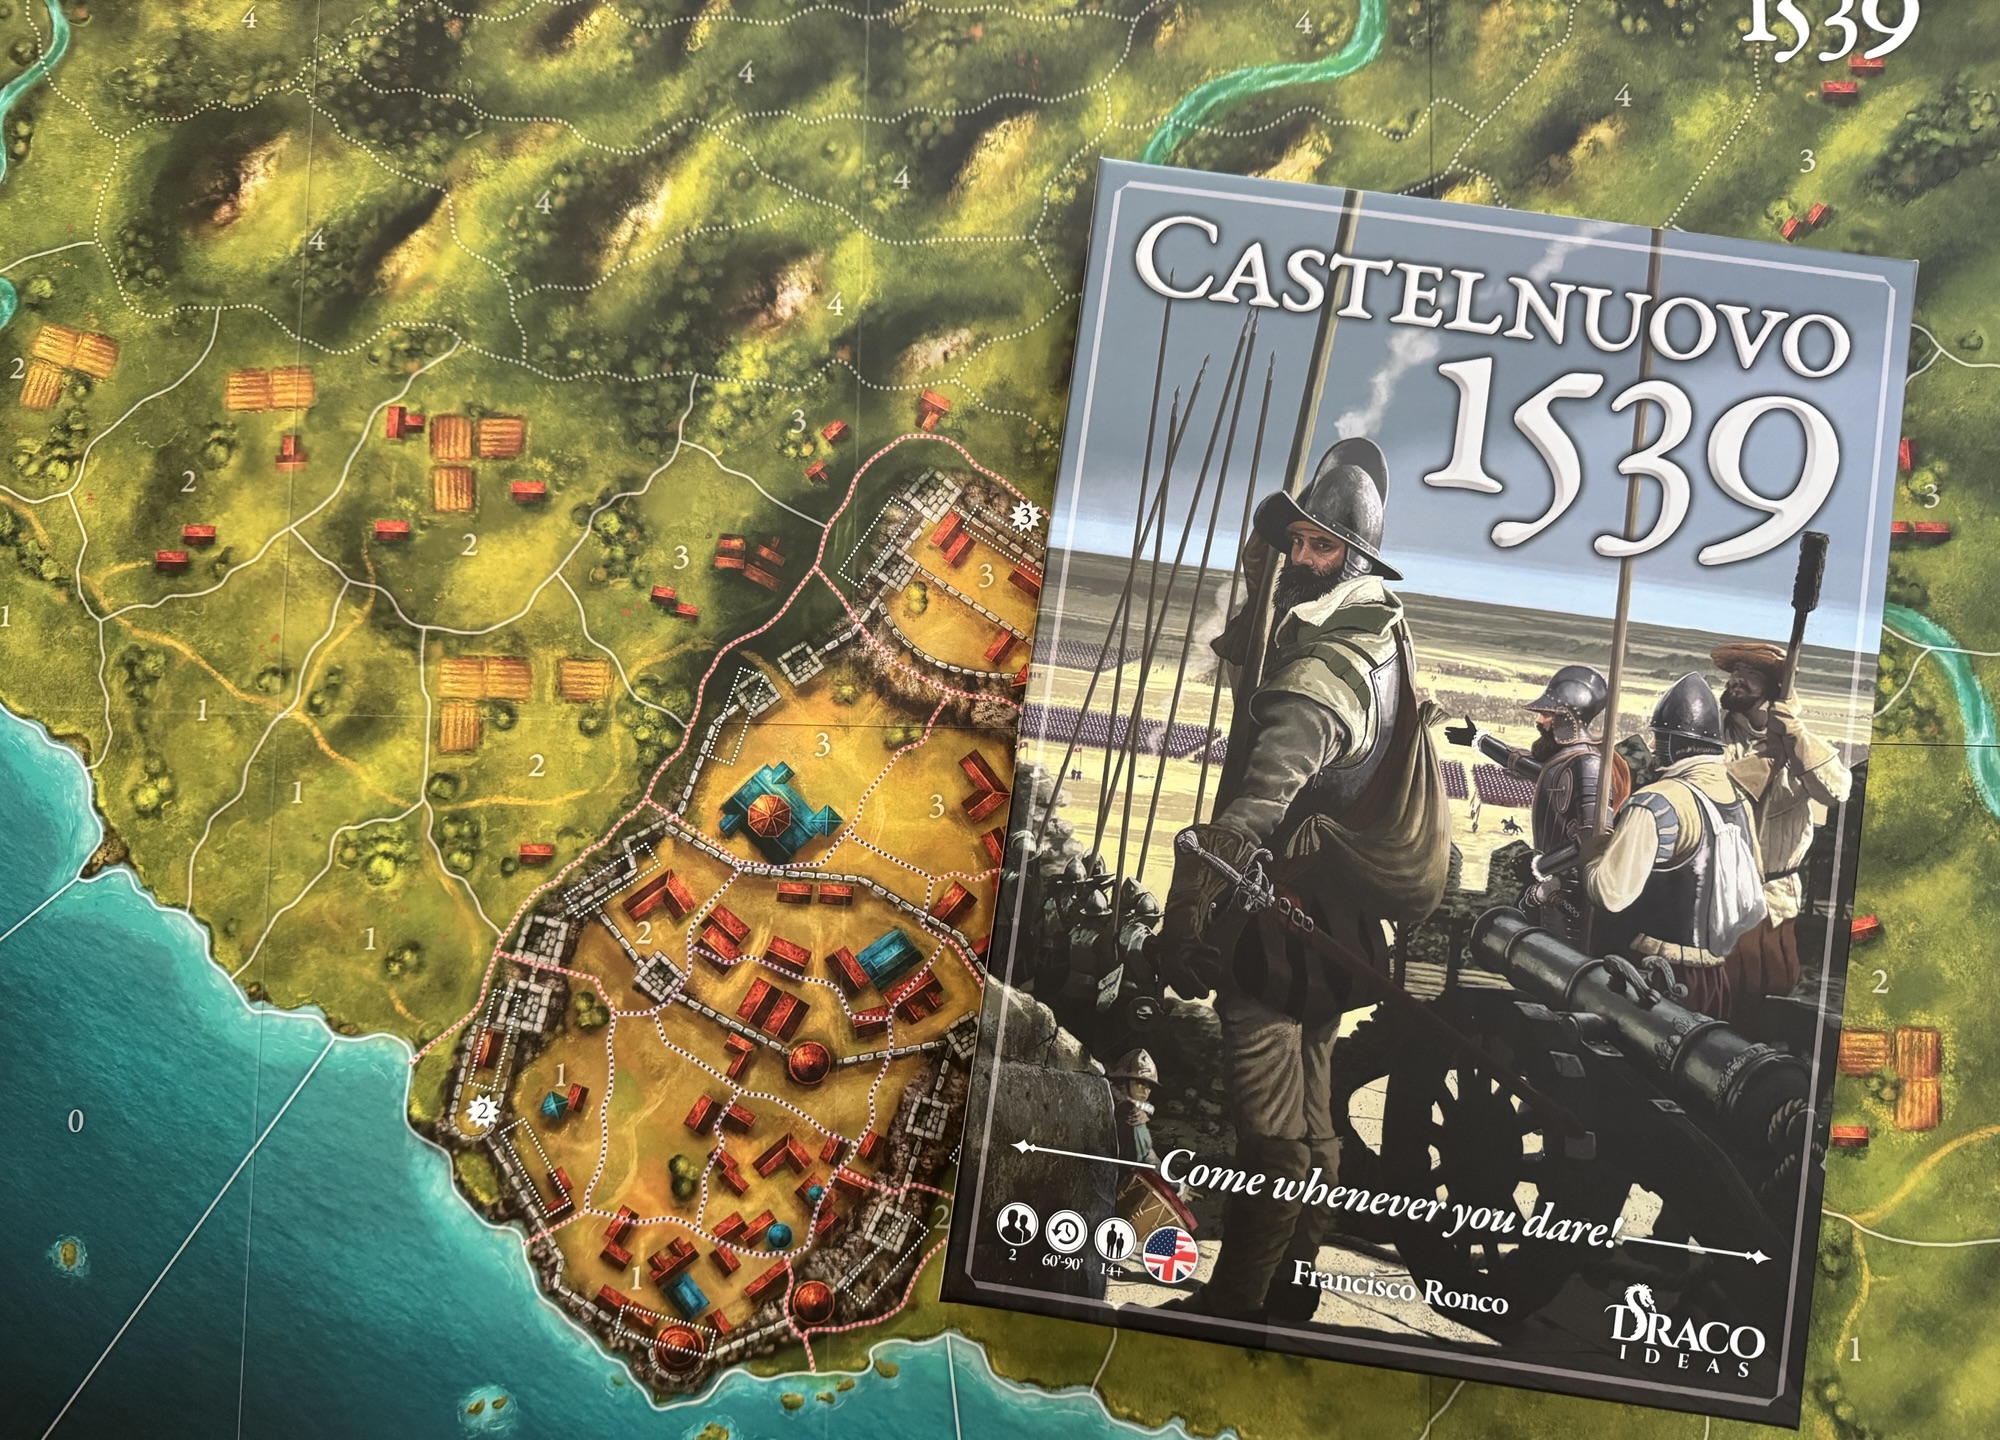
In 1539, a small Spanish garrison of troops numbering 3,500 men held the Albanian village of Castelnuovo for 22 days against the massive Ottoman army consisting of over 54,000 Turk soldiers. This siege took place as a part of the Ottoman-Habsburg struggle for control of the Mediterranean Sea in July 1539 at the walled town of Castelnuovo, which is the location of present-day Herceg Novi, Montenegro. After days of open trench warfare and more than a month of smaller combats, skirmishes, assaults and bombardments from the Turkish navy, the last Spanish defenders fell ending the siege. Castelnuovo 1539 is a wargame that focuses on this siege designed by Francisco Ronco. The defenders are safe behind sturdy walls and battlements but time and continual shelling from the Ottomans will lead to assaults over the walls. The battle is hopeless for the defenders but they can win the game by doing enough damage to the Ottomans to end their campaign and stop them from invading further into the Albania and then onto Spain and the rest of Europe. The game is very well produced using wooden blocks for soldiers, stylized walls, siege trenches and cannon along with ships and the board is also beautifully illustrated. The game is a block wargame where the strength of units are hidden from the opponent and plays pretty quickly in less than 90 minutes and really is a great representation of the battle and its history.
In Action Point 1, we took a look at the beautiful Game Board and its area movement scheme. In this Action Point, we will examine the units available to both sides and compare their relative strengths and weaknesses.
Units
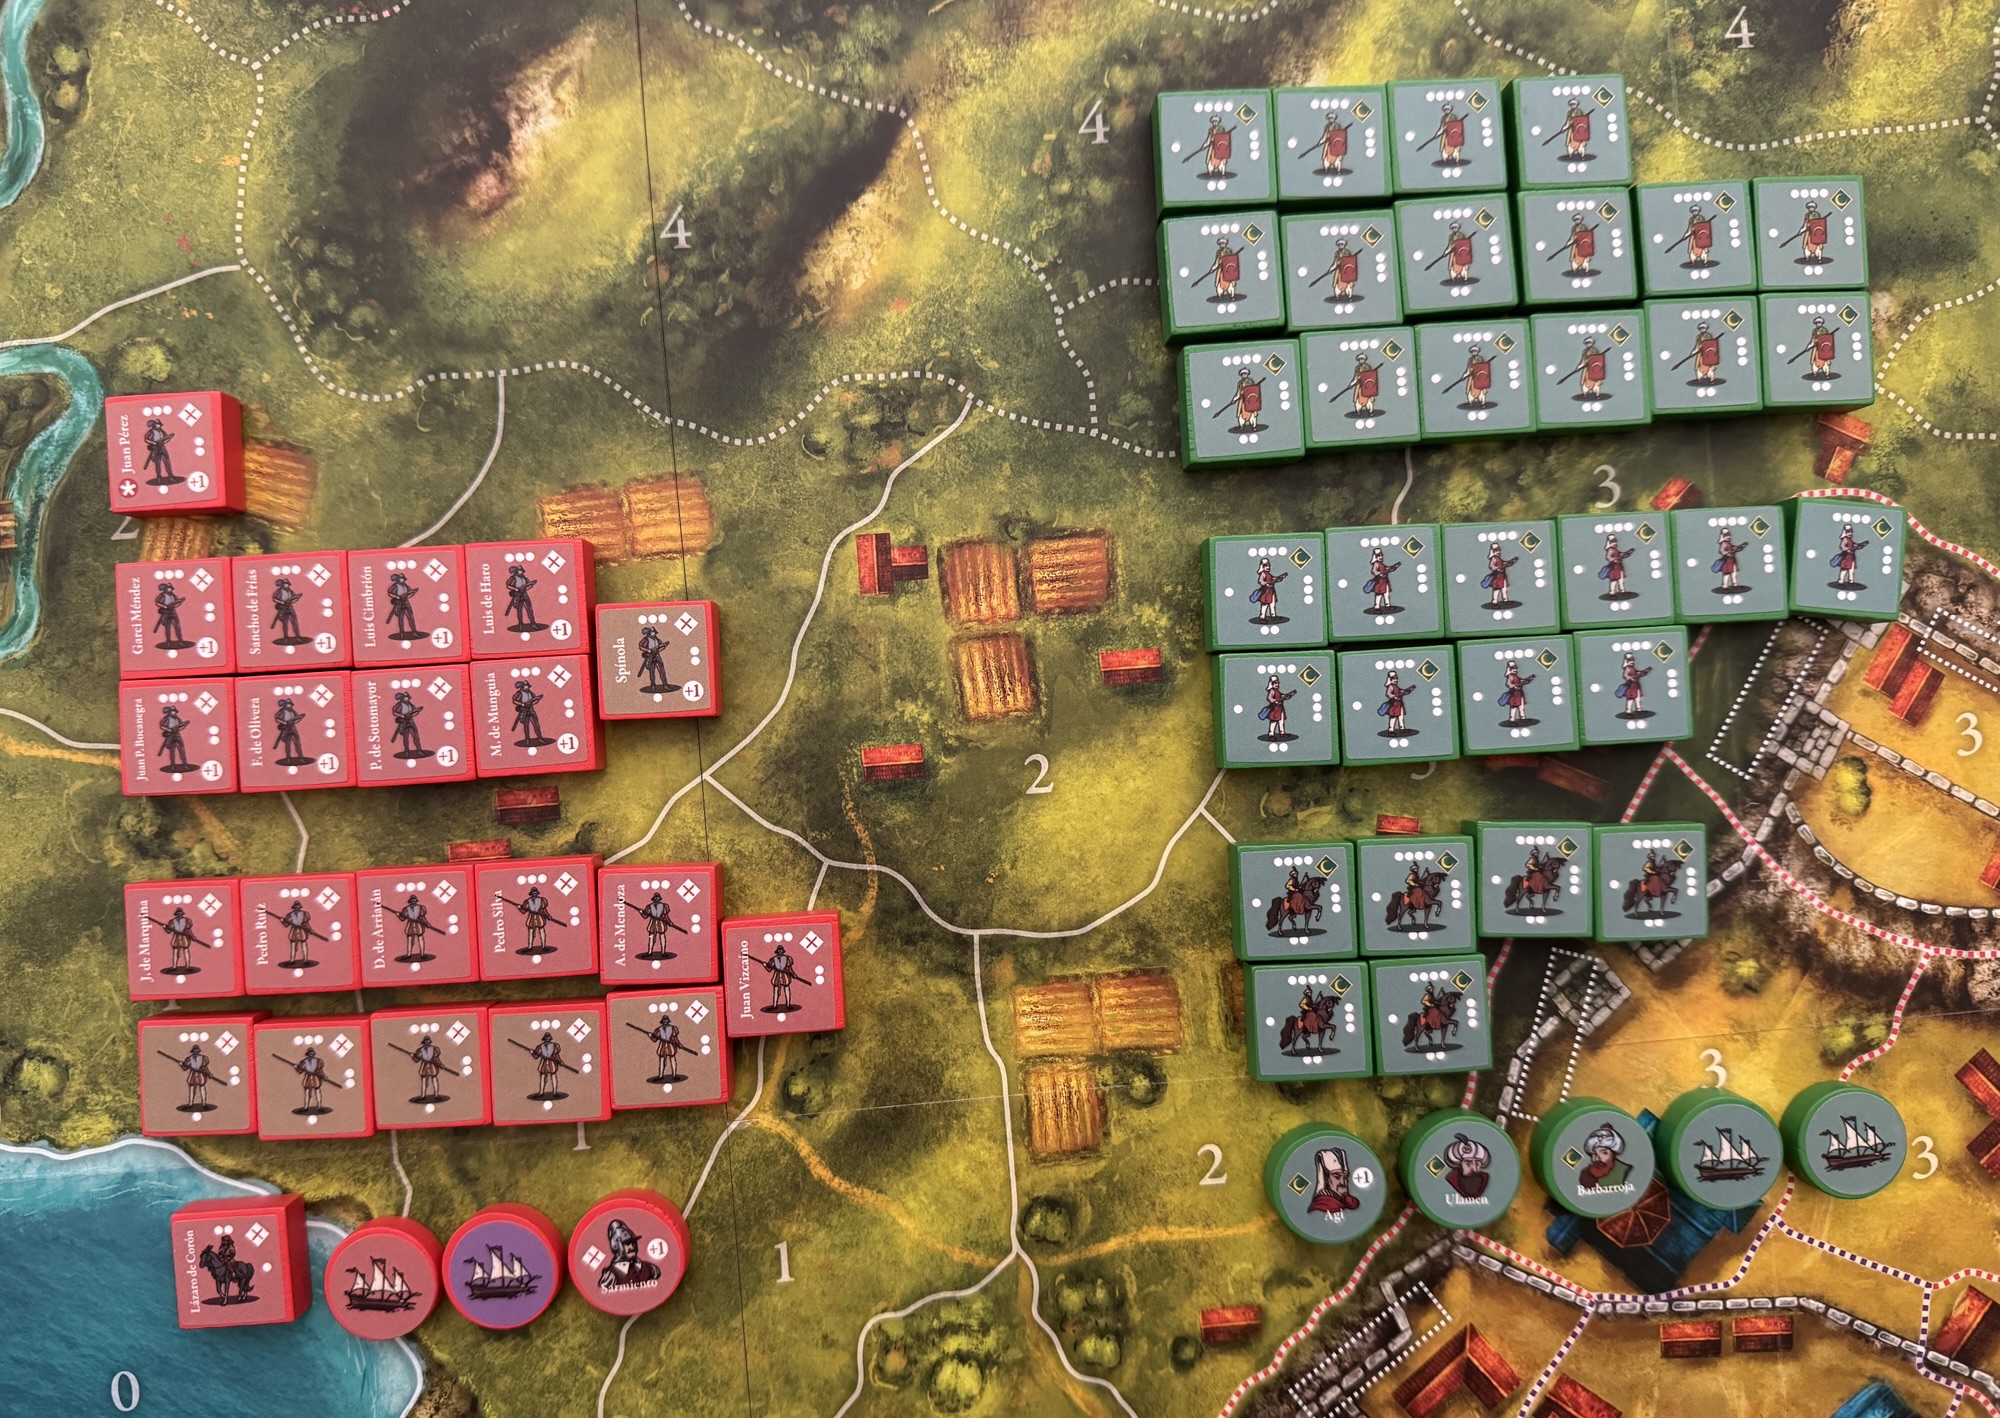
As a block wargame, all of the units in the game are represented by wooden blocks that have stickers affixed to them representing the fighting forces of the Spanish and the Ottomans. There are generally 3 types of units including Infantry, Cavalry and Naval. Infantry is a large category that includes Arquebusiers and Pikemen for the Spanish and Turkish Janissaries and Azab for the Ottomans. Cavalry units are fewer and include Albanian Cavalry for the Spanish and Sipahi for the Ottomans. Each Infantry and Cavalry sticker has a central icon with groups of dots printed on its sides which represent their Combat Strength and the number of dice that each unit will roll in combat. The blocks range in Combat Strength from 2 to 4 dots as not all units have the same Combat Strength. The number of dots oriented at the top of the individual block units represents the current Combat Strength of the unit and can be reduced when entering combat and taking losses. Naval units do not have dots, as they are used in a different way to Infantry and Cavalry units.
All blocks start the game at full Strength and each time a block receives 1 or more hits, it will be rotated counterclockwise so that the top of the block shows the Strength it has remaining. When a Spanish block loses its last Strength Point, it will be removed from the game permanently. The same will happen for Turkish Janissary blocks but for eliminated Ottoman Azab and Sipahi Cavalry units they will be able return to the game at the end of each round during the Reinforcement Phase.
Fleets represent the use of galleys as artillery platforms to support the land forces in their siege and to provide the opportunity to perform some amphibious landing operations with ground troops. The Fleet discs are placed on the board horizontally, unlike the other blocks, and in this way their presence is not hidden from the opponent. Fleet blocks cannot leave the sea areas and count as Artillery Batteries when playing Bombardment and Friendly Fire cards. Once placed, Fleets do not move during the game.
Let’s take a quick look at the statistical makeup of the opposing forces.
In the following table, you will see the number of different types available to each of the combatants. The Ottoman forces have a numerical superiority as they have the most Infantry units with 26, comprising 10 elite Janissaries and 16 Azab. The Spanish have just 21 Infantry, with 10 of those being Arquebusiers and 11 Pikemen. The Ottomans also have the edge in the number of Cavalry units available with 6 Sipahi as compared to just 1 Cavalry unit from the Spanish in the form of a single Albanian Cavalry. The Infantry typically are the backbone of the army and will do most of the fighting and do most of the damage while the Cavalry units will be used to move ahead quickly to seize key areas and set up defenses to allow for the Infantry who have slower movement to catch up. Each side has 2 Fleets and these are vitally important for the Ottomans as this is the means that they can bring onto shore additional units to siege Castelnuovo.
And a look at total Combat Strength for each side. But, first it is important to explain the Combat Strength of each of the units for both sides. The Spanish Arquebusiers have a Combat Strength of 3 as do their Pikemen. This means that these units will roll 3 dice in combat and will be able to take 3 hits before being killed. The Ottoman Janissaries have 4 Combat Strength as do the Azab. When you simply multiply the Combat Strength by the number of blocks of each type you will get their Total Infantry Combat Strength. The Ottoman has a total of 104 Combat Strength spread out amongst their 26 Infantry units and the Spanish have a total of 63 Combat Strength among their 21 Infantry units. This can be used to get a quick idea about which side is better and has more power but this can be deceiving as the Spanish have the walls which can slow down the sieging Ottomans and absorb hits as well. The Ottomans have 49.1% more Infantry Combat Strength than the Spanish with a numerical difference of 41. A fairly significant difference and when coupled with the fact that the Ottomans can bring back killed Azab units where the Spanish Infantry are removed from the game, it is easy to see that the Spanish have the tougher time of it. Also, the Cavalry advantage is on the side of the Ottomans with Sipahi having a Combat Strength of 4 as compared to the Spanish Albanian Cavalry’s Combat Strength of 2. This gives the Ottoman the advantage in Total Cavalry Combat Strength of 24 as compared to just 2 for the Spanish.
I do want to point out that the Spanish have better Leaders and some of their units are considered elite and gain advantage on their combat rolls. The Arquebusiers Blocks have a +1 printed on them as a reminder that they have a +1 bonus to their combat roll and this is a major advantage in combat.
The other difference in combat is a unit’s priority and when they get to roll their attack dice and if hits are scored steps will be removed before lower priority units get to roll. The priority is as follows:
Pikemen go first if enemy Cavalry is present and they are fighting in clear or rough terrain.
Cavalry, if no opposing Pikemen are present and the battle is fought in clear or rough terrain.
Arquebusiers.
All other Infantry will then attack simultaneously.
Cavalry, only if there are opposing Pikemen in clear or rough terrain.
Hits are scored when players roll a modified 5 or 6 result on their 6-sided dice. Remember that Arquebusiers get a +1 to hit, which means they hit on a roll of 4-6, which is a huge advantage. Also remember that there are Leaders and certain Leaders will give a +1 bonus to specific troops that are located in their areas.
Leaders must always have blocks of their side present in their areas on the board but do not count toward the 3-block limit per area. Leaders Agi (Ottoman Janissary Leader) and Sarmiento (Spanish Leader that affects all units with him) grant benefits to the dice rolls of the units they escort. Leaders do not have to accompany specific units and as such can move with any unit in the area they are in, or they can stay there with units other than the ones they originally moved in with. But Leaders must perform the full movement with the units they started moving with as you cannot drop or pick up a Leader during movement. You can move units from where the Leader is without taking the Leader with them, but some units will need to stay behind so the Leader is not alone in the area. If during combat, all blocks accompanying the Leader are eliminated, the Leader is eliminated as well.
Artillery Batteries
Both players have Artillery Batteries at their disposal, which represent vitally important siege pieces used to both defend and attack the city walls. These Artillery Batteries are in the form of red and green cannon meeples (they are very cute) and make a huge impact on the presence of the board as when they are placed they command respect. The Batteries allow players to play cards that fire from a distance and there can never be more than 1 of these Batteries in a single area of the map. The Spanish player’s Artillery Batteries are placed at the beginning of the game and cannot be moved while the Ottoman player can install an Artillery Battery when building Trenches with any cards that allow it. They can also move the Batteries through areas connected by Trenches using those same cards.
In Castelnuovo 1539, the Spanish and Ottoman fighting forces are deeply asymmetrical. The Spanish field a small, fixed and irreplaceable garrison of elite veteran Tercios focused on defense and repairing fortifications, whereas the Ottomans possess an overwhelming, recyclable horde of Azabs, Sipahi Cavalry, and Janissaries arriving by land and sea. You will feel the asymmetry in the game and I think that it is really very well done by the designer to represent this very difficult siege from history.
As this month’s Wargame Watch posts on the blog, I will have just come back from attending the World Boardgaming Championships in Seven Springs, Pennsylvania where I was able to spend 5 1/2 days of fabulous gaming. I bring that up because this month I just didn’t have the time to do the deep dive that I normally do and only was able to find 27 games (including a new game from our sponsor Nuts! Publishing). I was also able to find 3 games to share being offered on Crowdfunding through Gamefound and Kickstarter.
This month we have a sponsor for the Wargame Watch feature in Nuts! Publishing. Founded in 2011, Nuts! Publishing is a French tabletop and board game publisher established by four wargaming and history enthusiasts. While initially famous strictly for historical and tactical wargames, the company has expanded its catalog to include cooperative, sci-fi, and family-friendly board games, while maintaining a strict selection process for those games they do publish. They are well known for developing popular original titles like Mini Rogue, Diluvium, and 300: Earth & Water, which is a part of their unique small format wargame series called Combat Rations that recently released the 3rd volume in the series called Guerre Eclair. The “Combat Ration” Series is a line of highly accessible, compact wargames designed to be played in about an hour including the 2 previous titles of 300: Earth & Water that delves into the Persian invasion of Greece in 492BC, and Port Arthur that retells the story of the 1905 Russo-Japanese War.
But, they also have a full line of more beefy traditional wargames including such titles as Urban Operations, Saigon 75, Stalingrad Roads, This War Without an Enemy, We Are Coming, Nineveh and Phantom Fury.
In addition to their own unique games, they also hold licenses to translate and distribute highly acclaimed international games for the French market, such as One Deck Dungeon, War of the Ring and the UndauntedSeries.
Their newest wargame release is called Guerre Eclair designed by Yasushi Nakaguro and is a part of the Combat Rations Series. Guerre Eclair is a remake of the 2019 game called The Rise of Blitzkrieg from Bonsai Games and is a card-driven game for 2 players lasting around 45 minutes. The setting is World War II in 1940 as the Germans unleashed their new Blitzkrieg tactic to invade France. The attacking Germans hide their intentions by choosing a conquest goal of either taking the Maginot Line, conquering Paris or controlling the ports at Dunkirk. Dice are rolled for combat and the highest 2 dice totals determine the outcome and if doubles are rolled losses to units will be inflicted. The French and British really cannot afford to lose many units as they don’t have a lot but neither can the Germans. The game is simple but fairly meaty with lots of decision points and we had a great time with it, as we have had with the other games appearing in the series.
Here is what Florent had to share on their upcoming slate of games:
In May, we released Guerre Eclair the third game in the CombatRations series and work on the next titles in the line is well underway (specifically Norway 40, followed by Bulge 20 – Yes, by Joe Miranda previously published by Victory Point Games). Urban Operations 2nd Edition is now available in stores worldwide. Please note that an upgrade kit is available on our website for owners of the 1st Edition.
Upcoming releases in early 2027 include The Coldest Winter, a card-driven game about the 1939–40 war between Finland and the Soviet Union (designed by Timo Pohja; art by Nils Johanssen), followed by Supremacy 2050, in which the world’s four major powers clash between 2020 and 2050 (designed by Pierre Razoux; art by Domhnall Hegarty).
Finally, we will launch two crowdfunding campaigns in 2027. The first will be for the second edition of Sword of Rome, covering the rise of Roman power in the 3rd and 4th centuries BC (designed by Wray Ferrell; art by Nicolas Roblin and Gabriel Pardon). The second will feature Nemto a cooperative sci-fi wargame (designed by Hermann Luttman; art by Nicolas Roblin and Christian Benavides).
Quite a variety of eras and gameplay styles!
Here is a link to an interview we did with one of the owners, designer and main bottle washer Florent Coupeau while attending Essen Spiel 2025:
Here also is an older video we did with Florent while attending SDHistCon 2024 where we discussed the excellent Combat Rations Series and Guerre Eclair (recently released) and the upcoming Norway 40:
1. Pacific Fleet: Rise & Fall of the Japanese Empire from VUCA Simulations
VUCA Simulations is a newer company on the scene the last several years (really since 2021) and they are coming out with some really great looking games. We have played several of their games and always have a great time with them. One of their newest pre-order offerings is called Pacific Fleet: Rise & Fall of the Japanese Empire designed by Hiroyuki Inose. I love a good Pacific Theater WWII game and this one looks pretty great.
From the game page, we read the following:
The Pacific War was unlike any other conflict of the Second World War. Vast oceans, isolated island chains, carrier task forces, long-range bombers, amphibious invasions, and industrial warfare all combined into one of history’s most complex military campaigns.
Pacific Fleet: Rise & Fall of the Japanese Empire places you in command of this global struggle. Lead the Imperial Japanese forces in their quest to establish dominance across Asia and the Pacific, or direct the Allied war effort as overwhelming industrial power gradually turns the tide. Every carrier strike, convoy, amphibious landing, and production decision shapes the course of the war.
This is not merely a naval game—it is a complete grand-strategic simulation where sea, air, and land warfare are seamlessly integrated into one operational system.
Fight from the opening attacks of December 1941 through the climactic campaigns that determined the fate of the Japanese Empire. Unlike many Pacific games that focus on individual battles, Pacific Fleet presents the entire theatre as one interconnected campaign where logistics, production, intelligence, and operational planning are equally important.
2. Modern Tactics: Afghanistan – British Forces Expansion from VUCA Simulations
We have played a lot of Old School Tactical from Flying Pig Games, which is designed by Shayne Logan. Shayne now has a design with VUCA Simulations that deals with modern warfare in Afghanistan called Modern Tactics: Afghanistan. That was announced on pre-order a while ago and has since been delivered but there is now an expansion of sorts to the game called Modern Tactics: Afghanistan – British Forces Expansion but it is being designed by another designer named Kenneth Tee of People Power from GMT Games fame.
From the game page, we read the following:
The war in Afghanistan was fought village by village, compound by compound, and patrol by patrol. Every operation demanded careful planning, disciplined infantry, close cooperation with allied forces, and constant vigilance against an elusive insurgency.
Modern Tactics: Afghanistan – British Forces Expansion places you in command of the British Army, Royal Marines, Special Air Service, and supporting Afghan forces during Operation Herrick. Experience thirteen new scenarios inspired by real operations fought throughout Helmand Province between 2001 and 2012, introducing new units, mechanics, and tactical challenges to the Modern Tactics system.
Whether conducting a night raid with the SAS, leading Gurkhas into hostile villages, defending isolated platoon houses, or escorting Afghan National Army units through dangerous territory, every mission presents unique tactical and operational decisions.
3. Thirty Years of Misery: The Thirty Years War 1618-1648 from VUCA Simulations
A couple of years ago, I came across a new designer named Brian Asklev and have done interviews with him covering Baltic Empires from GMT Games and 1812 – Napoleon’s Fateful March from VUCA Simulations. Brian is a pretty sharp designer and I very much like his approach to design as well as the choices in designs that he is doing. His new game is called Thirty Years of Misery: The Thirty Years War 1618-1648. The cover art is amazing, the topic looks great and the approach that he is taking seems to be very novel.
From the game page, we read the following:
Between 1618 and 1648, Europe was consumed by one of the longest and most destructive conflicts in its history. What began as a rebellion in Bohemia soon engulfed the Holy Roman Empire and drew nearly every major European power into a struggle over religion, dynastic ambition, and political supremacy. Millions perished as armies marched across Central Europe, cities were besieged, alliances shifted, and entire regions were devastated.
Thirty Years of Misery places you in command of the major powers that shaped this conflict. Lead the Imperial Habsburgs, the Catholic League, Sweden, or France as you fight to reshape Germany through military campaigns, religious influence, political maneuvering, and strategic diplomacy.
Victory requires more than battlefield success. You must secure electorates, protect your heartlands, influence the religious landscape of the Empire, and achieve your faction’s unique historical ambitions before peace is finally negotiated at Westphalia. Rather than recreating individual battles, Thirty Years of Misery captures the entire strategic conflict across three decades of war.
Every campaign combines:
Military operations
Religious conflict
Political objectives
Coalition warfare
Historical events
Dynamic diplomacy
Each round features a randomized turn order, ensuring that no two campaigns unfold the same way. Players must continually adapt to changing circumstances, unexpected interventions, and opportunities created by both allies and enemies.
4. Iwo Jima: Hell on Earth Revised Edition from Neva Game Press
Neva Game Press (formerly Neva Wargames) is a new publisher who appeared on the scene 2+ years ago. When I started seeing their posts on Twitter and Facebook, I was immediately impressed with their interesting topic choices for their upcoming games as well as the fact that they are trying to make small footprint wargames that pack a punch. And the art is also very appealing and brings an aesthetically pleasing and attractive look to their games! Their first release called Iwo Jima: Hell on Earth, which is a solitaire look at the amphibious invasion of the island of Iwo Jima in 1945 at the end of WWII, was both commercially and critically successful and has sold out and now they are bringing back a revised edition for pre-order.
From the game page, we read the following:
Iwo Jima: Hell on Earth is a hex & counter wargame based on this iconic battle. This challenging solitaire wargame puts you in command of US Marine Regiments as they battle entrenched Japanese Battalions during the iconic 36-day Operation Detachment. Each game turn represents approximately four days, condensing the intense conflict into nine turns of strategic decision-making.
In Iwo Jima: Hell on Earth, your mission as the commander of US forces is to conquer the island of Iwo Jima to secure its three airfields and the iconic Mount Suribachi. The game simulates the 36-day battle in nine turns, with each turn representing approximately four days.
Victory is determined at the end of Turn 9 by calculating your Victory Points. You earn VP’s by: Eliminating Japanese units, Capturing key objectives on time and Japanese surrender. You can lose VP’s if: You play too many Special Orders and/or you suffer too many US casualties. Your final VP score will give you an assessment of your performance, ranging from a “pen-pushing job” (1 or less to 5 VP) to an “incredible victory” (19-20 VP).
I think that a new company selling out their first release is probably pretty rare in our hobby but Neva did it and it is partly because a good solitaire game is always in demand and their focus on quality, in both game play and components, speaks to wargamers and word will spread fast once it is out. So what is different in this new Revised Edition?
Because we are heading back to the printers, we saw the perfect opportunity to integrate our community feedback directly into the game. The Revised Edition will feature:
Upgraded Map: A minor visual tweak where hill hex frames are slightly thicker, making them much easier to identify during intense gameplay.
Box Art Variant: A fresh, slight variation of the original box art (while keeping the classic spirit of the original design).
Fully Integrated Updates: All components from our Update Kit (detailed below) will come standard inside the box!
5. Rebels Against Rebellion from Flying Pig Games Currently on Kickstarter
About 18 months ago, while attending Buckeye Game Fest in Columbus, Ohio, we met up with David Thompson to get a quick look at a few of his newest upcoming games at the time including Line of Fire: Burnt Moon from Osprey Games and the very interesting American Civil War game with a twist called Rebels Against Rebellion from Flying Pig Games. I got to play Rebels Against Rebellion and very much enjoyed the game and what it was trying to convey about the lack of support for the secession of Tennessee from the Union as most of the residents of Scott County voted against breaking away during the American Civil War. The game pits the local groups against each other as the Free and Independent State of Scott fights against the local secessionist residents as violent confrontations between Loyalist and secessionist-aligned partisans and outlaws engaged in raids on farms, stealing livestock, and destroying property. Since that time, the game has progressed and has already launched on Kickstarter.
From the game page, we read the following:
Rebels Against Rebellion is a card-driven war game designed by award-winning designers, David Thompson and Trevor Benjamin. The cards in your deck represent the units and locations under your control. Each turn you will play cards to perform actions on the board and to add, remove, and improve the cards in your deck. The player who most successfully spreads their control across Scott County is the winner.
Tennessee’s role in the American Civil War and the Secession Crisis was marked by significant internal divisions between its eastern, middle, and western regions. In early 1861, when South Carolina became the first state to secede from the Union, Tennessee’s legislature resisted the idea. However, following the attack on Fort Sumter in April 1861, Tennessee was forced to readdress its position. On June 8, 1861, a state referendum resulted in a decisive vote to secede.
Despite this formal decision, Tennessee remained divided. In the eastern part of the state, loyalist sentiment was strong. East Tennessee had overwhelmingly voted against secession in the 1861 referendum, while West and Middle Tennessee overwhelmingly supported secession.
As tensions escalated, residents of East Tennessee found themselves forced to take sides, often leading to violent confrontations. Loyalist- and secessionist-aligned partisans and outlaws engaged in raids on farms, stealing livestock, and destroying property. The establishment of local militia groups known as the home guard sought to defend loyalists. These small militias acted in secret, launching surprise attacks on Confederate soldiers and secessionist raiders, but they also faced constant threats from the Confederate army and local secessionist groups.
Of the thirty-one counties in East Tennessee, none voted against succession by a higher margin than Scott County. With a vote of 521 to 19 in favor of rejecting secession, the county’s stance was clear. Local residents so opposed the Confederacy that later in 1861, the county court approved a protest resolution declaring the county’s secession from the State of Tennessee and the creation of a “Free and Independent State of Scott.”
This is the story of the Free and Independent State of Scott during the Civil War.
If you are interested, we did an interview video with David while attending Buckeye Game Fest in the spring of 2025 and you can watch that at the following link for more information on the game:
Because I know that many of you will be paying this one solitaire, Denver did an overview video of the solitaire mode and you can watch that at the following link:
As of August 1st, the Kickstarter campaign has funded and raised $24,531 toward $10,000 funding goal with 450 backers. The campaign will conclude on Tuesday, August 18th at 12:00pm EDT.
6. Lee’s War: The War in Virginia 1861-65 from Worthington Publishing Currently on Kickstarter
One of the subjects that Worthington Publishing does really well is the American Civil War. They have their Civil War Brigade Battle Series that we have enjoyed and they really have a way of making these ACW games playable yet integrating some of the most important historical aspects to keep them grounded in history. Their newest series is focused on the Strategic Level and is supposed to be a 3 volume series. The first entry in the series is called Lee’s War: The War in Virginia 1861-65 and is currently on Kickstarter.
From the game page, we read the following:
Lee’s War is Volume I in what I hope to be a 3 Volume set on the American Civil War. It is meant to show the difficulties each side faced during the war. There is no plan currently for a full war campaign scenario. Players are given scenarios based on the campaigns and complete years of the war. I hope you enjoy playing the short crisp 2 – 3-hour scenarios giving an intense game experience as well as a study in Civil War command.
If this game is successful then Volume II, tentatively titled Grant’s War will be the Western Theater along the Mississippi from 1861 to 1864. Volume III, titled Sherman’s War, will be the Western Theater and the battle for Eastern Tennessee and Georgia from 1861 to 1865.
The game is for 2 or more players but is highly solitaire friendly (one player playing both sides) due to the random nature of certain rules such as Dice Differential and combat die rolls.
Lee’s War is a strategic level hex and counter war game for 2 or more players of the entire American Civil War in Virginia from 1862 – 1865. Leadership is highlighted using counters representing the combat leaders of the war. The destruction of the opposing players forces are the main objectives of the game, followed by the occupation of key cities or rail lines. The political aspects of the war are not reflected in the game per say, however they are reflected in the Victory Conditions. The longer the south drug out the war, and the more Union casualties inflicted, the better the chance that Lincoln would lose the 1864 election, and a peace Candidate (probably McClellan) would end the war with southern independence.
Here is the current 14 scenario list:
First Manassas / Historic 4 turns or optional long game 8 turns (July 1 – August 31, 1861)
The Peninsula Campaign / 10 turns (April 1 – June 15, 1862)
The Peninsula Campaign Plus Seven Days 16 turns (April 1 – July 31, 1862)
Second Manassas / 7 turns (July 14 – August 31, 1862)
As of August 1st, the Kickstarter campaign has funded and raised $27,212 toward its $1,861 funding goal with 304 backers. The campaign will conclude on Saturday, August 15th at 4:00pm EDT.
7. Warfighter: The WWII Eastern FrontSpecial Forces Card Game from Dan Verssen Games Currently on Kickstarter
The Warfighter system from Dan Verssen Games is a card based game designed for 1 to 6 players. You can play solo or cooperatively against the AI to complete World War II squad-level combat missions. One of my favorite parts of the game is at the start of each mission, you will select one or more Player Soldiers, equip them with skills, weapons, and combat gear within the mission’s Resource limit. You then fight your way through hostile territory and engage enemy soldiers, as you attempt to reach and complete your mission objective. Every mission is a stand-alone game. You build your Soldiers, select your Gear, and then run your mission. Within 30 to 60 minutes you will have succeeded or failed. We simply love the system and prefer the WWII focused modules (we really hated Fantasy!) and are very excited to see that they are doing this WWII Eastern Front offering as I think that it will offer a new and interesting view of the history.
From the game page, we read the following:
Warfighter WWII Eastern Front recreates the brutal skirmishes fought across the vast Soviet battlefields of World War II, where Soviet Red Army and German forces clashed for shattered cities, strategic strongholds, and hard-won ground in some of the harshest climactic conditions of the war. You will face fierce resistance from enemy troops, but the battlefield itself, from deep snow and choking mud to bitter cold and broken terrain, can prove equally deadly.
Do you have what it takes to defend the Rodina and drive the invader from our soil?
Warfighter WWII Eastern Front is the latest title in the Warfighter WWII Series, which includes other core sets for the Europe, Pacific, Mediterranean and North Africa Theatres of Operation. The Eastern Front has been an area of interest which we have been discussing for a time, and we began research and design work in January 2025. Now, the game design is complete, and we are ready to present it for crowdfunding support.
A key part of the game is squad building and mission planning. You decide which soldiers go on the mission, and which skills, weapons and gear to equip them with, best suited for the objective you are attacking. You control their actions and resolve all combat against hostiles and events encountered, but do not take too long, as the timer is counting down!
As a solitaire wargame, the game’s hostile response system handles all the enemy decisions and actions which will oppose your squad and thwart your mission plans. You will have to respond to the unexpected events and hostile attacks, as well as challenging weather and terrain, to make it to the objective and complete the victory conditions. Glory for the Motherland! Slava Rodina!
Along with the Eastern Front Core Box, there are seven Expansions which will allow you to extend your gameplay to include more armed forces and battles. The expansions offered with the Eastern Front core box feature Penal Battalions, Airborne, Partisans, as well as the Soviet Winter, Soviet Winter Vehicles and the Raid on Peenemünde.
We have also created the Critical Hit Deck pack, a new type of expansion which introduces critical hits to Soldiers and Hostiles alike, to add some cinematic flair and drama to your stories. All expansions are designed to be playable with the core set, and they add new Soldiers, Missions and Objectives, Gear, Skills, Locations, Hostiles and Events to your gameplay.
As of August 1st, the Kickstarter campaign has raised $24,469 toward its $20,000 funding goal with 151 backers. The campaign will conclude on Monday, August 3rd at 3:00pm EDT.
8. Lee Moves North: Campaigns of Antietam and Gettysburg from GMT Games
Several years ago, Mark Herman designed a unique and simple American Civil War game called Gettysburg that appeared in C3i Magazine #32. That game became the basis for his new Civil War Heritage Series with the first volume being Rebel Fury that focused on five battles from the Chancellorsville and Chickamauga Campaigns and Volume II being Army of the Potomac. Mark has now advanced the series with the upcoming Volume III called Lee Moves North: Campaigns of Antietam and Gettysburg that was announced this past month by GMT Games.
From the game page, we read the following:
Lee Moves North is a standalone game that covers the Confederate invasions that led to the battles of Antietam and Gettysburg. Lee Moves North is the third volume in Mark Herman’s Civil War Heritage Series that began with the Charles S. Roberts Award winning Rebel Fury (Best American Civil Wargame of 2024).
Lee Moves North is a low-complexity, grand tactical simulation that won the James F. Dunnigan Award for Playability and Design. Its unique combat system generates a detailed narrative that perhaps for the first time allows you to fully experience the risk calculus of a Civil War Army General.
If you know how to play Rebel Fury or Army of the Potomac, you can play the one map battles of Antietam and Gettysburg right out of the box. The game comes with 13 scenarios, 7 of which are played on one map to include 4 DOG (the four days of Gettysburg) with the remainder using all or some number of its EIGHT grand tactical maps, plus a standalone Theater scenario. The thirteenth bonus scenario covers Jubal Early’s 1864 invasion that led to the battle of the Monocacy River.
Through Lee Moves North you will experience these famous battles in a way that you have not seen them before. The grand tactical level is about maneuver combinations prior to and during a battle but make no mistake you will also see the brutal nature of Civil War combat. As the general leading an army, you will have player agency over when, where, and how often to attack using the unique Rebel Fury combat system. Following the combat narratives that are in every book that you have ever read on the Civil War you will experience the frustration of seeing your assaults fail more often than they succeed yet the better general is the one whose plans turn this historical reality into victory.
While we have not yet played Army of the Potomac, we have very much enjoyed the system and its first volume Rebel Fury. Here is a look at our video review for Rebel Fury:
If you are interested in Lee Moves North: Campaigns of Antietam and Gettysburg, you can pre-order a copy for $82.00 from the GMT Games website at the following link: https://www.gmtgames.com/p-1253-lee-moves-north.aspx
9. Rowing to Hades: Fast Playing Naval Battles of the Ancient World from GMT Games
Ancients games are always a good time and if that game has naval units, including triremes, Greek fire ships and the like sign me up. This past month, GMT announced this new game from designer Jason Walonoski called Rowing to Hades:Fast Playing Naval Battles of the Ancient World. Jason is a newer designer with his first game called Epipolae: The Athenian Expedition in Sicily, 415-413 BCE, which is a part of the Levy & Campaign Ancients Series. I share that because he knows something about Ancients and I also think that he is a good designer with a good approach.
From the game page, we read the following:
Rowing to Hades is a squadron-level naval wargame set in the ancient era. The era of oars, not sails. Rams, not broadsides.
Inspired by classics such as War Galley (GMT), Trireme (Avalon Hill) and the Commands & Colors system, it will appeal to gamers who want to enjoy quick naval battles at a different scale and complexity level.
A single battle can be completed in 30-60 minutes. There are scenarios for the Greco-Persian and the Peloponnesian Wars as well as a campaign system to link multiple battles together in an afternoon.
A key design goal was to create a fun quick-playing game, not a simulation. Many details are abstracted, while maintaining historical flavor.
Combat is simple and quickly resolved. After all units have moved, they may Ram. If units have not moved, they may conduct Melee.
Attackers roll a base number of dice determined by the unit type (different types of units roll different numbers of dice for ramming and melee), with the number of dice increasing or decreasing for factors like attacking from the rear, using a special maneuver card, or the enemy formation (for example, line abreast, line ahead, or kyklos).
I am very much interested in this one. Tactical level naval combat is something that is very appealing and this one looks to be on the lighter side of the spectrum but offers enough depth that it should be a very interesting experience.
If you are interested in Rowing to Hades: Fast Playing Naval Battles of the Ancient World, you can pre-order a copy for $55.00 from the GMT Games website at the following link: https://www.gmtgames.com/p-1252-rowing-to-hades.aspx
10. Commands & Colors: Ancients 8th Printing from GMT Games
Commands & Colors: Ancients depicts warfare from approximately 3,000 BC to the opening of the Middle Ages in 400 AD, which is quite a spread across time encompassing different strategies, tactics and even technology. CC: Ancients uses the standard card activation system which identifies a number of units that can take actions in one of three areas on the board, including the Left, Center and Right. This card system is standard to the series and really keeps the game light and fun as you sometimes simply cannot control take the actions you need to in order to win the game.
One of the reasons that I like Ancients and how it implements the system is that the scale changes during each of the battles represented. This means that some of the scenarios will have an Infantry unit representing an entire legion of fighters, while in other scenarios a unit may just represent a few warriors. This flexibility makes the game really interesting and you have to learn how best to use each of your units in each of the settings. This really adds to the replayability factor as well because you are learning from each scenario.
The unit variety in this one is interesting as compared to other games in the series such as Battle Cry and Memoir ’44 as each of those volumes had just three types of different units. In Ancients though there are multiple different types or classes of Infantry. Units are rated according to their makeup and in some ways their tactics and are placed in three neat and tidy categories including Light, Medium and Heavy. In the ranks of the Light Infantry, there are the standard Light Infantry, Auxilia, Light Bow and Light Sling for example. In looking at the other types of units there are Cavalry, Chariots, War Machines, Leaders, and the best part Elephants. The game comes with very clear and well done player aids that outline the different abilities of each type of unit and help you with an understanding of their movement, combat dice and any special abilities.
The final best thing about the game is the number of different engagements portrayed and how each of them uses different units and will require you to think on your toes about how best to utilize your assets. The battles covered include Akragas, Crimissos River, Ticinus River, Lake Trasimenus, Cannae, Dertosa, Castulo, Baecula, Ilipa, and Zama. All in all, I find Ancients to be a simple yet fulfilling gateway to the series and would recommend it heartily to anyone interested in getting on board.
From the game page, we read the following:
Commands & Colors: Ancients allows you to re-fight epic battles of the ancient world. Here the focus is on the two rivals for power in the Western Mediterranean – Carthage and Rome. Will you, as Hannibal, triumph over larger Roman armies; or as Scipio Africanus, will you beat Hannibal with newer tactics of your own?
Units in both armies can only move and fight when ordered. The command playing cards supply those orders, providing an element of luck that creates a fog of war and presents players with both challenges and opportunities. You must maximize your opportunities by playing your command cards judiciously. How well you handle the diverse units, their weapons, and the terrain, will determine victory.
Commands & Colors: Ancients contains the battles of Akragas, Crimissos River, Ticinus River, Lake Trasimenus, Cannae, Dertosa, Castulo, Baecula, Ilipa, and Zama.
11. Commands & Colors: Napoleonics 6th Printing from GMT Games
I will be honest with you, when we first played Commands and Colors, I was really leaning toward Ancients as my favorite one. But that all changed once we got the grand daddy of them all on the table in Napoleonics. To me, I really enjoy the added layers of depth to this one. It has six expansions for a reason as they have tried to capture the intricacies of each nation and their unique abilities and fighting styles to make for very highly stylized game.
Of all the C&C games this one is on the richer end of the scale, especially as you add in the expansions. The little bits of chrome make the combats more tactical. You can put your infantry into square formation to counter cavalry charges, but that comes with it’s own sub set of limitations. Each nation has their own special ability, and then each of their units have their own characteristics. An example of which are the Spaniards’ Infantry being straight up not as good as others. They roll dice equal to their number of blocks -1 for example. Each faction has strengths and weaknesses which gives you a little more to think about. Again, nothing overwhelming, and nothing you can’t handle but Napoleonics just has that extra richness and detail that brings the game to life and makes each play feel different from the last.
There are a few new differences in this one. Leaders play a very important role on the battlefield. They don’t add to attack but keep units in formation and from breaking. You must try to keep the Leaders away from the front line because they can become casualties but you need them to keep order on the battlefield as they will allow units to ignore some symbols.
Another major difference is in how units do when they are reduced. In all previous versions of the C&C system, the number of remaining blocks in a unit was not factored into the strength of that unit’s attack. If they had three units left, they would still roll their maximum 2 dice. But now that has changed and I really like this one. The basic attack strength of a unit is equal to the number of its blocks.
The color and the pageantry of a Napoleonics battle is hard to ignore and this one has a lot of substance to the game that the other volumes don’t approach. I will play Napoleonics at any time and relish the chance to learn new strategies and try out new tactics with the multitude of different units found in each expansion.
In the end, Commands and Colors is a fantastic system that has a little bit of everything that will appeal to any wargamer’s taste. I recently played Tricorne and man was that a fascinating experience. We also played the new one from GMT from 2019 Medieval and enjoyed it, and actually really liked some of the new additions, but just were let down by the theme. If you haven’t tried C&C yet, what are you waiting for? Pick a historical period you like and give it a try. You won’t be disappointed!
From the game page, we read the following:
The Napoleonic historical period has always been one of our favorites and was actually the second historical game that we developed using the Commands & Colors system. The Wars of Napoleon rules at first glance may seem more complex than other Commands & Colors games, but if you are familiar with the game system, you are only a few short steps away from taking Command. Even if you have never played before, learning the fundamentals of the game system is straightforward and will be an enjoyable endeavor.
For the game group in Orlando, Wars of Napoleon is one of our favorites. There is a wealth of subtle and bold features that set it apart from other historical periods and it truly embraces the tactical doctrines of France and the various nations that fought against Napoleon.
The Napoleonic period showcases a unique balance between the roles of Infantry, Cavalry and Artillery on the battlefield.
In combat, a unit’s battle strength is directly tied to the number of blocks present in the unit. Therefore, as a unit suffers block loses its combat effectiveness is reduced.
An Infantry unit, by forming square, can reduce the effectiveness of the most gallant Cavalry charge.
Artillery in combined arms combat along with an Infantry or Cavalry melee attack can produce the most devastating results.
As with other Commands & Colors games, the battle dice resolve combat quickly and the Command cards provide a fog of war and will present players with new challenges and opportunities for victory.
When in Command, the battlefield tactics you will need to execute conform remarkably well to the historical advantages and limitations inherent to each Napoleonic Army. For example, as the French Commander you will want to maneuver your infantry units into a position to take advantage of their melee attack dice bonus. While a British Commander will want his line infantry to take up a defensive position and stand and volley fire with a dice bonus. The other major powers also have similar seemingly simple advantages that can impact a battle and will influence your Command style for that army.
The core Wars of Napoleon game will feature French, British and Portuguese troops, while the expansions will showcase one Coalition army that opposed Napoleon.
12. Pacific War: The Struggle Against Japan, 1941-1945 Deluxe Edition 2nd Printing from GMT Games
Both Alexander and I love Empire of the Sun and really enjoy Mark Herman designs. Now I know that Pacific War is not EotS but it definitely was a precursor and led to its design and development. Unfortunately, I did not play the original Pacific War as I was 12 years old and focused on other things (baseball, football) and other games (mainly Dungeons & Dragons and other role playing in my teens). So, this one interests me because it will be a new experience for me.
From the game page we read the following:
Pacific War is a Strategic wargame that takes you from the attack on Pearl Harbor to the climatic summer of 1945… from Australia to China… from Burma to Hawaii… from the defense of Wake Island through the invasion of Guadalcanal culminating in the desperate battles to defend the Japanese Home Islands.
Strategic wargame that covers the entirety of the Pacific Theater of World War II…pretty big game, both in scale and distance. For a game to cover the entire theater, it has to be deep and have various systems to cover all of the different types of actions. Here is an answer on this aspect frog the game page:
For the first time in a Pacific Theater game, size, subtlety, and ease of play has come together in a game of sharp action and historical accuracy. Players can become familiar with the layered Pacific War systems in the solitaire Engagement scenarios, then fight their way through increasingly panoramic Battle, Campaign, and Strategic two player and multi-player Scenarios. As they learn the game’s basic maneuver and combat systems, they will then layer on more advanced systems for Strategic bombing, submarine attacks on merchant shipping, search and detection, amphibious assaults, and extensive Operations driven by their command decisions.
As this game is a reprint and updating of a classic, the first thing I thought about was what has changed in the design? Mark answered this question very well in the game write up on the game page:
So, what will change in the new version? The structure and feel of the design will be unchanged, so if you played it in your youth, you already know how to play. That said, a devoted number of players have been playing this game for 35 years and I have incorporated the best of their feedback into this new and final edition for this title. I am going over each scenario and updating them with information that I did not have available back in 1985. For example, I now have several Japanese translations of their official records that were only published in the last few years. Toward this end, I am adding at least six new campaign and strategic scenarios, so you can experience the entire panorama of the war in a long afternoon .
The key question that I consider when buying a new game is will it hit the table? The owners and reviewers who created the game’s reputation were excited that Pacific War had a layered set of scenarios that incorporated fifteen-minute solitaire learning engagements, two hour battles (such as Coral Sea and Santa Cruz that were used in a decade of tournaments), two to eight hour Campaigns (such as Malaya, Guadalcanal and Breaking the Bismarck barrier), and of course the Strategic scenarios that cover the entire war from a single year to the entire war. Will you ever play the entire war? It’s unlikely (to date I have only done it three times). However, Pacific Waris an operational level game and the Campaign scenarios are the heart and soul of this game system. Most play in an afternoon to completion. So, will it hit the table? Only you can answer that question, but from a time and learning perspective this game will support any time commitment you wish to make, to include the 100+ hour Strategic Scenario.
No cards, as this one is not a Card Driven Game, and lots of counters with 9 counter sheets listed. This is going to be blast and I hope that we get around to playing this game so that I can get a view of the original work from one of my favorite designers.
1. Bohemian Rhapsody – Battles of Wimpen: May 6, 1622 and Hochst: June 20, 1622 from High Flying Dice Games
Paul Rohrbaugh and his company High Flying Dice Games is a designer I love to follow. He is always doing games on smaller or lesser known conflicts and I just find his work to be superb and really draws me in. Recently I saw where he was releasing a new series of games covering the Thirty Years War called Bohemian Rhapsody – Battles of Wimpen: May 6, 1622 and Hochst: June 20, 1622.
From the game page, we read the following:
Bohemian Rhapsody – Battles of Wimpen: May 6, 1622 and Hochst: June 20th, 1622 is a game with 2 battles and both battles were part of the so called “Bohemian Phase” of the Thirty Years War and were one the result of the other. The first took place when the Catholic forces of Tilly and Cordoba surprised the smaller force of George Fredrick of Baden who was trying to cross the river Neckar near Wimpfen. Even if the Protestant forces made their best in the battle, thanks to a favorable uphill position, theywere defeated.
A month and an half later, another part of the Protestant troops moving around the Rhineland, the part commanded by Christian of Brunswick, was stopped by the same catholic army under Tilly and Cordoba near Hochst, while trying to cross the river Main. The ensuing battle was a sort of a draw, as at least a part of the catholic army was able to join the other catholic force under Mansfeld, but at so high a cost in losses, that the Palatinate theatre of the war was de facto closed.
If you are interested in Bohemian Rhapsody – Battles of Wimpen: May 6, 1622 and Hochst: June 20, 1622, you can order a copy for $20.95 from the High Flying Dice Games website at the following link: https://www.hfdgames.com/bohemia.html
2. La Conqueste: The French and Indian War 1754-1763 from White Dog Games
I have really enjoyed my plays of several games designed by R. Ben Madison. He has a knack for including elements of the history into the gameplay while placing the events into the framework of his chosen system, which is usually the States of Siege Series…but not always. His newest offering called La Conqueste: The French and Indian War 1754-1763 from White Dog Games uses the States of Siege Series System and dives into the French & Indian War.
From the game page, we read the following:
Over 270 years ago, France controlled most of North America east of the Mississippi River. The British had colonized only along the Atlantic Coast and wanted to expand further west. Conflict between these two great powers in the New World was inevitable. The immediate issue in the new World was whether the upper Ohio River valley was to be a part of the British Empire, and therefore open for trade and settlement by English colonists, or part of New France. When, in 1754, war broke out between France and England in Europe, it quickly spread to the New World, where it was called the French and Indian War, and where two of the most famous generals in history fought one another: Wolfe and Montcalm.
In this exciting game of that titanic struggle in America designed by R. Ben Madison, you control the forces of New France against England and the British colonies as the epic nine-year long French and Indian War breaks out.
If you are interested in La Conqueste: The French and Indian War 1754-1763, you can order a copy for $60.00 from the White Dog Games website at the following link: https://www.whitedoggames.com/french-and-indian-war
3. Fortress of Oblivion: Iran in the Sasanian Era 224-651 AD from White Dog Games
Another new solitaire States of Siege Series offering this month from White Dog Games takes us to ancient Persia and Iran in the Sasanian Era covering the years of 224-651 AD. This one is also designed by R. Ben Madison and looks to be very interesting.
From the game page, we read the following:
Fortress of Oblivion is an exciting solitaire game by designer Ben Madison that puts the player in the role of the ancient Shahs of Iran during the Sasanian Era, 224-651 AD – or even later, if you survive! You will use the economic, military, and social resources of the Iranian Empire, called “Persia” in the west, to defend your realm against invading foreign armies from the west (Armenians and Romans, later called Byzantines), the east (China, Central Asian nomads, and the mighty empires and petty states of India), and marauding Himyarites and Ethiopians from the south, soon to be routed by your greatest foe: the giant Arab Caliphate!
If you are interested in Fortress of Oblivion: Iran in the Sasanian Era 224-651 AD, you can order a copy for $60.00 from the White Dog Games website at the following link: https://www.whitedoggames.com/fortressofoblivion
4. Santa Cruz 1797 Reprint from Bellica 3rd Generation
One well recieved wargame from 2017 was called Santa Cruz 1797 from Bellica 3rd Generation which was designed by Iván Cáceres. The game covers the British amphibious assault on the fortress at Santa Cruz de Tenerife in Spain and is a card driven siege game. Bellica 3rd Generation is now reprinting this game which has been out of stock pretty much everywhere with a new edition.
From the game page, we read the following:
Early morning on July 25, 1797…A squadron of His Britannic Majesty under the command of Lord Admiral Horatio Nelson set out to assault the fortifications of Santa Cruz de Tenerife. The fight would be desperate and the first light of day would find the
On this occasion, in addition, Nelson lost his right arm due to an impact from a cannon (“El Tigre”) that is still preserved in the Museum of the Castle of San Cristobal, in Tenerife.
Santa Cruz 1797 is a game for two players in which each player has a well-defined role: the British must storm the city and occupy its key points while defeating the Spanish military forces, the Spanish must wait to see where his opponent lands and then launch into a tenacious and aggressive defense to defeat him.
The game is a block wargame and works with a card engine that allows players to act on the opponent’s turn and creates a situation of unparalleled tension and uncertainty until the end of the game.
If you are interested in Santa Cruz 1797Reprint, you can purchase a copy for 50,00 € ($57.00 in US Dollars) from the Bellica 3rd Generation website at the following link: https://bellica3g.com/en/product/santa-cruz-1797/
5. Lone Panther from Mike Lambo
Over the past several years, print and play solitaire wargames have gained a lot of traction in our hobby. A solitaire wargame that is very affordable at $10-$15 and can be purchased and downloaded online. What is not to like? And the name of Mike Lambo has been tied to a lot these games as he has designed 20+ of these titles and has built quite the rabid and loyal fanbase. His newest game is called Lone Panther and can be downloaded from Wargame Vault. I do know that typically these games are sold on Amazon but I have not seen this offering make it there as of yet.
From the game page, we read the following:
The German front in the Italian Po Valley is collapsing. Months of retreat, shattered divisions, and dwindling fuel have left the once‑proud Panzerwaffe reduced to scattered pockets of armour fighting desperately to hold back the Allied advance. In this flat, misty landscape of farms and villages, marshland, narrow roads and orchards, tanks are no longer committed in massed formations. Instead, single vehicles are thrown forward to plug gaps, delay Allied spearheads, or hold a vital crossroads.
You command one such machine, a Panther Ausf. G, operating alone, cut off from its parent battalion and reliant on its crew. Allied forces push north with growing momentum. British armour probes ahead, infantry screens advance through the fields, and fighter‑bombers circle overhead searching for targets of opportunity.
In this final phase of the Italian campaign, a Lone Panther can still shape the battlefield – if its Commander keeps his nerve.
Whilst this game is not a ‘narrative driven’ game as such, with a little imagination it will provide memorable stories. Some events are randomly generated, but the Player always has at least some degree of control over the level of risk they wish to take and how vulnerable they leave their Tank to these Events.
This game is designed to be easy to learn and good fun to play.
This is a solitaire wargame. You play the game, and the enemy is controlled by the game (or the Artificial Intelligence or ‘AI’). You will need at least 7, but preferably 9, standard six-sided dice (not included). There are 10 very replayable missions included with full colour maps and clear instructions.
It is highly recommended that the counters provided on the final page of the game are used to play this game. Simply stick them to card and cut them out. A video demonstrating how generally to do this can be found on the Mike Lambo Games YouTube channel. The easiest way to make these counters is to print or copy them onto an A4 printer label, leave the ink to dry completely, then peel the back and stick to 1-2mm card. Alternatively, any standard paper glue will do such as PVA. You can also find ‘Instructional Playthrough’ videos on the Mike Lambo Games YouTube Channel to see how the game plays.
6. Great War Battles Volume 2: Tankschlacht: Cambrai, 1917 from Revolution Games
World War I is always an interesting war to game. We have played our fair share of WWI games and pretty much enjoyed them all. The Great War Battles Series from Revolution Games is a wargame system designed by Kerry Anderson that simulates World War I engagements at the brigade and regimental level and the newest offering in the series is called Tankschlacht: Cambrai 1917, which is now available for purchase.
The Battle of Cambrai was a massive British offensive on the Western Front in France during World War I and was fought between November 20 and December 7, 1917. The battle is legendary for marking the first large-scale, effective use of massed tanks in warfare.
From the game page, we read the following:
Tankschlacht is the second game in the Great War Battles Series; the first being Death of an Army: Ypres, 1914. Tankschlacht is a brigade/regimental simulation of the Battle of Cambrai, November 20 – December 3, 1917. A two player game where players assume the role of the German and Allied troops as they desperately fight for the valuable position in the line.
7. Blind Swords Series Volume 13Early Threatens Washington: The Battle of Monacacy Junction, July 9, 1864 from Revolution Games
Blind Swords is a series that most all wargamers have heard of and played at least a few games that use the system. We have played several of these games including Shiloh: The First Day and Gettysburg: The First Day in the series from Revolution Games. Recently, they announced a new title in the series called Early Threatens Washington: The Battle of Monacacy Junction, July 9, 1864 designed by Mike Wimple.
From the game page, we read the following:
The Confederate’s 1864 Maryland Campaign, led by Lieutenant General Jubal Early, was designed to draw Union forces away from the siege of Petersburg, Virginia and pose a possible threat to Washington. On the morning of July 9, 1864 Early was in Frederick Maryland, ready to cross the Monocacy River and drive toward a lightly defended Washington. Opposing him was Union General Lew Wallace. Wallace put together a hurried defense using any available troops who delayed the Confederate offensive towards Washington long enough that battle hardened forces from Grant’s Army were able to reach the city and bolster its defenses. These additional forces proved sufficient to repel the threat to the city. Thus, the ensuing Battle of Monocacy Junction has been referred to by many historians as “The battle that saved Washington”.
Early Threatens Washington includes one introductory and two full battle scenarios. The all-day full battle scenario allows players to try various strategies for clearing the Georgetown Pike. Do you try Early’s plan of forcing his way across the Wooden and Railroad bridges while feigning interest in the other crossings or some other, more clever method? The half-day full battle scenario allows players to play out Early’s plan as it actually unfolded, ignoring the morning actions, and focusing on the afternoon climax of the battle. Even though the Union is outnumbered by the Confederates, the situation is balanced and offers tough choices for both players. The thirteenth game in Revolution Games’ popular Blind Swords system, Early Threatens Washington provides an immersive experience of tactical American Civil War combat without a heavy rules load. The game can be enjoyed solitaire, two-player or multi-player.
If you are interested in Blind Swords Series Volume 13Early Threatens Washington: The Battle of Monacacy Junction, July 9, 1864, you can order a copy for $70.00 ($55.00 for a Ziploc edition) from the Revolution Games website at the following link: https://stores.revolutiongames.us/early-threatens-washington-boxed-edition/
8. Stalingrad: Advance to the Volga, 1942 from Revolution Games
I love a good solitaire wargame. And if that game covers the famous Battle of Stalingrad mores the better! A few years ago, they released the first volume in a new Solitaire Area Movement Series called Stalingrad: Advance to the Volga, 1942 designed by Mike Rinella. Mike has done a slew of area movements games, such as Patton’s Vanguard and Last Battle, Ie Shima, and his designs are always interesting and playable.
I have played this one quite a few times, and have also played the follow up version called Manila: The Savage Streets, and the AI and the overall design itself really worked well to create a very interesting and challenging game. In fact, after 4 or 5 plays, I have yet to taste victory. I really have enjoyed my experience with Stalingrad: Advance to the Volga, 1942 as the game is well put together, well thought out and frankly just works. They now have reprinted the game and you can get a copy now after the game was out of print for a year or so.
From the game page, we read the following:
There can be little question Stalingrad was one of the bloodiest and most decisive battles of the entire Second World War. The campaign by the German 6th Army to crush the Soviet 62nd Army and capture the city has been the subject of numerous two-player designs. It is a situation known to most gamers but is presented here in a new and exciting SOLITAIRE format, the first in a series of single-player area movement games by publisher Take Aim Designs. Stalingrad: Advance to the Volga, 1942 puts the player in charge of the attacking and far more mobile German side while the game system handles the defending and largely static Soviet side. No two games will ever be the same. Each turn presents new and unique challenges for the player in the form of random events, uncertain supply deliveries, and unknown Soviet area strengths and defensive strategies.
The primary game is a nine-turn campaign covering the first great German assault on the city during September 1942. The deeper German forces advance, from the city’s less developed periphery to its urban and industrial core, the greater Soviet resistance becomes. The number of German units bled white, effectively out of action, mounts. German determination to secure a rapid victory, represented as “morale” in the game, gradually decreases. The player wins by equaling or exceeding historical German gains and loses if they fail to do so, or if morale falls too low.
Also included is a five-turn “Factory District Scenario” representing the second great German effort in October 1942. The challenge is now even greater: the player must capture all of Stalingrad in order to release divisions in time to cover the German flanks outside the city against the coming Soviet winter offense, which was not far off. With a setup time of less than 15 minutes, low counter density, endless variability, and quick playing time, Stalingrad: Advance to the Volga, 1942 will appeal to every level of player, from the novice to the grognard.
9. Drive on Voronezh, June 28-July 27, 1942 from Legion Wargames
I love Legion Wargames. They are just a solid publisher and Randy Lein is such a great guy. Recently, they started shipping a new game designed by John Theissen called Drive on Voronezh, June 28-July 27, 1942 that deals with combat on the East Front of World War II.
From the game page, we read the following:
The Battle of Voronezh was fought on the Eastern Front of World War II, in and around the strategically important city of Voronezh on the Don river, 450 km (280 mi) south of Moscow, from 28 June-27 July 1942, as the opening move of the German summer offensive that year. The German attack in this sector bit into parts of the Soviet Briansk and Southwestern Fronts with German panzer corps leading the drive.The German assault was conducted by the element of the 4th Panzer Army′s forces of Army Group South under commanded by General Hermann Hoth, who was under strict instructions not to get bogged down in street-to-street fighting.
The armored units of the 4th Panzer Army partly captured Voronezh on 6 July by occupying the western river-bank suburbs, however German troops were subjected to a Red Army counter-attack. The 4th Panzer Army was to be followed by the Sixth Army, and when Voronezh was occupied the former was to wheel south-eastward and move down the right bank of the Don towards Stalingrad as part of Operation Blau. It took two days for infantry divisions from the Army Group South to reach Voronezh to hold the line and free the Panzer troops; Adolf Hitler later came to believe that these two days, when combined with other avoidable delays on the drive south, allowed Marshal Semyon Timoshenko to reinforce the forces in Stalingrad before the 4th Panzer Army could arrive to allow taking of Stalingrad.
Drive on Voronezh covers this opening move in the Fall Blau offensive. The scale of the game is nine miles per hex and two days per turn. The basic units in the game are divisions with special brigades for the Germans and brigades/corps for the Russians. The game uses a basic I Go – You Go system but also includes special event chits that allow players to augment certain combat and movement situations.
If you are interested in Drive on Voronezh, June 28-July 27, 1942, you can order a copy for $46.00 from the Legion Wargames website at the following link: https://www.legionwargames.com/legion_DOV.html
10. Bear Trap: The Soviet-Afghan War, 1979-1989 from GMT Games
A few years ago, GMT announced a very cool looking game designed by Paul Daniels covering the Soviet-Afghan War from 1979-1989 called Bear Trap. The game was described as a block wargame that used a similar system to what was used in the design for Sekigahara: The Unification of Japan.
From the game page, we read the following:
Bear Trap is a quick-playing, low-complexity 2-player block wargame covering the Soviet-Afghan War (1979-1989).
In the Soviet–Afghan war, Insurgent groups—including the mujahideen—fought a guerrilla war against the Soviet 40th Army and the Democratic Republic of Afghanistan (DRA) government. The game begins shortly after “Operation Storm-333” was executed at the end of 1979—in this coup, Hafizullah Amin (General Secretary of the People’s Democratic Party of Afghanistan) was killed, and Babrak Karmal, a Soviet loyalist, replaced him. By putting the Brezhnev Doctrine into practice, the Soviets sought to prop up the sympathetic local government and “solve the Russian Ice-lock Problem” while the Insurgents sought to expel the secularist government and foreign invaders.
Although the two sides in this conflict were fundamentally different in a variety of ways, they also faced some parallel challenges. For instance, they struggled to maintain loyalty. For the Soviets and the DRA, the DRA armed forces merely offered an opportunity for a paycheck, and there were cases where conscripts in the Soviet Army defected to the Mujahideen (e.g. Kazbek Hudalov). For the Insurgents, propaganda, threats, and promises to family drew would-be combatants away, as did injuries suffered from landmines and attacks on villages. Both sides also struggled to puncture the fog of war, not being able to secure reliable intel about force deployment and strength. And both faced various challenges around supply, communication, and coordination. Both sides needed to react to shifting strategies and developments over this decade long Cold War proxy war, where the landscape upon which it was fought presented many unique challenges.
Bear Trap is a spiritual successor to Sekigahara—building on the same core system. In both games, each player has their own deck of cards; players spend cards from their hand to activate areas or in combat to commit units to battle. This means fans of Sekigahara will find learning Bear Trap easy, but the feel and experience of the games are highly divergent. In addition to the difference in topics covered, other differences include:
In Bear Trap, forces are represented by blocks, stickered side hidden from the opponent, and the orientation of a block determines its disposition (i.e. the orientation of a block dictates whether it’s mobilized, fortified, disordered, poised to offer fire support to a battle initiated by friendly units, or ready to ambush enemy units). The orientation of a block also determines which battles it can join, whether card play is required to commit it to battle, and whether it can be moved or activated.
Bear Trap features an area-based map, rather than the point-to-point style found in Sekigahara.
The sequential combat system popularized in Sekigahara is utilized in Bear Trap, adapted to suit the setting. This includes the use of ‘loyalty challenges,’ making Bear Trap simulate the proneness of (for instance) Afghan forces to defect.
Bear Trap is, like Sekigahara, first and foremost a 2-player game—but Bear Trap includes a unique solo mode, built around a card assisted flowchart bot.
Bear Trap has fewer blocks than Sekigahara, and each player has fewer card types (‘suits’) in their decks.
Bear Trapintroduces ‘strategy’ cards—powerful event cards. Although it would be misleading to label Bear Trap a deck-building game, players will add 2 cards from a pool specific to their side each time they reshuffle their deck.
Bear Trap is not a “clone” of Sekigahara—they are very different games with differences in topic, feel, and mechanism, despite having an underlying shared game system. Bear Trap is also a more asymmetric game than Sekigahara. AlthoughBear Trap is a slight step up in complexity (relative to Sekigahara), the mechanics remain simple, and Bear Trap can be completed in 2-3 hours.
11. Fields of Despair: France 1914-1918 2nd Printing from GMT Games
Fields of Despair: France 1914-1918 is a medium weight 2 player hex-based strategic level block war game set on the Western Front of World War I. Players take control of either the Allies, including France, England, Belgium, the United States and an abstracted Russia or the mighty Central Powers fighting the war not only on land, but also at sea, and most importantly and probably one of the better and more interesting parts of the game, in the air all while having to focus on and make tough decisions about your economic and technological progression.
Fields of Despair uses a very unique and revolutionary block system designed to maintain the confusion and uncertainty of the Fog of War throughout the entire game. The reason that I consider this system revolutionary is that in most block games, the combat values of individual blocks usually range from one to four, so as you scan the battlefield and after a quick calculation in your head you can come up with a pretty good guesstimate of what force power is arrayed against you, while in FoD the combat value of blocks ranges from zero (dummy blocks) all the way to a maximum of twenty. This difference in value ranges alone has completely changed the block wargame and has created a very strategic game that can be quite deceptive and difficult to play well. The reason for this deception is that you can build up one block in a hex to 20 when in other block games this would require 4 or 5 blocks that have tipped your hand and help your opponent to gauge your strategy and react more effectively to counter that. But, this deception does have its limits as air reconnaissance, one of the best parts of the design, allows players to scout out the strength of units and remove that deception. But, you cannot simply scout with no opposition as your opponent can place their air units in that hex you are scouting to initiate aerial dogfights that will ruin your recon attempt.
Movement in the game is also very straightforward and simple and can be used as a deceptive tool as well in addition to the use of dummy blocks. Players are allowed to “make change” during the movement phase, which means a larger block can be broken apart into 2 separate blocks or can even be done in reverse by consolidating a few smaller blocks into a larger force. So after the movement phase, you will not be 100% confident in your enemy’s strength and will have to sometimes just throw your hesitancy out the window and attack. The Fog of War also isn’t lost after first contact with the enemy. Blocks remain hidden even when enemies occupy the same hex and stay hidden until one player decides to allocate an air squadron for reconnaissance or sends his men across no man’s land to attack.
I love that this game is so unique with the Strategic Reorganization element as well as the continuous battle for reconnaissance with the airplanes. I have played several block wargames and the way this is handled is very revolutionary and I am sure will be replicated in future block wargame designs. I also am very impressed with the tightness of the rules and how easy they were to understand and apply. For an ambitious wargame covering the entirety of the Western Front of World War I, a 24 page rule book was a shocker. But it is done very well and has very few rules problems.
If you are interested in Fields of Despair: France 1914-1918 2nd Printing, you can order a copy for $108.00 ($69.00 if you hurry and place your order before they ship in mid-August) from the GMT Games website at the following link: https://www.gmtgames.com/p-686-fields-of-despair-2nd-printing.aspx
12. Small Battles of the American Revolution Volume I: The Battle of Cowpens from GMT Games
While attending the World Boardgaming Championships 2 years ago, I was able to meet up with Dave Stiffler (acting as Developer on the project) and Bruno Sinigaglio who is the designer to get an early look at the upcoming debut release in the Small BoAR Series called The Battle of Cowpens.
I didn’t get any pictures because they didn’t have the components along to show but learned a lot about the design and how it changes the Battles of the American Revolution Series from GMT Games. First off, the scale is the major difference as it is 1/8th of the scale used in the normal series. This means 25 yard hexes and 2-3 men per counter. They also have included both rifle fire and musket fire which is a change as musket fire is simply an abstracted part of the close combat mechanic in BoAR. They also have added some new mechanics to account better for things like morale and being shaken or even shattered.
I have known about this game for a few months, actually nearly a year or so, but am very excited to see this one added to the P500 and hope that the reception is great and that the game does well because I would like to see more small battles covered in future volumes.
From the game page, we read the following:
Two critical battles were considered turning points in the American Revolutionary War: the Battle of Saratoga in New York and the Battle of Cowpens in South Carolina. The Battle of Cowpens was a catalyst to a series of events that led eventually to the surrender of the British at Yorktown. Small BoAR Volume I, The Battle of Cowpens, puts players directly into the milieu of this decisive contest.
The goal of the Small BoAR design concept is to include small yet critical battles that otherwise do not fit the scale of the historically simulating and highly successful Battles of the American Revolution (BoAR) system designed by Mark Miklos. This new system, aptly termed Small Battles of the American Revolution (Small BoAR), was designed by Bruno Sinigaglio working closely with Mark Miklos to preserve the continuity and popularity of the original Battles of the American Revolution game system.
Although extremely important to the history of the Revolutionary War, the Battle of Cowpens involved slightly over 1000 participants per side. In the Battles of the American Revolution system, which represents 100 men per strength point, this would equate to only ten or so combat factors per side. The scale for the battle of Cowpens, on the other hand, is 12 men per strength point, or one-eighth that of the BoAR system. The map scale is also correspondingly reduced to 25 yards per hex from the BoAR scale of 200 yards per hex. The time scale is approximately four minutes per turn as compared with one hour per turn in BoAR.
I think that one of the best parts of this new series, aside from the size and scope of the battles covered being smaller, is that they have not just rested on their laurels and reproduced the BoAR System but have added new mechanics and elements to better deal with these battles and to model the smaller scale battles.
Although Army Morale, the game-within-the-game in BoAR, is faithfully preserved in Small BoAR, and the Small BoAR sequence of play resembles that of BoAR and will look familiar to anyone who has played games in the original series, certain novel elements appropriate to the new scaling have been added. These include:
The ability to designate cavalry units in reserve
Artillery Fire conducted both offensively and defensively
Simultaneous ranged musket Fire as a complement to ranged rifle fire
A Cavalry Reserve Phase where units designated in Reserve may charge after the normal Close Combat Phase
And Opportunity Card Management
As mentioned earlier, I had the honor of sitting down with Bruno Sinigaglio and Dave Stiffler to discuss this new series and The Battle of Cowpens. Here is a link to that video interview:
If you are interested in Small Battles of the American Revolution Volume I: The Battle of Cowpens, you can order a copy for $75.00 ($48.00 if you hurry and place your order before they ship in mid-August) from the GMT Games website at the following link: https://www.gmtgames.com/p-1140-the-battle-of-cowpens.aspx
13. Twilight Struggle 20th Anniversary Hall of Fame Edition from GMT Games
As if you don’t know but Twilight Struggle is a 2-player game simulating the forty-five year ideological struggle known as the Cold War between the Soviet Union and the United States which can be played in 2-3 hours. The entire world is the stage on which these two countries “fight” to make the world safe for their own ideologies and way of life. The game starts right after the end of World War II in the midst of the ruins of Europe as the two new “superpowers” of the world squabble over what is left and ends in 1989, when only the United States remained standing.
I remember my first impressions of Twilight Struggle was that it needed some graphic design improvements and the game just didn’t grab me visually but that was all erased the first time we played as the topic and the mechanics just really spoke to me. This game was our gateway to the CDG mechanic and I still have a real soft spot in my heart for it. Well, this month I got my wish and this new edition of TS with upgraded art is now on the P500.
From the game page, we read the following comments and a bit about the history of Twilight Struggle on the new offering:
“Twilight Struggle is my all-time favorite game. It is a brilliant first design by the team of Jason Matthews and Ananda Gupta. It takes the card-driven genre of games like We The People, Hannibal: Rome vs. Carthage, and Wilderness War to its highest peak. Every game is different and the game gets better and better as you become more familiar with the individual cards. You are surprised as hidden combos are revealed game after game. Every turn is filled with tension as you try to figure out the best way to play the hand of cards you’ve been dealt. Gaming simply doesn’t get any better than this”. – Alan R. Moon
That quote from legendary designer Alan Moon, spoken not long after Twilight Struggle was released in 2005, helped sell out the game’s first print run and introduced thousands of gamers to Twilight Struggle. Fortunately, they mostly shared Alan’s opinion of the game and they told their friends. Soon, a groundswell of play and support for the game ran rampant across the gaming community as tens of thousands of players immersed themselves in the tense competition and compelling storytelling of Twilight Struggle. As a result, Twilight Struggle was the #1 ranked game on BGG for over five years, something no other game has achieved.
Soon there was a digital version of the game for Steam and tablets, introducing hundreds of thousands of additional gamers to GMT’s most commercially and critically successful all-time game and supporting a total of twelve sold-out versions of the boardgame. And over those years, the awards rolled in, reflecting the joy and challenge that Twilight Struggle brought to so many gamers: BGG Golden Geek Game of the Year, IGA Game of the Year, Charles Roberts Awards, and more.
Then, in the summer of 2024 at its Origins convention, GAMA (Game Manufacturers of America) bestowed on Twilight Struggle its most prestigious award, inducting Twilight Struggle into the GAMA Hall of Fame. Designers Ananda Gupta and Jason Matthews attended the awards ceremony and jointly accepted the honor on their behalf and for all of the Twilight Struggle team at GMT.
As we now approach the 20th anniversary of the game’s release, and in light of the recent Hall of Fame honor, we are thrilled to announce a new edition of our most successful game. We invite you to check out Twilight Struggle 20th Anniversary Hall of Fame Edition.
So what exactly is new and different about this edition:
Twilight Struggle 20th Anniversary Hall of Fame Edition adds even more beauty and play options to the original game. Here are some of the additions you’ll see in this new Edition:
A brand new game box by the incomparable Terry Leeds
A double sided map with a new Terry Leeds map on the front and the familiar Deluxe Edition Mark Simonitch map on the back
The Turn Zero and Alternative Space Race variants included.
A new alt-history scenario, “Red Sun Rising” with new cards.
A collection of promotional cards including the Kickstarter Promo Packs #1 and #2 and a selection of promo cards from foreign editions of Twilight Struggle
A background booklet including retrospective essays from the designers
We cannot think of a better way to commemorate the Cold War, this vital piece of world history, than with our freshest and richest version of Twilight Struggle to date.
Here is a comment from Gene Billingsley about this game offering:
We’re really proud of Jason and Ananda and what they and their brilliant game have meant to GMT over these past 20 years—and for all of the TS team that helped to make their design vision a reality. And we’re so honored and really happy that Twilight Struggle was inducted into the GAMA Hall of Fame at Origins this past summer. That is a rare honor. So, to celebrate both the 20th Anniversary of Twilight Struggle and it’s HoF induction, we are adding a new Twilight Struggle 20th Anniversary Hall of Fame Edition to our P500 list this month. As you can see from the artwork, this is a beautiful new edition, featuring a new box and mounted map from Terry Leeds (with the Mark Simonitch map on the back side) as well as all new card fronts (we’re keeping the backs standard so there’s no problem mixing in cards from other versions). It’s also chock-full of a lot of new or hard-to-find play value, with a new scenario and a variety of cards and other game add-ons all in one new package.
With the recent advances in art and production, I have often longed for GMT to retouch some of their best games and give them the art and components that they deserve. It looks like this might be the first step in that direction and I would argue there are other great games that deserve a similar treatment including Here I Stand, Labyrinth, Wilderness War and others.
14. Falling Crescent: The British Offensive: September-October 1918 from Compass Games
More WWI is never a bad thing. Particularly when that game focuses on a front that doesn’t get a lot of love in the wargaming world. But Falling Crescent is such a game that focuses on the British offensive against the Turks in Palestine in the fall of 2018.
From the game page, we read the following:
Falling Crescent is an operational-level game of the British offensive of September-October 1918 against the Turks in Palestine. One player controls the Turkish, German, and Bedouin forces, and the other, British, French, and Arab guerilla forces. A three-player version, commanding the Arabs separately is also included.
After lasting for centuries, the Ottoman Turks’ hold on Palestine is at risk. British forces and Arabs in revolt threaten to bring down the Ottomans and their Crescent flag. The game is one of skill, in which it is entirely possible to change the course of history. This game proves to be an interesting challenge as modifications to the design, such as strategic and operational cards, bring a new feel to the classic model also built-in!
In designing Falling Crescent, designer Roger Nord brought out the flavor of encirclement and surrender, of charging cavalry and elusive Arab guerillas. The Palestine campaign is one of history’s last great cavalry actions. In this fluid scene, local plans can often go astray unforeseen developments may hinder or even alter command plans. The players’ cards, new to this edition, add their part to the fortunes of war with reactive tactics and shifting events.
The game’s pace is swift, and we believe players will enjoy it as a World War I game devoid of attrition and stalemate. Especially in the use of cavalry and air, they will see a hint of things to come in 1939-1940, when a later war will no longer be fought with horses and canvas biplanes, but with treaded armor and screaming dive bombers.
I am very much looking forward to this one. Games on this subject and with this scale are pretty rare and the comment in the description about “one of history’s last great cavalry actions” definitely has my attention!
As usual, thanks so much for reading along and sticking with me this month as I navigated through the many websites and game pages looking for new and interesting games to share.
Finally, thanks once again to this month’s sponsor Nuts! Publishing!
An Impossible War: The First Carlist War in the North, 1834-1838 from Bellica Third Generation is a block wargame that recreates the First Carlist War in the North of Spain which was a civil war between the Carlists who supported the succession of the late king’s brother Carlos de Borbón and the progressive and centralist supporters of the regent Maria Christina acting for Isabella II of Spain who were referred to as the Liberals. The game uses blocks representing units but also includes counters and uses cards. I was able to play the game about a month or so ago with Francisco Ronco who owns the publishing company Bellica Third Generation and very much enjoyed the game and how it represented this interesting struggle.
In Action Point 1, we took a look at the Game Map, discussing the point-to-point movement configuration, the various spaces and the delineation of the Carlist versus the Liberal Zones, as well as explained the use of the Rest of Spain smaller map. In Action Point 2, we examined the units available to both sides and covered the importance of Supply. In Action Point 3, we took a closer look at the Carlist Uprising Phase and what it means for the game. In Action Point 4, we examined the activation system and the use of Action Point Markers. In this Action Point, which is the conclusion to the series, we will take a look into how Battles work, focusing on the tactical aspect of combat with the use of the Battle Board.
Battle
One of my favorite parts of the game is the Battle mechanic. With Battle, I very much enjoy the use of the Battle Board but also like that there are several different types of combat. Battles focus on asymmetric combat rather than massive open field engagements and are typical of the First Carlist War. These Battles boil down to 3 primary types including Skirmishes, Battles and Assaults and each type have their benefits and uses and one of the important things about the game is the need to learn their best uses and then how to perform them. If both sides have at least 3 Infantry or Cavalry units in a contested space, then there is a Battle. Also if 1 or both sides has less than 3 Infantry and Cavalry units in the space, or only has Cavalry units, then there will be a Skirmish. And finally, in order to launch an Assault on a Fortress, the besieging player must have a Field Artillery unit of any value in the enemy Fortress space.
But before we take a look at these different types of Battle, I want to cover the Combat Cards. Combat Cards provide background events and assist tactical maneuvers without running the game on their own. Each player holds a distinct 36-card deck (Liberal or Carlist) representing historical, operational, and tactical modifiers. These cards simulate unpredictable elements, like sudden skirmishes, political shifts, or logistical hurdles. The Liberal Player generally leads larger, but lower-quality forces plagued by supply issues. Their Combat Cards tend to focus on maintaining order, quelling uprisings on the Rest of Spain Map and chasing Carlist expeditions. The Carlist Player will command smaller, high-quality troops. Their Combat Cards focus on exploiting superior mobility, terrain knowledge, and sudden strikes. Since this is an “impossible” war featuring guerrilla tactics, siege warfare, and frequent skirmishes rather than massive battles, the cards adapt to these asymmetric scenarios.
There are 3 types of cards found in the decks, including Event Cards, Operational Cards and Tactical Cards. Event Cards are played immediately when drawn and provide both positive and negative benefits to the players. Operational Cards can be played when the conditions stated on the card are met, during the player’s own Player Phase or sometimes during the opponent’s Player Phase. Tactical Cards can be played in combat as stated on the card. Each player can use a maximum of one tactical card in each Skirmish, Battle Round or Assault Round.
At the beginning of a player’s Player Phase each Turn, that player will take the top card from their draw deck. If it is an Event Card then it is applied immediately. If it is not an Event Card, the card is kept in the hand so that the other player cannot see it. A player can have up to 8 cards in their hand and these can be played as indicated on the card itself.
These cards are very well done and keep the game very interesting and tense as you just don’t know what type of cards your opponent has that they can spring on you in combat. These cards alter the conditions of the battle and cannot be planned for but must be kept in mind as players enter conflicts. From adding defenses that absorb hits (such as the Stone Walls Tactical Card) or provide additional Effectiveness Rating to units in battles when they are firing (such as the False Retreat Card), these cards make a difference and keep the game feeling like a game.
Now that we have looked at the cards, let’s now take a quick look at the various forms of Battle. A Skirmish consists of just 1 single round of fire. First the defender will fire and applies all hits to the attacking units, then the attacker will fire and applies hits to the defending units. There are no morale rolls in the game. In a Skirmish a player fires with a maximum of 3 Infantry and Cavalry units. The player must choose which units will fire with several limitations. maximum of 1 Cavalry unit in rough terrain and a maximum of 2 Cavalry units in open terrain. A player always fires with all Artillery units.
The Battle Board operates as a dedicated, zoomed-in tactical area where the details of combat are resolved. When opposing blocks meet on the main strategic map, units are moved to this board to fight out the encounter safely separated from global troop movements. When a Battle begins, players move their hidden army blocks from the main map onto the Battle Board. Depending on the terrain where the battle takes place (such as rough terrain for a city or plains for the countryside), players deploy their units into specific zones on the board. The Flanks are outside positions that trap or outmaneuver the enemy. The Front Line are the units taking the direct hits and dealing the damage to the enemy and the Reserve is where extra units are kept on standby to join the battle as losses are suffered.
Combat on the Battle Board happens in rounds. As a block wargame, the number of dice rolled by any unit is based on the number of pips shown on the block and the to hit number is equal to or less than their Effectiveness Rating printed on the block. Modifiers may be added from terrain or from the play of Combat Cards. Dice are then rolled and hits are determined with the defending units taking losses by reducing their pips by rotating the block counterclockwise. It is as simple as that.
The big difference in the types of Battle are the duration. A Skirmish last only 1 round while a Battle can last up to 3 rounds. The Battle ends immediately when 1 of the following situations arises. If the Battle lasts the full 3 round, when the 3rd Battle Round ends the defending player remains in the space and the attacking player retreats. There is no Rout or Pursuit A player has no Infantry units in the front line. The other player wins, gains 1 VP, and causes a Rout by the losing side, which will then retreat. Or, a player decides to retreat voluntarily in the End of Battle Round phase. The other player wins and can carry out Pursuit.
The Battle mechanic in An Impossible War captures perfectly the frustration of asymmetry in both competing sides and their troops. The name of the game is specifically reference to the the Liberals’ massive, clunky numbers versus the Carlists’ nimble, guerrilla style of warfare. 2 different armies with 2 different philosophies has created a situation where neither side can feel comfortable with the war and their chances at winning it. I frankly think that the designer David Gómez Relloso did an exceptional job at creating this asymmetry and creating a highly playable and engaging game. If you didn’t know, I chose to add An Impossible War to my Top 10 Wargames of 2025!. It landed at #8 on the list, and probably would have scored higher had I had a chance to play the game further and experience all of the parts of the design.
I also was able to shoot a fairly short video summary of my game play with Francisco Ronco who is the owner of Bellica Third Generation and you can watch that at the following link:
In 1539, a small Spanish garrison of troops numbering 3,500 men held the Albanian village of Castelnuovo for 22 days against the massive Ottoman army consisting of over 54,000 Turk soldiers. This siege took place as a part of the Ottoman-Habsburg struggle for control of the Mediterranean Sea in July 1539 at the walled town of Castelnuovo, which is the location of present-day Herceg Novi, Montenegro. After days of open trench warfare and more than a month of smaller combats, skirmishes, assaults and bombardments from the Turkish navy, the last Spanish defenders fell ending the siege. Castelnuovo 1539 is a wargame that focuses on this siege designed by Francisco Ronco. The defenders are safe behind sturdy walls and battlements but time and continual shelling from the Ottomans will lead to assaults over the walls. The battle is hopeless for the defenders but they can win the game by doing enough damage to the Ottomans to end their campaign and stop them from invading further into the Albania and then onto Spain and the rest of Europe. The game is very well produced using wooden blocks for soldiers, stylized walls, siege trenches and cannon along with ships and the board is also beautifully illustrated. The game is a block wargame where the strength of units are hidden from the opponent and plays pretty quickly in less than 90 minutes and really is a great representation of the battle and its history.
In this series of Action Points, we will first take a look at the beautiful Game Board and its area movement scheme, examine the units available to both sides and compare their relative strengths and weaknesses, take a look at the 5 different types of Command Cards and discuss how they are used, look at the 2 different types of rounds including a Siege Round and an Assault Round and how they differ, take a look at an example of combat and bombardment and finally examine the victory conditions for both sides and how casualties effect this outcome.
Game Board
The Game Board represents the fortified city of Castelnuovo and its surrounding areas, including the Mediterranean Sea to the south and the rolling countryside to the north. The Game Board is divided up into areas which are used to regulate the movement and positioning of the block units. The Game Board is pretty large really measuring in at 29″ x 21″ and is a fully mounted map board and is very nicely illustrated by Paco Arenas and absolutely was a joy to play on.
As you look at the Game Board in the picture above you will notice a few things. The areas of the city of Castelnuovo are outlined in red with a dotted line representing the city walls around its perimeter. There are also 4 inner areas of the city itself outlined in purple. Sometimes the game rules make reference to the “Fortress”, which means the 4 areas of the city and the walls surrounding them.
Here is a closeup of the Fortress where you can see the colored lines a bit better. You will also notice that there are rectangular boxes on top of the walls in the Fortress outlined with white dotted lines. These are spaces where the wooden wall segments are placed to represent the Resistance Level of the walls. You will see that in each area of the city that has walls, there is a number found in a white star that represents this Resistance Level. There are areas with both Resistance 1, 2 and 3 inside the Fortress. As the walls are attacked with bombardments from artillery, their Resistance Level will be degraded represented by placing wooden cubes in each area marking the current Resistance Level with 1, 2 or 3 cubes. If an area has 3 Resistance Level and takes a hit, the player will remove one wooden piece indicating that the Resistance points have dropped. Once the Resistance Level reaches 0, the walls are destroyed and the wooden wall pieces are removed from the board. The Ottoman player may then storm the walls and attack the defending units in the city.
There are 2 types of terrain found in the countryside of the Game Board with clear terrain being shown by a solid white outline and rough terrain outlined by a white dotted line. Each area of the map has a Height Level value printed in its location, which indicates the height of the area. The heights are 0 being the lowest, or basically the sea level with a 4 being the highest which represents a mountain level. The height effects the shooting of firearms. In addition, other terrain features are printed on the Game Board including the coastline, which separates the sea areas from the land areas, and also is a landing point for a majority of the Ottoman player’s reinforcement troops. Also, the 3 areas with Resistance Levels of 2 and 3, marked with the white star, are the areas that the Ottoman army must occupy at the end of any round to win the game.
Movement is specifically tied to the type of lines found in the areas of terrain. Units and Leaders can move by playing Action Cards, which allow a group of 1 to 3 units that are in the same area to one or more areas. Activated Infantry units will have 2 movement points and Cavalry have 4 movement points. Moving into a clear terrain area costs 1 movement point while moving into a rough terrain area, which is marked with white dotted lines will cost 2.
The countryside areas have various depictions of buildings including shacks, storage sheds, houses as well as farm fields. These buildings do not affect combat or movement and are simply illustrative of the surroundings of the city. They are also many trees and bushes drawn on the Game Board with connecting roads also shown.
There are a few pieces that the players will place on the Game Board at the outset of playing including the wall blocks already mentioned as well as the Bastions. These Bastions are used by the Spanish player and are placed at the beginning of the game in any terrain areas outside of the city proper. These Bastions function similarly to the walls of Castelnuovo’s fortifications. Once these are placed, they cannot be moved and will remain on the board even if their Resistance drops to 0 and they are destroyed. The Ottoman player can destroy them with artillery Bombardments or by spending Trench Points from Command Cards when entering them. These Bastions do not provide defense to the Ottoman player.
The Casualty Track is printed in the bottom left hand corner of the Game Board and is used to keep track of the number of blocks lost by the Ottoman player. In addition, also tracked will be Leaders and the number of Assault Rounds used by the Ottoman player.
The game really is a nicely made production with the Game Board being one of the best parts of the package. It is clear, well laid out and takes little to no time to understand its locations and areas. I think that one of the strengths of this game is that it is not only nicely produced but the rules are very clear and the strategy of what each side should be doing, by taking advantage of their defenses and the terrain.
In Action Point 2, we will examine the units available to both sides and compare their relative strengths and weaknesses.
An Impossible War: The First Carlist War in the North, 1834-1838 from Bellica Third Generation is a block wargame that recreates the First Carlist War in the North of Spain which was a civil war between the Carlists who supported the succession of the late king’s brother Carlos de Borbón and the progressive and centralist supporters of the regent Maria Christina acting for Isabella II of Spain who were referred to as the Liberals. The game uses blocks representing units but also includes counters and uses cards. I was able to play the game about a month or so ago with Francisco Ronco who owns the publishing company Bellica Third Generation and very much enjoyed the game and how it represented this interesting struggle.
In Action Point 1, we took a look at the Game Map, discussing the point-to-point movement configuration, the various spaces and the delineation of the Carlist versus the Liberal Zones, as well as explained the use of the Rest of Spain smaller map. In Action Point 2, we examined the units available to both sides and covered the importance of Supply. In Action Point 3, we took a closer look at the Carlist Uprising Phase and what it means for the game. In this Action Point, we will take a look at the activation system and the use of Action Point Markers.
Activation System
The main focus of the activation of units is the concept of Action Points. These Action Points are used to take various actions such as to activate units for movement, build fortresses, destroy enemy fortresses, obtain replacements, recruit units into Expeditions, suppress uprisings and enter into combat as a part of activation for movement. Both the Carlist and Liberal player has Action Point Markers in the color of their side and each year they can use a specific number of each value of marker. This is determined at the outset of each year according to the Action Point Marker Table.
After the number of Action Point Markers used is determined, the players will each build a chit draw cup for their own Action Point Markers. This should be an opaque container that obscures the identity of each marker as the draw is supposed to be random and is really part of the fun of the design. Then at the start of their Activation Phase, the player will randomly draw an Action Point Marker and then mark their Action Point Track accordingly. As already mentioned, these Action Points are the “fuel” spent to perform actions.
As you can see in the chart above, each year the players both have access to the same amount of overall Action Point Markers with 6 but the makeup of these markers will be different ranging from 2 points to a maximum of 4 points. For example, in 1834 the Carlist player will have three 2-point markers and three 3 point markers while the Liberal player will have access to three 2-point markers, two 3-point markers and one 4-point marker. This is an interesting point as the Liberal player has the potential to obtain more Action Points in 4 of the 5 years covered in the game. This is random of course and fate can decide that the Carlist player will get the most Action Points each year but the potential is there for the Liberal player to have the advantage.
As mentioned, these Action Points are the currency used to take various actions and in most instances they will be used to Activate units on the board. Activated units can then move and their movement allowance will depend on how many units move together and the roads used, either main or secondary.
But one of the more interesting ways that Action Points can be used is to convert them into Command Points. The player may choose to convert as many Action Points as desired each year into Command Points, noting them on the Command Points Track. A player may have no more than 5 Command Points. Command Points are flexible currency that will not be lost and can then be used to contest initiative, as Action Points or even to attempt an interception of enemy units. These Command Points are vital and should be something that players invest into as they are very flexible and also allow for the taking of actions during the other players activation. I like the way the game uses this random activation concept and currency for those actions. In reading the designer notes in the Playbook, the designer David Gómez Relloso emphasized the fact that the war was brutal, difficult and that communication and distribution of orders was very difficult, particularly for the Liberals as they were operating in hostile territory where the locals continually harassed and denied them of provender as they would flee taking their livestock with them to keep them out of enemy hands. This random number of Action Points, and thereby a varied number of points to do things with on the board, really is central to the design and can make for a very interesting challenge for those that are unlucky like me. While the differences in the values of the Action Points are not that far apart, a few extra or less than your opponent can cause great difficulty as you will simply not be able to perform what you need to each turn. This boils down to a prioritization of goals and will lead to some very tough decision having to be made about activating units versus recruitment of new units or focusing on the game board state versus the state of the Rest of Spain Map and the Carlist Uprisings and Expeditions.
I also was able to shoot a fairly short video summary of my game play with Francisco Ronco who is the owner of Bellica Third Generation and you can watch that at the following link:
In Action Point 5, which is the conclusion to the series, we will cover some examples of Battle, focusing on the tactical aspect of combat with the use of the Battlefield Board, as well as an example of a Siege.
While attending Buckeye Game Fest this spring, we were gifted a copy of a newly published game called And the War Came: American Civil War 1861-1865 from Pinkerton Games, which is published by Blue Panther LLC and Steve Jones. The designer and owner of Pinkerton Games Larry Pinkerton had been their earlier but had to leave due to some other pressing business and we were unable to meet but were very grateful for the game. Upon returning home, I reached out to Larry to see if he would give us a bit of an inside look at the design and he was more than willing to discuss the game.
Grant: Larry welcome to our blog. First off please tell us a little about yourself. What are your hobbies? What’s your day job?
Larry: Grant and Alex, first, thanks for the opportunity to tell you about myself, and my game, And The War Came. I’m a lifelong resident of southwest Ohio, from the Dayton area. I’ve got three great adult kids, each working on their families and/or careers. I’m now retired from both my civilian job, and my almost 34 years as a traditional Ohio National Guard member-last duty assignment as an Air Defense Brigade Commander-so now more time for hobbies.
Now that And The War Came is finally done, I enjoy hanging with my kids, playing music, and traveling. I still do part time contract work in support of US Army training events, which I enjoy as well. And I hope to find more time for playing other wargames too!
Grant: What motivated you to break into game design? What have you enjoyed most about the experience thus far?
Larry: I’ve always been interested in the American Civil War, and many years ago it came to me that a block style game and a strategic level treatment of that war would make a great game-one that didn’t really seem to be available, at least for what I was looking for. I’ve really enjoyed developing the game, adopting, changing or dropping processes, seeking to get at the right balance of playability, workable mechanics and good history. It took a while, but I’m happy with the results.
Grant: What is your upcoming game And the War Came about?
Larry:And the War Came is a strategic level American Civil War game, focused on the southeastern United States. It started life as a block game, but when I decided to self-publish, I switched to rotatable counters due to cost. But play is similar-it’s area movement and card driven, so those familiar with Columbia style block games will recognize some of the mechanics.
Grant: What does the title mean in relation to the history of the American Civil War?
Larry: I bounced so many title ideas and finally settled on And The War Came, which is a sentence in Lincoln’s 2nd inaugural address (March 4, 1865). I felt that line summarized how the United States stumbled and staggered into civil war. And the wonderful Carte de Visite Collection images from the US Library of Congress I chose for the game box spotlight who the actual participants really were.
Grant: What games gave you inspiration for your design?
Larry: Columbia Game’s Hammer of the Scots and Victory Game’s The Civil War 1861-1865 were by far the strongest influences.
Grant: What is important to model or include in a game about the American Civil War?
Larry: Above all, I think it is leaders and leadership at the corps and army level. Any discussion of ACW campaigns seems to hit on the “what ifs” of senior leaders. There were simply so many generals I could have chosen to model in the game, but I finally settled on 22 Union and 19 Confederate leaders that did or could have risen to army or independent command. The formations on both sides were so similar, in my opinion it was the leadership that was truly decisive.
Grant: What challenges did you encounter in the design? How have you overcome them?
Larry: Wow, there were a lot; game flow, simple but historically accurate mechanics, relative strength and play balance, rail and naval capacity, re-playability, map scale-all had to be refined through trial and error, playtesting and compromise. And countless rulebook edits! Rules concepts I thought made perfect sense in my head and on the page drew several questions when reviewed by others. But I think it’s a pretty good final product.
Grant: What is the scale of the game? Force structure of units?
Larry: Regional area movement, and seasonal turns, representing three months. The map is bounded by eastern Kansas to eastern Texas on the western edge, New Jersey to northern Florida along the Atlantic Coast, lower Midwest on the northern edge, and Gulf of Mexico on the southern. Most states contain 4 to 10 areas-states with better road networks tend to have less areas. But there is more territory than units to control it. Fortress cities (i.e. Washington, D.C.), major railroads, navigable rivers, and mountains and swamp areas are also portrayed on the map. Rail and naval support capacity change each year.
Units represent infantry or cavalry corps, with a strength of from 1 to 4 divisions, or forts representing 1 to 4 installations. Unit count is: Union-33 Infantry counters, 10 Cavalry counters, 5 Fort counters, Confederate-26 Infantry counters, 8 Cavalry counters, 8 Fort counters.
Grant: What is the counter anatomy?
Larry: Very straightforward if familiar with Columbia style block wargames-a mechanic I have always admired for simple and clean fog of war, step reduction, and ranged or initiative combat. \Counters are square with strength point symbols (divisions) arrayed along each edge, plus movement and combat ratings. Infantry has a combat value of C2 with a move allowance of 1. Cavalry has a combat value of B1 with a move allowance of 3. Forts have a combat value of A1 with a move allowance of 0-they are stationary. There are also corps insignia (Union) or battle flags (Confederate) just to add historical flavor, and the branch insignia of the period for infantry, cavalry or forts. Ultimately, I chose to give similar units of both sides the same combat or movement ratings (since both Union and Confederate formations grew from the same organizational foundations and traditions), but those ratings can be modified by the leaders who command them, both at corps and army levels, and/or the battlefield terrain.
Grant: What does it mean the “game is We Go turn based”?
Larry: Most functions are conducted by both players at the same time. For example, in the Administration Step, both players recruit (buy) their new units/strength points, enter new or recovered from wounds generals, or administratively move/transfer generals already on the map to new assignments/commands. When both players are done, they go to the next step, (Operations), with Action Phases where each plays a card to determine who moves first, they complete their moves and then resolve any battles that result from movement. The Logistics Step and Victory check complete a turn.
Grant: What type of experience does this approach create?
Larry: It minimizes down time for one. Actions in the Administration Step, Operations Step, Logistics Step happen simultaneously. Only in the Operations Steps’ Action Phase (or depending on the season, phases) does movement happen sequentially. This limits the action/reaction dynamic to operations, where maneuver happens in small chunks due to the seasonal card play. Neither side is able to make big sweeping moves, while the other side can only watch-the mechanic enables campaigns like Gettysburg or Vicksburg, although they may not necessarily occur during the course of play.
Grant: How does the game use cards?
Larry: Cards list the number of “orders” you can issue to units in order to conduct movement or other actions. There are also cards with both events and orders where players must choose which to use. And most cards have a bonus action (improved combat, movement, or leader promotion) to spice things up. The season determines the number of cards each player receives that turn. The Winter season/turn, each player receives only one card-in the single Action Phase, each player compares their card to the other player’s to determine who moves first (initiative), then second, then resolve any combats. This makes for a short turn. In both Spring and Fall seasonal turns, players receive two cards each, then play their cards against each other in each of the two Actions Phases, conducting moves and combat. In the Summer seasonal turn, three cards are dealt to each player-thus there are three Action Phases that turn.
Grant: What type of cards are included? Can you share a few examples?
Larry: There are 30 cards in the common game deck (there are not separate unique decks for Union or Confederate players). The deck includes 22 orders cards, each card with a value of 1, 2, 3, 4 or 5 orders. The orders determine how many units (corps) or commands (see Leaders below) can be moved with that card-a card with only one order allows the movement of only one unit, etc. Orders can also be used to promote generals or repair rail roads, etc. Again, most, but not all of these 22 cards also have a bonus that improves movement, or combat for a unit, or gives a free general promotion.
There are also 8 cards that include a combination of orders and events such as blockade impacts, partisan activities, native uprisings, surprise attacks, diplomatic incidents, immigrant or native recruits, or spy activity-each event with favorable impacts for themselves, or negative impacts for the opposing player. I chose for the event cards to be generic in nature and usable for both sides, verses specific events (i.e. Trent Affair) scripted events. For these 8 cards, players have the option to play the event and still have two orders to move other units, or not play the event at all, and have all three orders for movement.
The entire deck is reshuffled at the start of a new year. Since each player only receives 8 cards in a four season/turn year, only 16 of the 30 cards are played each year-some cards may not get played during the entire war, while others may reappear several times.
Grant: How does combat work?
Larry: Again, similar to other Columbia style block games.
Paraphrased from the rulebook:
Units Fire or Retreat in a combat round. The sequence of combat is A class units fire/retreat first, before B class units, followed by C class units which fire/retreat last. If both sides units are the same class, the defender has the advantage, and fire/retreat before attacking units of the same class. A general’s initiative rating may change who has the first shot advantage. To Fire, roll as many dice as the unit’s current strength points (SP). A hit occurs for each die roll equal to, or less than the unit’s combat number rating. Hits on the enemy take effect as they happen, each hit immediately reducing the enemy unit strength point count by one. Say a 3 division (SP) infantry corps has a combat rating of C2-that corps rolls 3D6 dice and every “1” or “2” rolled is a hit, reducing enemy strength and effectiveness when returning fire. In a battle between a B1 cavalry unit and a C2 infantry unit, the B1 rolls first, but only scores a hit for each 1 rolled. The C2 rolls second and scores a hit for each 1 or 2 rolled. One round of combat is complete when each unit fires or retreats.
Some unit strength may be recovered at the end of combat if the unit is not destroyed-with this recovery rule I’m trying to account for after the battle return to duty wounded, stragglers, local prisoner exchanges, etc. I was aiming for about 20% casualty rates in combat.
Grant: How do Leaders work? How are they killed or wounded?
Larry: Leaders are used to command corps or armies (units under the command of a general are actually called “commands”, i.e. Sherman’s command). A leader imparts his initiative (A, B, or C class) and tactical ratings to the unit or units he commands. In Sherman’s case, he changes a C2 infantry corps under his command to a B2. A leader’s initiative and tactical ratings may change at different ranks. And I’ve added optional rules to randomize when leaders enter the game, and their ratings.
Leader counters also rotate-they all enter the game as a one star general. They may be promoted to two or three star rank. Grant and Sherman can even be promoted to four star (GEN) rank as they historically became army group commanders. A one star general (BG) controls one corps counter; a two star (MG) may command one or two corps.
The only way a leader can be promoted to three stars (LTG) rank is to take command of one of the 5 named armies: Potomac, Cumberland, and Tennessee for the Union; Northern Virginia and Tennessee for the Confederacy. Named armies may contain four or more corps, depending on the army. And only named armies may have subordinates of one or two star rank. If a three star army commander is relieved of command, there is a political cost, and the leader reverts to one or two star rank.
Leaders also represent staffs and logistics trains, so commanded units may engage in two rounds of combat, whereas corps without a commander may only initiate one round of combat-so even lower quality leaders can be beneficial since they allow you to fight an additional round. Most leaders also increase the movement allowance for infantry to 2 instead of the base 1.
And yes, leaders may be wounded, killed or captured. At the end of each combat which involved leaders, a leader casualty assessment is rolled-lower ranked leaders are more likely to be casualties. If assessed as a casualty, another D6 is rolled for severity of wound. Rolls of 1 through 5 indicate the leader is out for that many turns. A roll of 6 means the leader is killed. And if a commanded unit is destroyed but the leader is not killed or wounded, the leader is captured. Captured leaders may be exchanged as prisoners.
Grant: How does the design create fog of war and uncertainty?
Larry: The counter covers hide counter information until opposing units engage in combat. Of course, leader losses will occur, which adds to uncertainty. The cards also provide for a lot of variability in maneuver. And the strength replacement recruiting is a combination of fixed values for the year, plus a die roll for variable recruits each season. Recruitment strengths diminish for both sides over the course of the game. There’re several optional rules that address the Emancipation Proclamation, Drafts, Leader randomization, etc. to add historical flavor or variability to the game.
Grant: Who is the artist for the game?
Larry: I did the artwork…in MS PowerPoint. Whew, not the easiest thing to do! But I’m happy with the results. I used public domain art and was able to generate nice graphic quality with the tools available. And I found you can only go so far in development before you have to start addressing production concerns. And the War Came is definitely a game on a budget!
Grant: How is victory achieved?
Larry: Quite simply, players must accomplish more than their historical counterparts in the same period, for example the 1862 scenario, when the Border States, most of Tennessee and New Orleans were in Union hands by year’s end. So, victory usually means holding more territory, but there are also war weariness and political factors that contribute to, or detract from, victory. Examples are the midterm elections of 1862, Presidential elections of 1864, and weariness of the northern population.
Grant: What do you feel the game models well?
Larry: The overall ebb and flow of the conflict-using corps formations on a large area map just works well. And although there are abstracted naval and logistics rules that function well, I chose to focus on the senior commanders and Lincoln’s and Davis’s struggles to find effective military leadership for their troops at corps and army levels. And I think I’ve got the right level of political factors that contributed to the War’s outcome factored in. It’s hard for the CSA to win, but if the USA sits on it’s hands to build strength and perfect its leadership, the USA will lose. The USA must take the fight south early and often-and that’s a lot of territory to cover.
Grant: What are you most pleased about with the design?
Larry: There’s so many classic ACW titles out there that cover the entire scope of the war in great detail, and yet I think And the War Came fills a niche. For those familiar with board wargames, it’s not overly complex and it plays fairly quickly. I like the unknowns and fog of war, and think the re-playability is there. The historical framework is solid. I tried to not model for effect, so historical campaigns and outcomes are certainly possible, but not preordained. I wanted an interesting beer and pretzels game, one that both those familiar and unfamiliar with the ACW could enjoy. Again, I’m satisfied with the results.
Grant: What other designs are you contemplating or already working on?
Larry: I think if there’s another one in me, it’ll be a strategic treatment of the American Revolution-but to model that conflict will take some work, initially just to get the scope right, and factor in the interrelationship with the wider Anglo-French conflict.
Oh, and I must add a hearty thanks to Blue Panther Games, for their great production and distribution support! I just couldn’t nail down a publisher-but after consulting with Steve Jones (BPG) I realized I could partner with Blue Panther and do it myself! I would recommend them to any aspiring designer who’s interested in self-publishing.
If you are interested in And the War Came: American Civil War1861-1865 from Pinkerton Games, you can order a copy for $65.00 from the Blue Panther LLC website at the following link: https://www.bluepantherllc.com/products/and-the-war-came
An Impossible War: The First Carlist War in the North, 1834-1838 from Bellica Third Generation is a block wargame that recreates the First Carlist War in the North of Spain which was a civil war between the Carlists who supported the succession of the late king’s brother Carlos de Borbón and the progressive and centralist supporters of the regent Maria Christina acting for Isabella II of Spain who were referred to as the Liberals. The game uses blocks representing units but also includes counters and uses cards. I was able to play the game about a month or so ago with Francisco Ronco who owns the publishing company Bellica Third Generation and very much enjoyed the game and how it represented this interesting struggle.
In Action Point 1, we took a look at the Game Map, discussing the point-to-point movement configuration, the various spaces and the delineation of the Carlist versus the Liberal Zones, as well as explained the use of the Rest of Spain smaller map. In Action Point 2, we examined the units available to both sides and covered the importance of Supply. In this Action Point, we will take a look at the Carlist Uprising Phase and what it means for the game.
Carlist Uprising Phase
The map of the Regions of Spain, or Rest of Spain Map as it is referred to in the rules, is smaller and simpler than the Game Map itself and is a separate board that plays along side the main board. It consists of 9 large regions that cover large territories of Spain. This map’s purpose is to record the spread of the Carlist Uprisings, to enable Carlist expeditions to operate and for the Liberal player to chase and hunt these expeditions down. The Rest of Spain Map is divided into regions and each region has a Carlist Uprising Level of between 0-3. Also, there are 2 regions, including Valencia-Murcia and Catalonia, where the Carlist Uprising Level cannot fall below 1, reflecting the intensity of Carlism in these regions. The Carlist Uprising Level cannot ever be less than 0 (or less than 1 in Valencia-Murcia and Catalonia which is the printed value on the Rest of Spain Map) or more than 3. Any effects that change the Carlist Uprising Level below or above these numbers is simply ignored.
The Carlist Uprising Phase begins with a roll on the Carlist Uprising Table to determine any effects that will be carried out this turn. Then, if there is an existing active Carlist Expedition on the Rest of Spain Map, the Carlist player may attempt to increase the Carlist Uprising level in its region. This increasing of the Uprising Level is like a wave. A wave that starts out small with presence of unrest being only in a few spaces on the Rest of Spain Map, but it will soon get out of control and turn into a tidal wave that can crush the Liberal player if they have not being paying attention to the situation on the board.
The Carlist player will roll 2D6, sum the result of both of the dice, and then will consult the Carlist Uprising Table found on the Rest of Spain Map to find and then apply the result. If you know anything about the probability of the outcome of this 2D6 roll, the most likely outcome is 7. There are 36 total possible combinations when rolling 2D6 and there are 6 different ways to get to a result of 7 including 1+6, 2+5, 3+4, 4+3, 5+2, and 6+1. So generally your spread will be around that 5-8 range, which according to the Carlist Uprising Table means that you will see the Uprising Level increase in places like Castile-León (result of 5), no increase (result of 6), Valencia-Murcia (result of 7) and Catalonia (result of 8). But it is also important to remember that the highest a region can attain is 3 and if it is rolled then the Carlist player will choose to increase the Carlist Uprising Level in 1 adjacent region.
The next step of this phase is the Expedition portion. If there is any active Expedition on the Rest of Spain Map then the Carlist player can attempt to increase the Uprising Level in each region where there is an Expedition, as long as there are more Carlist units than Liberal units there. The number of Liberal Infantry and Cavalry units in the region is subtracted from the number of Carlist Infantry and Cavalry units forming the Expedition. The Carlist player then rolls a die, and if the result is equal to or less than this number, the Uprising Level increases by +1. An Expedition cannot increase the Uprising Level in a region where the level is already 3 and there is no adjacent spill over of this furor.
The units of the Liberal player can move on this map at all times. The units of the Carlist player cannot enter the Rest of Spain Map before 1835. It is important to keep in mind the Carlist player can only have a single active Carlist Expedition on the Rest of Spain Map in 1835, and a maximum of 2 Expeditions from 1836 onwards.
So why is this part of the game important? Uprisings can provide Victory Points to the Carlist player. In addition to VP’s, Uprisings provide replacements for Carlist Expeditions and feeds the spread of rebellion on the Rest of Spain Map. There is a track on the map where the Carlist player keeps an accounting of the the Carlist Prestige marker to gain VP’s. If the amount of regions with an Uprising Level of 3 is at 3 or 4 regions, the Carlist player will gain 1 VP. If there are 5 or more, the Carlist player will receive +2 VP’s.
But there are other benefits to the players that come as a result of the Uprising Level on the Rest of Spain Map. For the Liberal player, at the end of each year for each region that is empty of Carlist Expeditions and has an Uprising Level of 0 or 1 (no 2’s or 3’s), they gain 1 Replacement Point in 1834-1835 and 2 Replacement Points in 1836-1837. Think of it this way. If there are no Carlist troops threatening the local Liberal supporting public, they are more willing to provide their sons to the military to fight the rebellion. But, if the Carlist fire of uprising has spread and there are active Carlist troops in the streets there will be less support for the Liberal cause.
Also for the Carlist player, if at the start of their turn there is an Expedition on the Rest of Spain Map and there are 5 or more regions with an Uprising Level of 2 or 3, they will gain +1 Action Point that can only be used to move or recruit Expeditions. Once again, if the groundswell of support is leaning toward the Carlist, the local populace are more in favor or supporting these Expeditions and expelling the Liberal from the region.
As you can see, there are a great deal of benefits for both players from the Uprising Level but there seem to be more impactful benefits for the Carlist player. If they can control the Rest of Spain Map, and dot the landscape with support and uprisings, they can win the game handily. But don’t worry, the Liberal player has an action available to them for combating and reducing the Carlist Uprising level in a region. This action is called Suppress Uprising.
Suppress Uprising is where the Liberal player can attempt to reduce the Carlist Uprising Level in a region by spending 1 Action Point and rolling 1D6. If there are no Liberal Infantry or Cavalry unit in the region, or if no unit takes part in the action, if the result is equal to or less than the Carlist Uprising level, then the attempt has no effect. If the result if higher than the Carlist Uprising Level, then the level is reduced by -1. If there is at least 1 Liberal Infantry or Cavalry unit in the region that takes part in the action, for each Liberal Infantry or Cavalry unit after the first that participates in the action, the Liberal player adds +1 to the roll. But there are possible losses that come with using your troops in this manner.
If the result is less than the Carlist Uprising Level, then the attempt has no effect. If the result is equal to the Carlist Uprising Level, then the level is reduced by -1, and one Liberal Infantry or Cavalry unit loses 1 strength point. If the result is 6 or more, then the Uprising Level is reduced by -2. So there is incentive to make sure you use your troops in this action. A bit risky but useful and definitely worth the risk.
An Impossible War is a fantastic design that attempts to capture the historical aspects of this titanic struggle for the throne of Spain in the mid 19th century. Historically, the Carlist forces who were defenders of traditional monarchy, regional privileges, and the Catholic Church, were a minority faction fighting an overwhelmingly larger, richer liberal government. The uprising phase reflects how the Carlists compensated for this disparity by forcing the Liberal government to fight on multiple fronts and suffer from logistical nightmares across hostile terrain. The Carlist Uprising Phase, and the use of its auxiliary Rest of Spain regional map, forces some really tough dilemmas on the Liberal player. They must attempt to divide their forces between the main Game Map and the Rest of Spain Map to prevent the opposition Carlist forces from overwhelming the home territory in the north. It serves as a vital strategic balancing act for the Liberal player that cannot be ignored and must be dealt with systematically and somewhat evenly. Too much focus on the Rest of Spain Map and the situation on the Game Map will quickly snowball and they will lose control. Focus on the situation on the Game Map and the protection of Cities and Towns and the Carlist Expeditions will gain momentum and turn the countryside red. While the primary war centers on the rugged terrain of northern Spain (Navarre and the Basque Provinces), the uprising mechanic abstractly models scattered insurgencies across the rest of the country. And as you know, insurgencies can be very unpredictable and difficult to contain. You stamp out one area only to see a fire start in another. The Liberal player must divert troops and supply resources to the secondary map to quell these localized rebellions and hunt down Carlist expeditions originating from the north. And, the important thing for the Carlist player and the expansion of the uprisings and the success of their expeditions is the possible generation of generation of Prestige and Victory Points, which is really crucial to their path to victory.
In Action Point 4, we will take a look at the activation system and the use of Action Point Markers.
An Impossible War: The First Carlist War in the North, 1834-1838 from Bellica Third Generation is a block wargame that recreates the First Carlist War in the North of Spain which was a civil war between the Carlists who supported the succession of the late king’s brother Carlos de Borbón and the progressive and centralist supporters of the regent Maria Christina acting for Isabella II of Spain who were referred to as the Liberals. The game uses blocks representing units but also includes counters and uses cards. I was able to play the game about a month or so ago with Francisco Ronco who owns the publishing company Bellica Third Generation and very much enjoyed the game and how it represented this interesting struggle.
In Action Point 1, we took a look at the Game Map, discussing the point-to-point movement configuration, the various spaces and the delineation of the Carlist versus the Liberal Zones, as well as explained the use of the Rest of Spain smaller map. In this Action Point, we will examine the units available to both sides and cover the importance of Supply.
Units
Units in the game represent Carlist (red) and Liberal (blue) armed forces, as well as the logistics needed for these troops to operate in hostile territory. Most of the units are wooden blocks including Infantry, Cavalry, and Supply Trains but there are also cardboard counters representing Artillery, both Field and Mountain, and Knapsack units, which are limited and temporary supplies that are transported by the soldiers themselves.
Let’s first take a look at the scale of the game and the units. With Infantry, a single Strength Point is roughly equivalent to a battalion consisting of between 500 to 800 fighting men. The only difference in the Infantry scale between the sides is a Carlist Partida unit, which represents a variable number of local guerilla fighters who are loosely organized in the amount of about a hundred men. For Cavalry, a Strength Point is equivalent to a squadron consisting of about 100 horsemen. For Artillery, a Strength Point is equivalent to 1 or 2 batteries made up of between 4 to 12 cannons of different calibers. The Supply units for the game are a very interesting and granular approach to supply and I very much enjoyed the juggle of keeping these units in good shape and with large moving armies. A Supply Train, which is represented by a block unit with the picture of a pack horse on it, represents a group of carts and pack animals that transport the needed supplies to keep an army in the field including food, munitions, and baggage. On a smaller scale are the Knapsacks that represents the food and munitions carried by the soldiers themselves.
As a Block Wargame, the Infantry and Cavalry Blocks used have various dots located along the edges of the blocks. Some blocks have 4 steps while others have less but usually no less than 3 steps. The exception to this general rule is the Partida units that only have 1 step. The current combat strength of the units determines how many 6-sided dice will be rolled in combat. During combat, for each hit that a unit receives, its strength is reduced by 1, which is shown by simply rotating the block 90 degrees counterclockwise. If a block is reduced below 1 strength then it will be eliminated.
Supply Train Blocks also have pips located on the block which represent the units ability to provide supply to other units. When the Supply unit provides supply to friendly units located in its space, its strength will be reduced by 1 pip by rotating the block 90 degrees counterclockwise. If the block is reduced below 1 strength then it is eliminated. No dice are rolled for a Supply Train in combat as it is solely a logistics unit rather than a combat unit. Supply Capacity is indicated on the units by the letter “S” and a number, such as S6 or S2. The number is the amount of friendly Infantry and Cavalry units that a Supply Train or Knapsack can supply during the Supply Check. A Supply Train with S6 can supply up to 6 friendly Infantry and Cavalry units in its space. A Knapsack with S2 can only supply a maximum of 2 units
Artillery counters show the current strength with the number of pips on the visible side of the counter. The strength determines how many dice are rolled in a Skirmish and how many points of Artillery it will contribute to a Battle. Artillery units do not receive hits in combat, but they can be eliminated or captured if their side is defeated.
Now that you know the makeup of the units and the various forces represented, let’s take a very quick look at the statistics of each side’s combatants. Before we go any further, I am very hesitant to provide these details as I have gone over them about 10 times and am sure that I miscounted or left out certain units and their abilities. But, this look should give you an overall feel for the differences between the units and their general fighting abilities.
Carlist Units
The Carlist player will have access to a total of 26 units. These include 4 Cavalry, 21 Infantry, amongst this number are a total of 3 Partida units, and 1 Supply unit. The Effectiveness Rating for these units, which as described above equates to their fighting prowess with the higher the number the more likely they are to hit in combat, are shown in the below table with 5 units with an ER1 (20.0%), 16 units with an ER2 (64.0%) and just 4 units with an ER3 (16.0%). Keep in mind that Supply units do not have an ER as they are non-combatants.
Liberal Units
The Liberal player will have access to a total of 48 units. These include 10 Cavalry, 35 Infantry and 3 Supply units. The Effectiveness Rating for these units, which as described above equates to their fighting prowess with the higher the number the more likely they are to hit in combat, are shown in the below table with 12 units with an ER1 (26.6%), 29 units with an ER2 (64.4%) and just 4 units with an ER3 (8.9%). Keep in mind that Supply units do not have an ER as they are non-combatants.
By way of comparison, you can see that the Liberal Units have a slightly better average Effectiveness Rating (1.82 per unit) as compared to the Carlist Units (1.64). This difference is a bit deceiving though as the Carlist player actually has the same amount of ER3 units (4 for the Carlist player vs 4 for the Liberal player) but as a percentage of their total units they have 16.0% of their units as ER3 as compared to just 8.9% ER3 units for the Liberal player. This means that the Carlist units are a bit better and will generally have better units making up their forces than the Liberal player in any given battle.
The real comparison, and where the difference between the 2 sides stands out, is in the area of Morale. Morale is indicated by the letter “M” on the units and is shown as a number, such as M7, M8 or M9. This Morale number is the maximum result of the sum of 2d6 that gives a success in a morale roll. Each time during an activation that a unit receives 1 or more hits, it must then roll a Morale check. Morale checks are only made in Battle and never in a Skirmish, Assault, Pursuit, or Rout. If the Morale check fails, the failing unit will immediately be moved to the Demoralized Units Box. Morale is also key for Infantry that are being charged by Cavalry as they will make a Morale check and if they succeed they can initiate a counter charge. If they succeed the check then the attacking Cavalry will be spent and do no damage but if failed the attacking Cavalry unit fires and adds +1 to its Effectiveness Rating.
The Liberal player has an Average Morale value of their 45 units of 7.97 as compared to the Carlist player Average Morale value of their 25 units of 8.76. While not a huge difference, this slight edge to the Carlist player means that their units will be able to more often counter charge and stay on the battlefield as they will not break and become Demoralized as often.
Also, if you remove the 3 lowest value Carlist units, the 3 Partida units who each have a Morale Value of 7, this average becomes much higher at a 9.0 and really starts to show the significance of the Carlist advantage in Morale. In my play with Franciso Ronco, I felt like he definitely had the advantage on the battlefield, at least value wise in the area of Morale, but all it really took was for 1 of his better units to be demoralized and the odds became much more even.
The other advantage that the Carlist units hold is that they are typically fighting on their home turf and supply is much less stringent on their forces. The Liberal player must make consistent campaigns in the Carlist Zone of the board and this will require them to invest more into Supply units such as Supply Trains and Knapsacks.
I very much enjoyed the asymmetry between the Carlist and Liberal forces. It made for a very interesting tactical challenge for both sides as they have to play to their strengths and not get too overly concerned with the numbers. The Carlists will be much more mobile in their defense and look to exploit every gap in a supply line to move around and stay away from the numerically superior Liberal forces, whereas the Liberal player will have to move more methodically to take outlying towns and settlements to be able to shore up their lines and create less opportunities for end arounds by the Carlists. The disparity in the forces was a very interesting choice by the designer David Gómez Relloso and I am sure is reflective of the historical reality of the First Carlist War.
I also was able to shoot a fairly short video summary of my game play with Francisco Ronco who is the owner of Bellica Third Generation and you can watch that at the following link:
In Action Point 3, we will take a look at the Carlist Uprising Phase and what it means for the game.

 Anmelden